Followup to the Onewheel XS
-
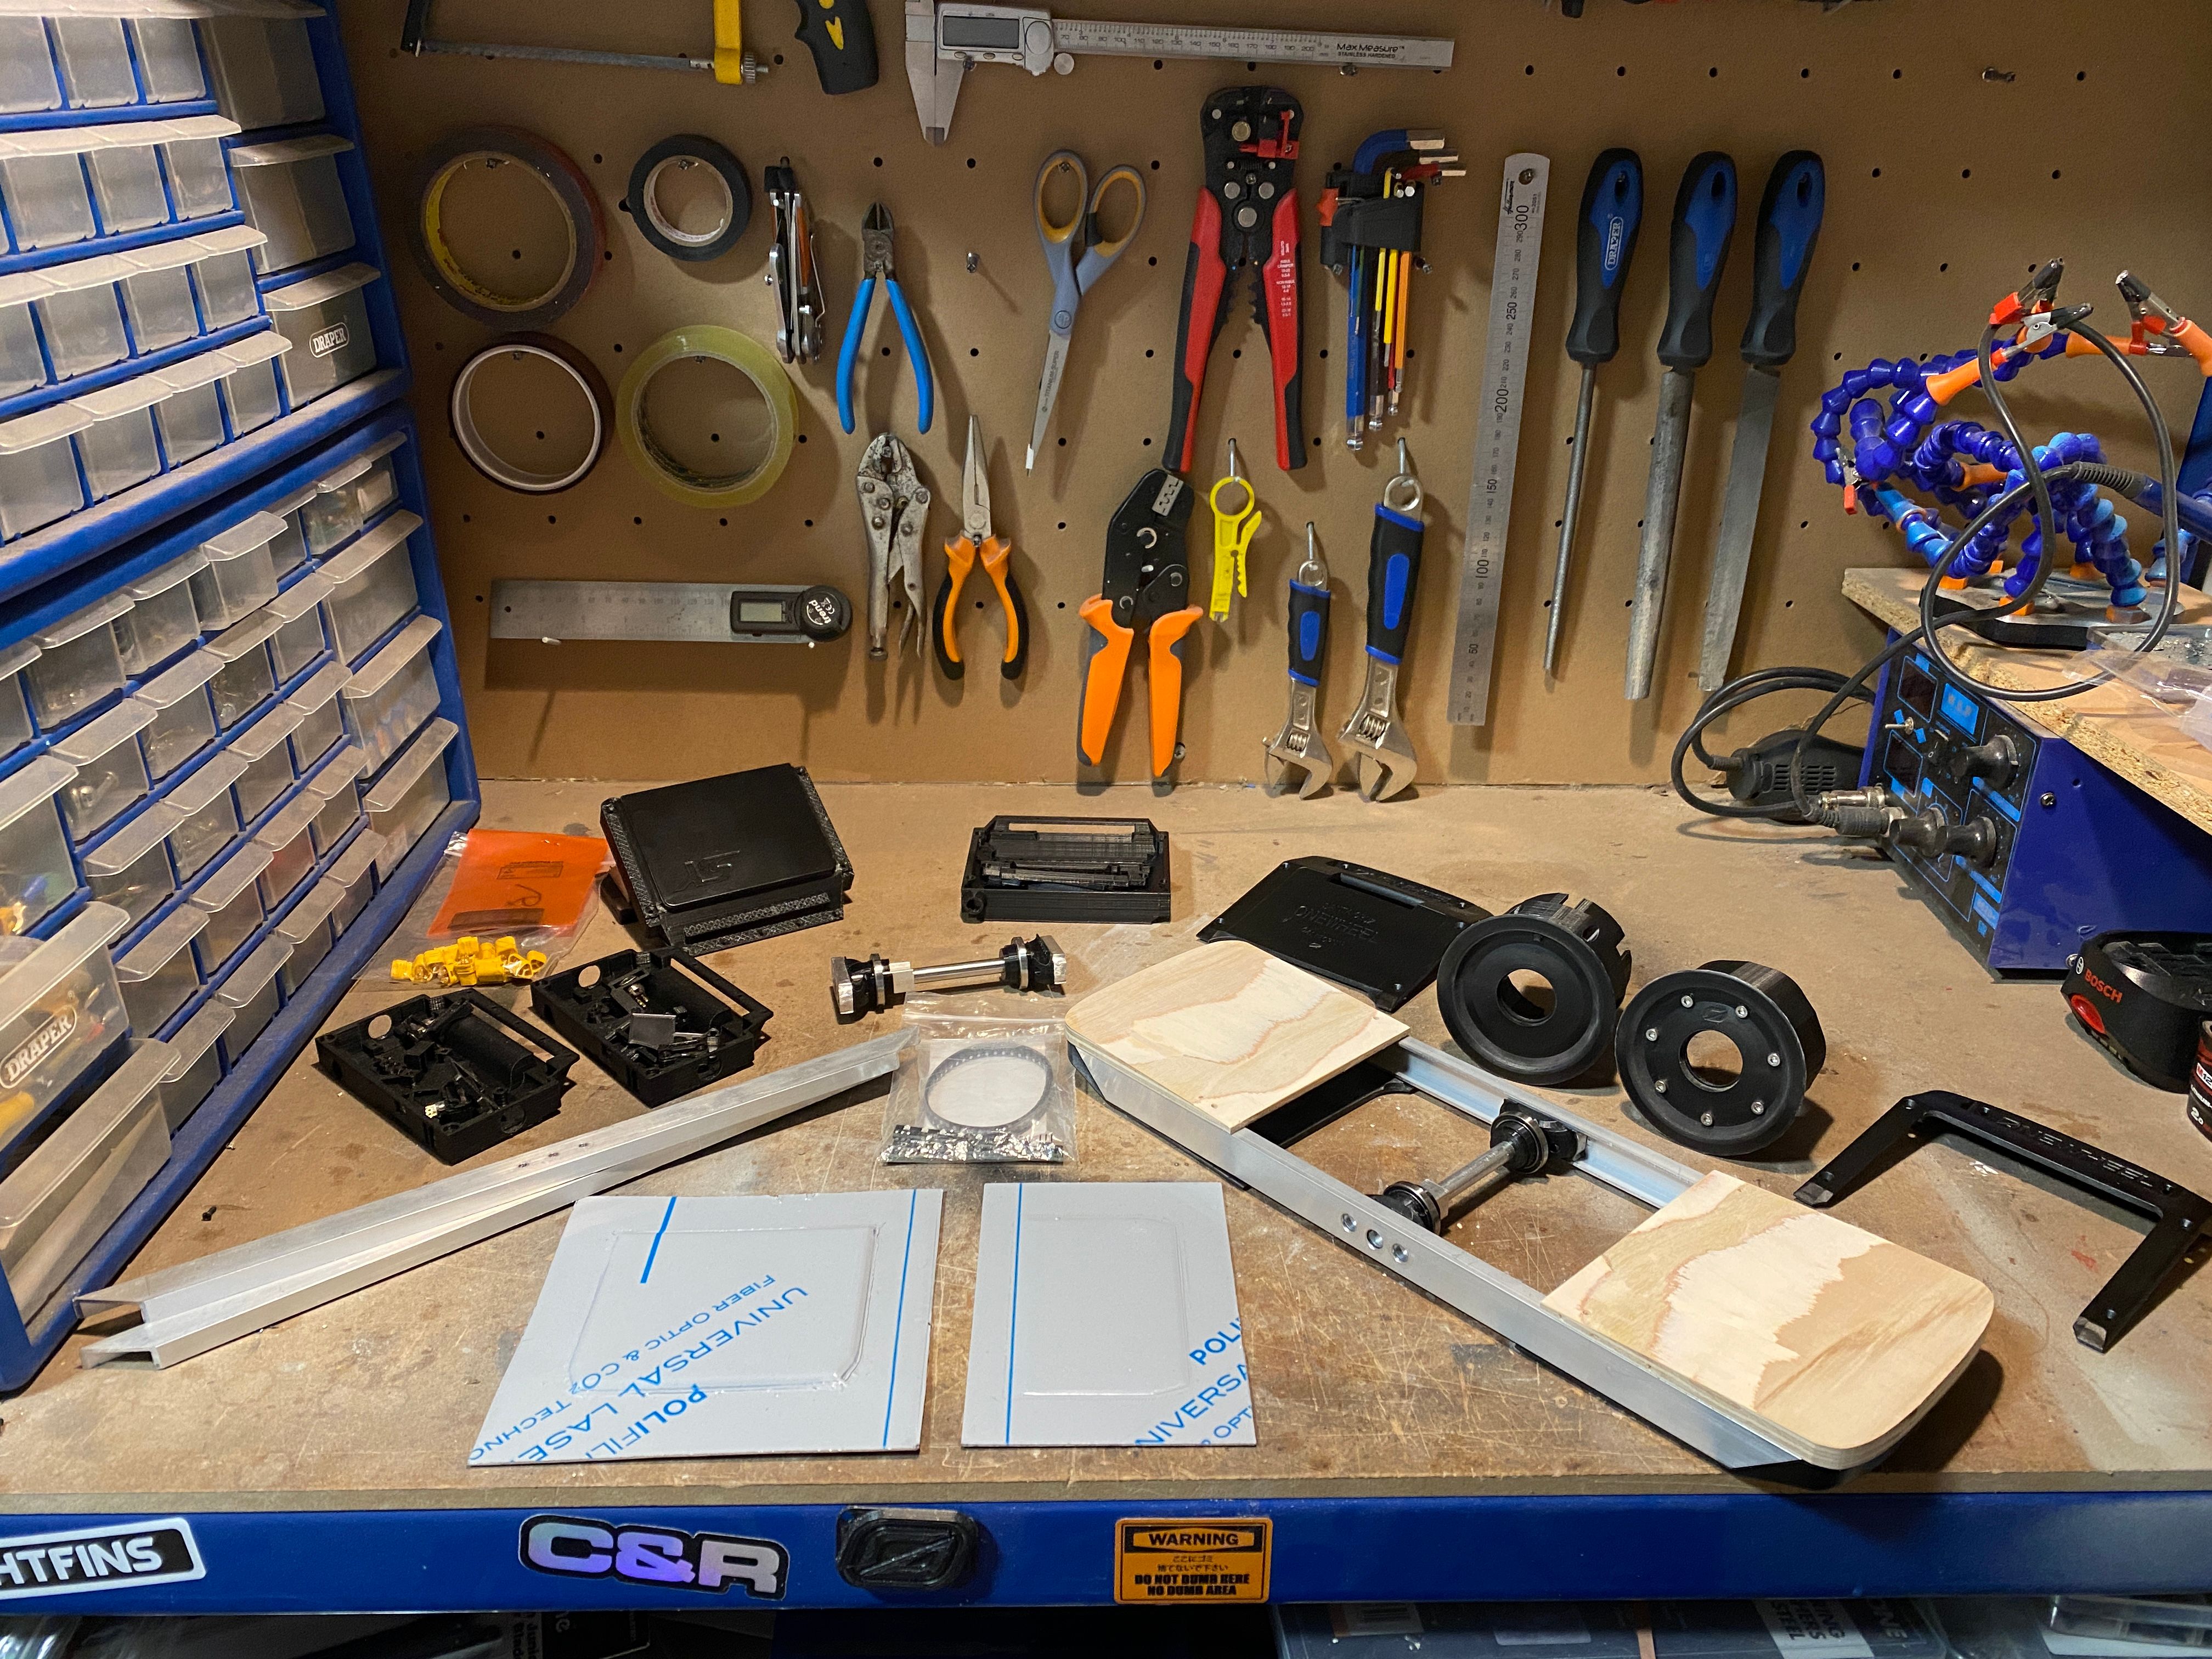
Don't get your hopes up but... the dust has been cleared off a shelved project once again.

With
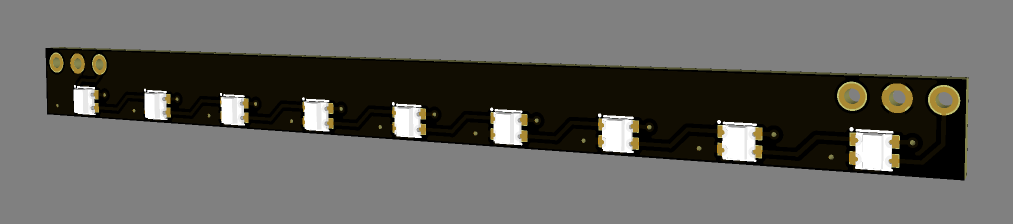
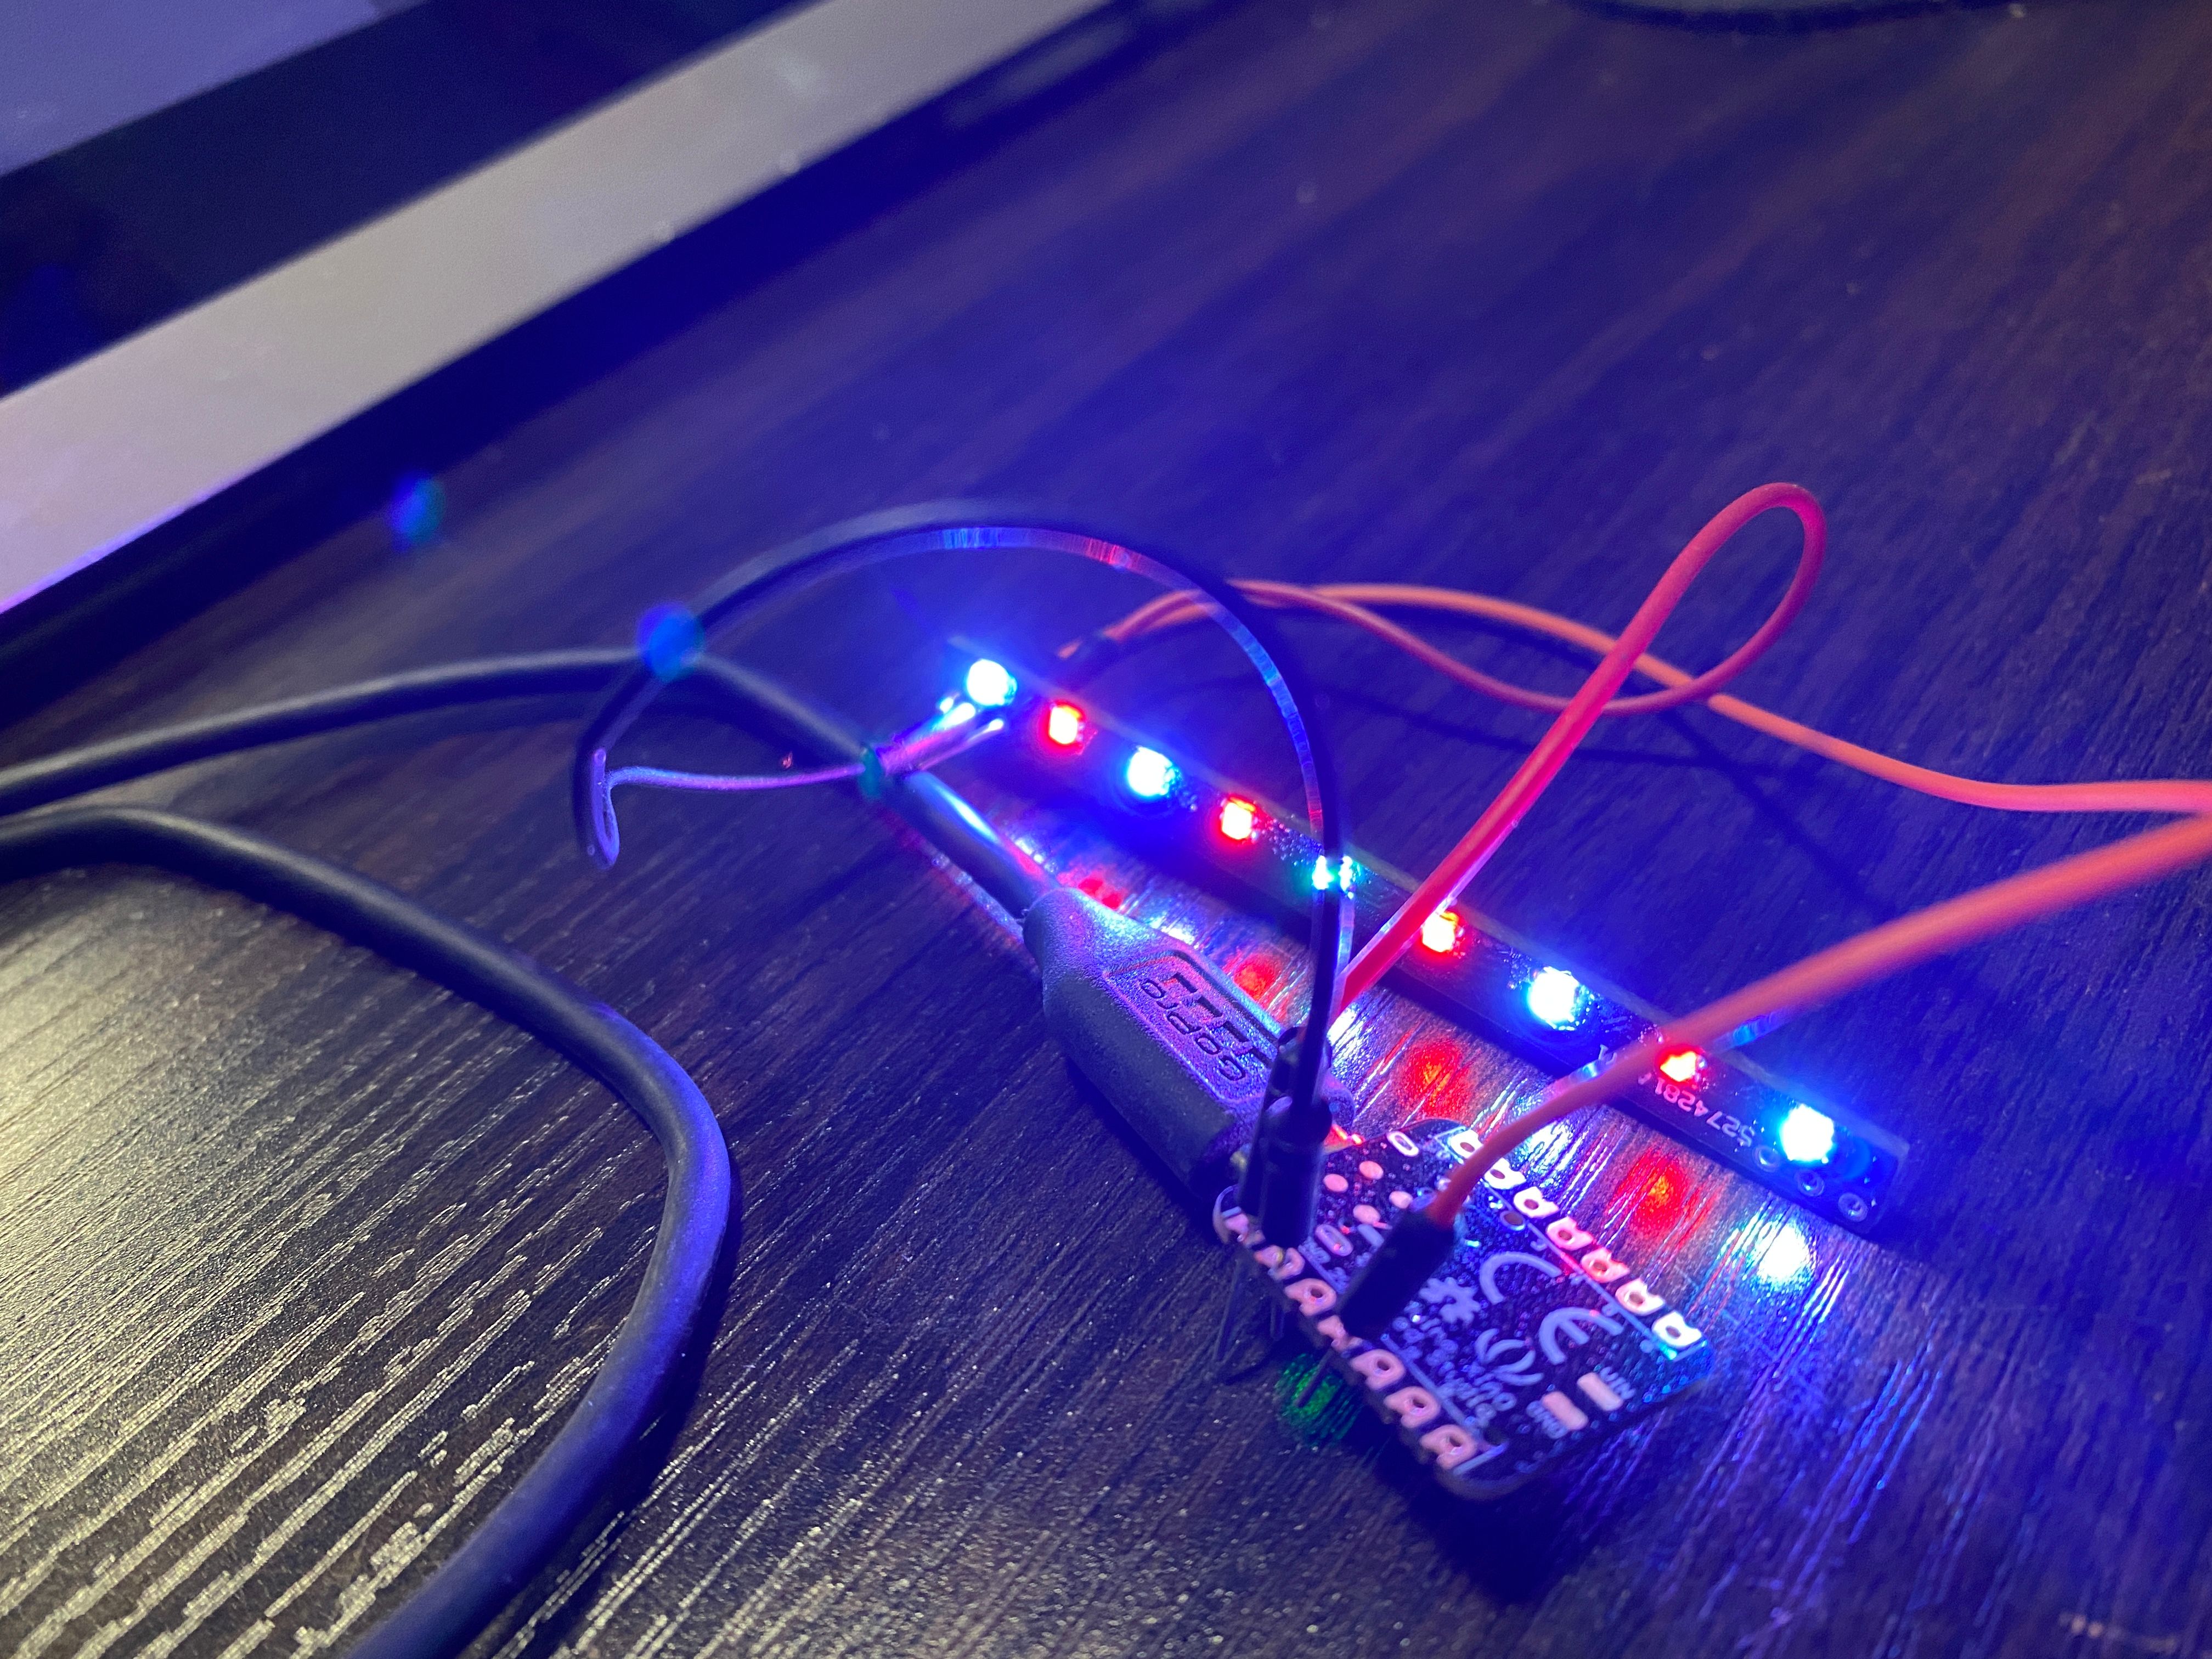
somea lot of encouragement from @cheppy44 I picked this up again and redid some bits I wasn't happy with. Namely the LED driving. I am however waiting for the parts to come since the LEDs and PCB are being shipped from China.Nick pointed out I could just use addressable LEDs which I'd formerly written off since I wanted to keep the style the same. Being the idiot I am I forgot I can just... program them to be identical to stock anyway. Duh >.>
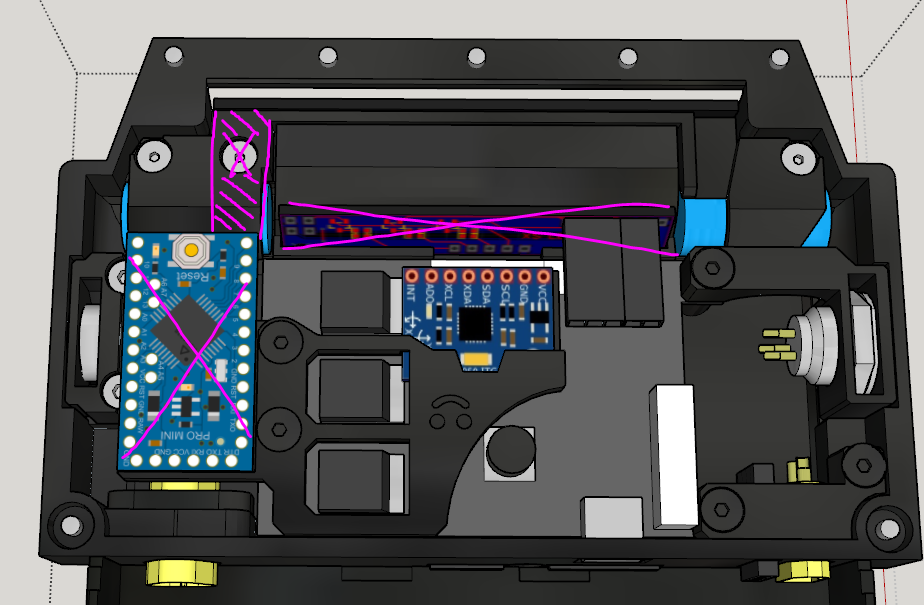
This removes the need for my abomination of an LED driver board and I've been made aware if the Seeeduino which I'll use in place of the Arduino Pro Mini that's taking up more space than needed.
With the LED's being 5v and data driven I can run a single 5v line off the FSESC then use just a data pin to string the LEDs together. Big brain. I'll butcher the power button and put one of the addressable LEDs in it too to get the flashy blue light we all love once again since... I... er... kinda melted the first one >.>
In using smaller LEDs I'm also able to fit the full 5w 4r rather than just 4w 3r like before. Further keeping in theme of being an accurate as a working scale model as I can get.
I'll redo the CAD once the parts turn up. Wish me luck. I want the following done before summer.
- LEDs fully functioning (again) and responding to motor direction.
- Functioning power button.
- As close to colour accurate rails as I can get.
- Custom made rubber tire.
- Accurately etched/painted decals and griptape design.
- Resin printed bumpers and hub casing.
- A cute letter from Kyle asking for one (totes not happening but I can dream lol).
-
@lia I AWAIT FOR THE NEXT UPDATE
I now have something to look forward to, thank you
-
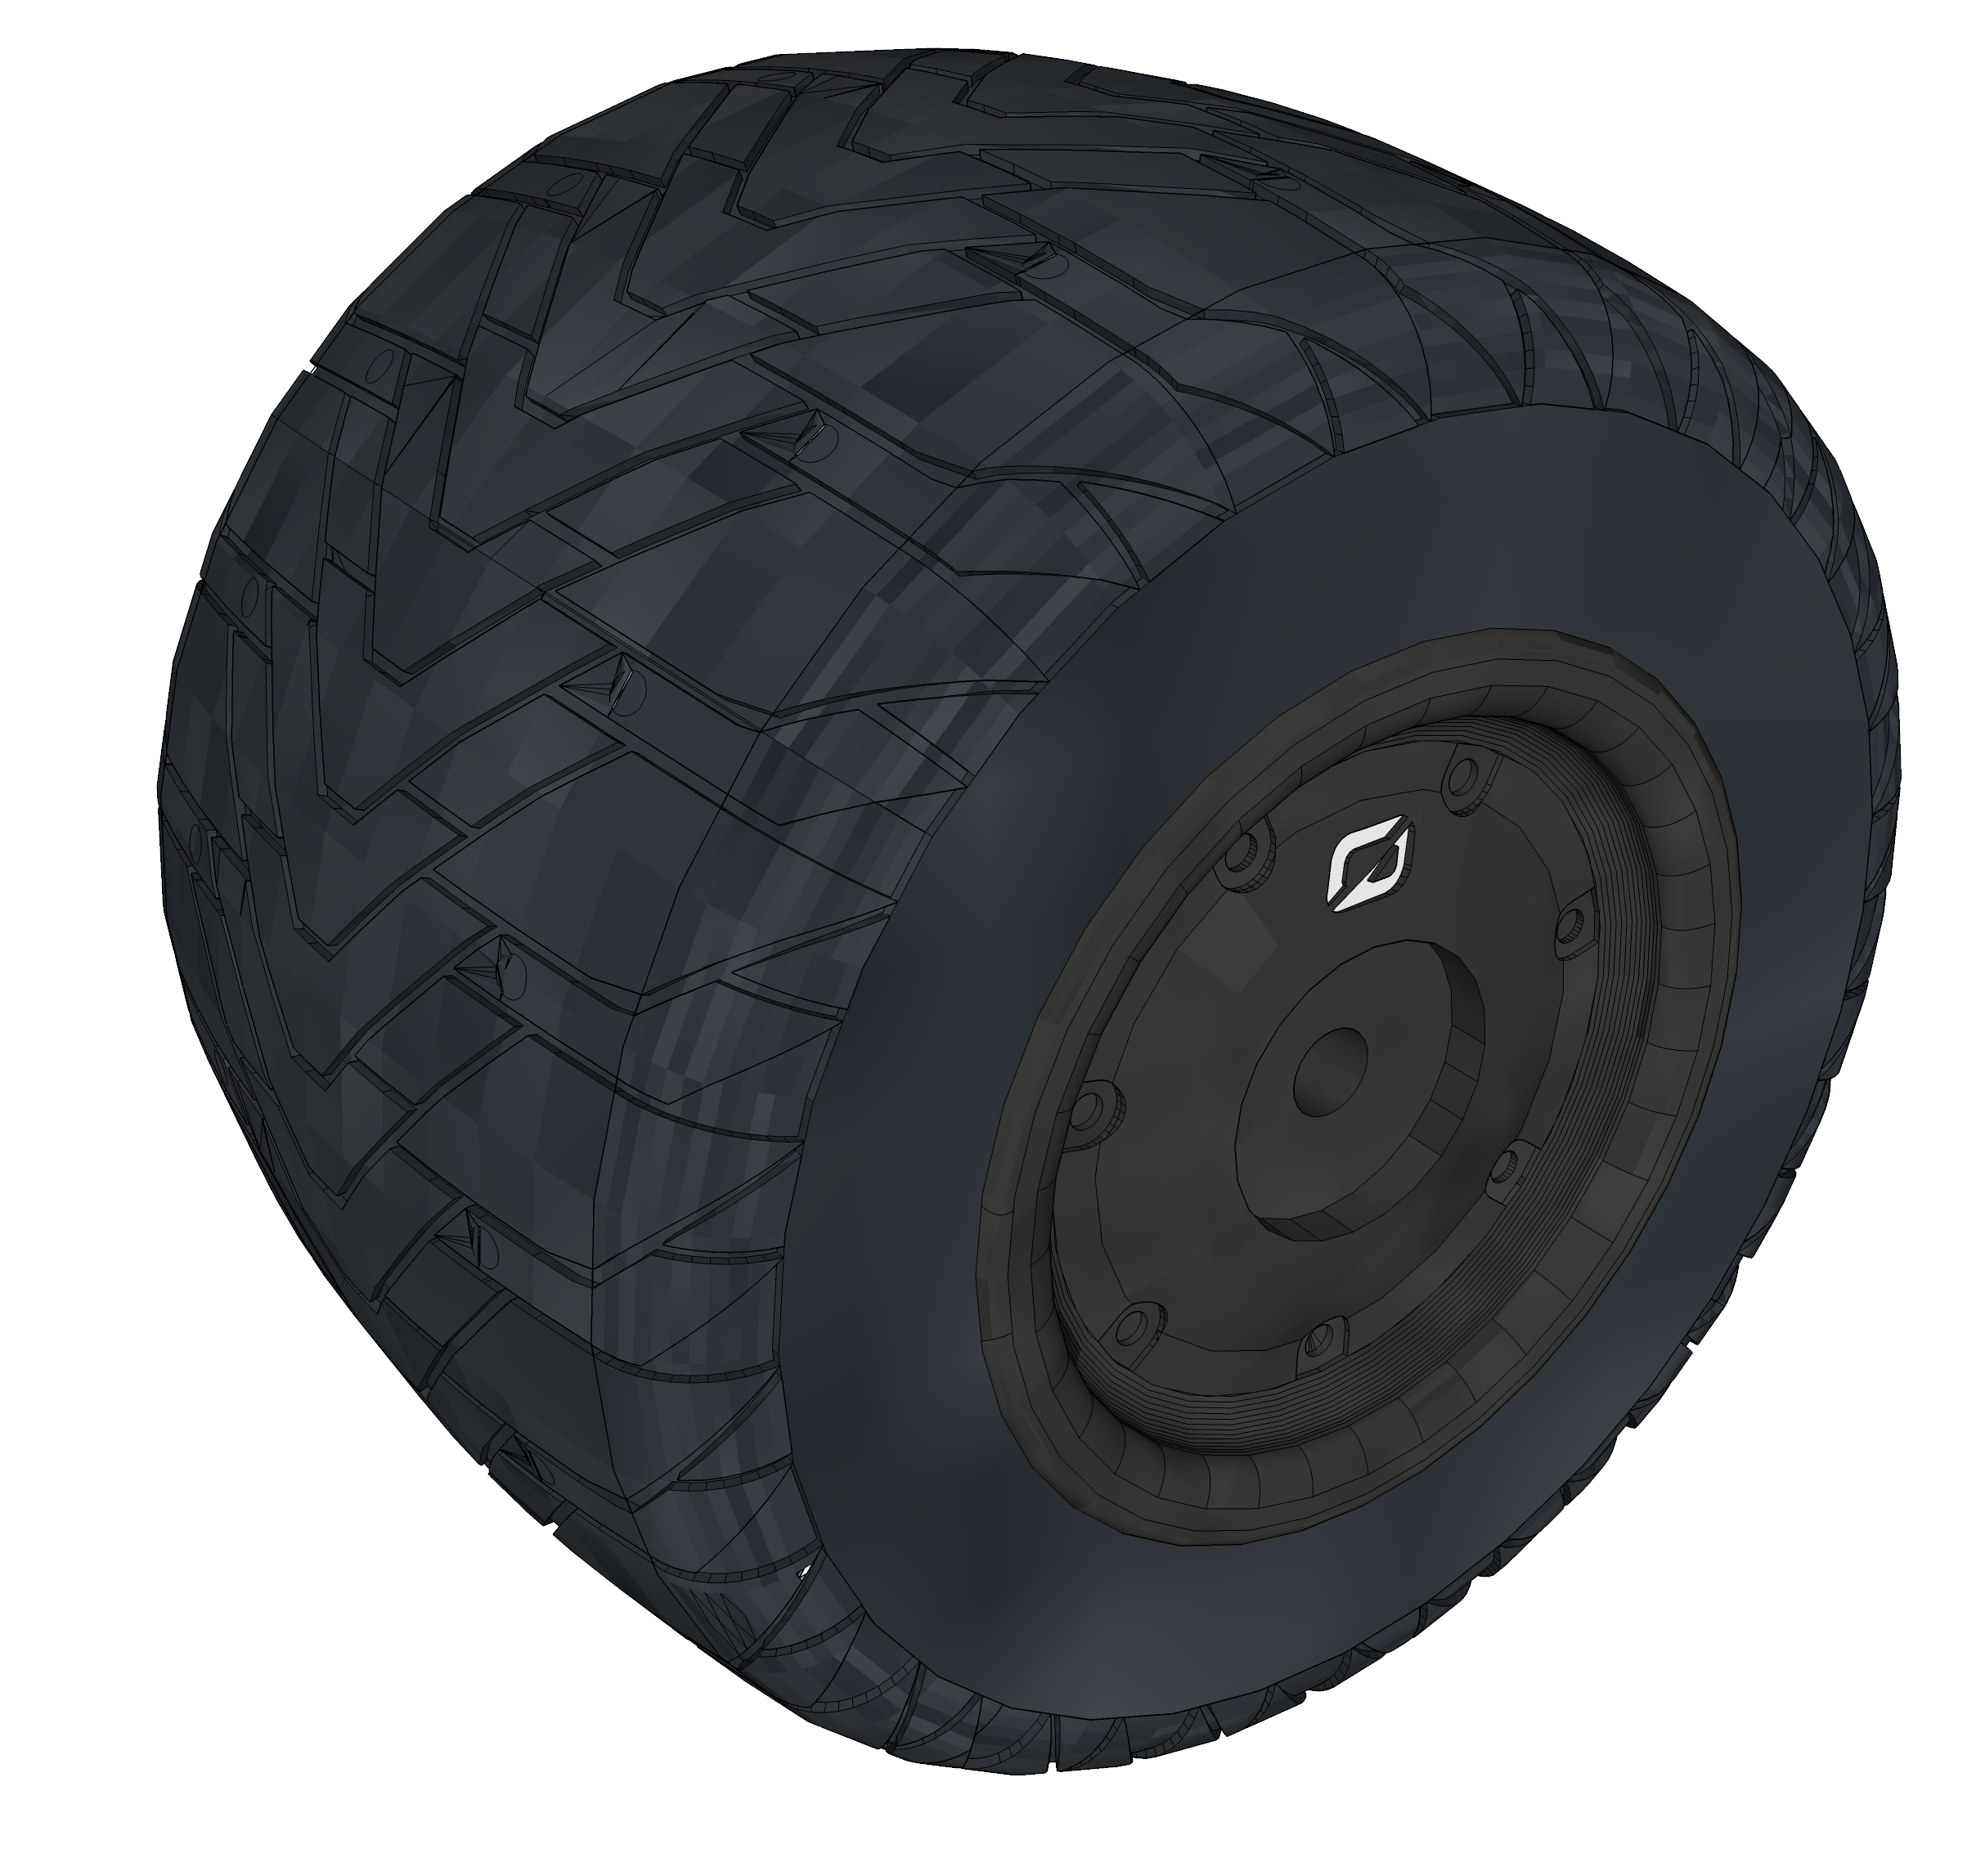
While waiting for the new components for the headlights and power button LED I've started work making a master tire to create a mould and later rubber cast a solid tire replica.
First up was redoing the tire model to be rounder and reprint. The entire thing was over 24 hours of printing because I was doing it at a 0.12mm layer height. Then I added some wood filler to fill the seam in the middle. Lots of sanding later I got a smooth enough surface.
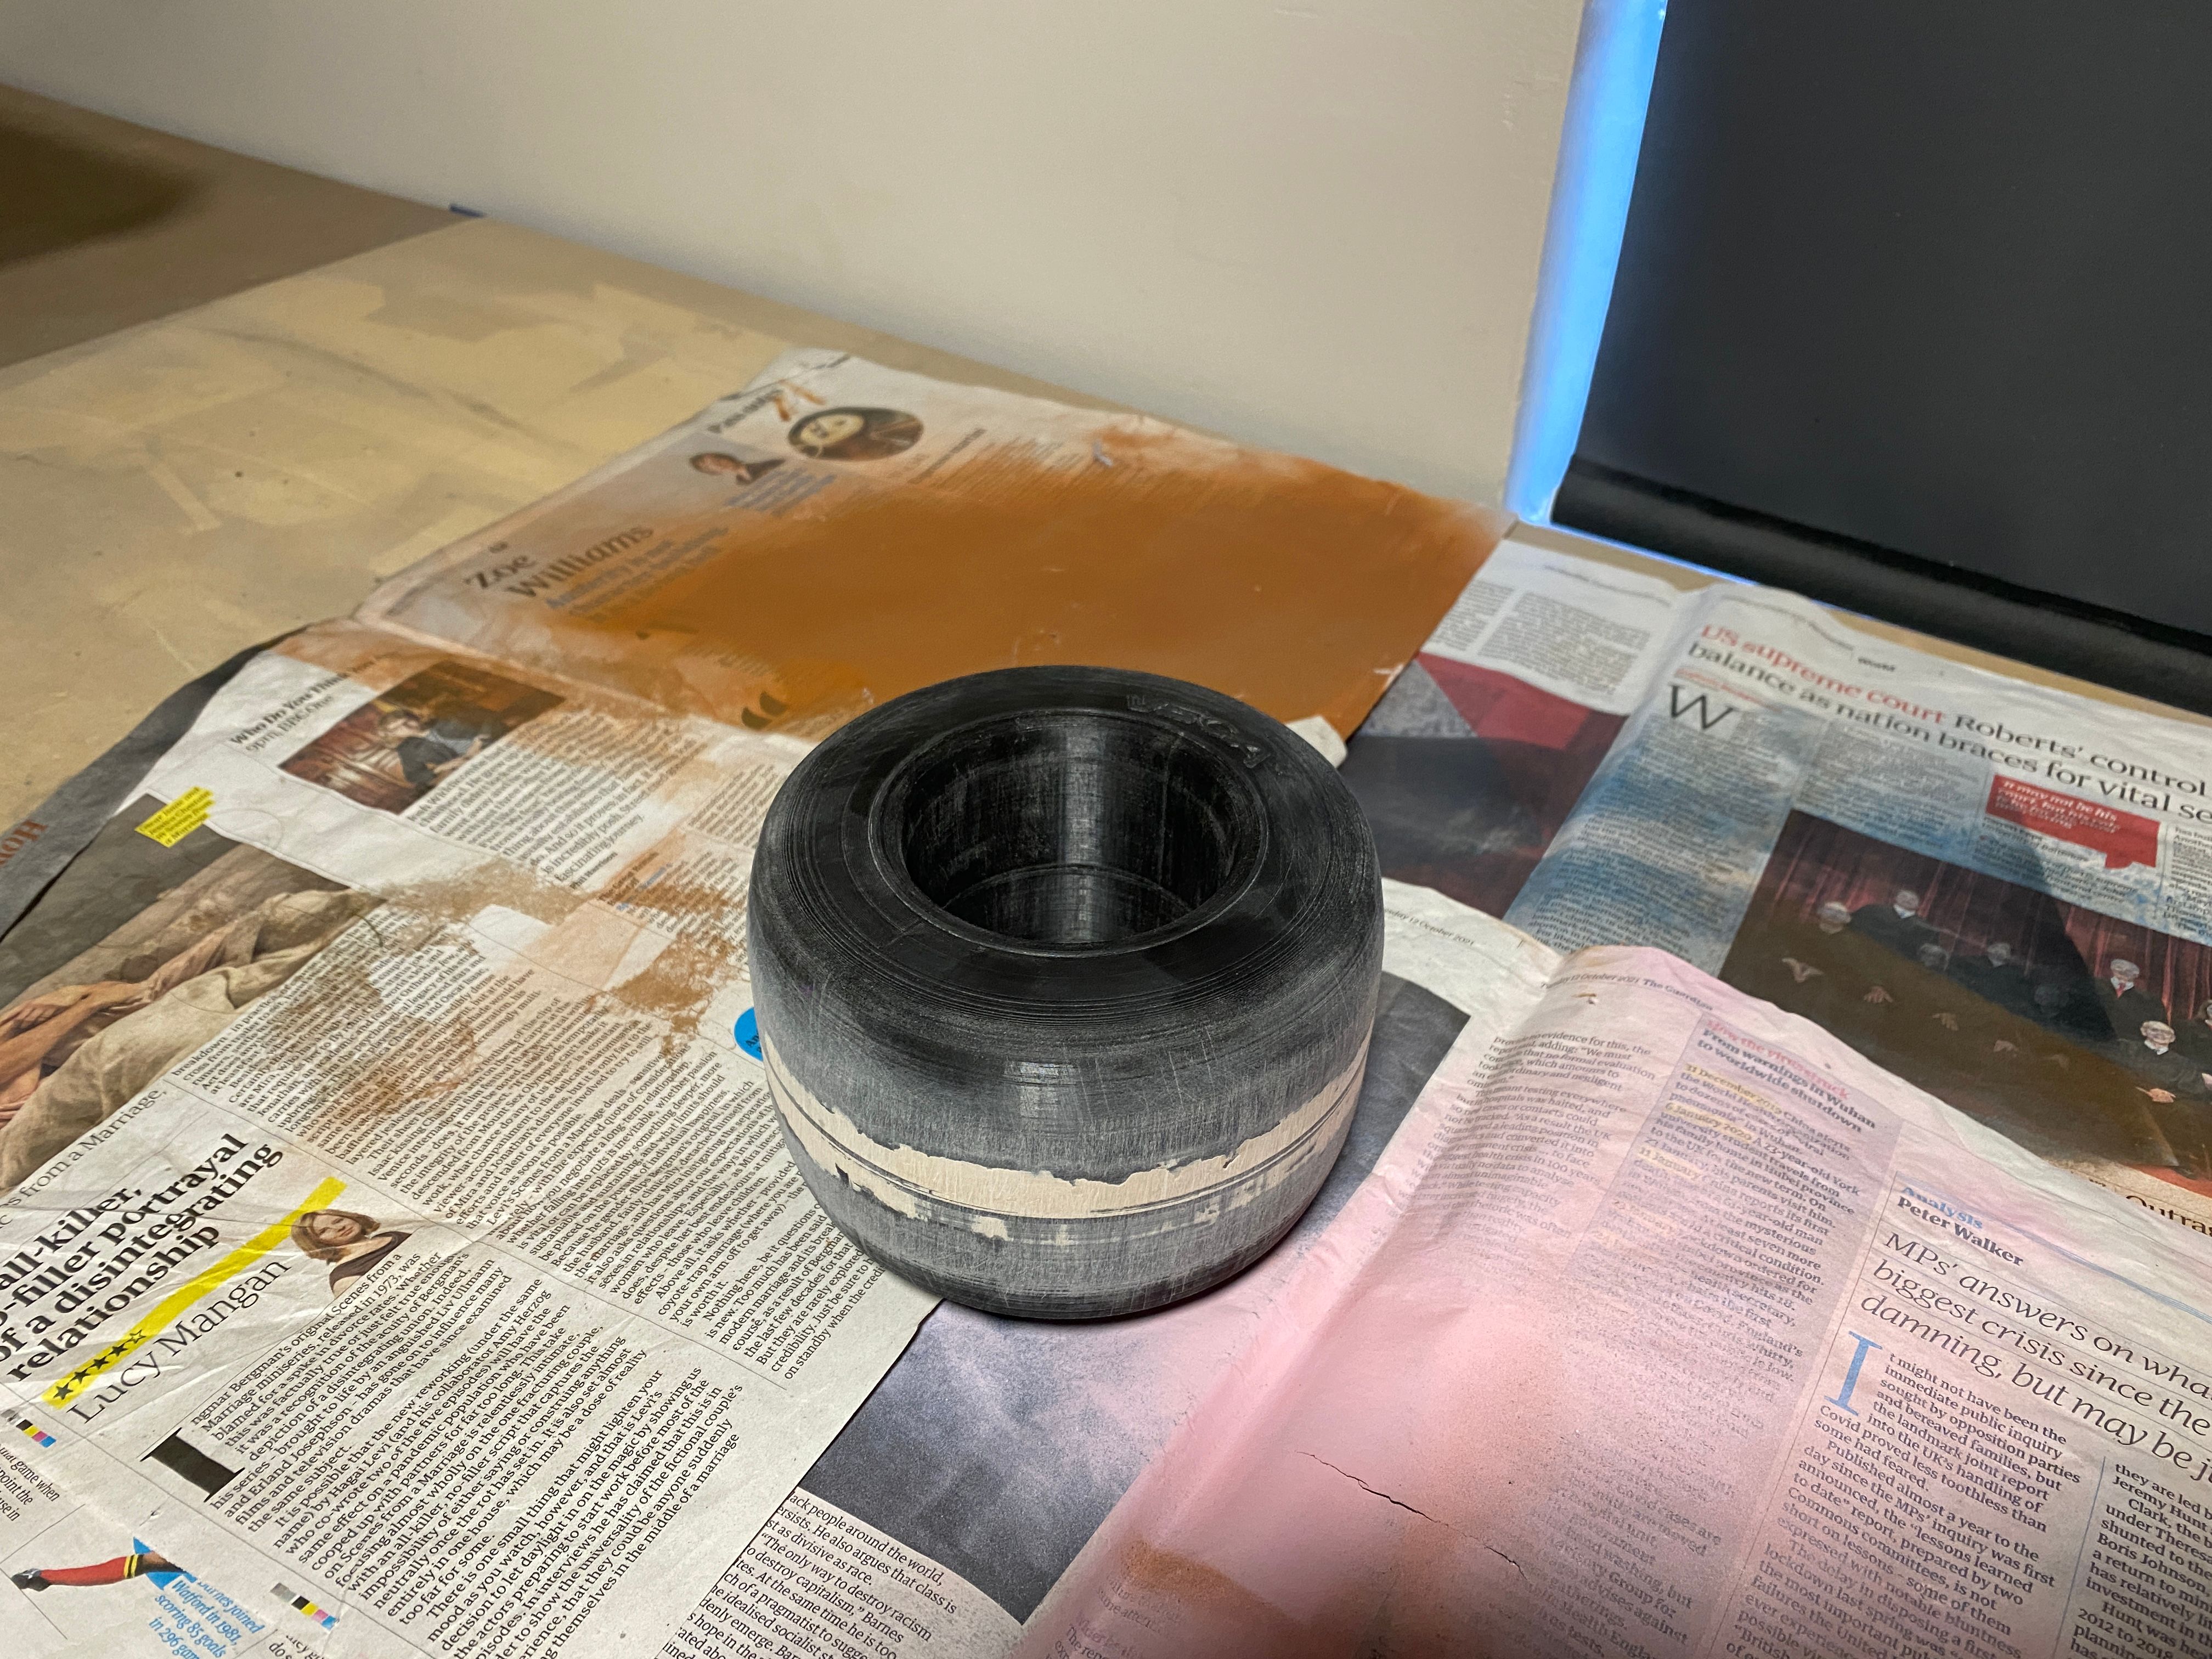
HOWEVER... that's not enough so out came the filler primer and I managed to completely smooth it out. The ics don't do it justice how smooth and nice this is to hold.
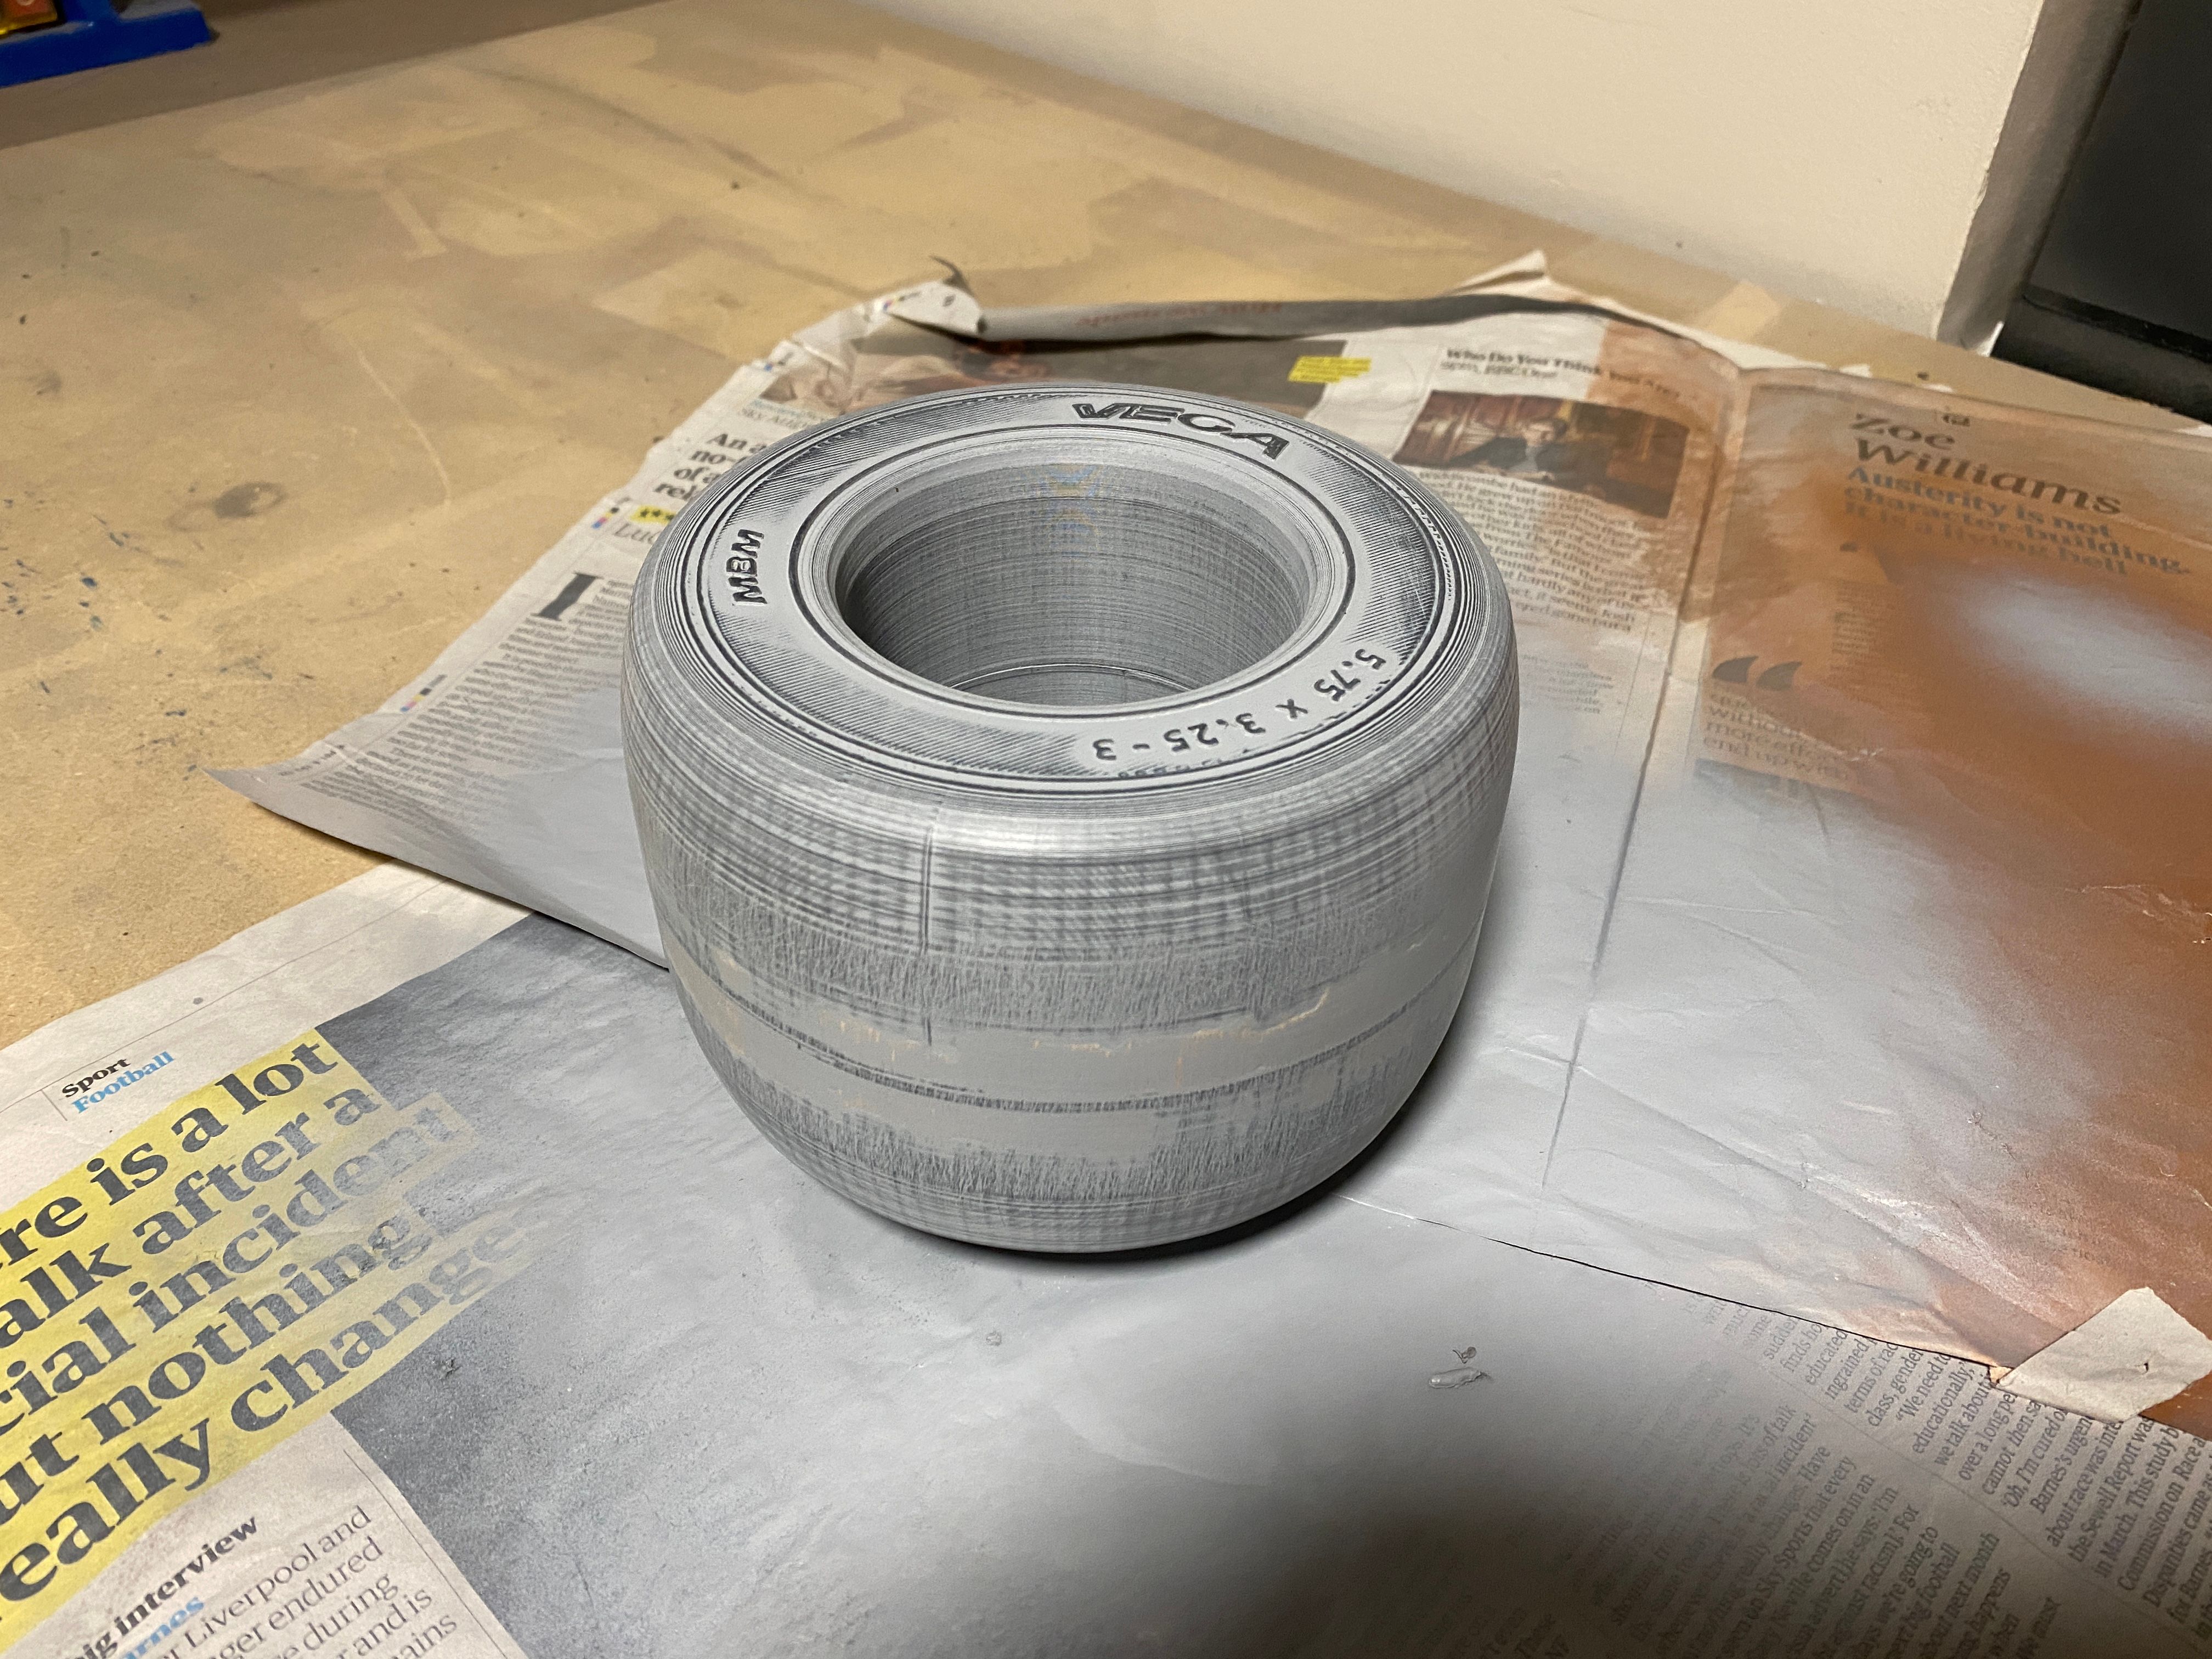
Trouble is I haven't cast anything ever and trying to figure out the best the best method while also not over-complicating a mould. Then I also need to decide on the best materials to use for both the mould and actual tire.
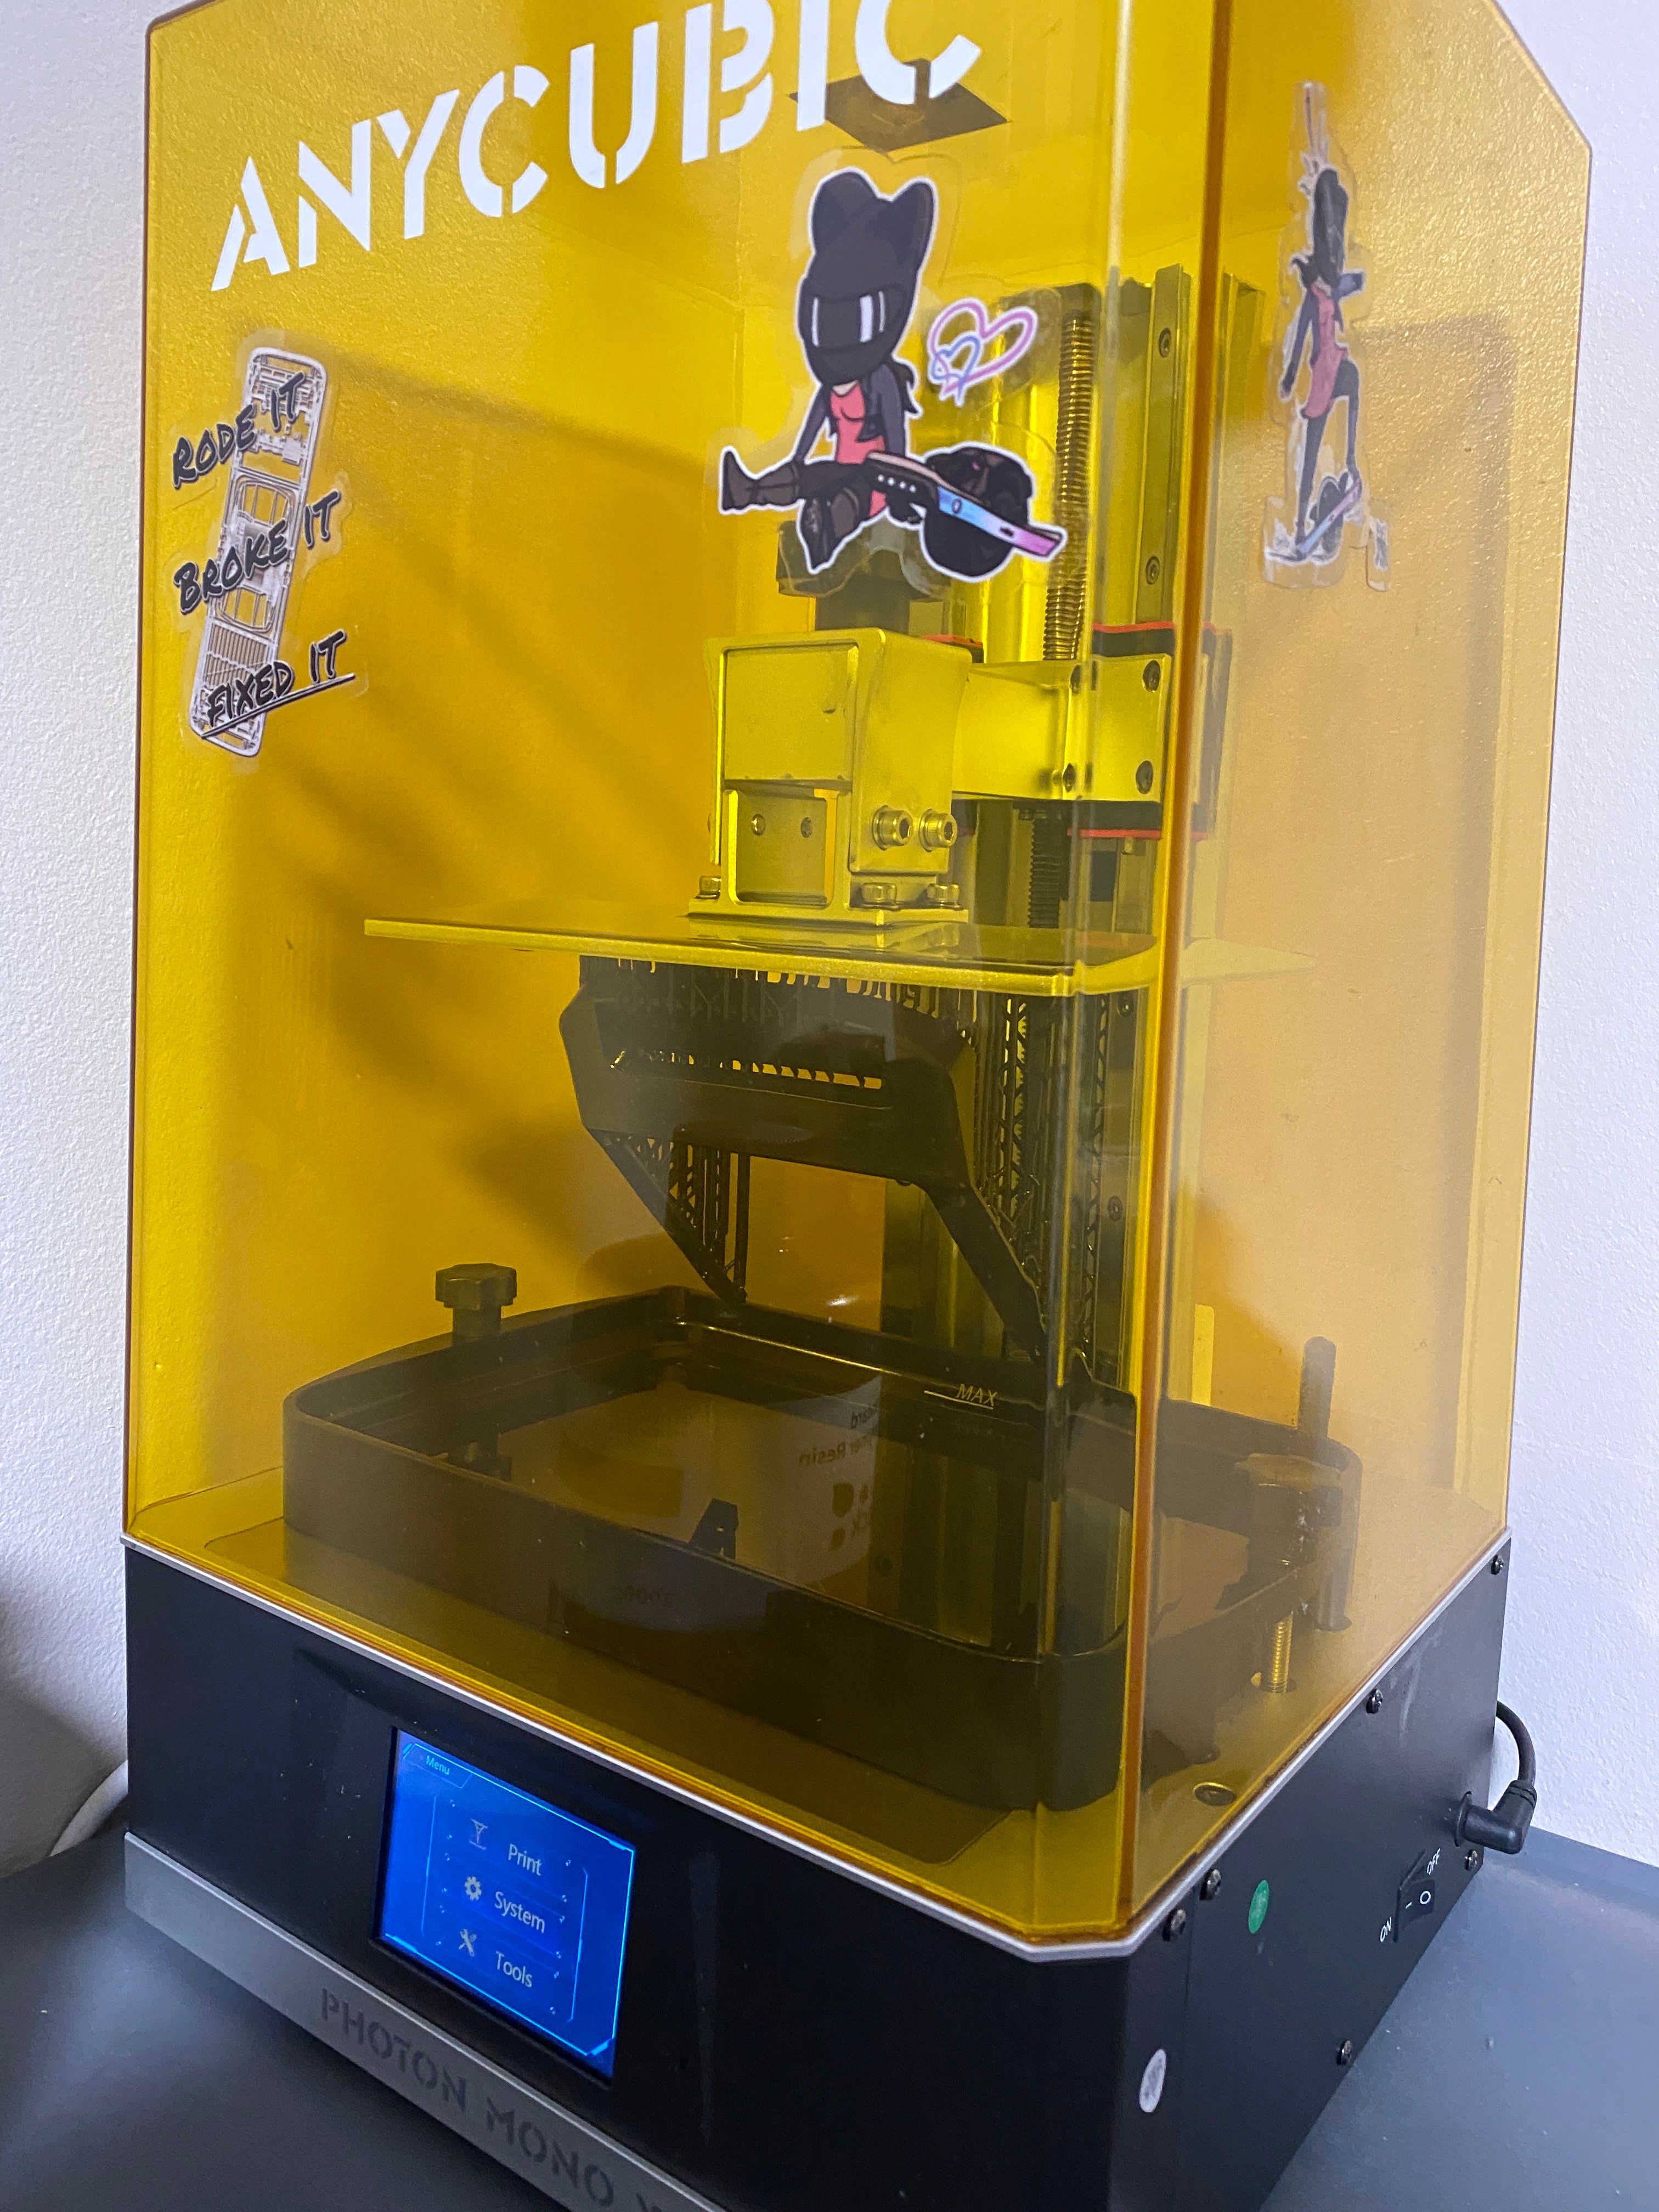
So while I figure that out @cheppy44 convinced me to give the resin printer a try. I've been holding off using it because the idea of getting in over my head on yet another CNC based workflow is daunting. However... I at least managed a successful print.
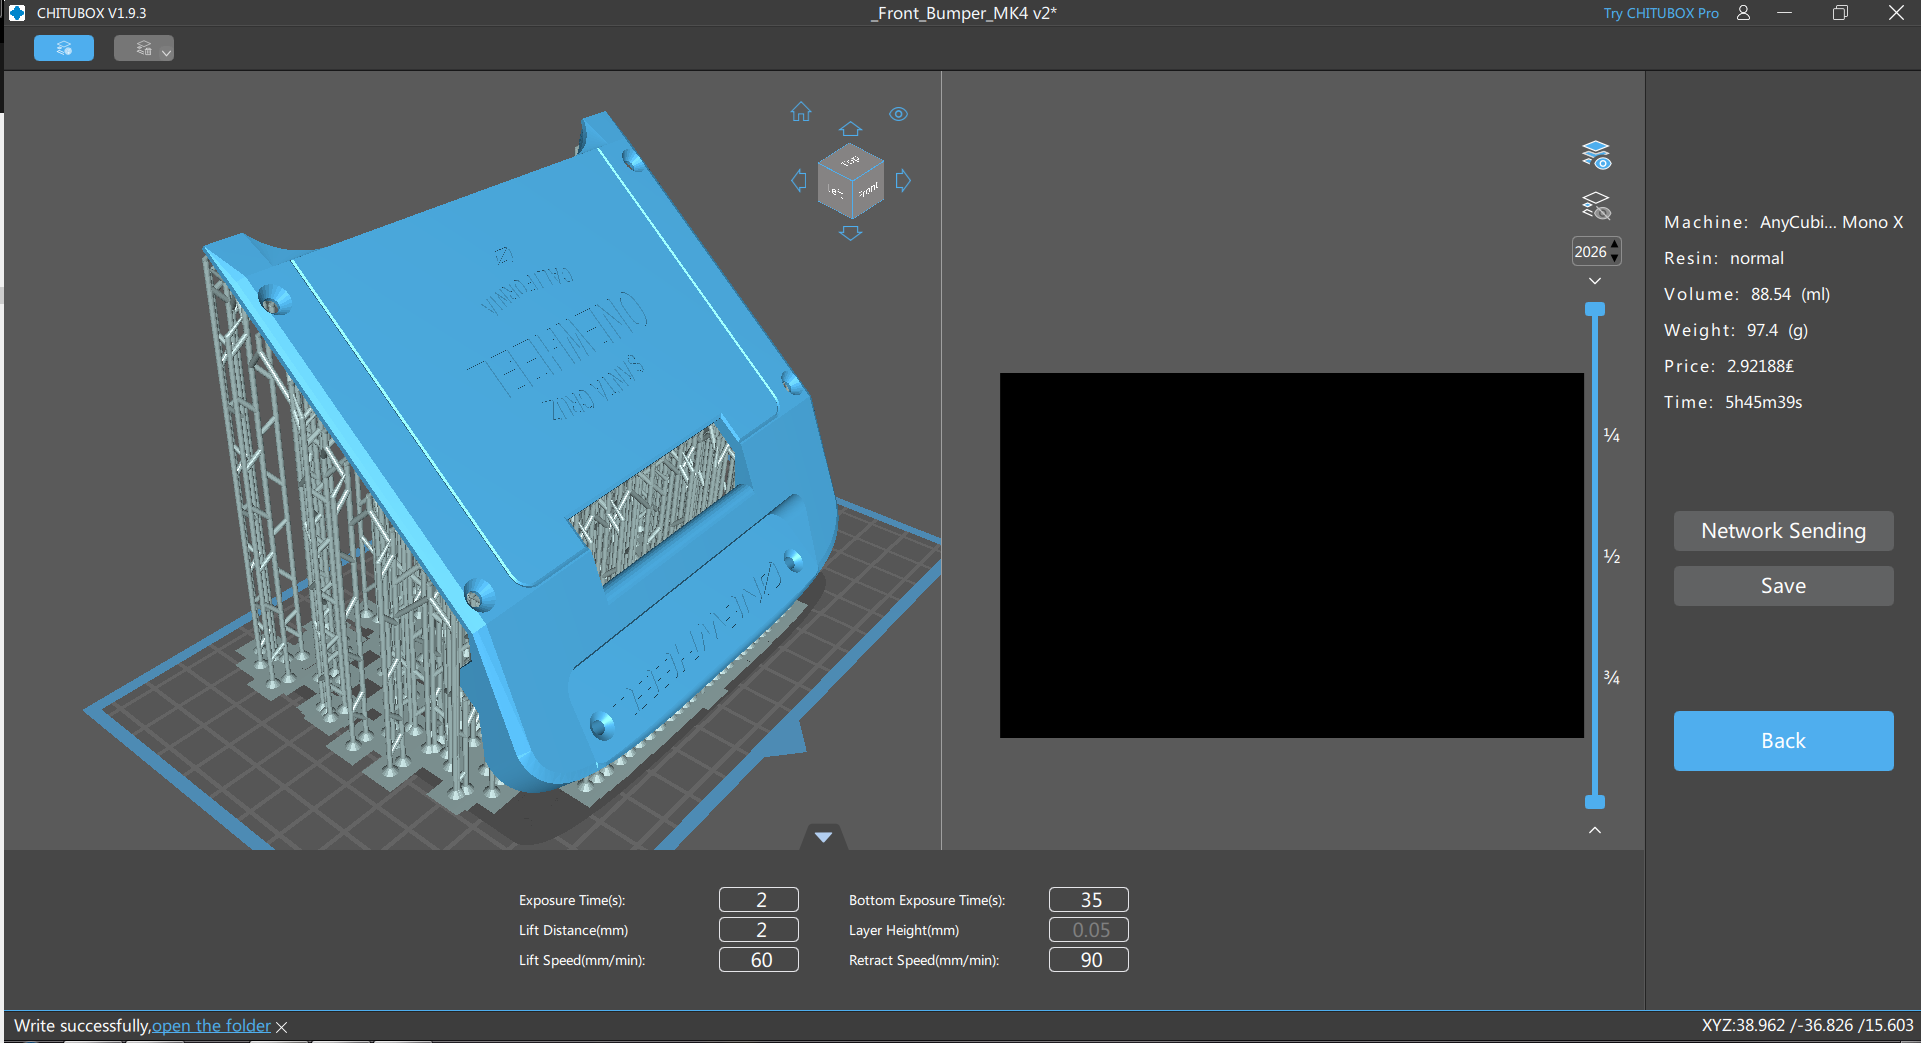
Woke up to find it finished waiting to be removed from the bed, supports removed, washed and finally cured.
It looks good, other than some artifacting that I'll need to figure out.
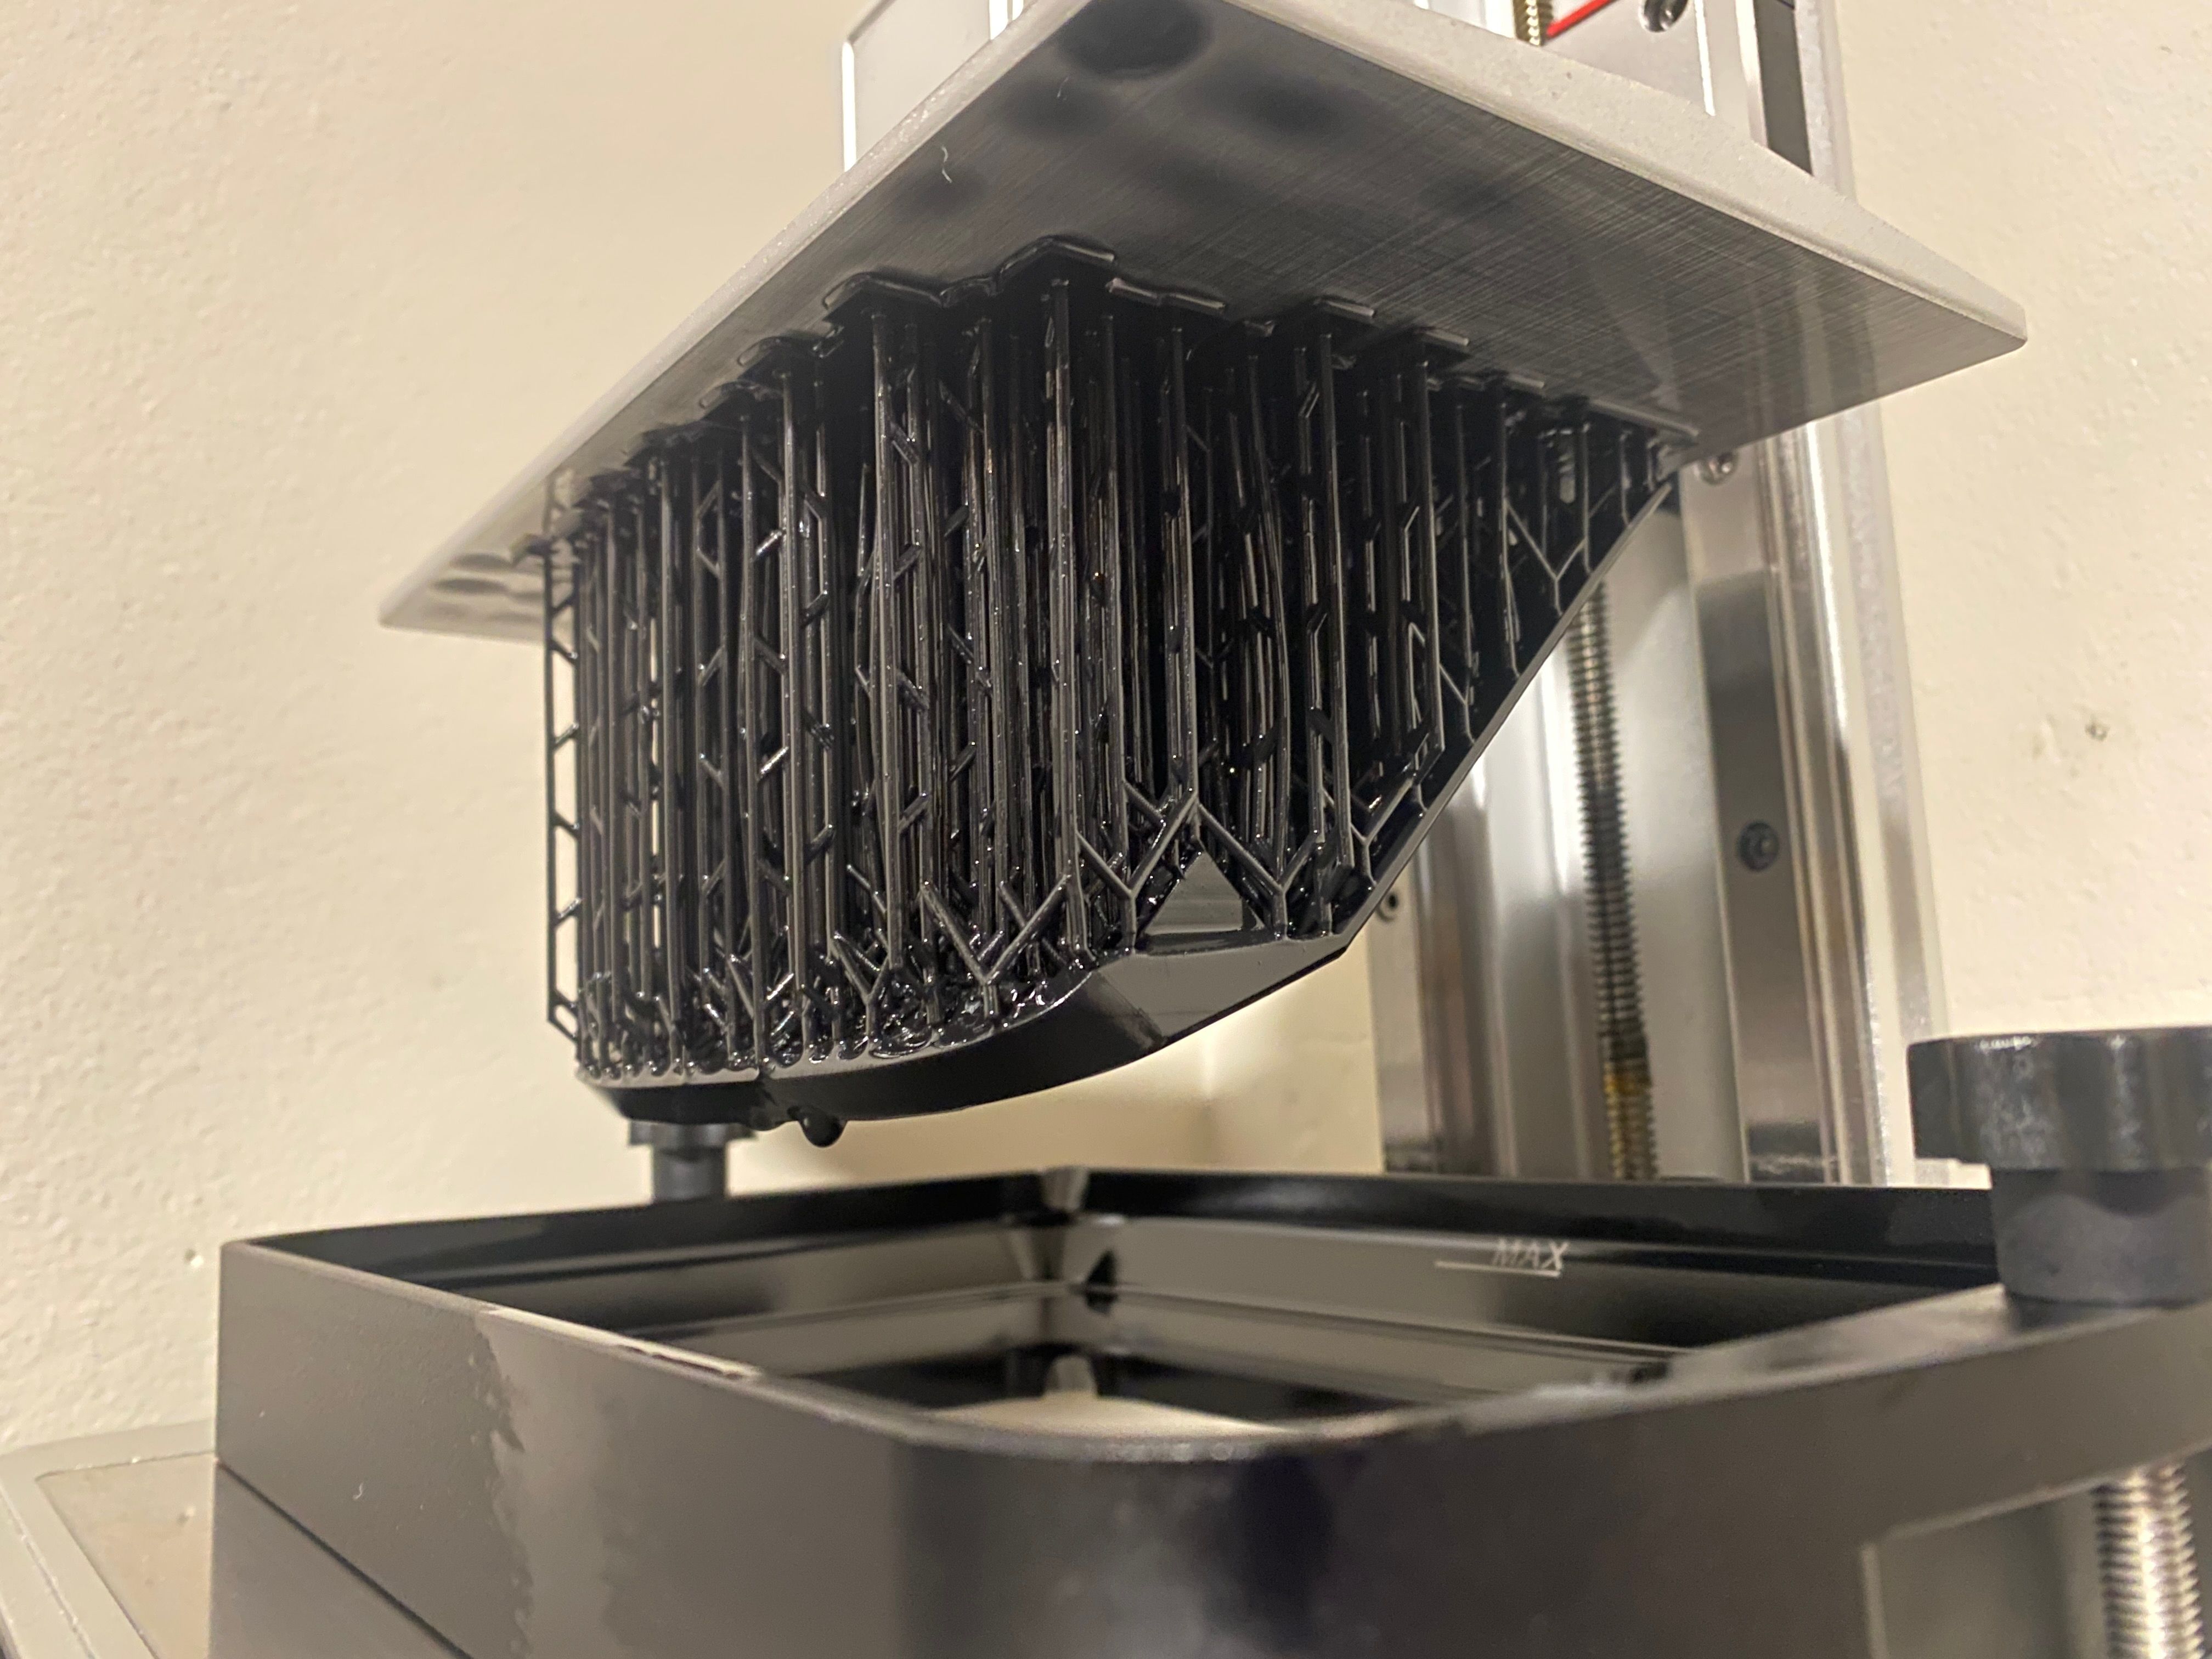
Tore off the supports which went smooth and was oddly satisfying sliding your fingers through the supports to pull them off.
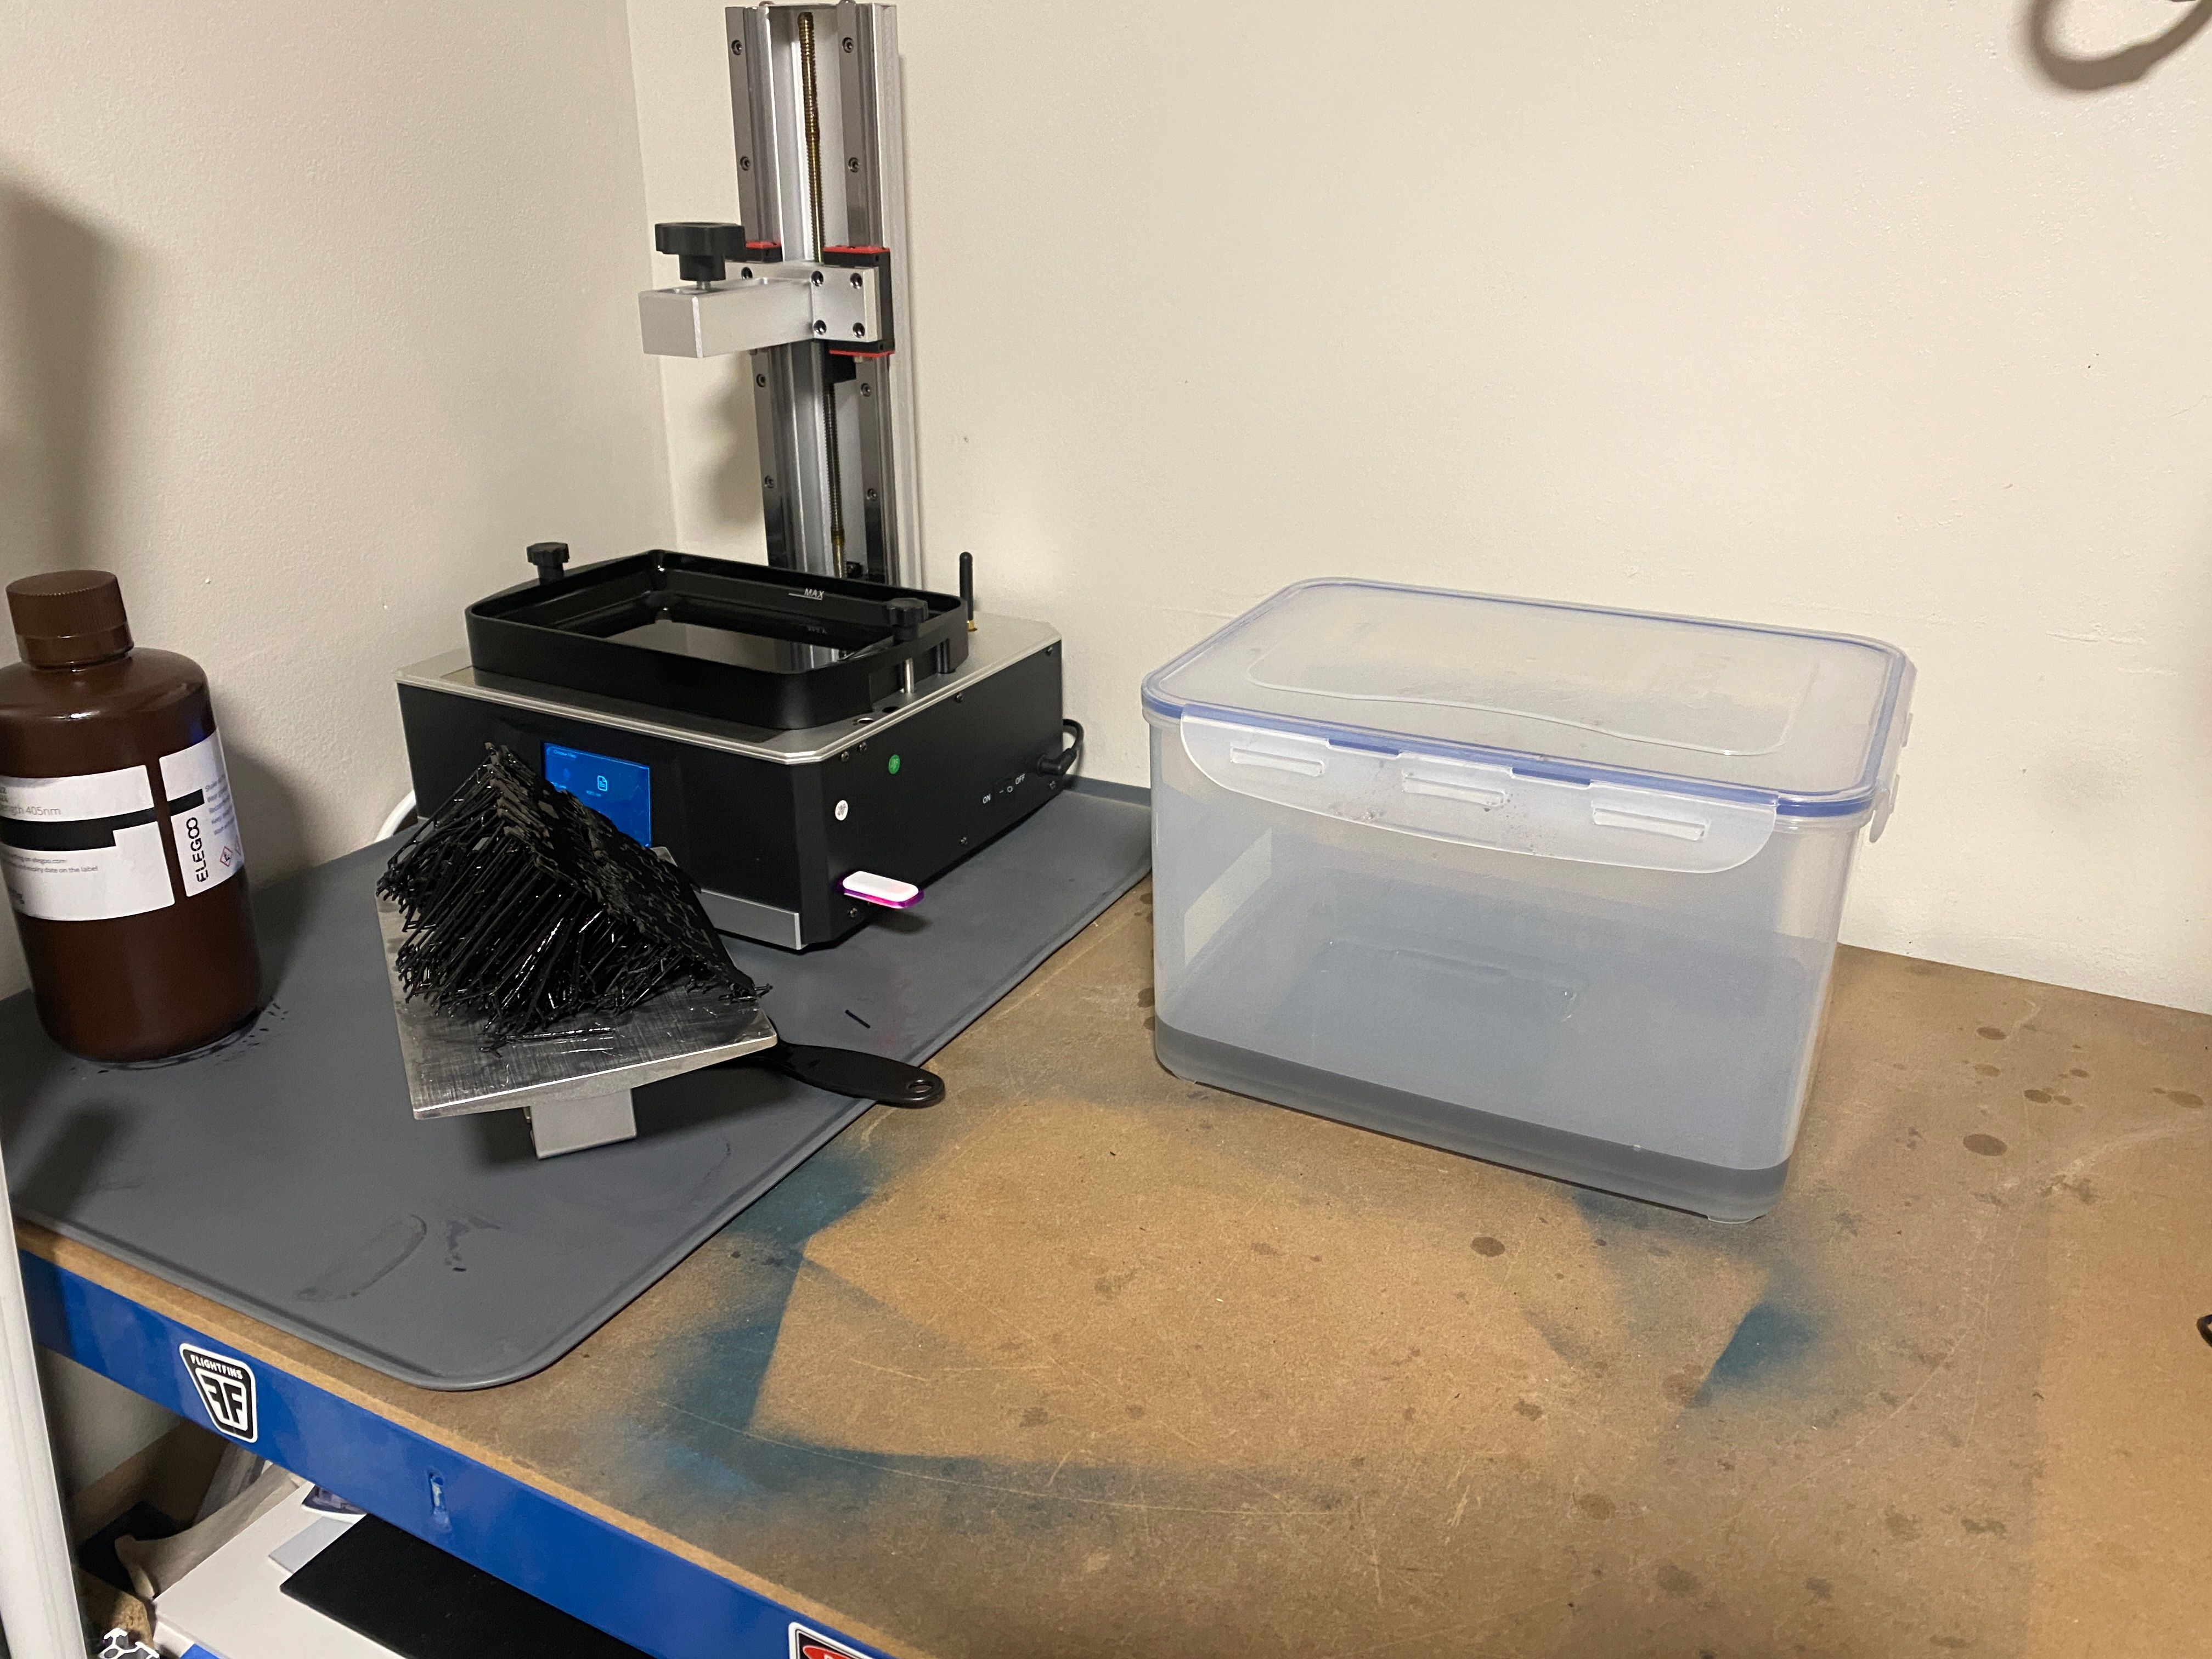
At this point I had noticed some odd white smears which I think was me not letting the iso-alcohol to dry before curing in my DIY cure station.
Wasn't prepared to pay like £200 on a wash/cure station that fits the models I make so £20 in some specific bits was fine for me.
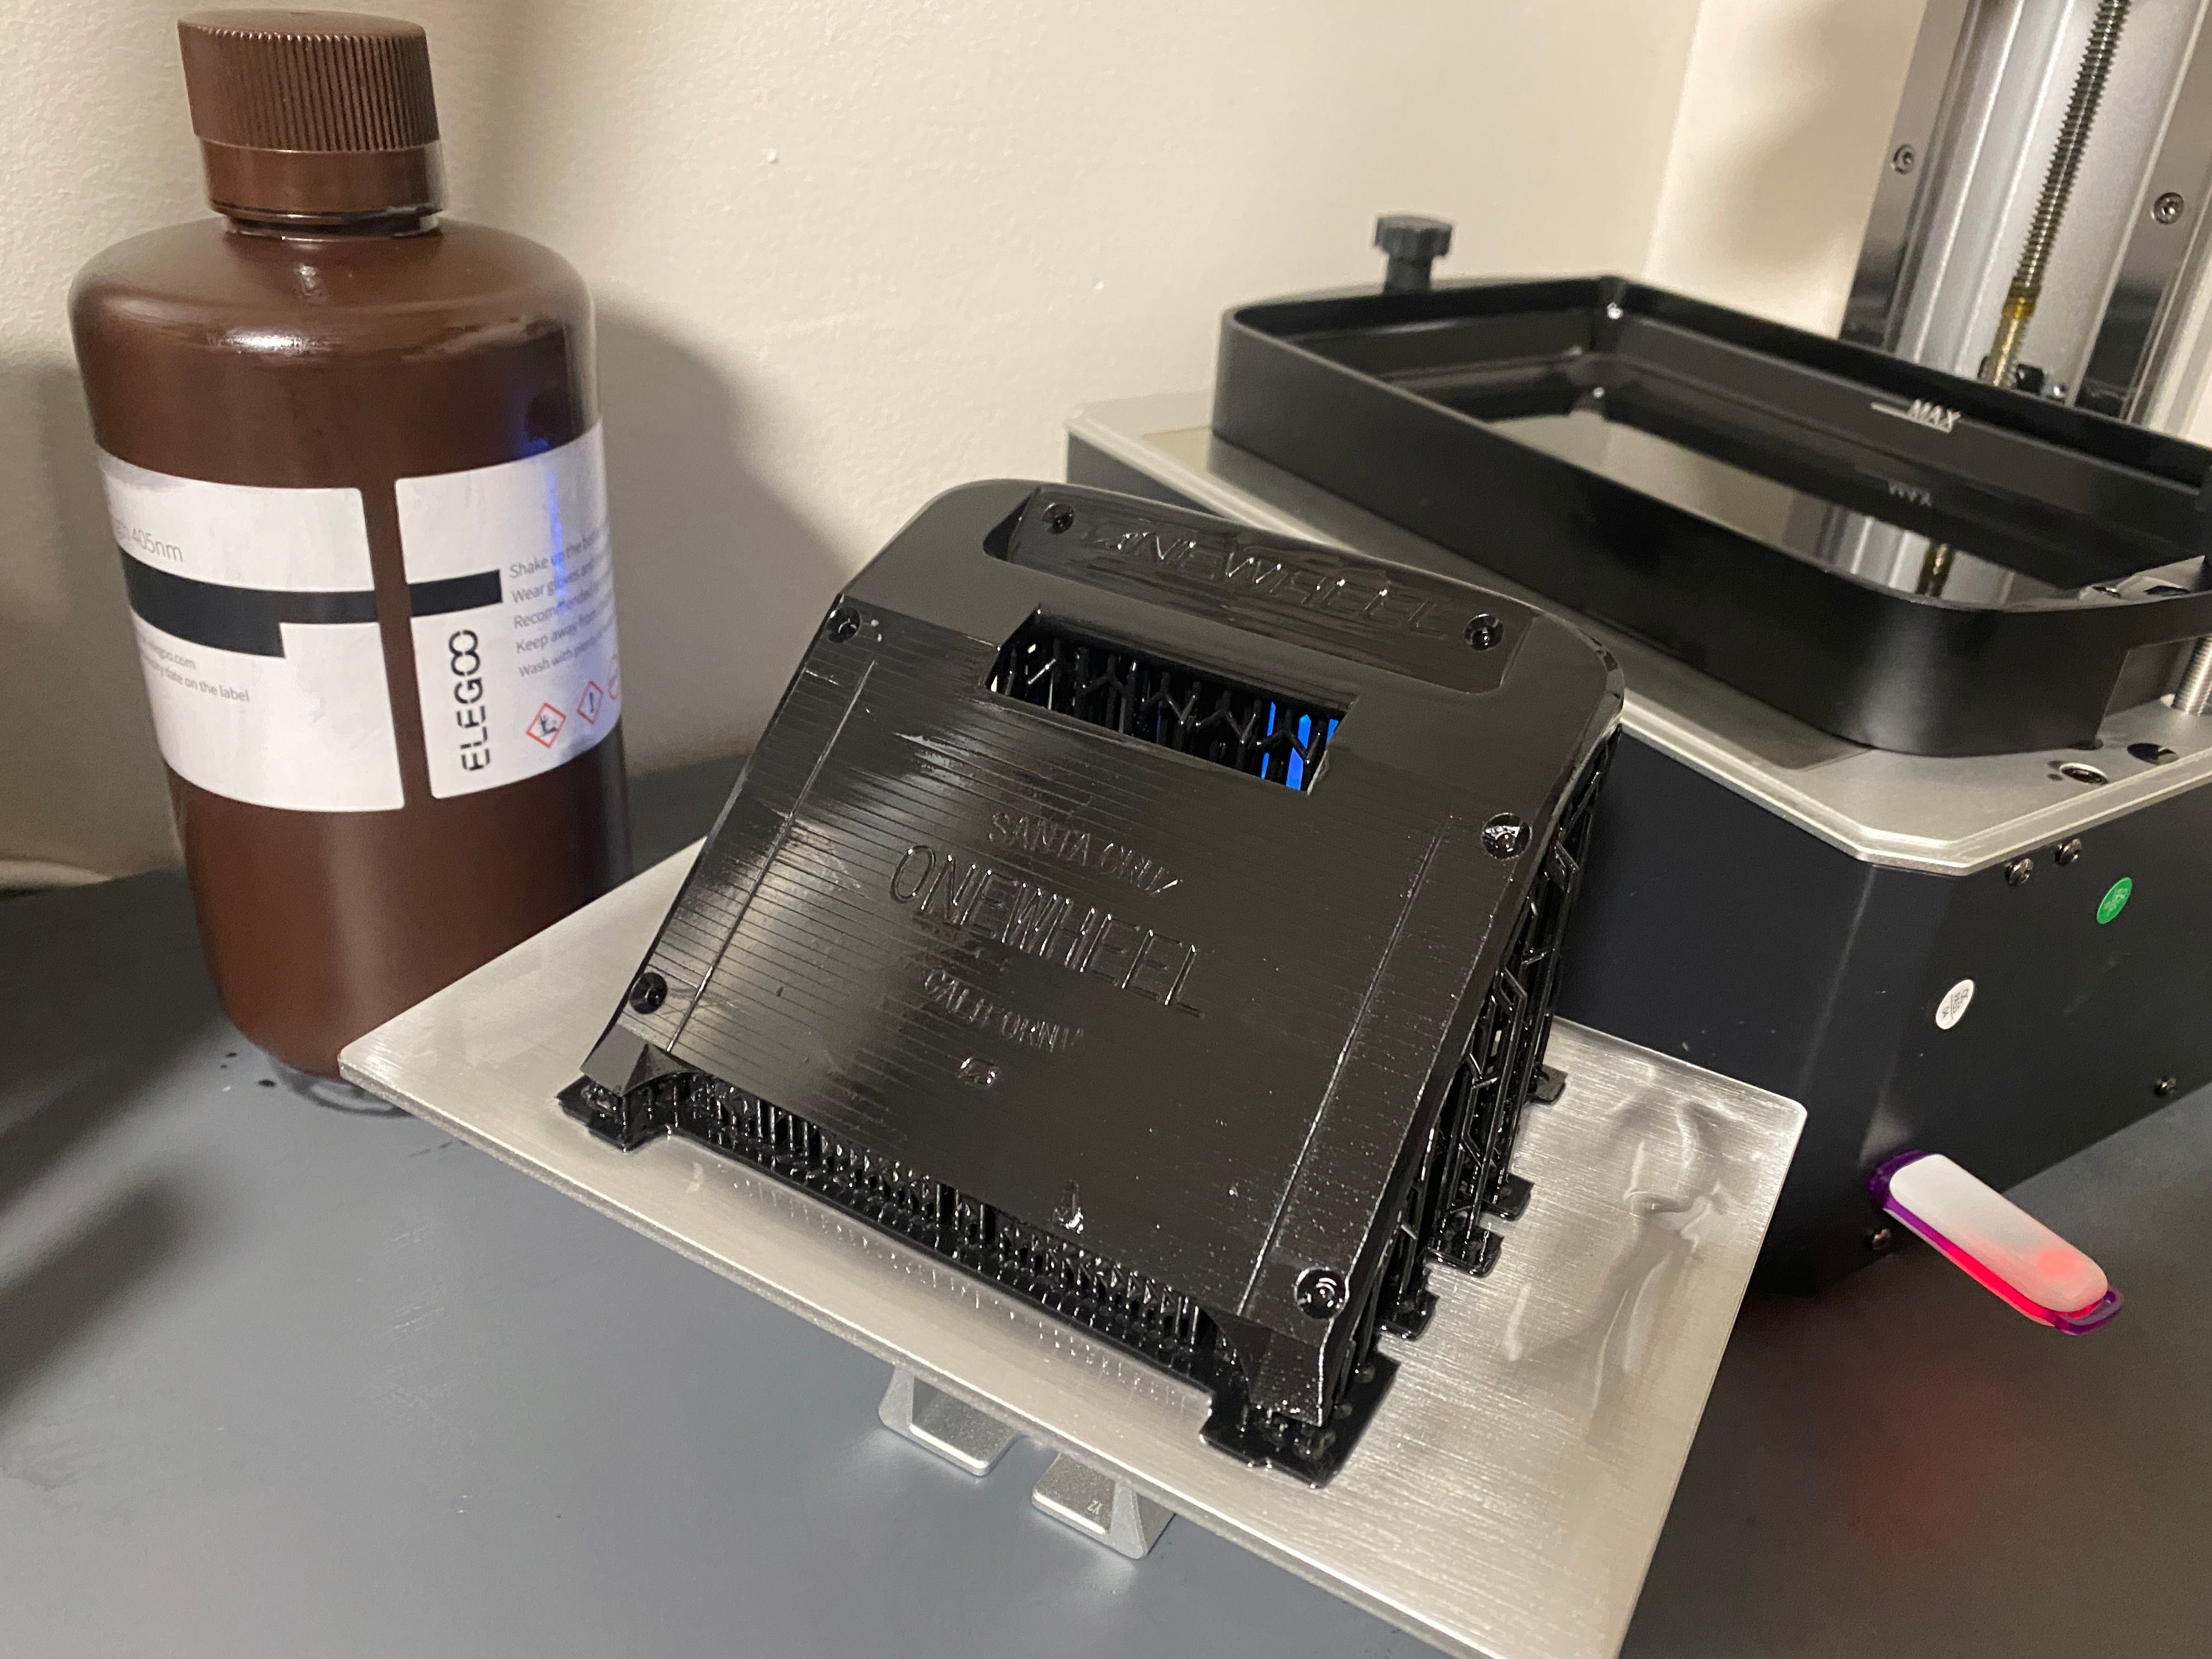
You can see the difference, if not for the white smears this would be night and day in an improvement.
Sadly it looks like the print wasn't perfect. The very front appears to be warped and doesn't actually line up as per the CAD as shown with the wildly out of tolerance bits below.
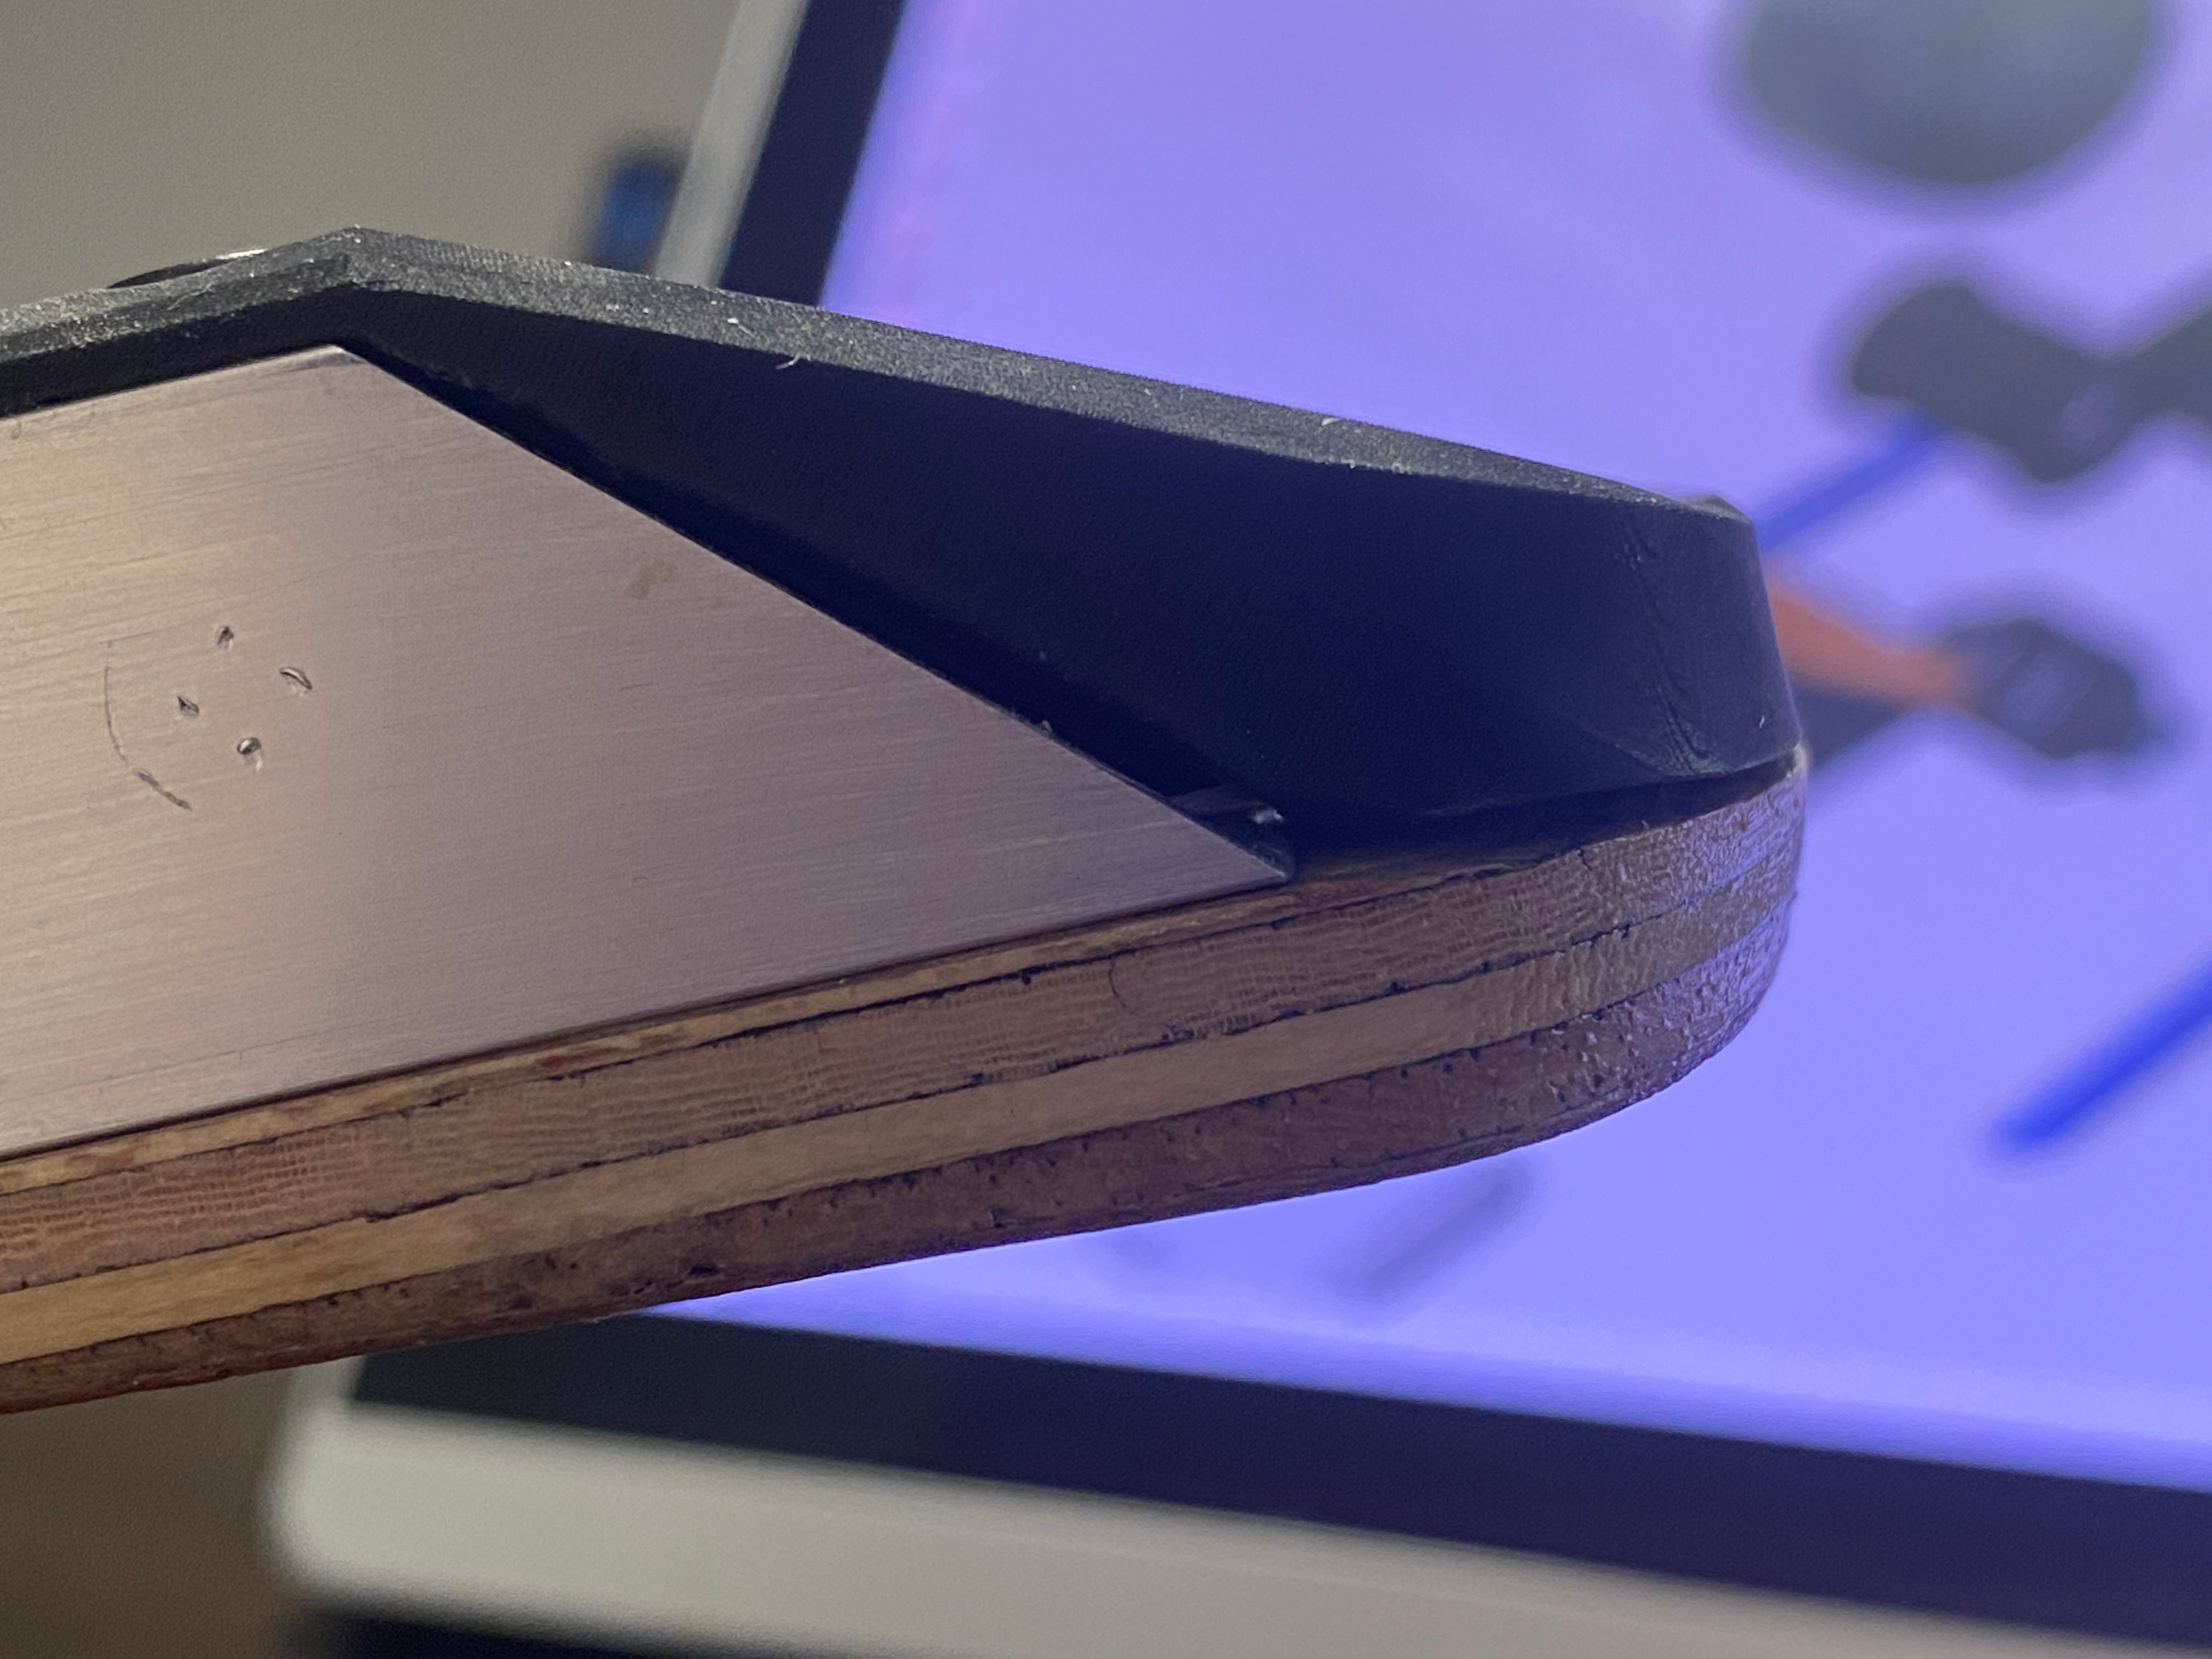
For a first print though I'd say this is pretty good. I think the issue was the parts that warped don't appear to have any support.

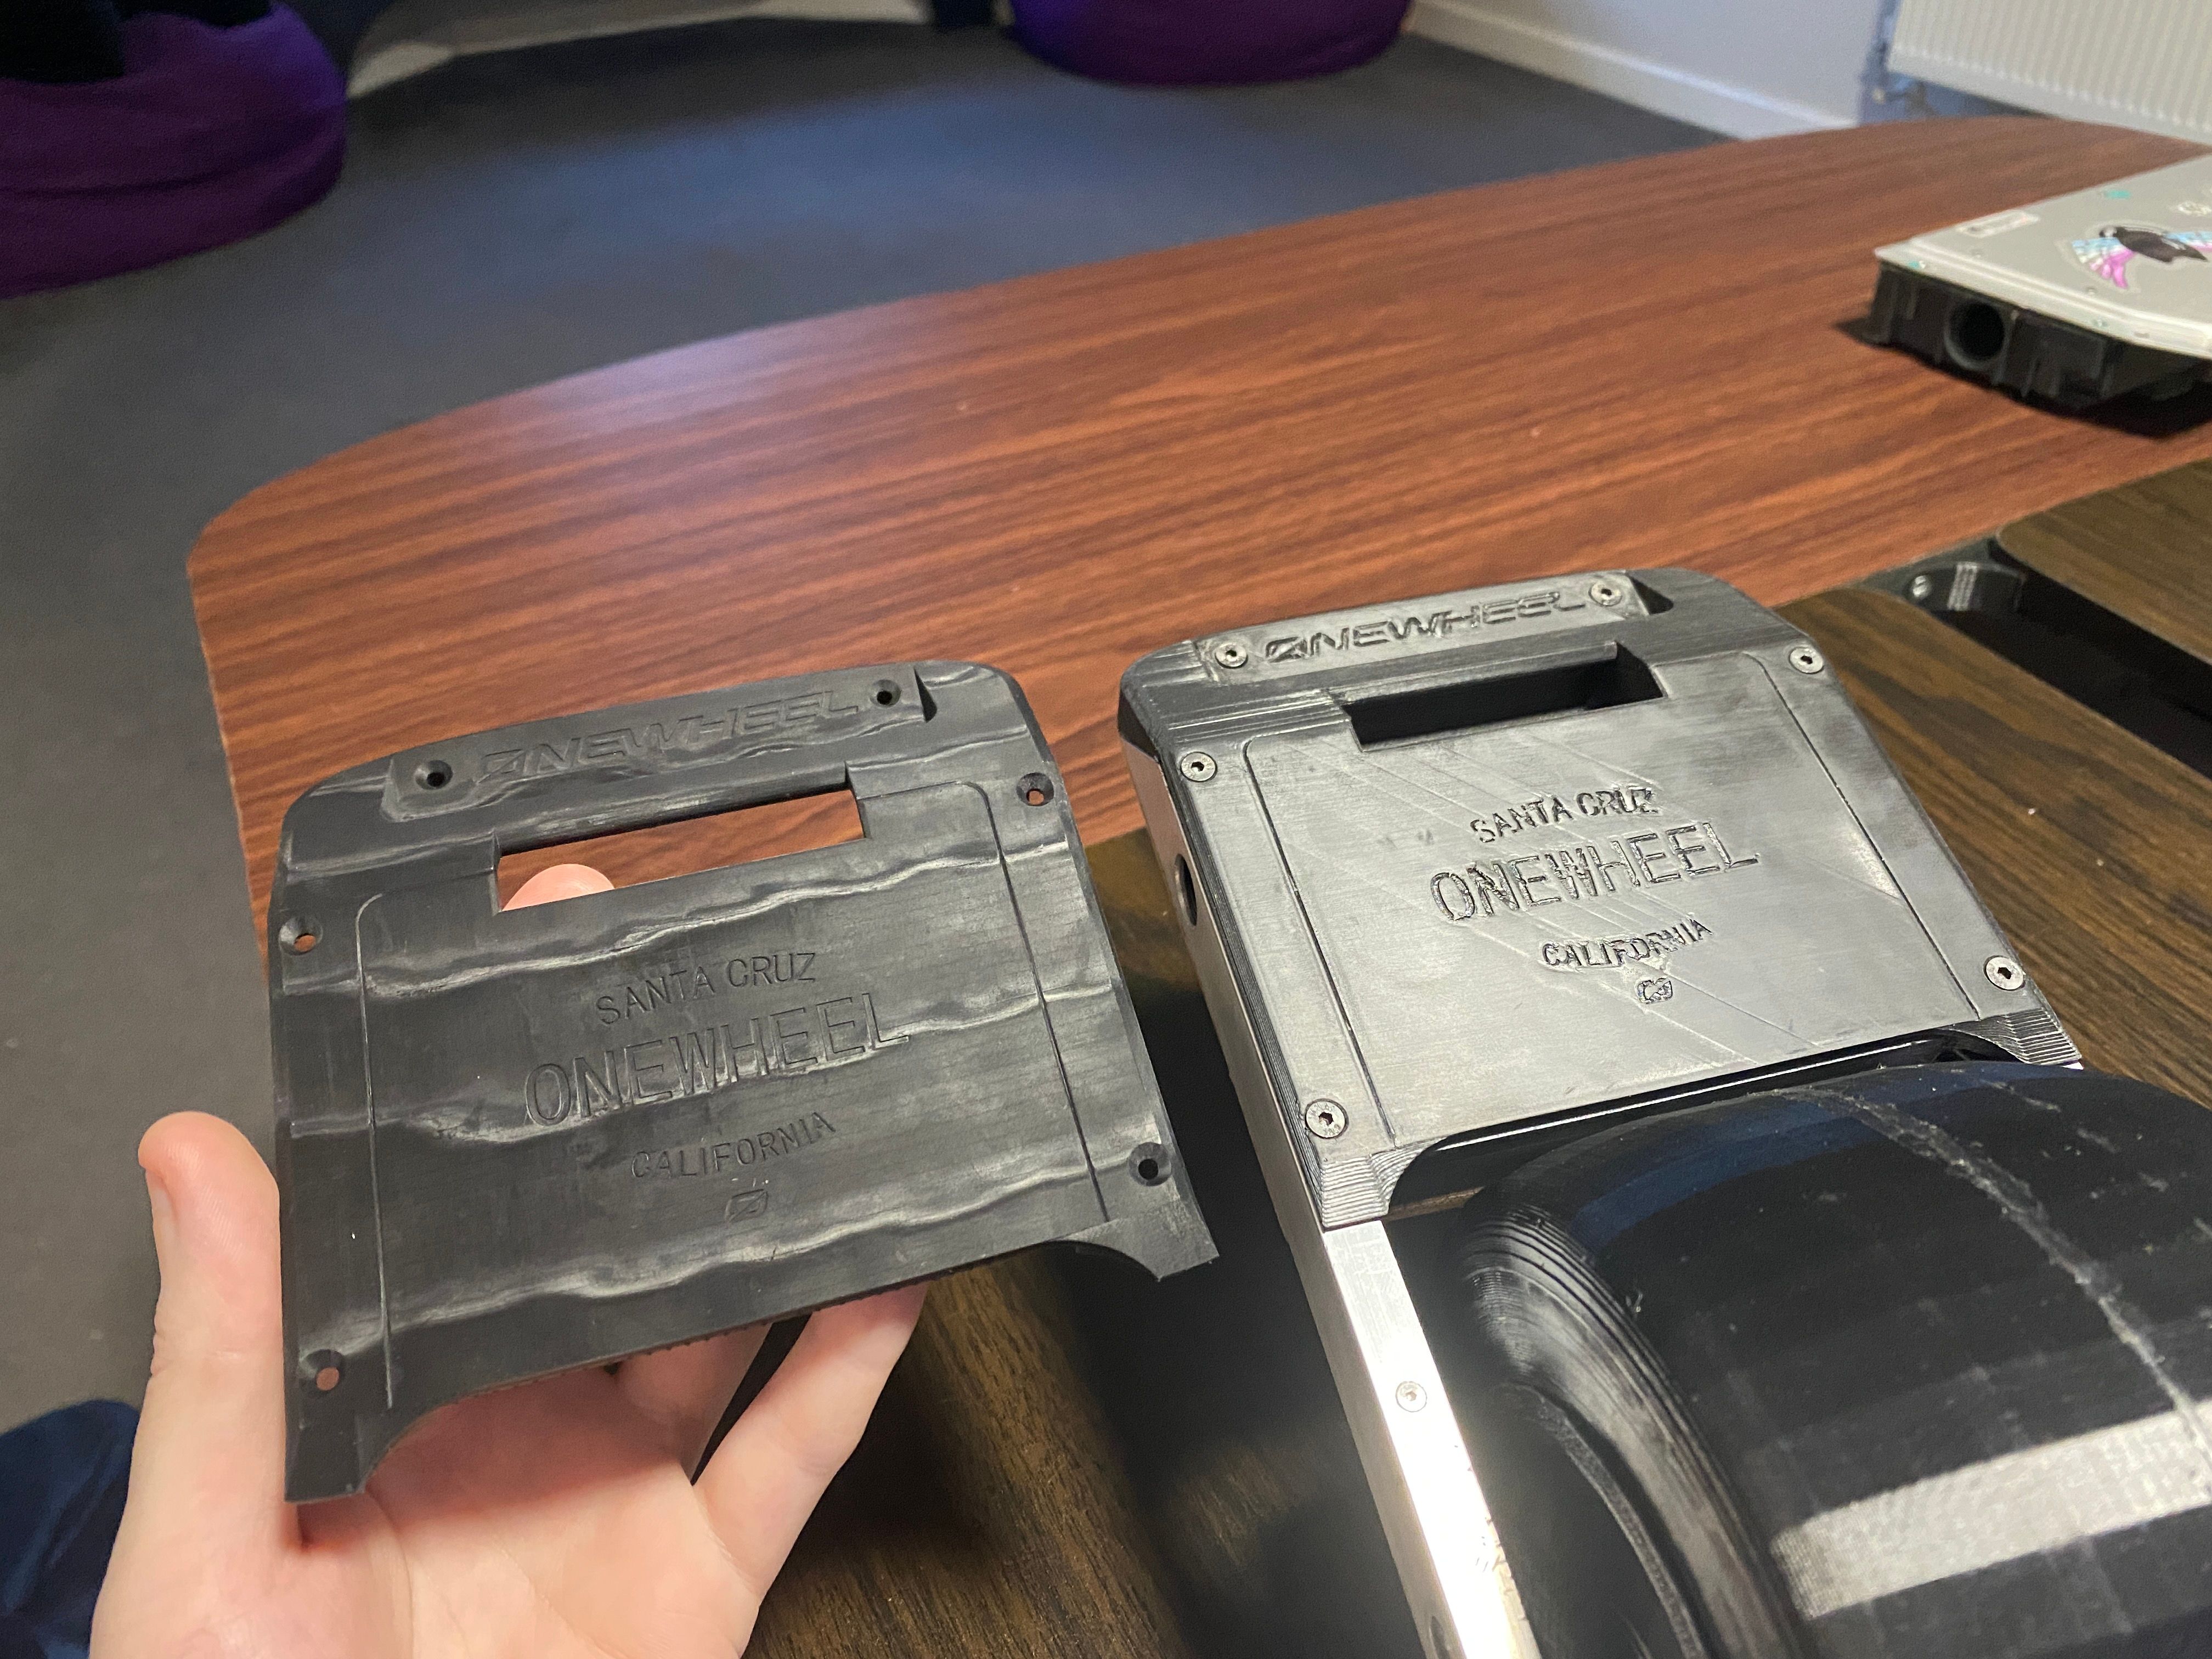
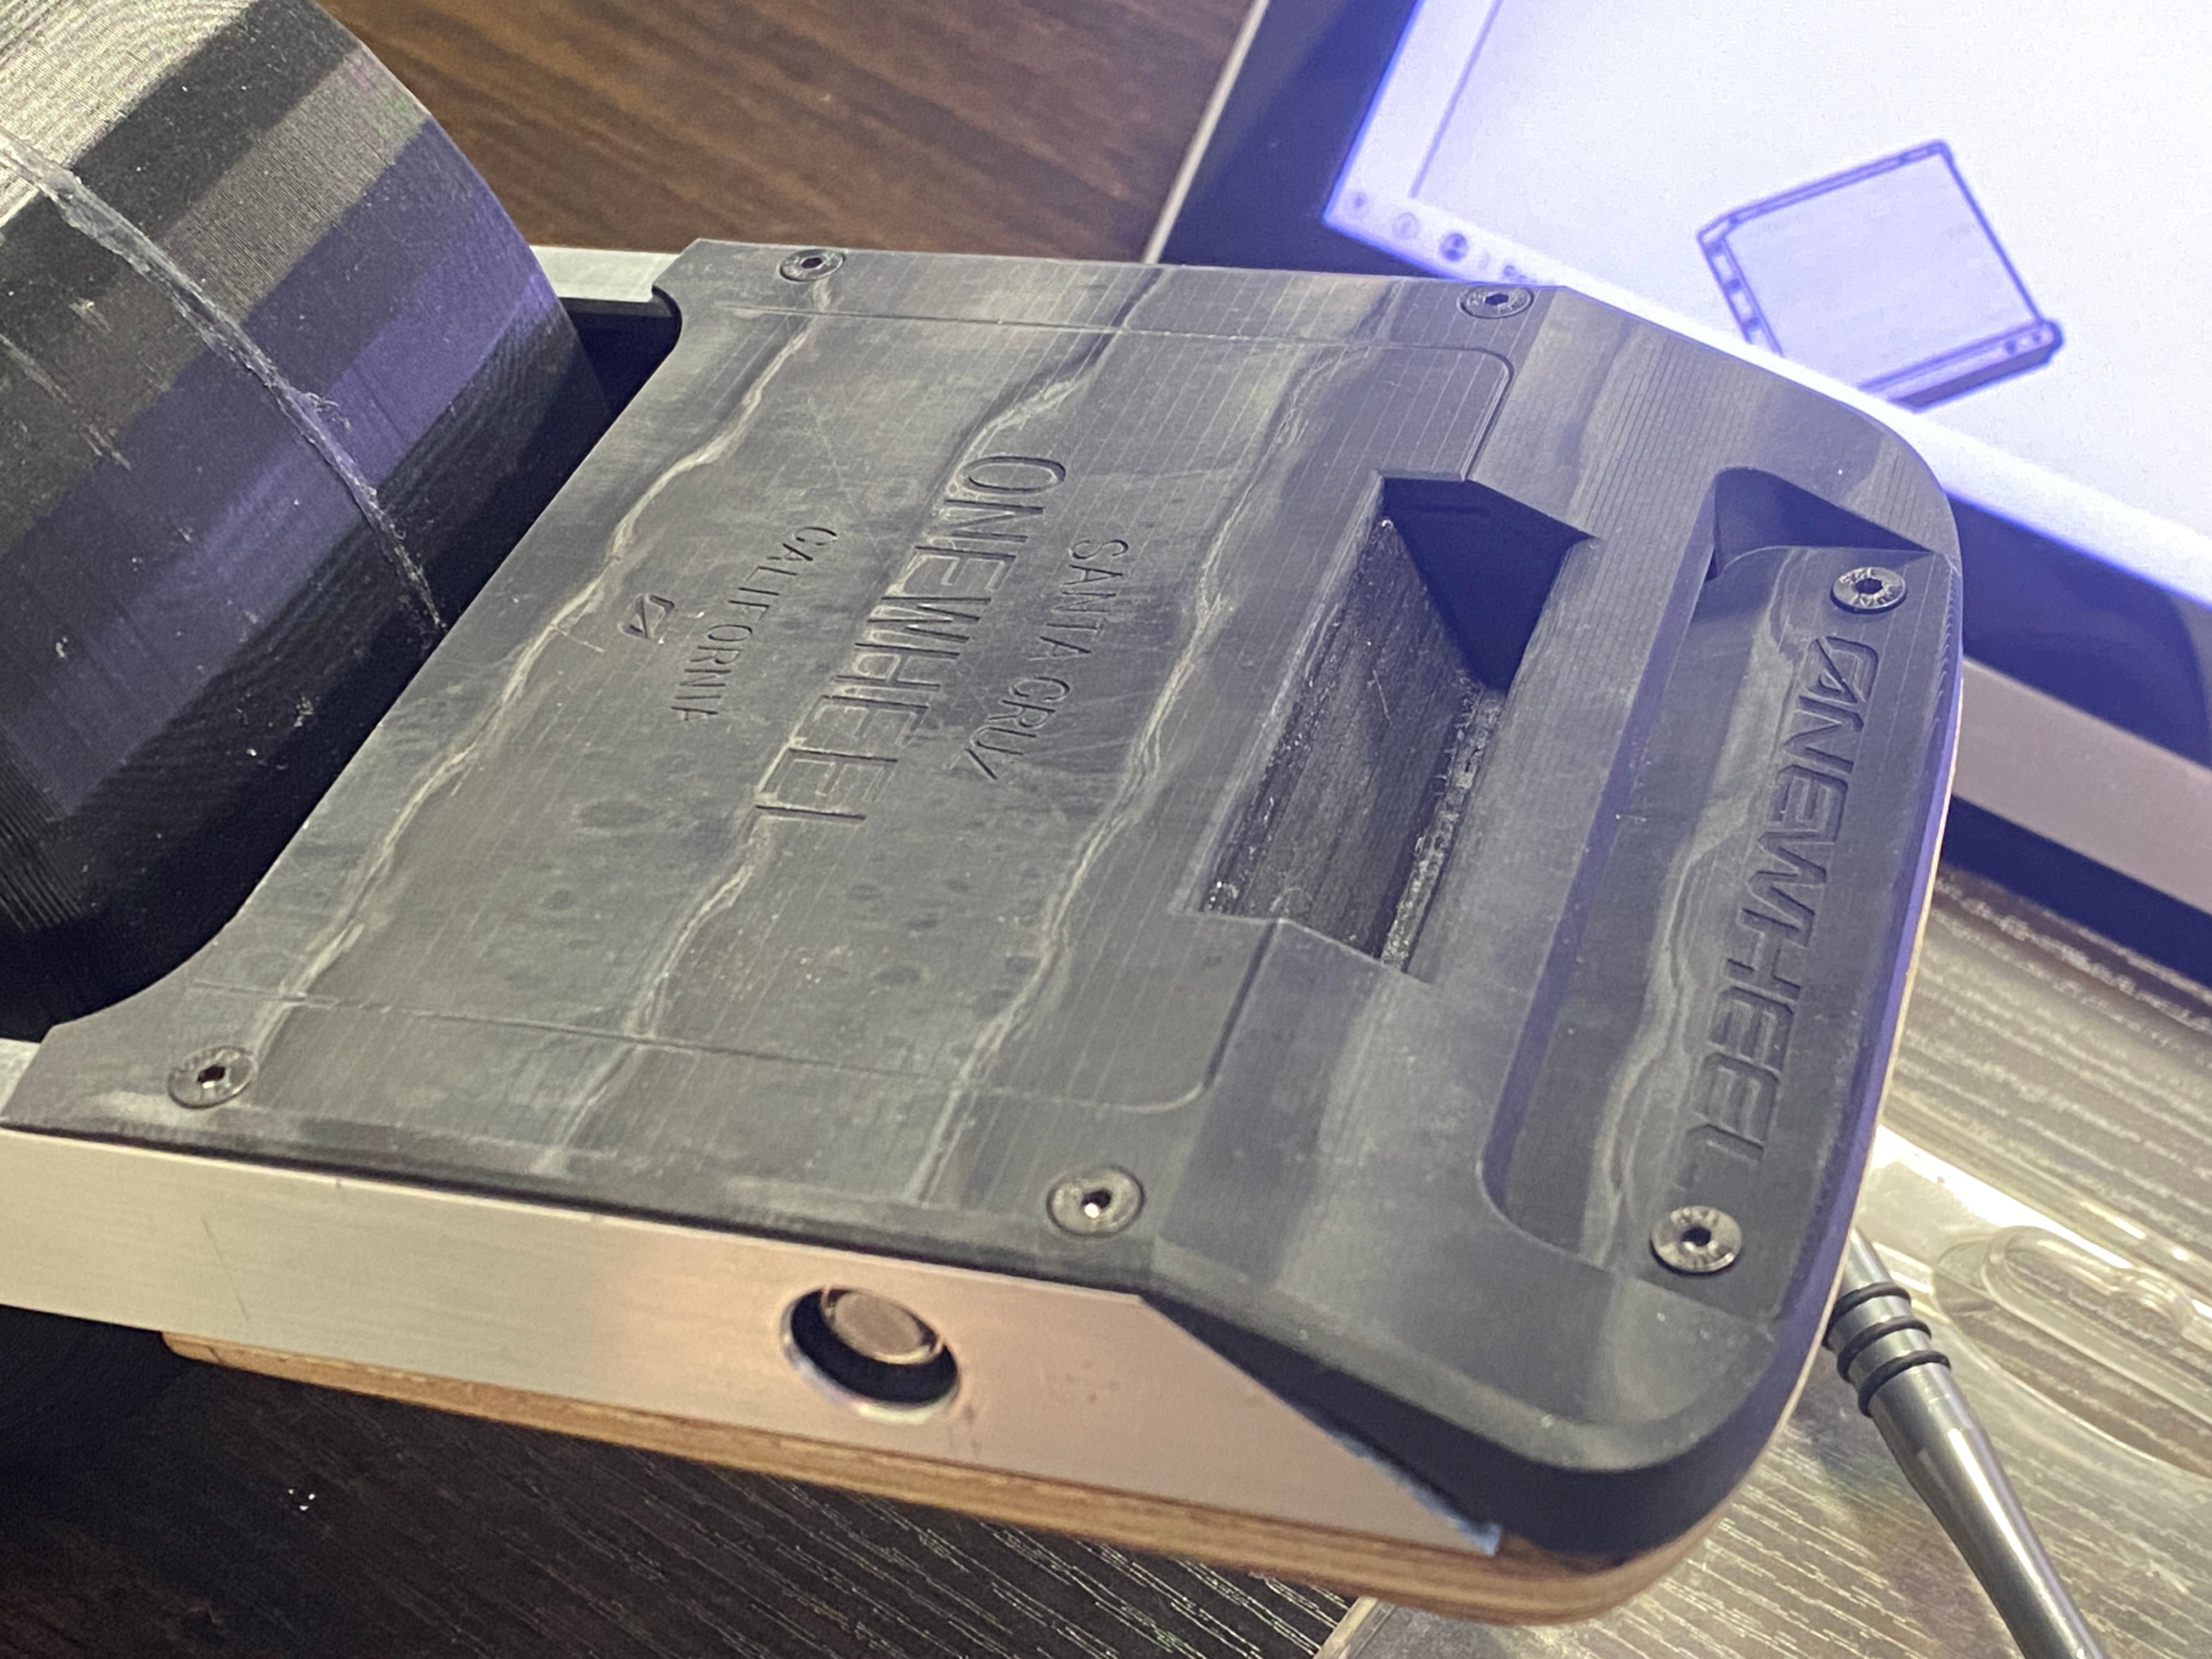
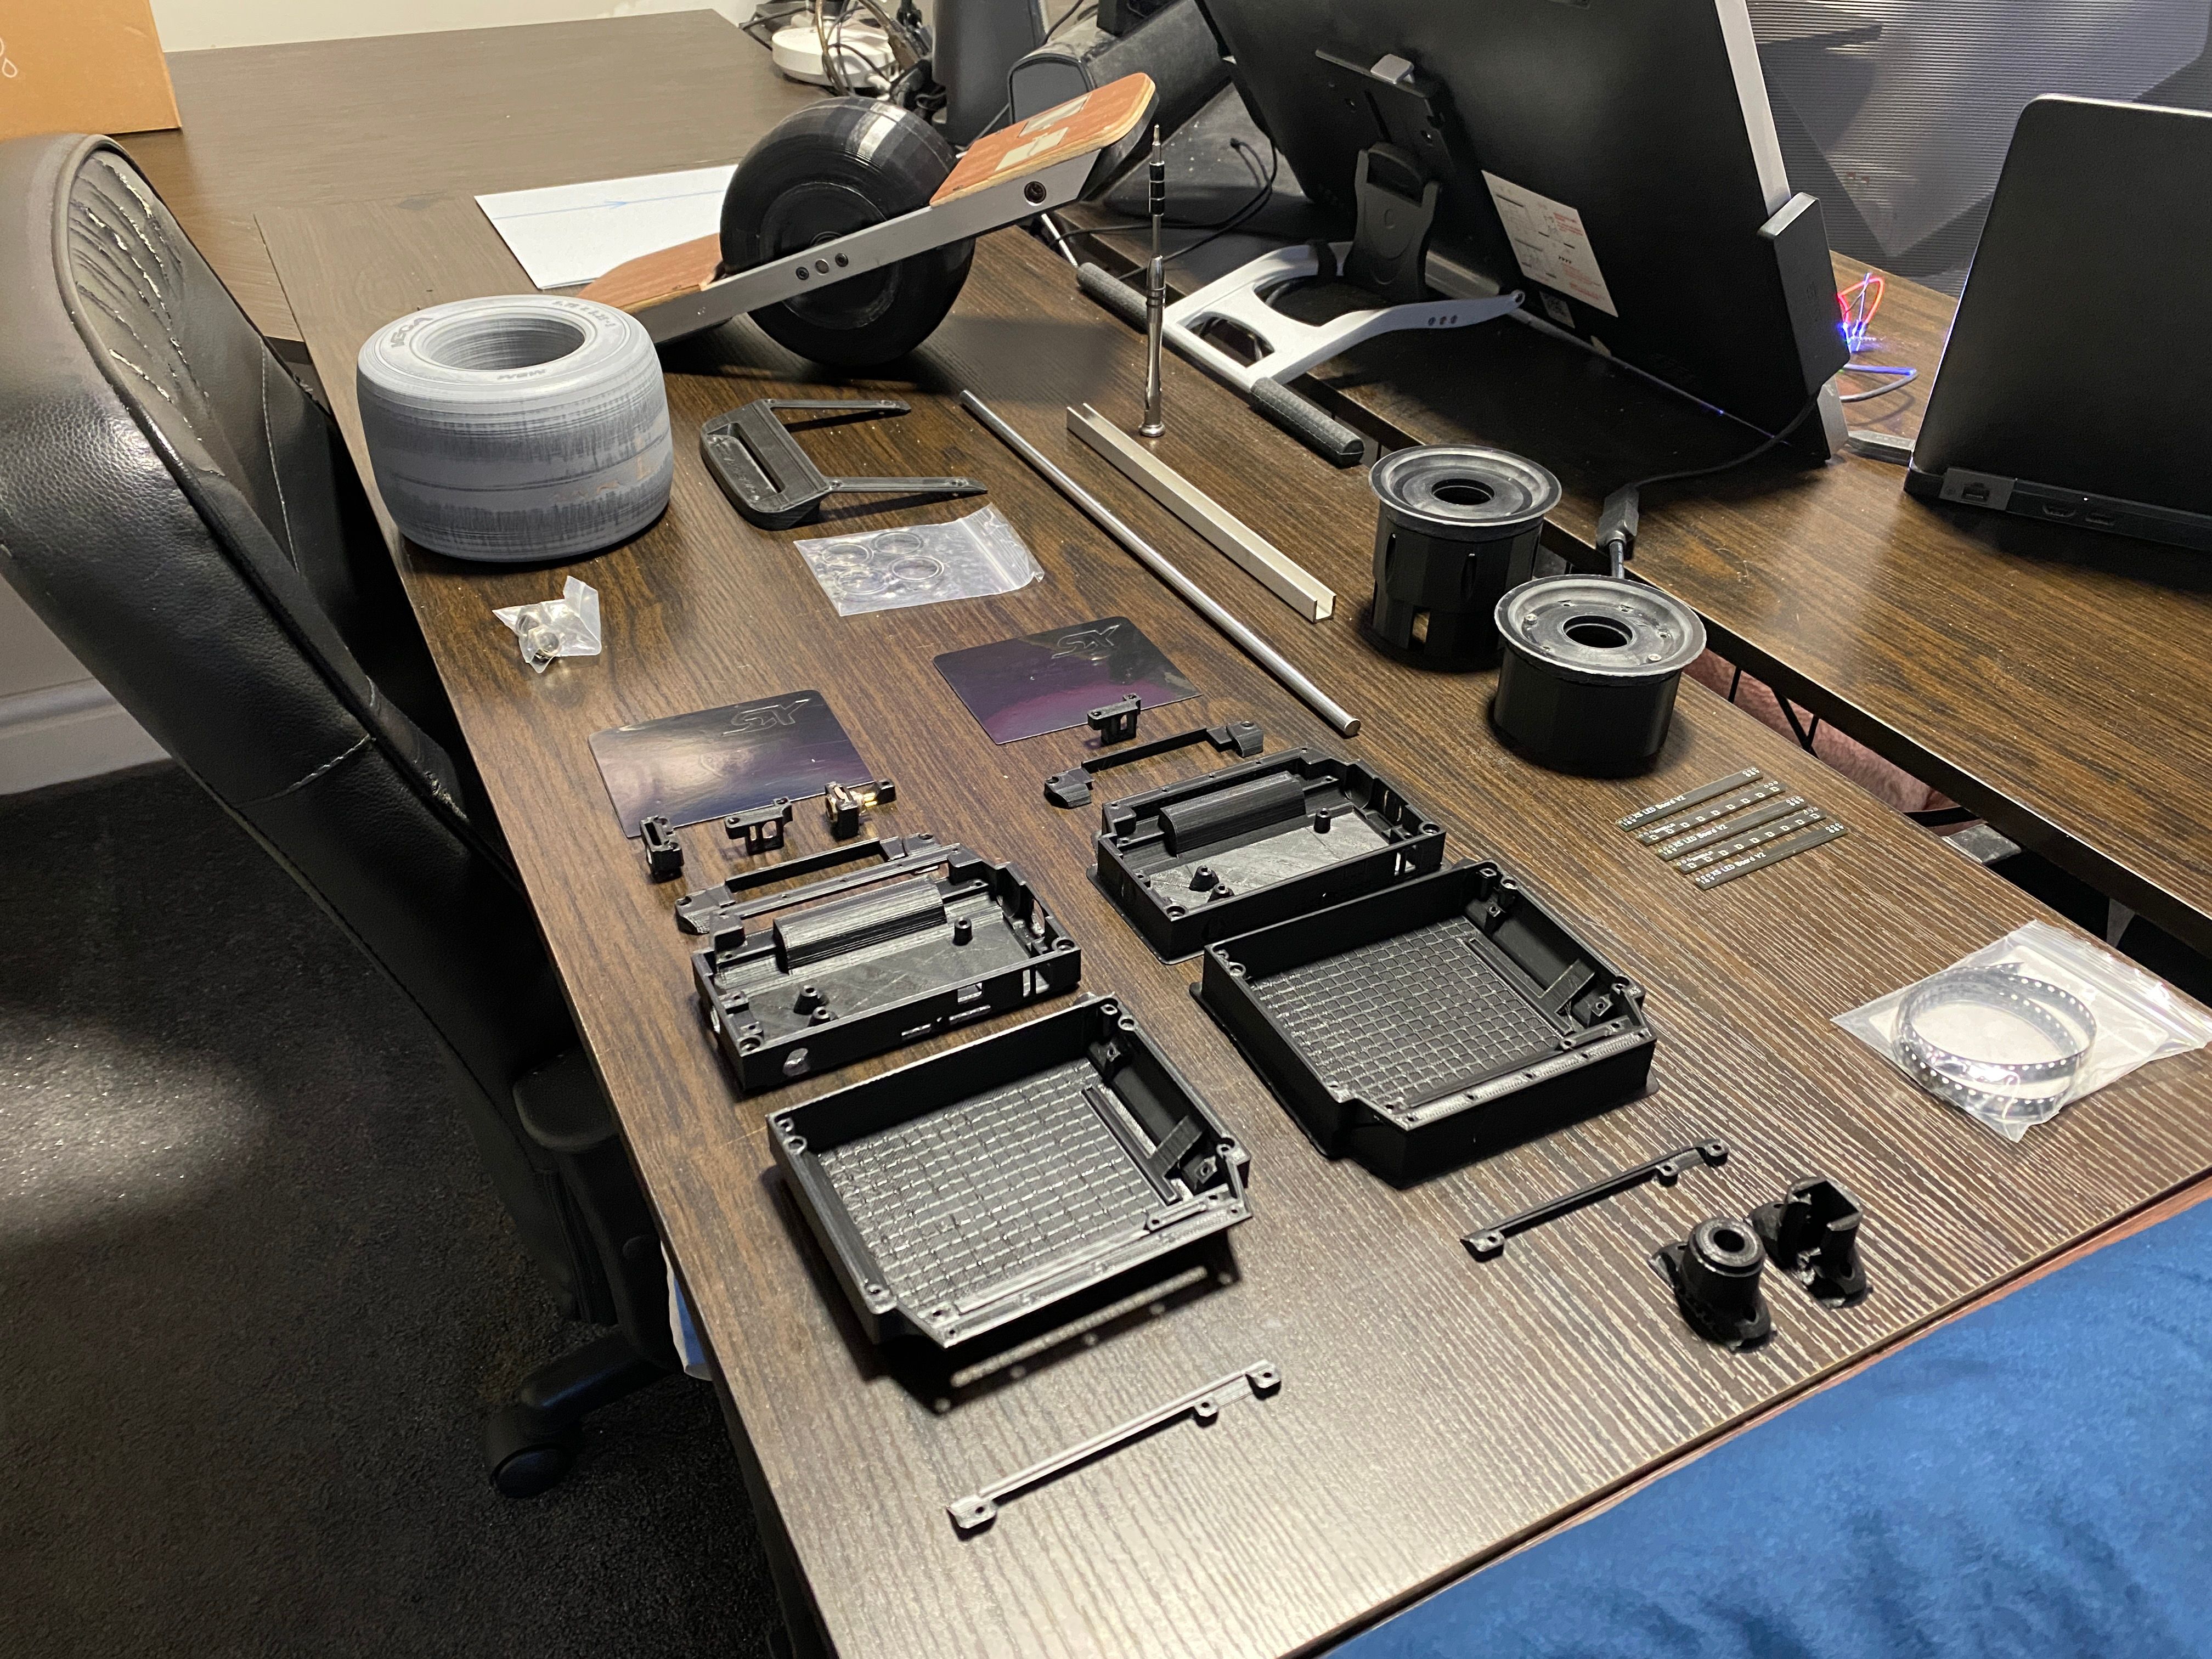
I'll try that again but since that took 9 hours to print I've opted to do one of the hub face plates which is only 2 hours. It did mean I needed to remodel it. See before/after (don't worry I wasn't printing in this orientation).
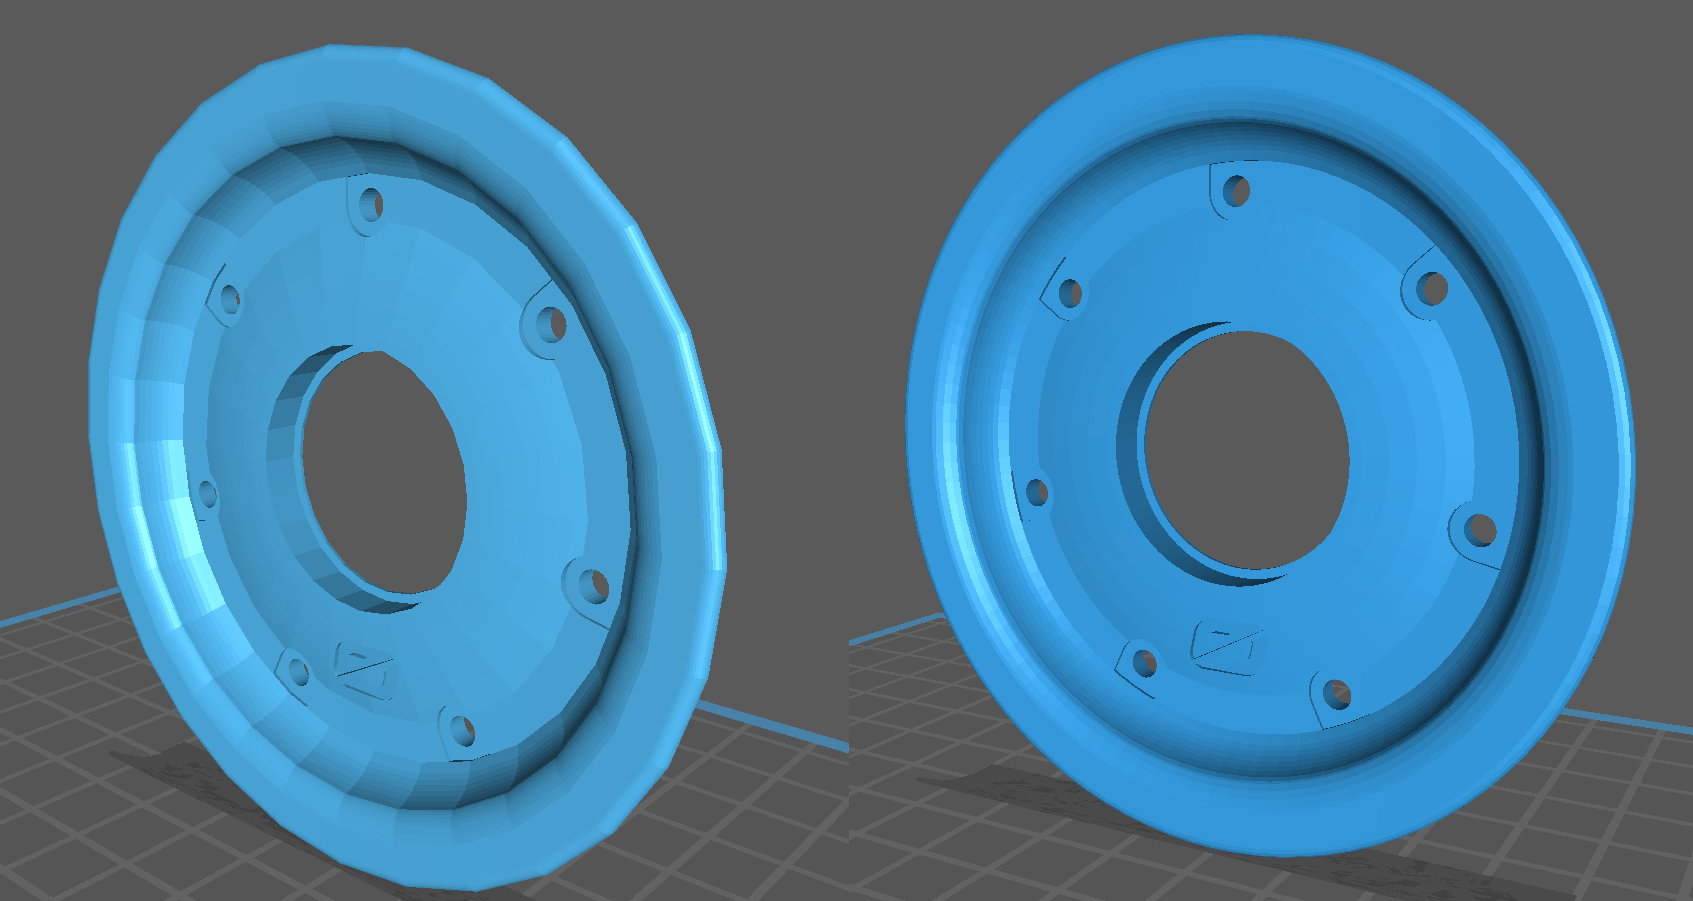
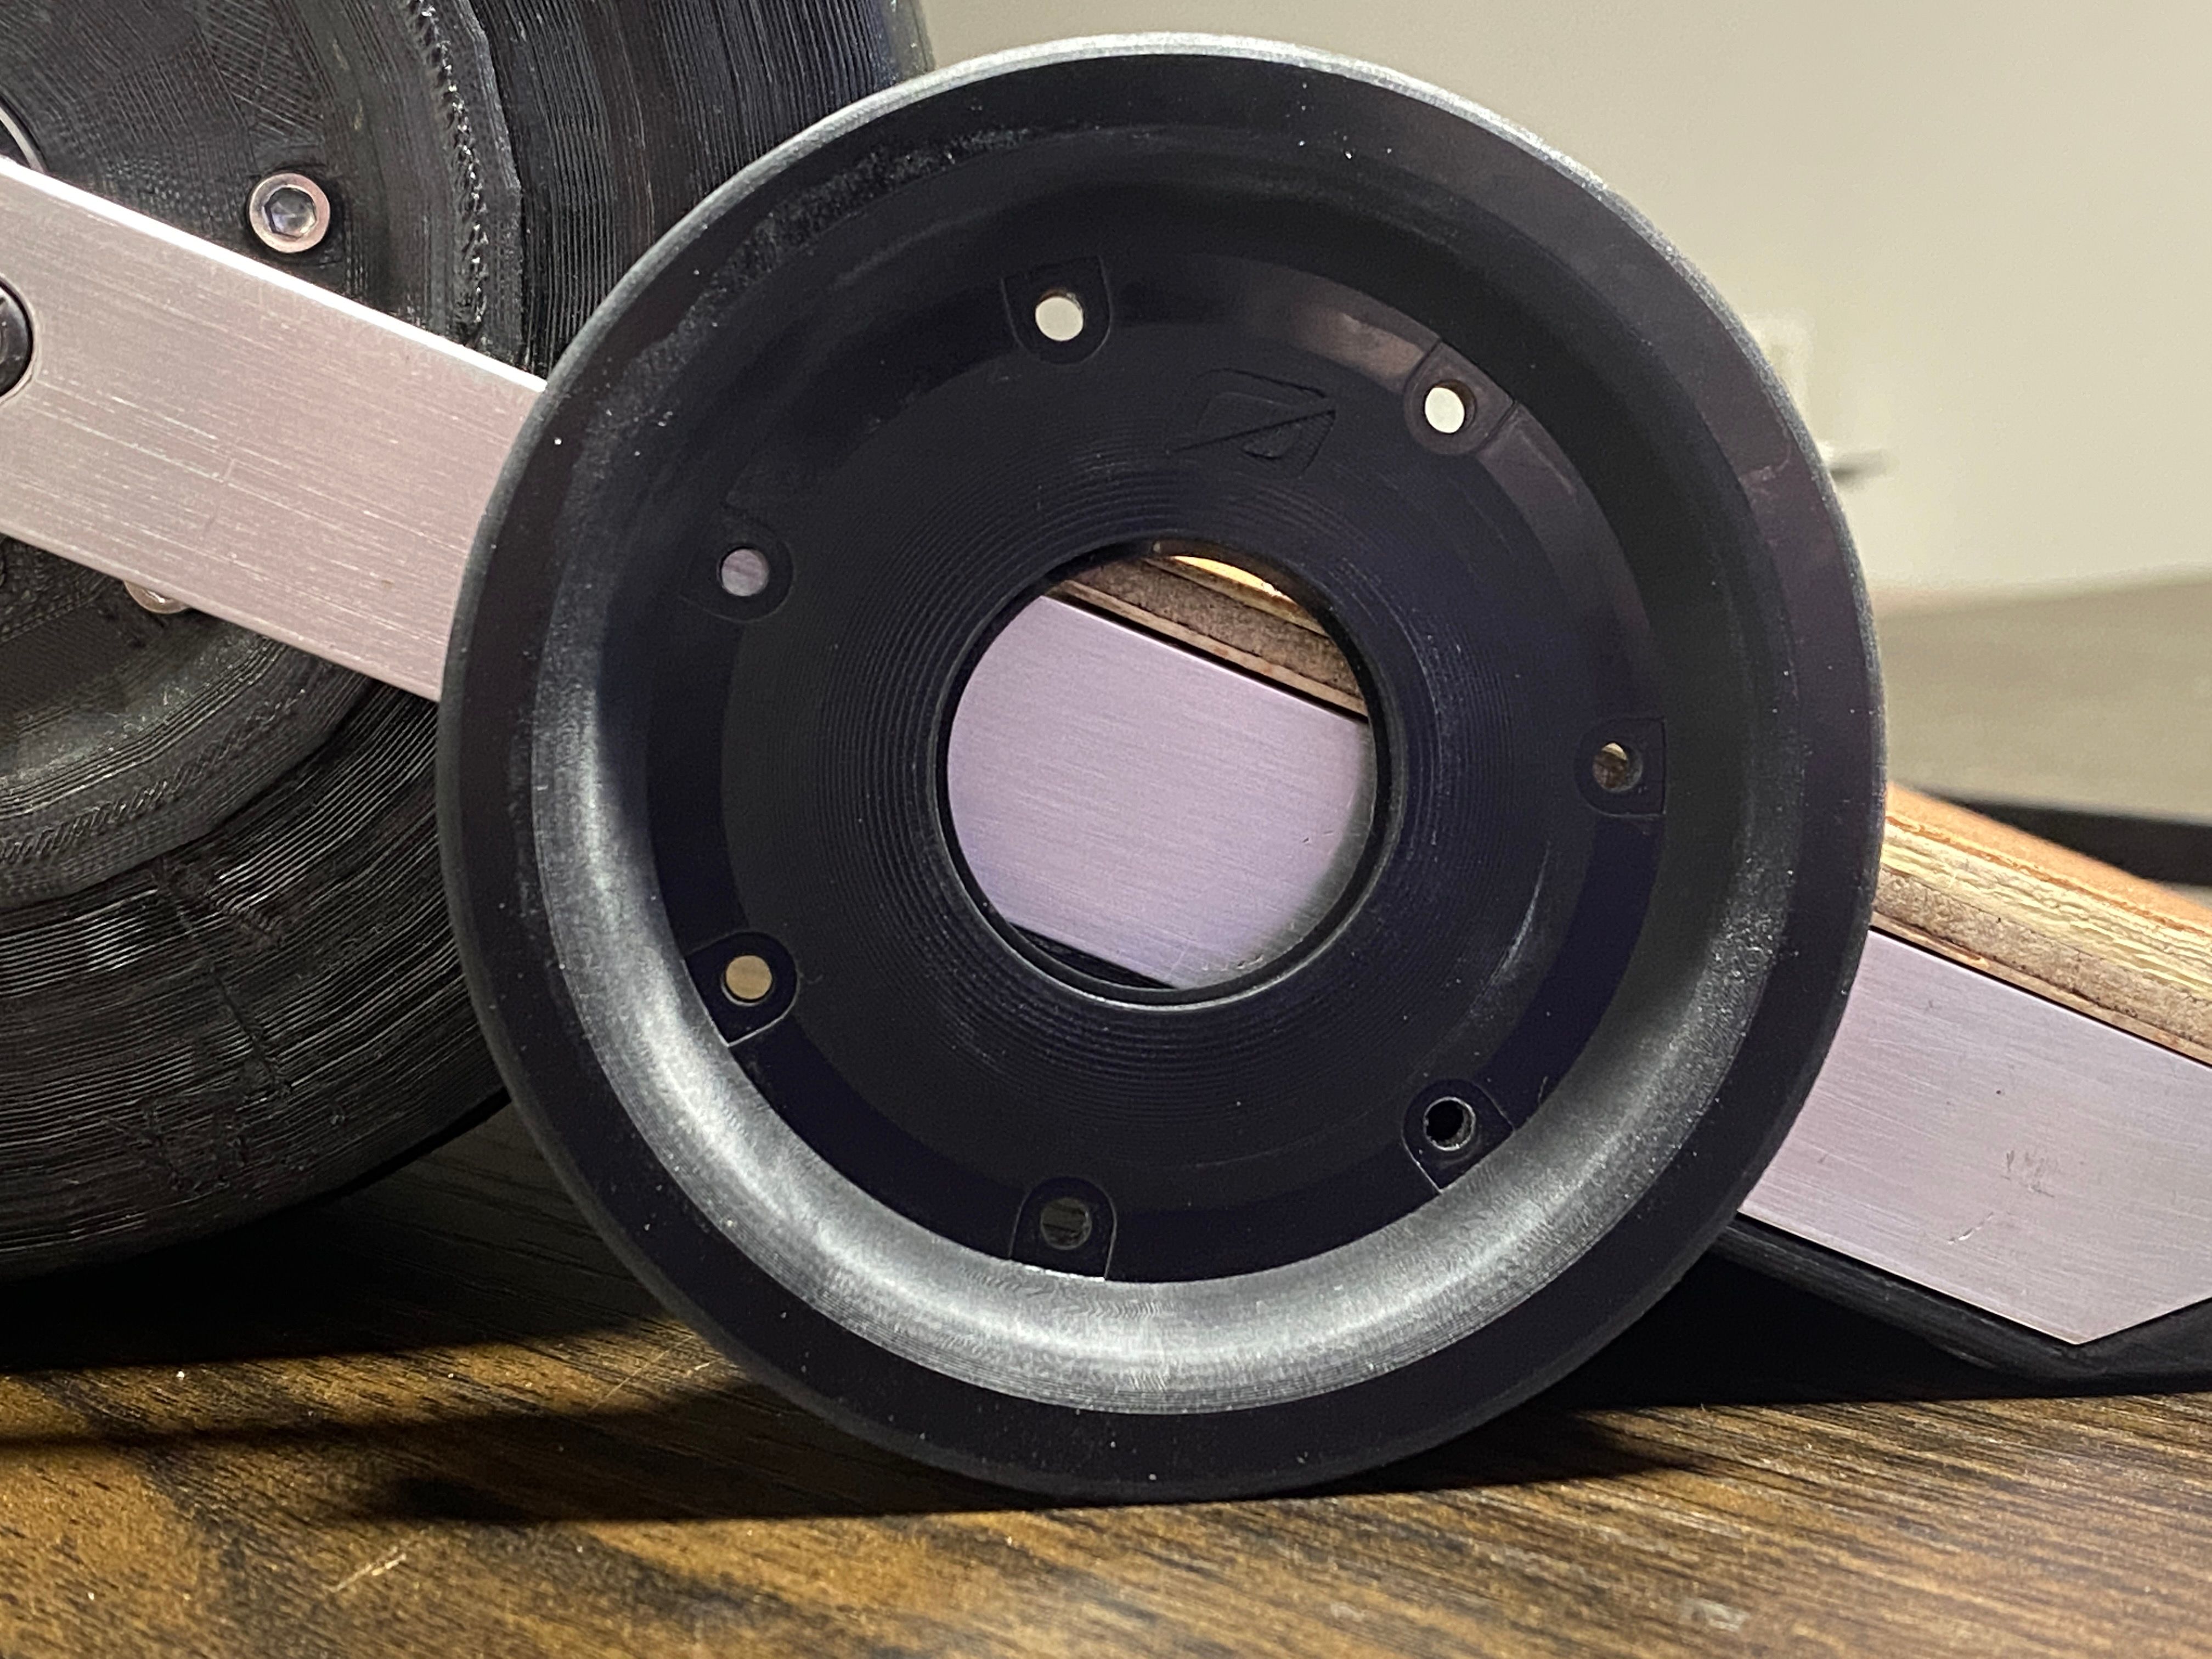
Edit: Left hub cover finished, impressed with how good the parts look!
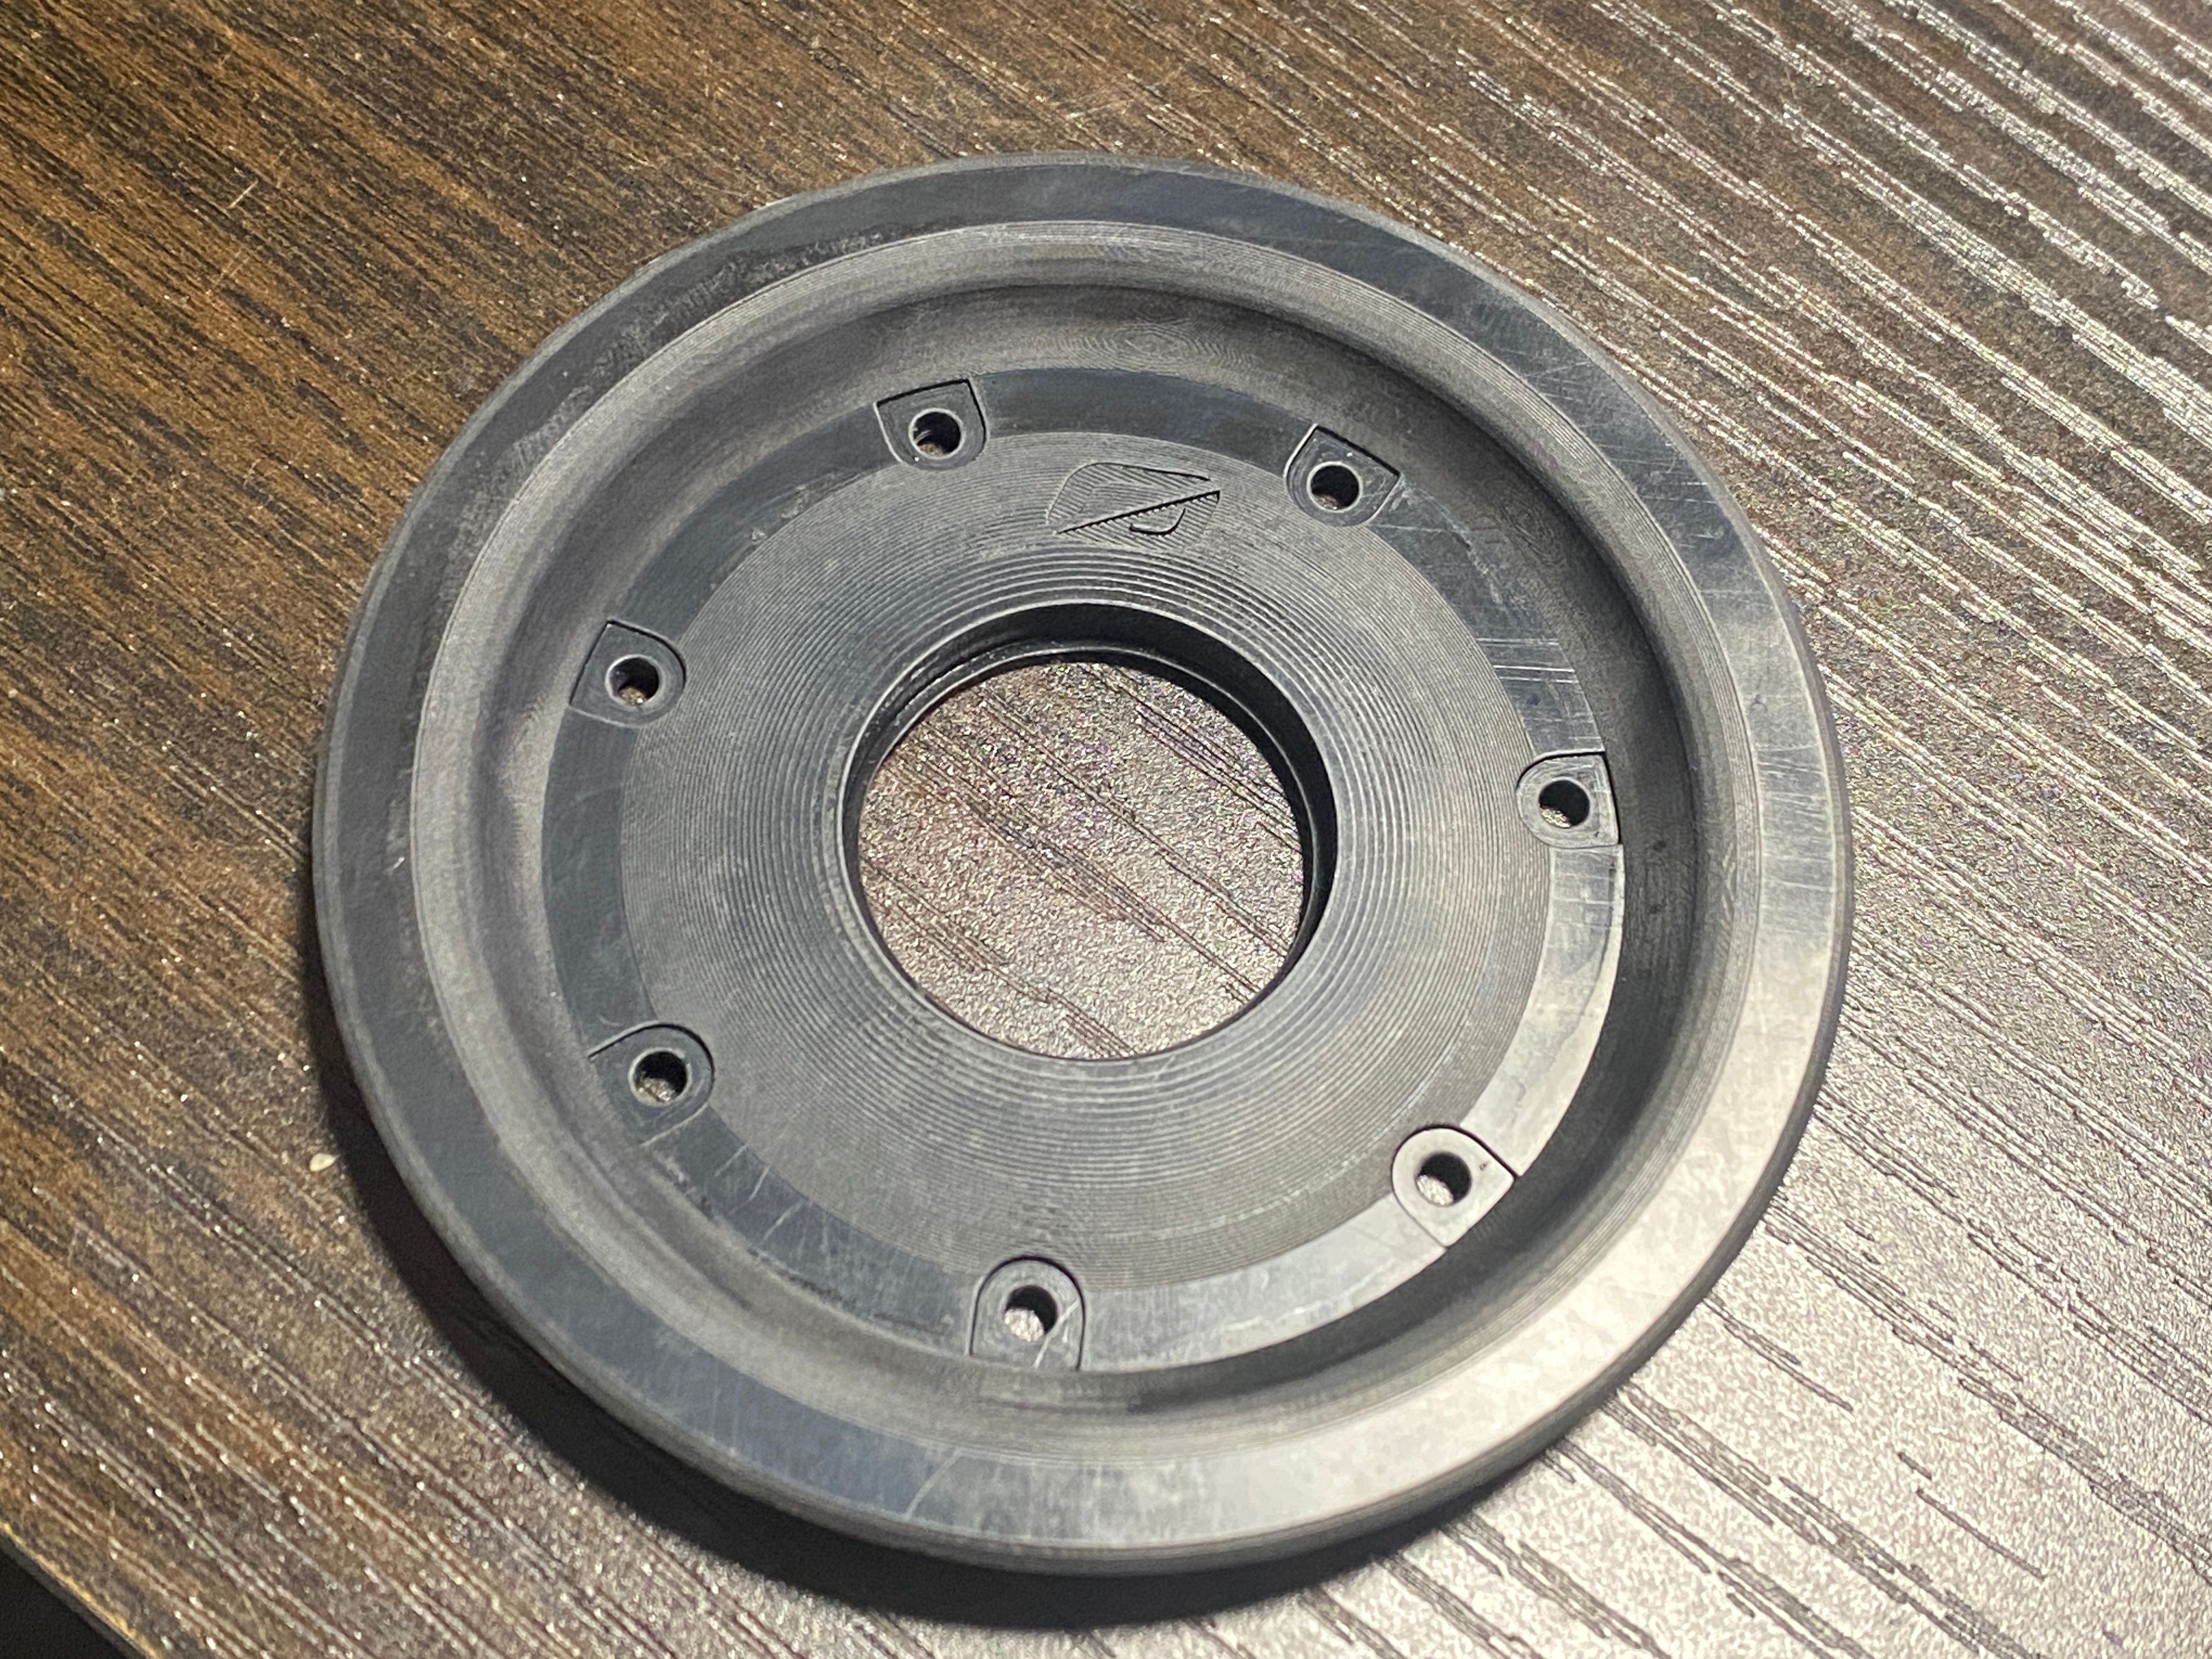
Next to the old one that's still on the XS. Waiting to get the other side done before taking the hub apart to add it.

-
@lia said in Followup to the Onewheel XS:
Then I also need to decide on the best materials to use for both the mould and actual tire.
But when will the aftermarket tires come out? Inquiring minds want to know!!!
GTS XL > GTS > GT > Pint X > XR > +
-
@onedangt Thanks to another project I'm working on with @cheppy44 The Enduro and Hoosier Slick D20 is getting modelled 👀
-
Much muuuuch simpler!
Also look at the bebe Seeeduino that will replace the Arduino Pro Mini :3
In the process of printing more of the bumpers now that I figured out why the first one warped. I feel like a mad scientist with this machine!
Tolerance dialled in to the point I'm happy with it :3

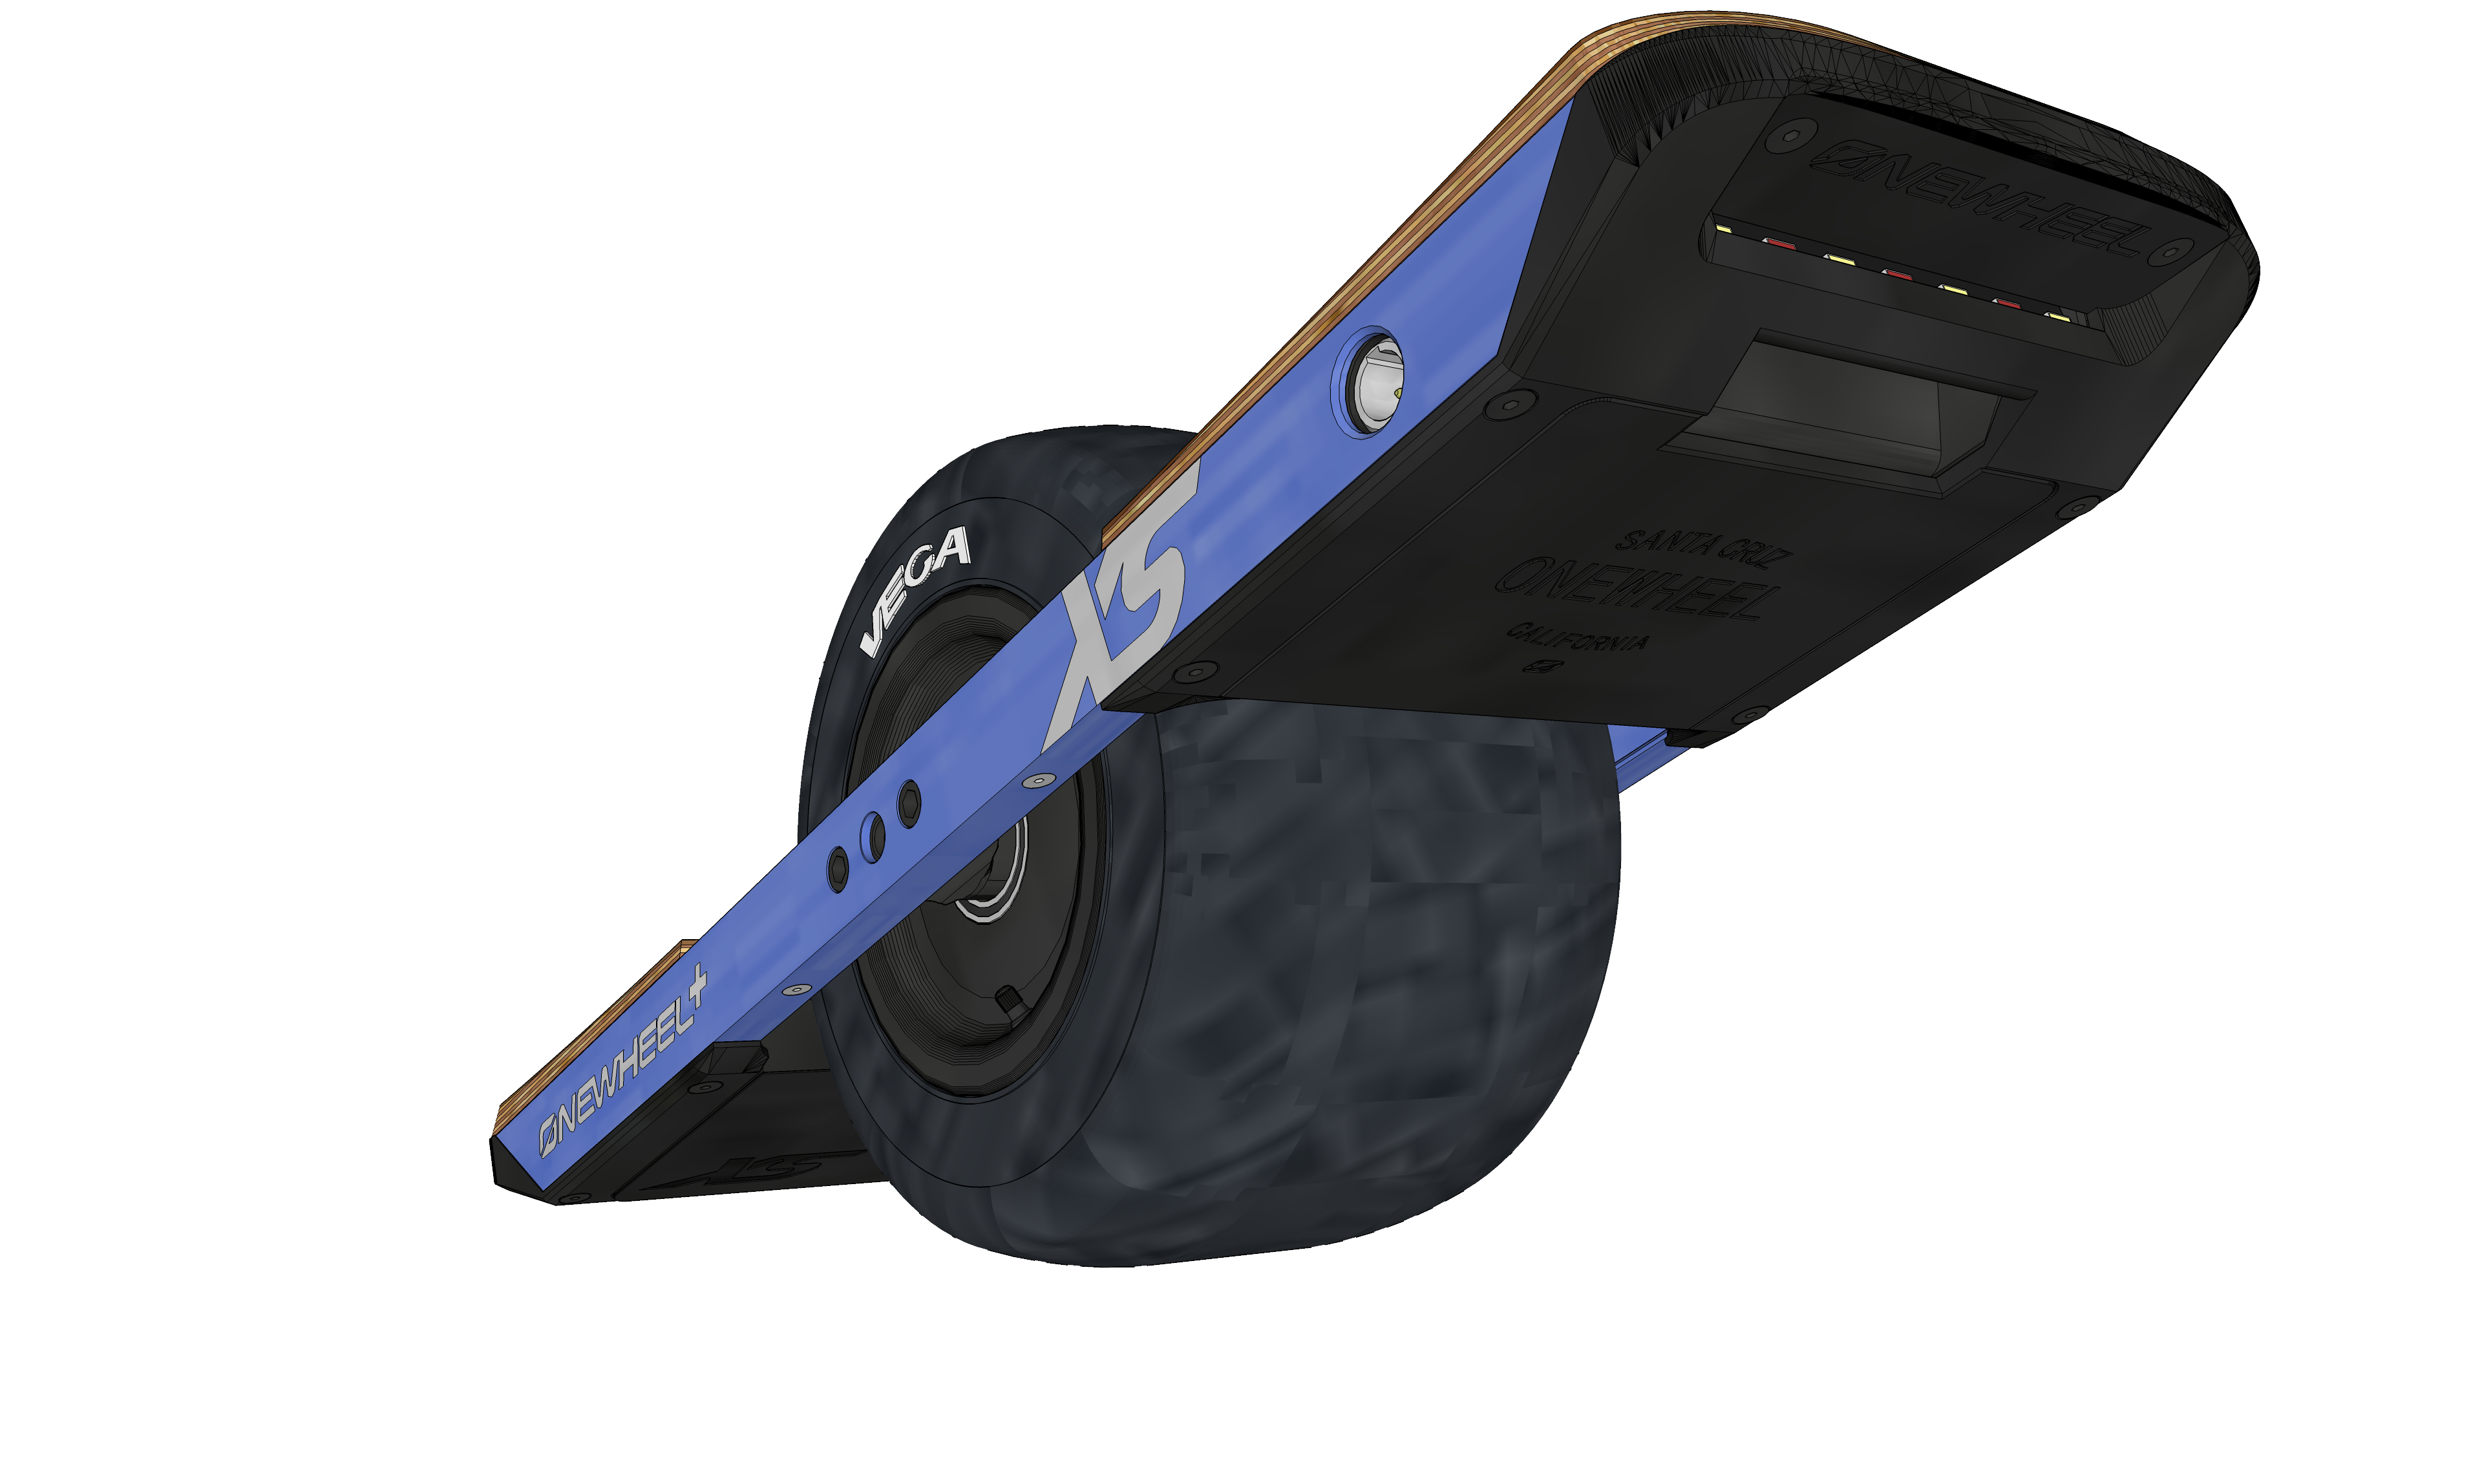
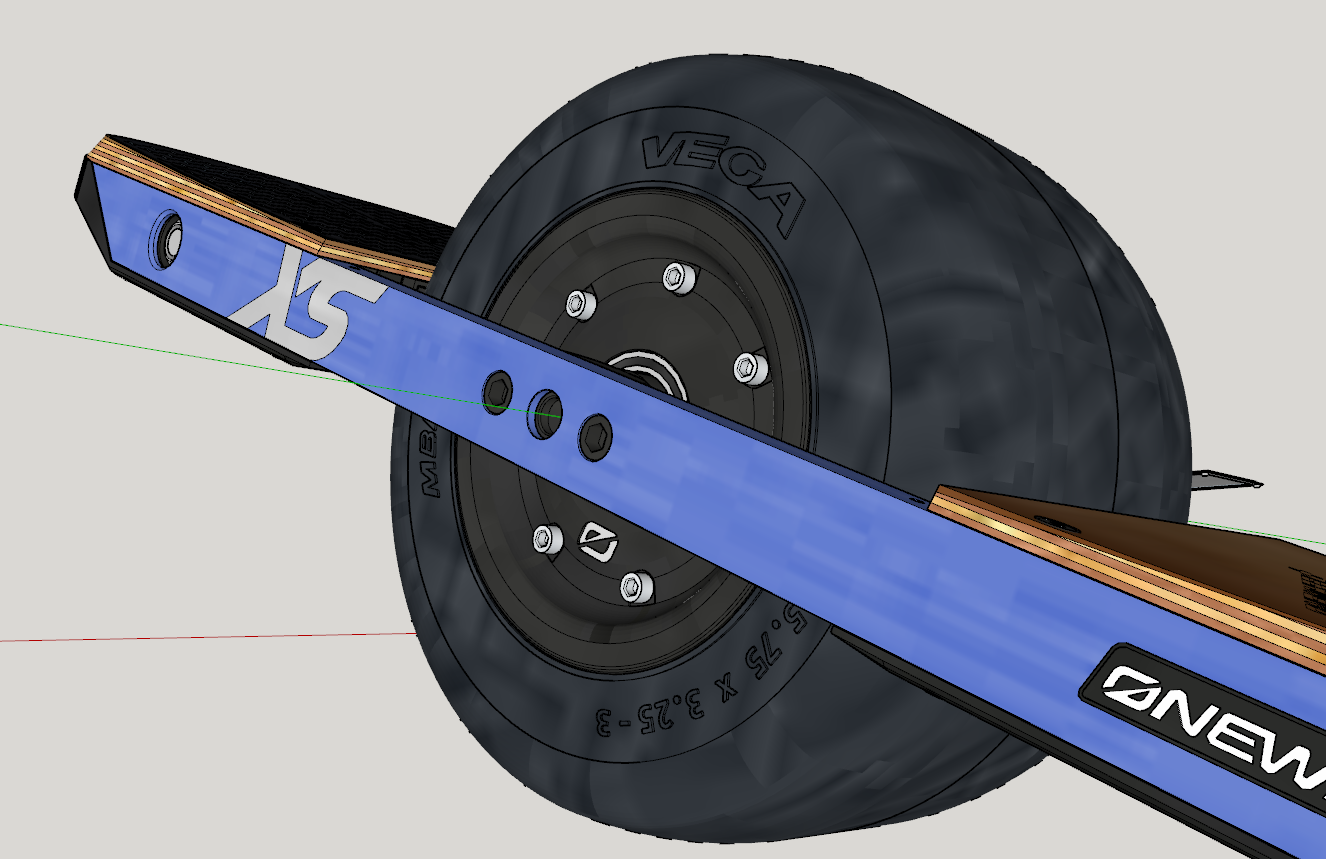
So with a replacement front coming I've decided I might just make a V2 of the XS since I kinda like how it looks as is in it's prototype unfinished look. Just by chance @cheppy44 is visiting again next week and wanted to make one together soooooo...
Looks like I'm making a little family of XS's. I might re-use parts from the original for my V2 since I did a BOM for the parts and just the materials alone is near £400 to build one at the current spec and that's not including the cast tire that I have yet to figure.
Non-functioning ofc is cheaper since there are no need for cells, ESC, motor, connectors, BMS and all the fiddly wiring although working lights would still be a must lol. -
@lia What are the dimensions on your tire? Would it just be better to design the new XS models around an 8x3-4, 9x3.5-4, or other tire? You could probably have everything working fine with a hard compound at 10PSI. Could your hub handle that? If it can't take the PSI, could you fill it with foam?
Instead of choosing the model ratio before fabrication, take something that is hard to replicate, and base the model ratio on what best makes that part work. Also, if it is a standard tire size, maybe there is a hub you can use as your starting point.
-
@lia said in Followup to the Onewheel XS:
I feel like a mad scientist
I can not disagree with this statement
-
@biell That did cross my mind when first looking at making one but I wasn’t able to find a tire that made sense at the time.
The motor just barely made sense for exactly 1/2 scale and I figured that was enough space to still make it work so settled on that. It at least made scaling parts easier since the xlr would have needed to be custom D:
-
I've wanted to work on this so much but a lot of things have gotten in the way.
Also haven't felt like combing through the pics that me and @cheppy44 took since I kinda get sad looking through them (I miss yooooooou). However I figured I should probably share something as I will probably pick this back up again. These are all back from January.
Below are some pics of Nick setting up some headlights for using the reflow iron to solder them up :) We added a bit too much paste but that's my bad lol.
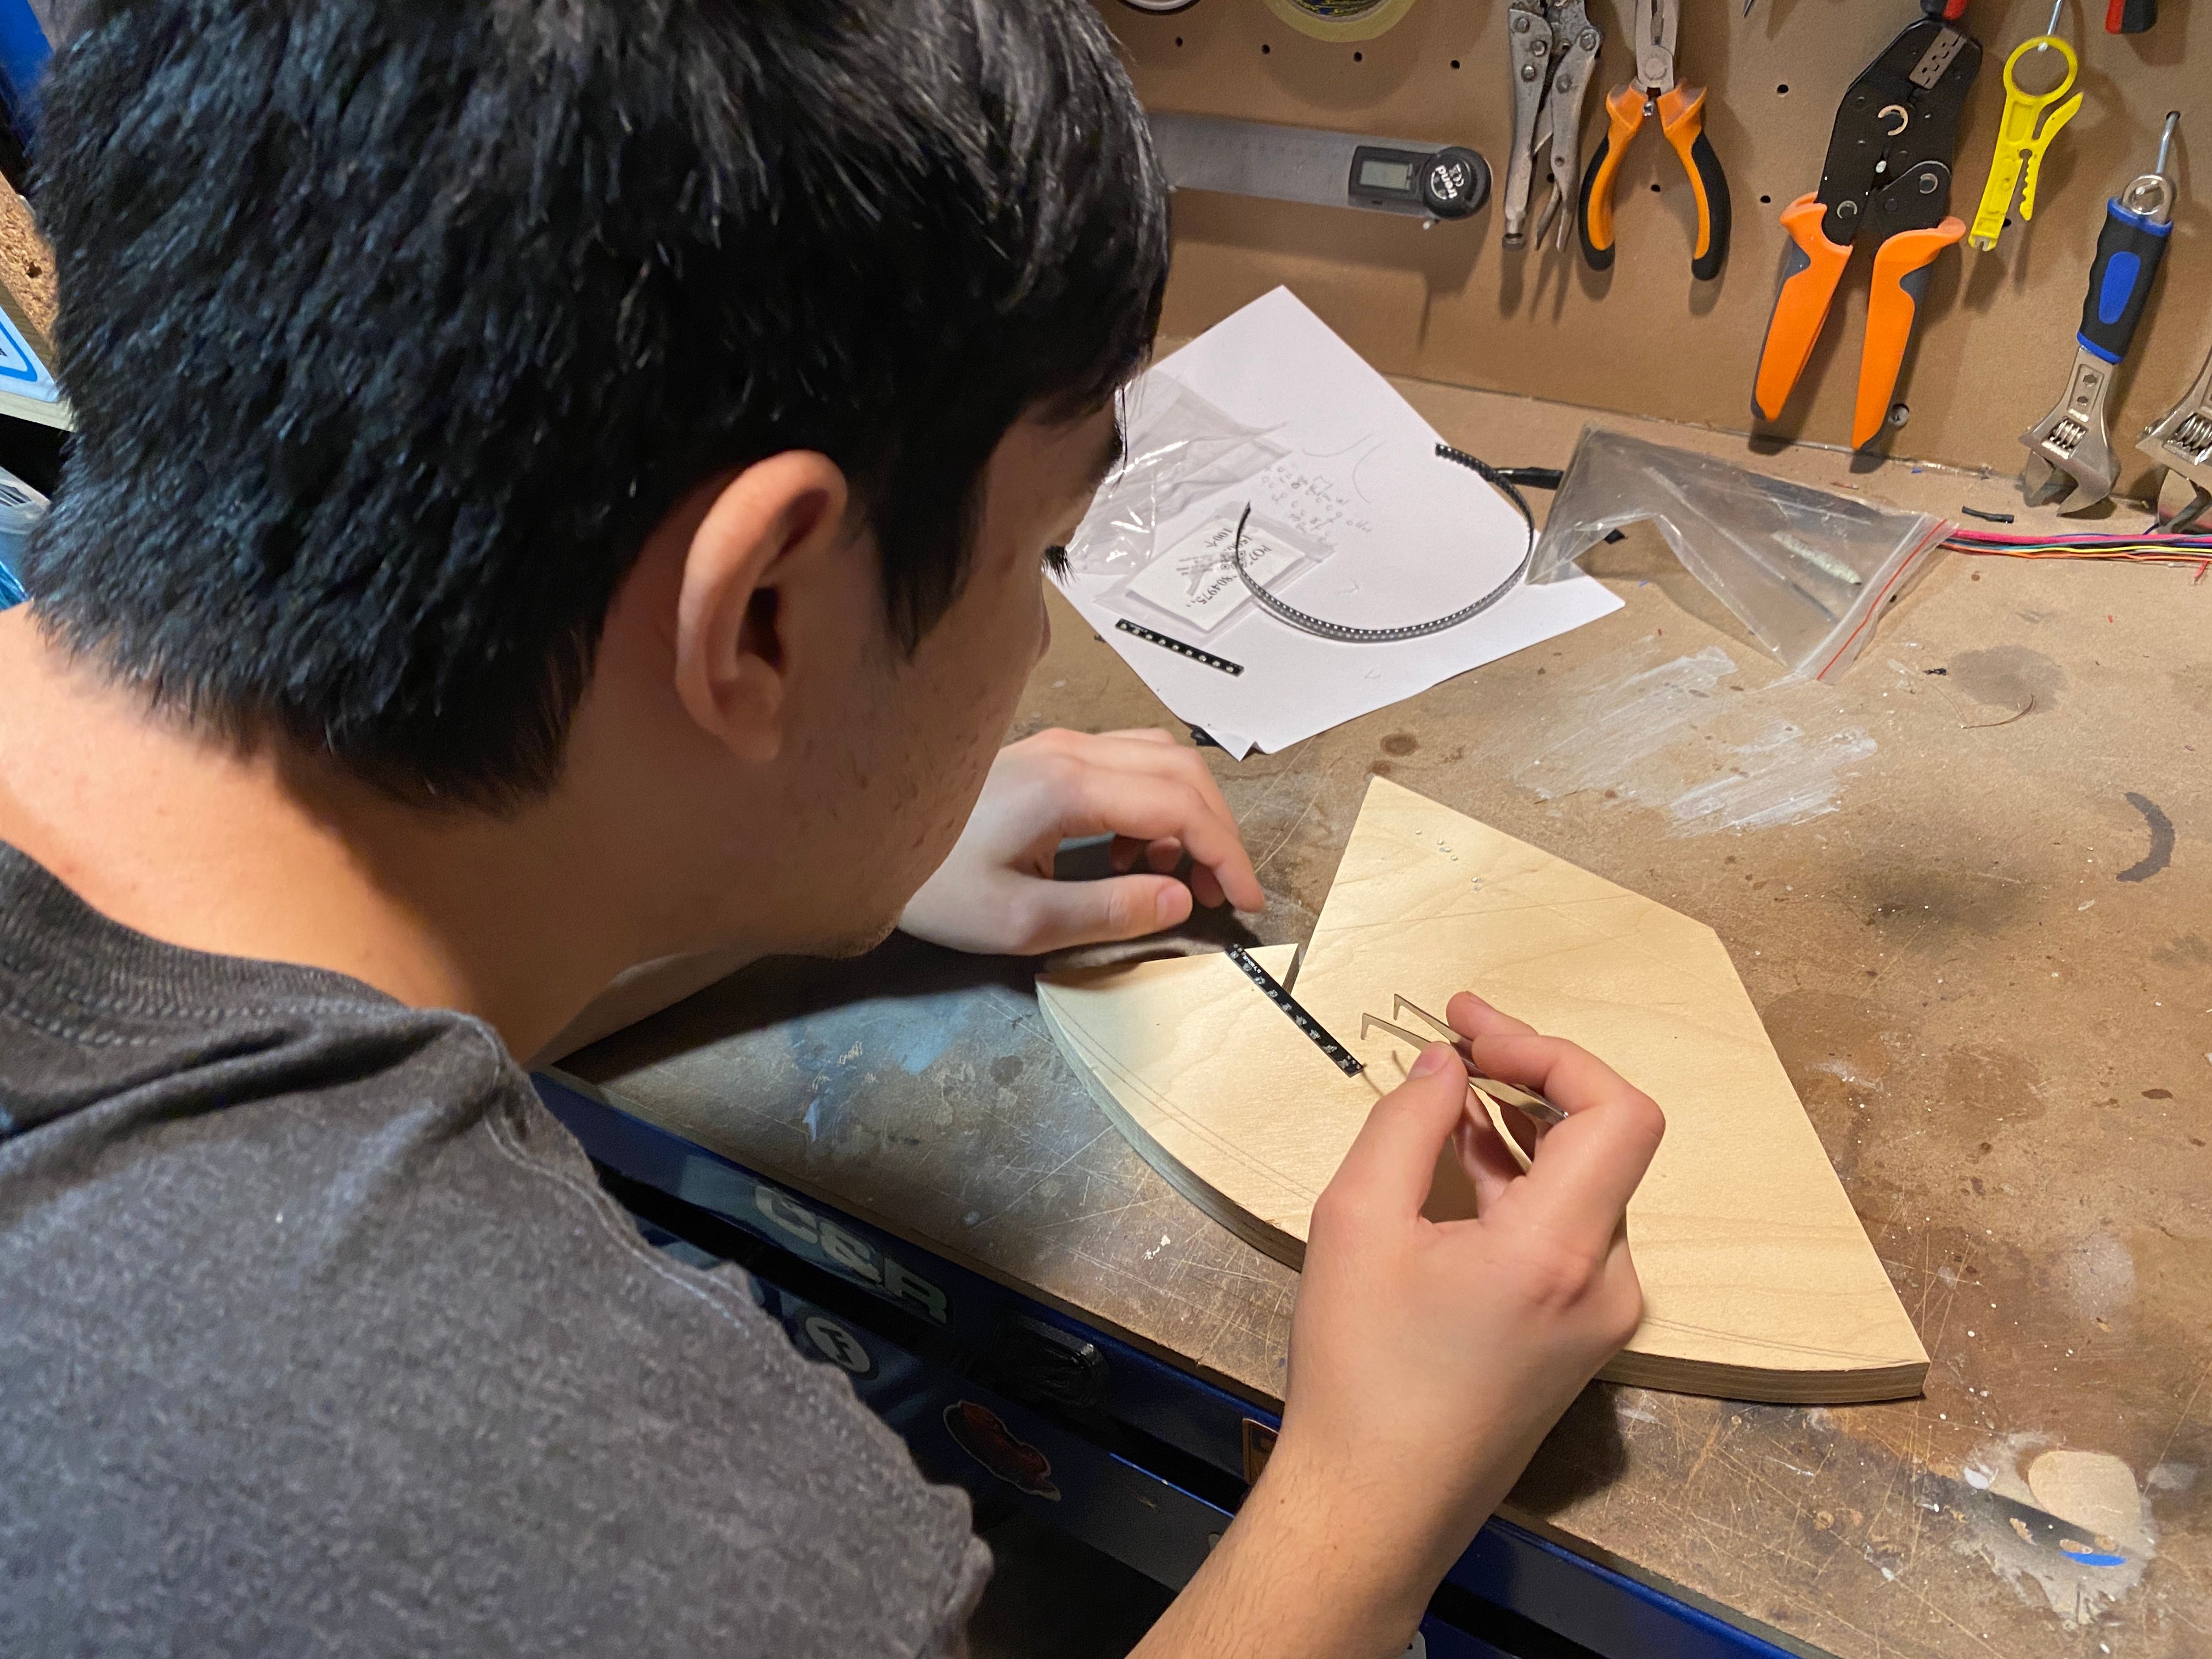
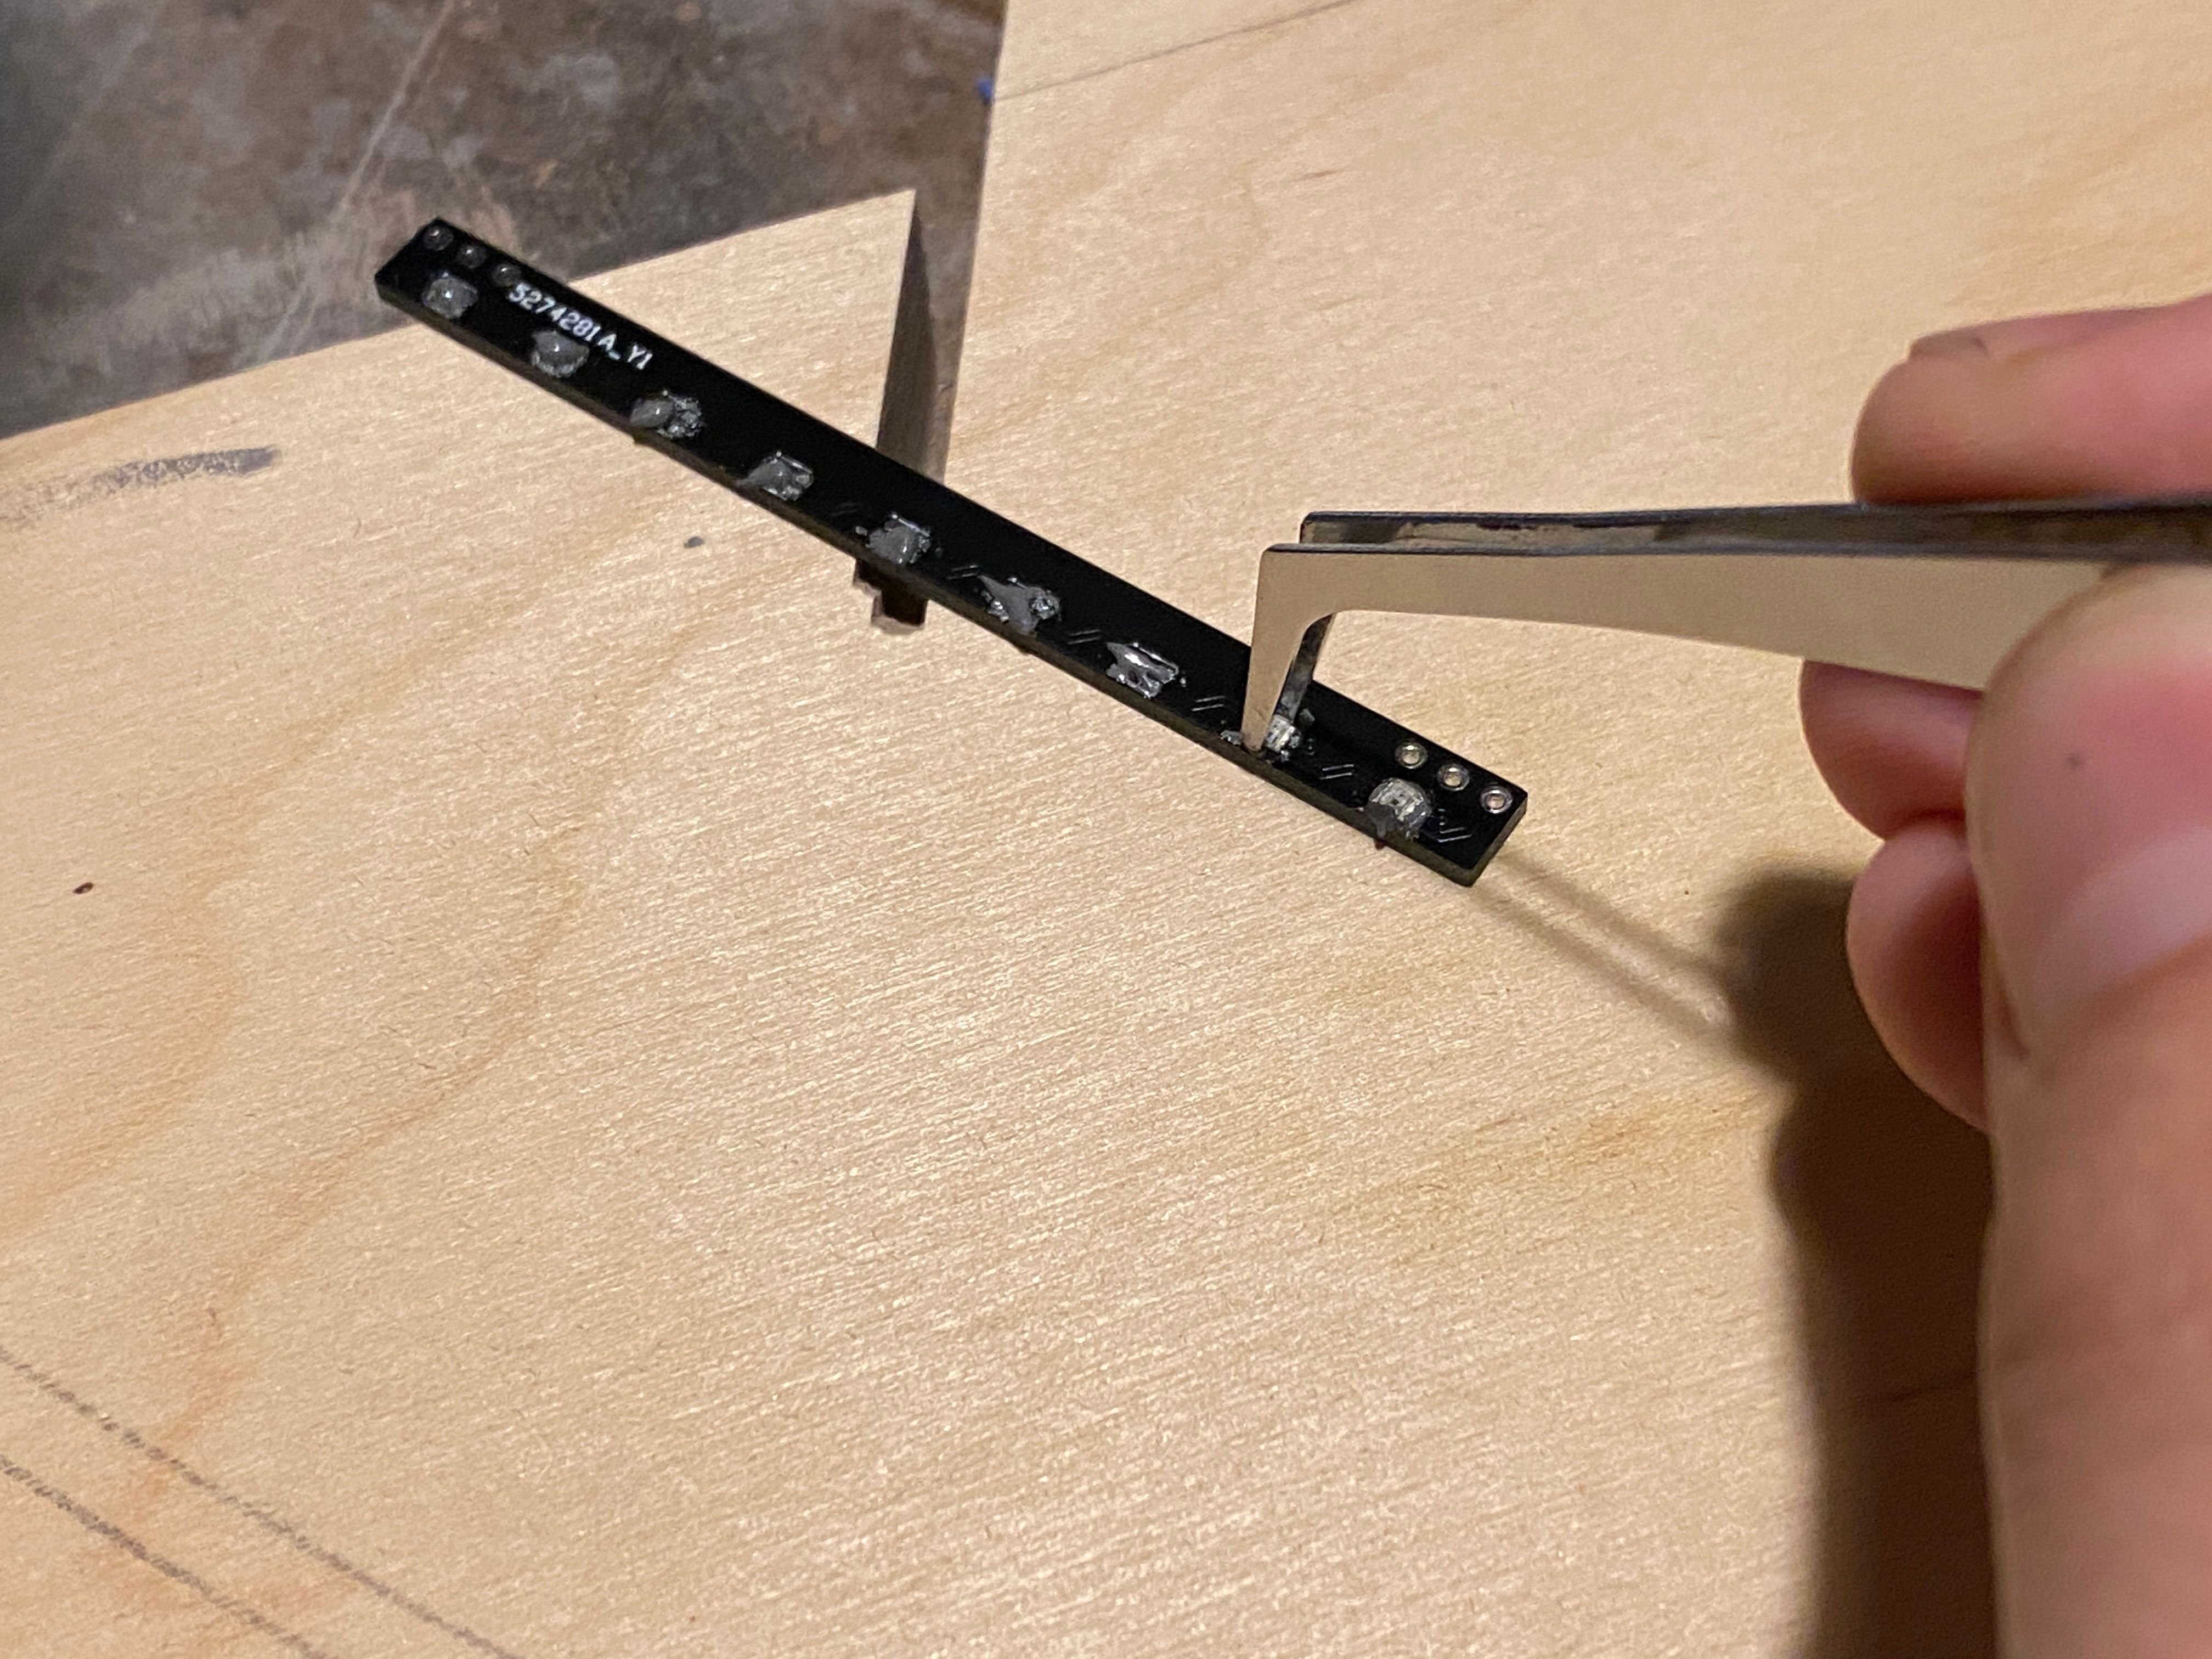
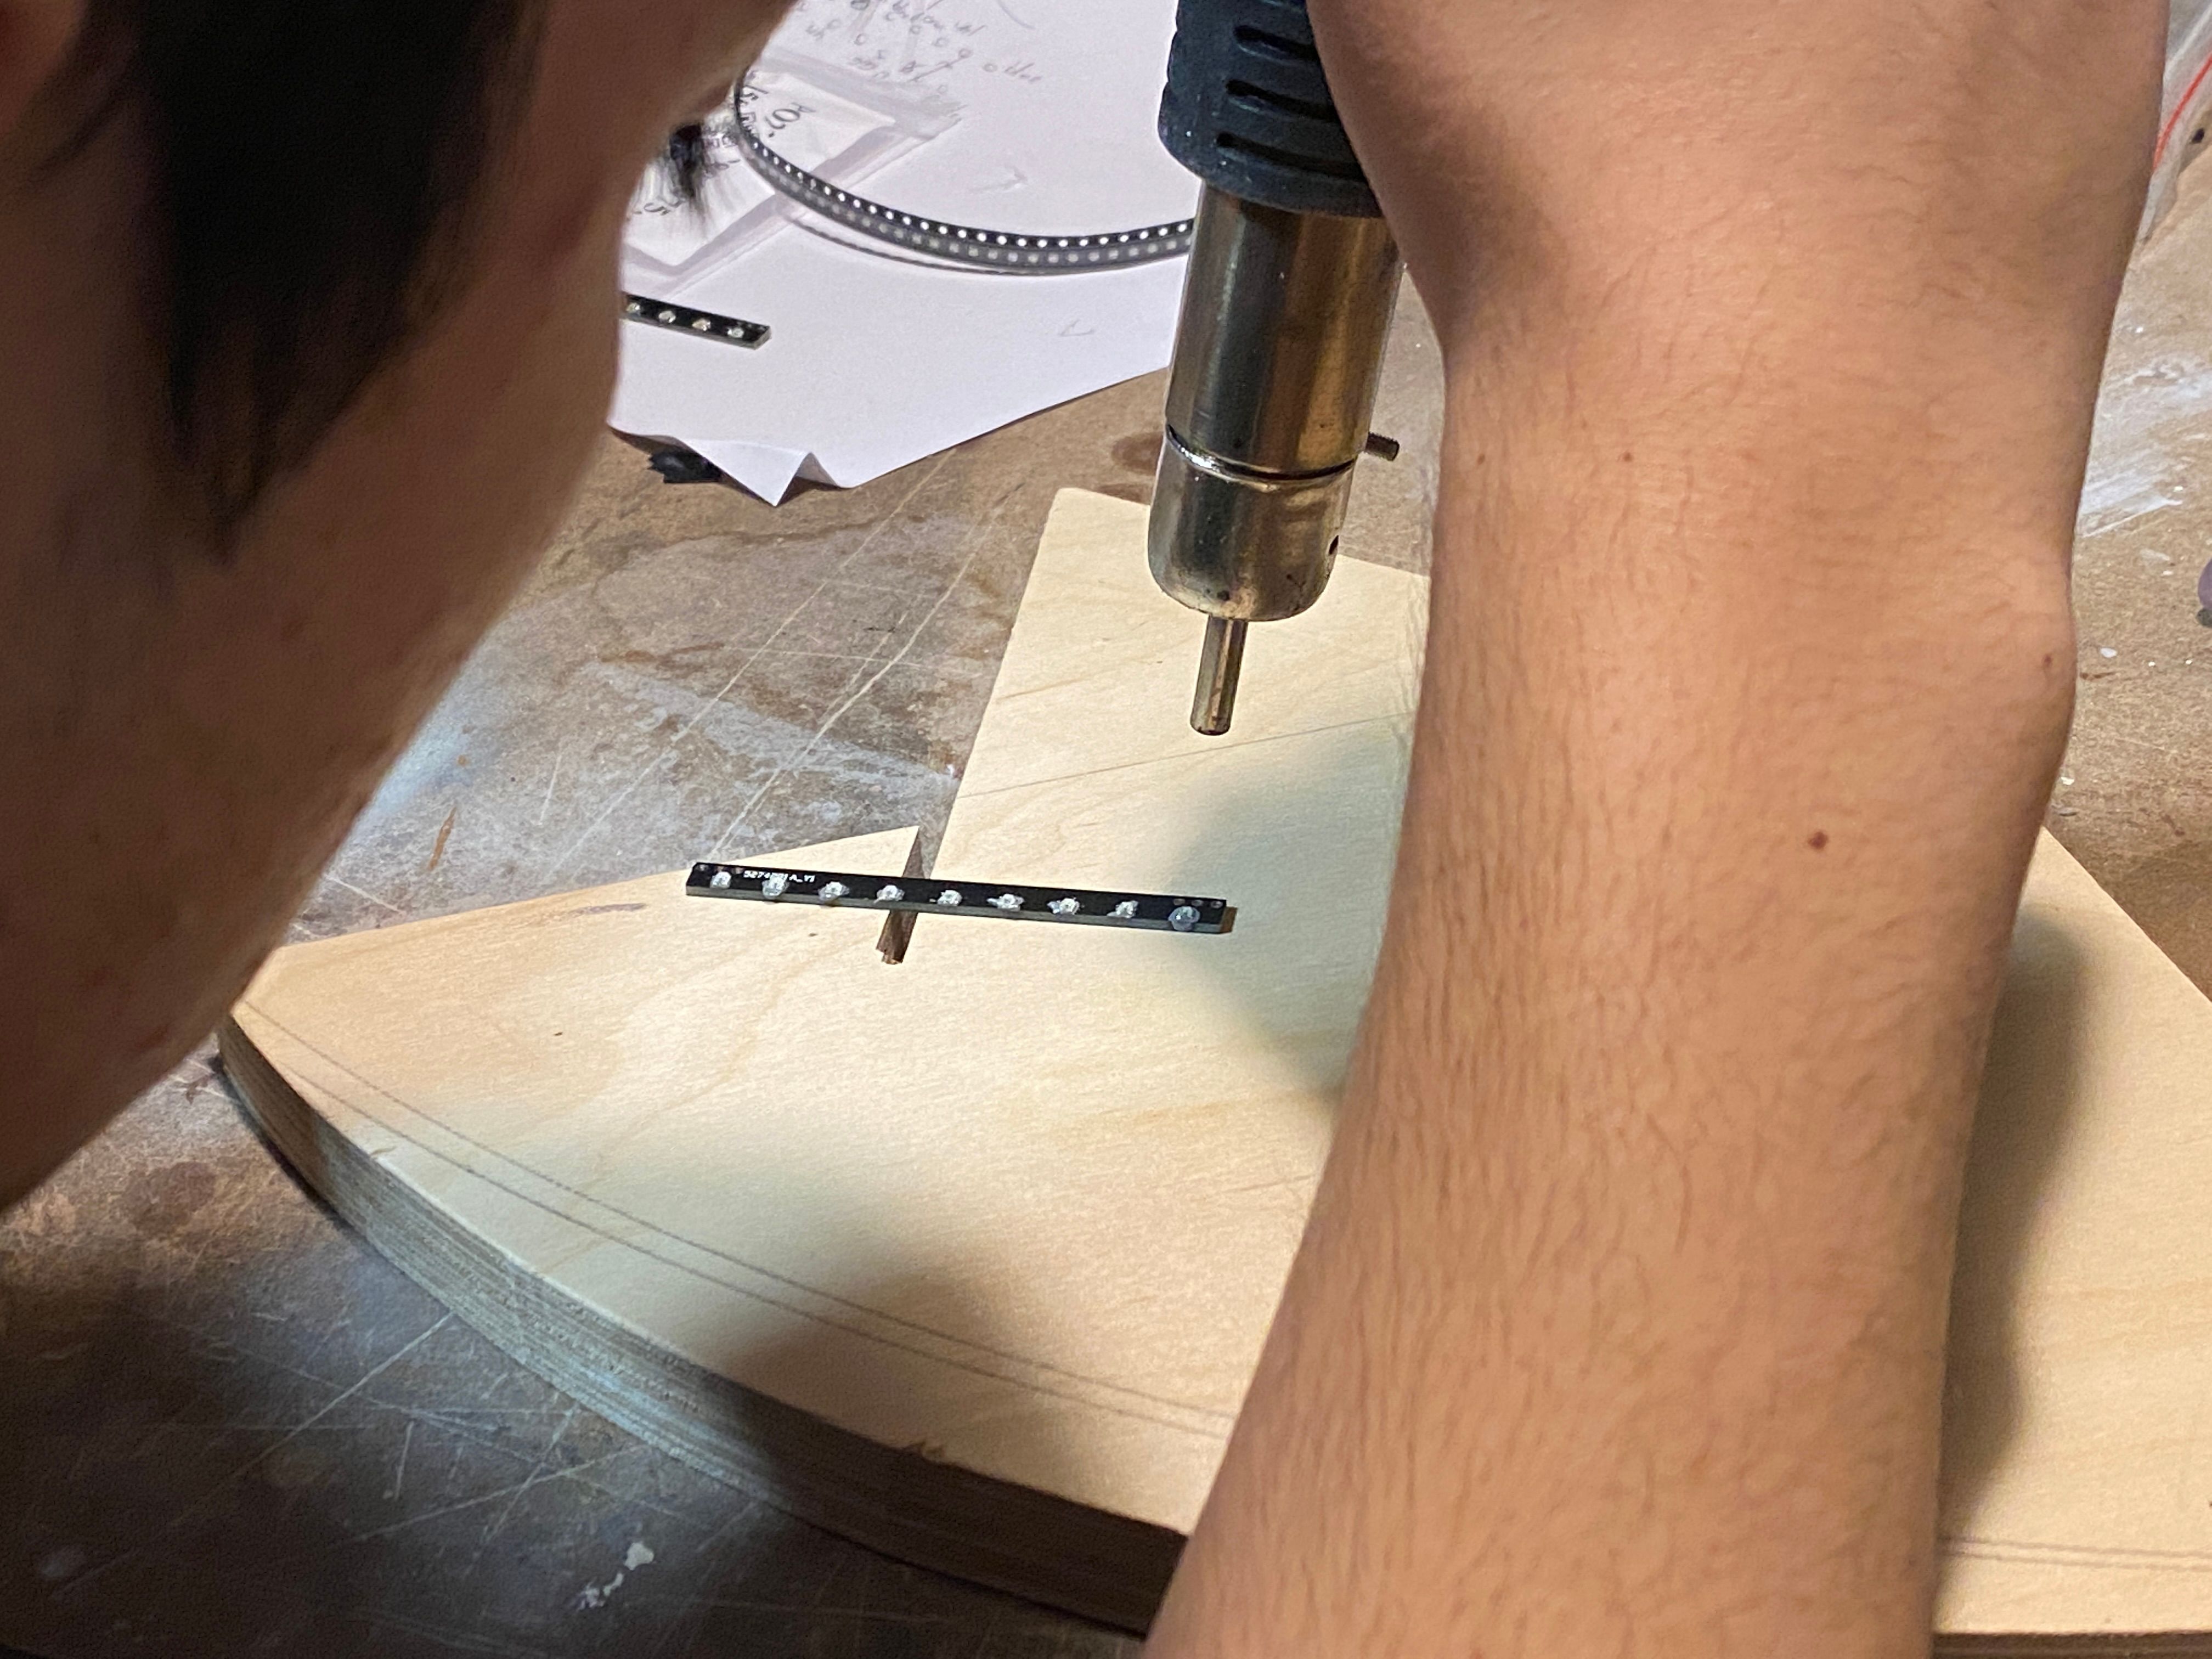
We used a block of ply as a mat to work on since my workbench is covered in all sorts of paint, oil, solvent and other nasties that get in the air when you heat them up.The old jig to make the axle blocks was fine so we printed 4 more since they get destroyed once used.
And as usual they come out looking amazing.
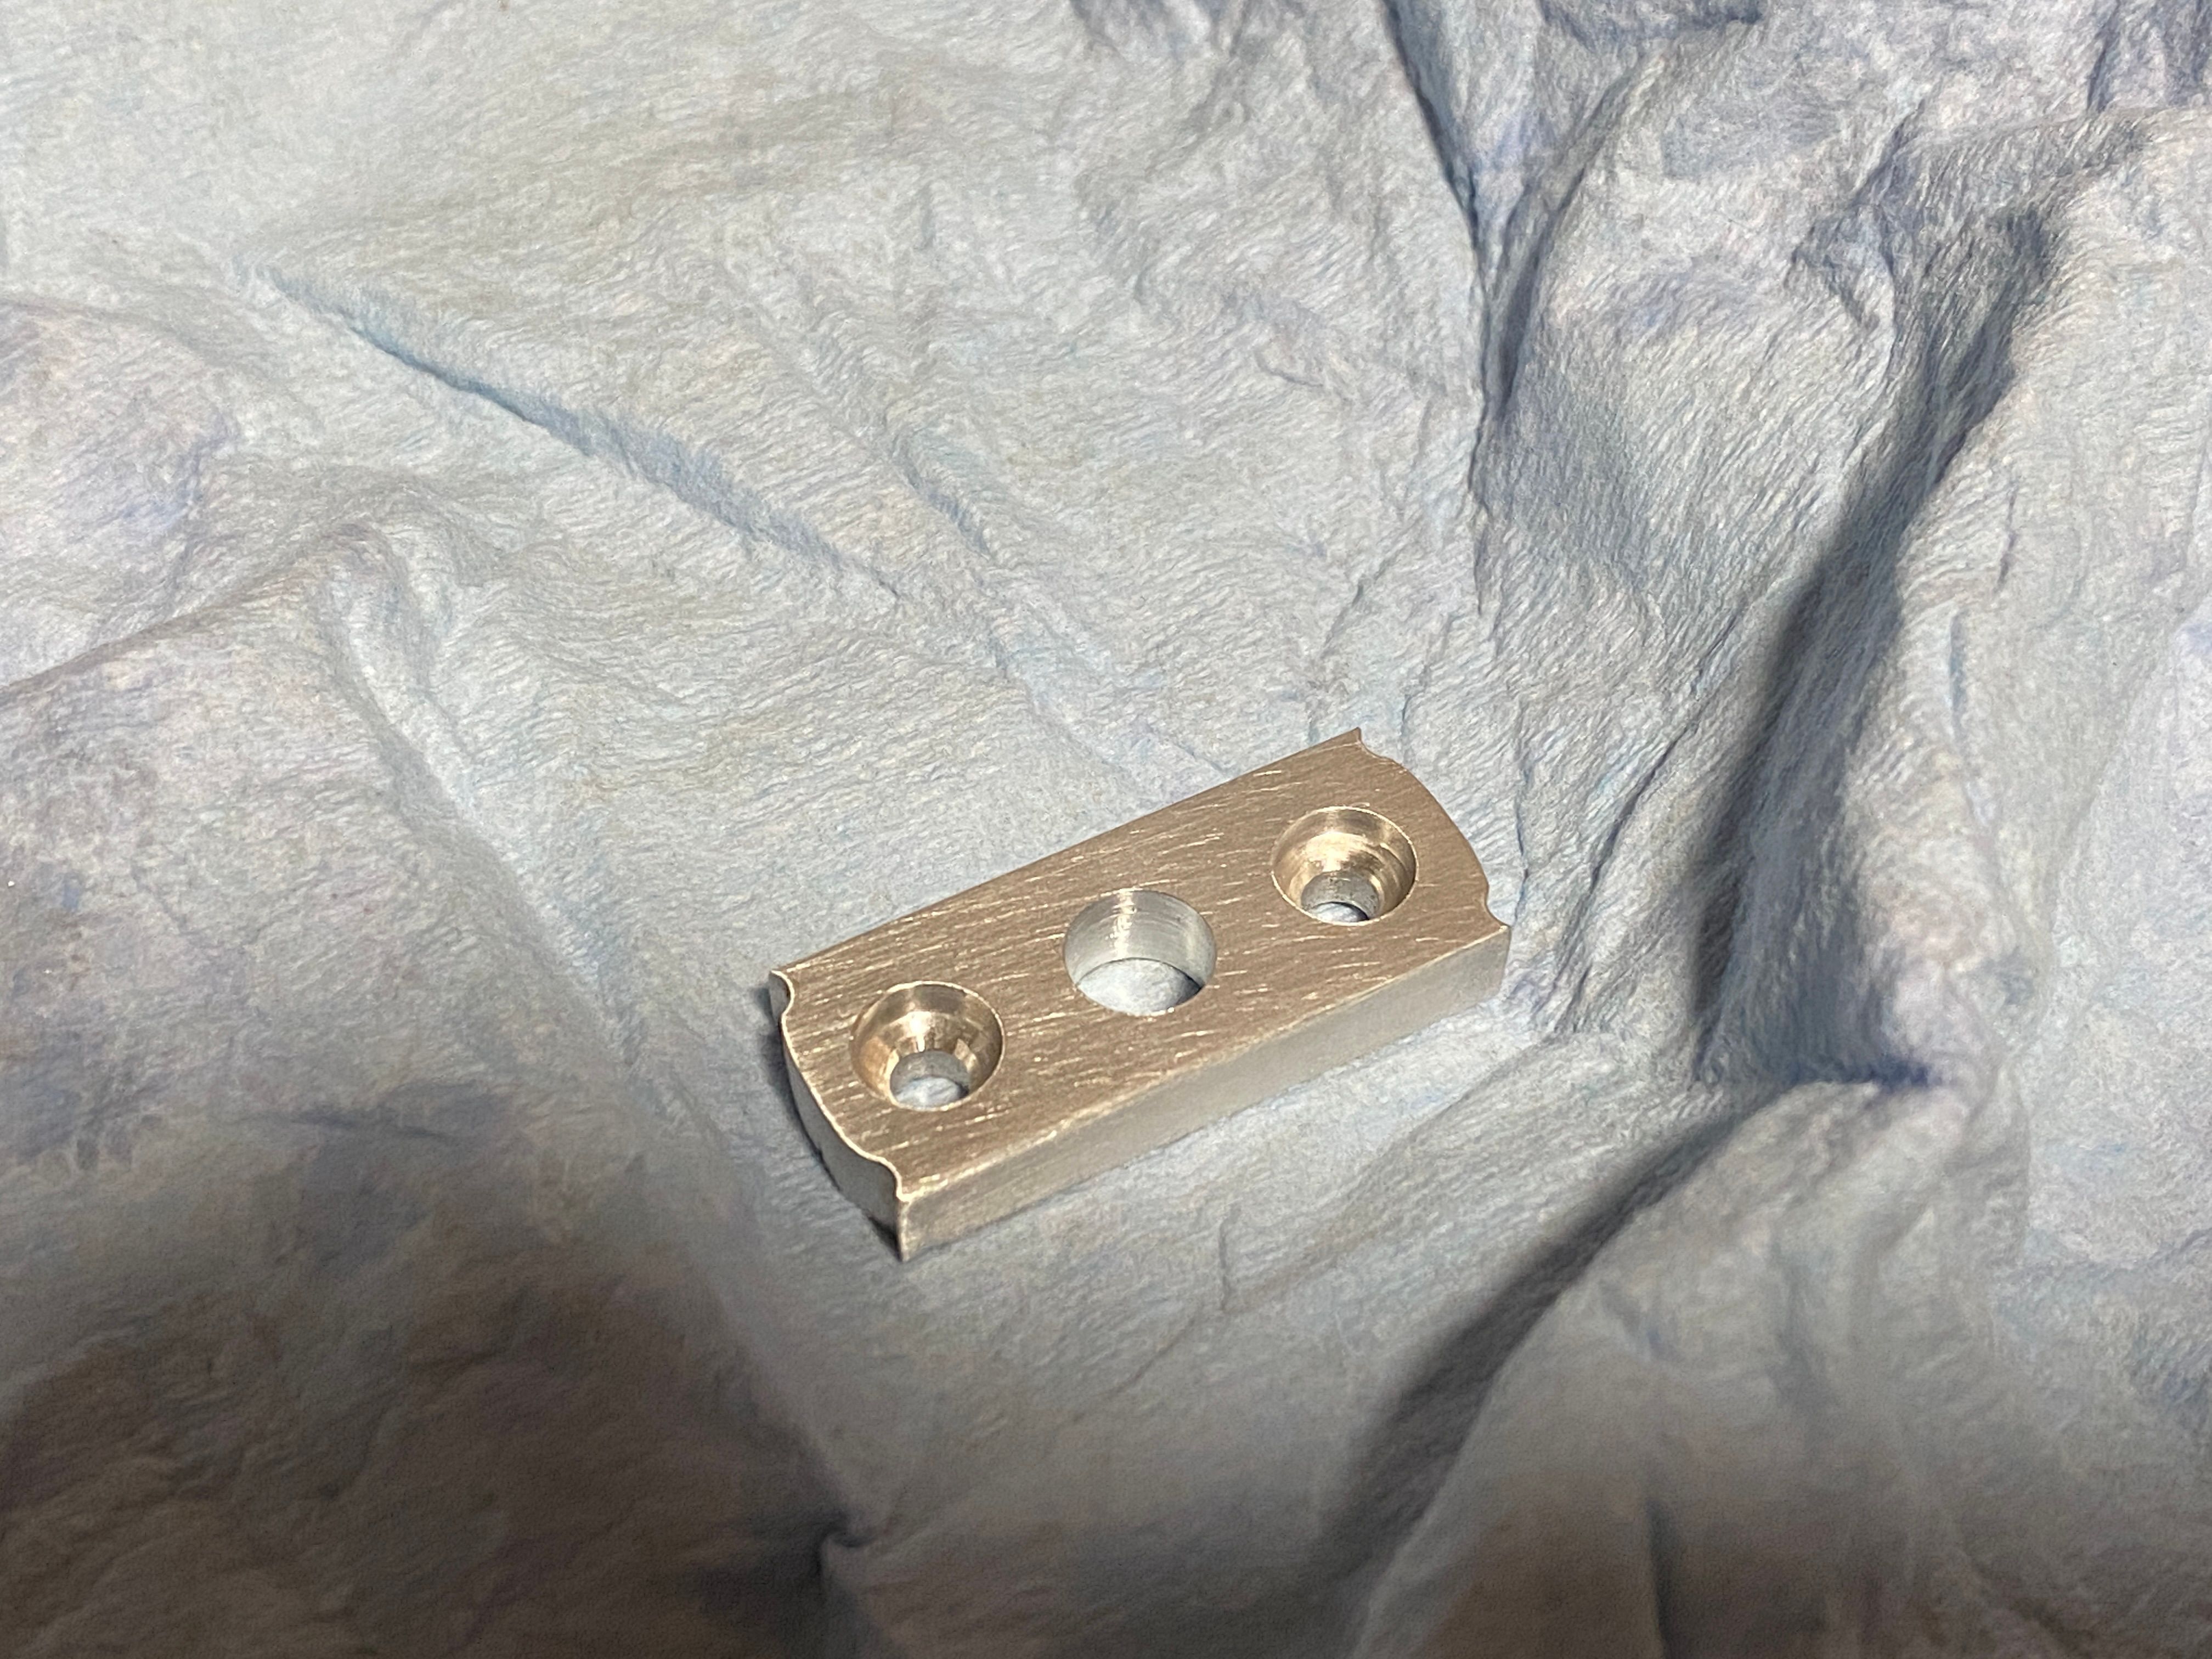
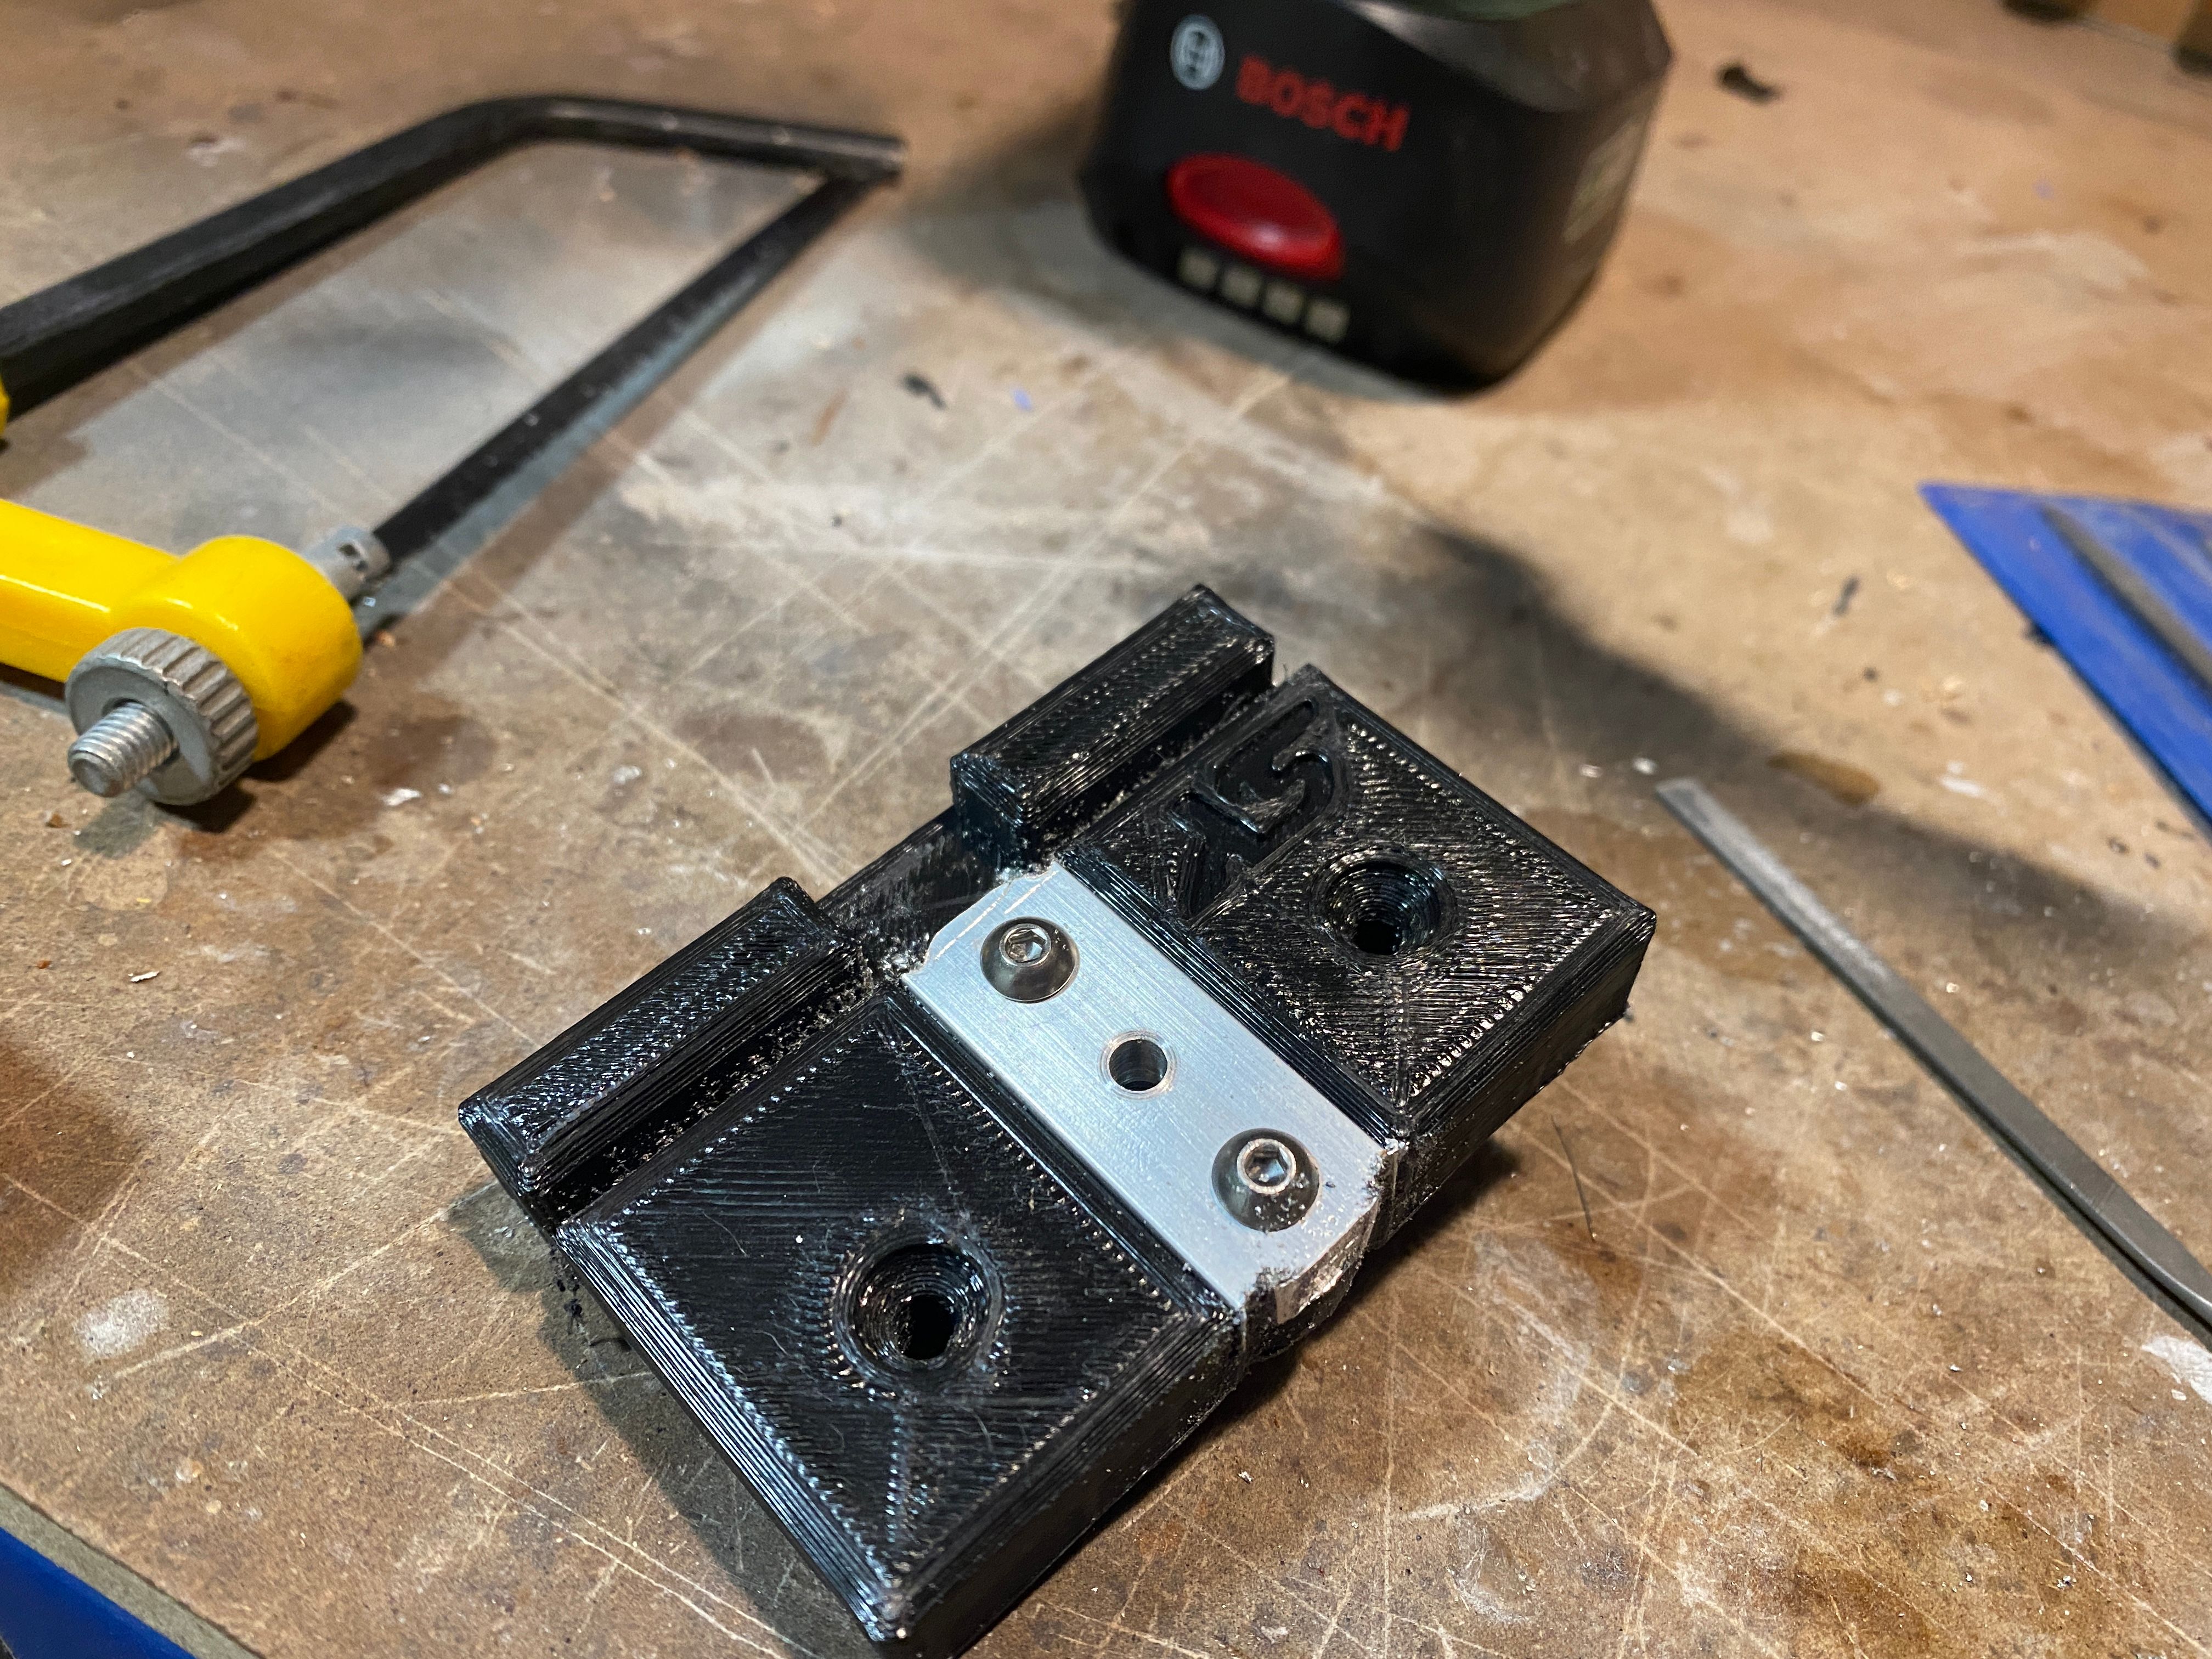
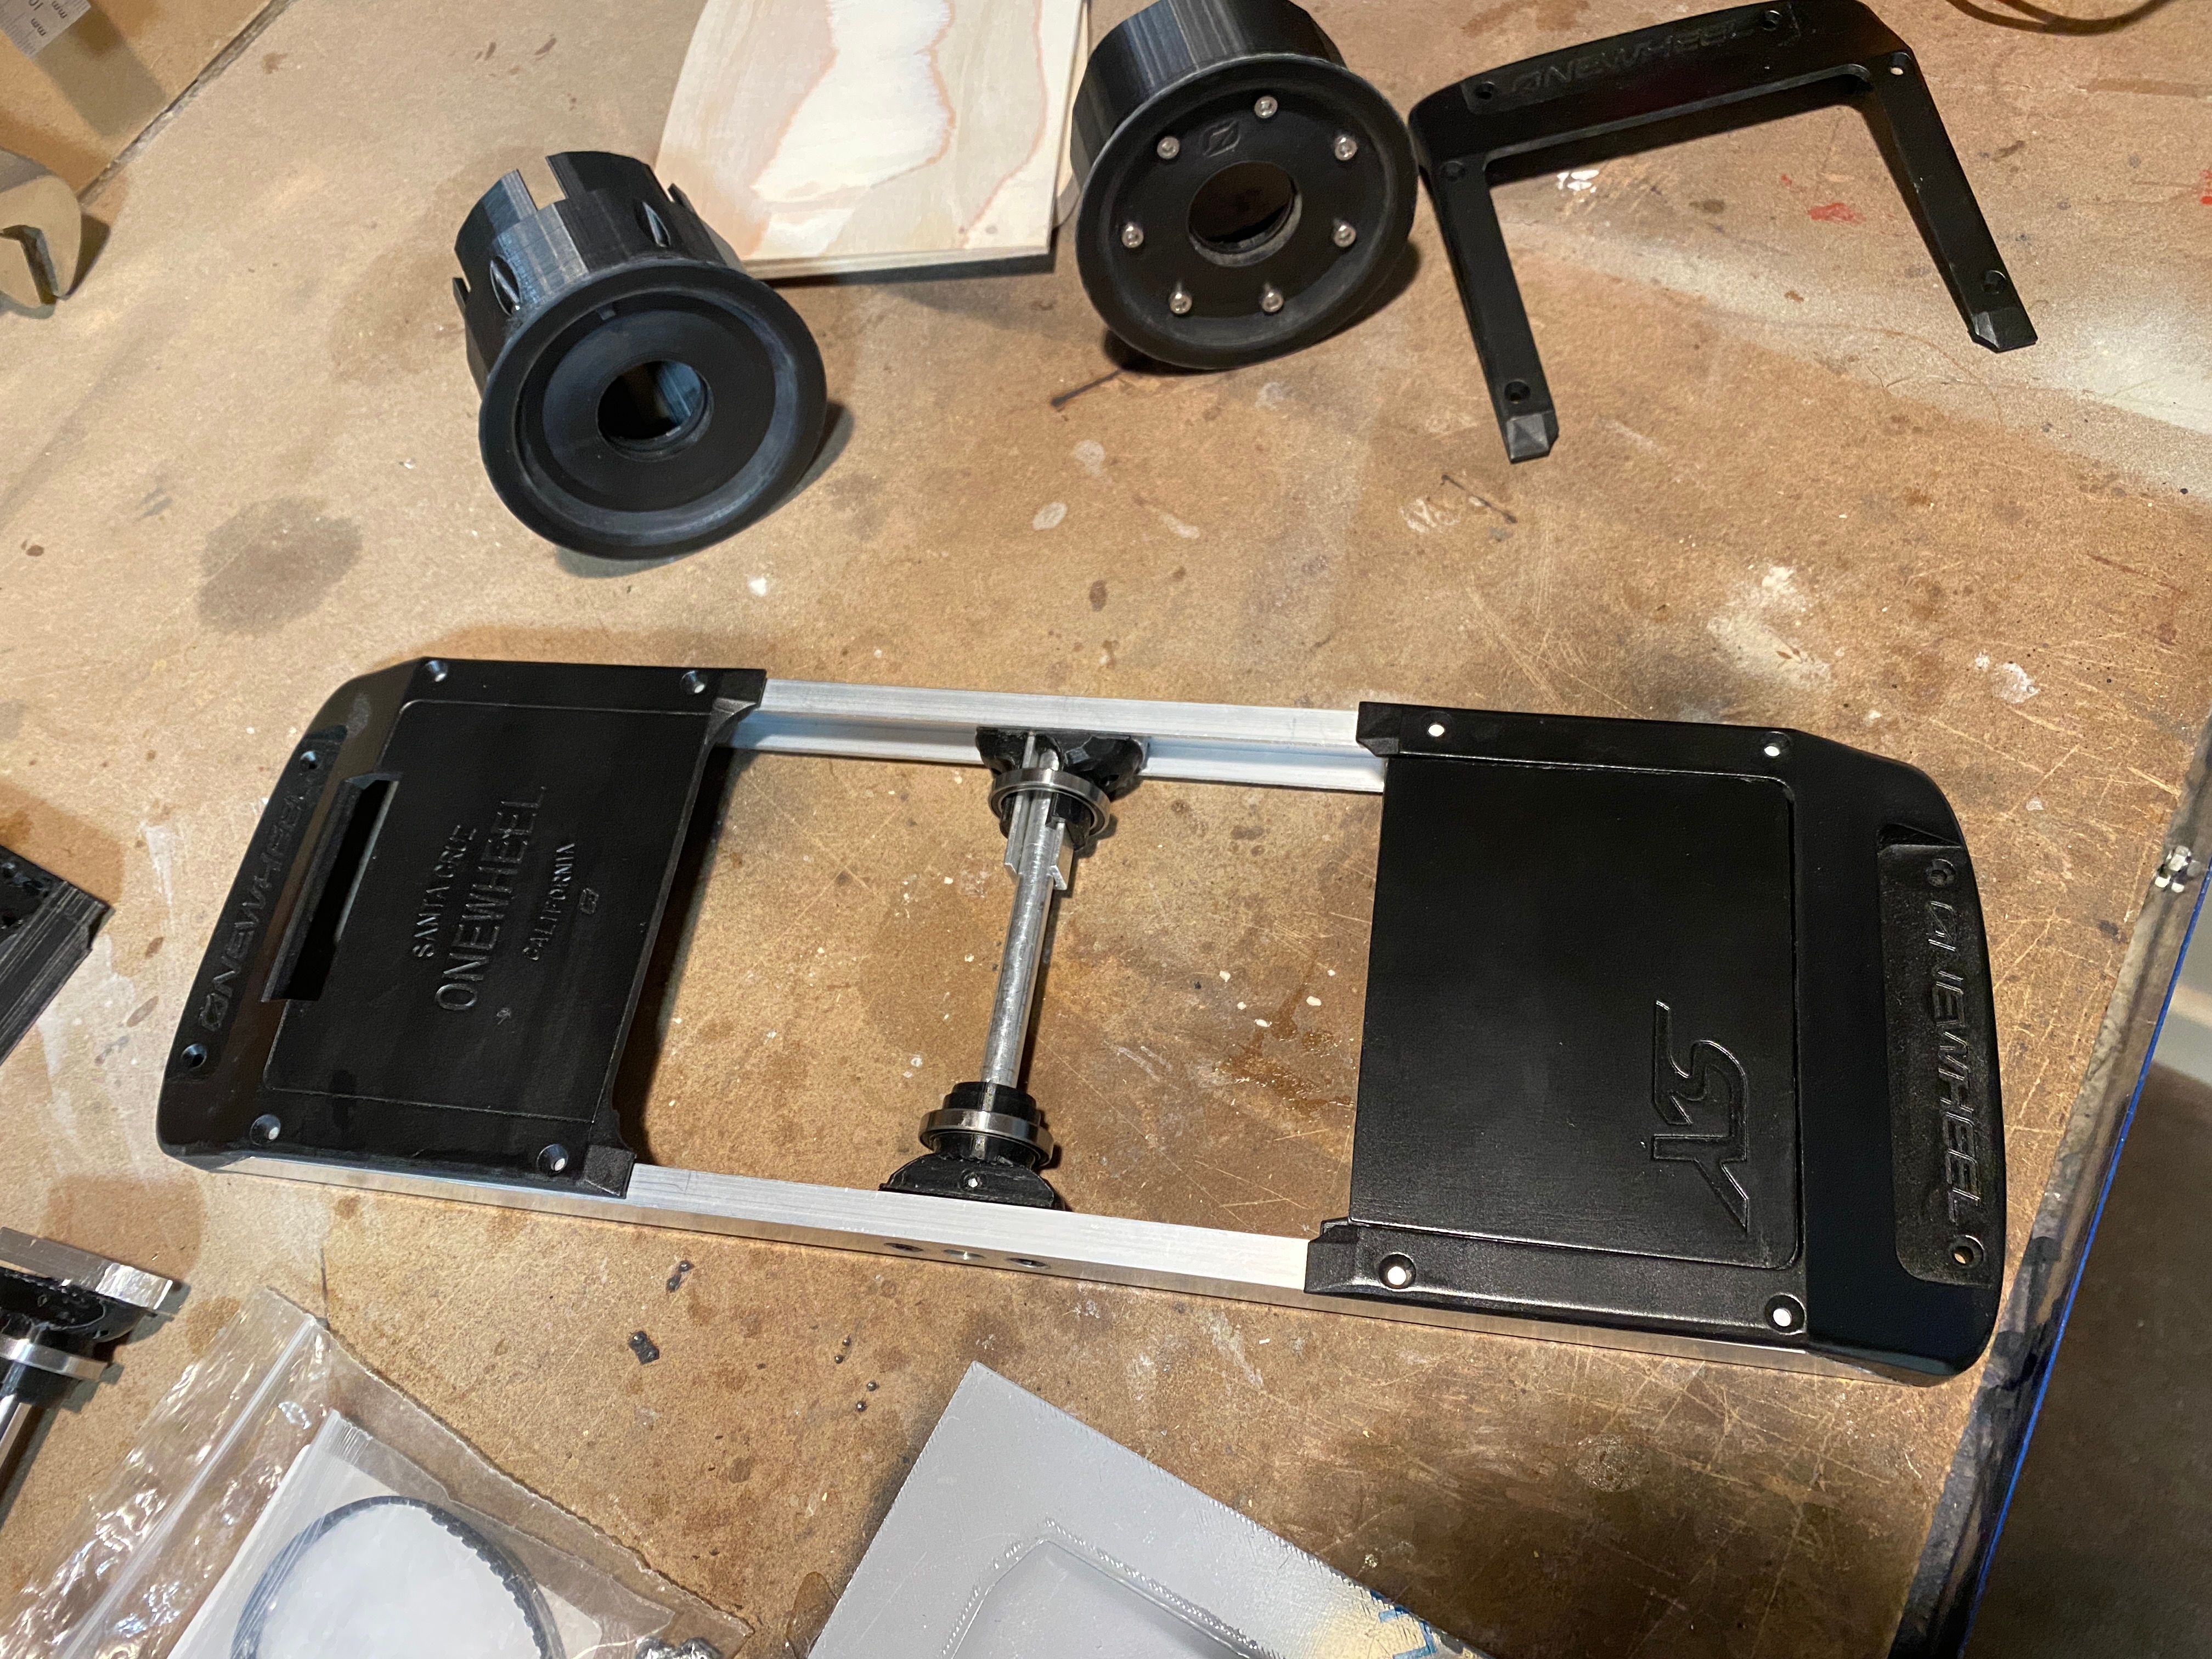
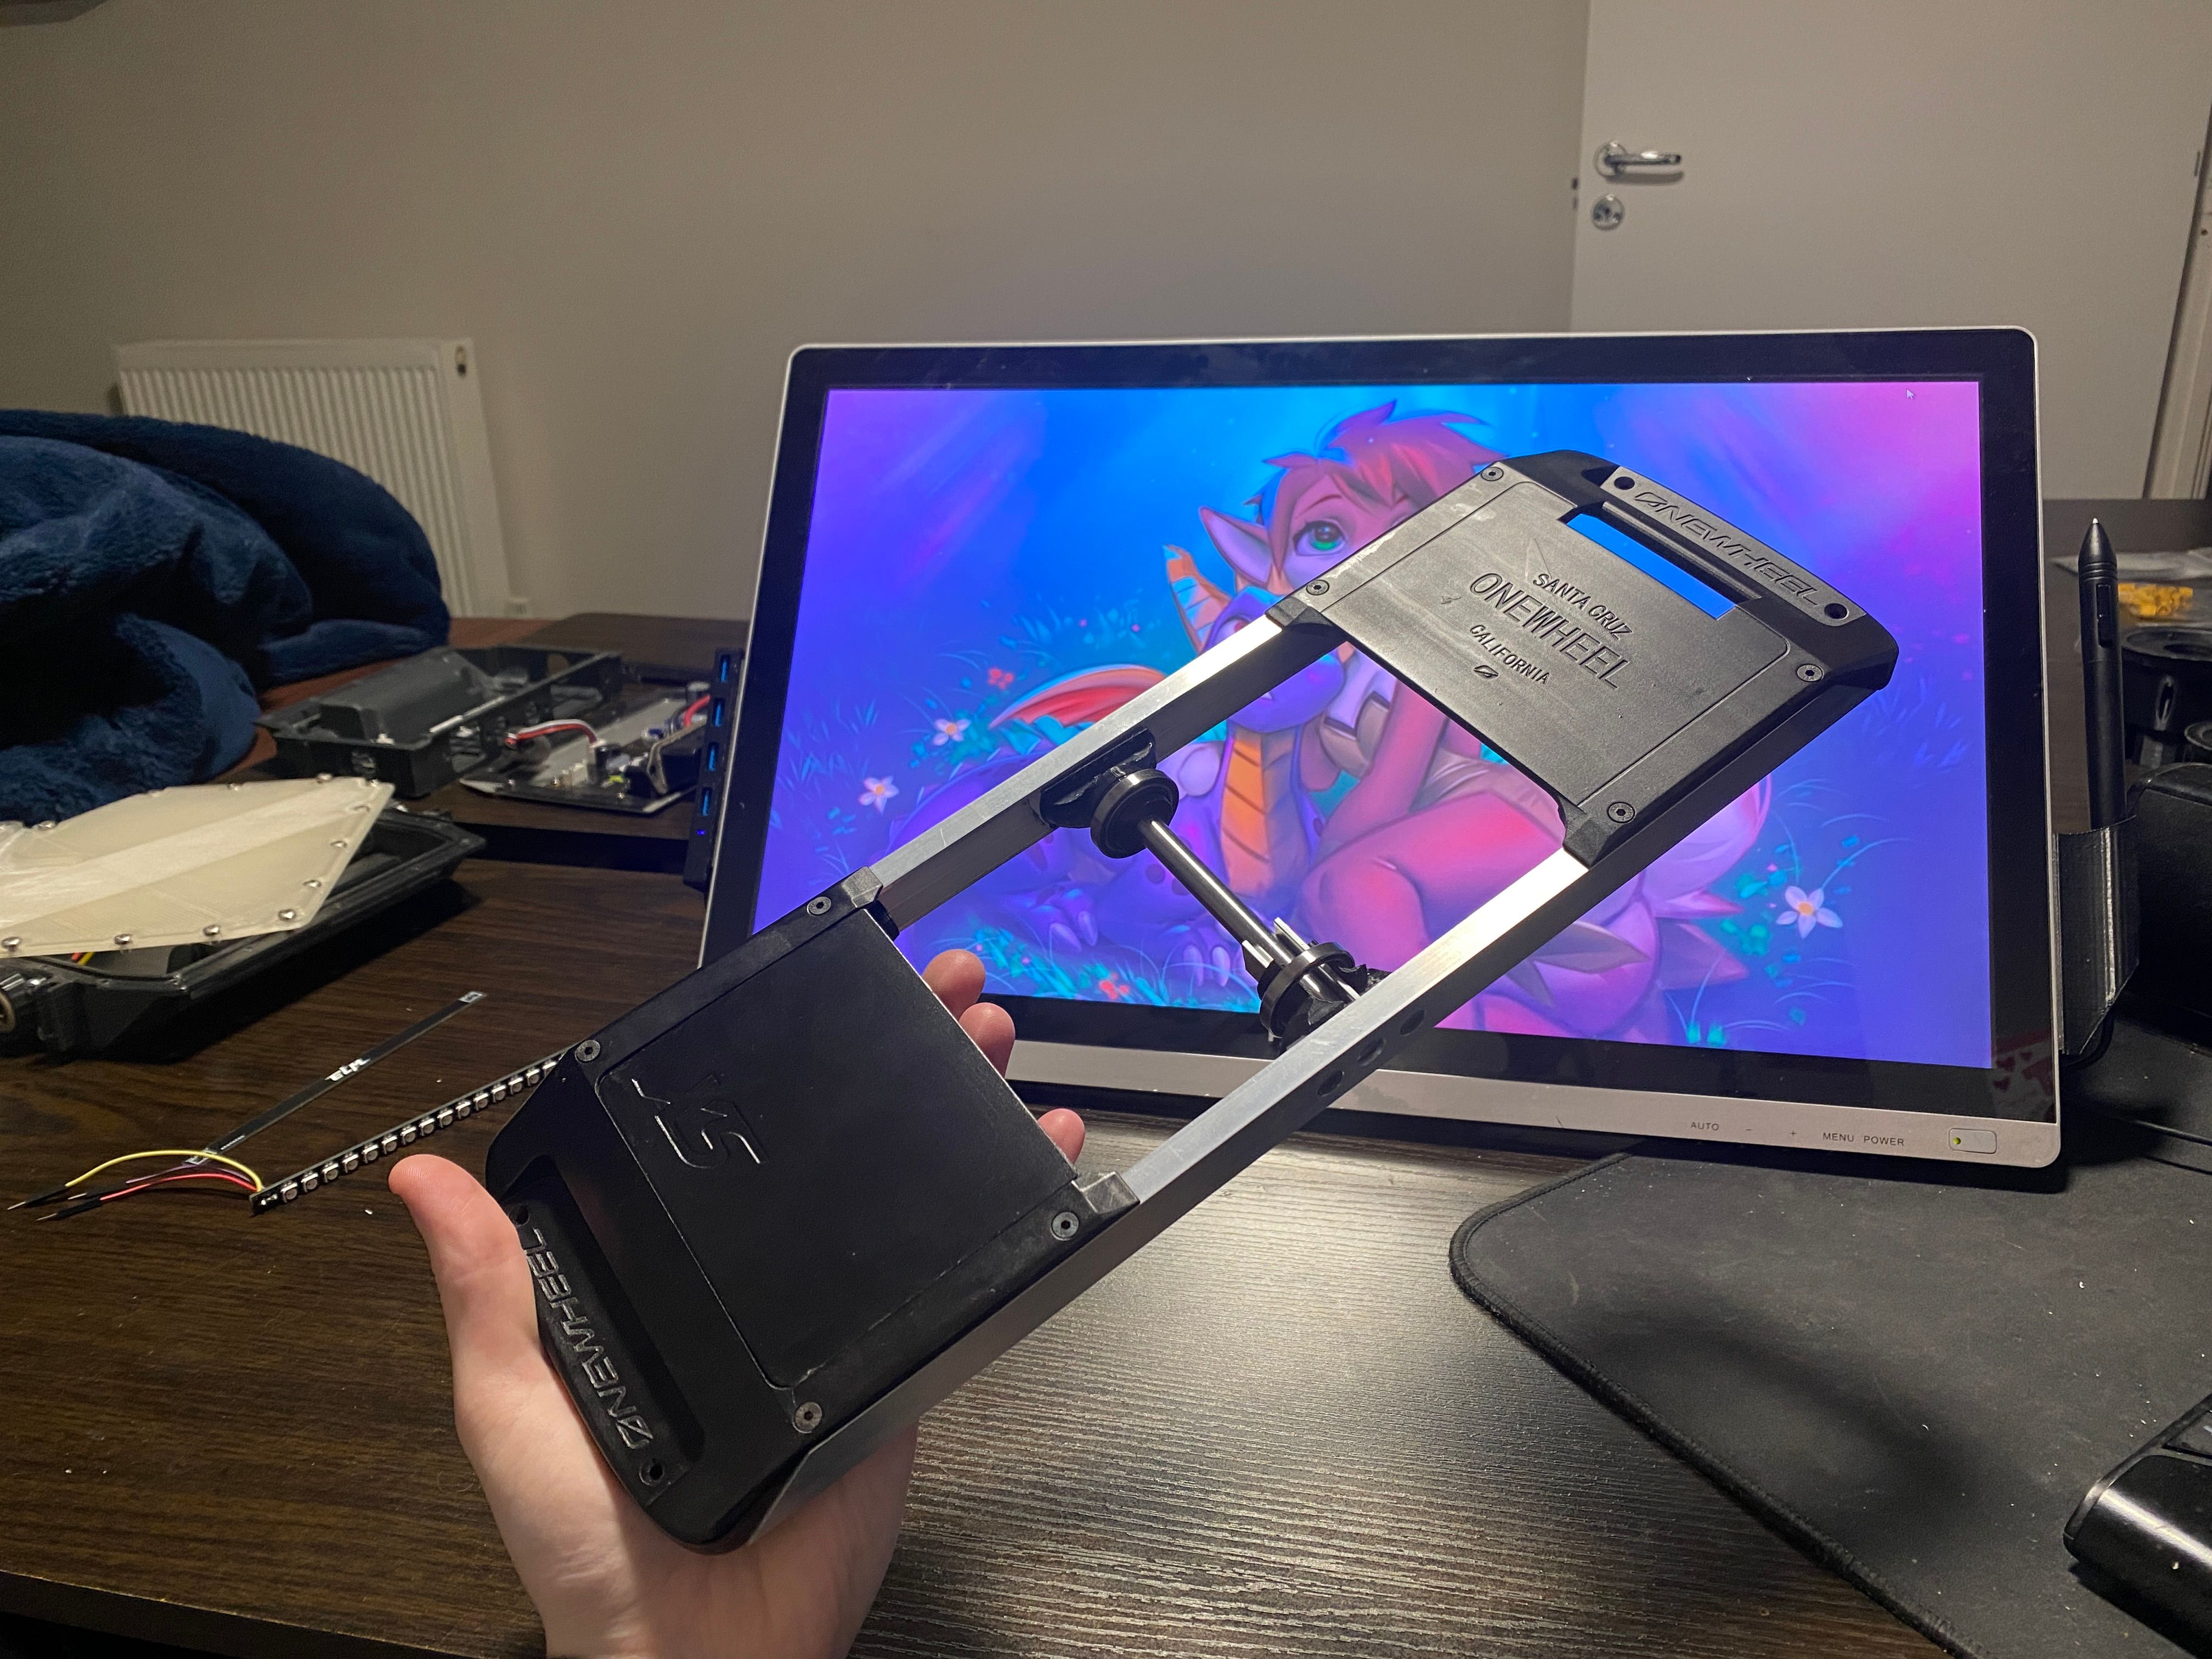
Put with some printed blocks, bearings, the U channel keys and stainless steel axle (one is still the alu test piece since we only did one axle at the time)
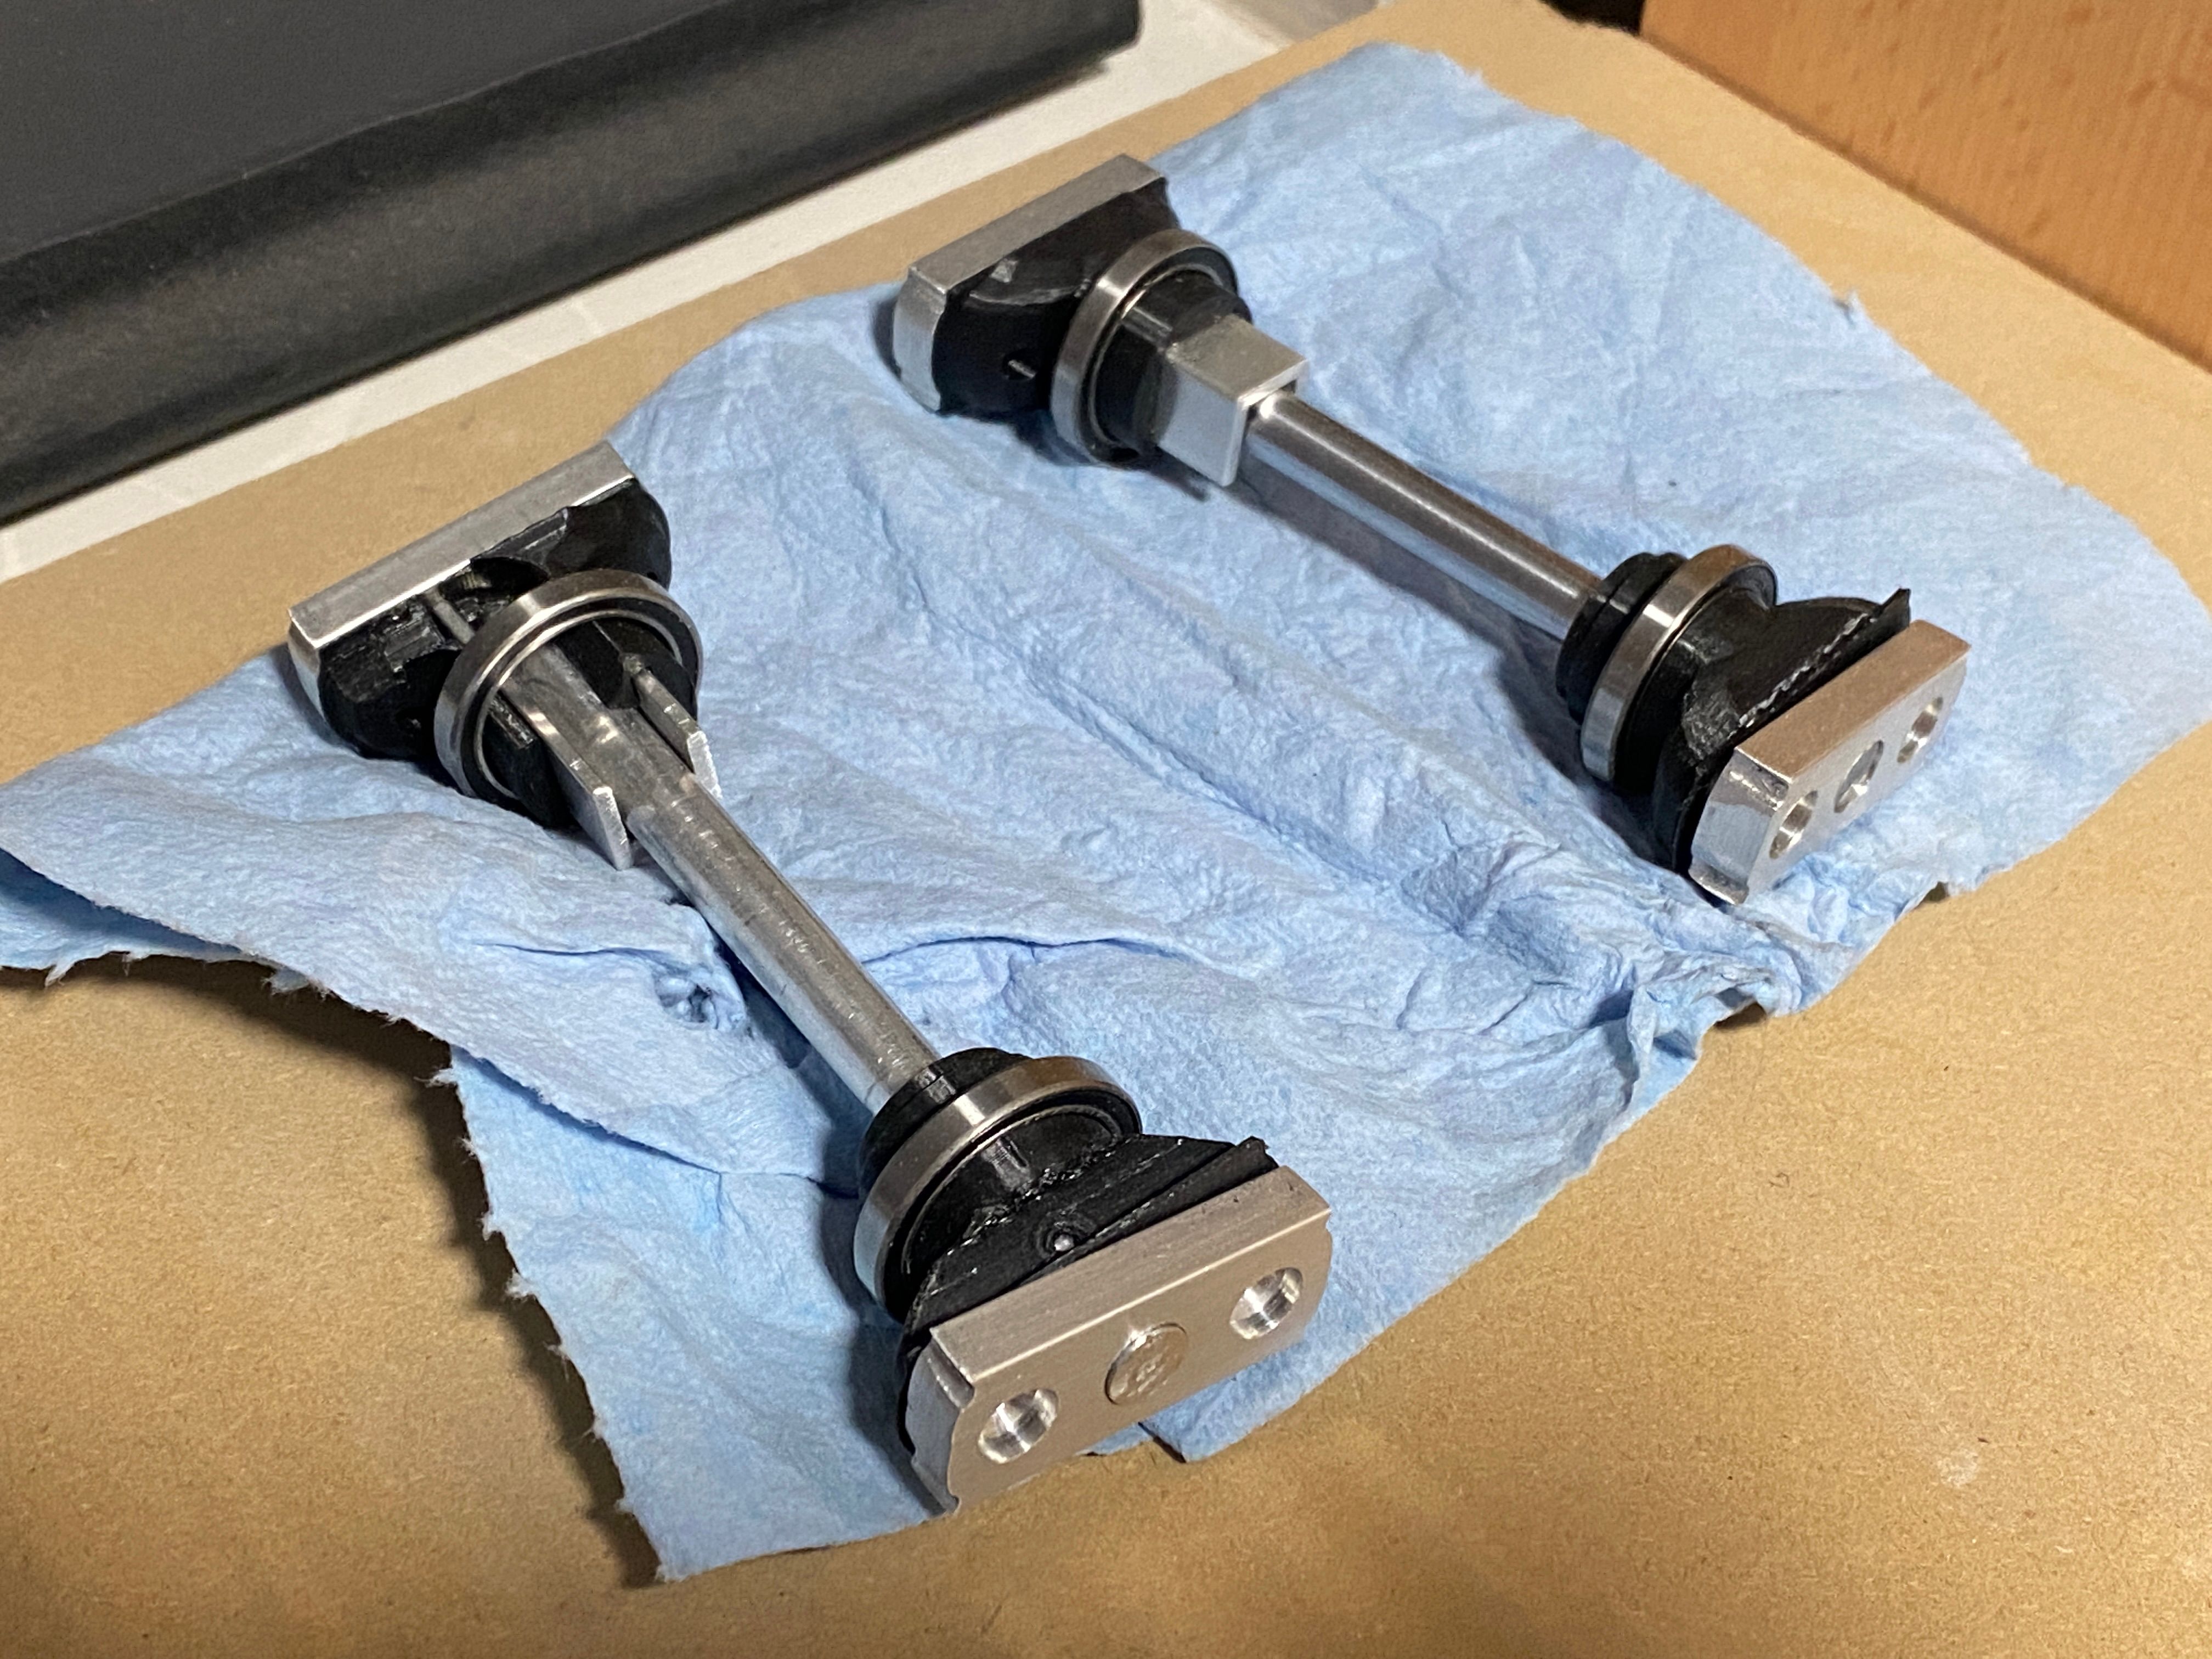
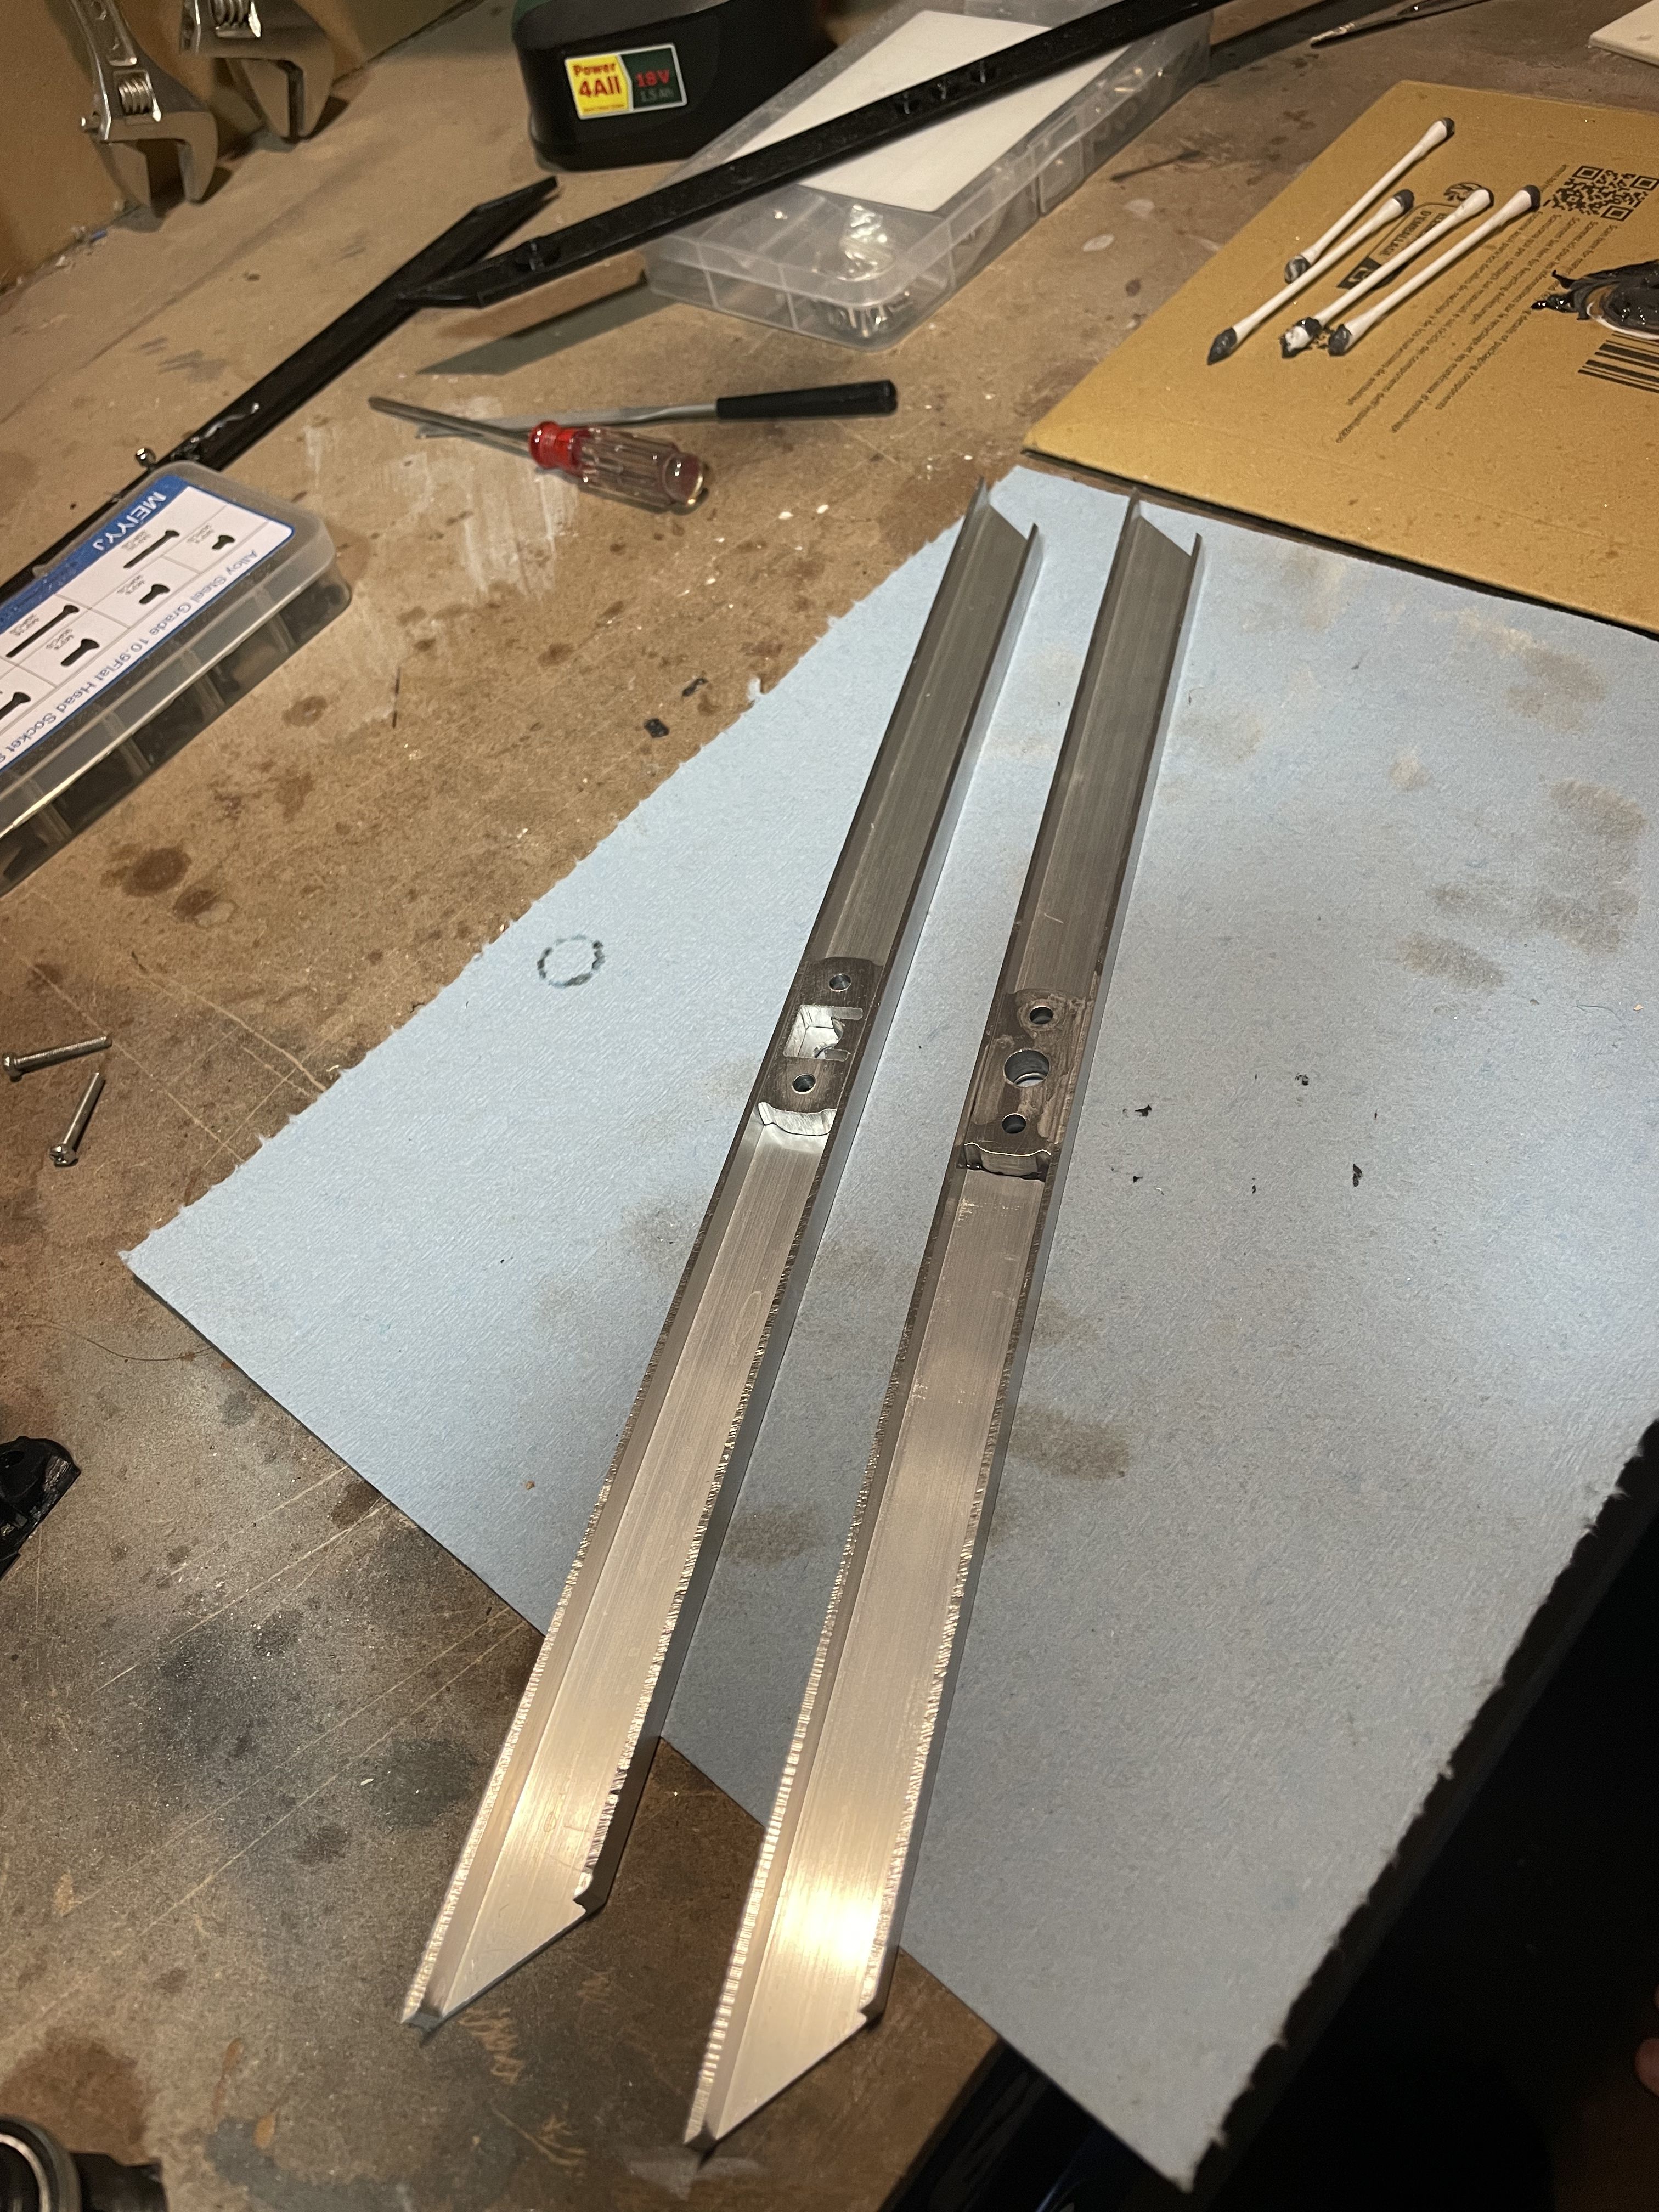
4 more rail were cut on the litre saw and then routed to the right depth with the same jig as before however I will be updating this as there is a 0.5mm variance in depth from one end to the other.

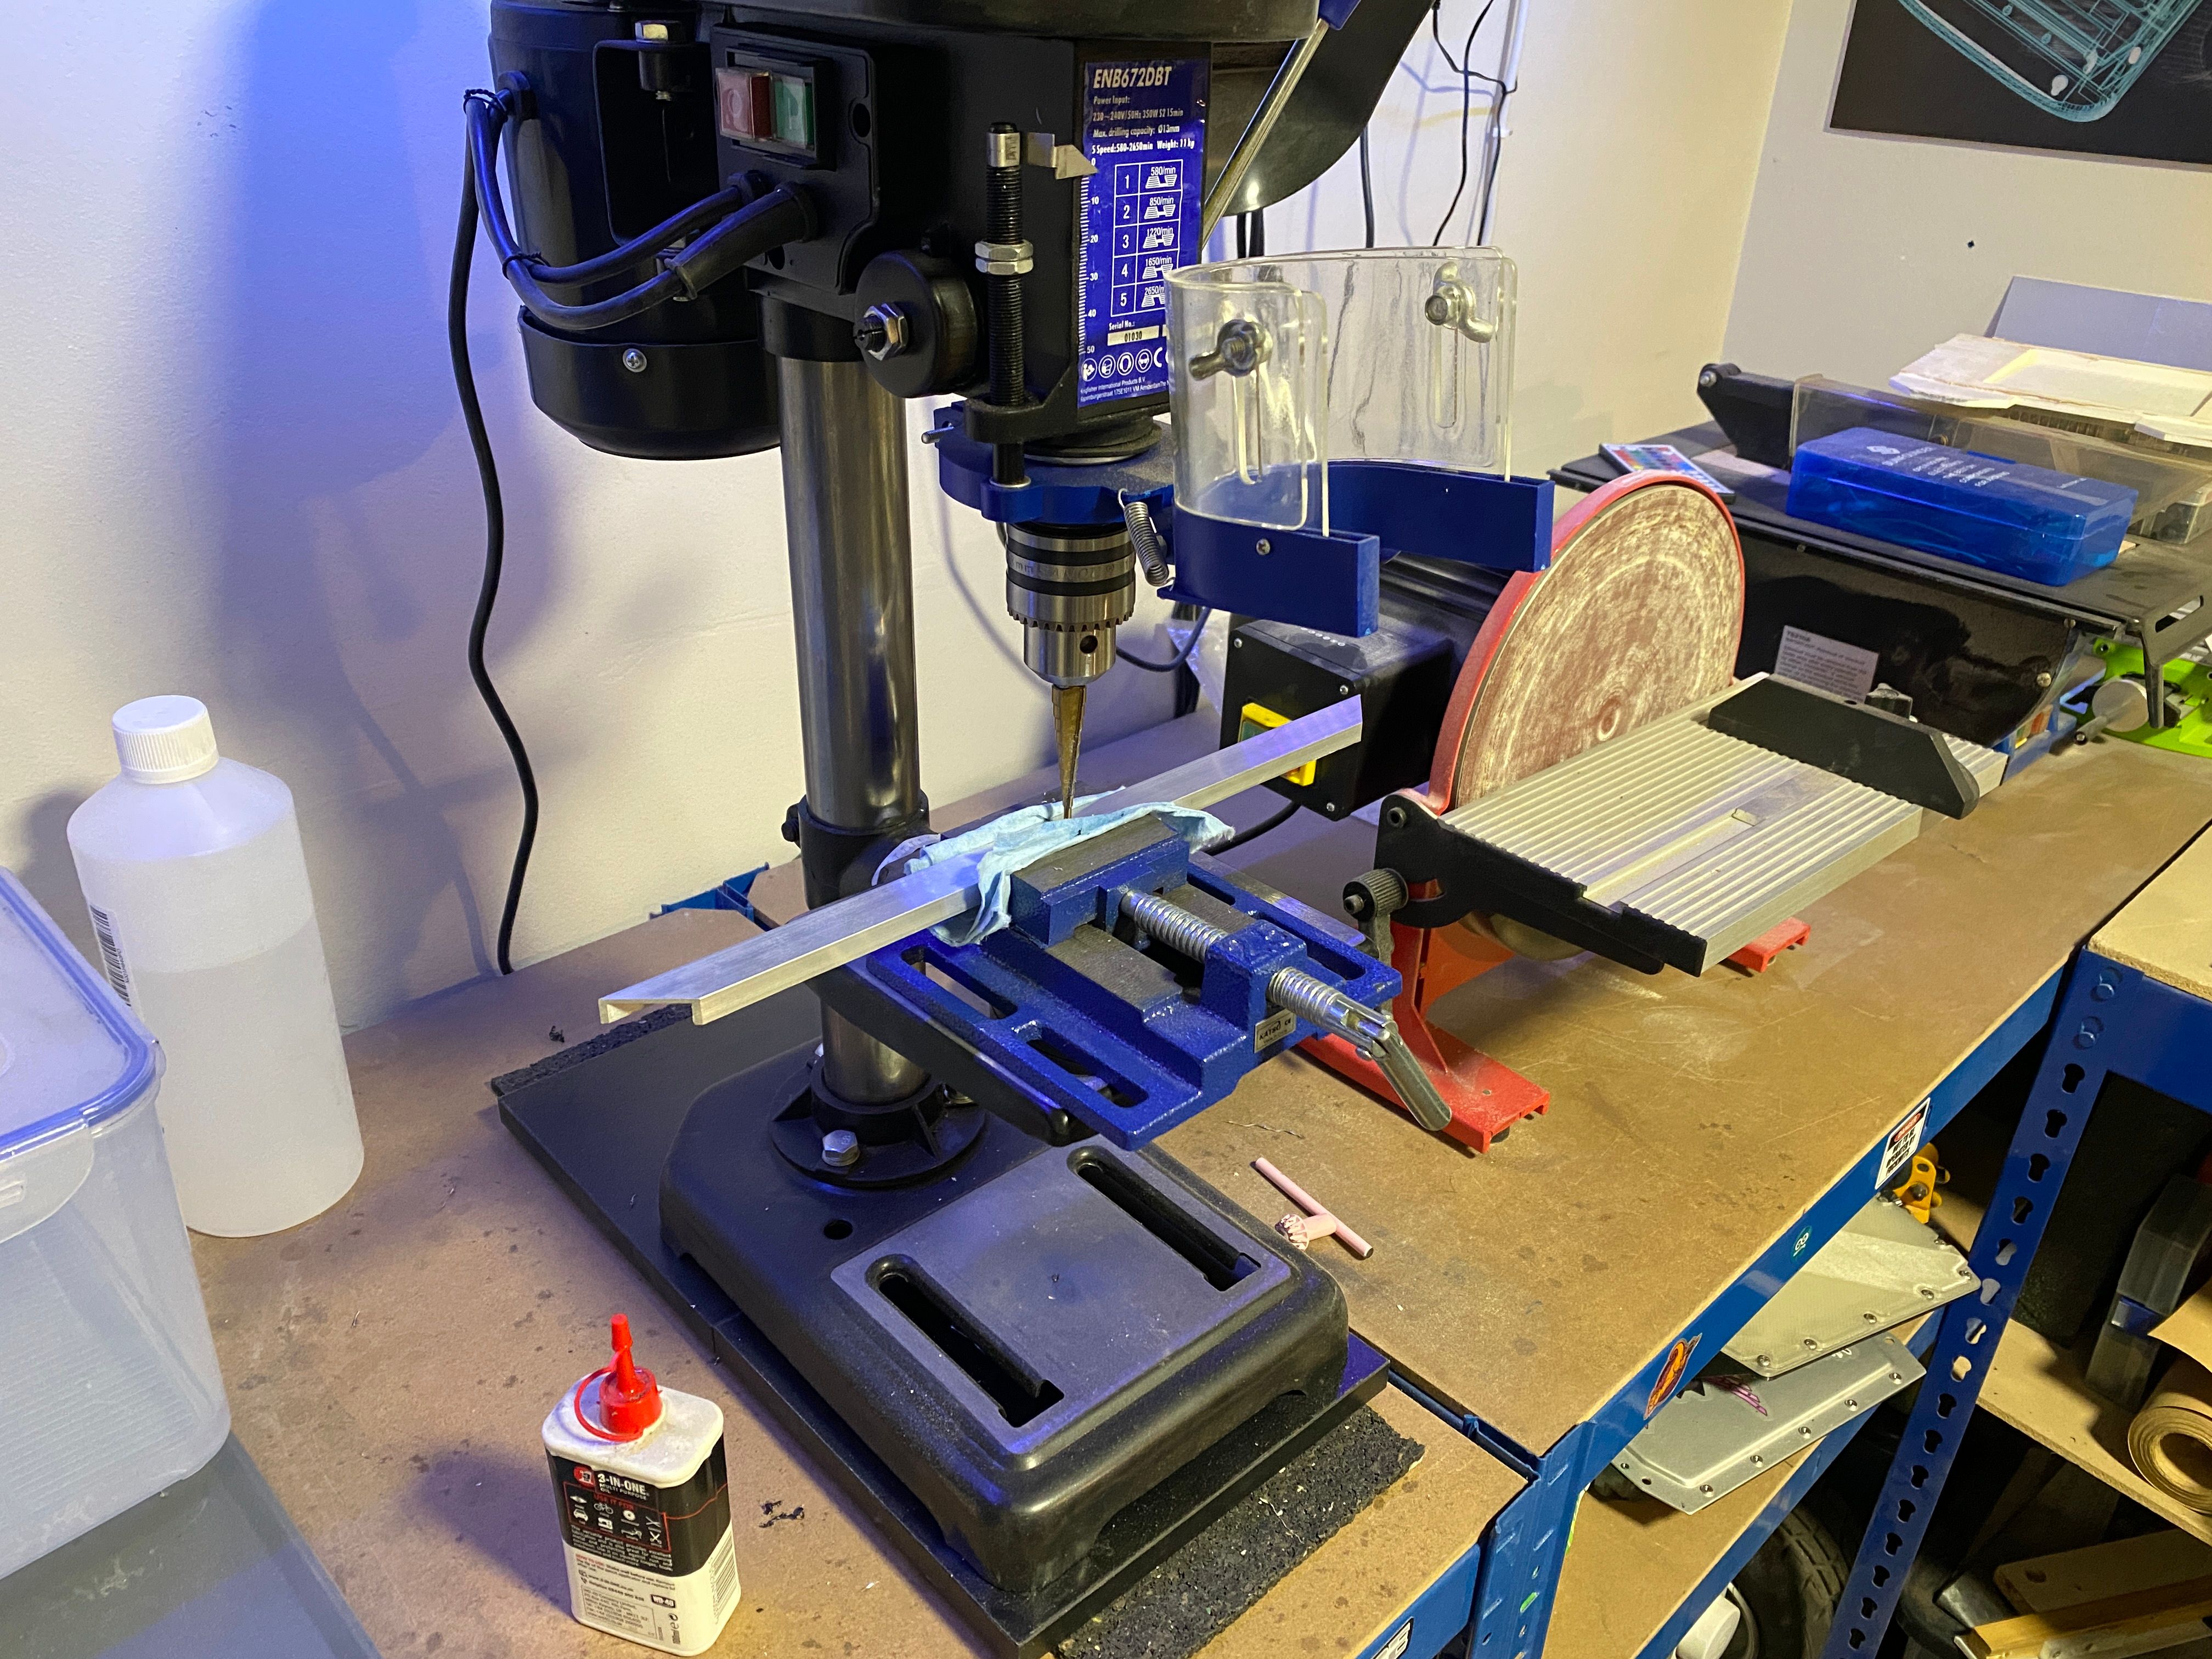
The rails of course need their bolt holes so off to the pillar drill and step drill they went, his time with some shop rag to stop the vice marring the rails like on my first XS.
With the holes in place the axle blocks could be JB-welded into place and left to dry making them extremely tough.
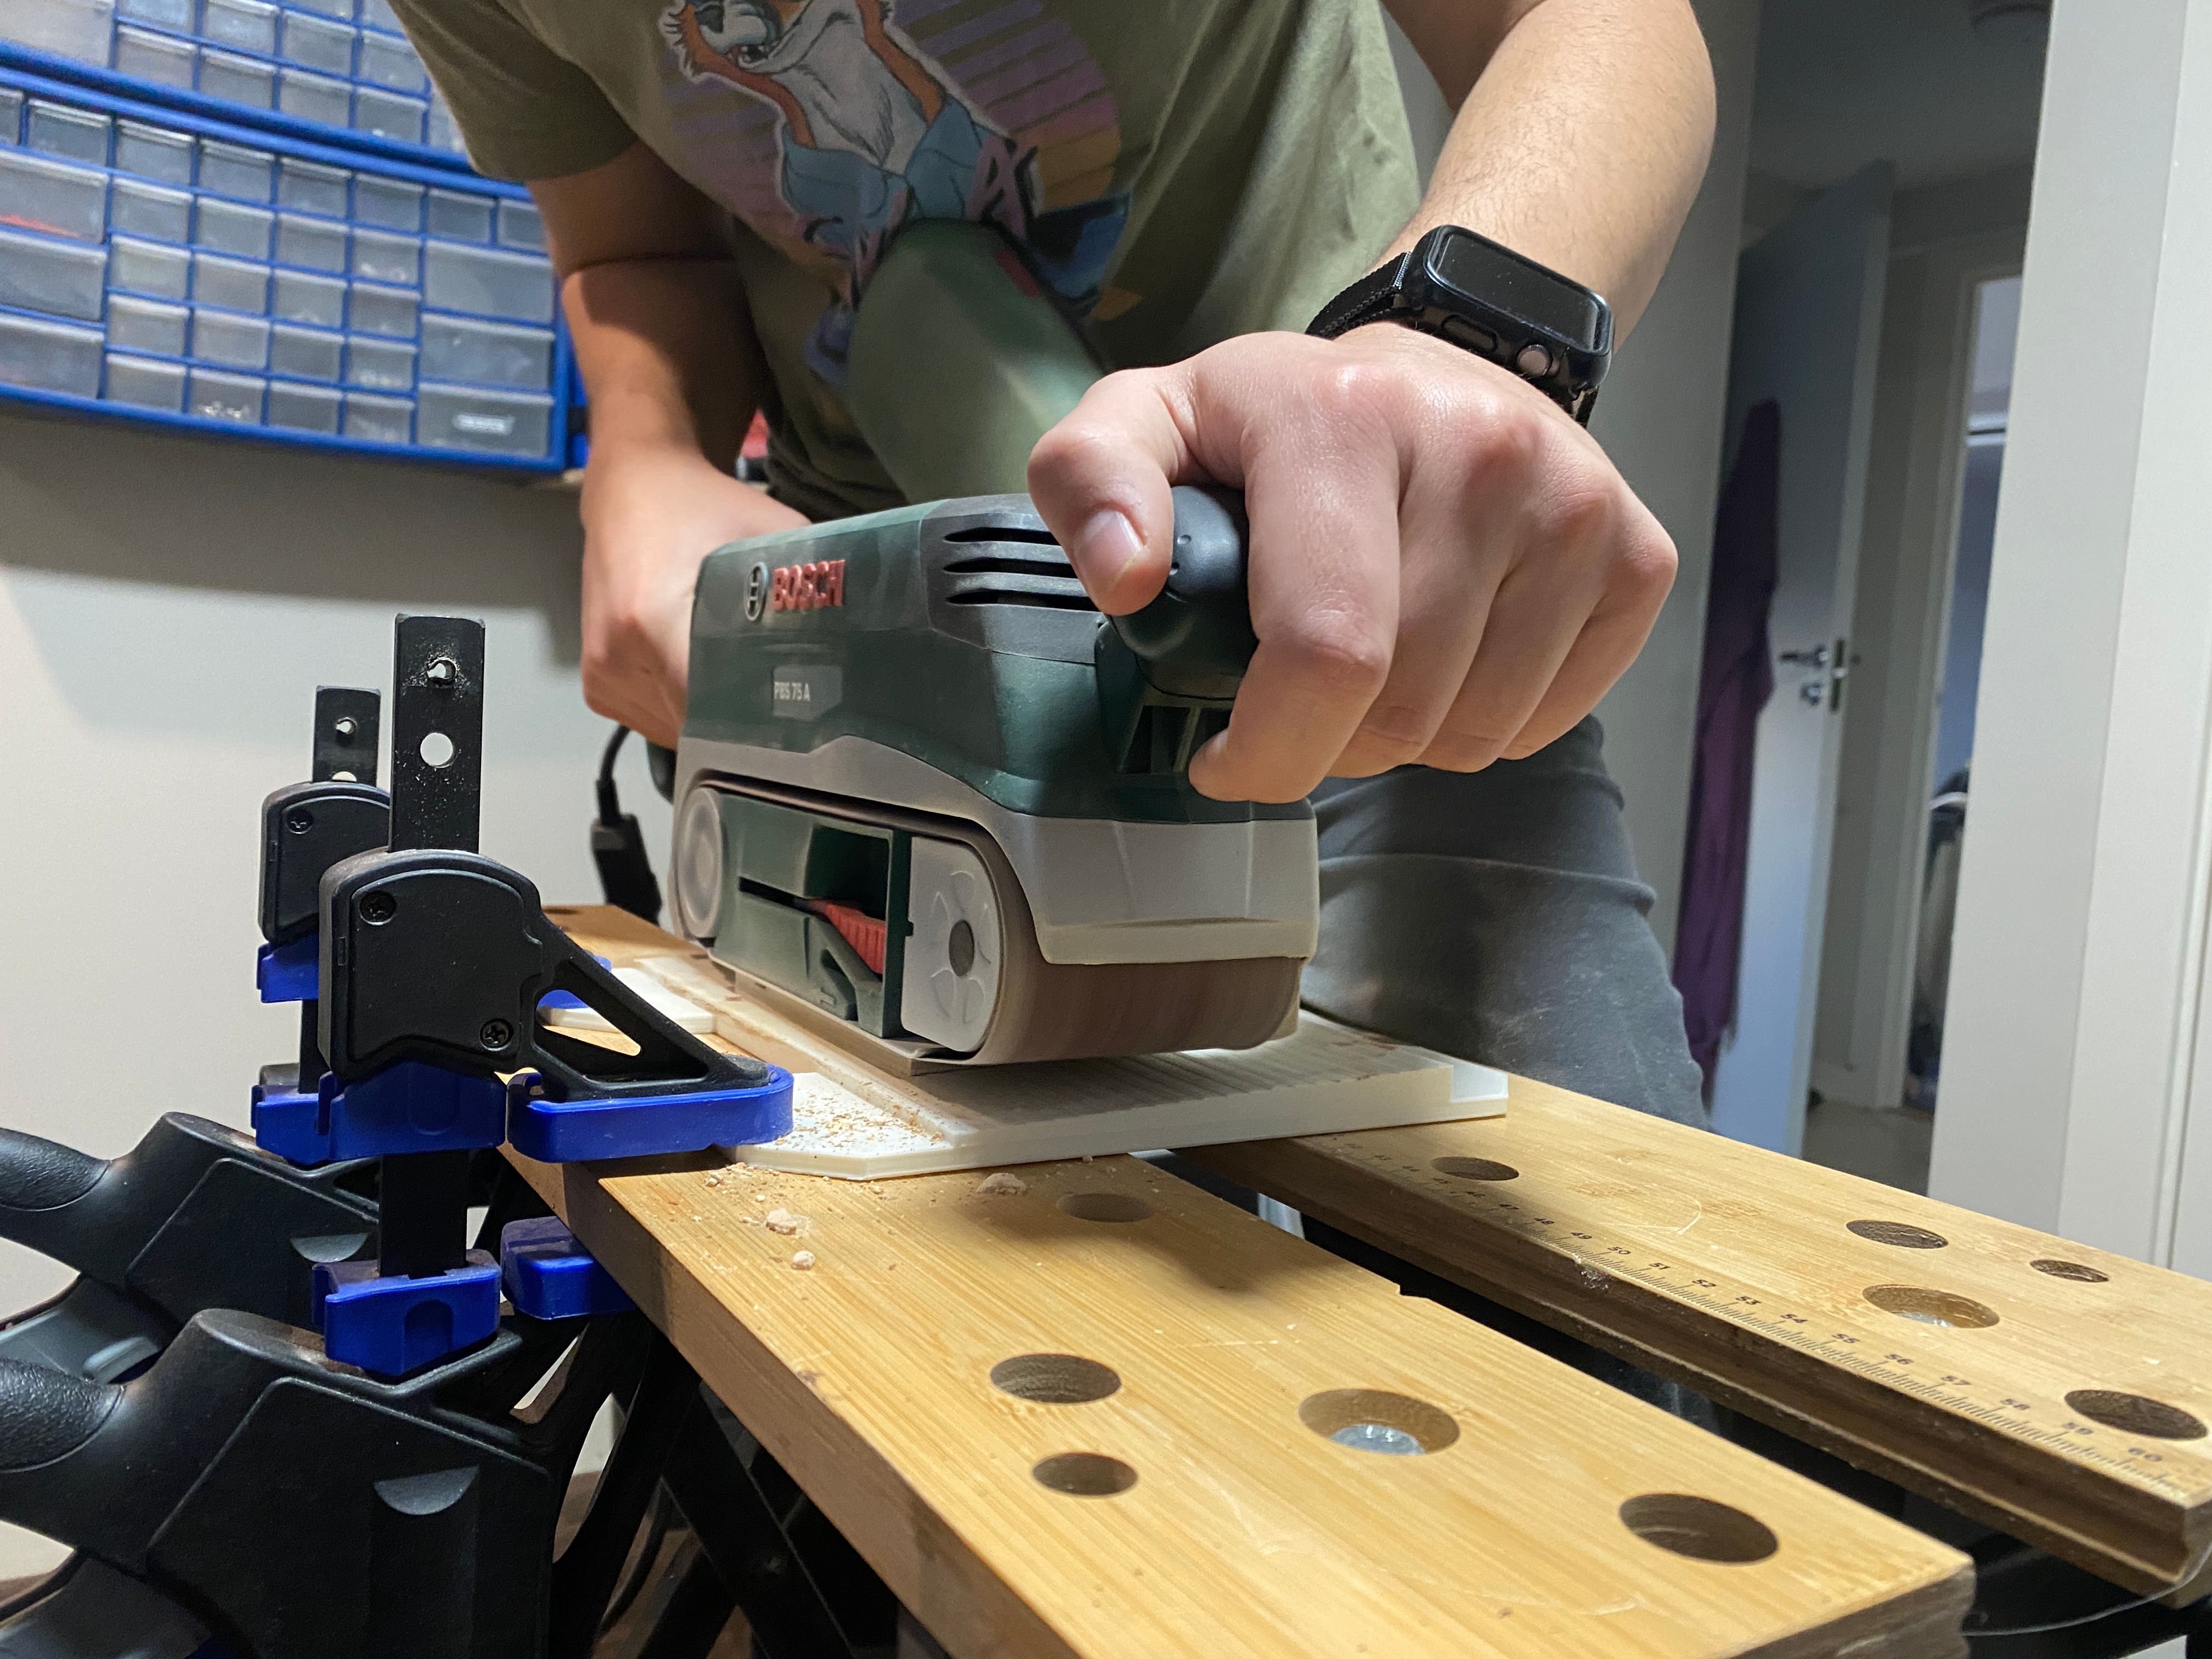
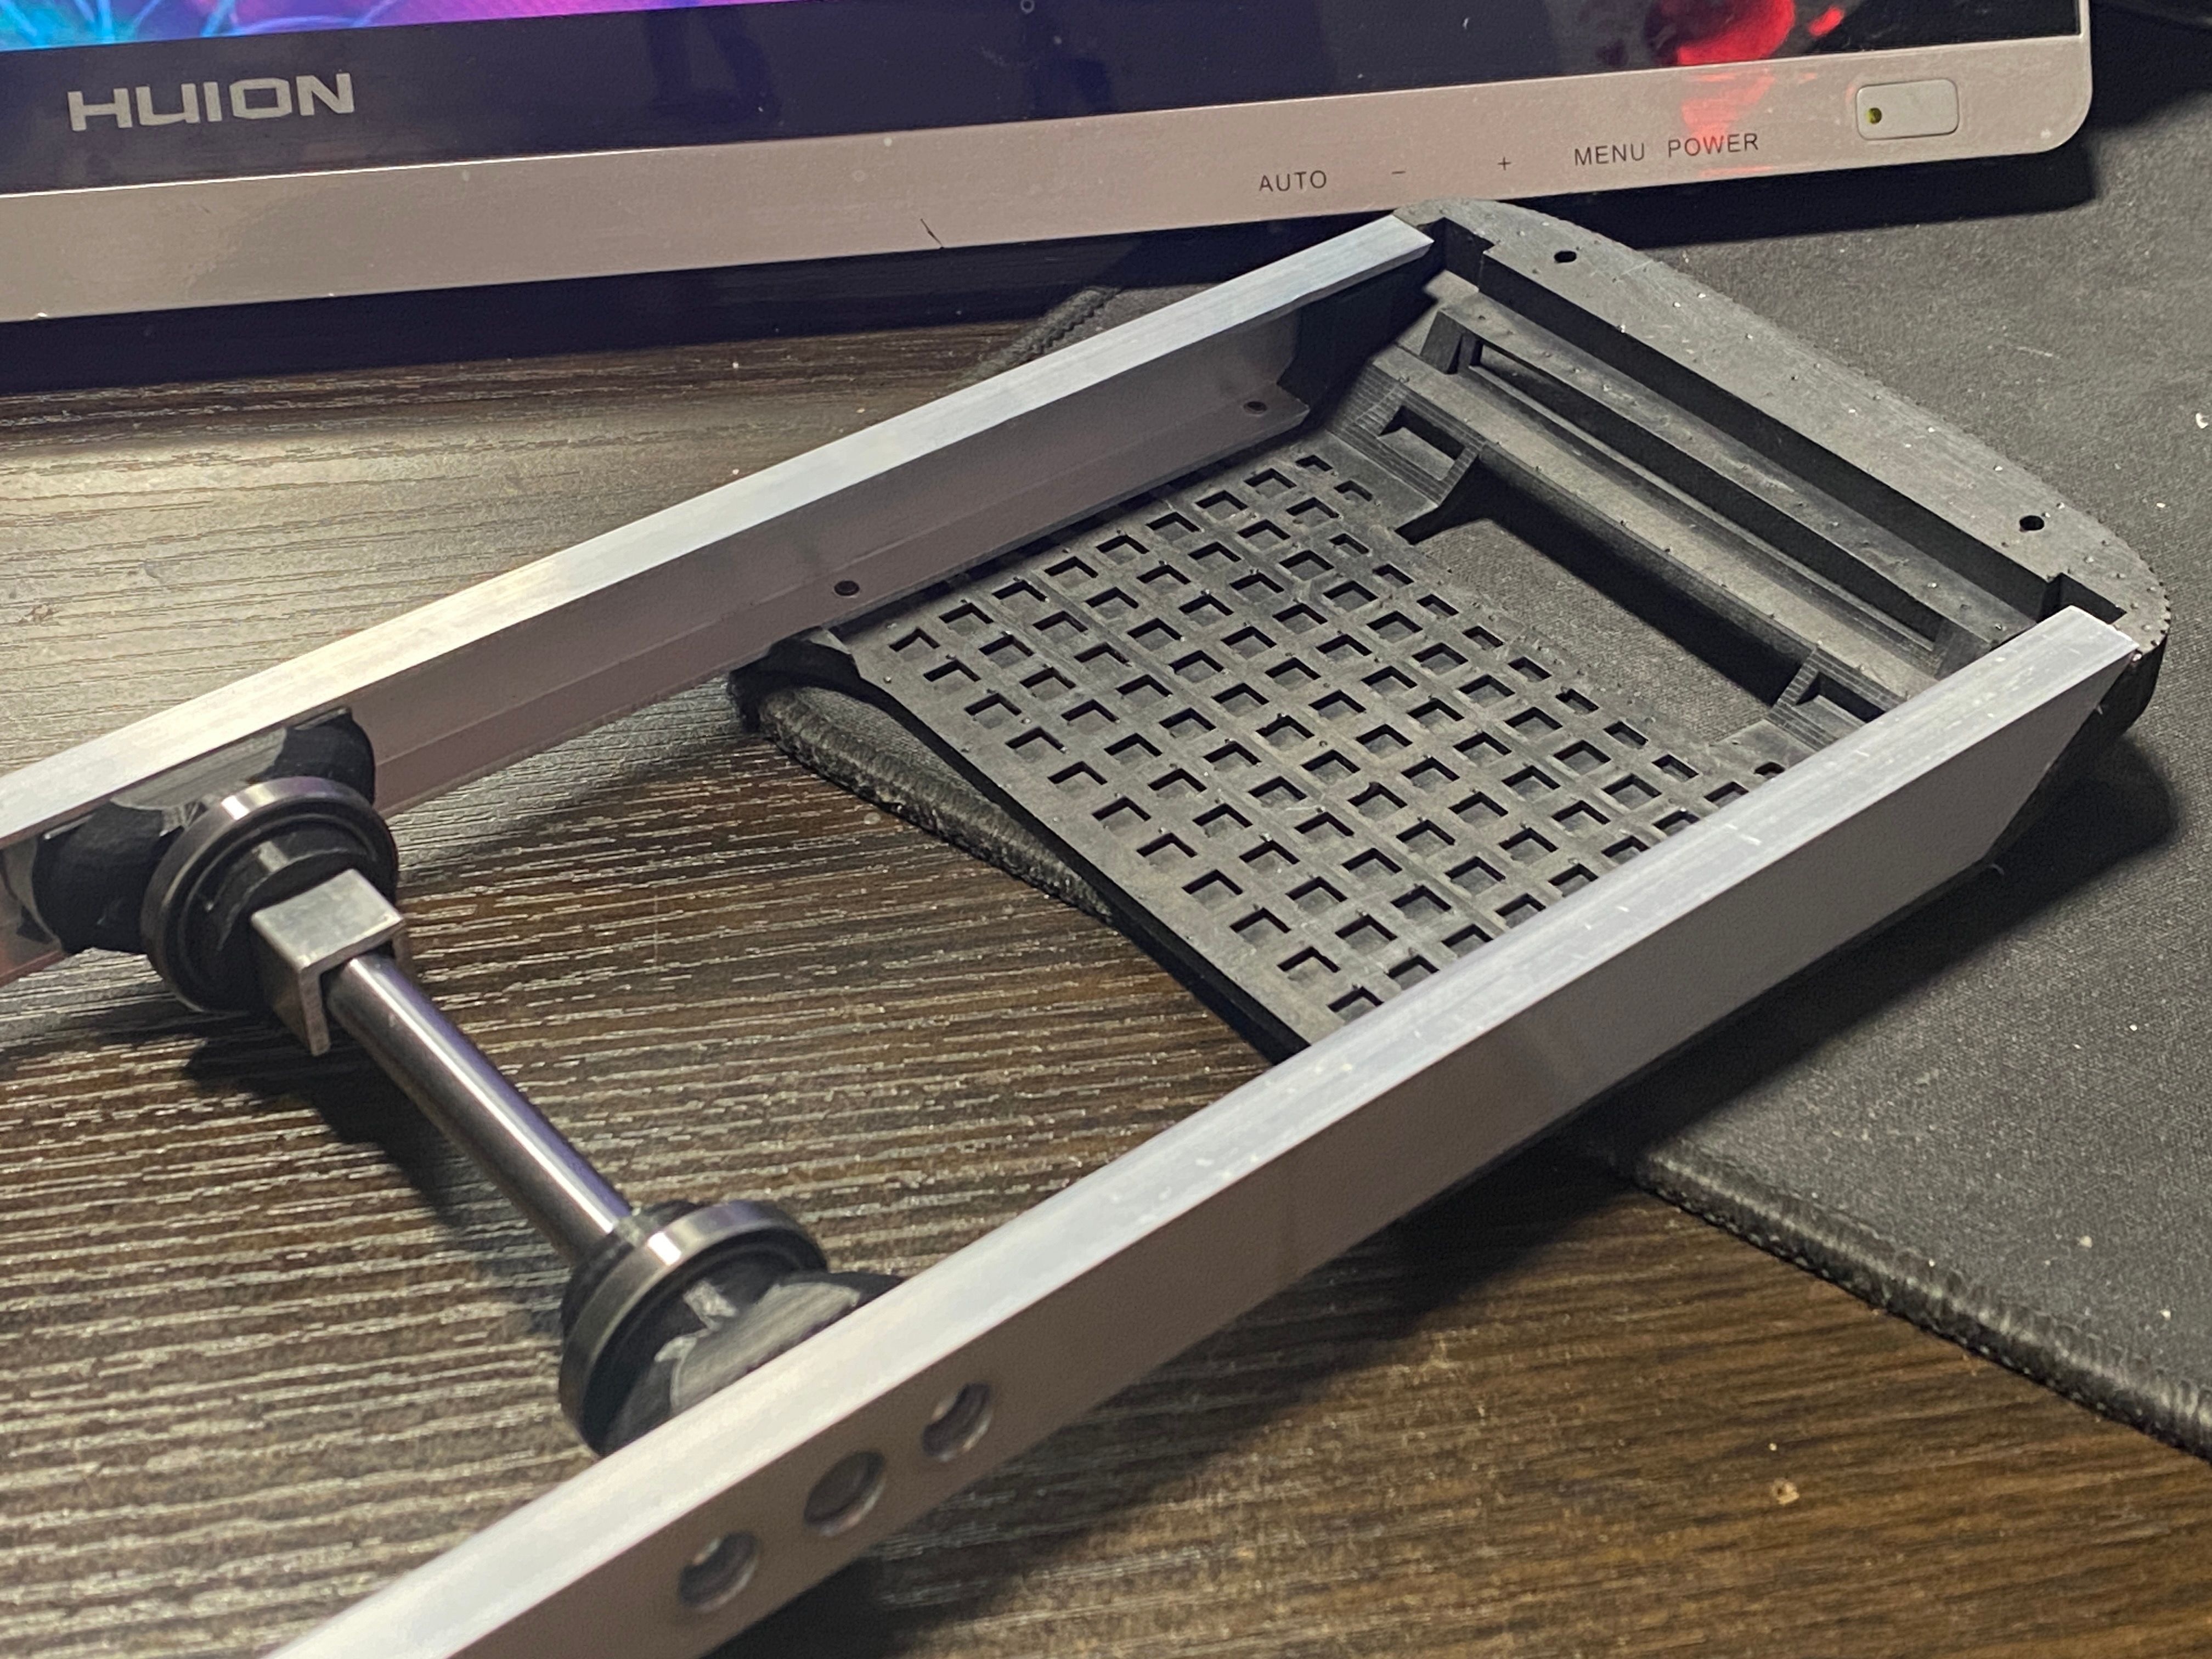
Of course the footpads needed work so those got cut to size, slapped on the same jig as before and belt sanded to the right angle then later disk sanded to shape.
Before Nick had to leave this was where we got. A week of working on and off (between doing other stuff ofc) these take a long time since a lot of manual work is needed. But the results are nice :) We began forming the lids but ran out of time and these take aaaaaages to slowly form in my puny bench vice.
The new hubs look really nice and I added the waffle pattern to the front bumper... totally to save on resin and not because I like silly details.

Looks so clean and nice. Really proud of what we managed to achieve with these.
Then just earlier when tidying up my bench I added some mounting holes in the rails for the bumpers since it's all loose. I really want to finish these 😭
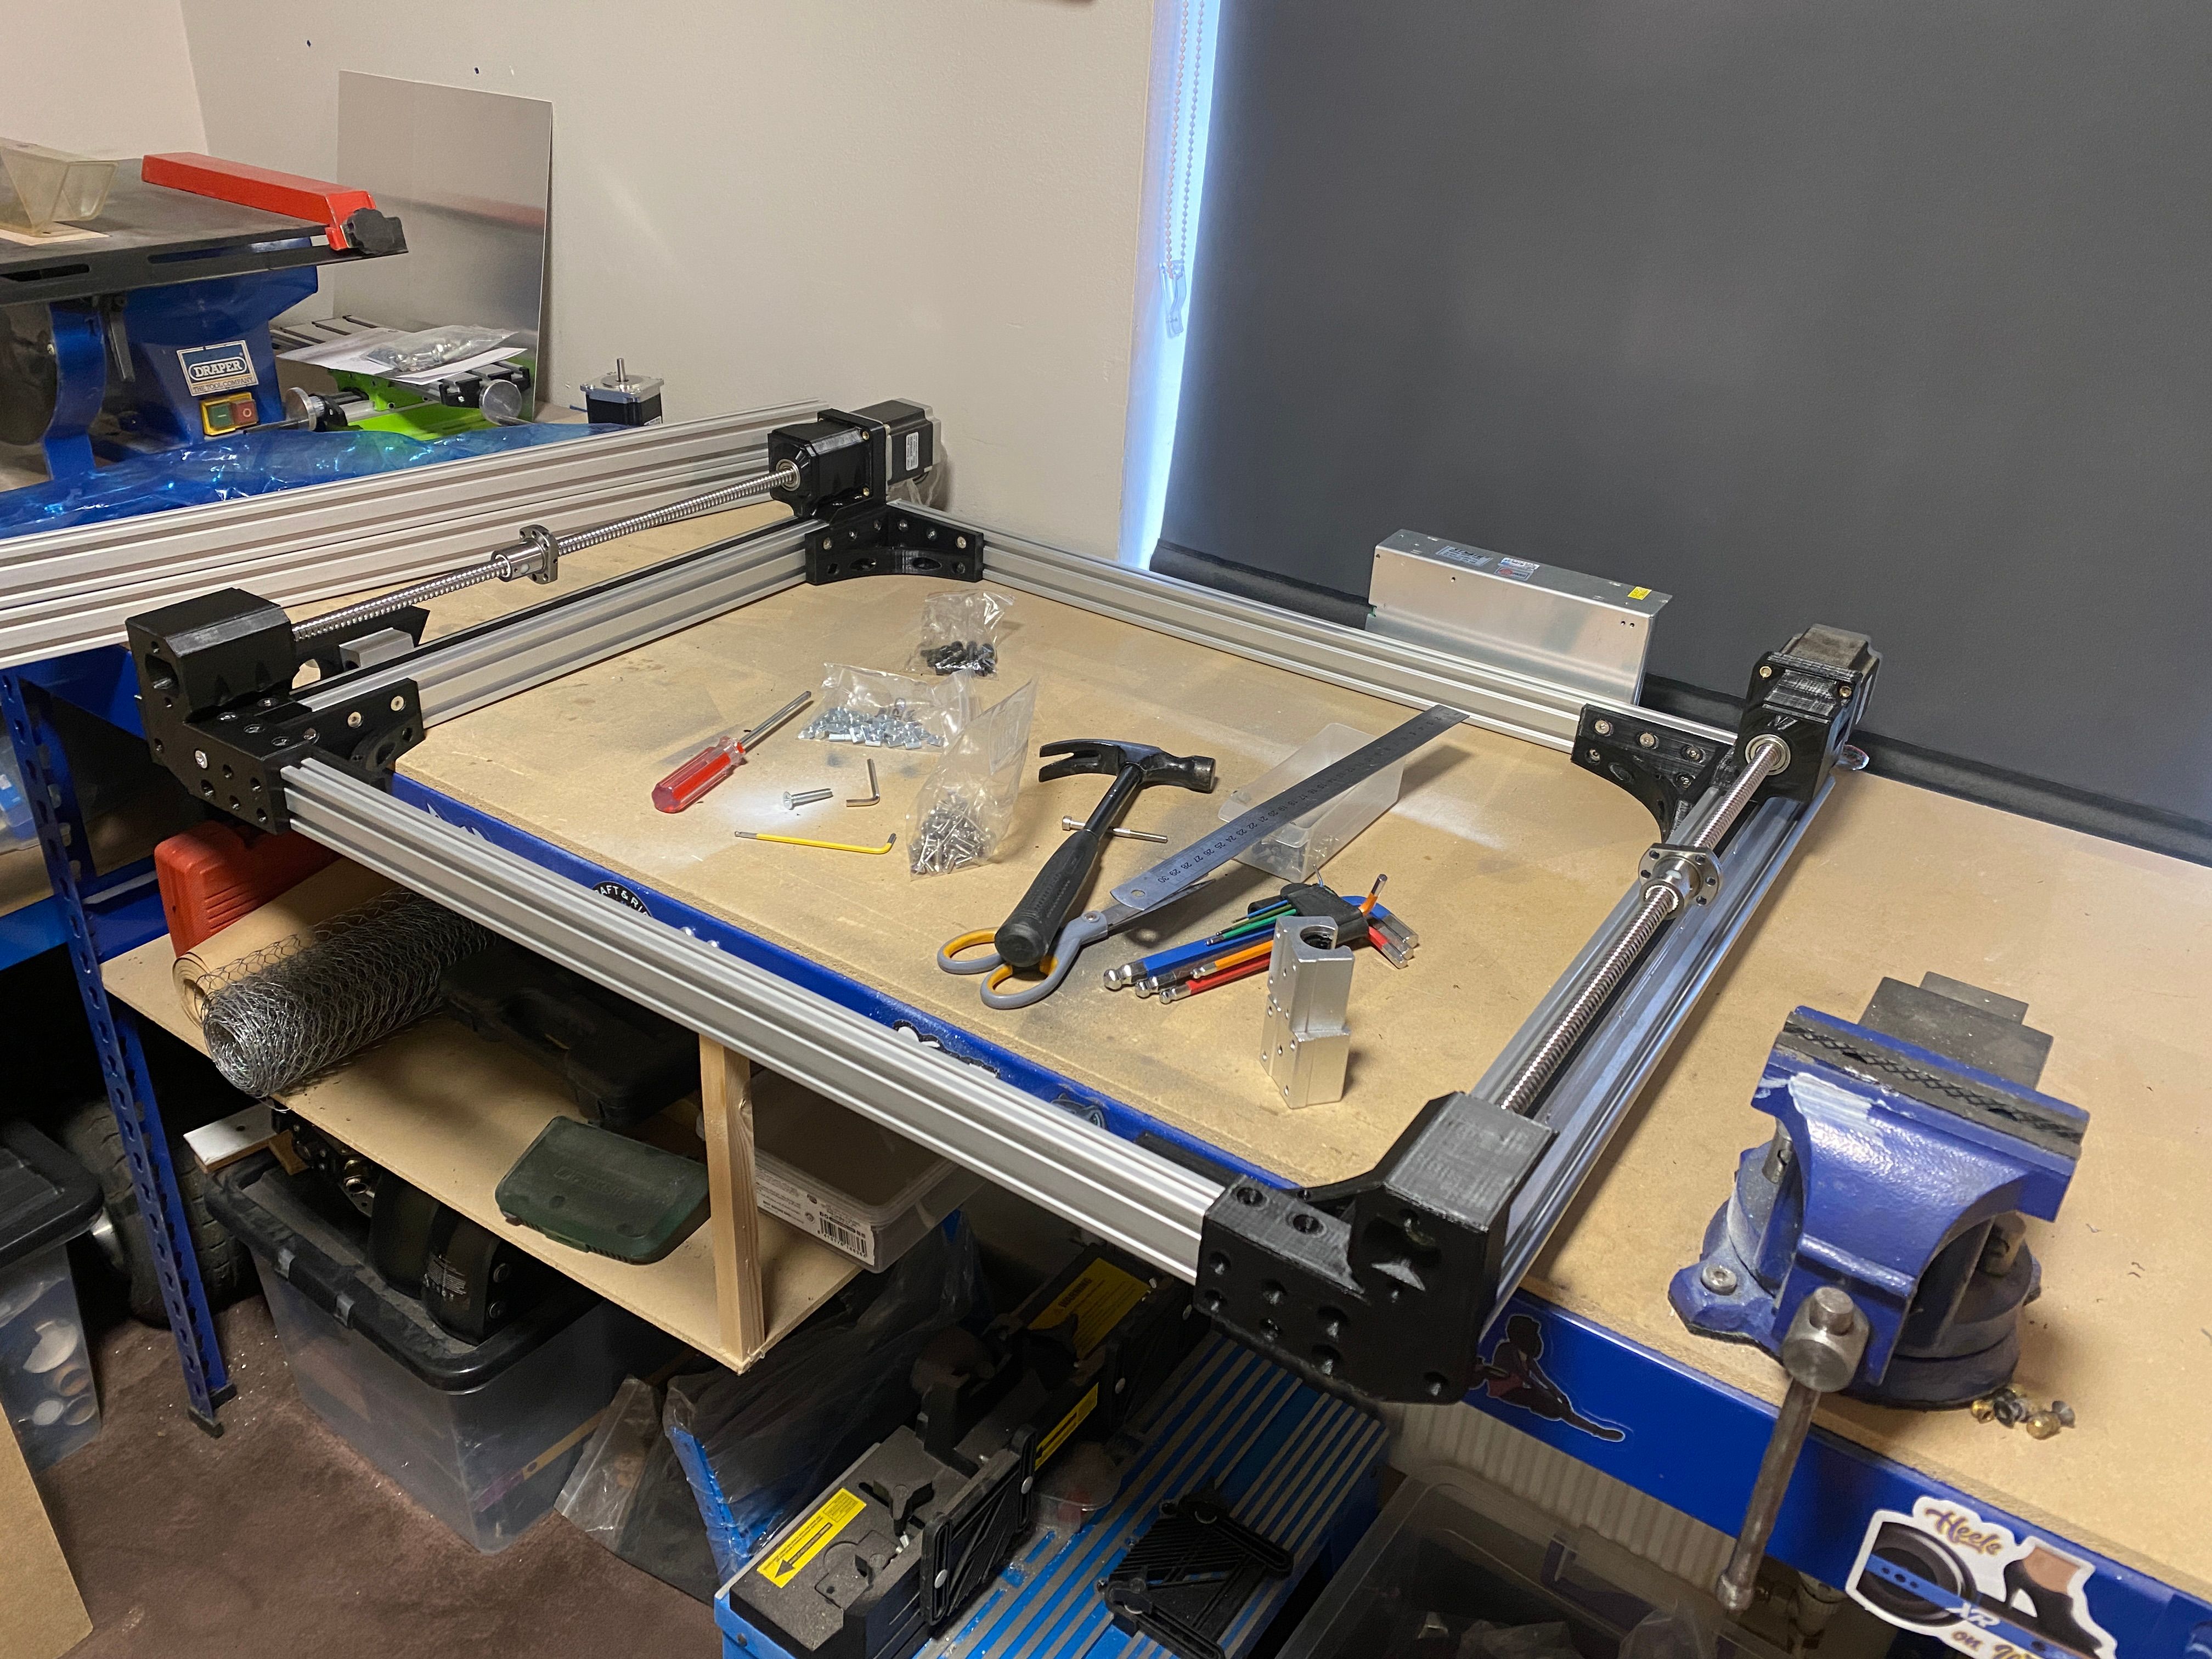
I have on the side been working on a CNC router/mill to hopefully take some of the tedious tasks on and make them way more accurate but that's taking a long time in itself sooooo I'll probably finish these 2 manually with Nick.
Some stuff about the CNC router/mill below.
Bear in mind the CAD is still WIP since I'm designing it as I build it up.
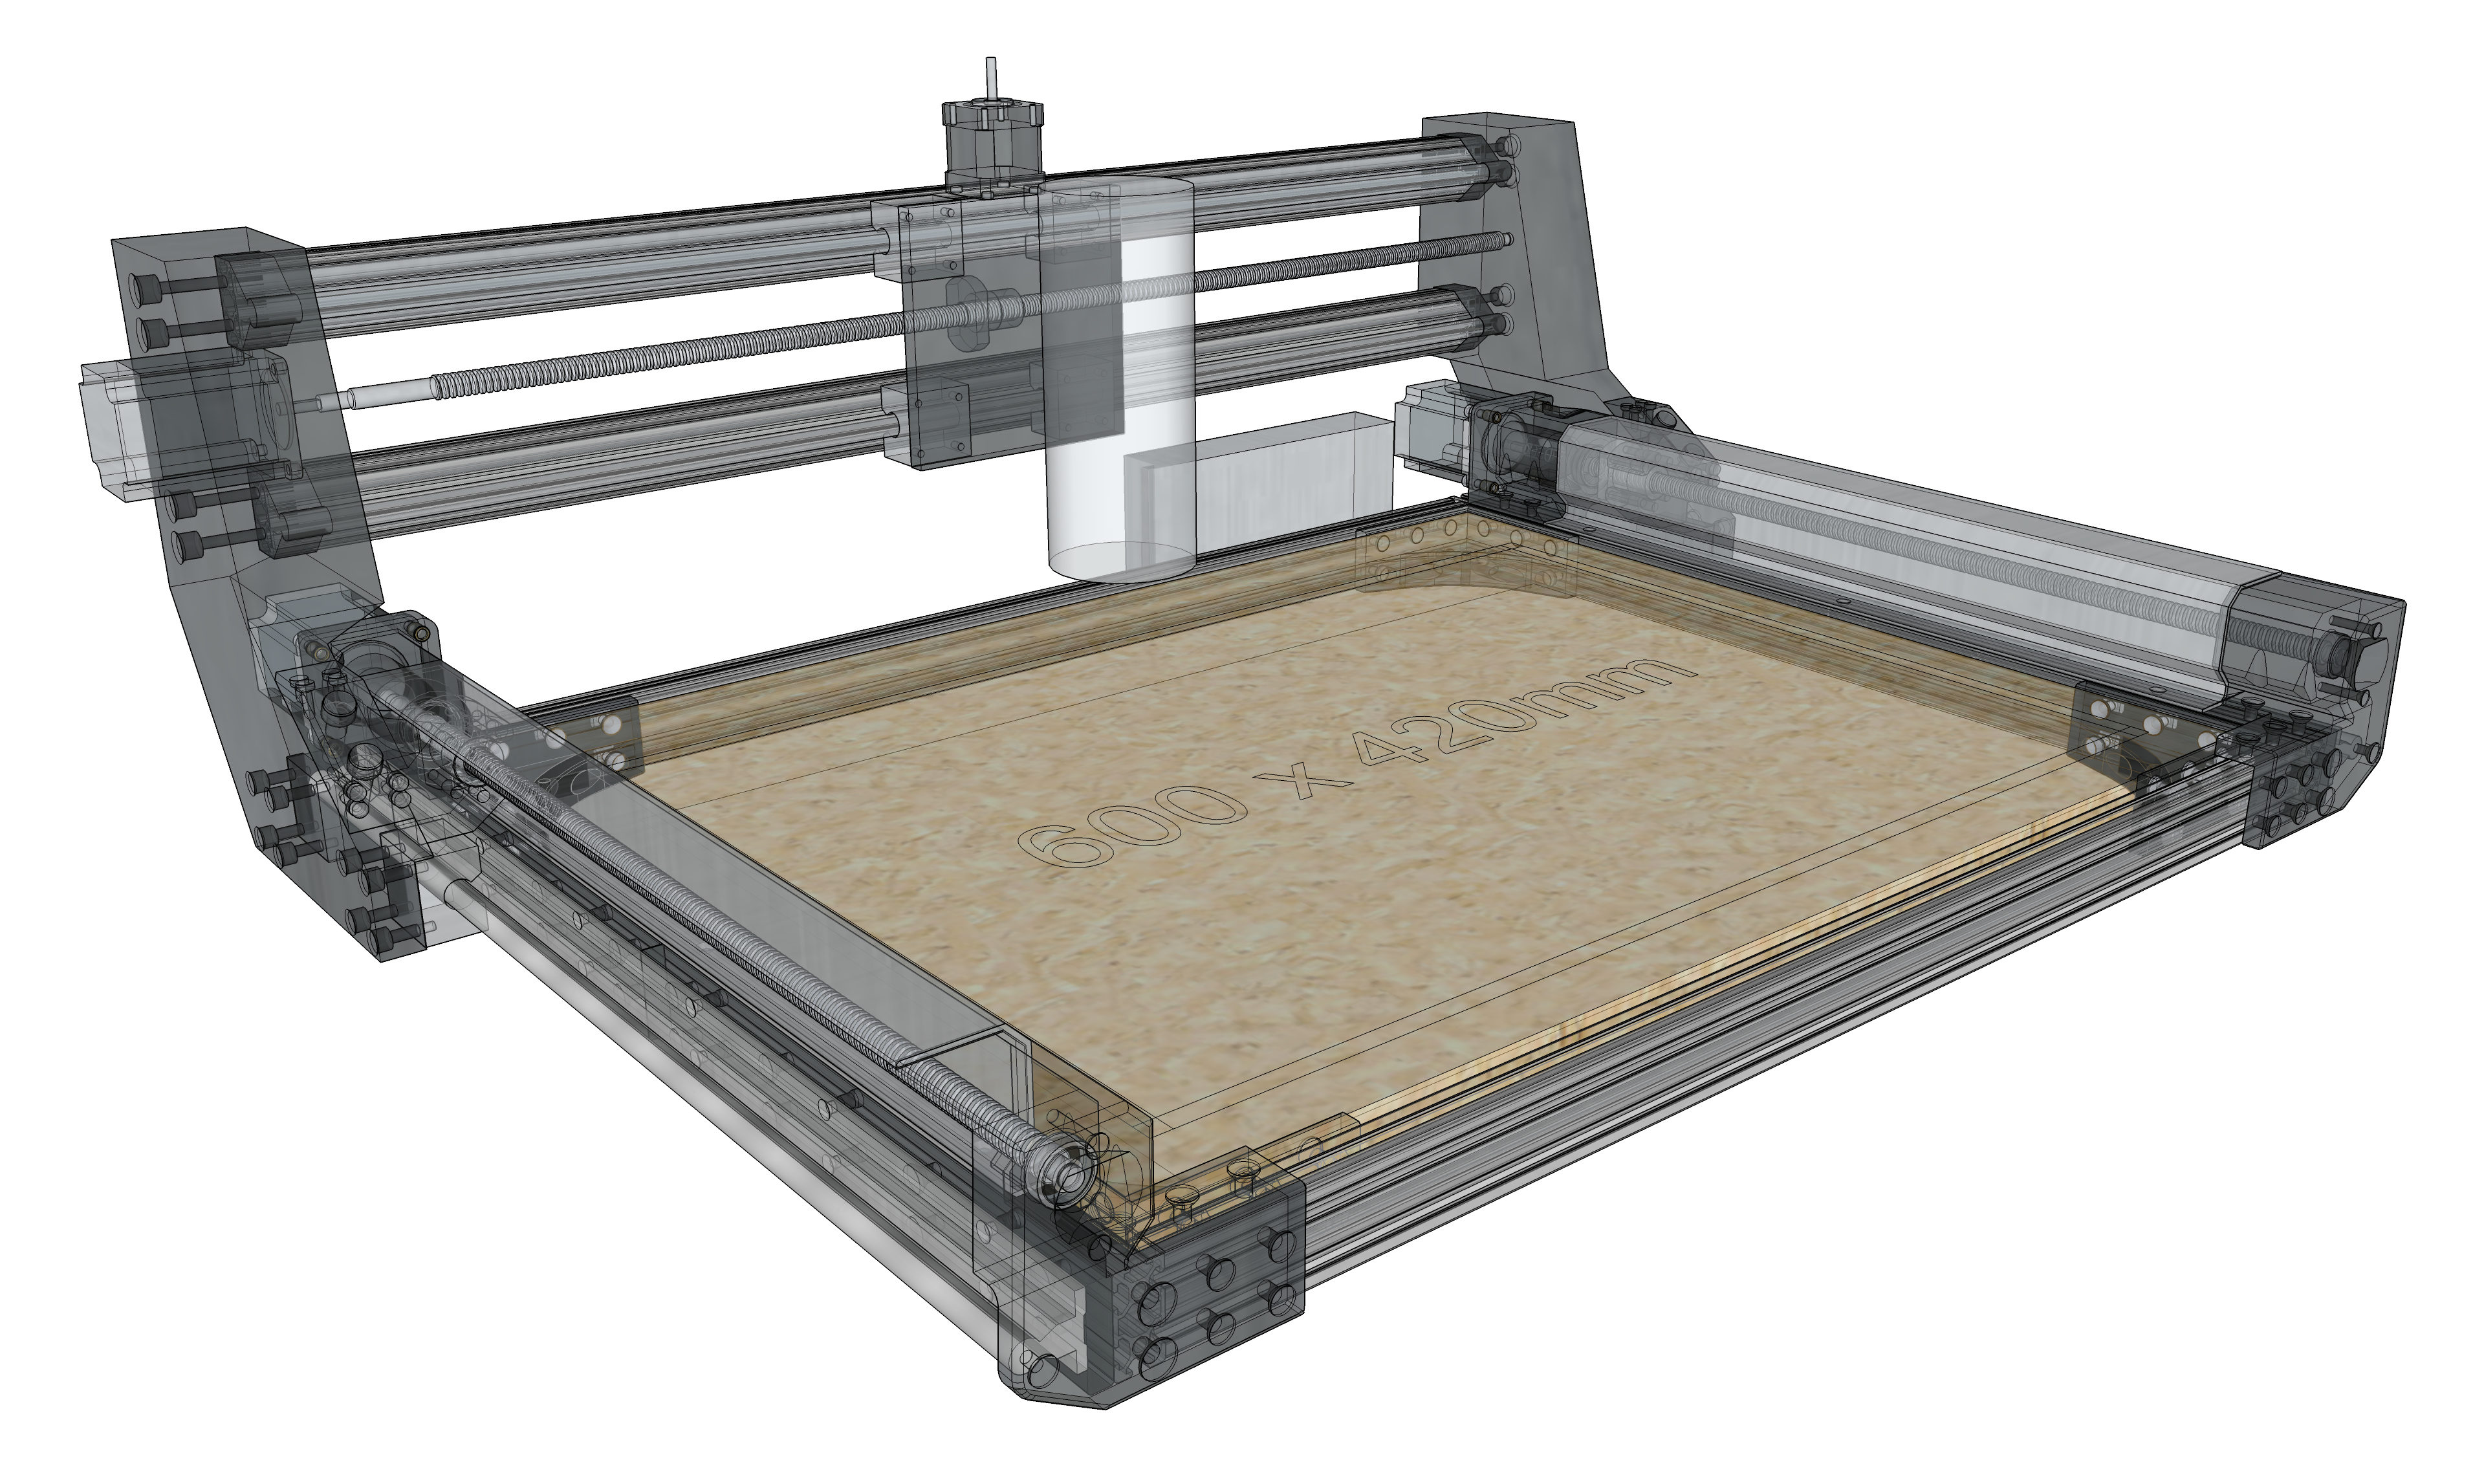
600x420mm work area isn't totally just so I can possibly machine a full scale Onewheel rail if done diagonally.So if anything Nick can now also confirm how hard, fiddly and time consuming making one of these is with all the manual work. Even with jigs there are a lot of things that need to be done right else it all goes wrong anyway D:
-
XR's got what plants crave!
-
@notsure I know, about time lol.
-
watching this project makes me want to jump into making a complete CAD model of my Onewheel for the hell of it
This is amazing, and I'm beyond impressed!
-
I am painfully falling behind on things >.>
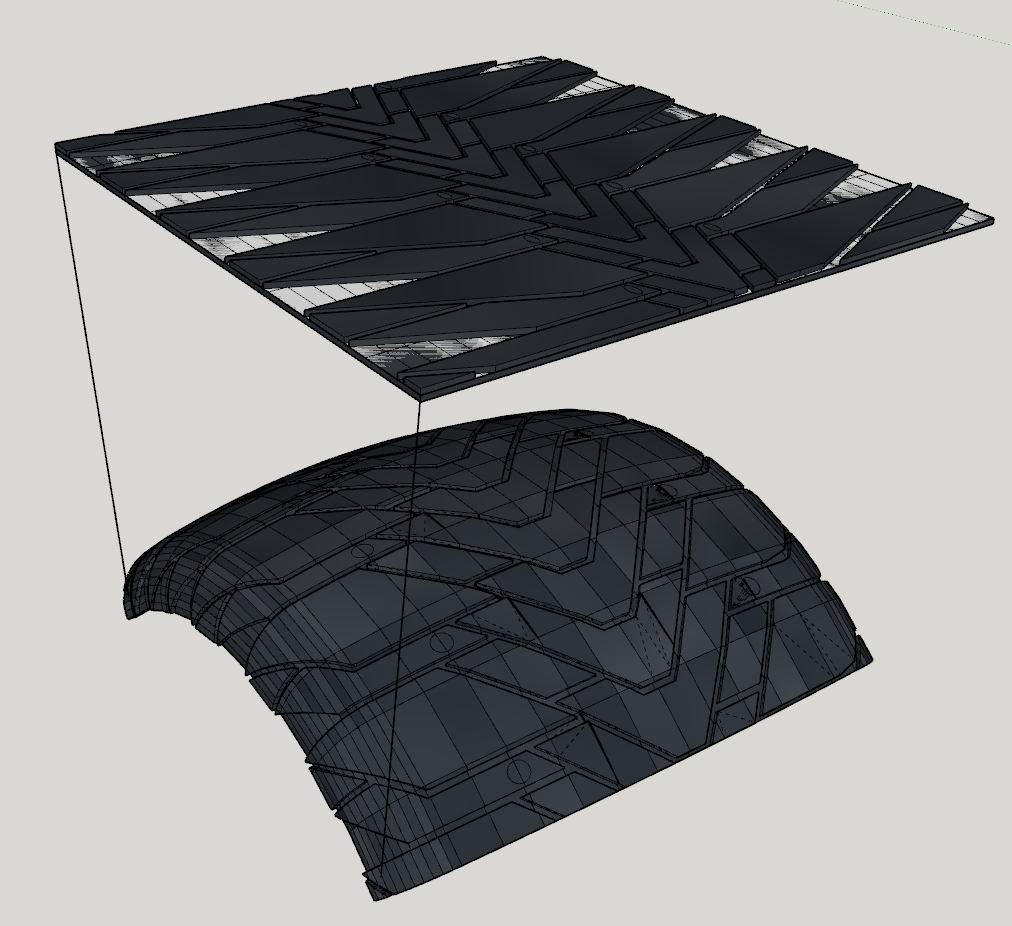
Was experimenting and I think I found a way to translate 2D geometry onto 3D planes... then also 3D geometry onto other 3D planes.
What I'm trying to say is I have roughly re-created the Enduro for a little XS version when I get time and cash to experiment with casting.
It's really dirty but I discovered the Flowify plugin for Sketchup (Yes the XS is still being done in Sketchup). It needs a lot of tiding up and maybe doing at a larger scale to remove the geometry errors but I am very proud of this :3
Below is what it looks like when creating the geometry. Don't ask me how tf it works, it's just magic.
Edit
Okay it's messy and I'm figuring out how Flowify does the deforming BUT... it's looking cleaner!
Edit 2
I fixed the warping!!!!!!!

-
Out of curiosity. How did you got to this point deciding making XS Enduro as only aftermarket part? (Electronics aside) I thought you intended to re-create solely originals resized.
-
-
this is amazing!
I'm excited to see what comes of this project!
-
You wouldn't download a tire?

My poor computer is suffering with this one. I might have to remove the tire when doing anything else just so I can go back to having more than like 10 frames when panning around.
I also have to figure a way to print it since like... well...
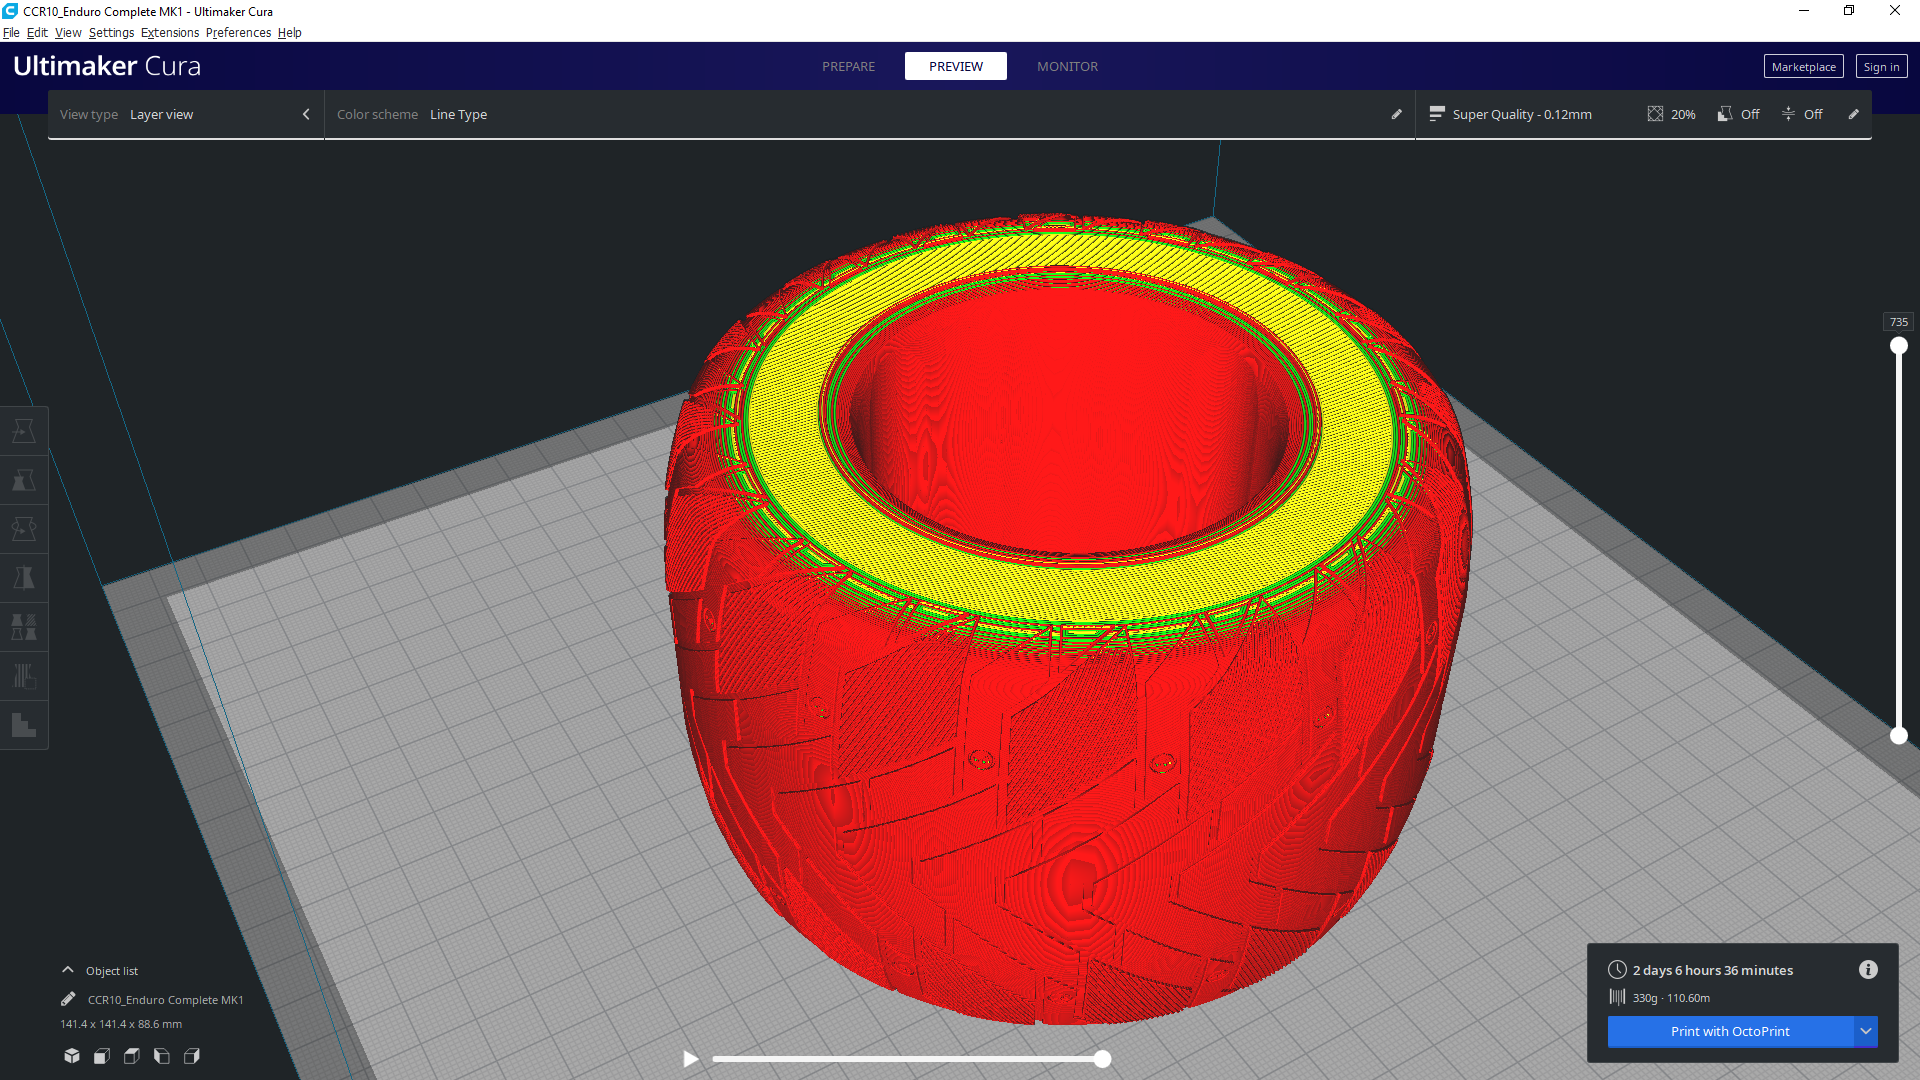
The resin printer would be ideal but the support would get in the tread. If I halve it the model won't lay flat on the bed so it'll be hard to get it looking nice post processed.
I'll figure something out :3
-
So I've been a bit busy... scratch that extremely busy so I haven't had time or funds to pour into this recently as much as I'd love too.
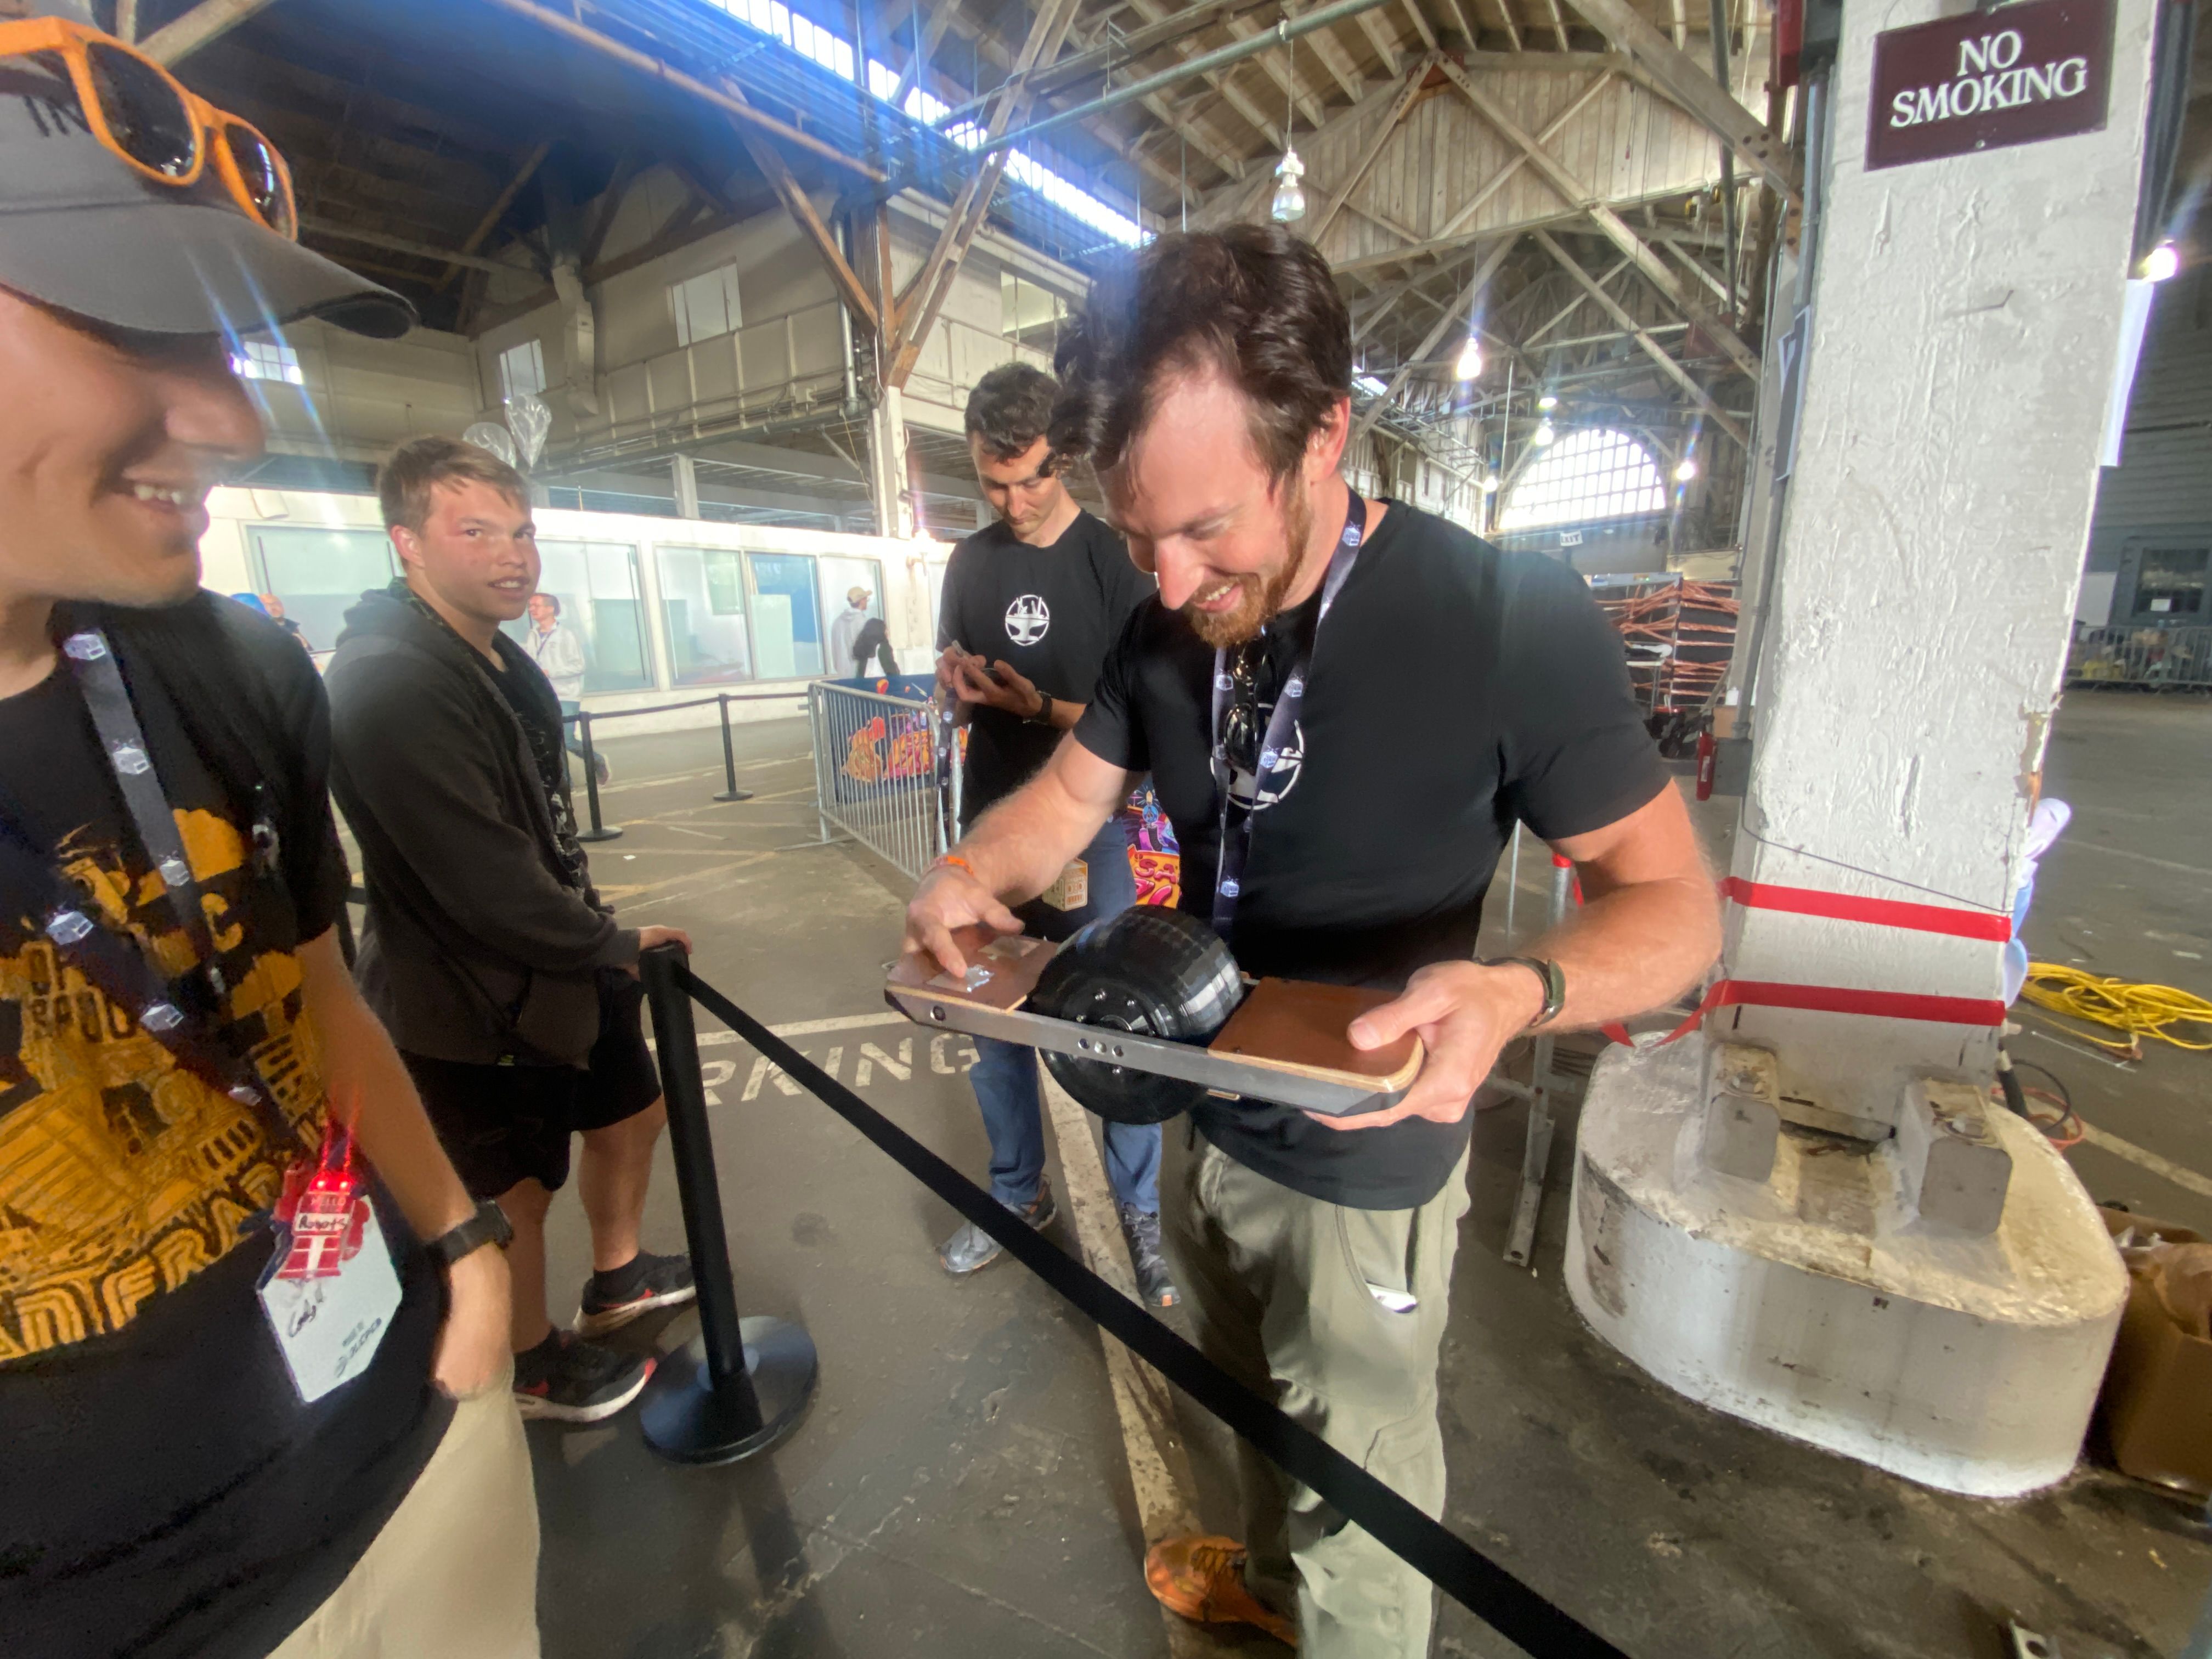
However earlier this month me and @cheppy44 went to OpenSauce. It's an event for makers by makers. Nick thought it would be a good idea to bring the XS. Unfortunately we didn't have time to get a booth but we walked around carrying the lil bebe.
Honestly it was an amazing idea because the dinky little guy got a lot of attention from a number of other event goers especially Wren, James and Ian from the Hacksmith and Cody Hovland.
If you have instagram then here's some of it, otherwise below are some bits.
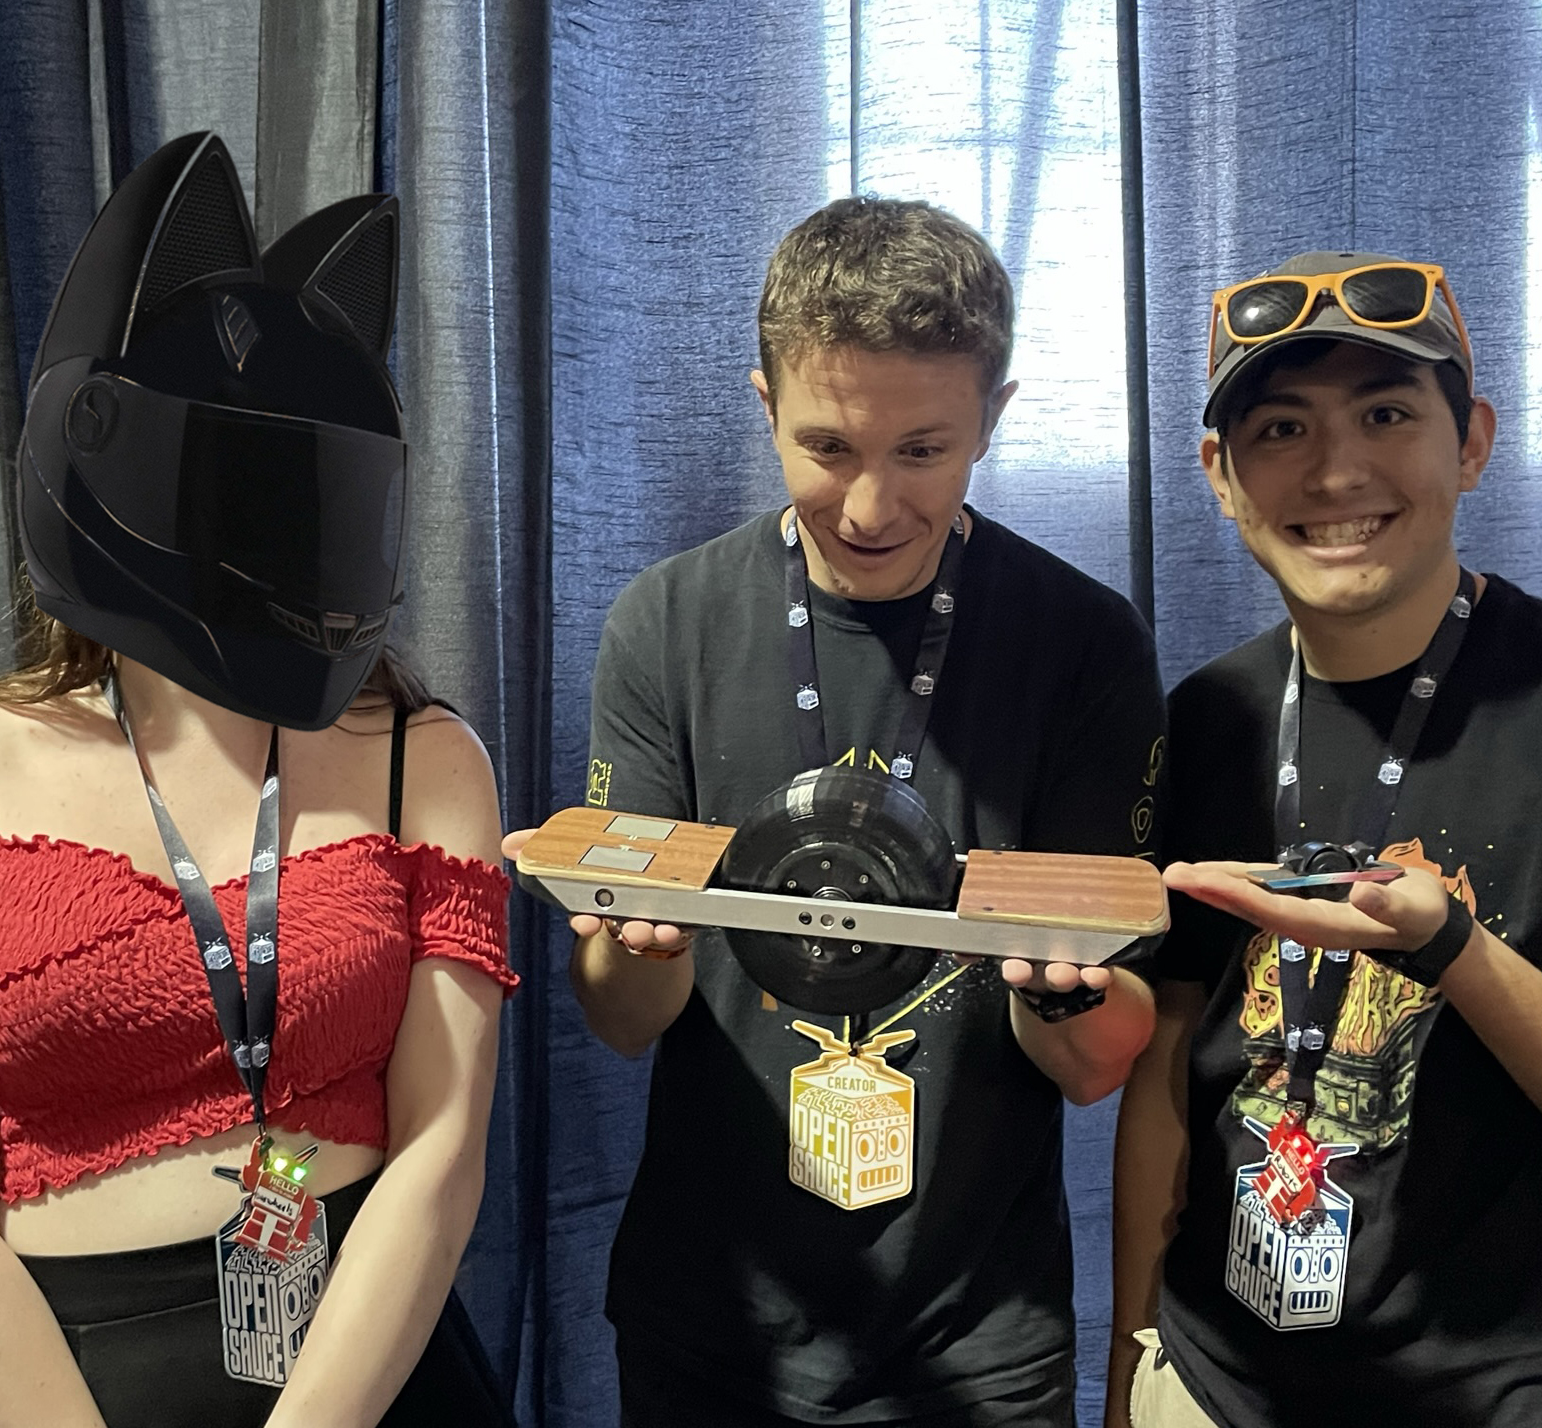
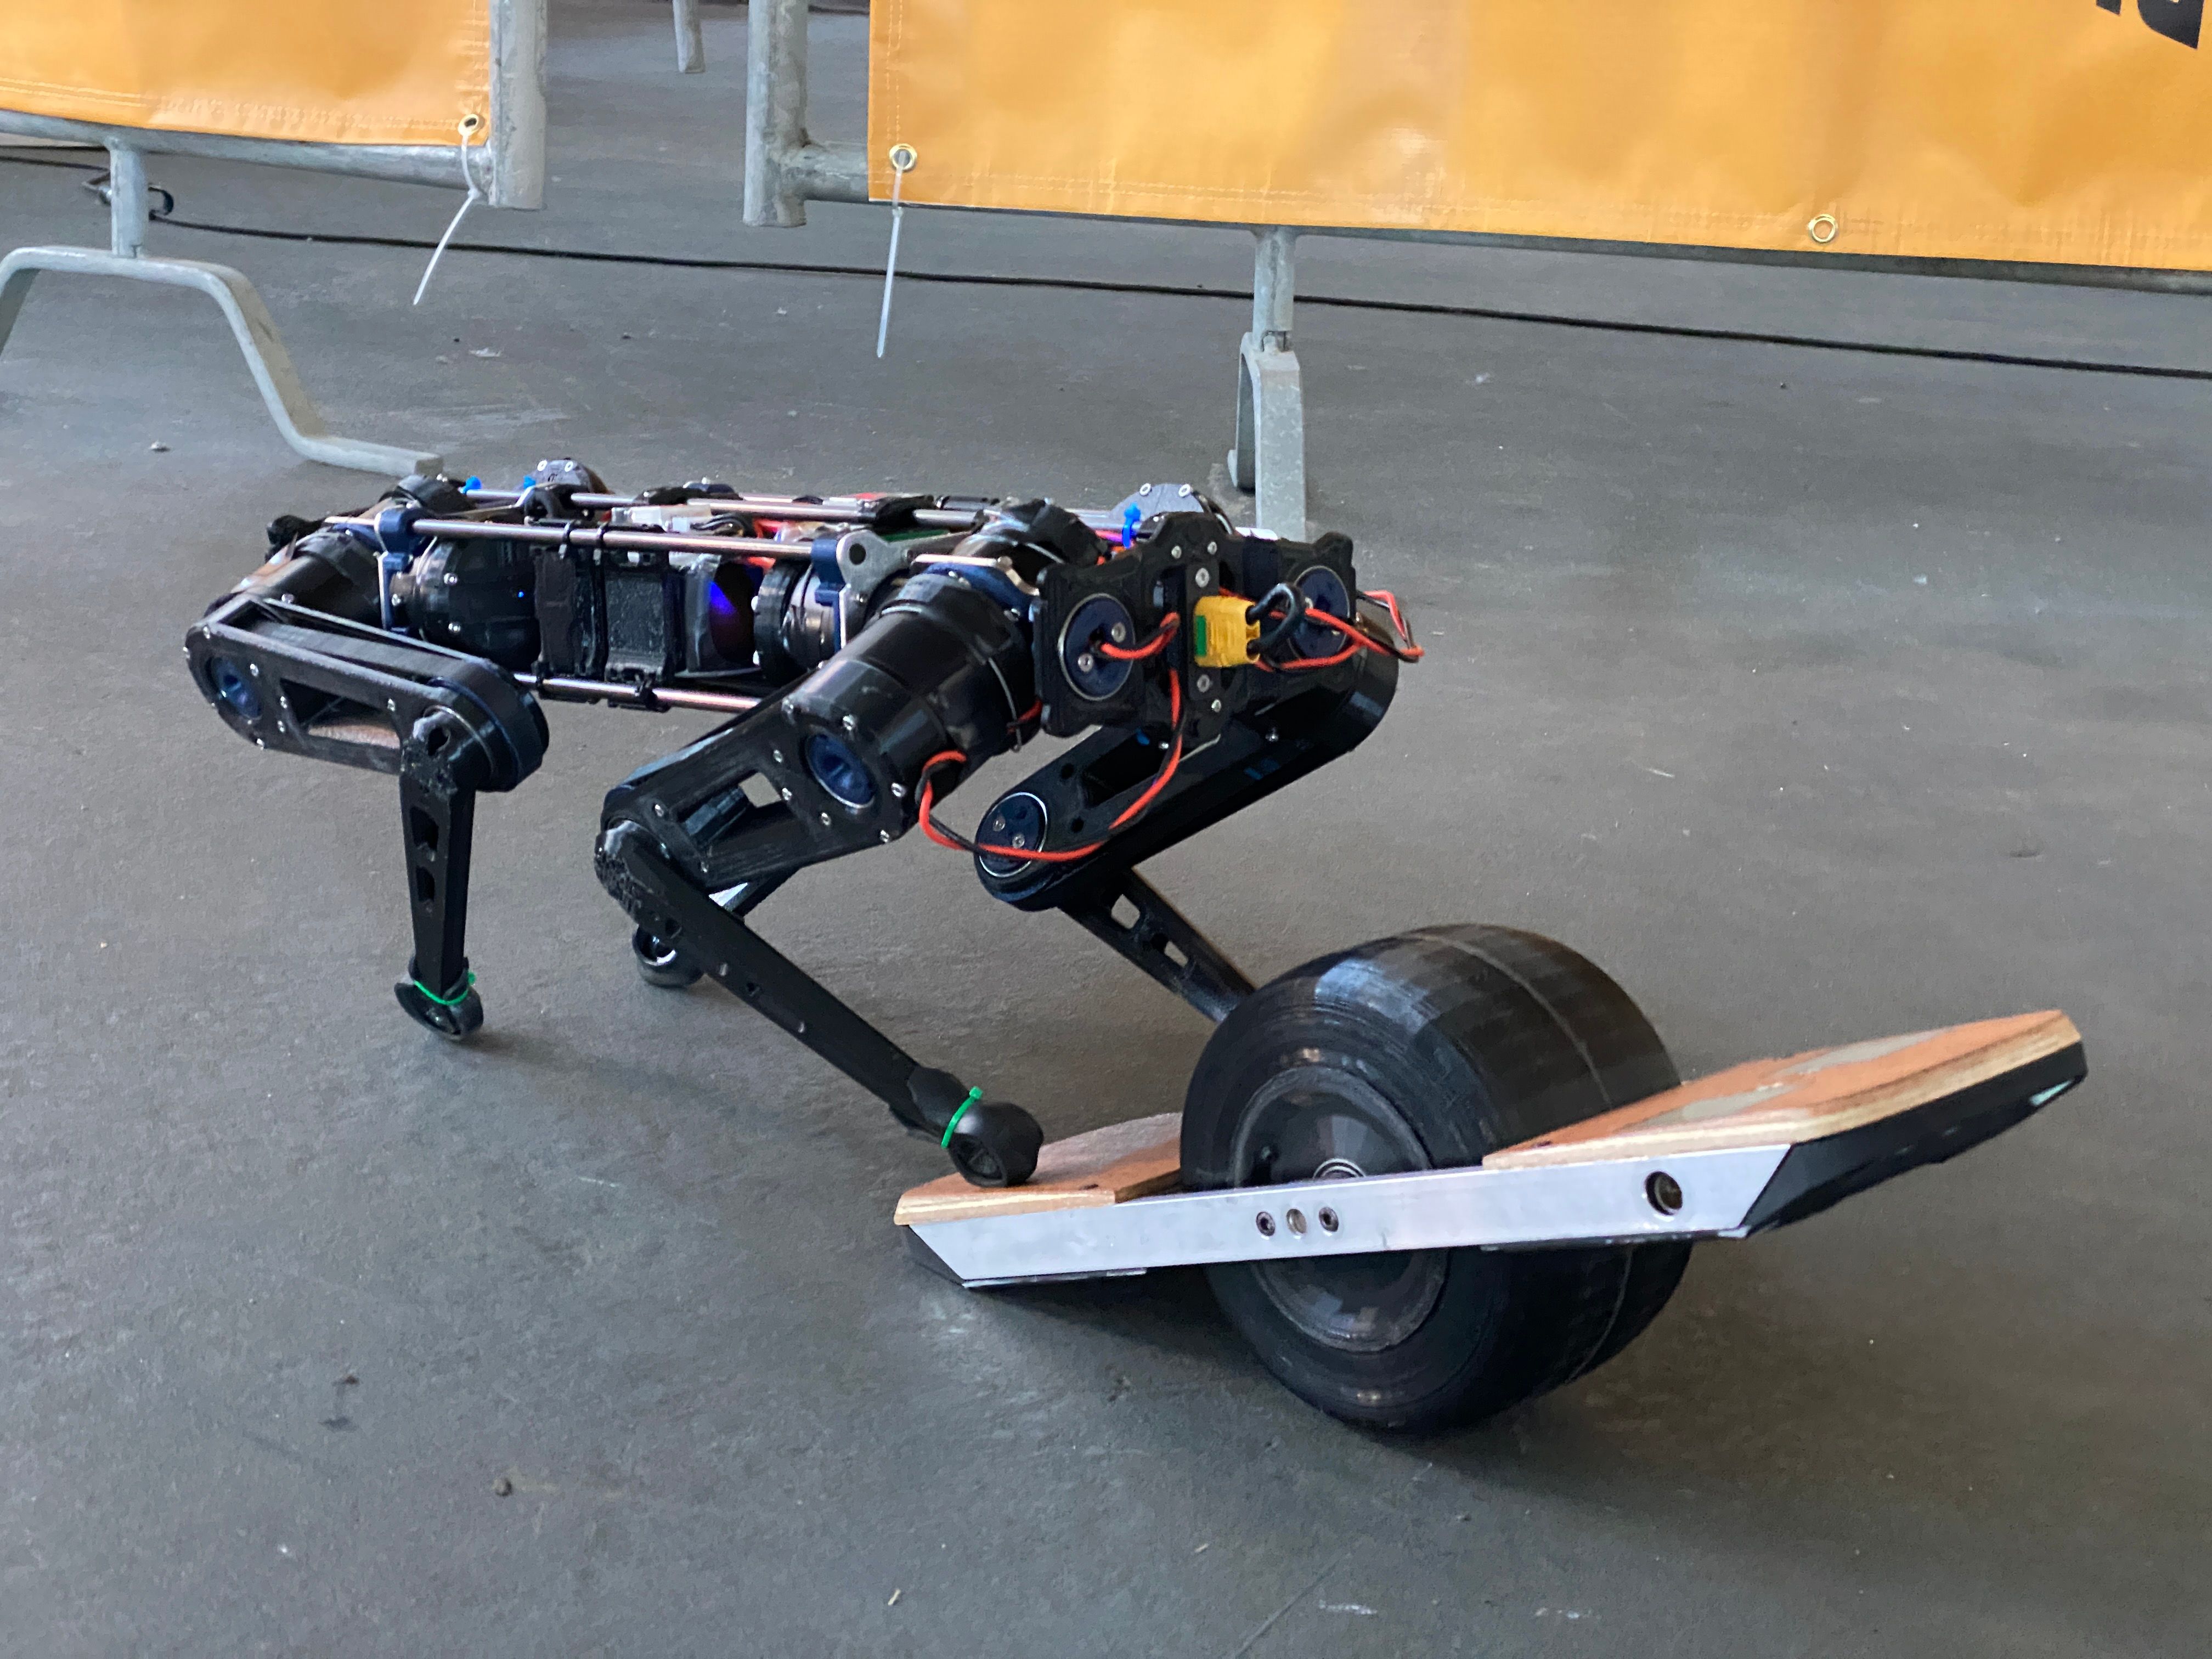
We had a robot dog try ride it... somewhat successfully. About as good as most people's first time.
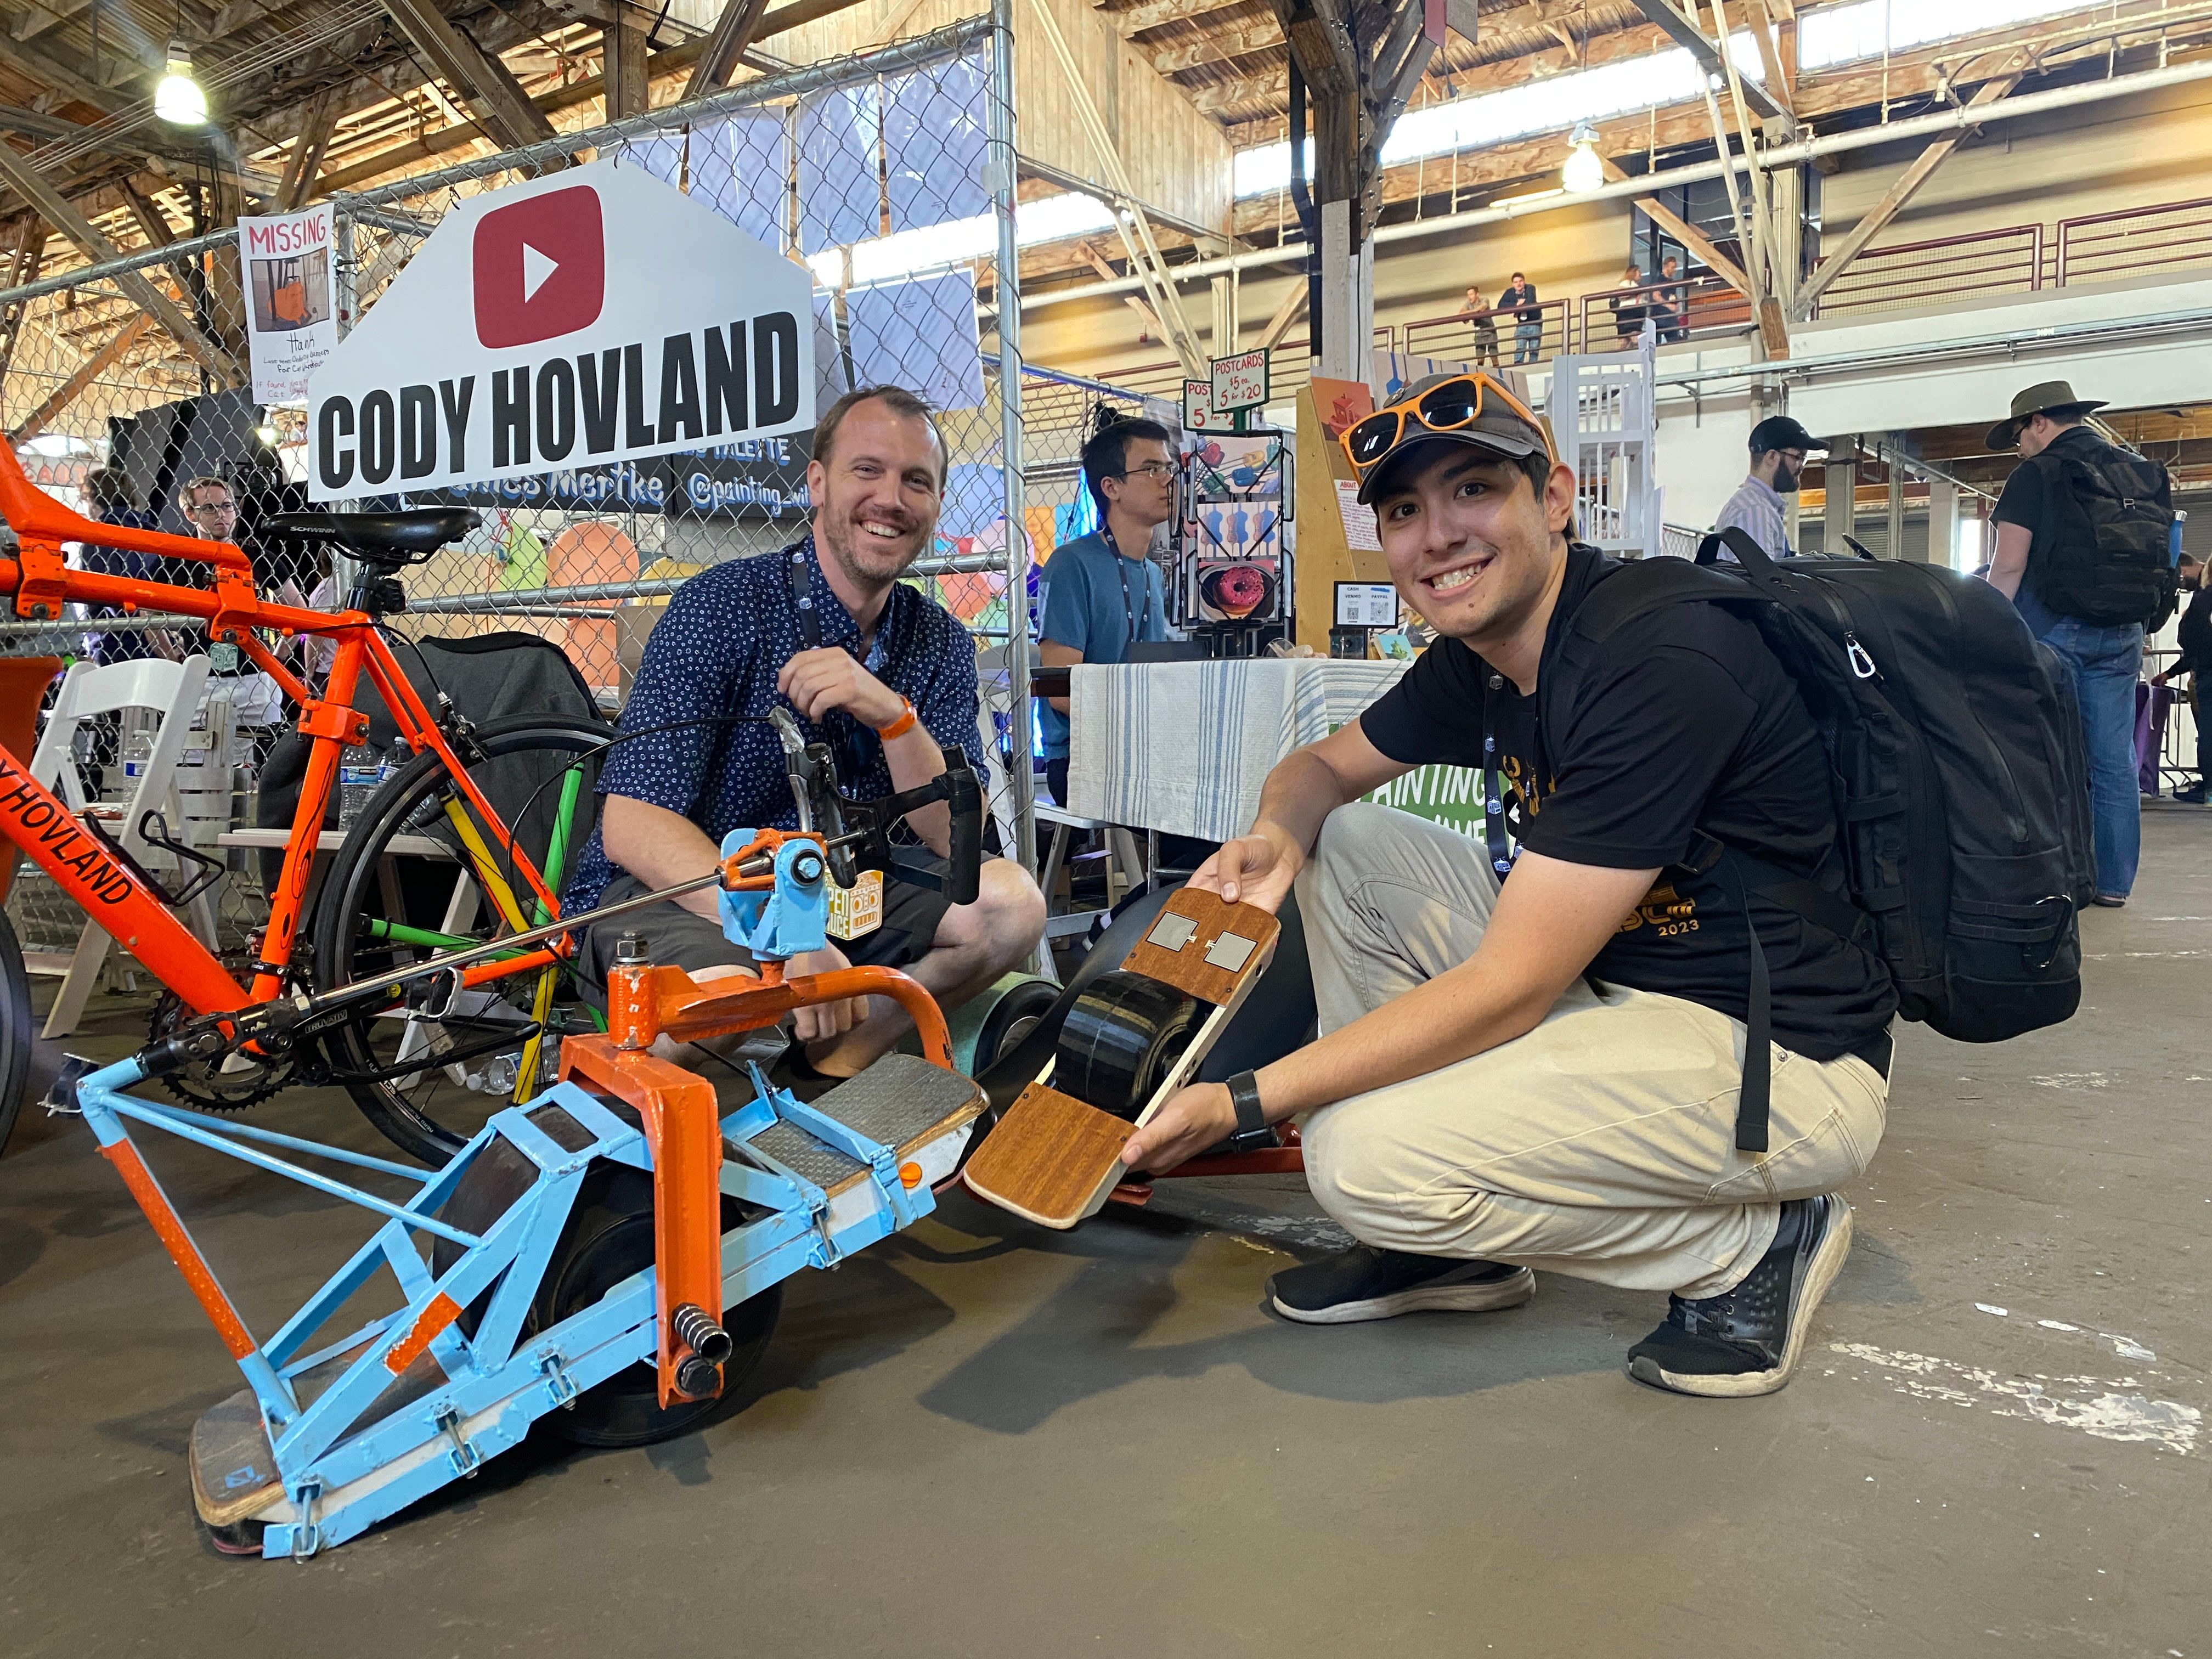
This caught the eye of Ian Davis who I at the time didn't even realise was recording us till after the fact.

https://www.youtube.com/watch?v=el1jDh9jaUg&list=LL&t=167sofc we finished up the second night with pizza.
It was a very fun event and extremely fun to meet dozens of people that wanted to ask questions about the board. After all of this I'm itching (again) to carry on. After the headlights and xr controller pcb swap I will likely begin this again ^-^ Especially since me and Nick might actually have a booth next year and will try to show off a few more finished versions among other things we've both worked on.
-
@lia You really should have posted these as separate items in the thread, so we could give it all the upvotes it deserves. It looks like you had fun at the convention!