Followup to the Onewheel XS
-
@sirgu It's doing shockingly well considering that TPU isn't very grippy. Definitely need to cast a tire from rubber instead.
Kind of amusing how if I add any sort of instability on the throw it keeps it on the return. PIDs are really basic so might explain the lack of damping.
@S-Leon Rambunctious indeed!It's definitely starting to take on a personality or an attitude.
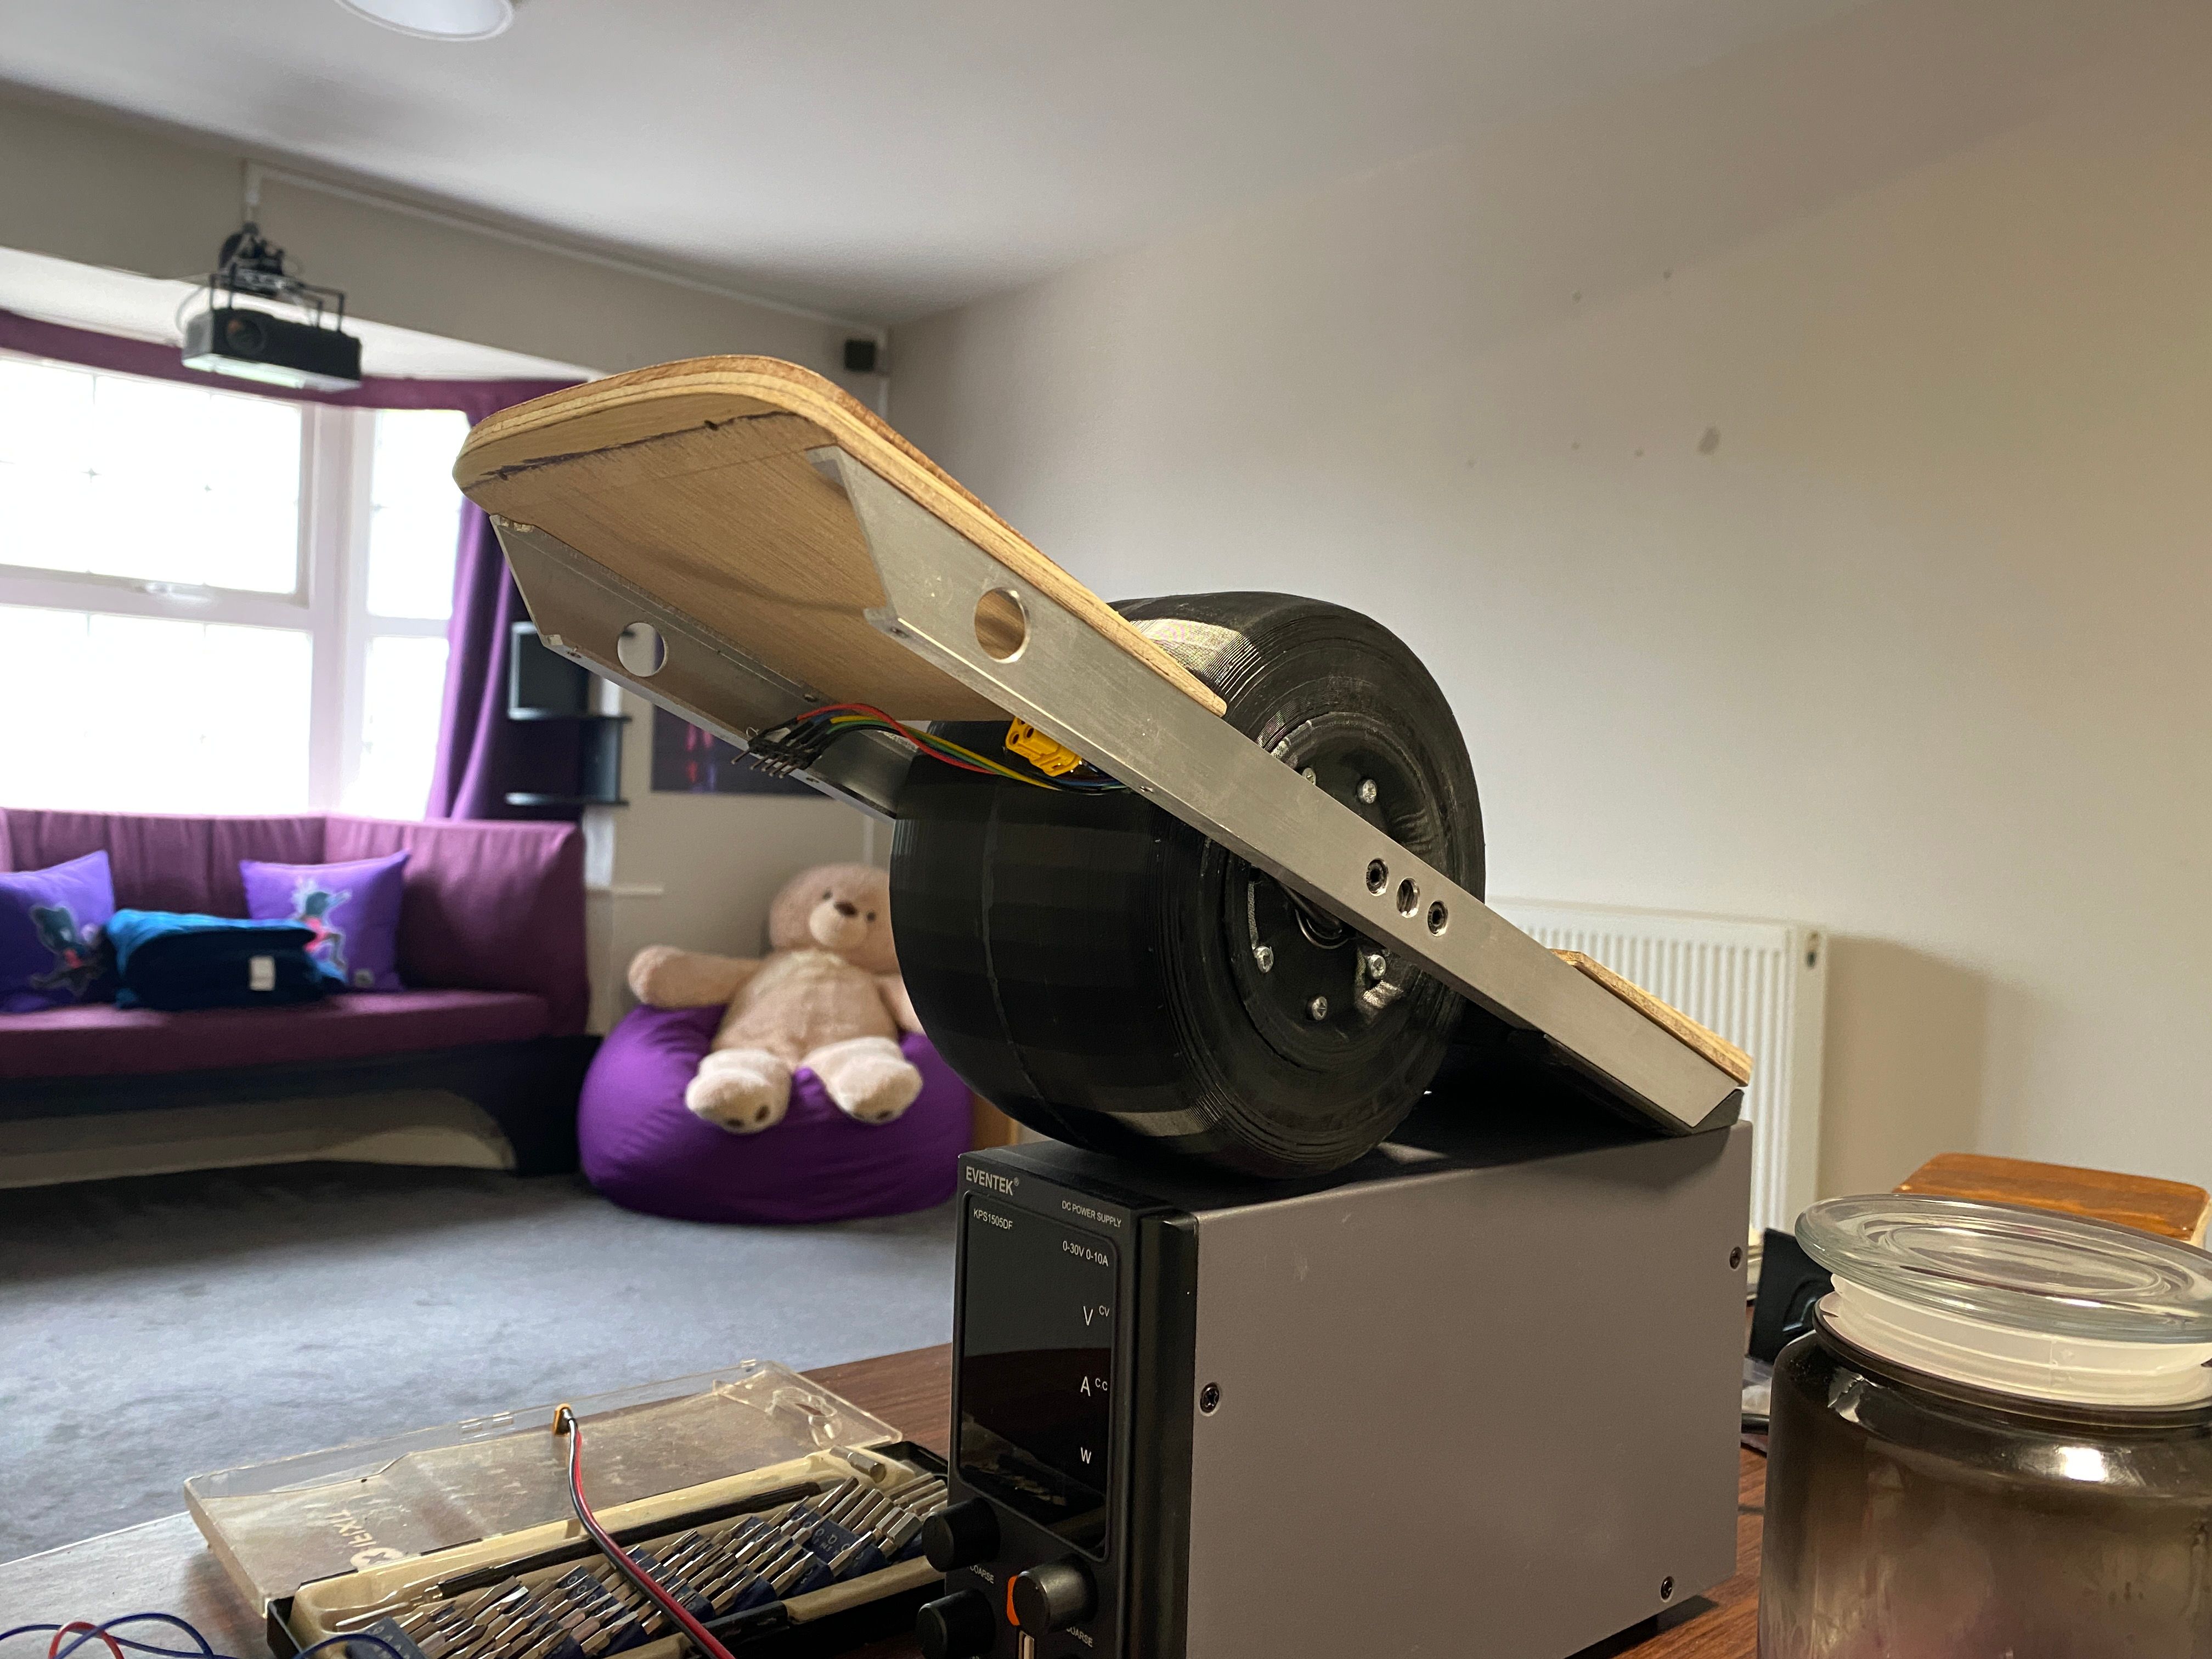
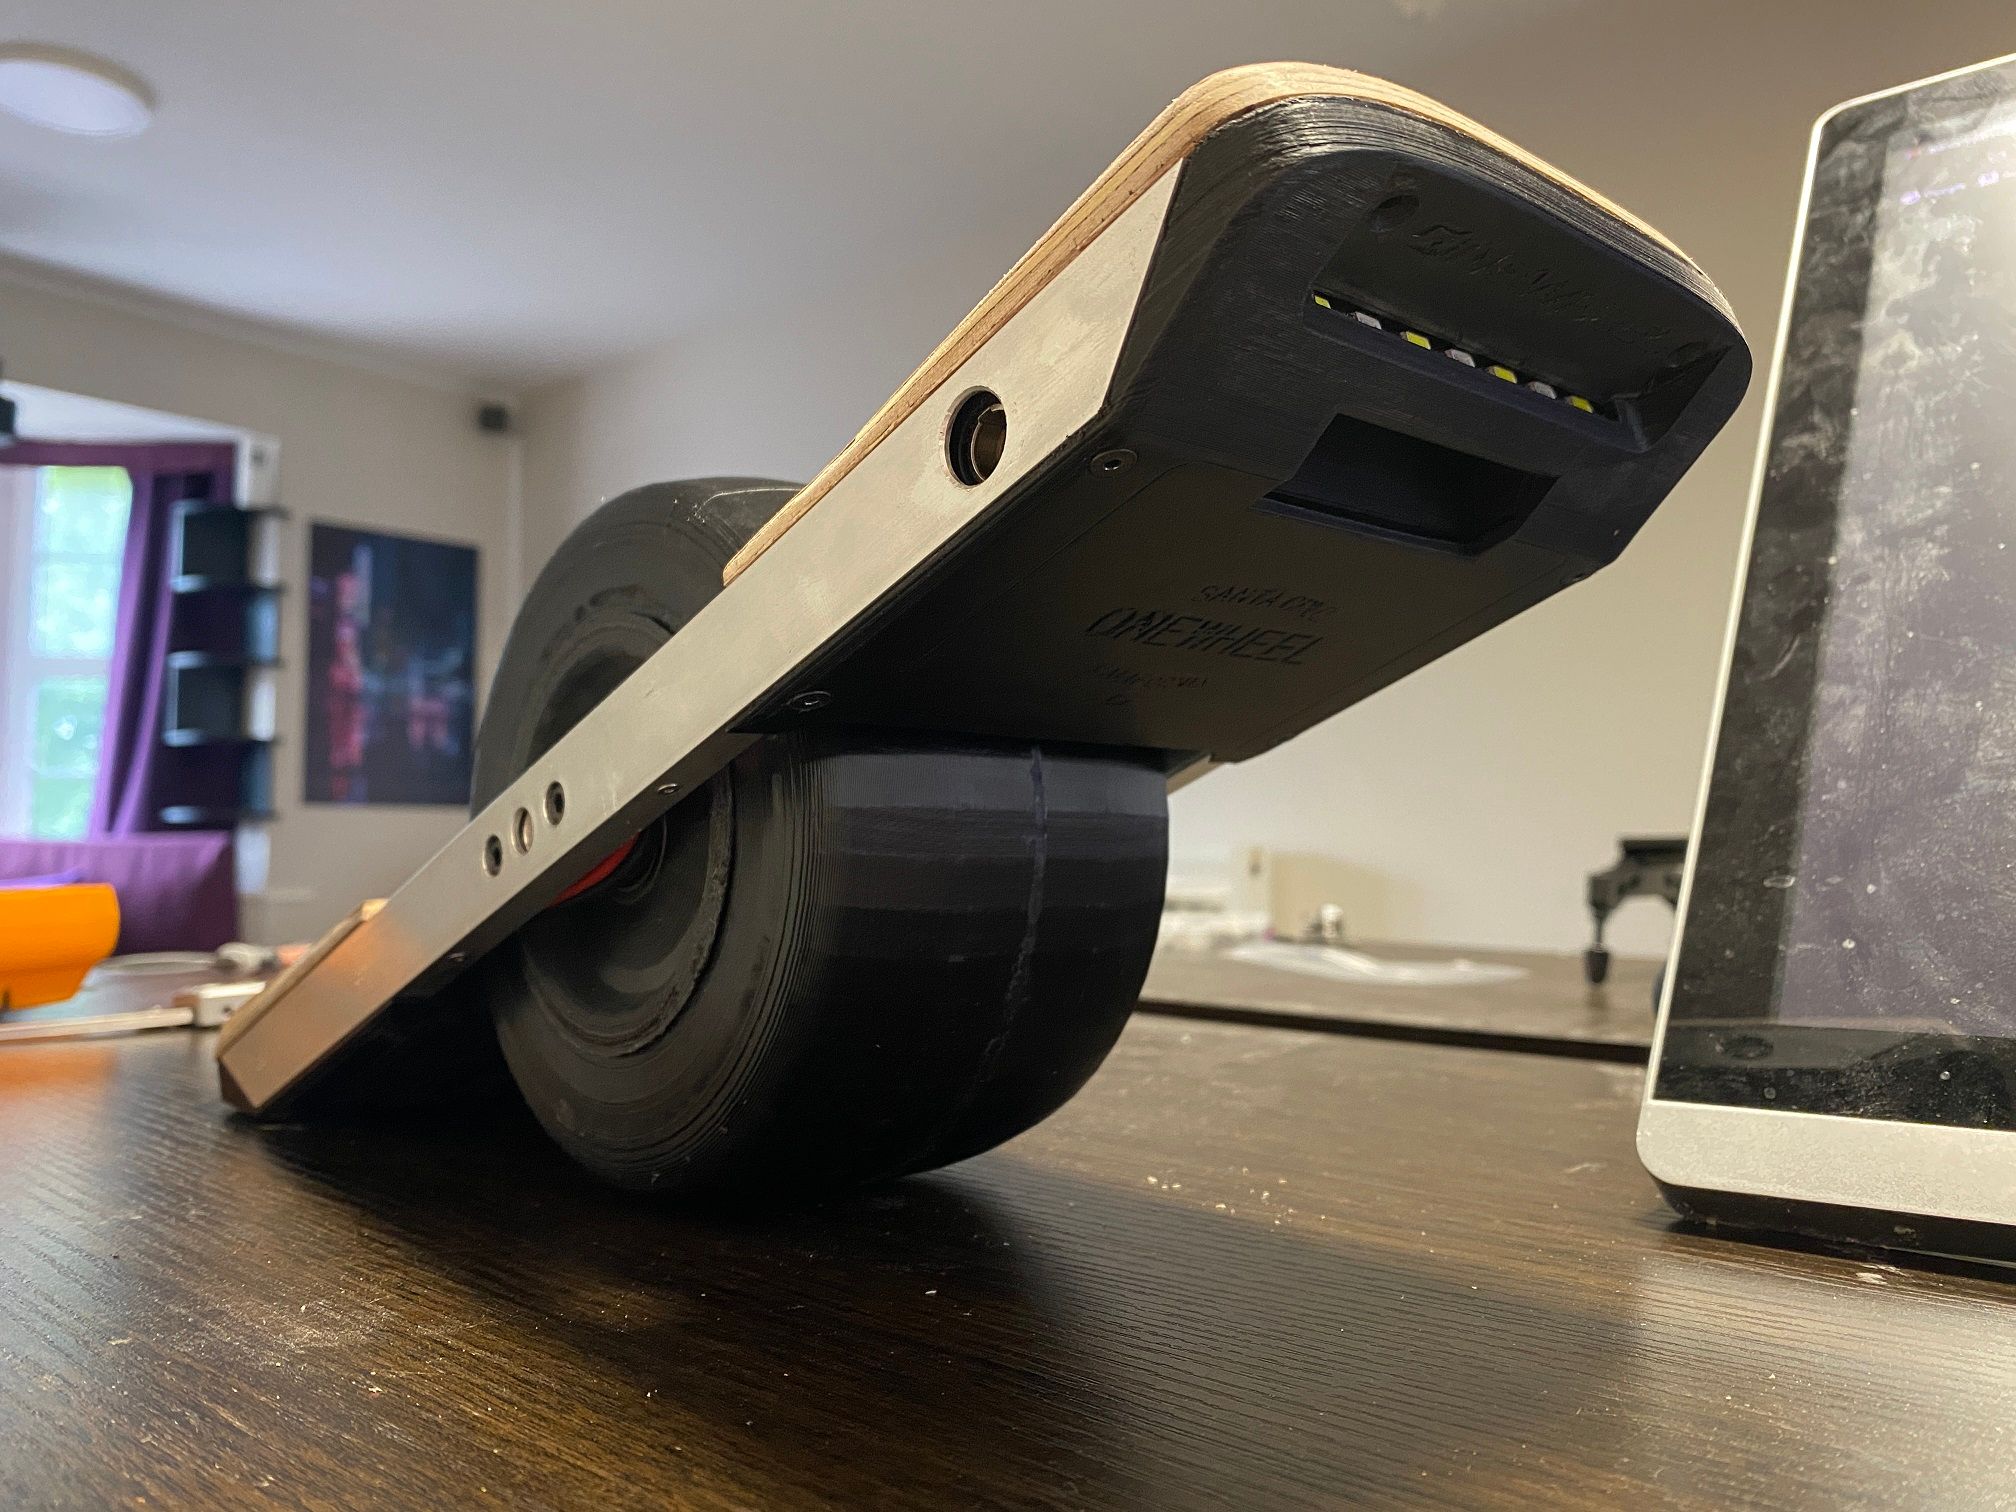
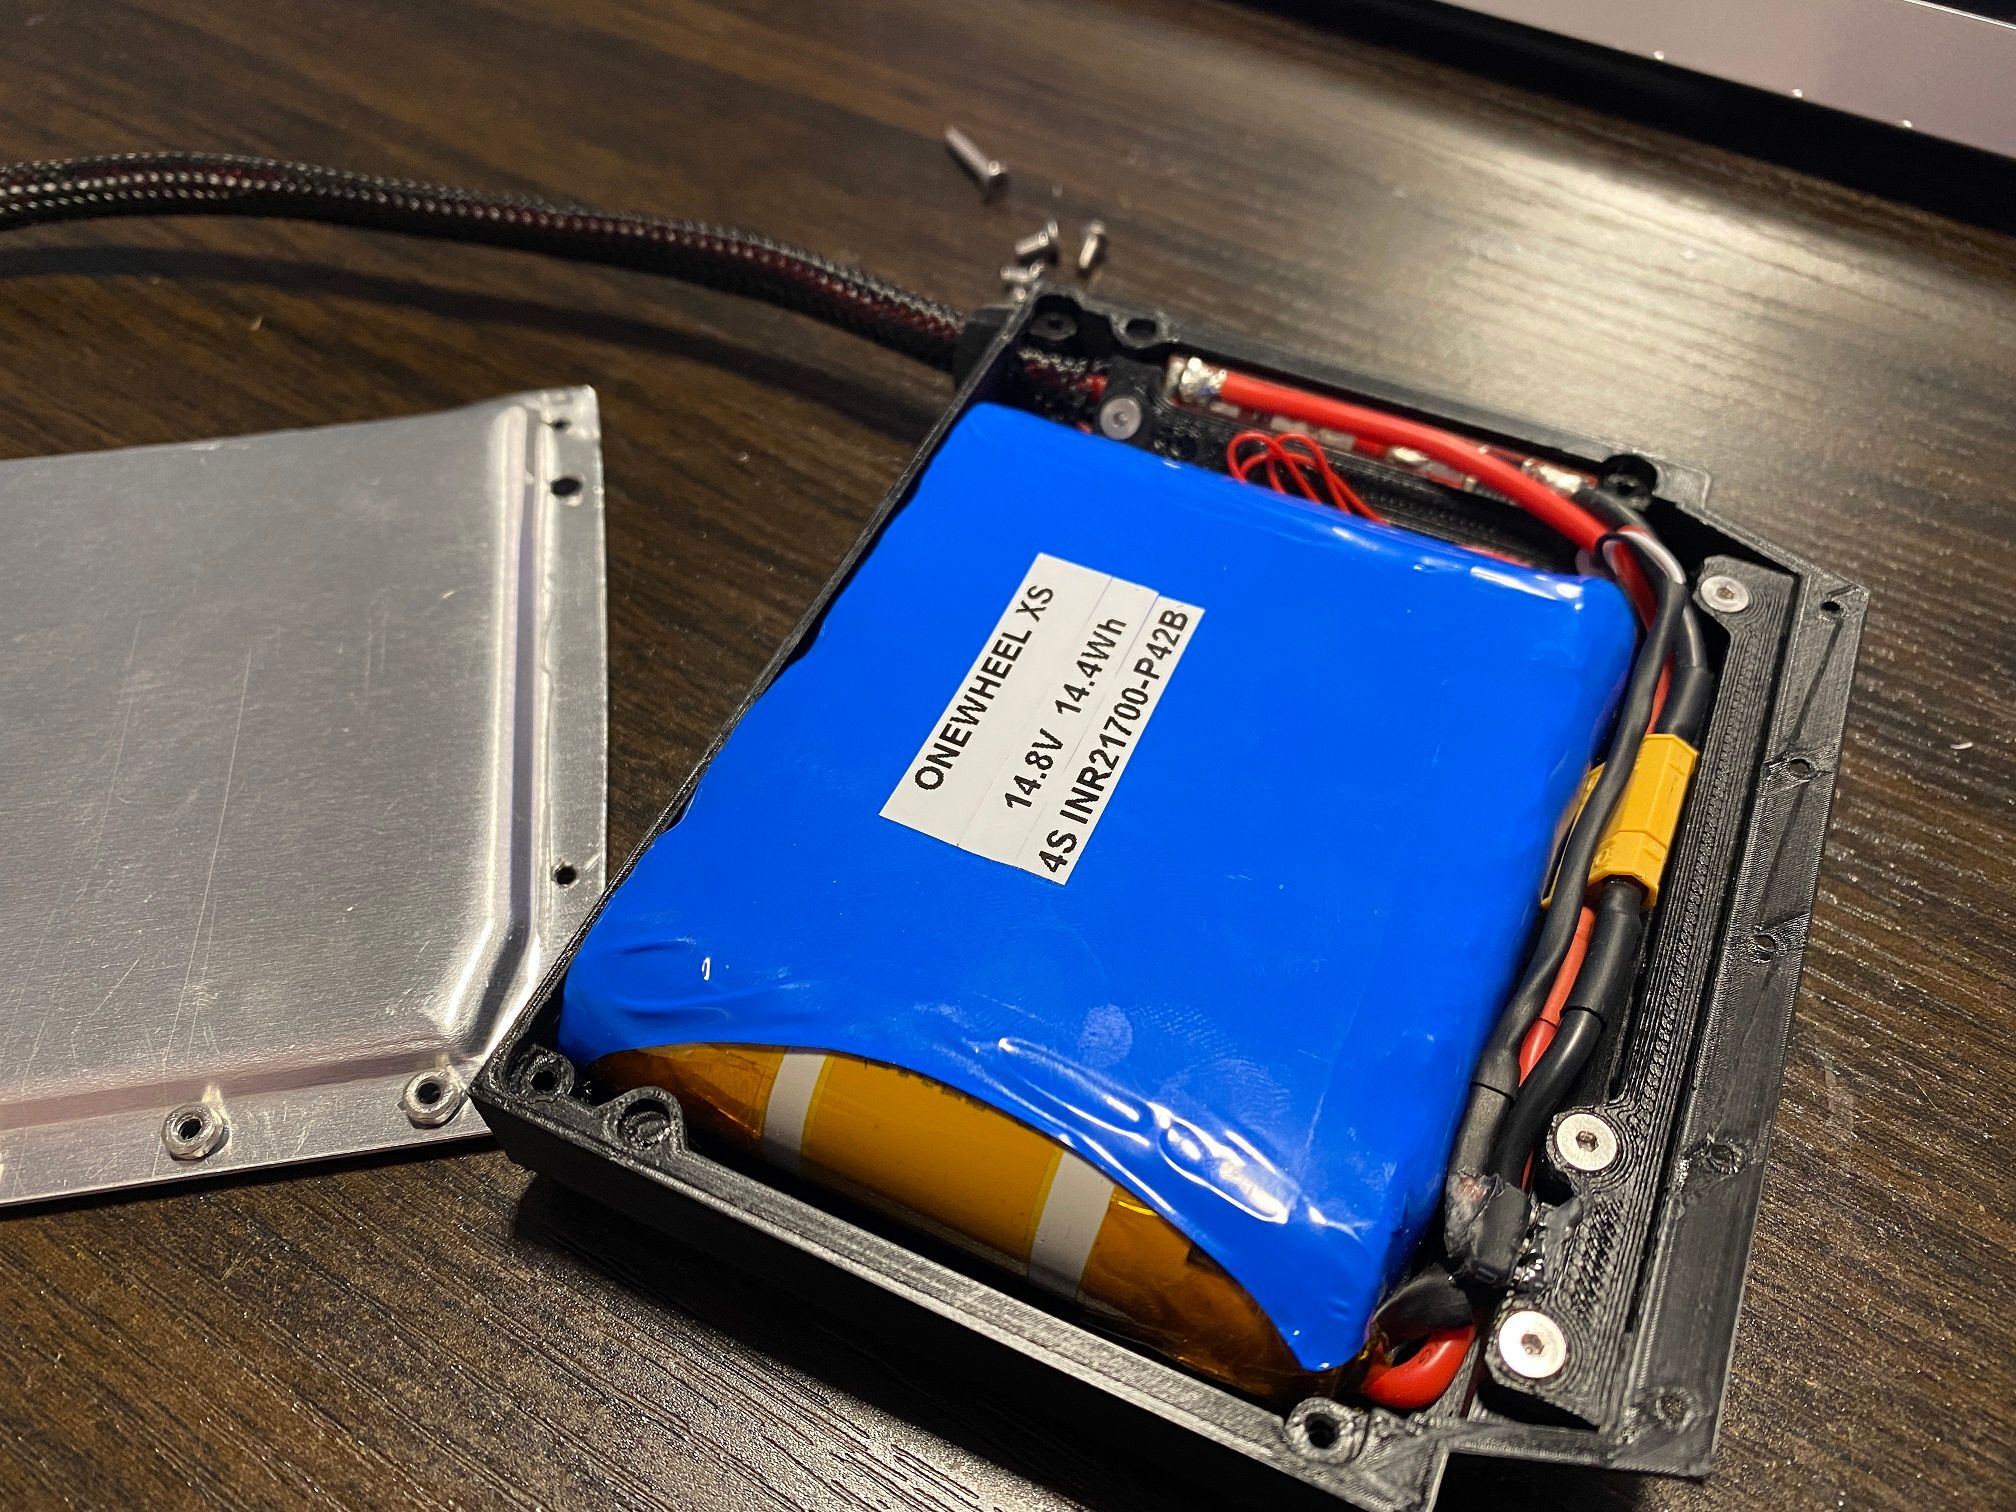
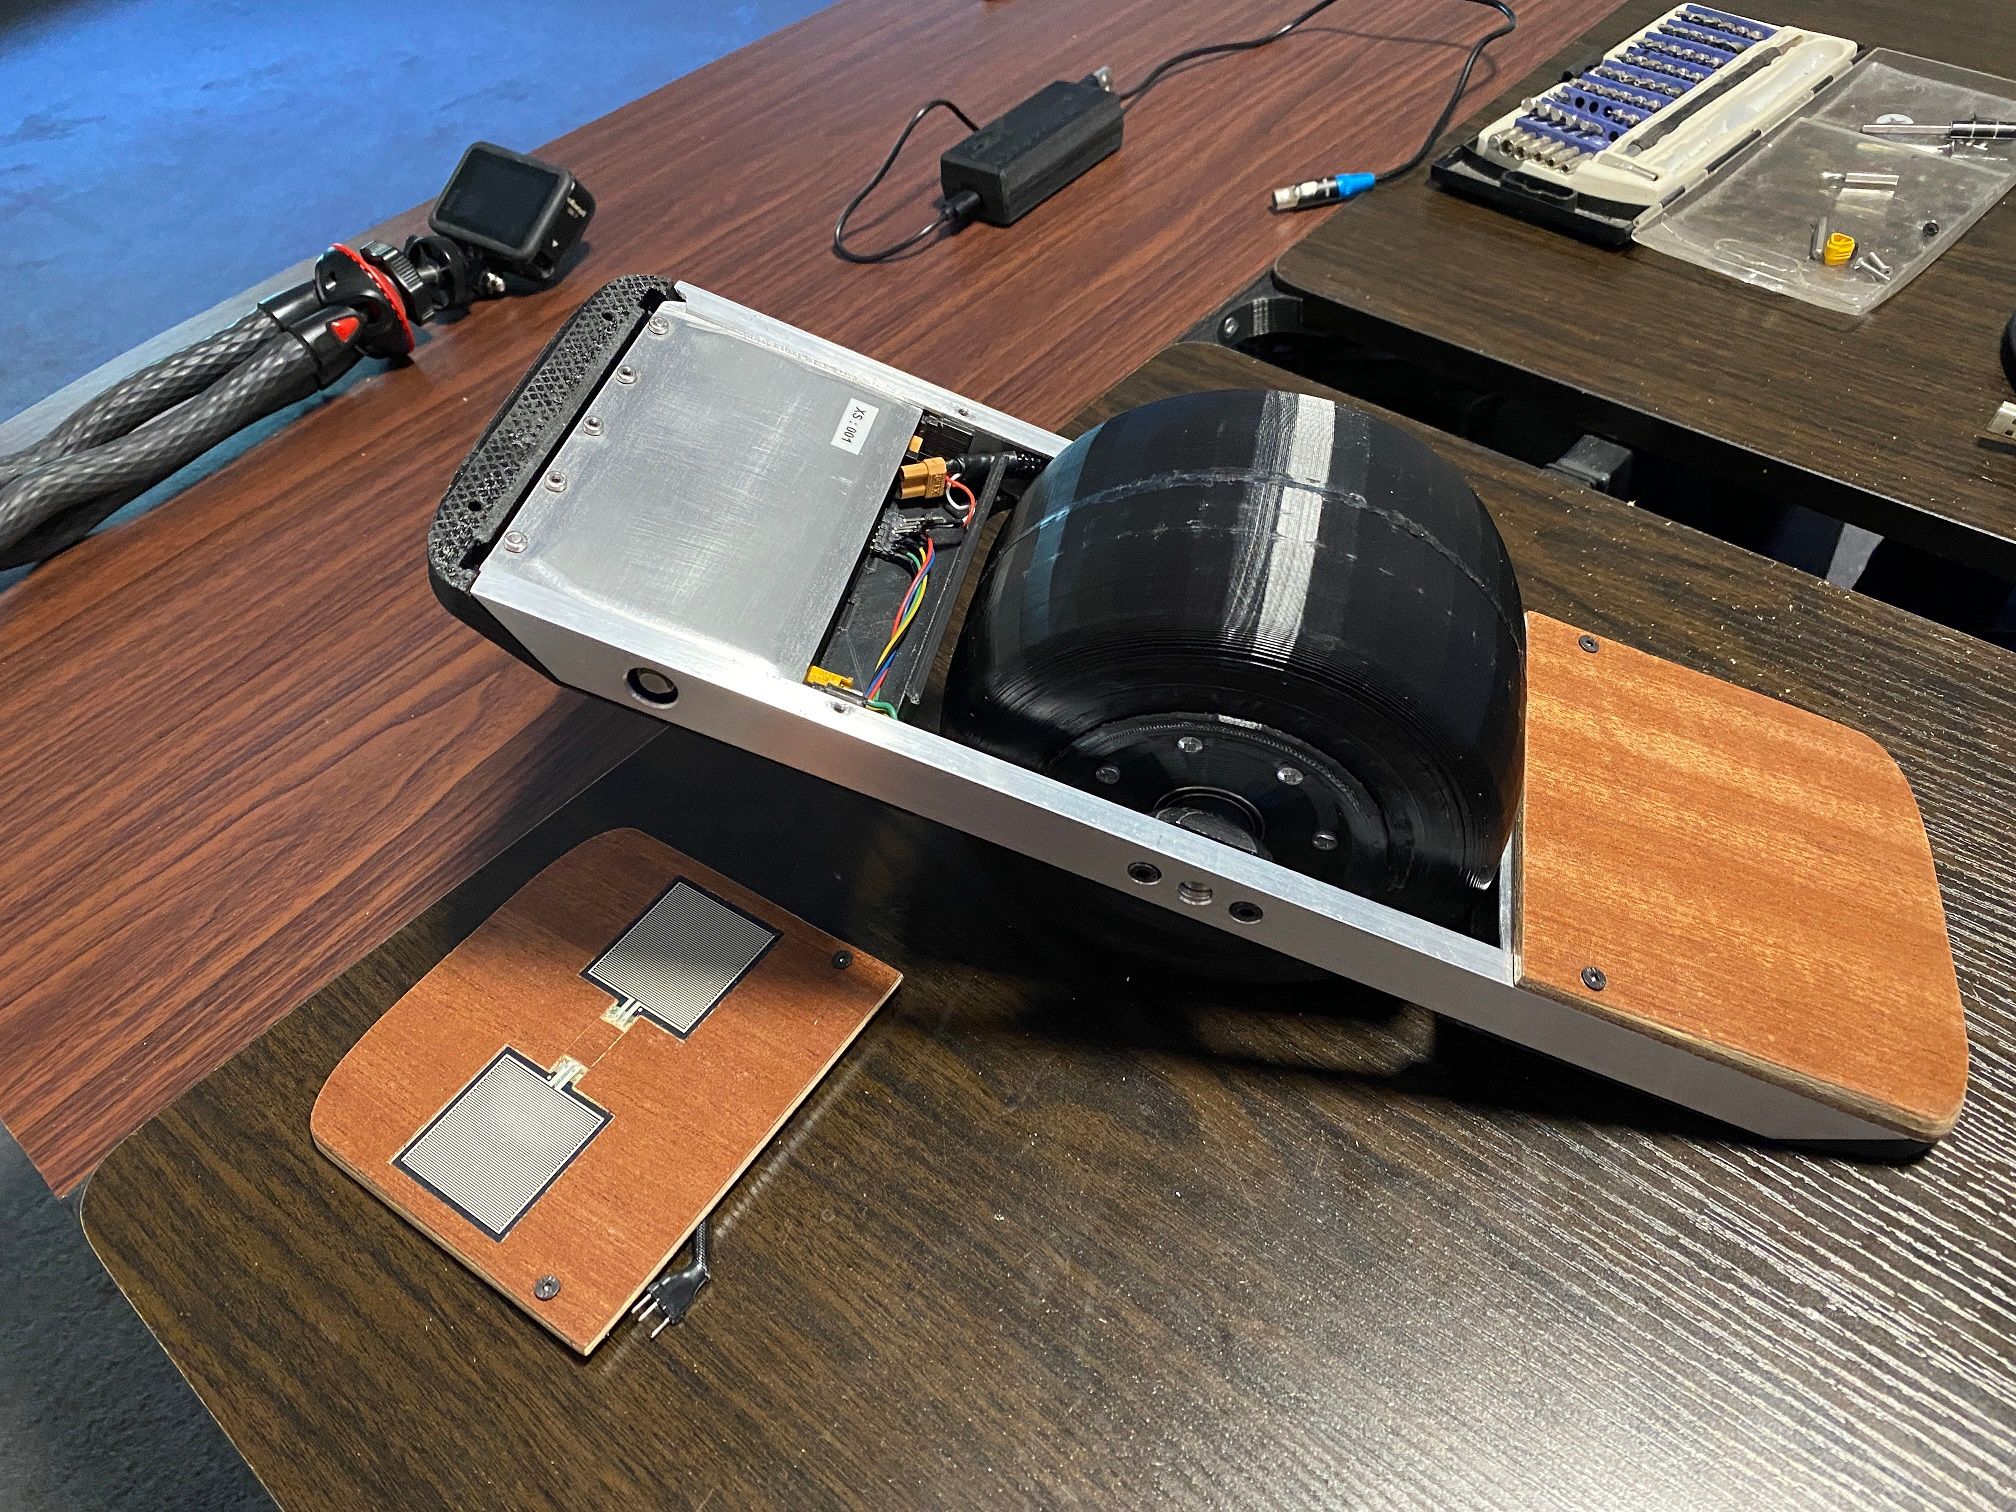
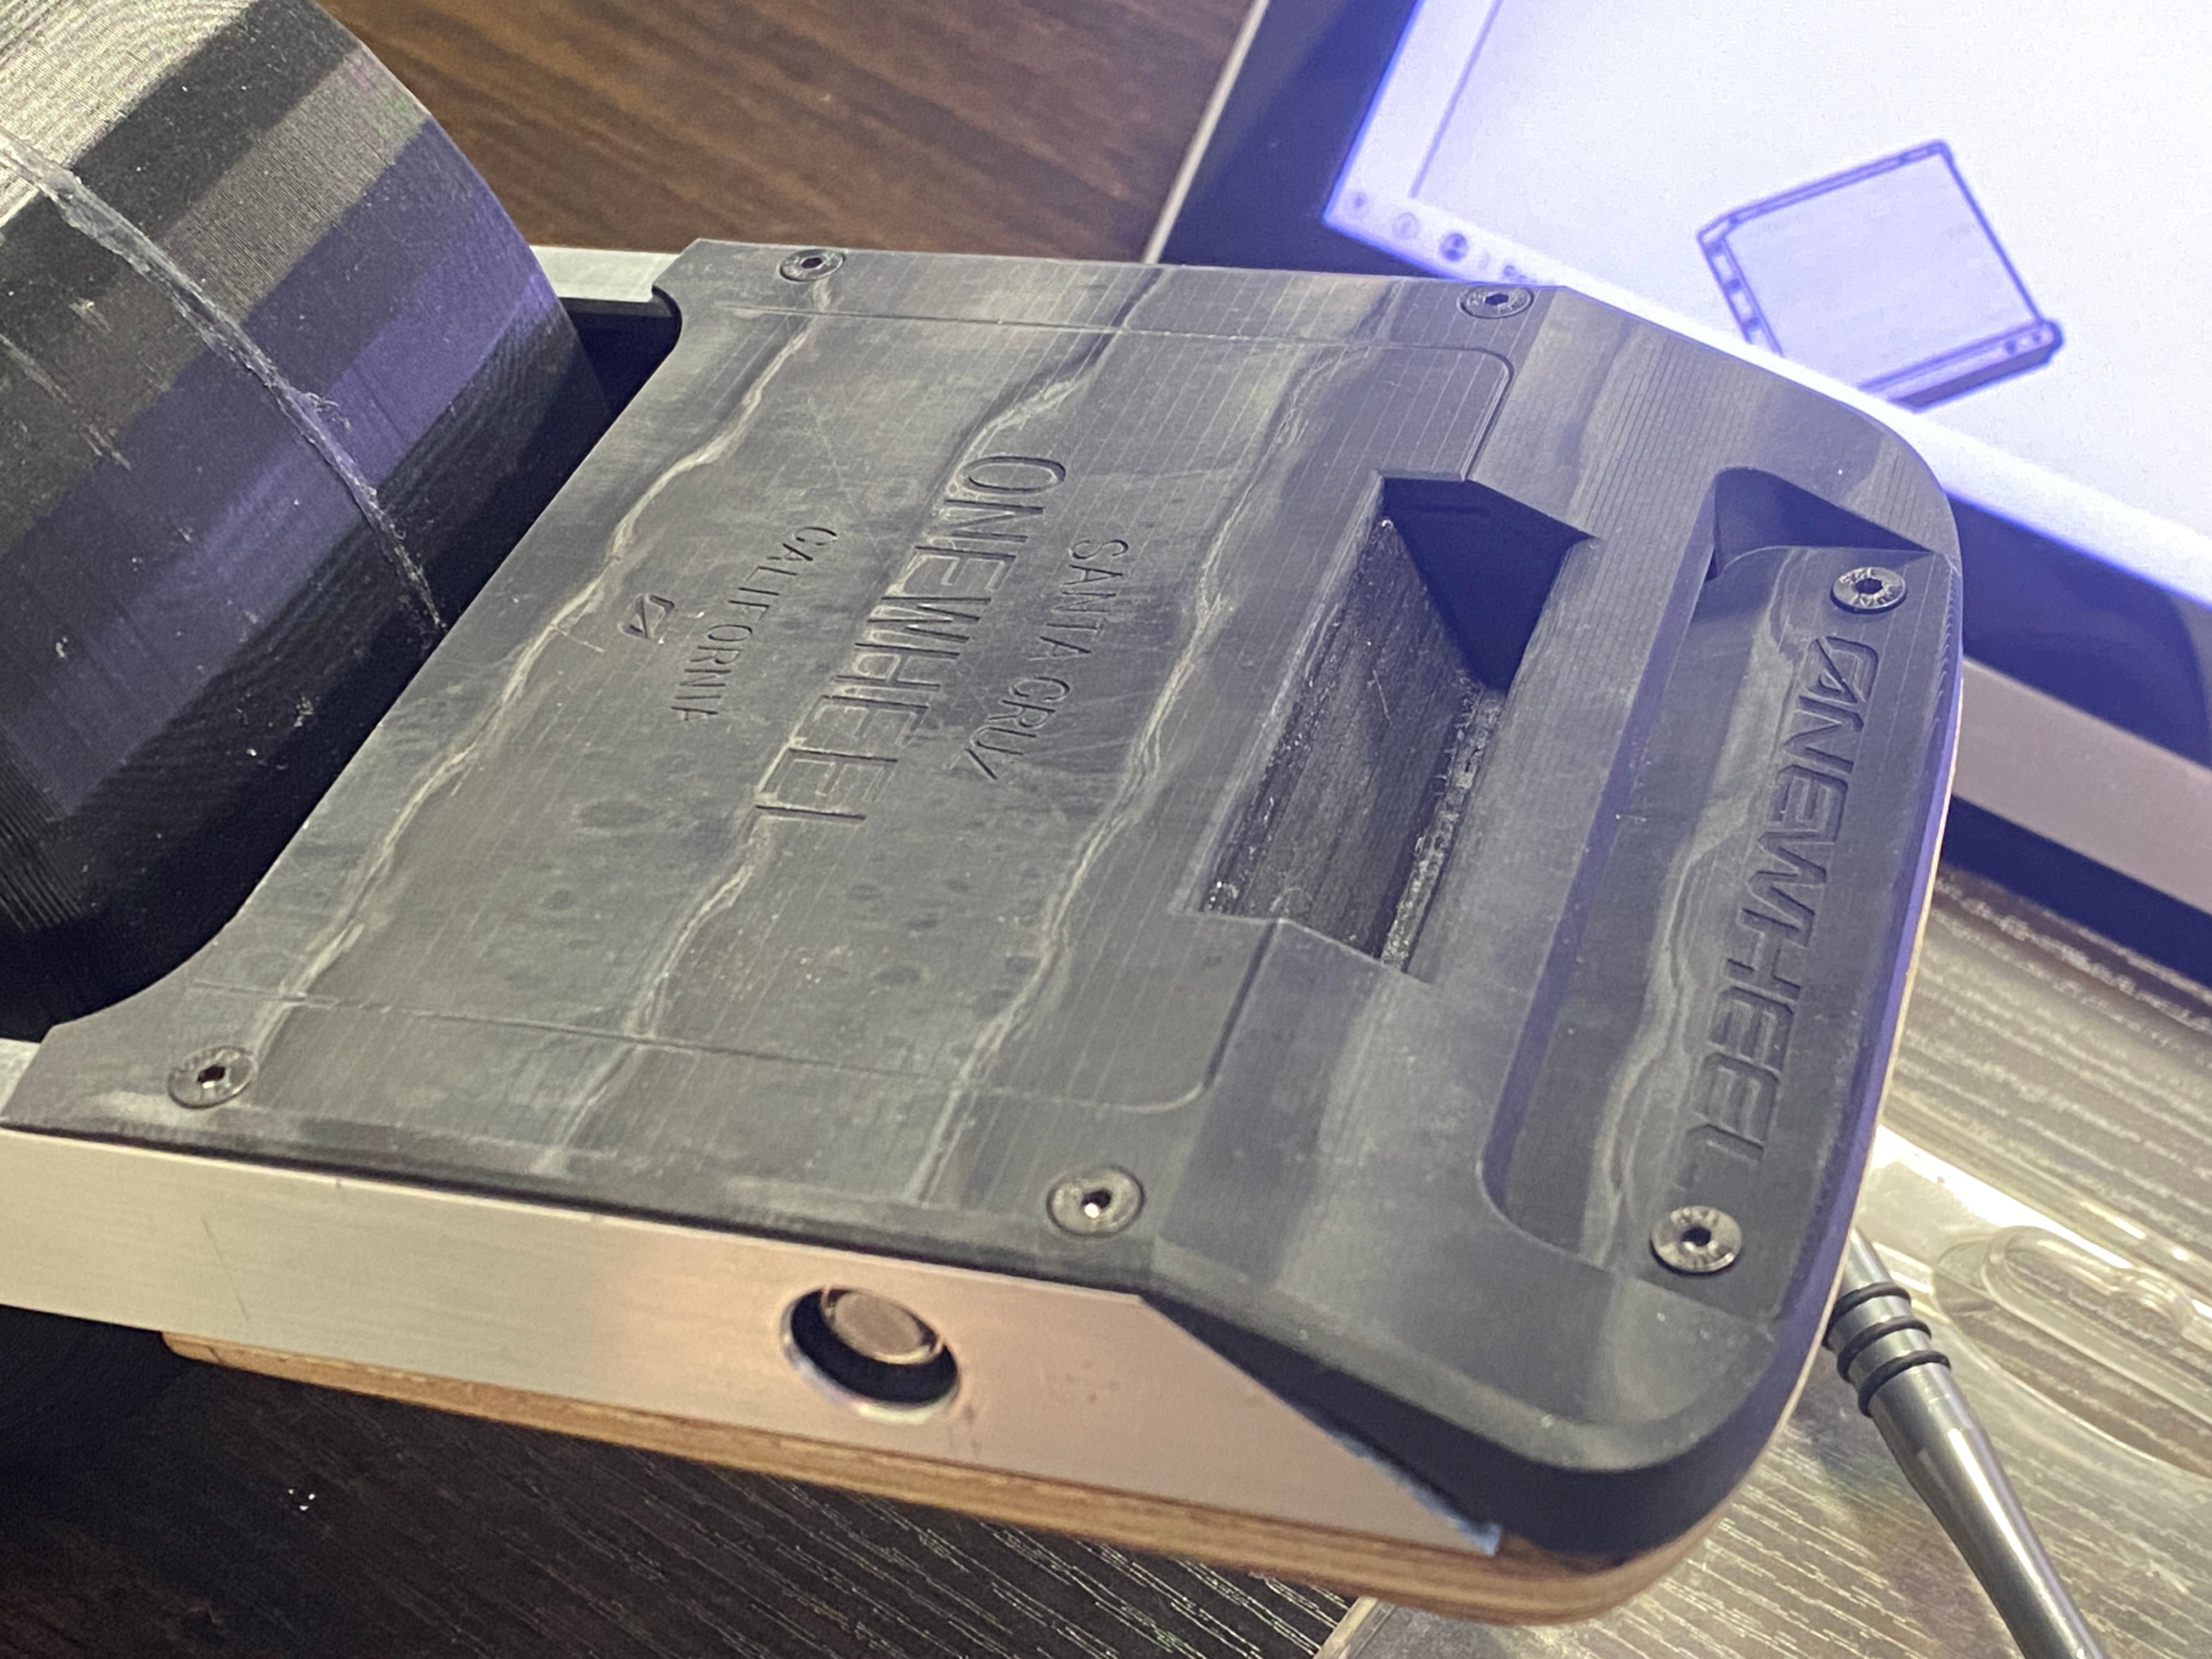
One pic I took of it a few days ago actually reminded me of a pic you took of your Plus when showing the missing battery section. Just the un-anodised rails, pad and cavity underneath.
-
I've been holding back, got some bits done that I'm particularly proud of but wanted to wait till after releasing a video before sharing ;)
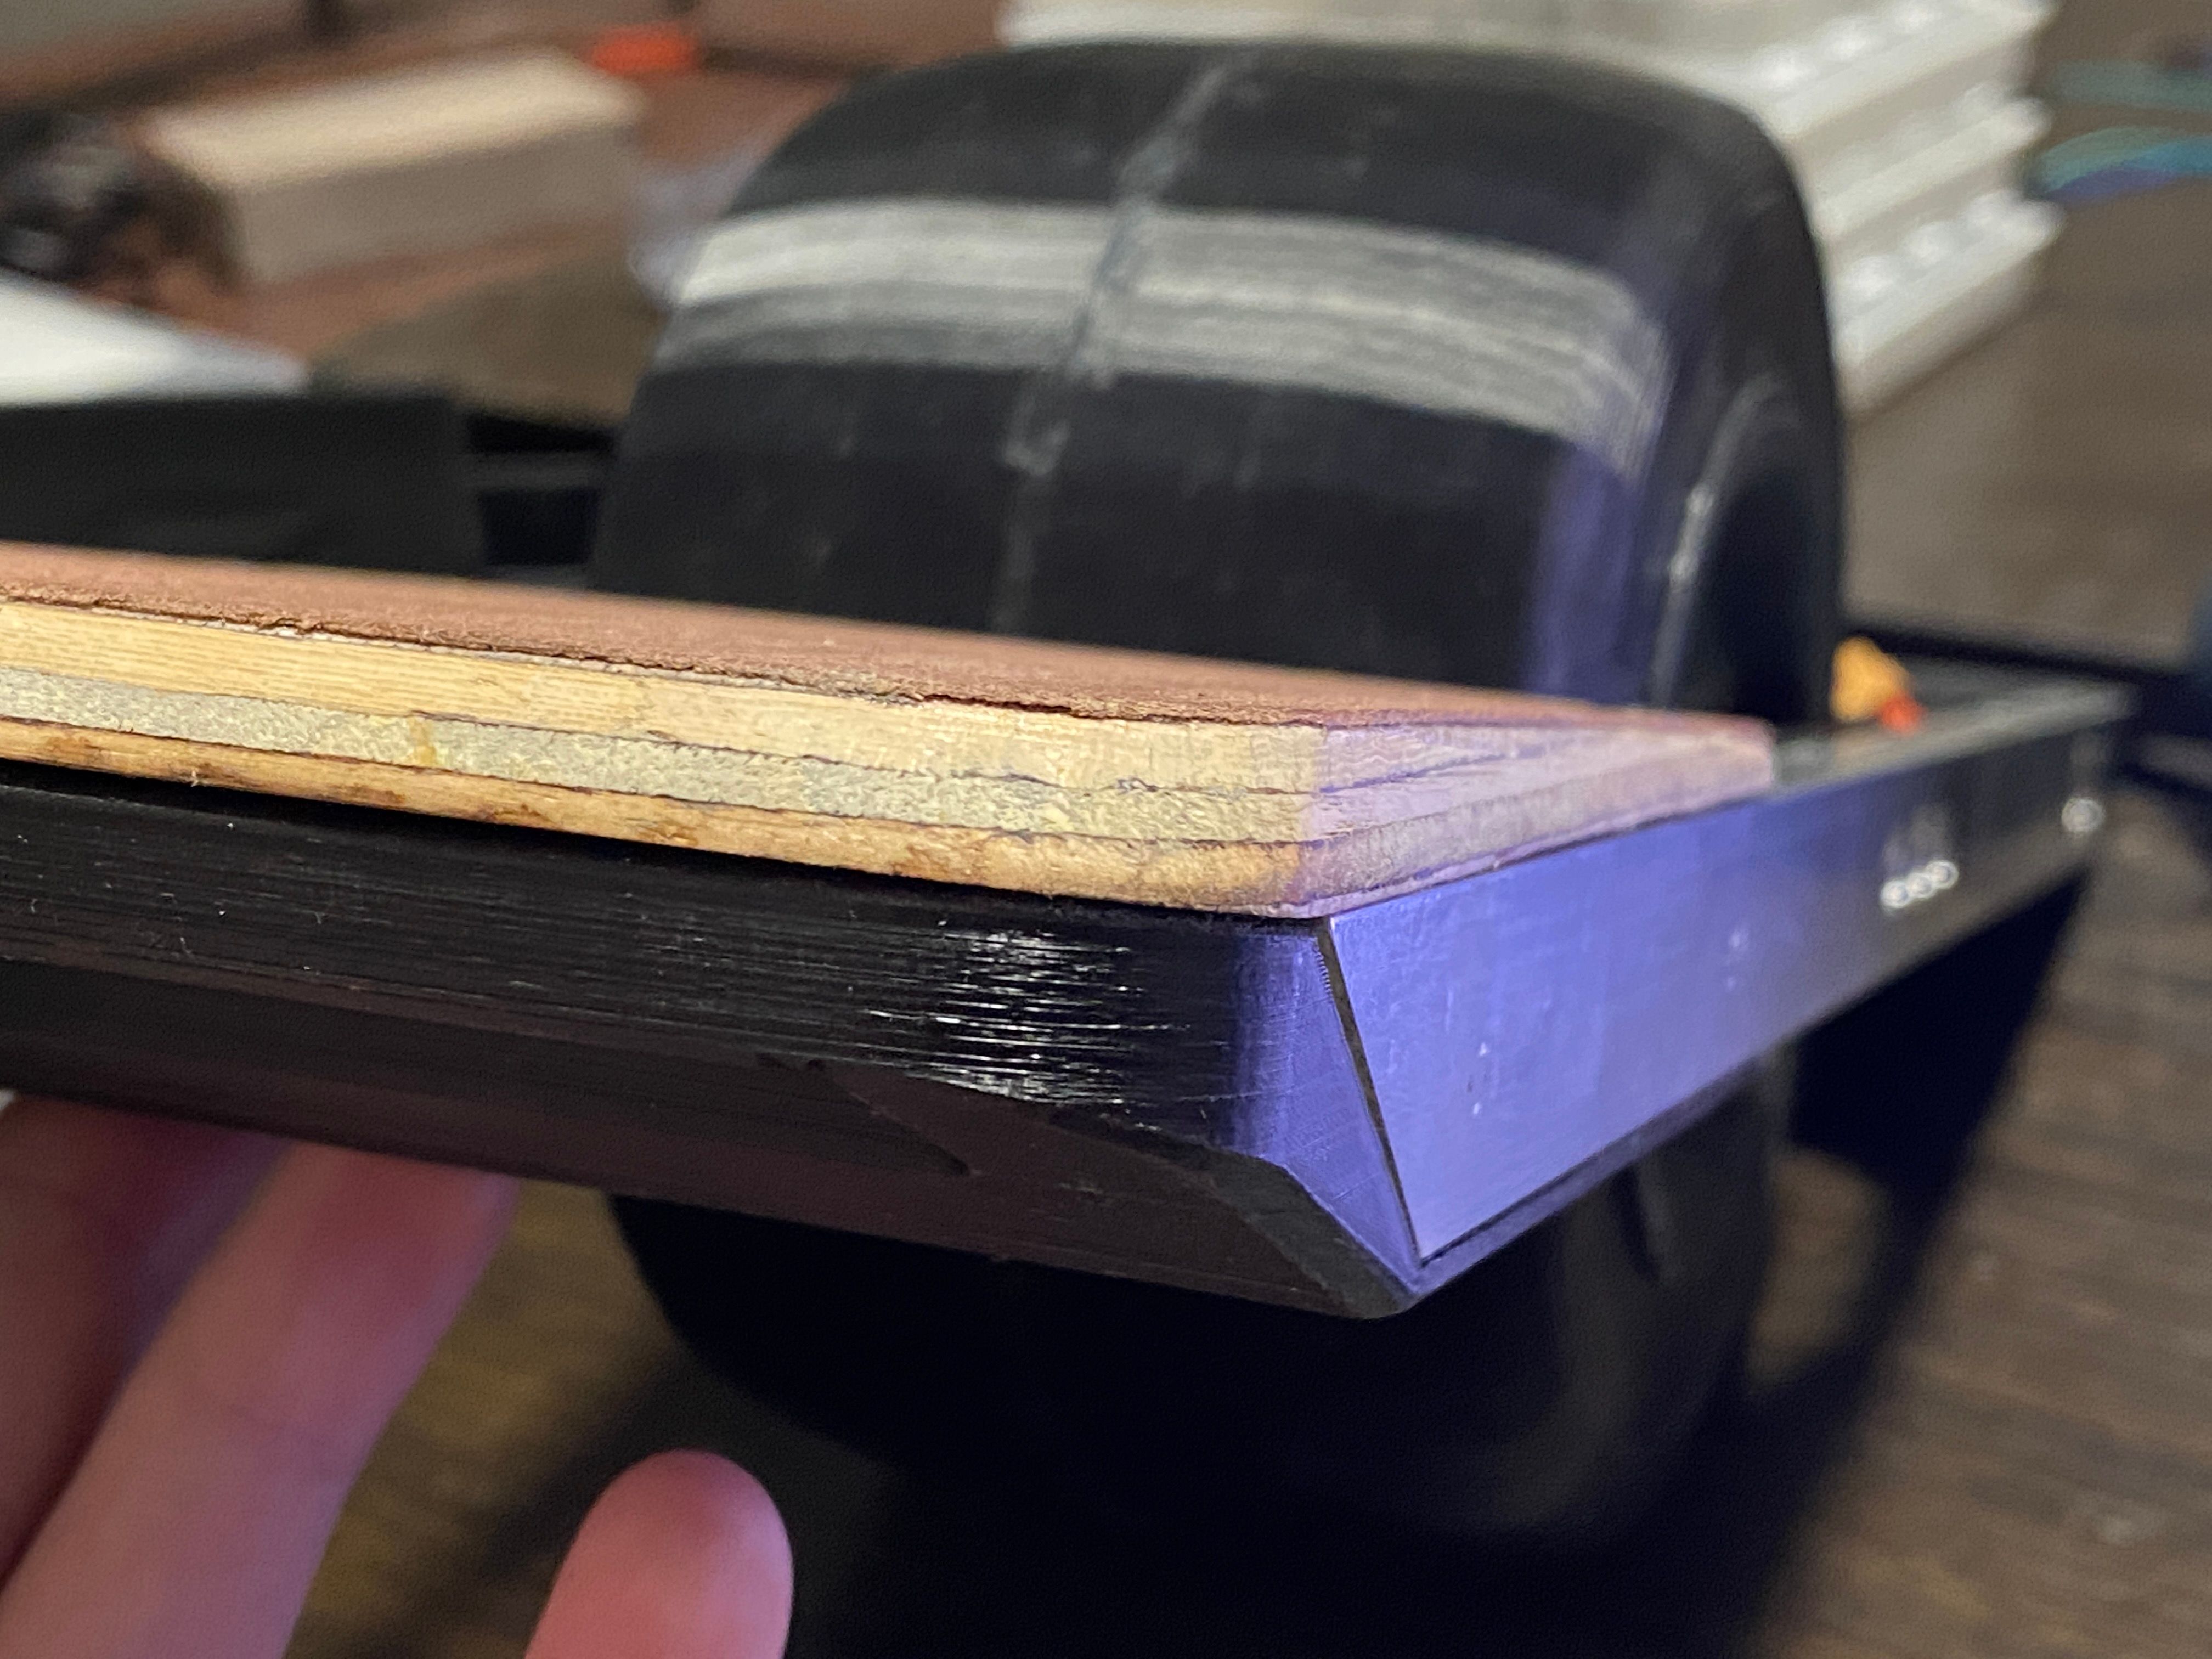
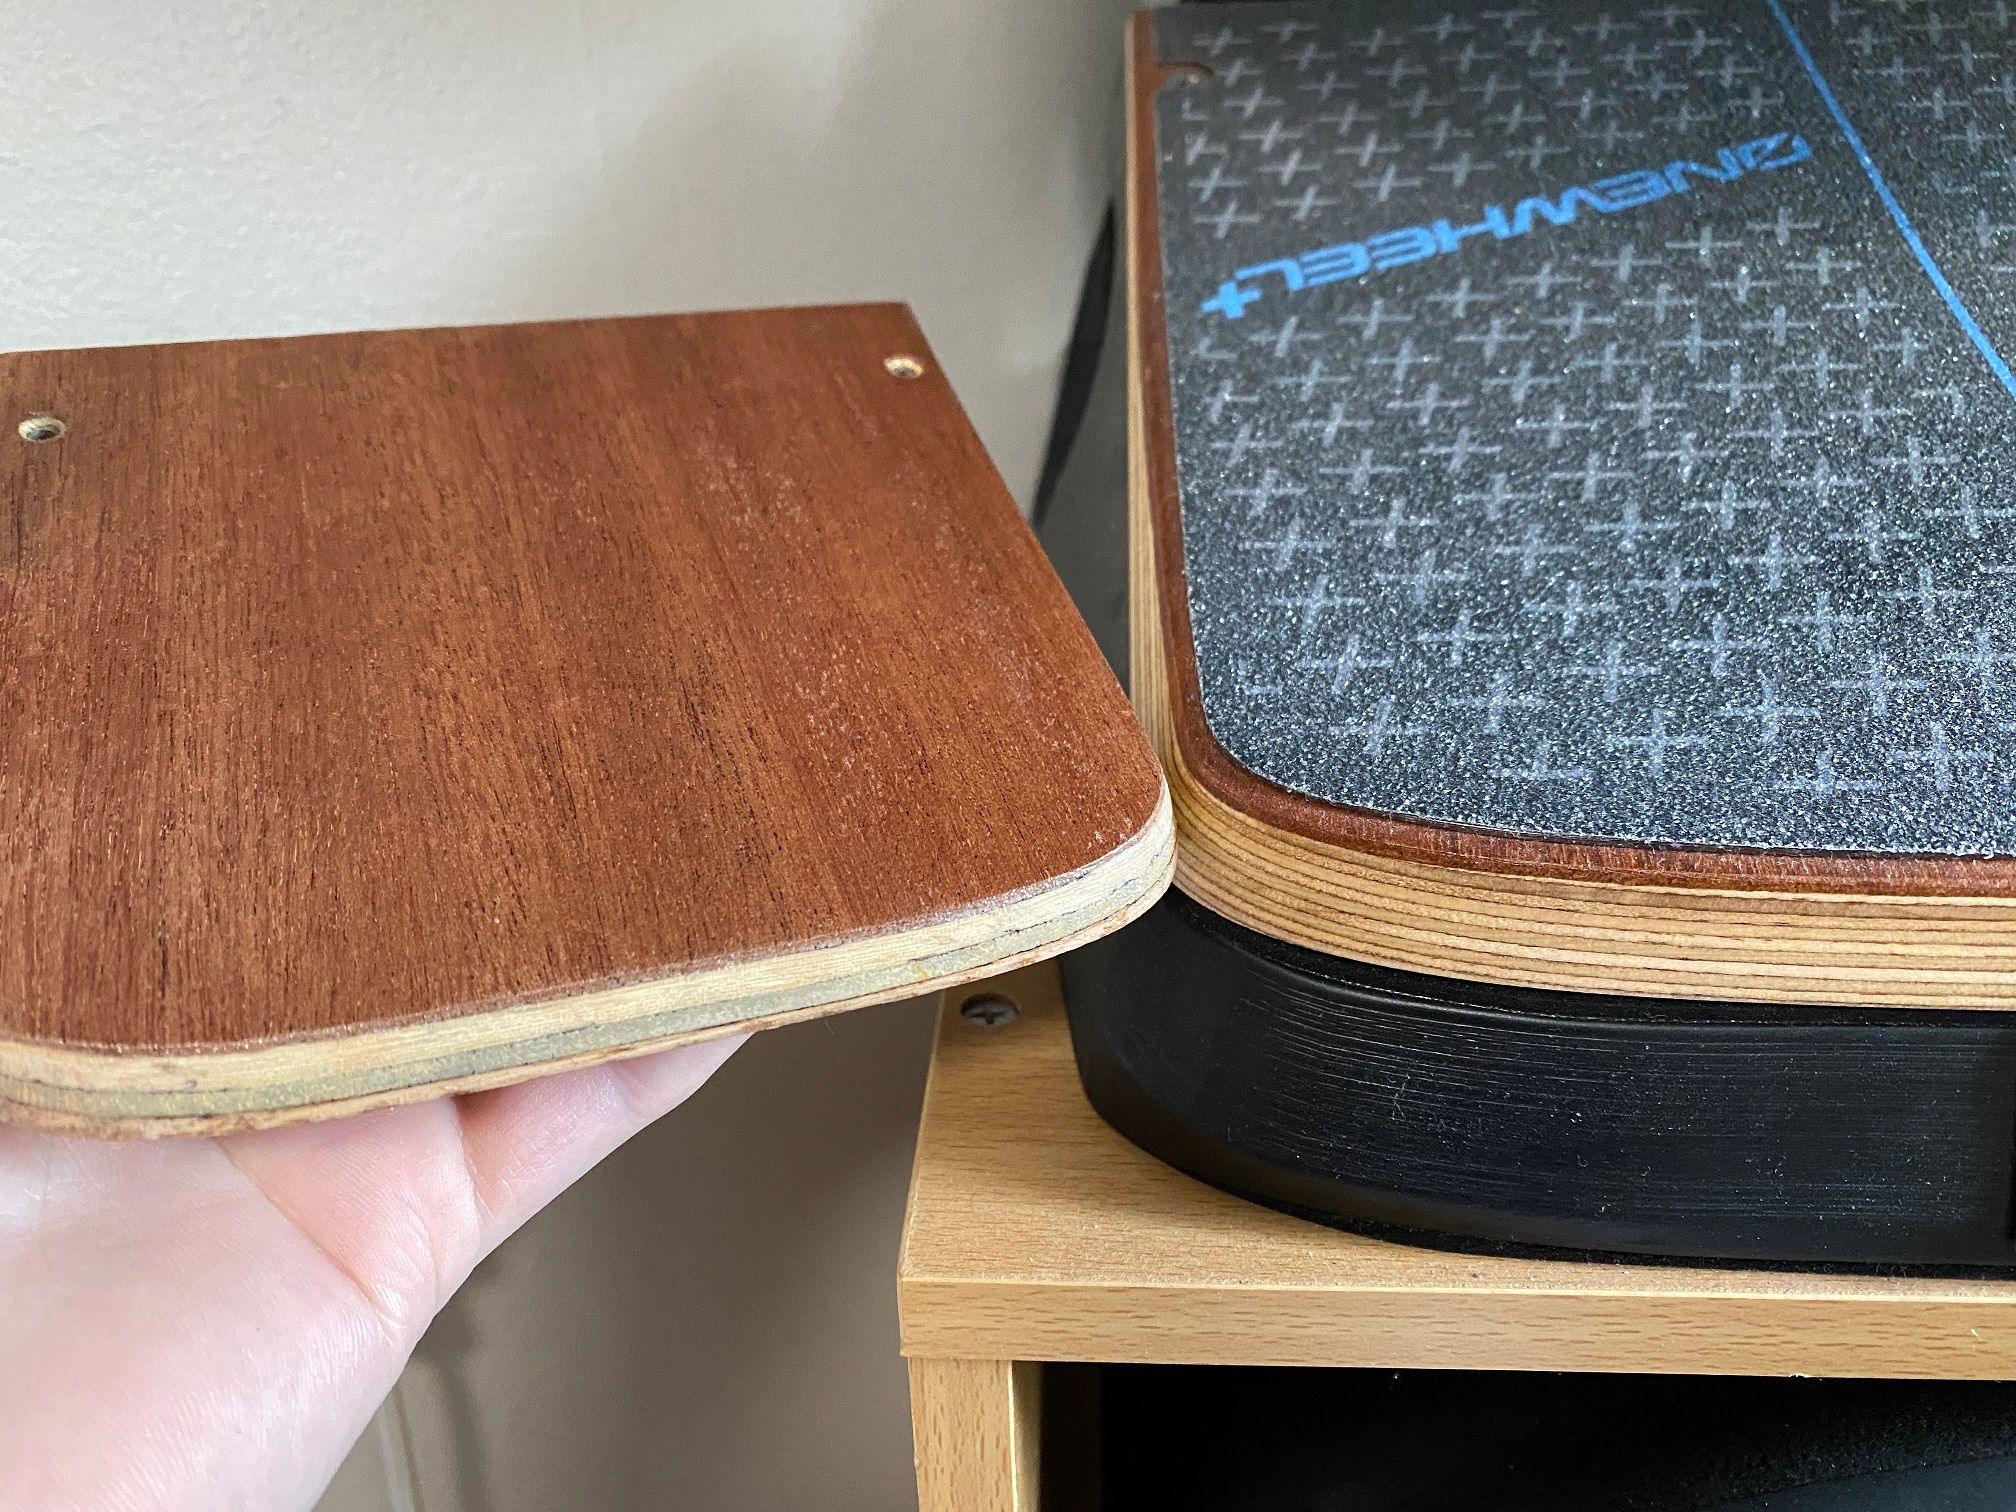
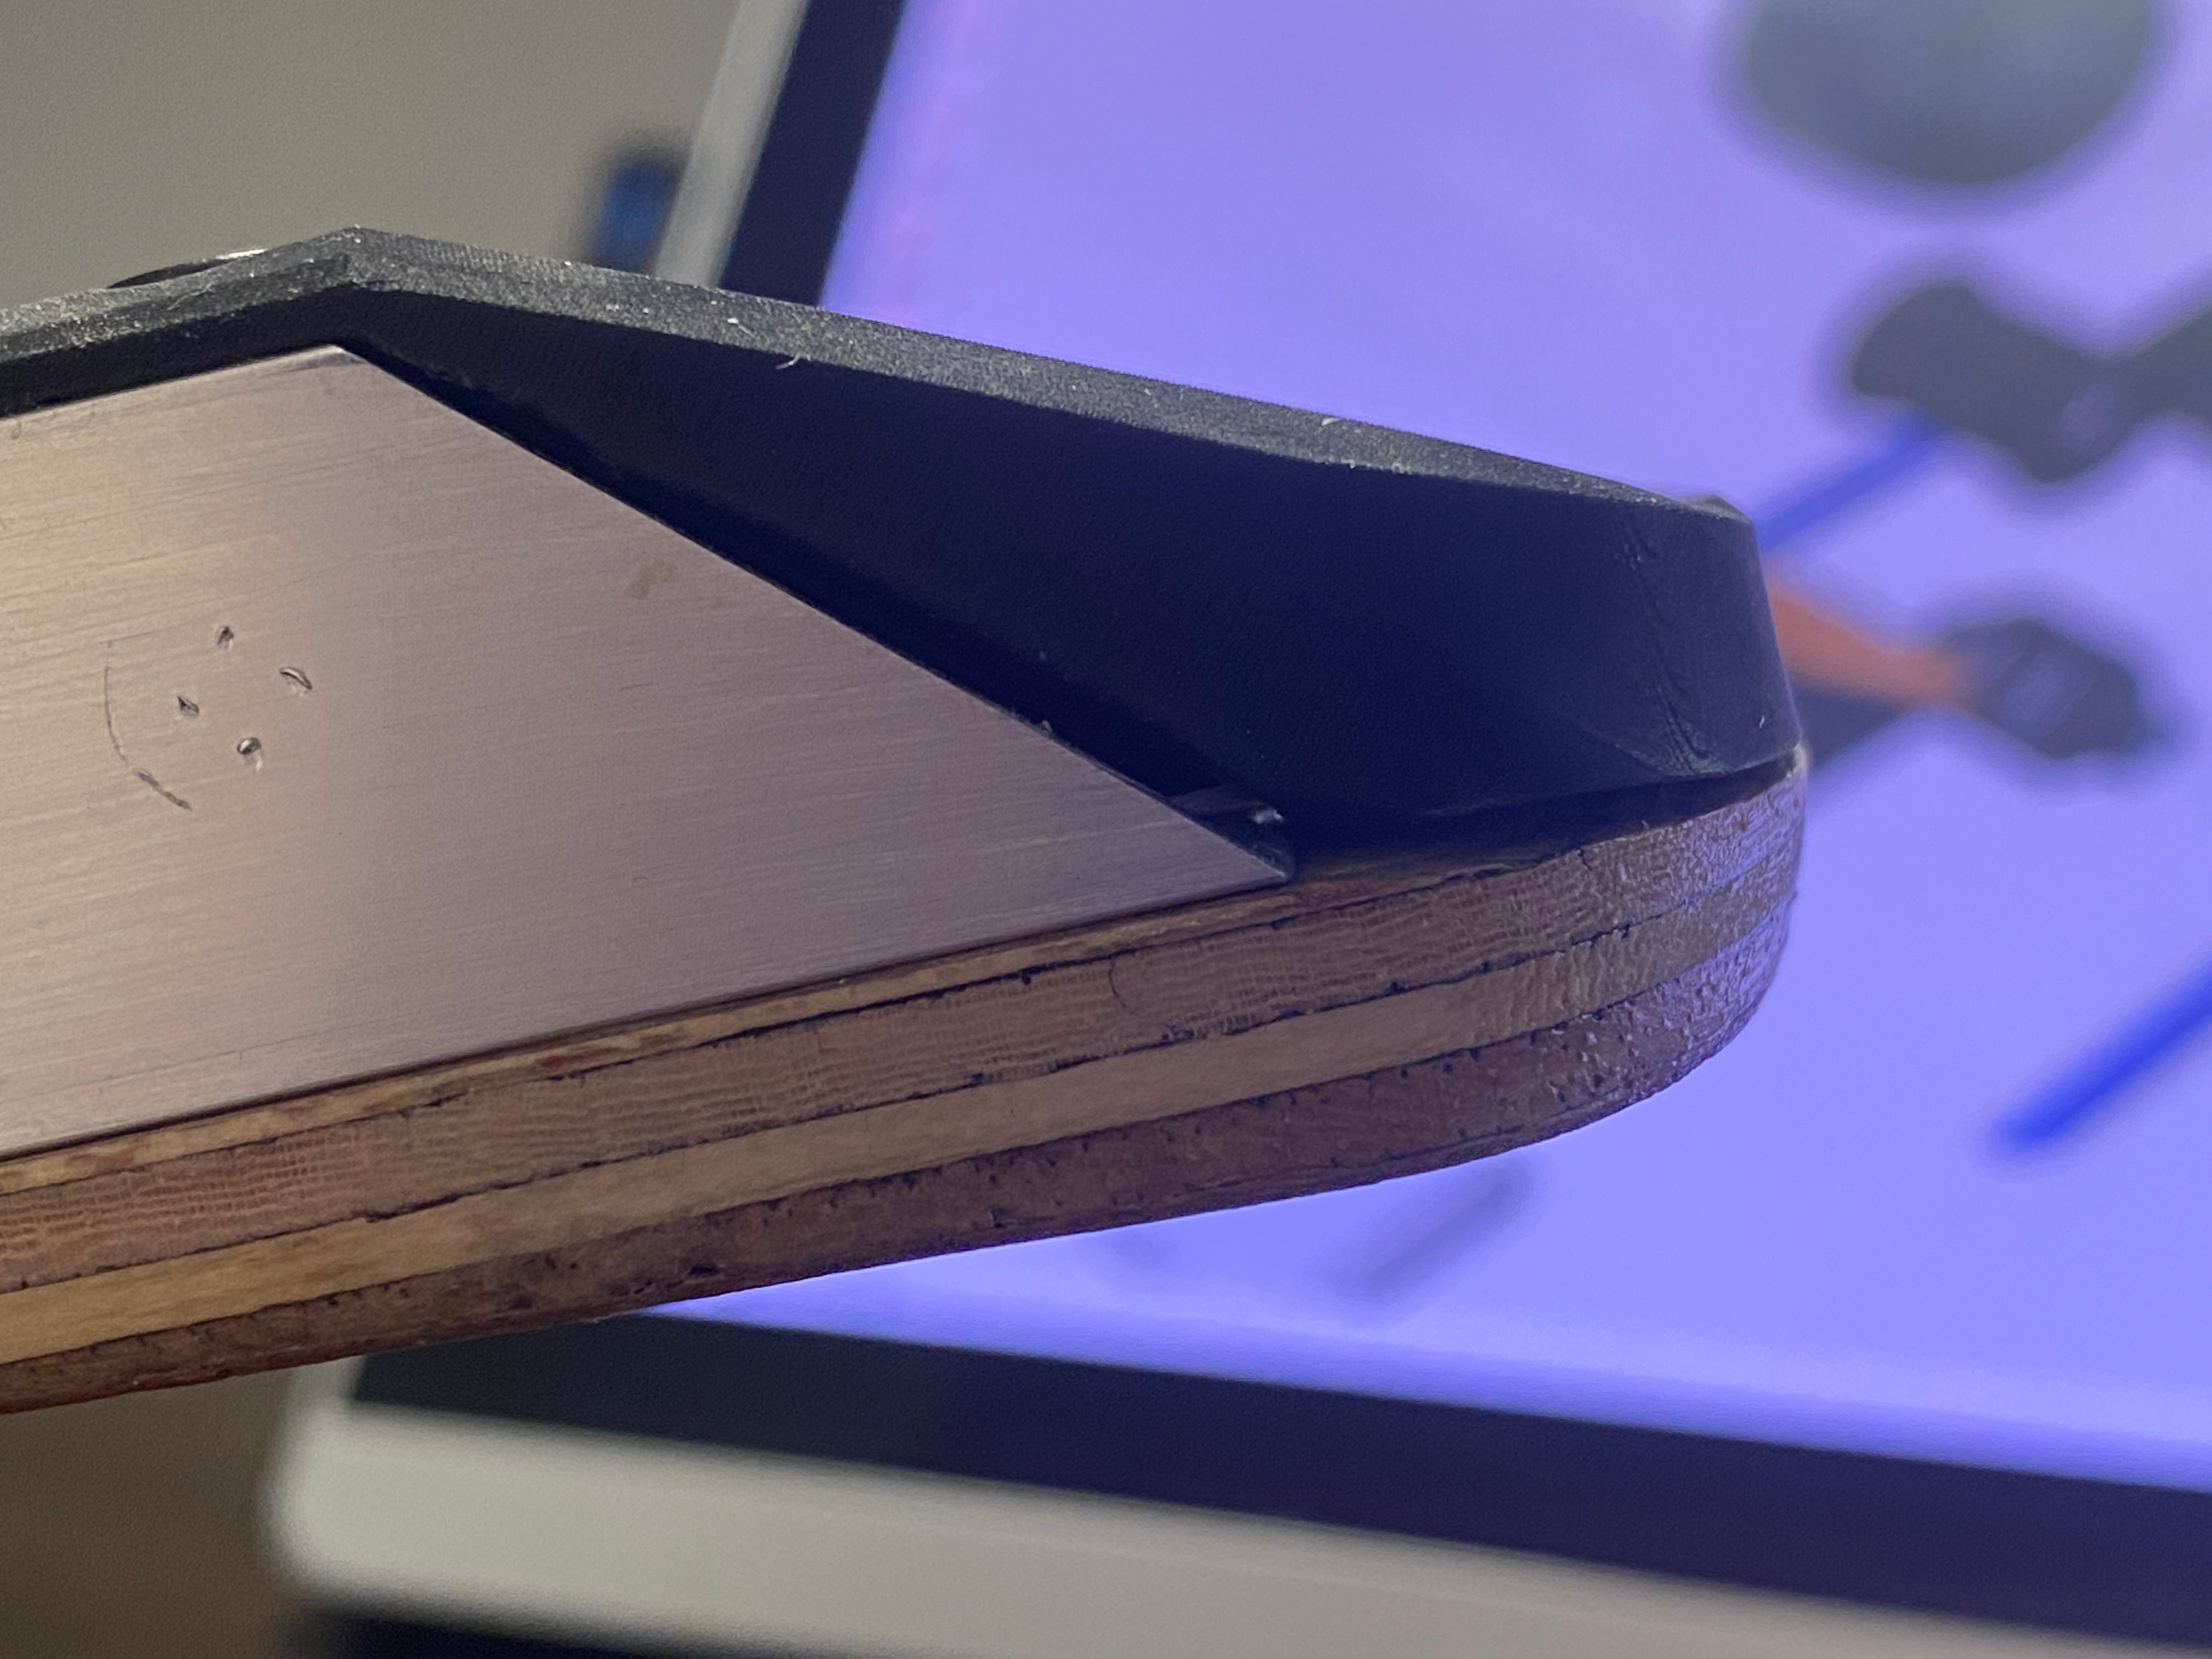
The footpads, I cannot for the life of me remember who suggested this so please feel free to remind me. Someone suggested the footpads should have a different wood layer for the top piece rather than me cheating and using a coat of varnish to artificially make the alternate top layer. It was a very good suggestion and whoever made it deserves a gold star x
However due to the size I was able to instead get away with using some veneer to achieve this and the results are great. So much better than faking it with varnish. I actually still don't know what type of wood it is though since I bought a cheap pack of assorted off-cuts and chose what looked right assuming it'd be darker after some clear coat (it was, more on that later).
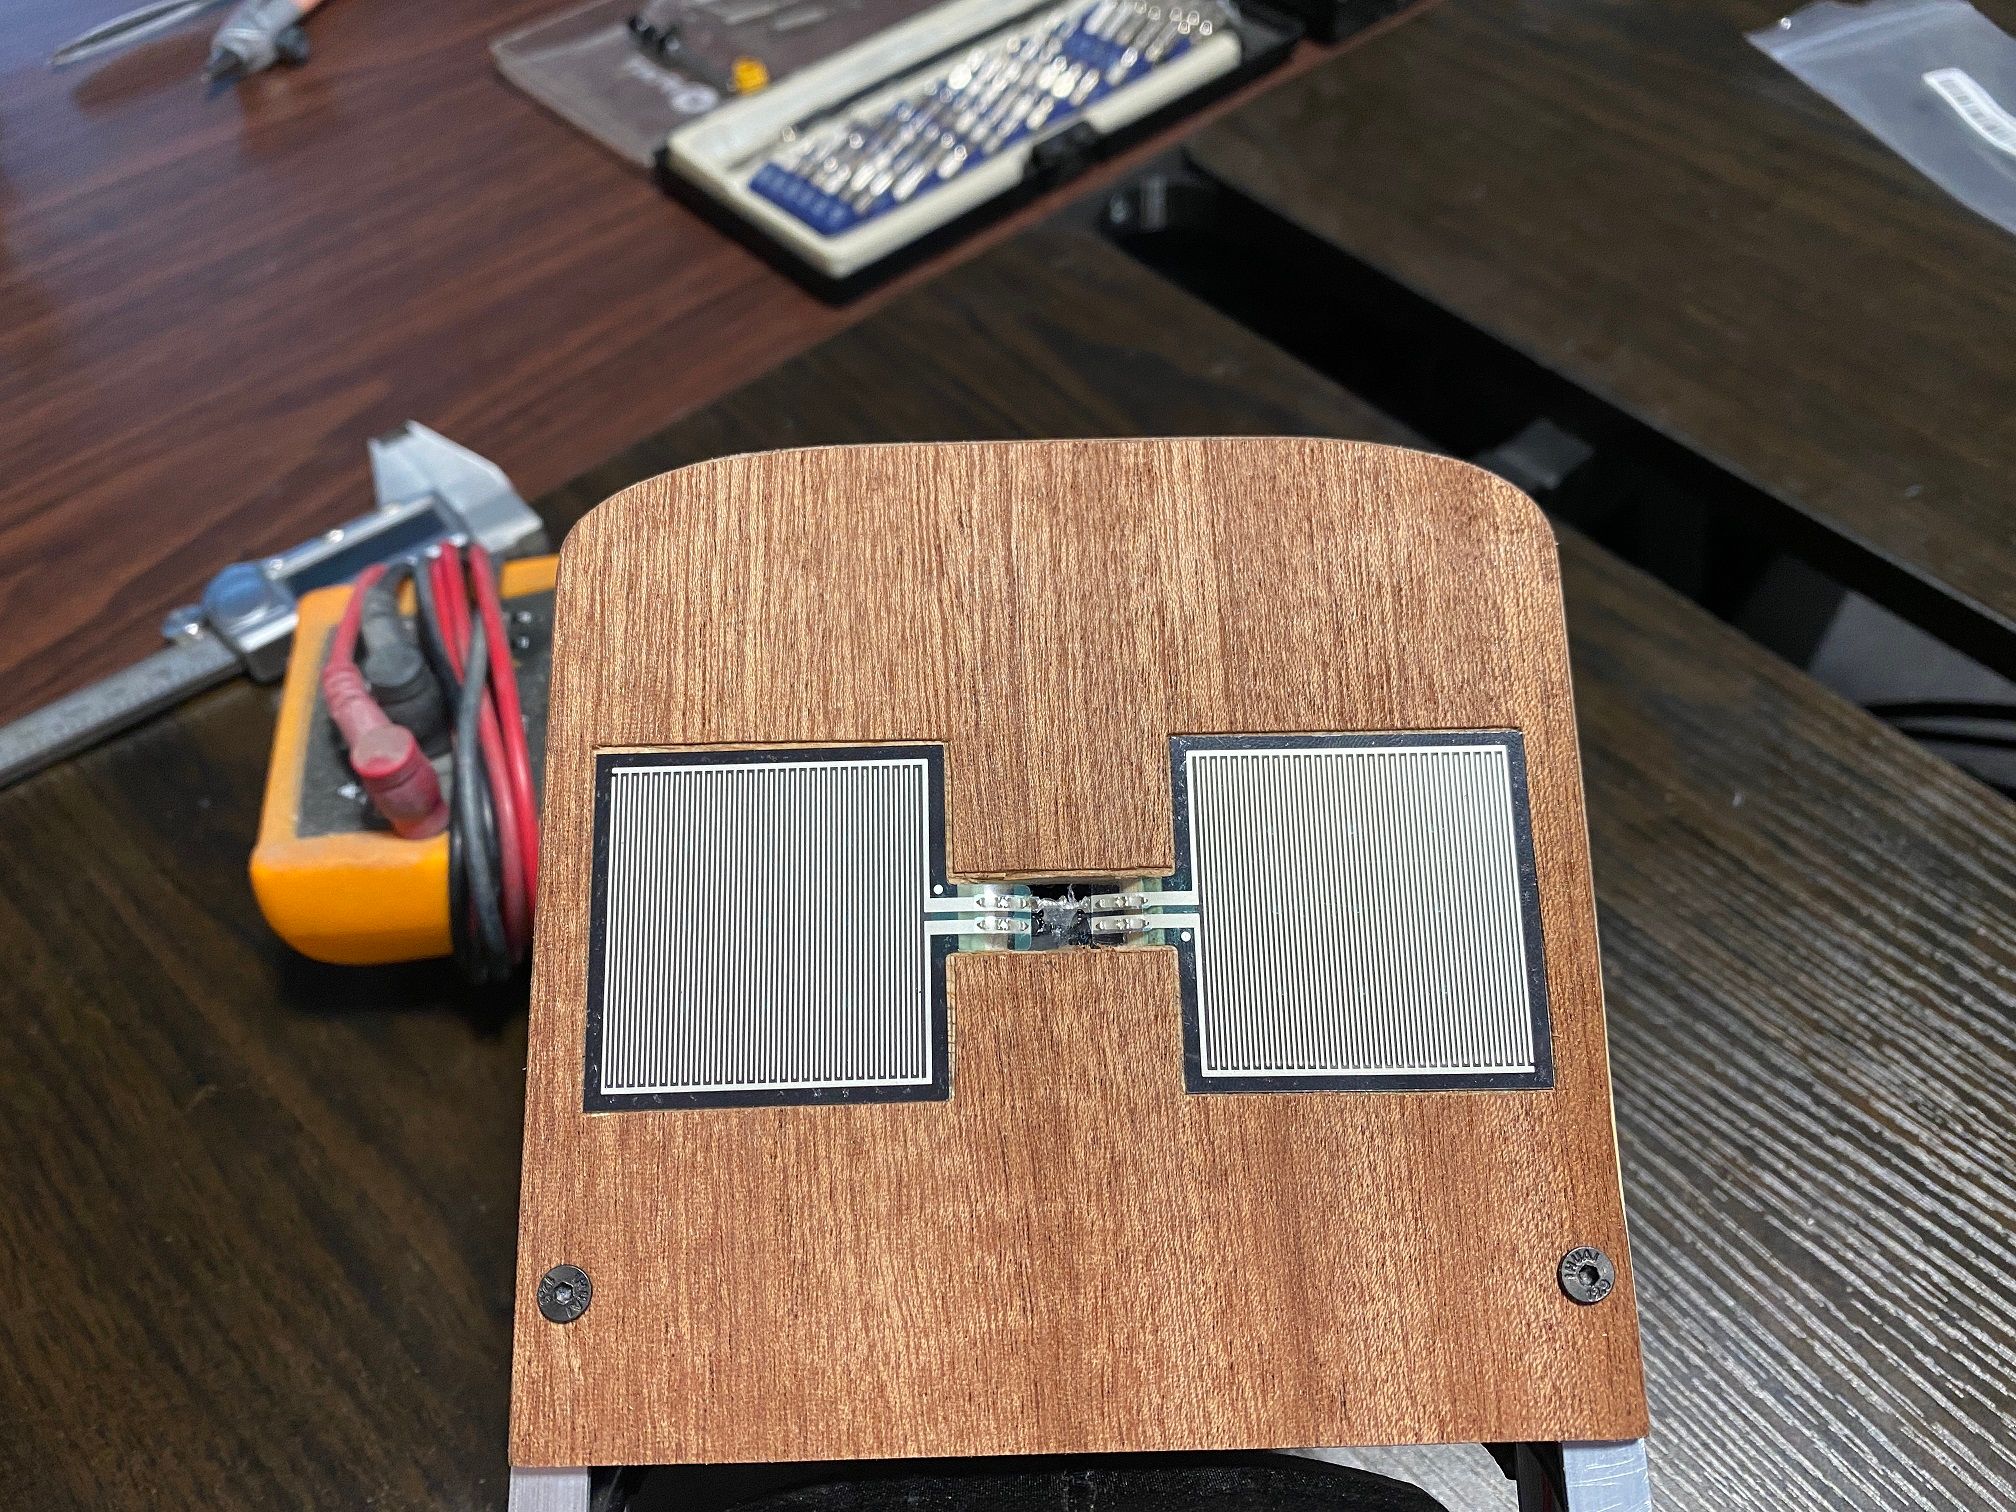
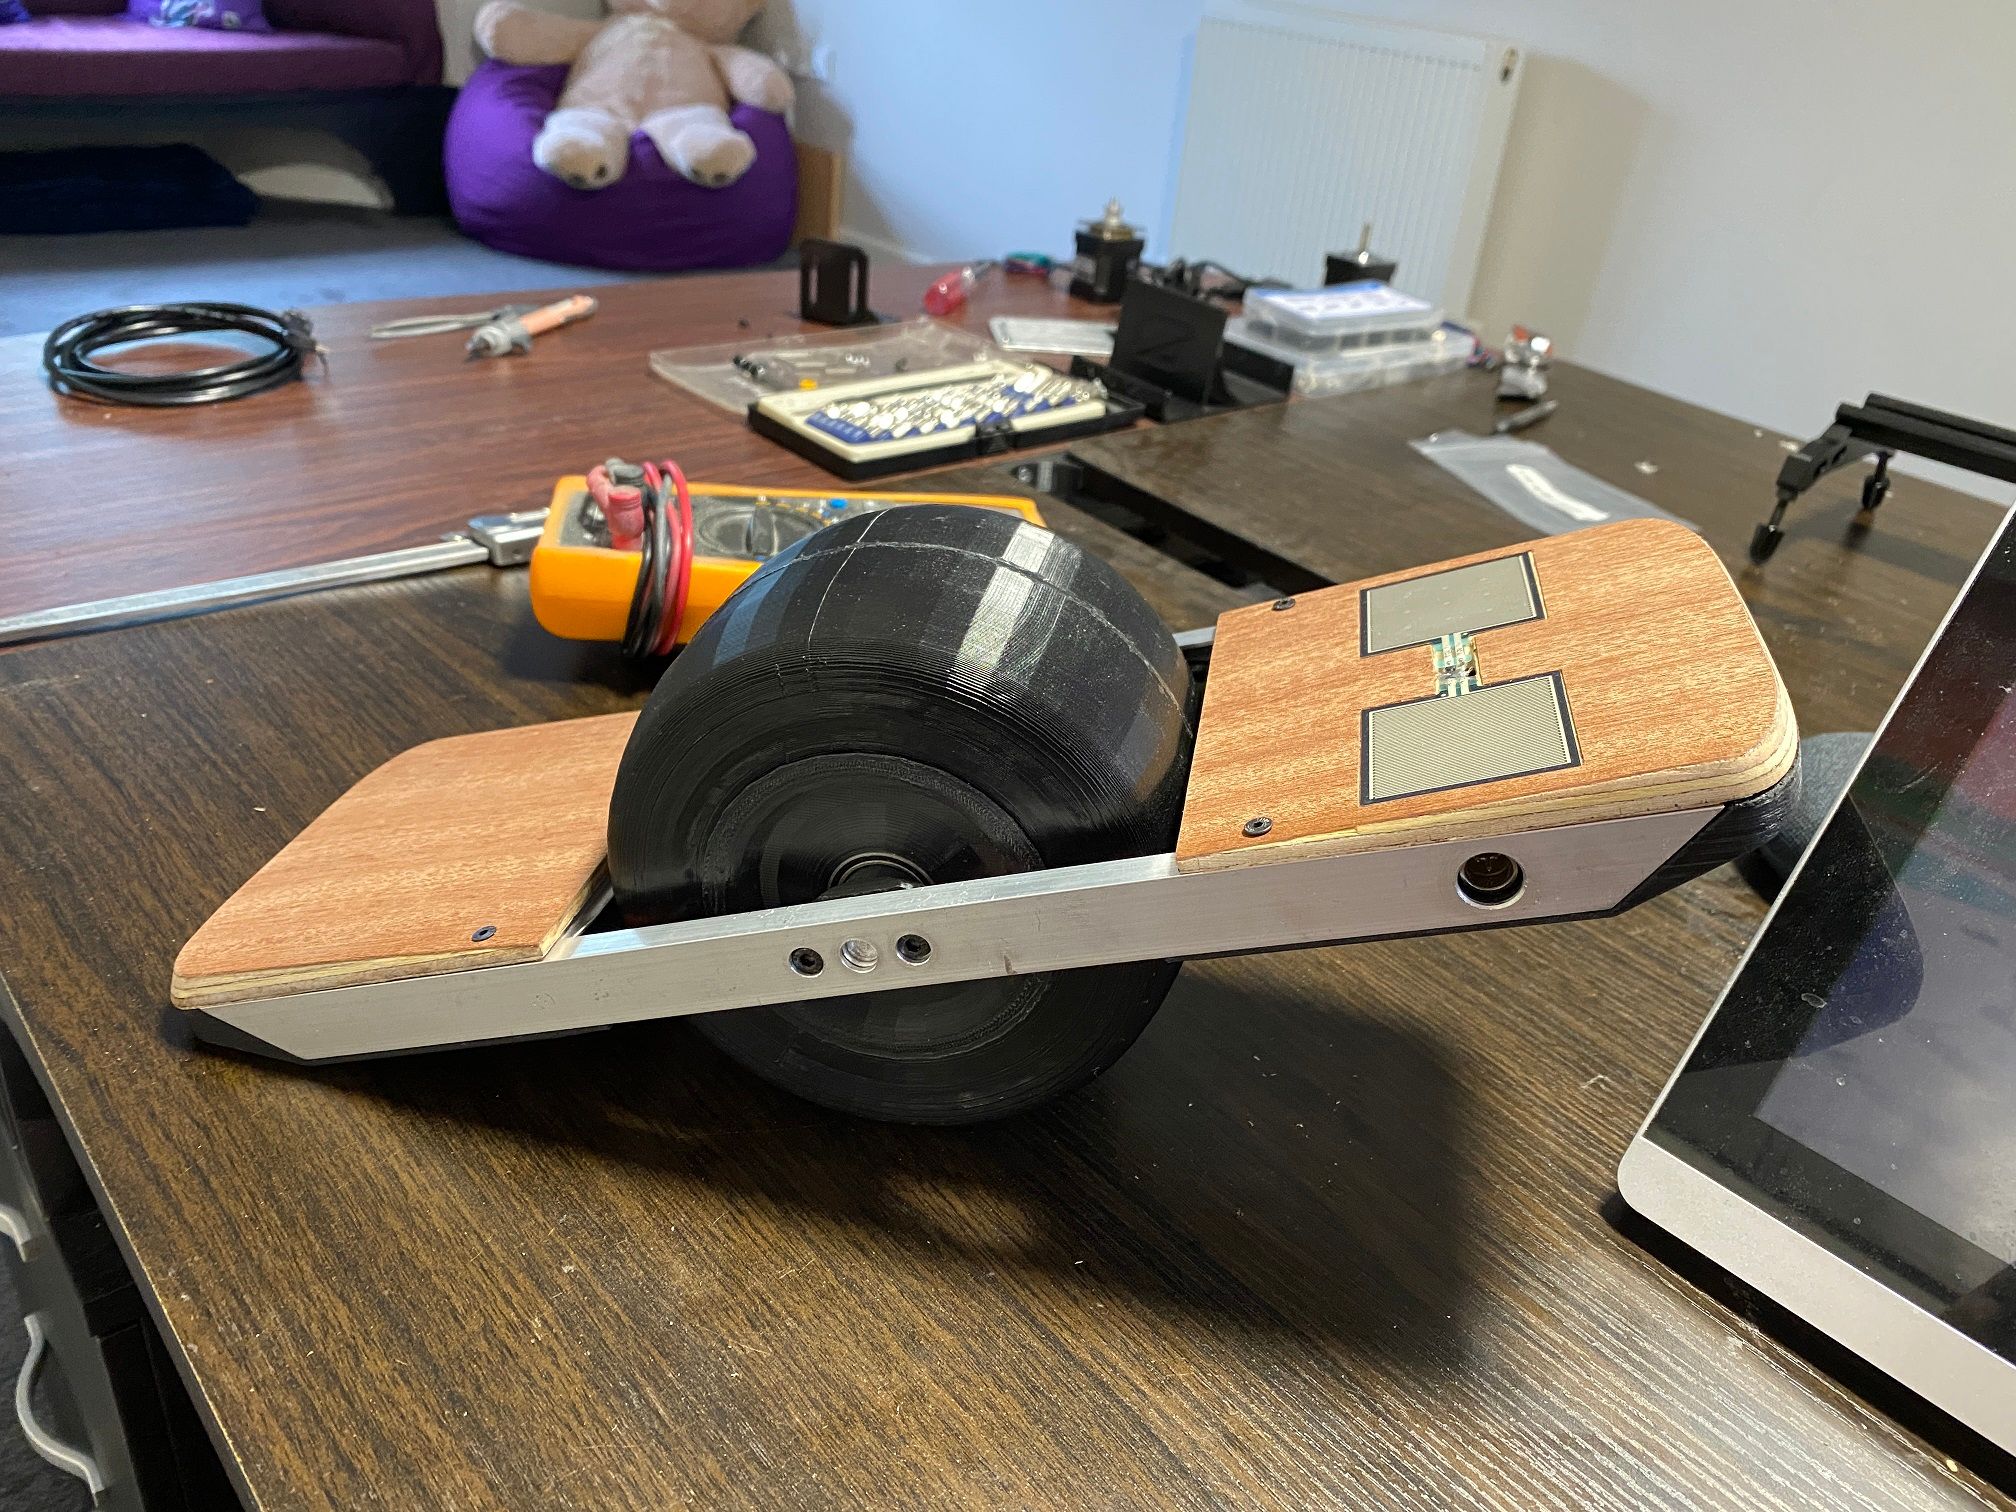
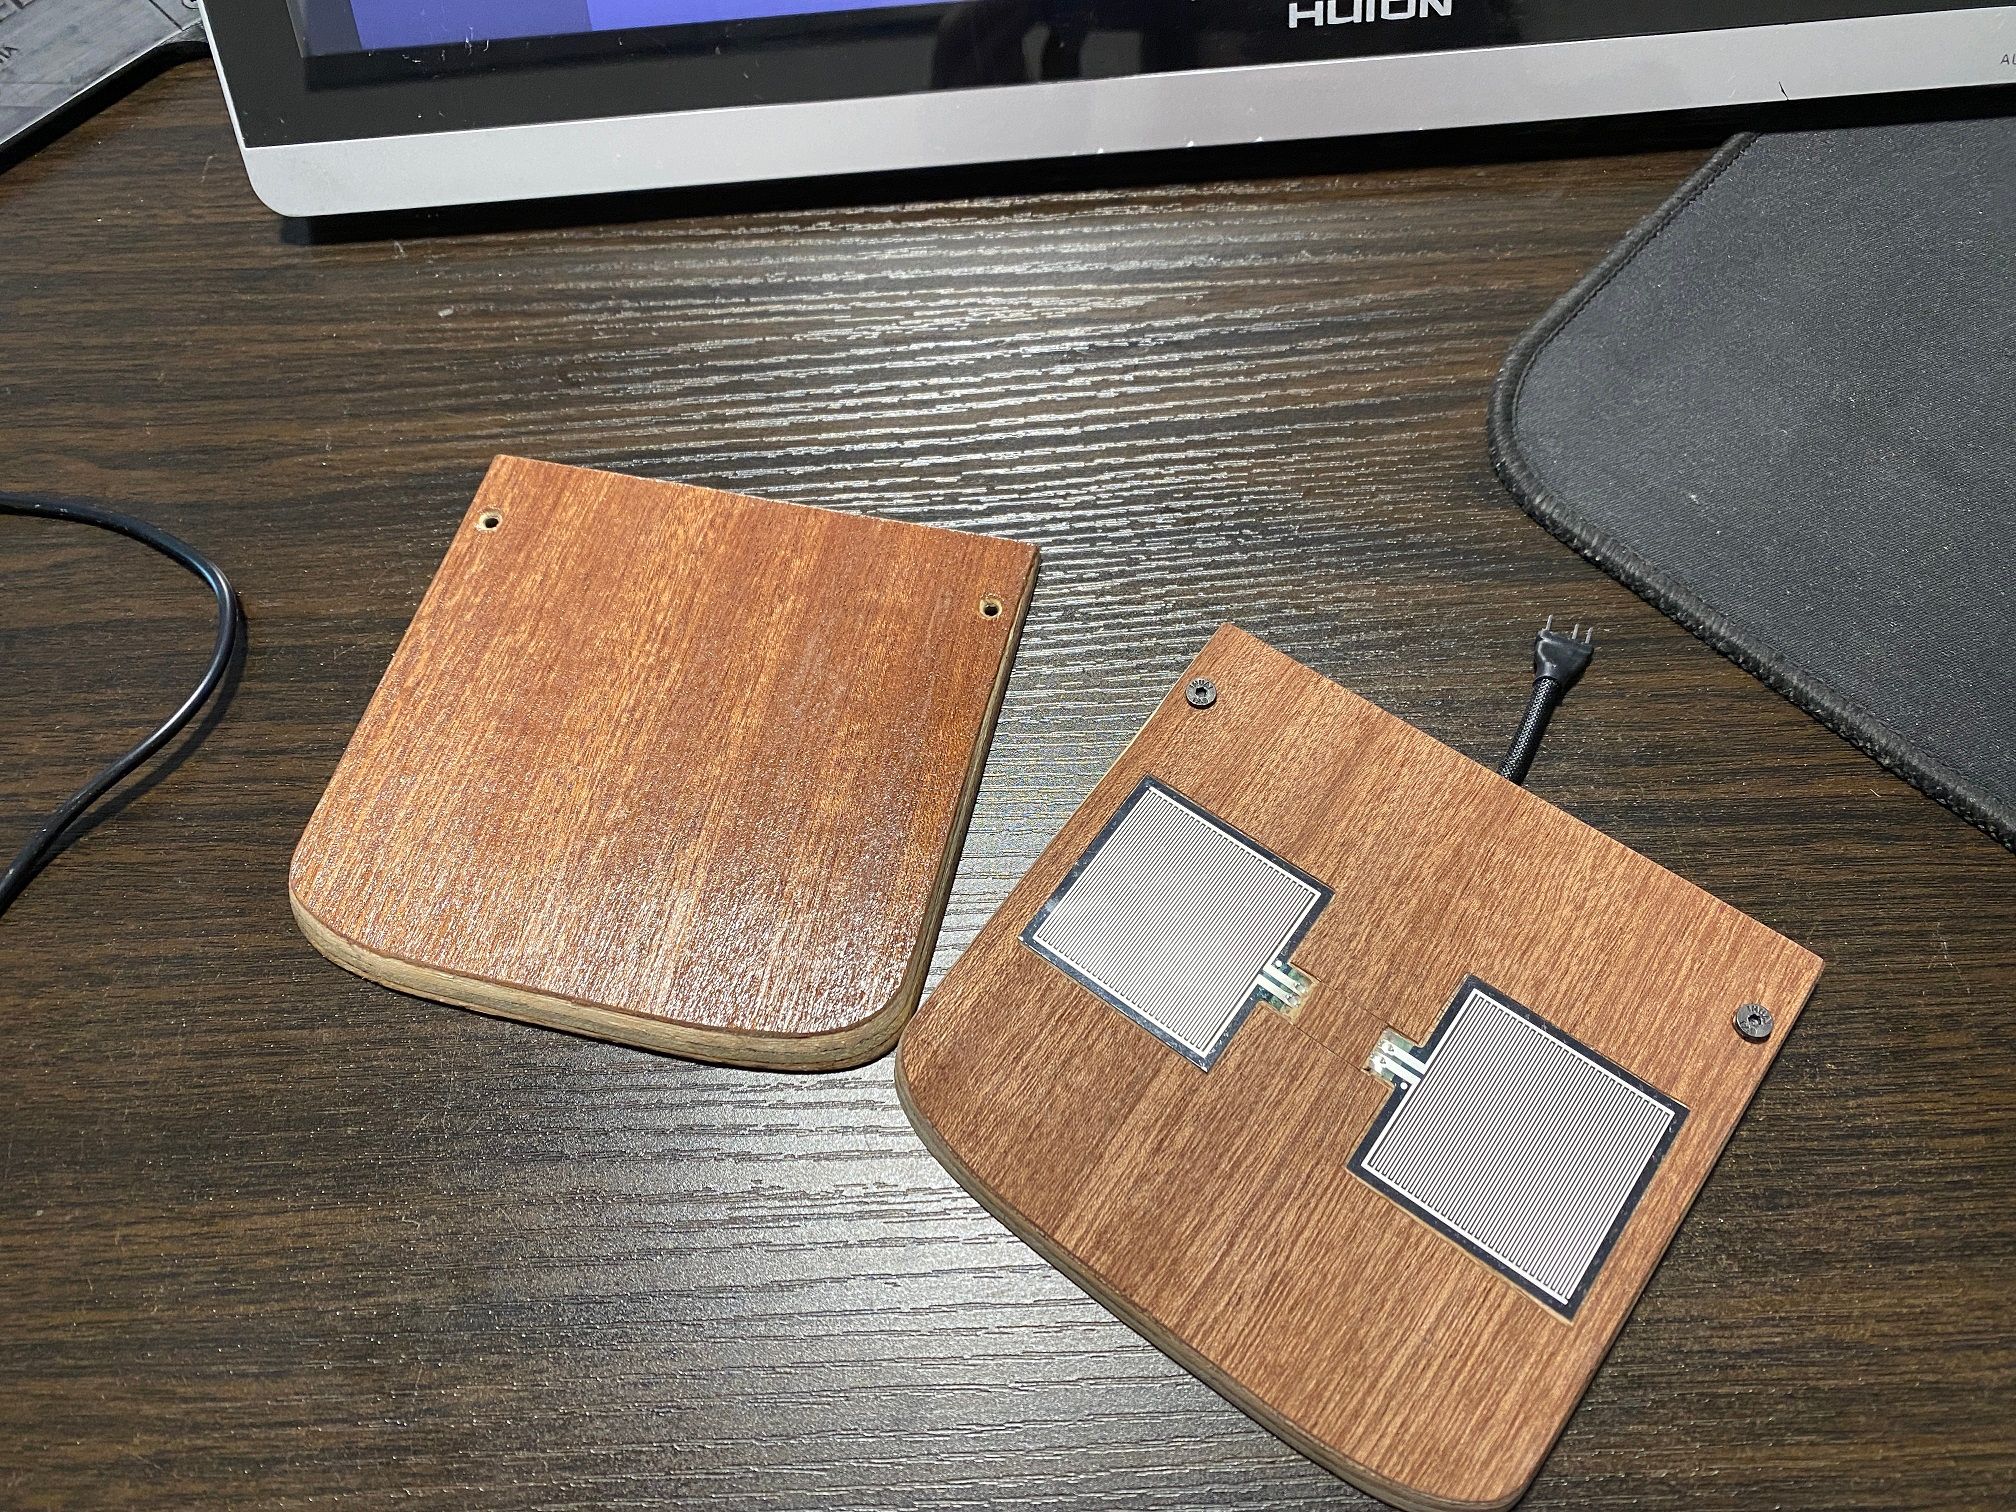
Looks good so far, still needs the clear coat however I wanted to also get the front done andalso mount those little sensors.
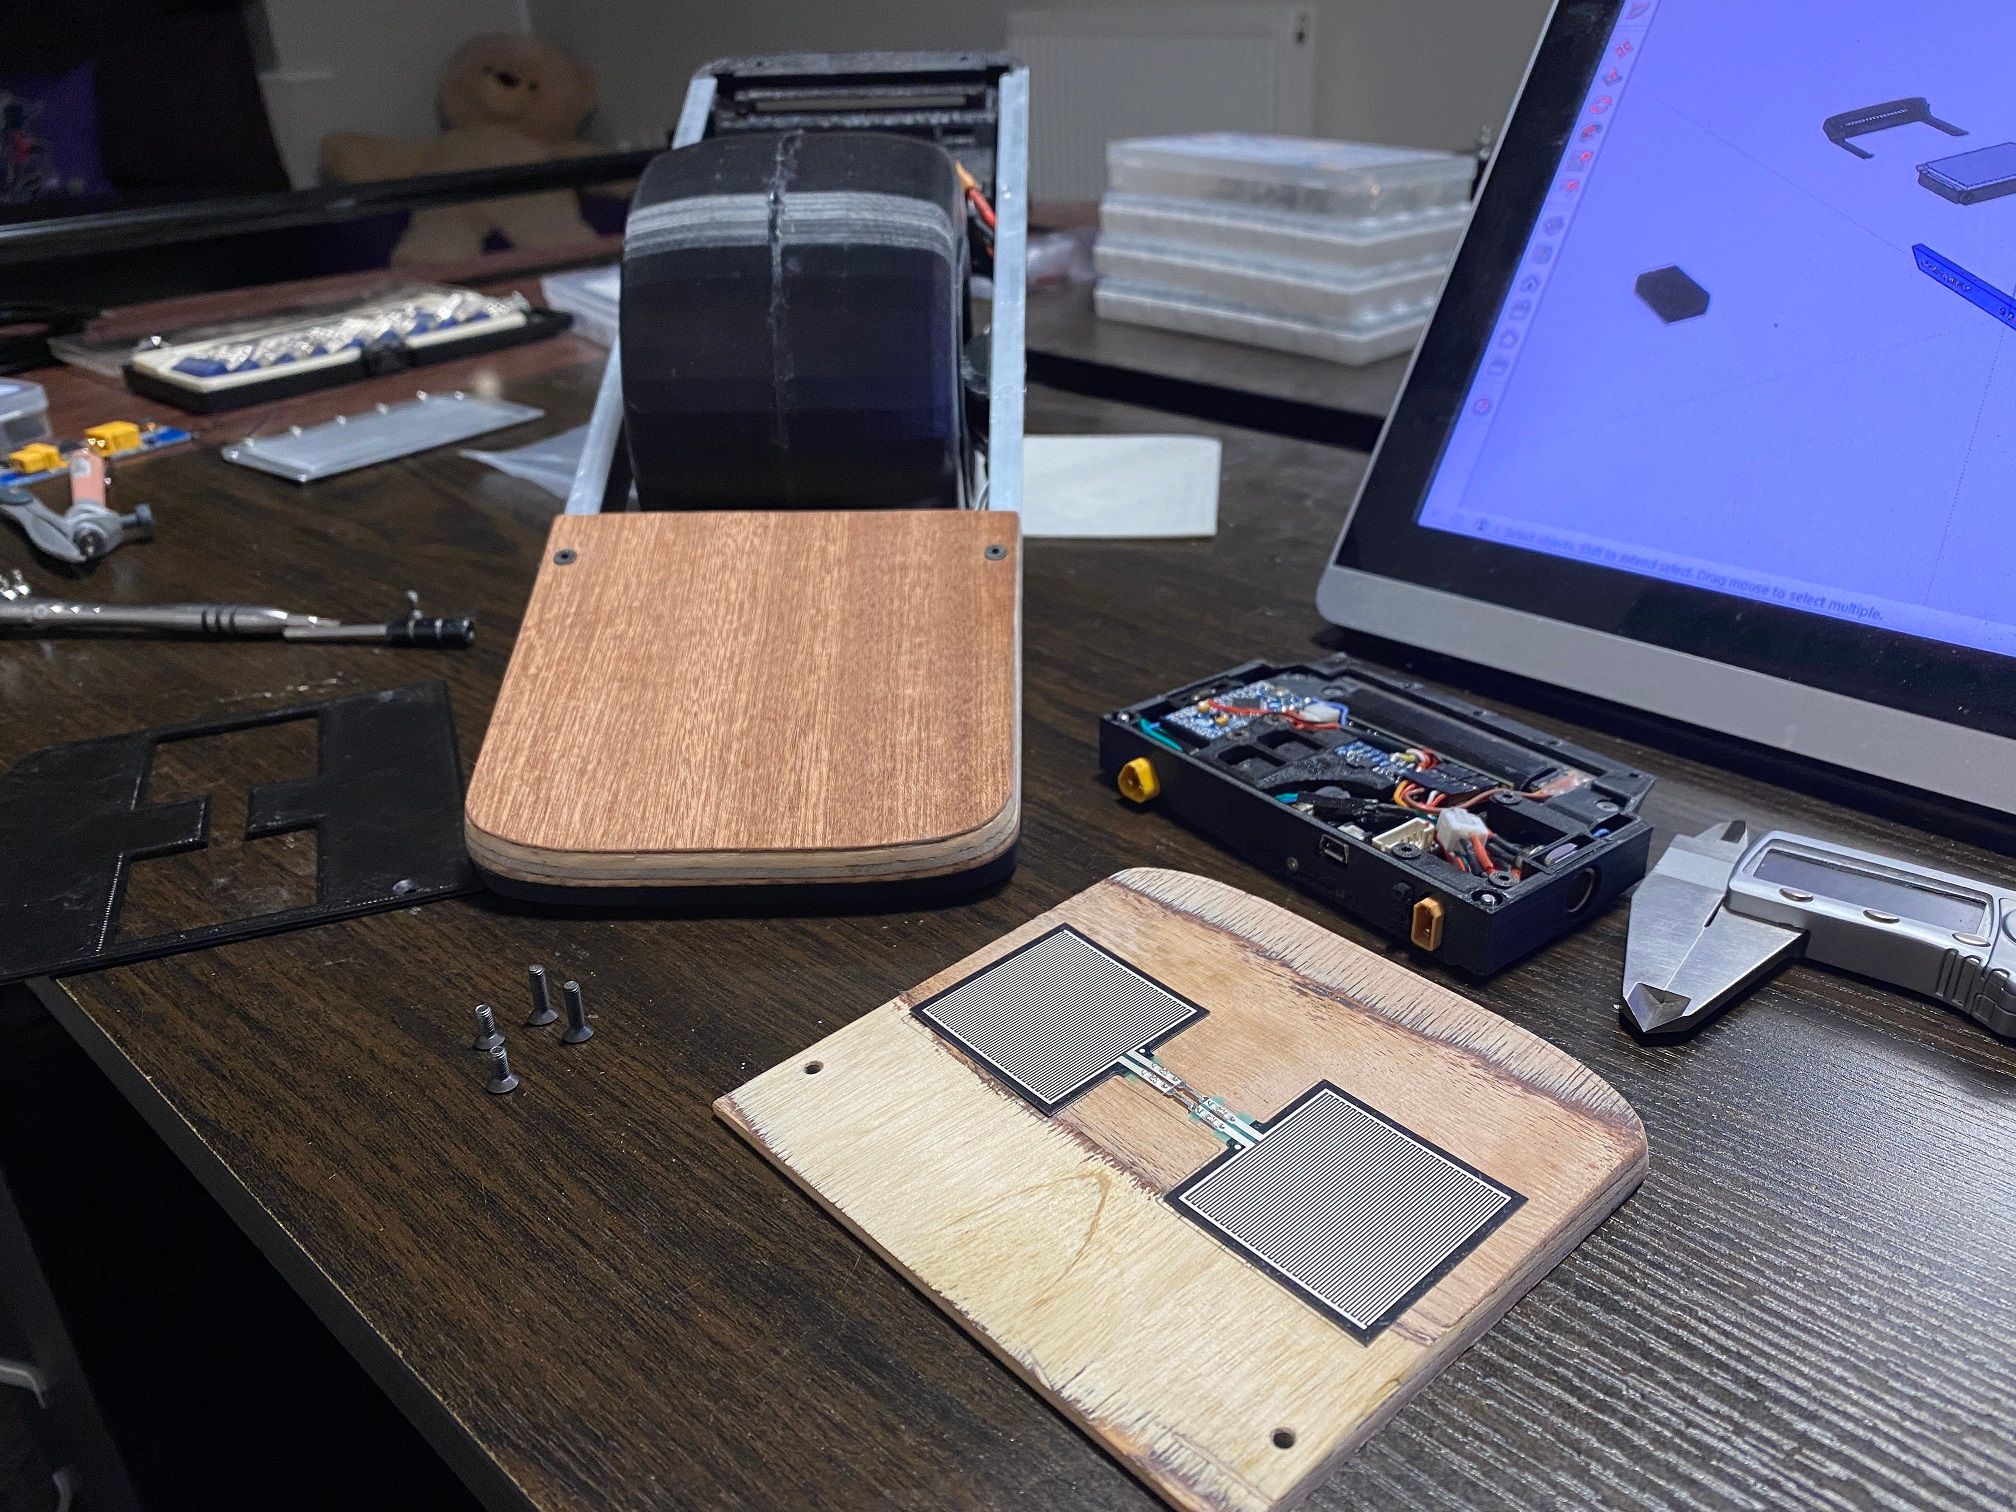
Reminiscent of the V1 sensors hat didn't occupy the entire footpad. To make sure the griptape didn't bulge because the sensors were taller than the veneer I cut out where the would sit and then placed that on the pad making the sensors barely sitting proud of the surface. Enough to function under griptape (tested with a sheet of paper) but not so that you can clearly see where the pads are.
Lastly came the clear coat. I haven't done the front pad yet but the rear came out so well I'm eager to do it.
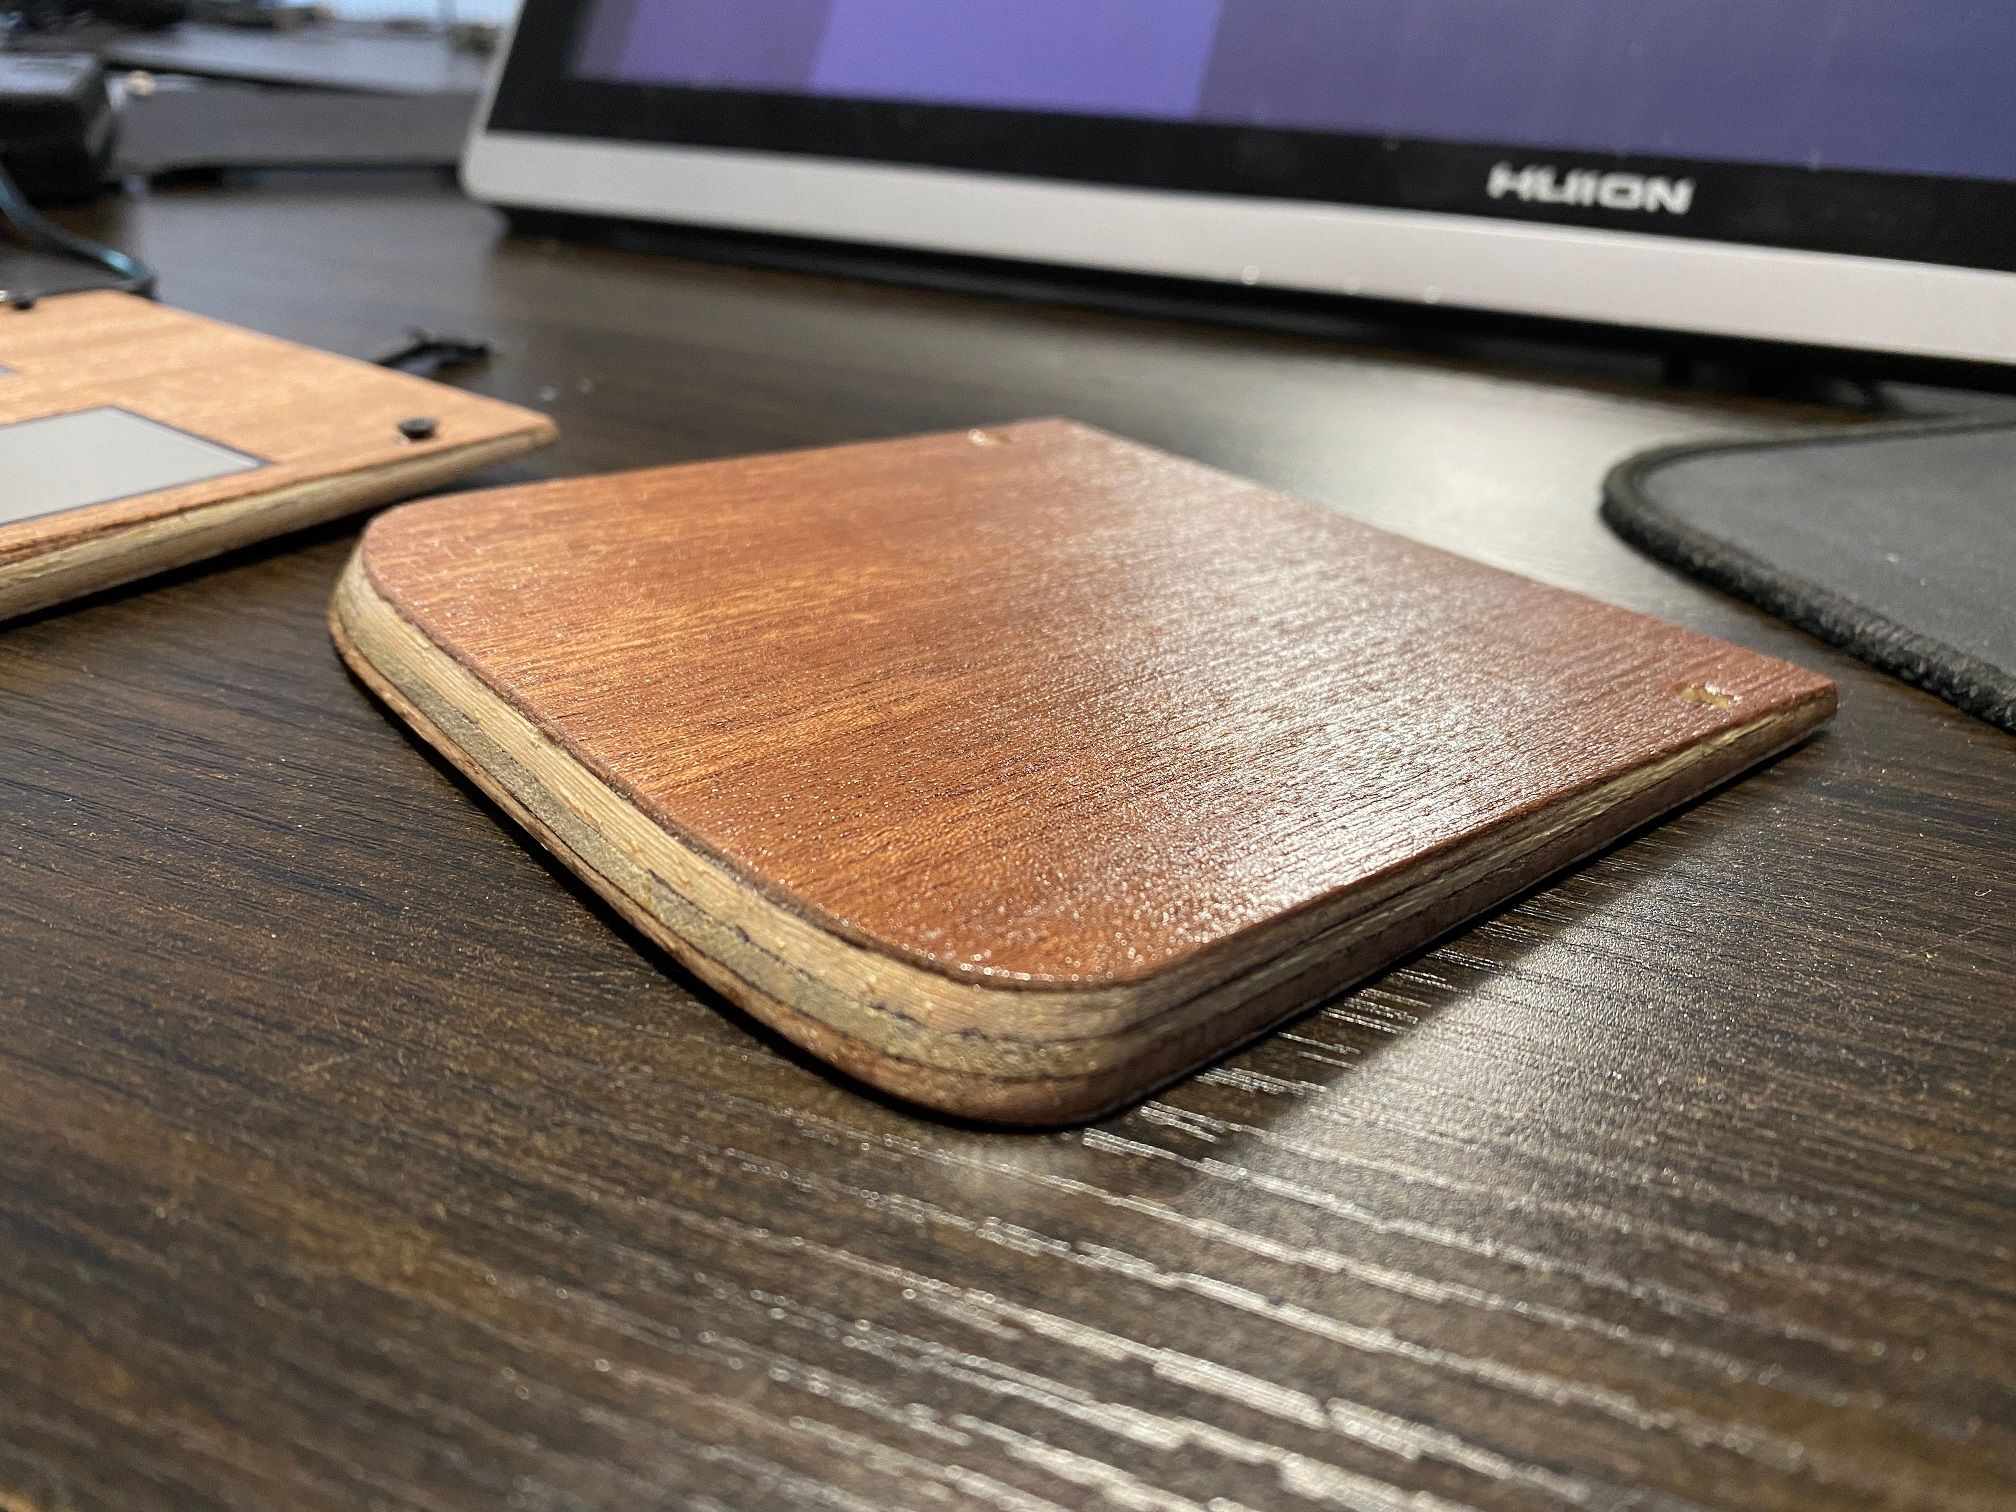
You'd think I knew what I was doing, it's almost perfect (ignoring the ply density)
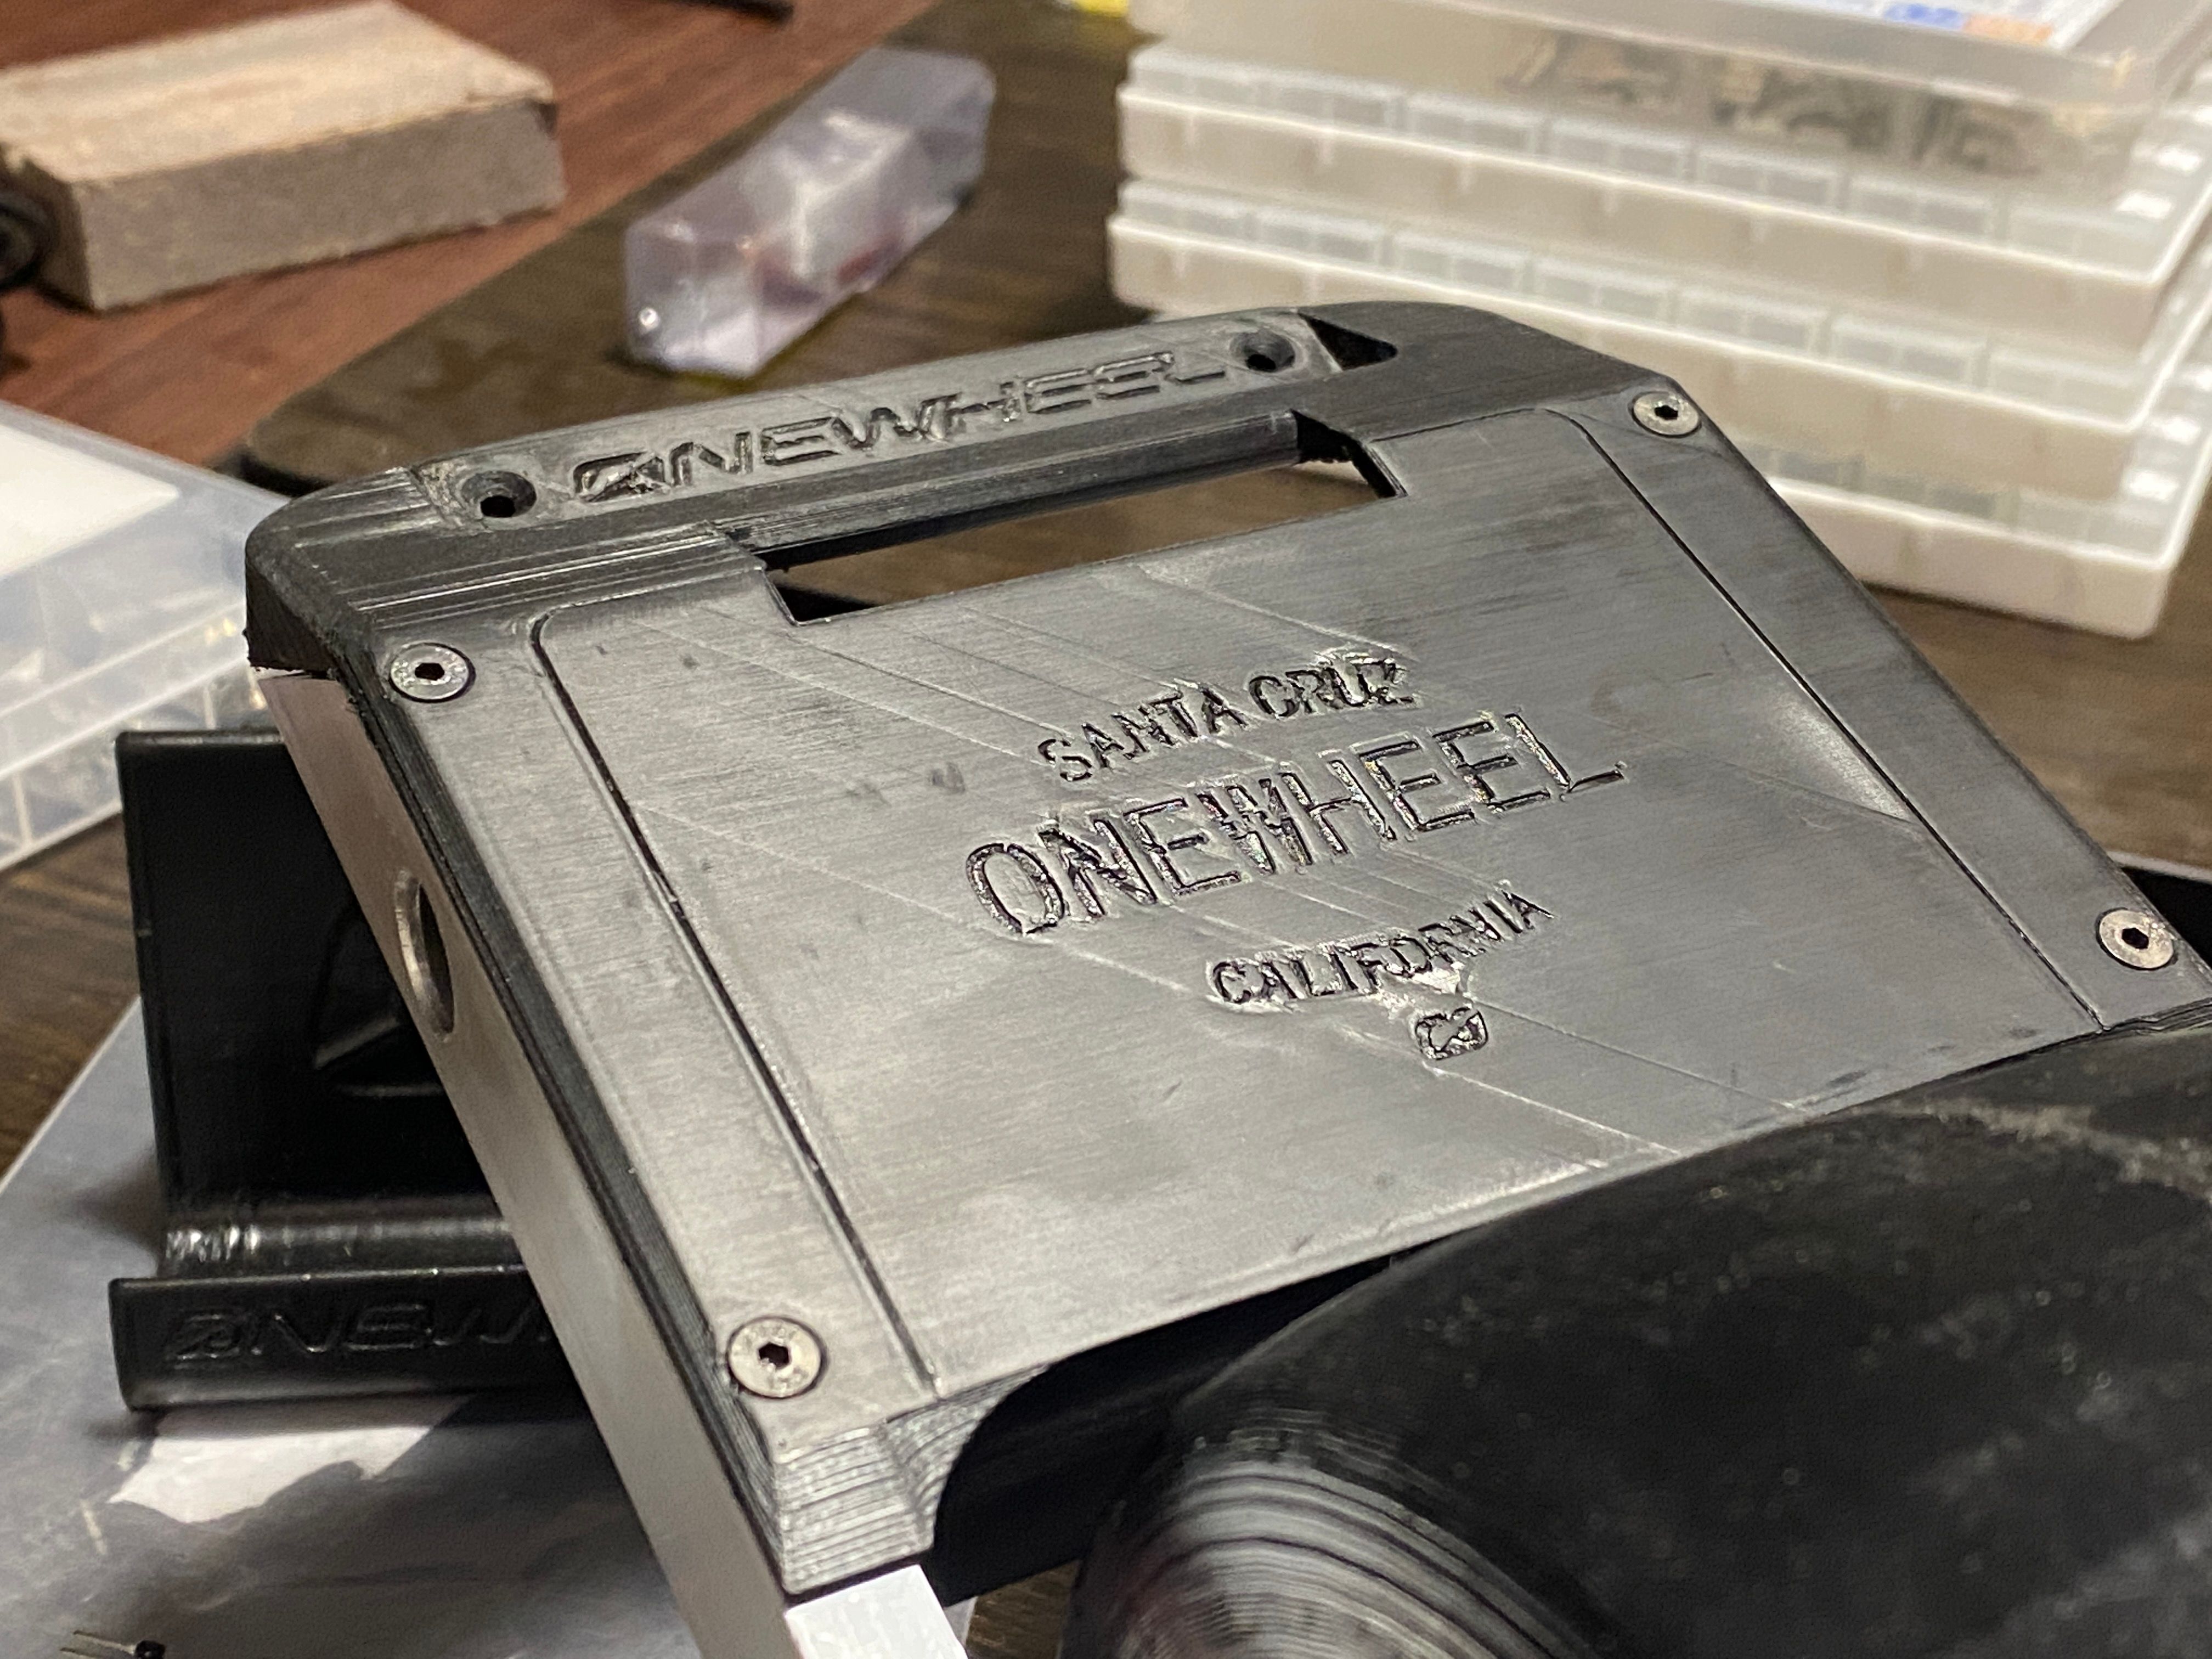
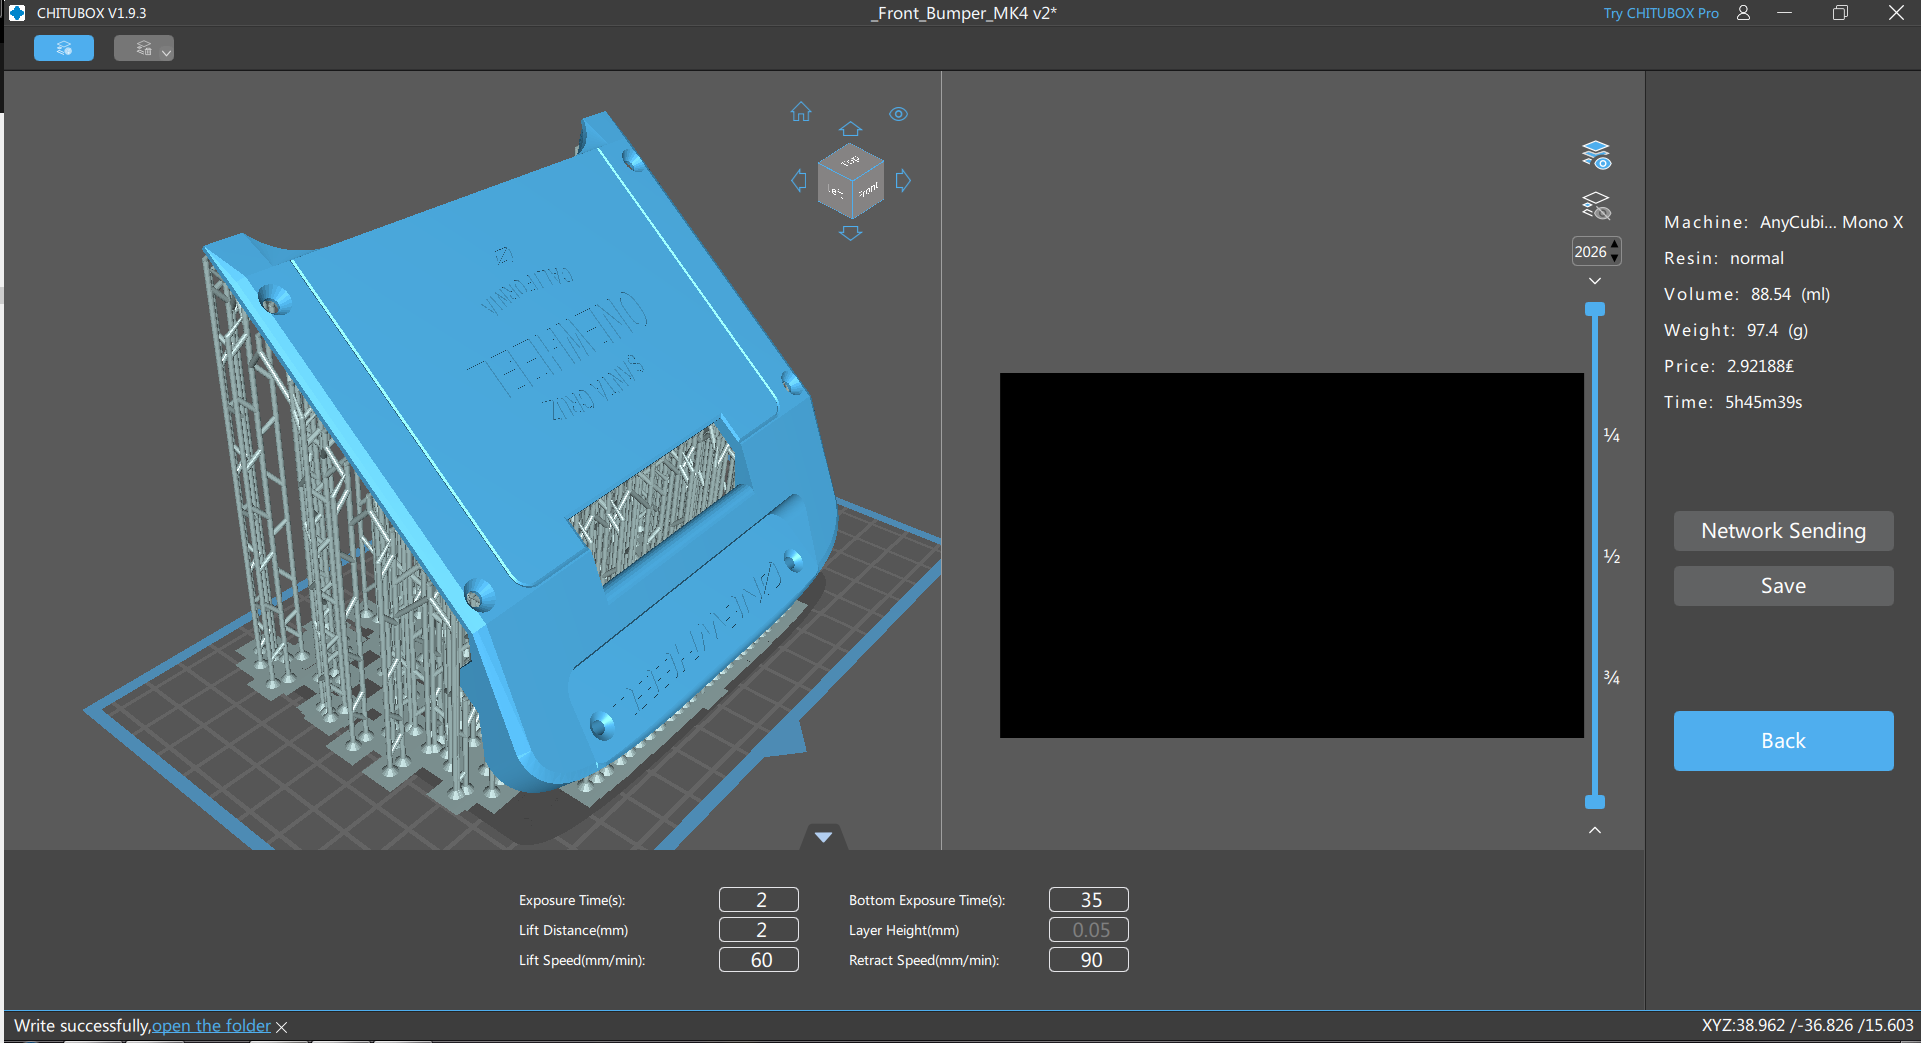
As an added bonus I redid the front bumper to remove the pillowing effect caused by the infill pattern on the last one. After a light sanding it's buttery smooth. Almost looks like it was done on a resin printer. Still want to resin print these though for the added detail retention on the lettering.
To see my playing around with it working there's a few sprinkled in clips on the video I mentioned earlier.
It's so stupidly fun to just place 2 fingers on the pads and feel it move once level. Nothing, not even a video can translate the stupid joy I get letting it roll around. I made noises I didn't know I was capable of, which thankfully will never leave these walls ;)
-
Few more updates :D
Finally gave reddit an update too, of course here is where all the best pics and info is though :)
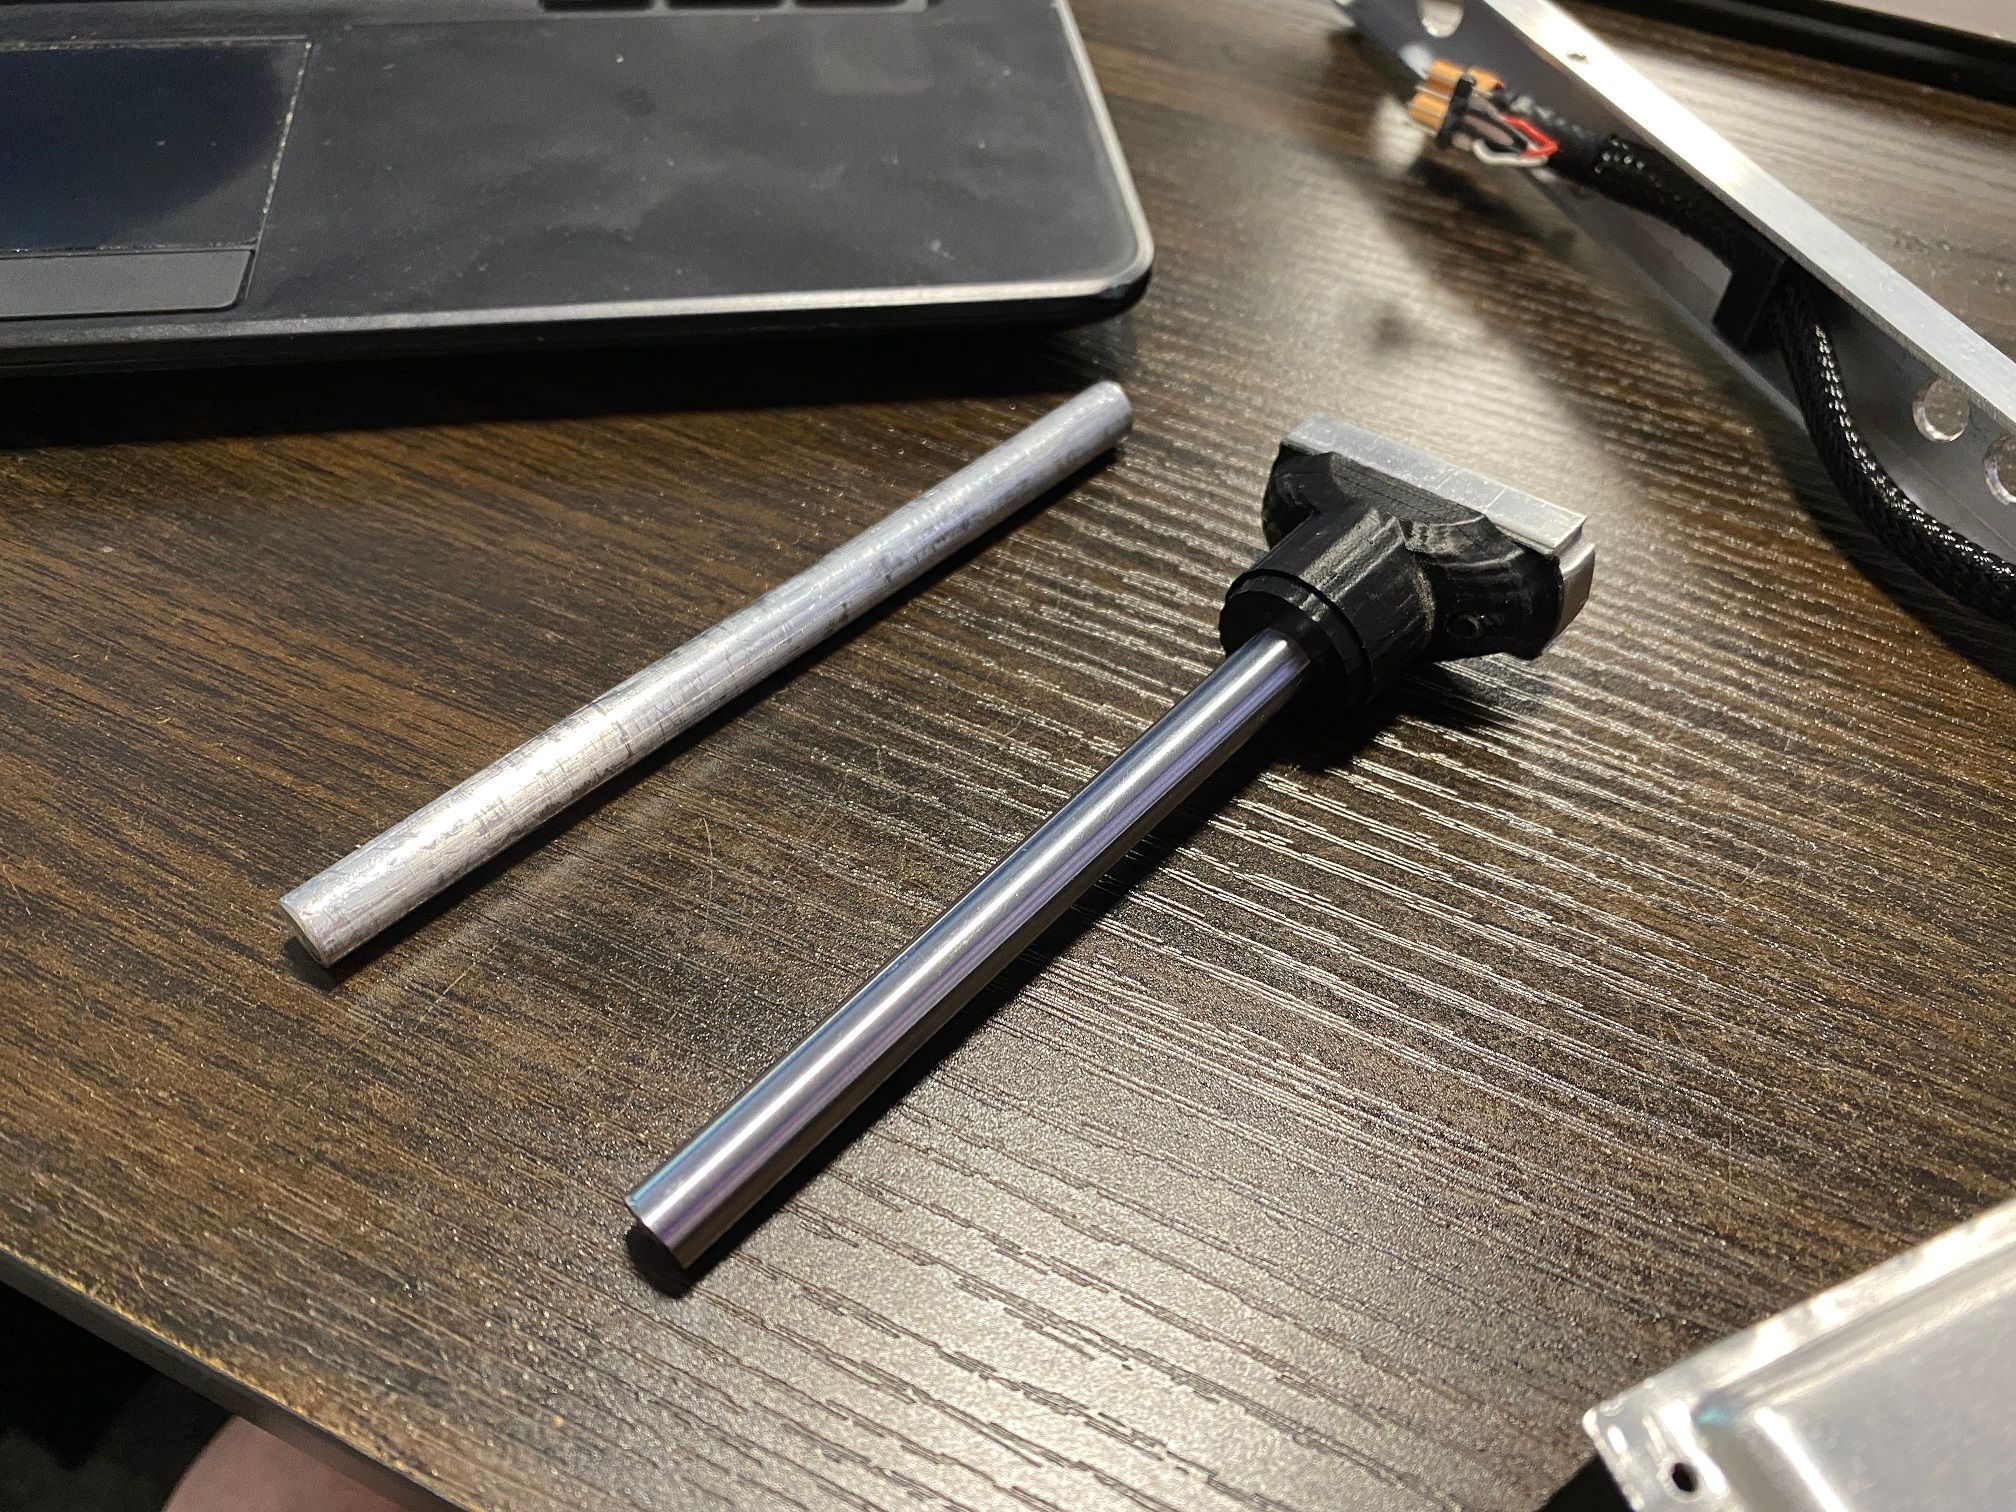
Replaced the axle with a steel one. Had a feeling the aluminium one might bend which would probably destroy the bearings and motor. Was too scared to use my angle grinder so spent like 20 minutes with my little dremel cutting through 8mm of steel bar to get a 115mm long axle. Worth it though, look how shiney it is compared to the scuffed up oxidised aluminium one.
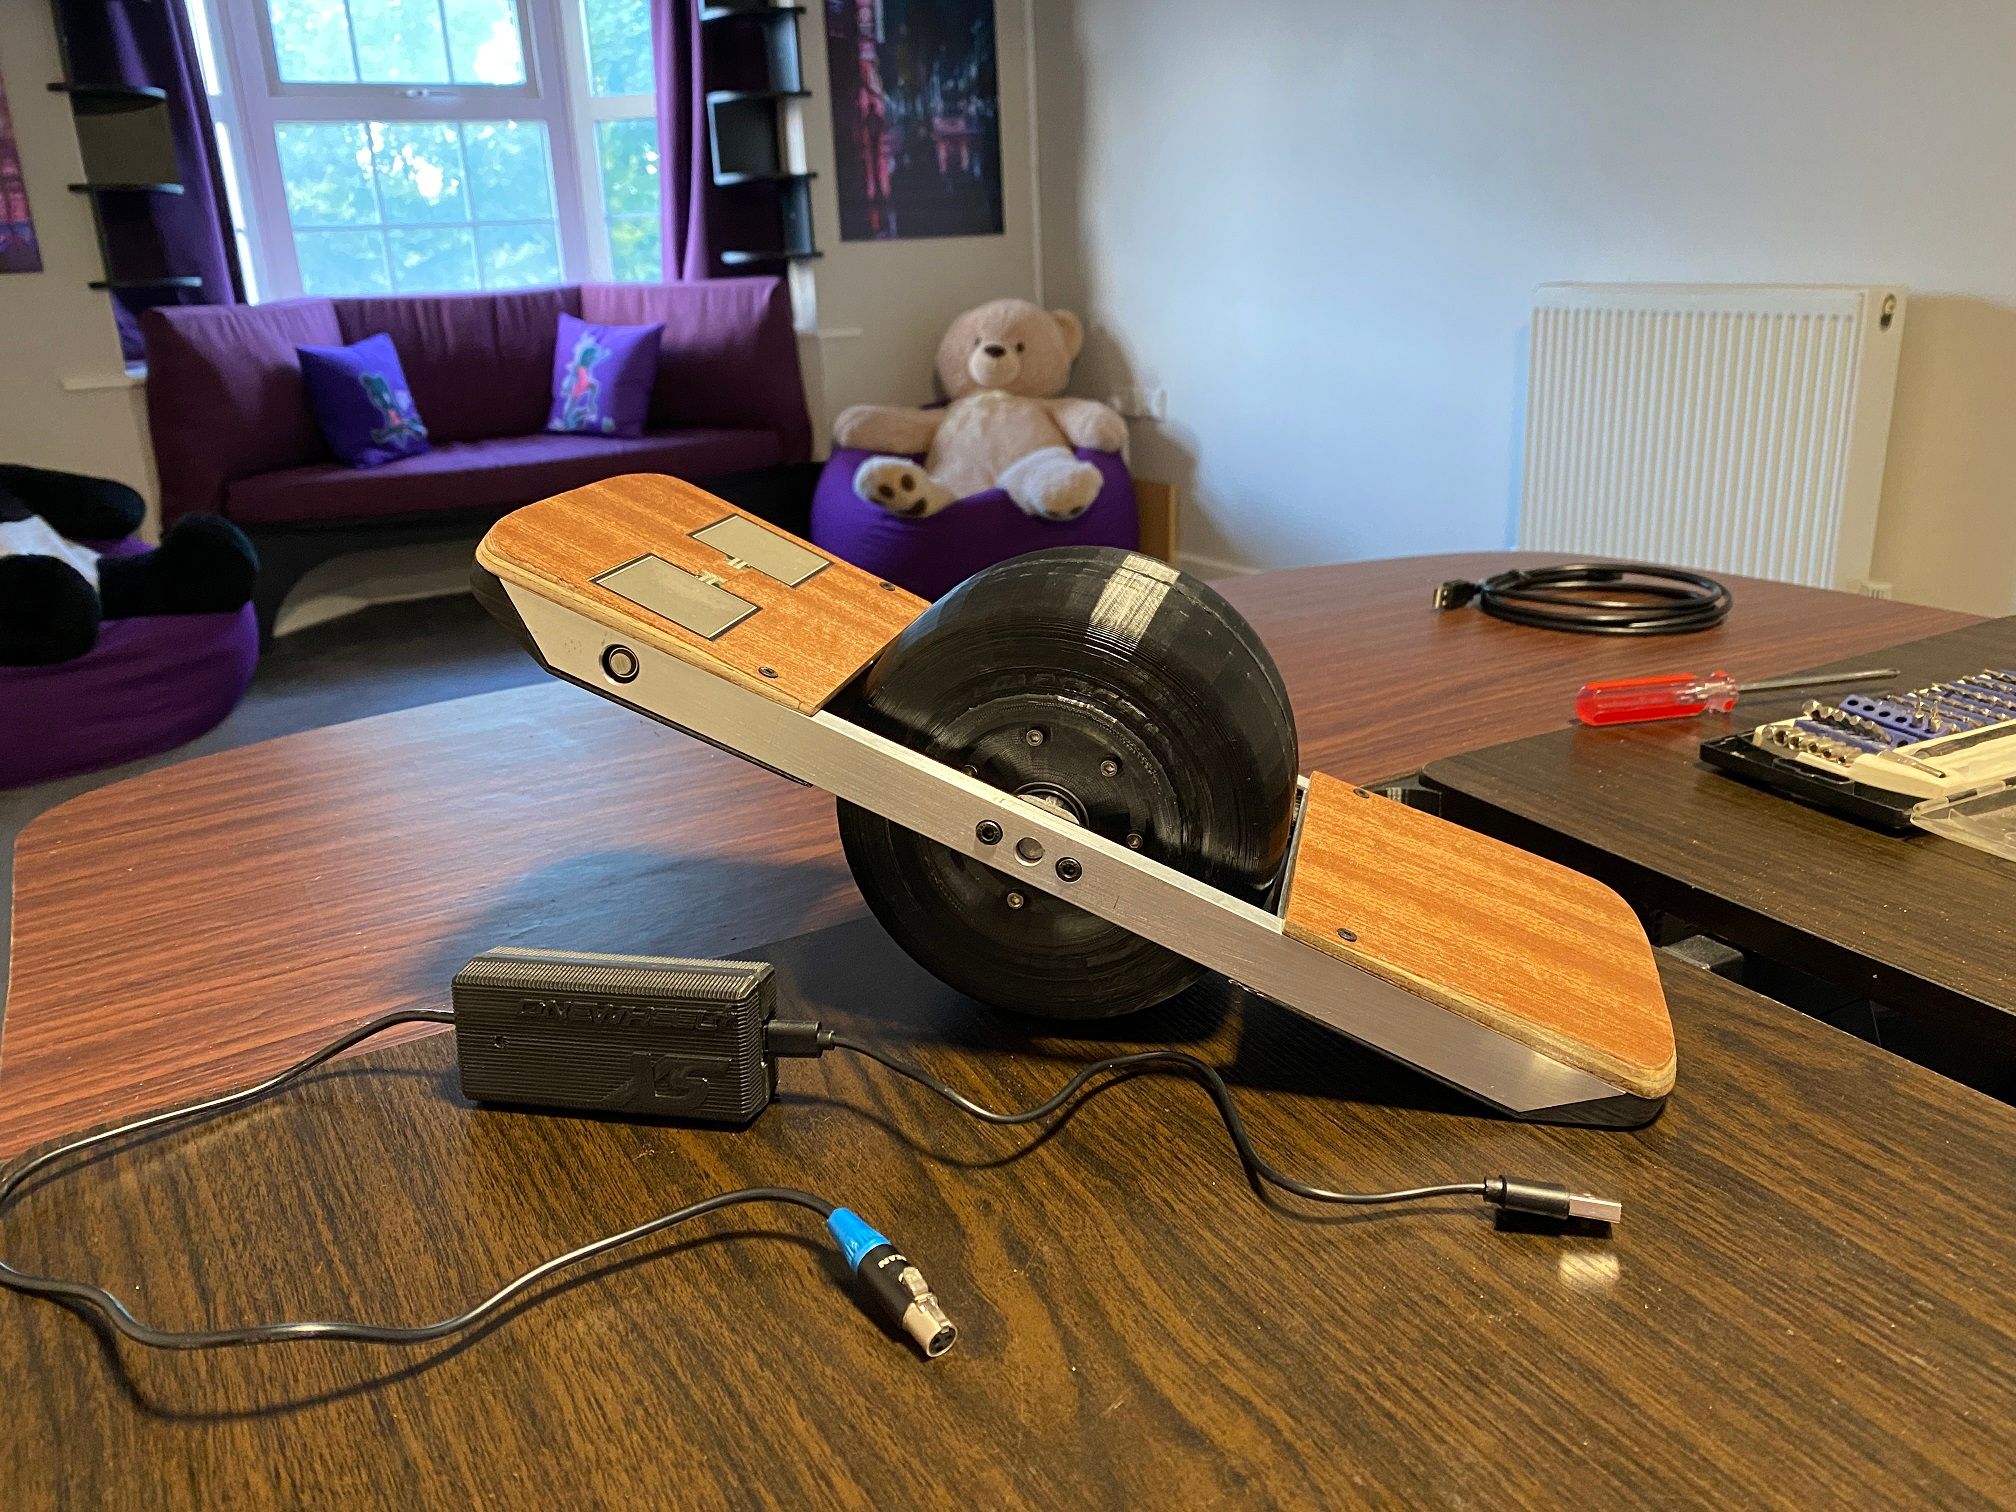
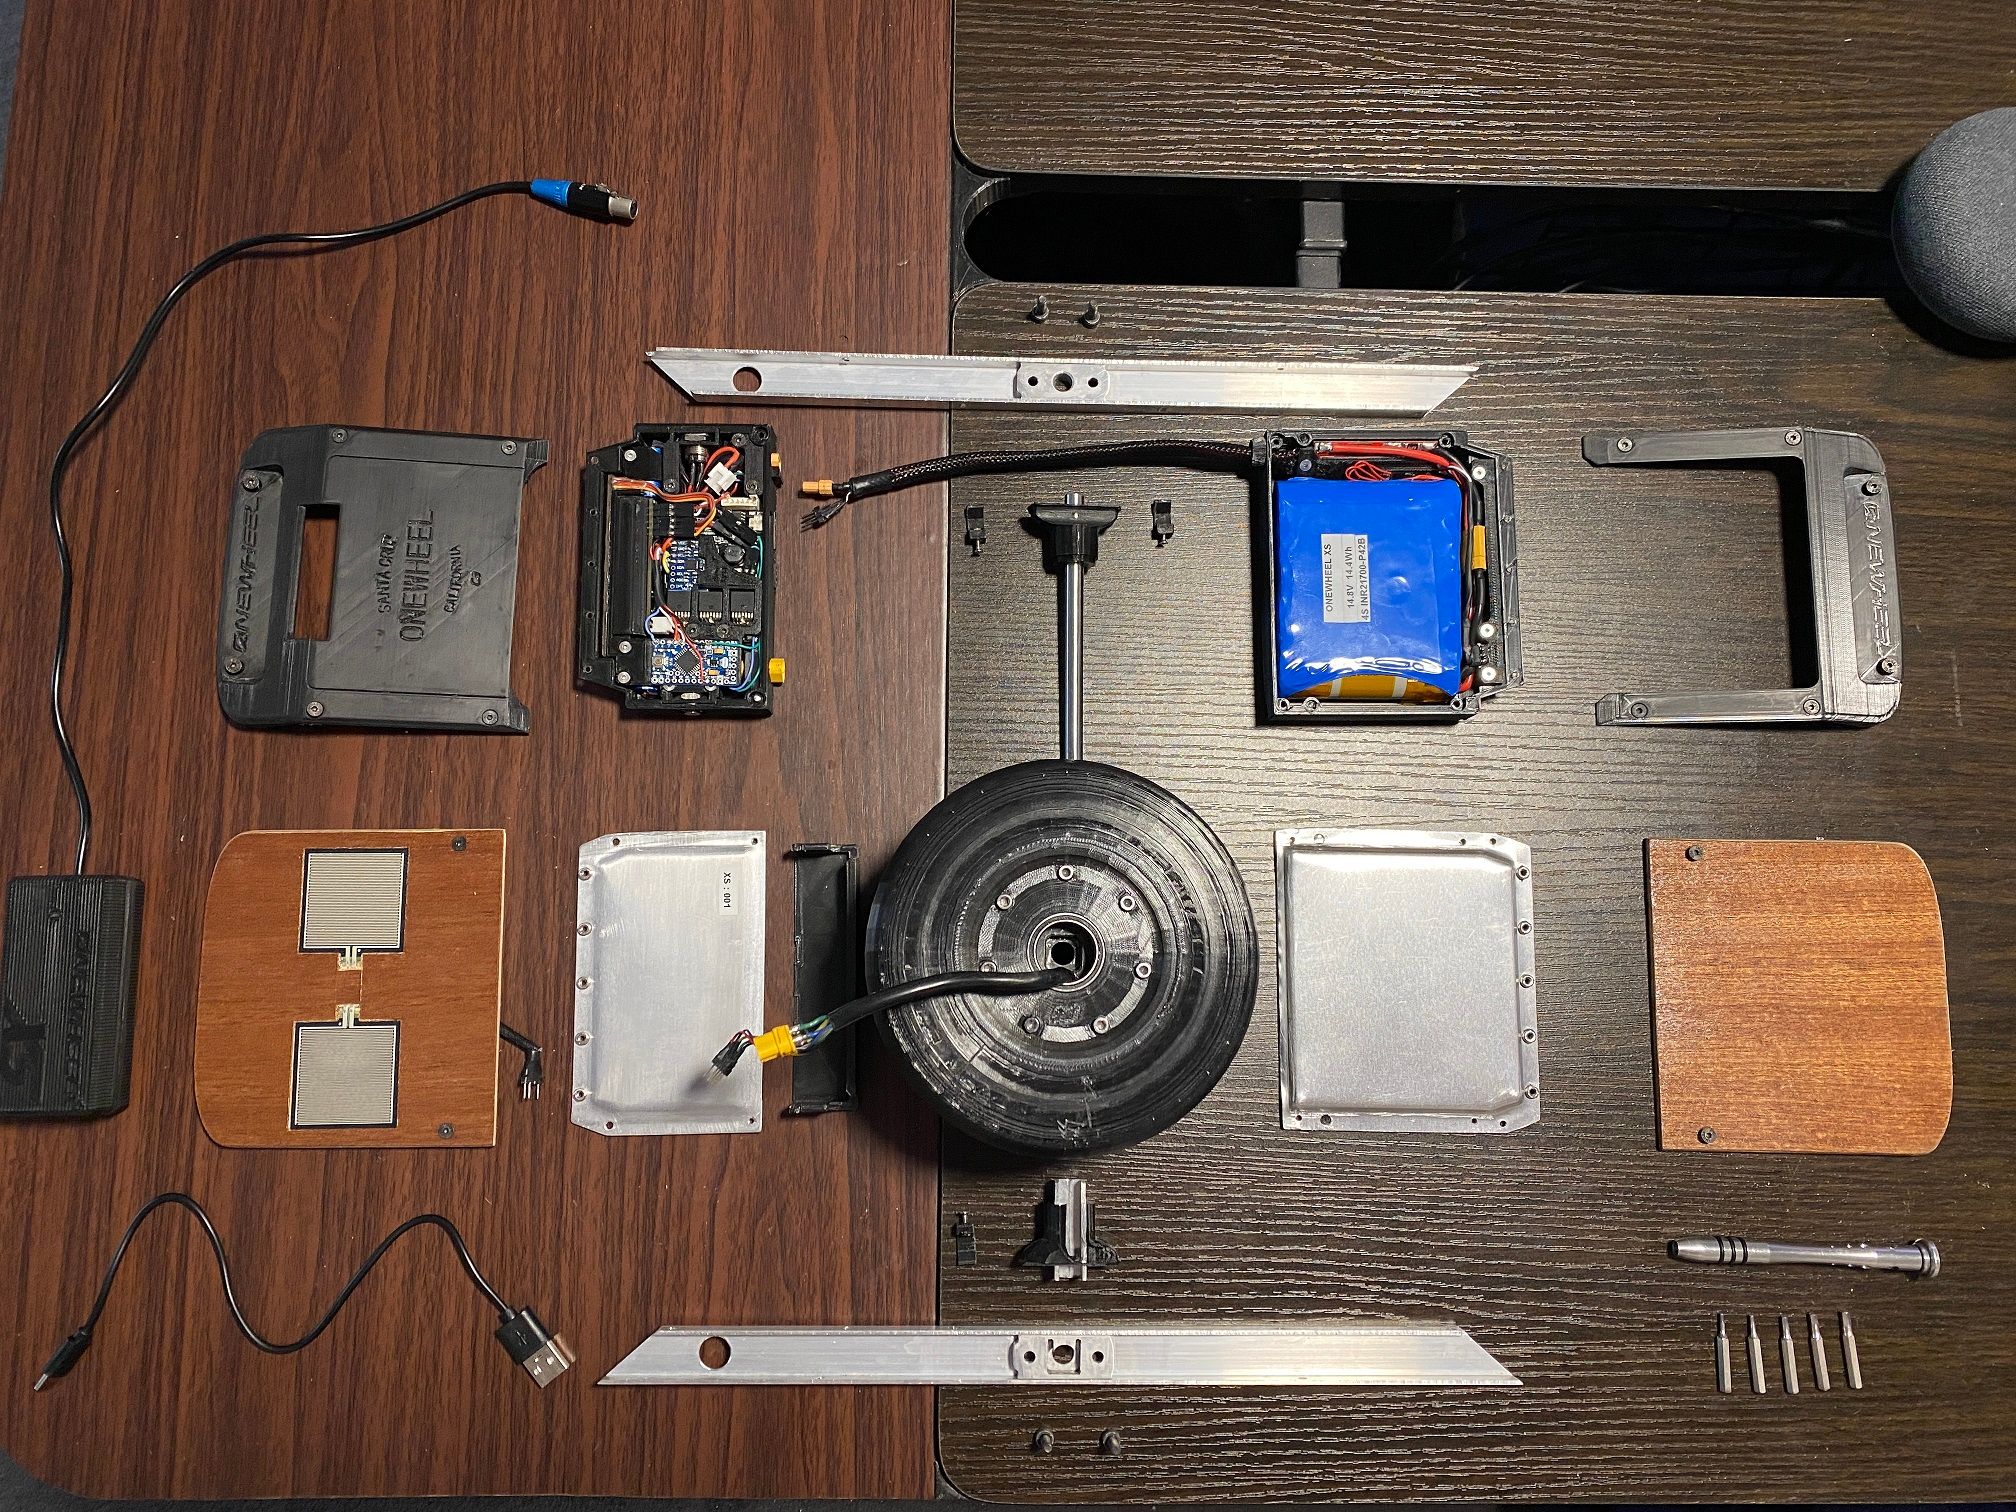
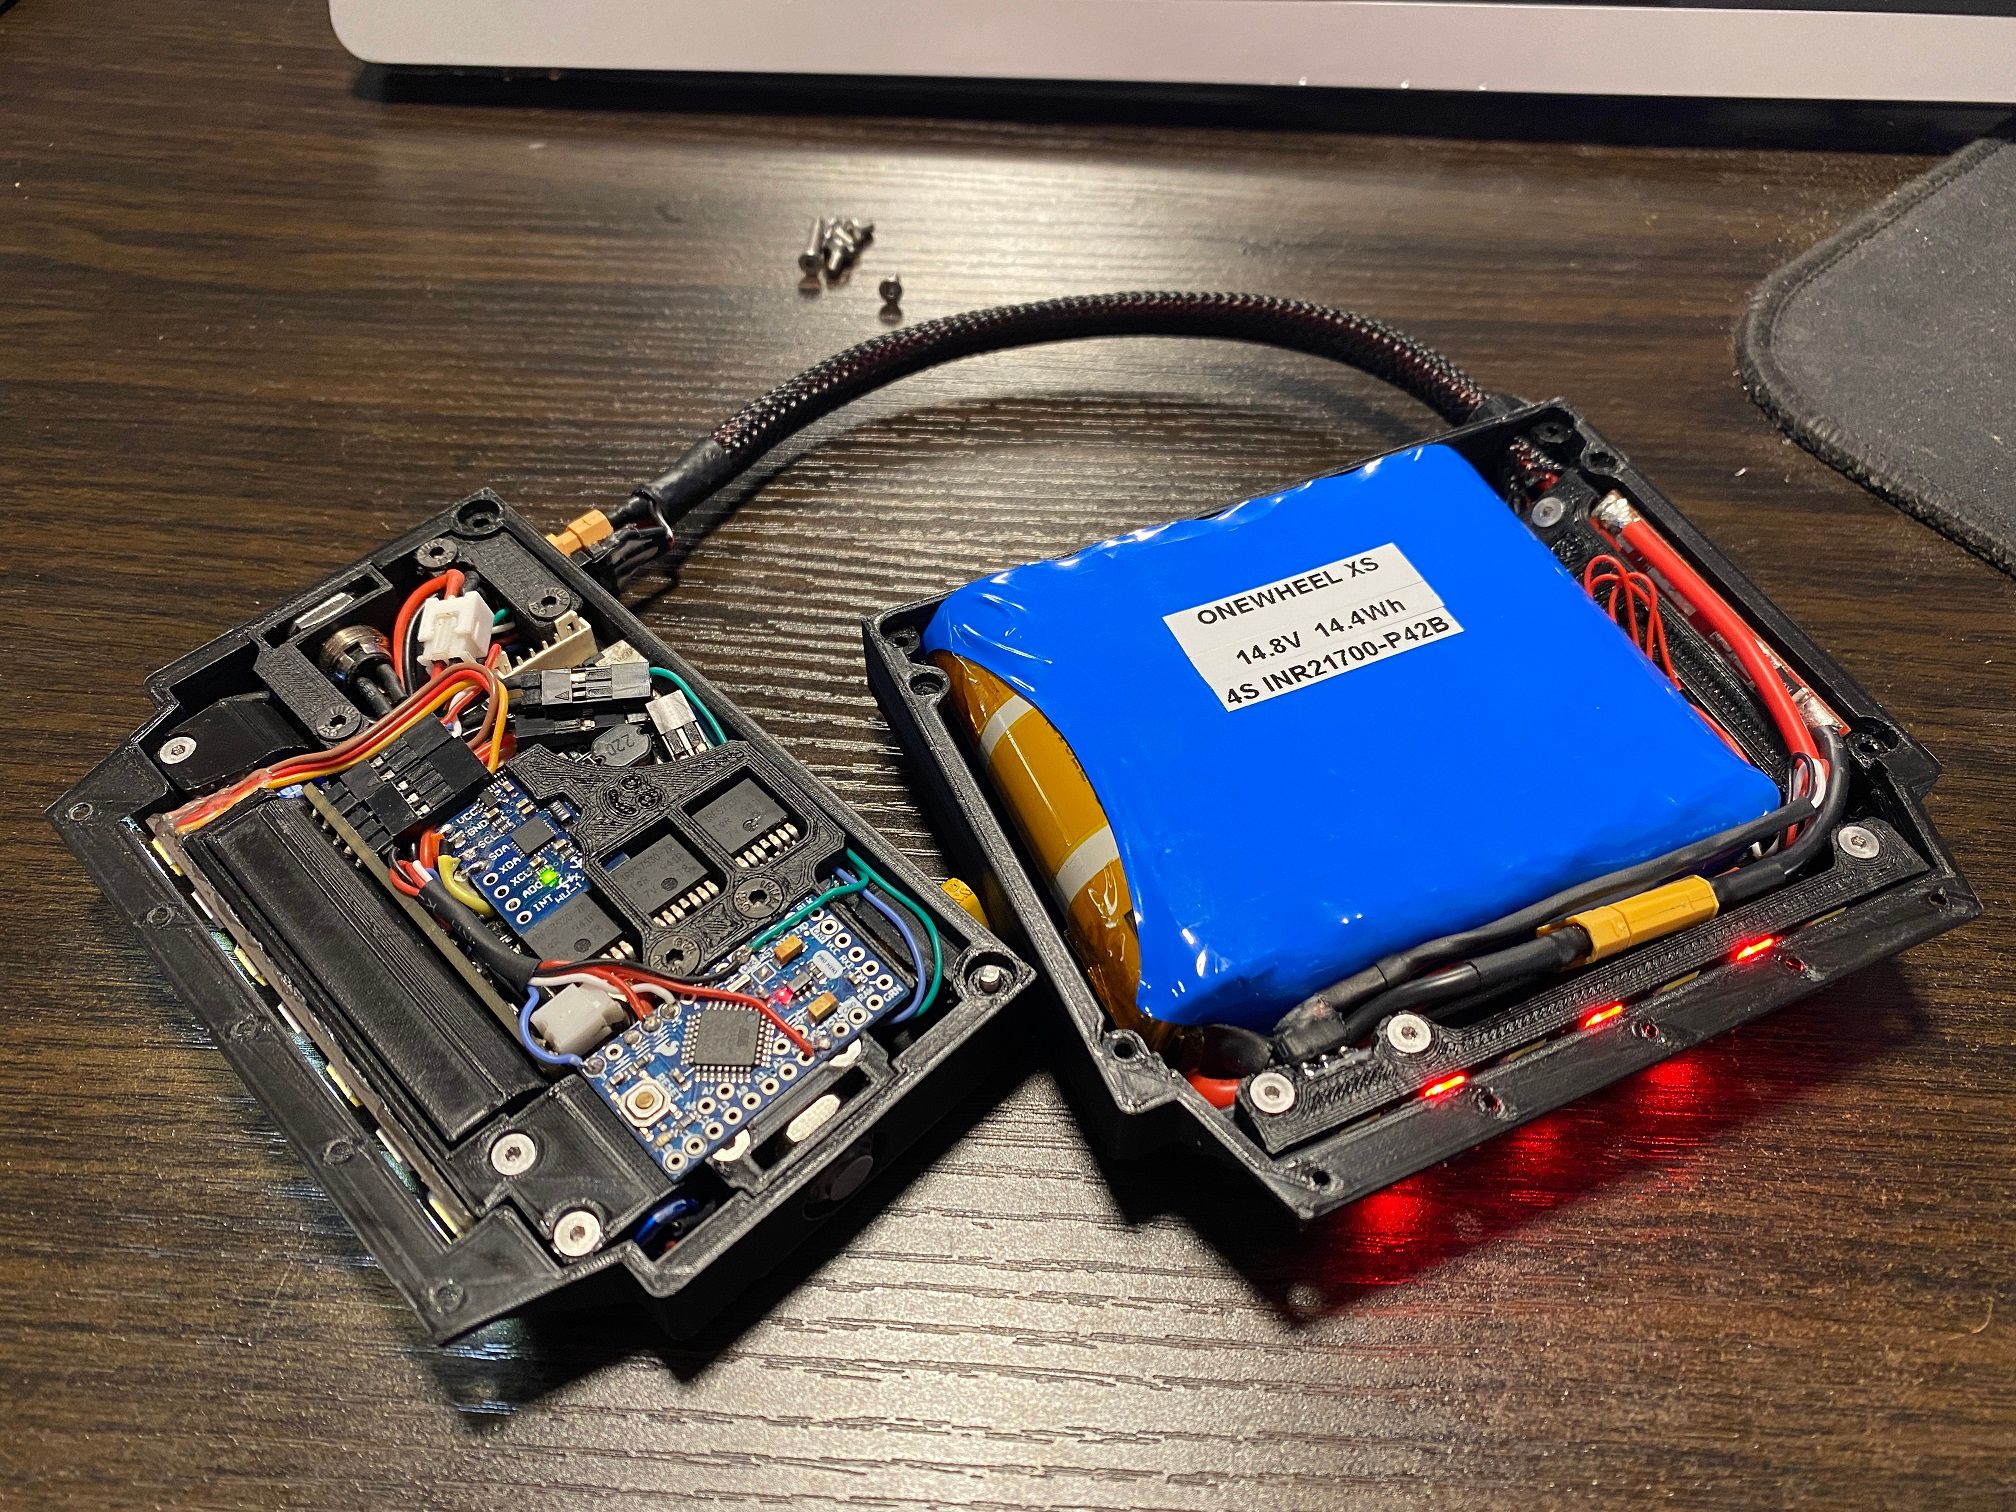
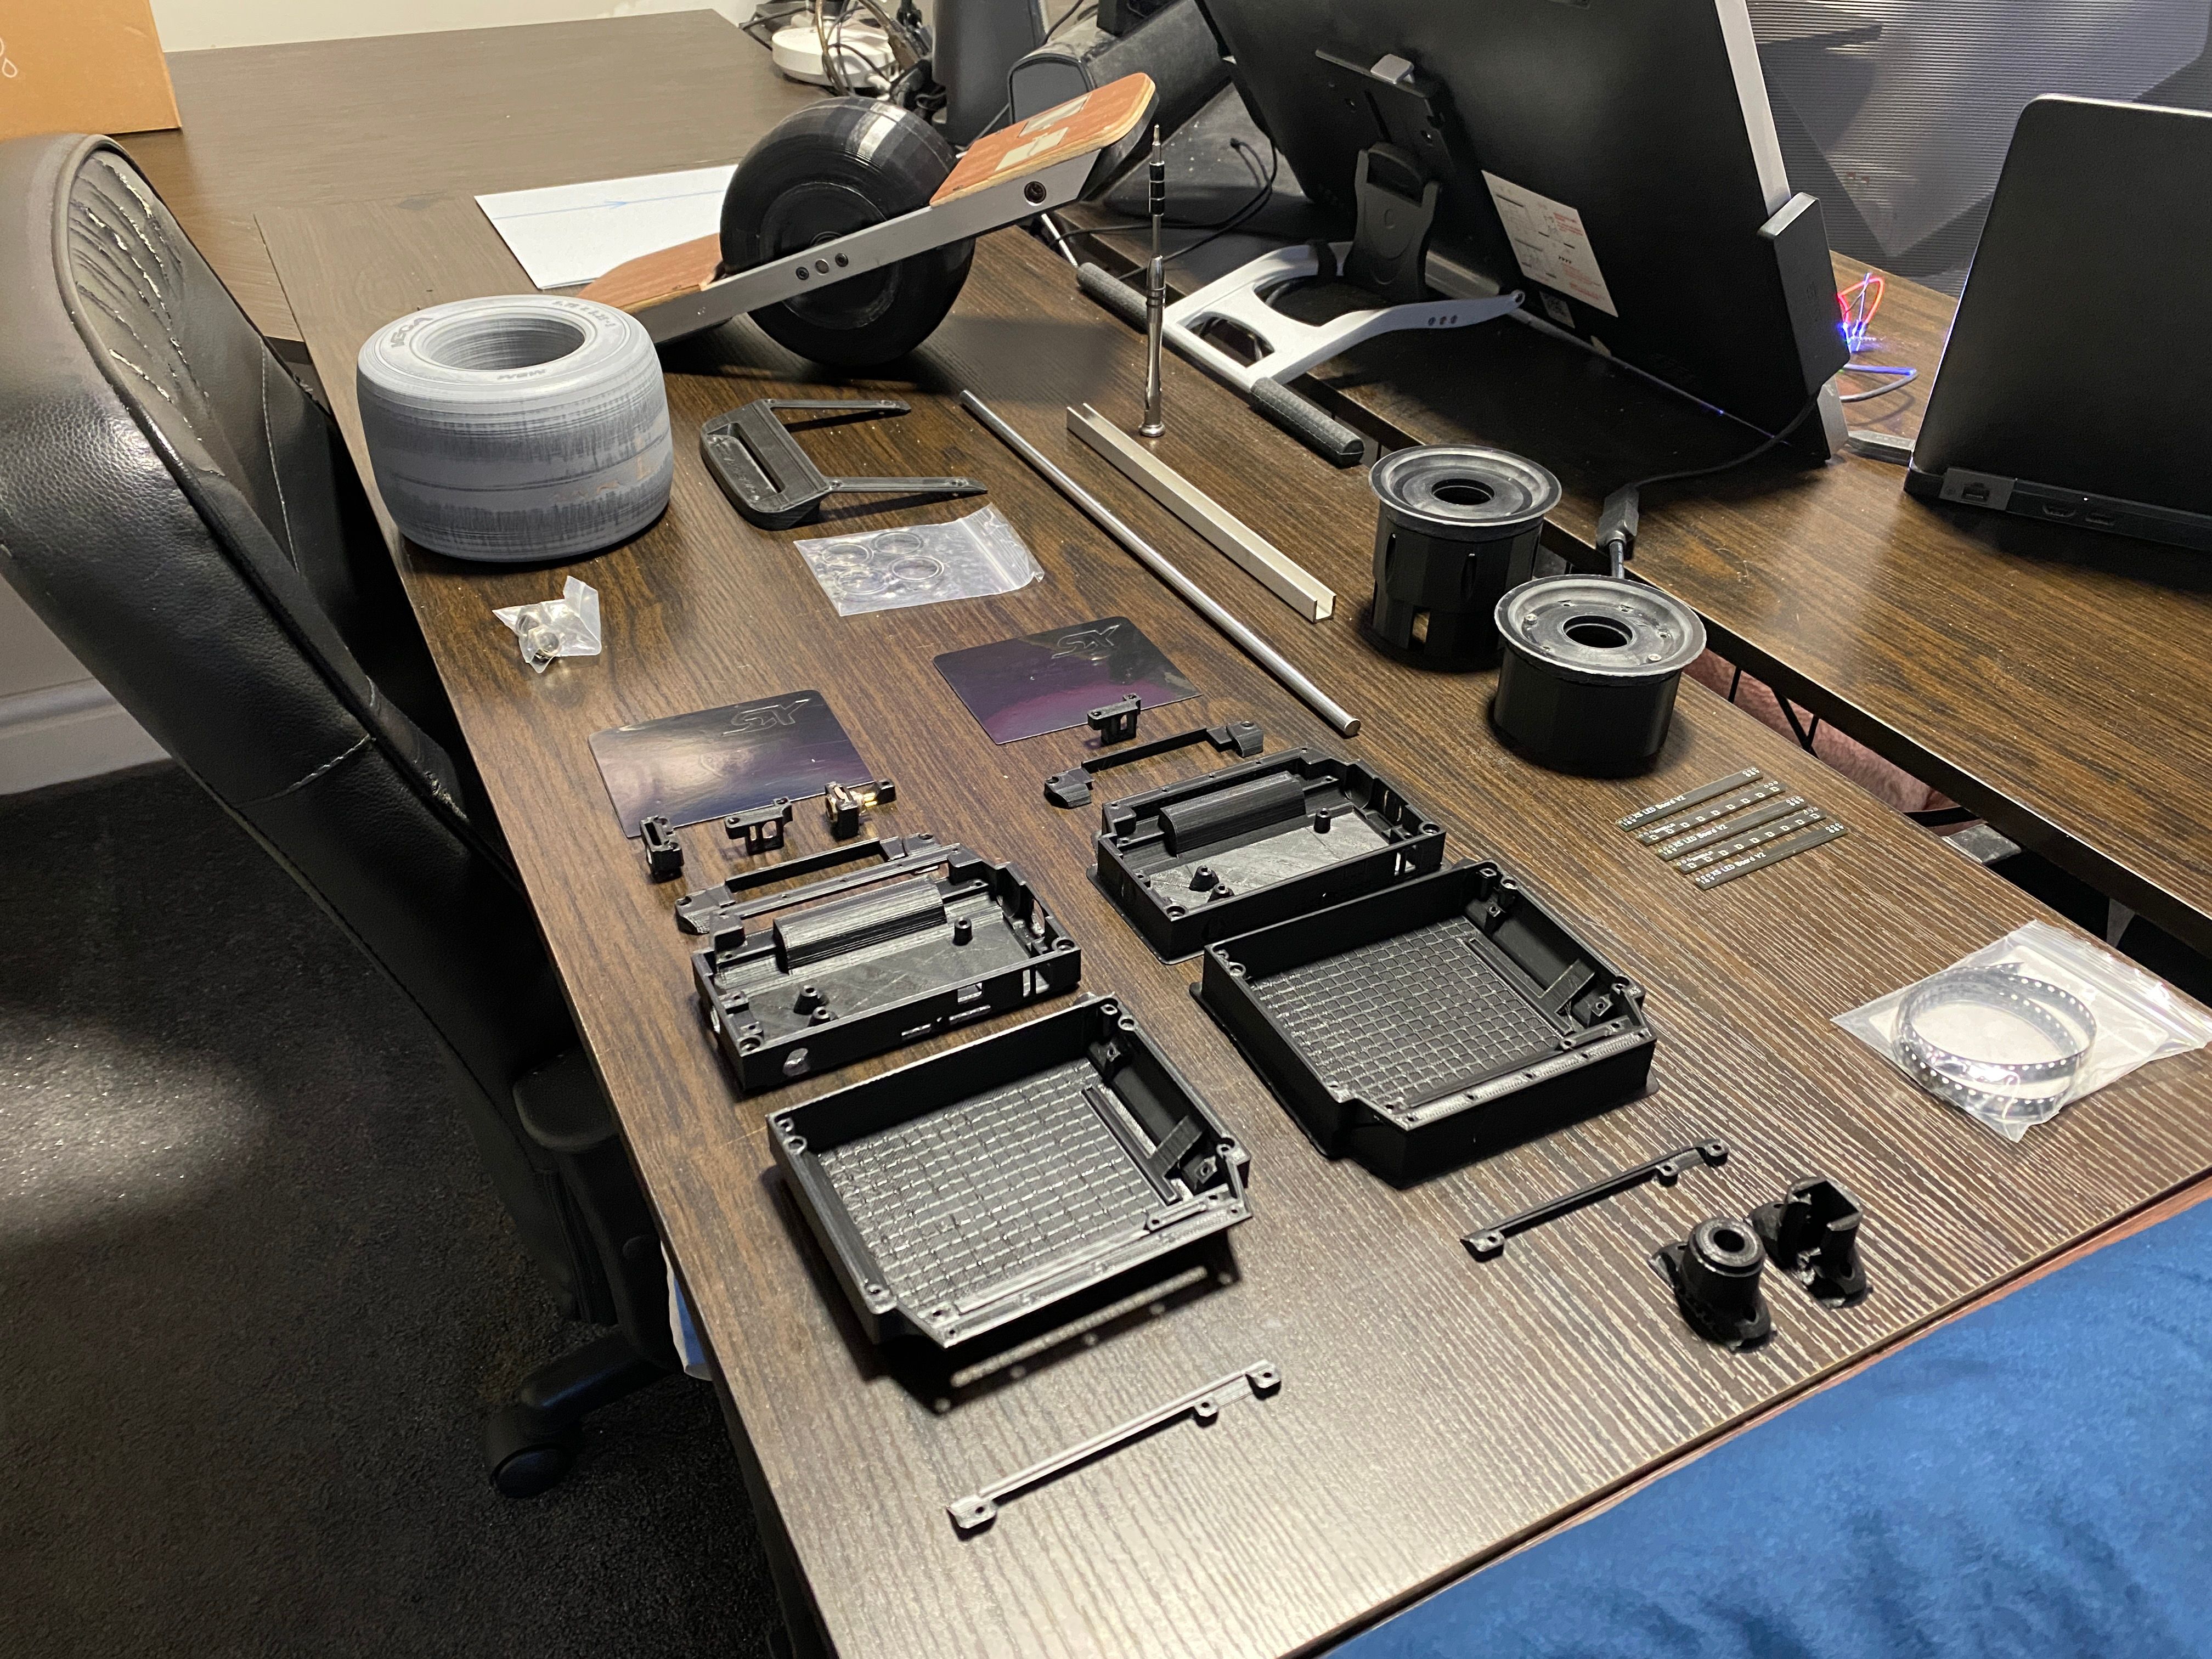
All in bits down to the major components this is what it looks like.
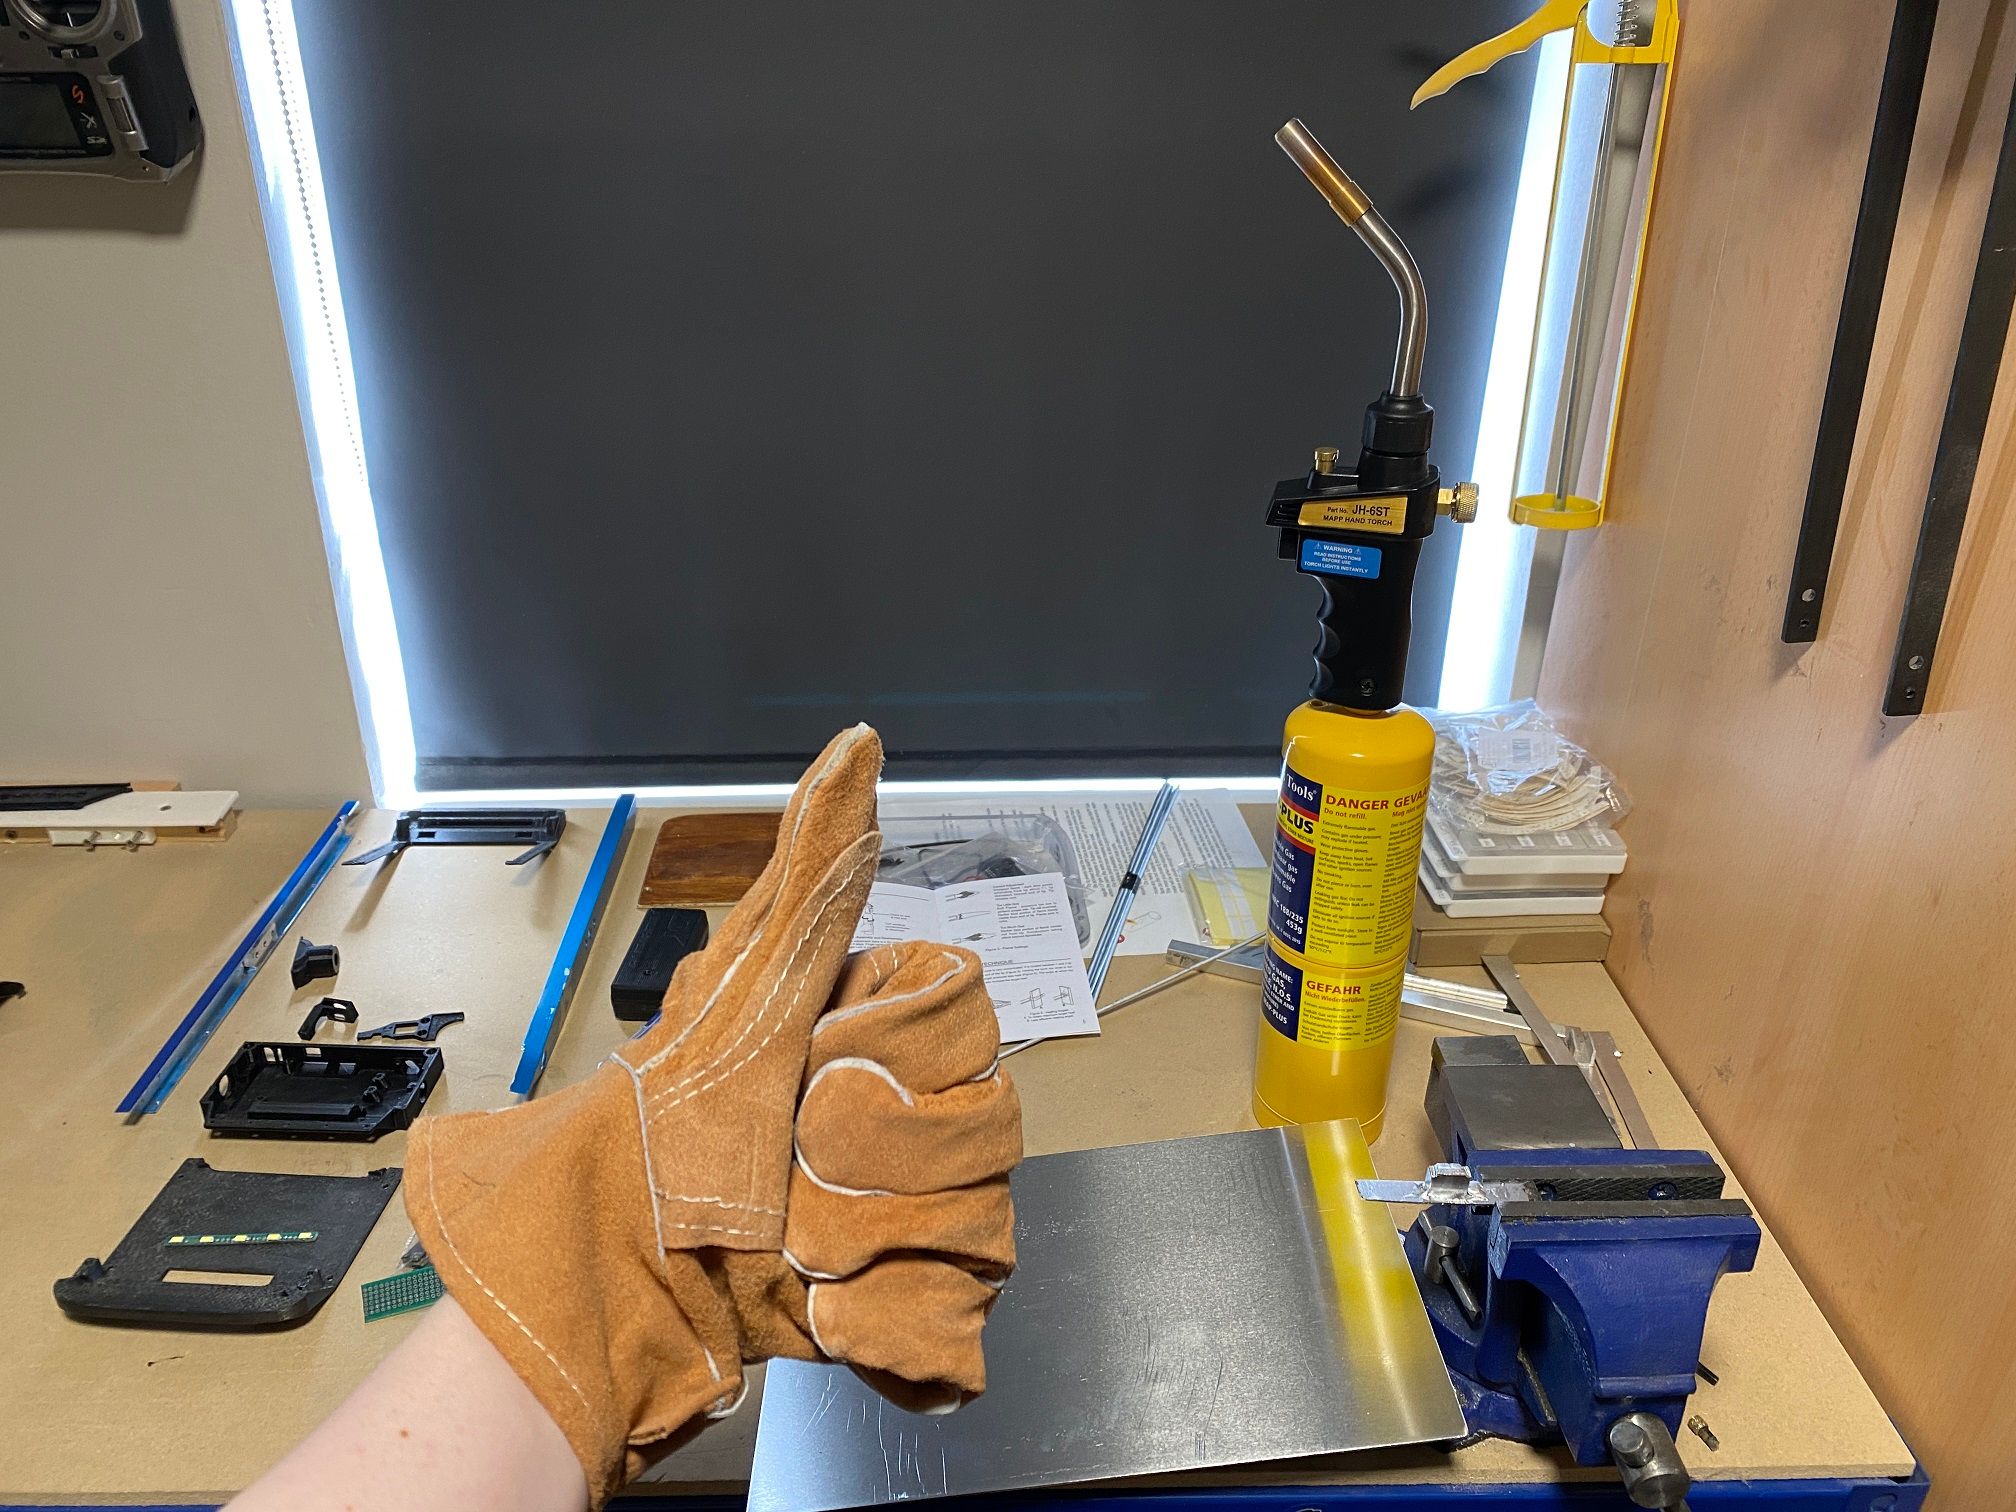
Worked up the courage to try the gas torch today with the brazing rods. These rods melt real quick and I haven't yet mastered the finer touch like I have with normal soldering so although I didn't burn myself or explode the can I'll instead JBweld the axle block to the rail. Tried to do it and it got messy D:
I wish they made smaller gloves too. These gloves are huge... like... do they come in women's sizes lol. I'll keep practising so I can continue the W-Rails.
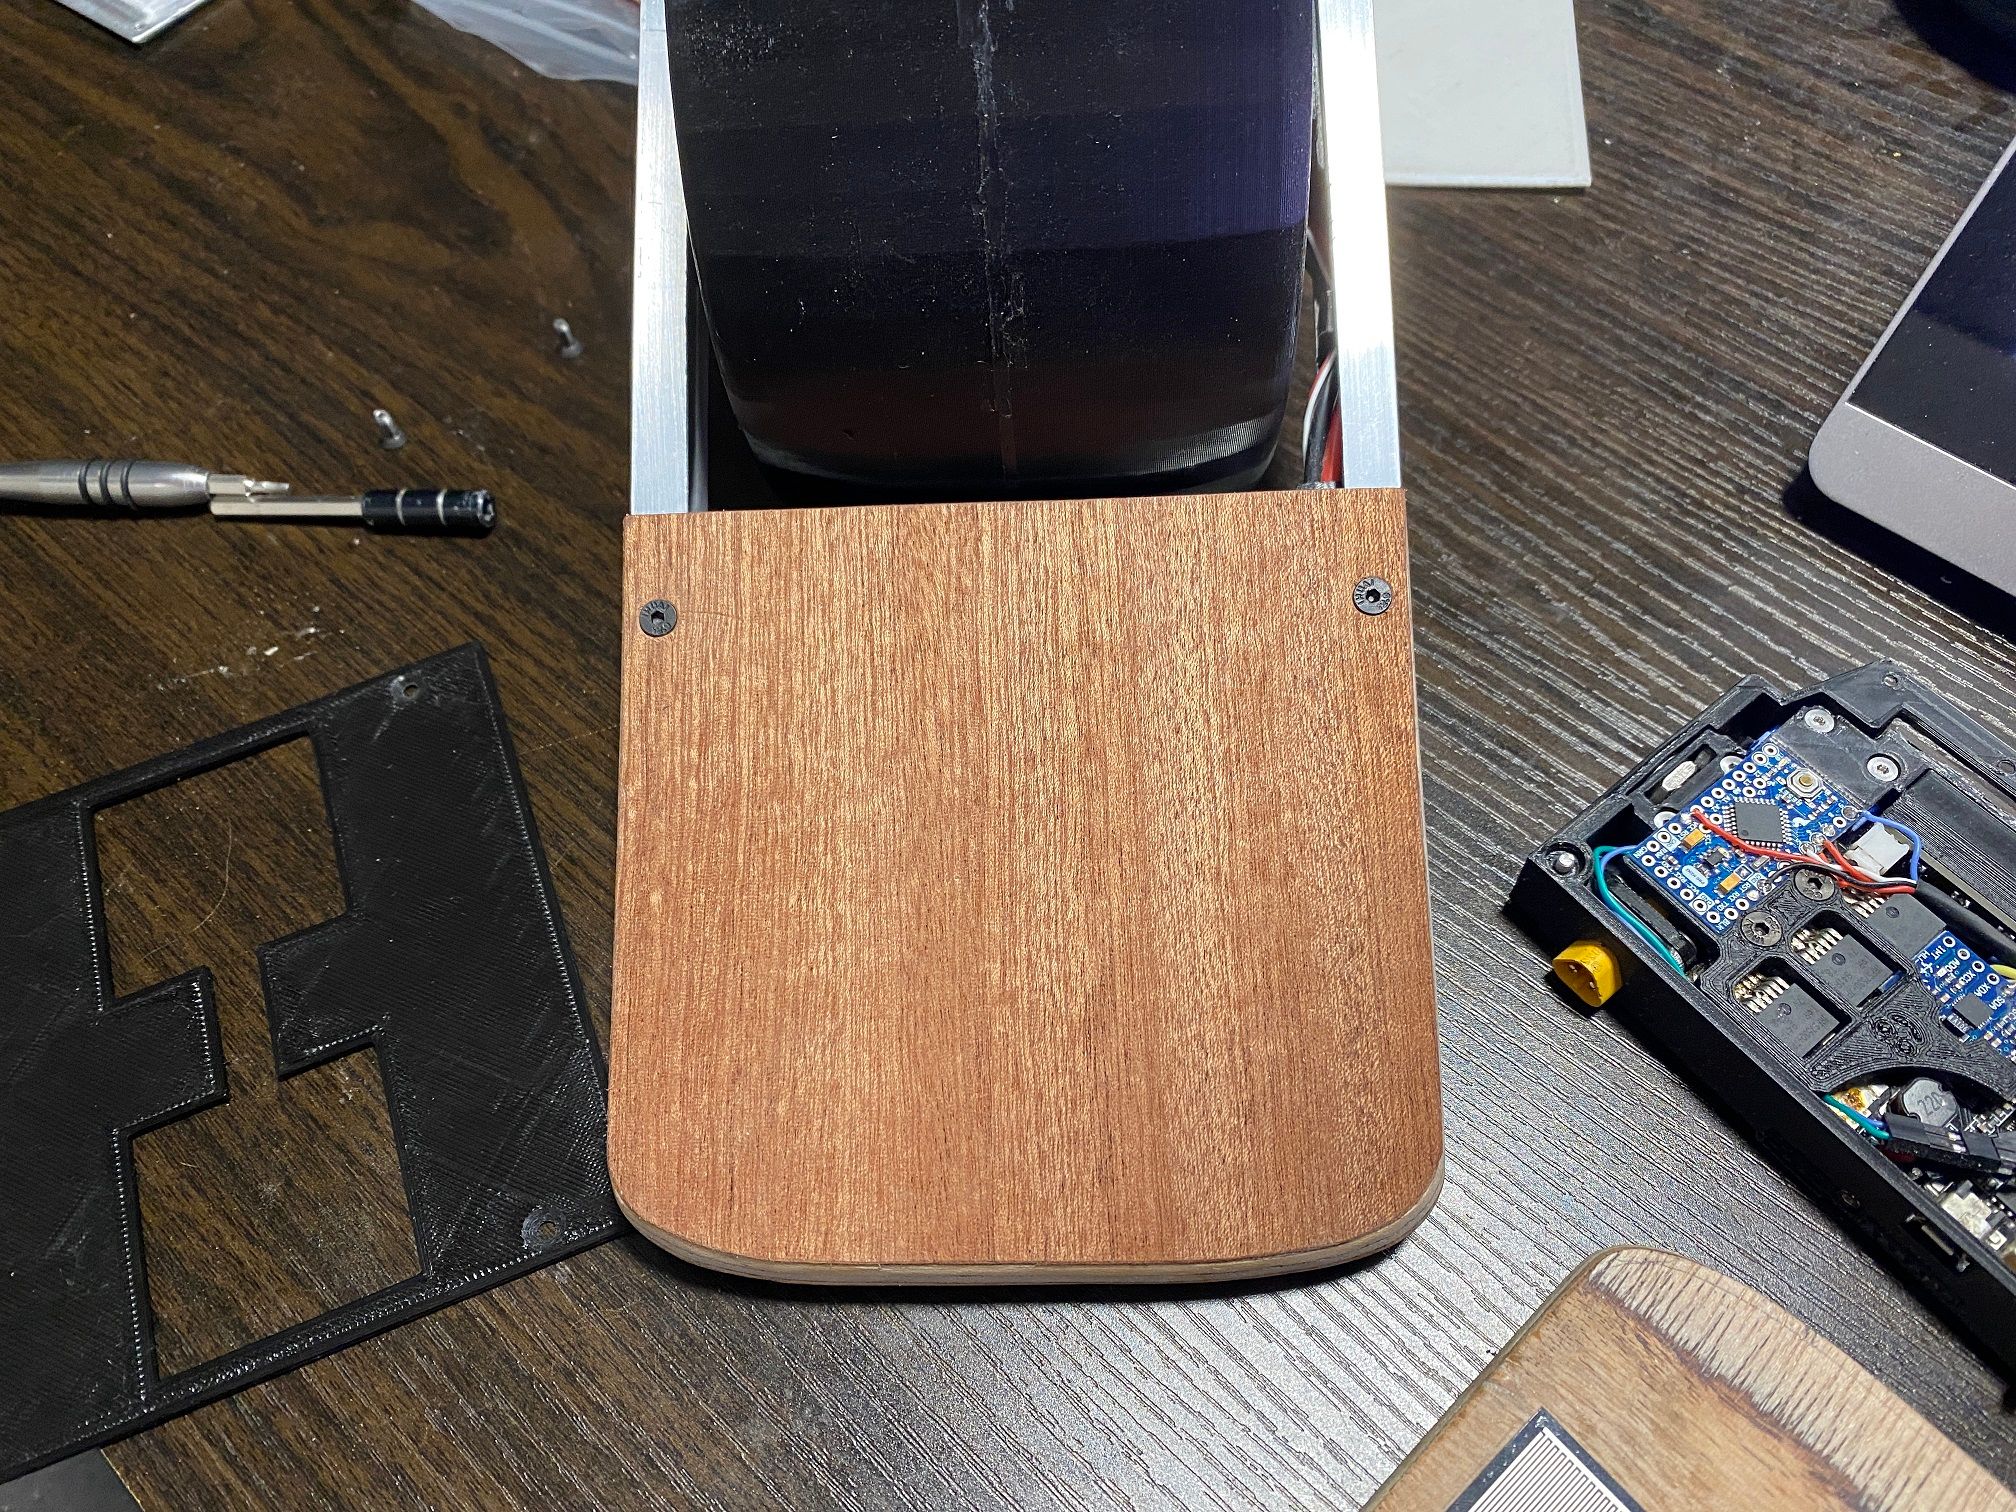
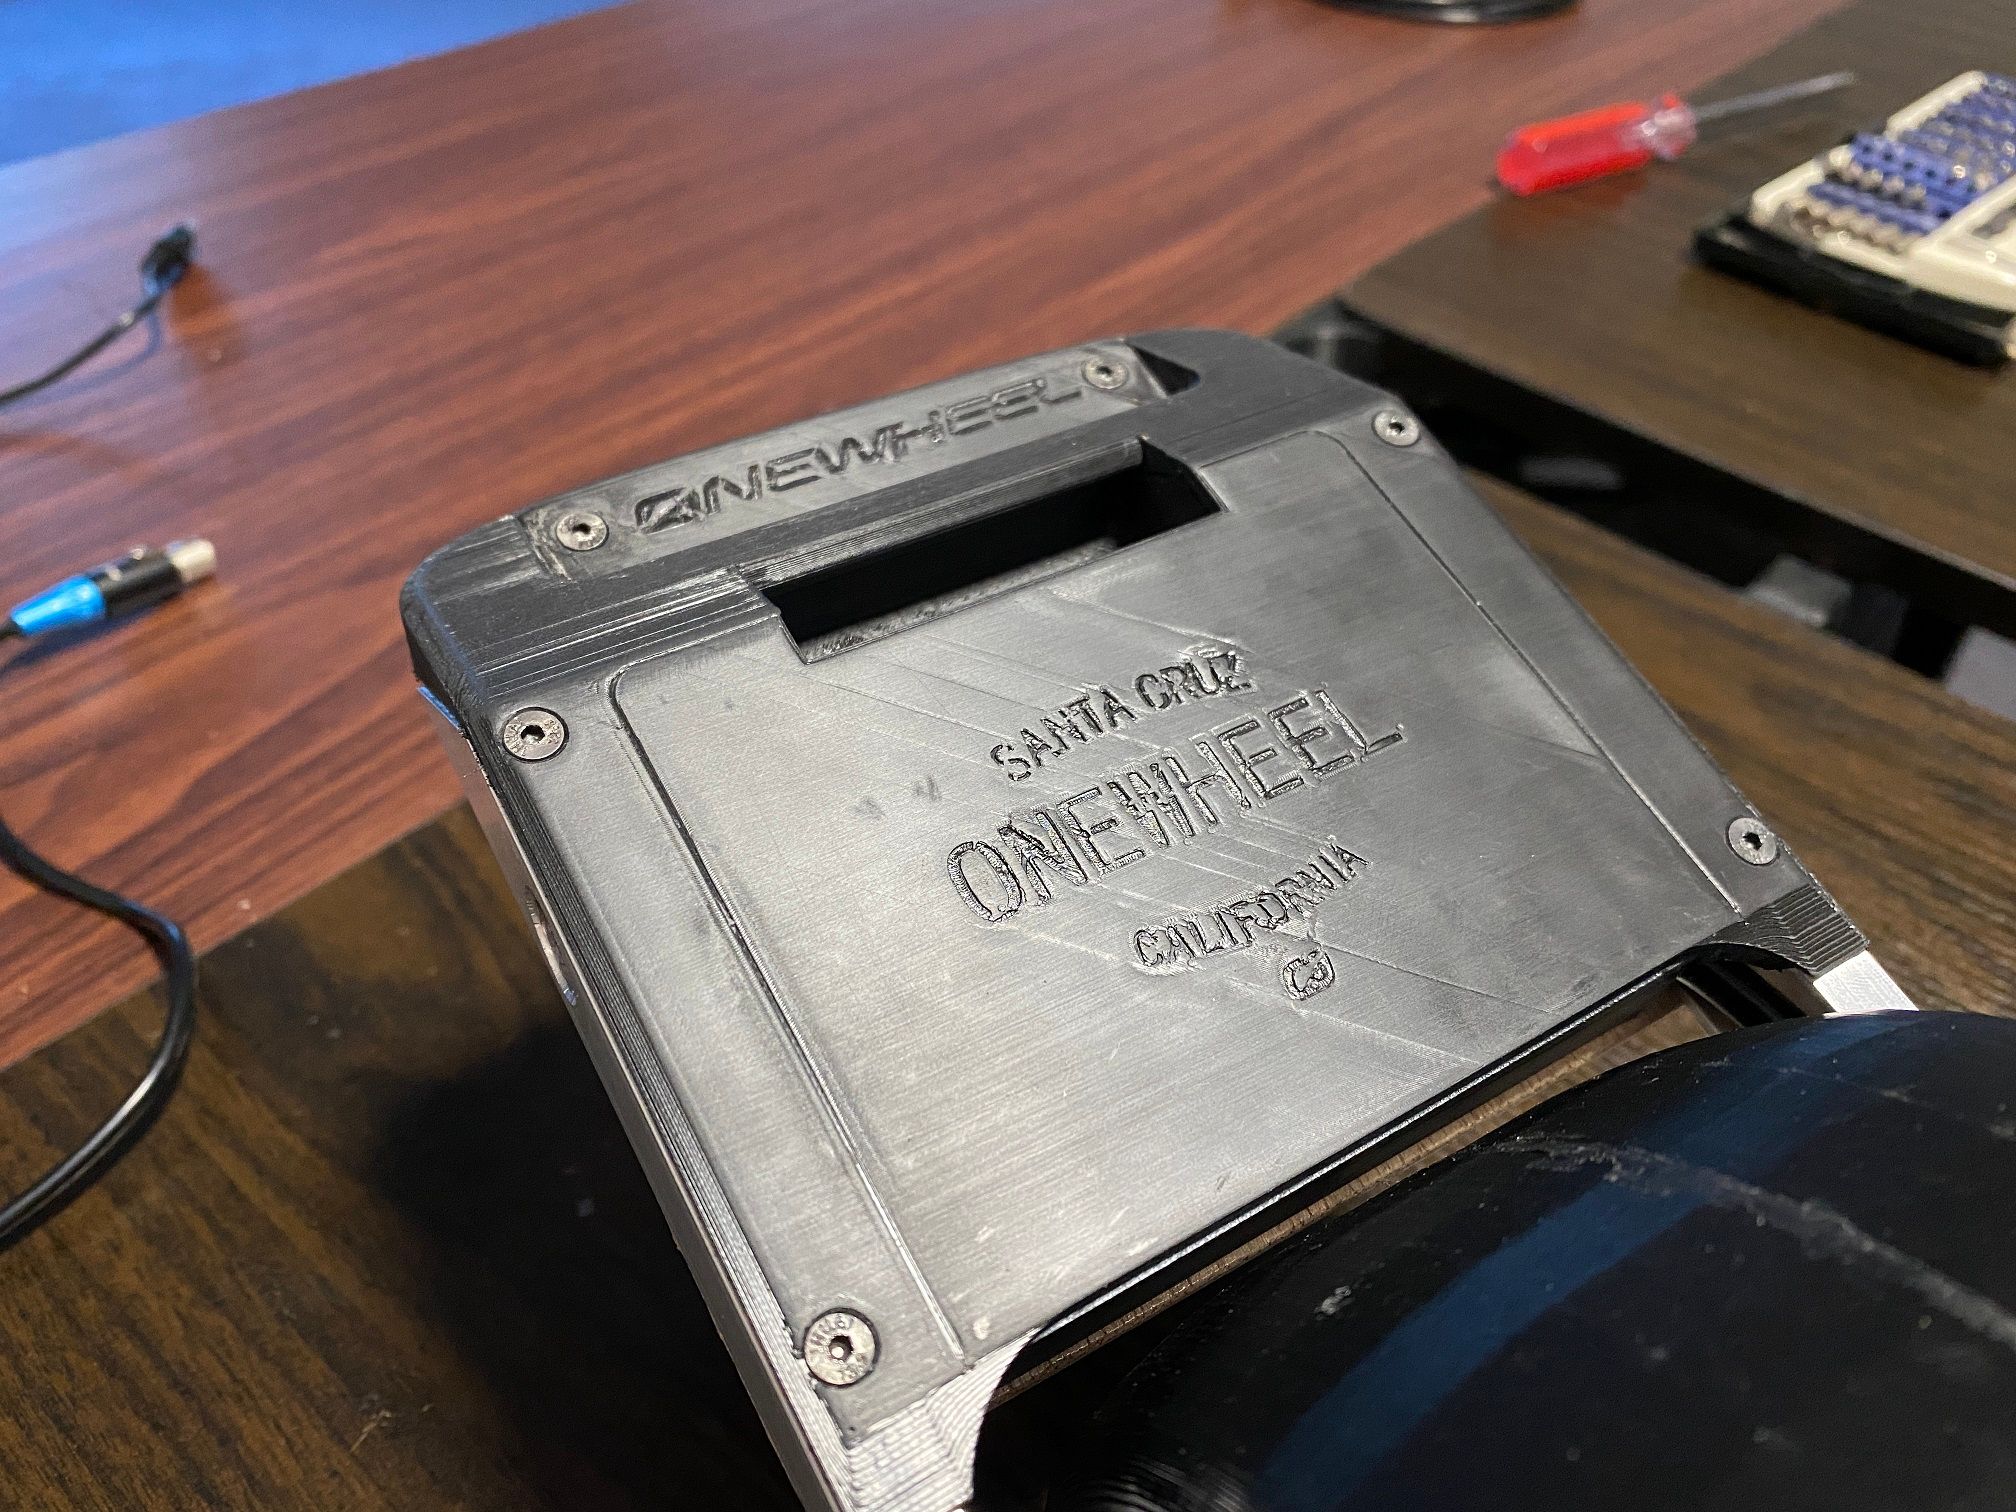
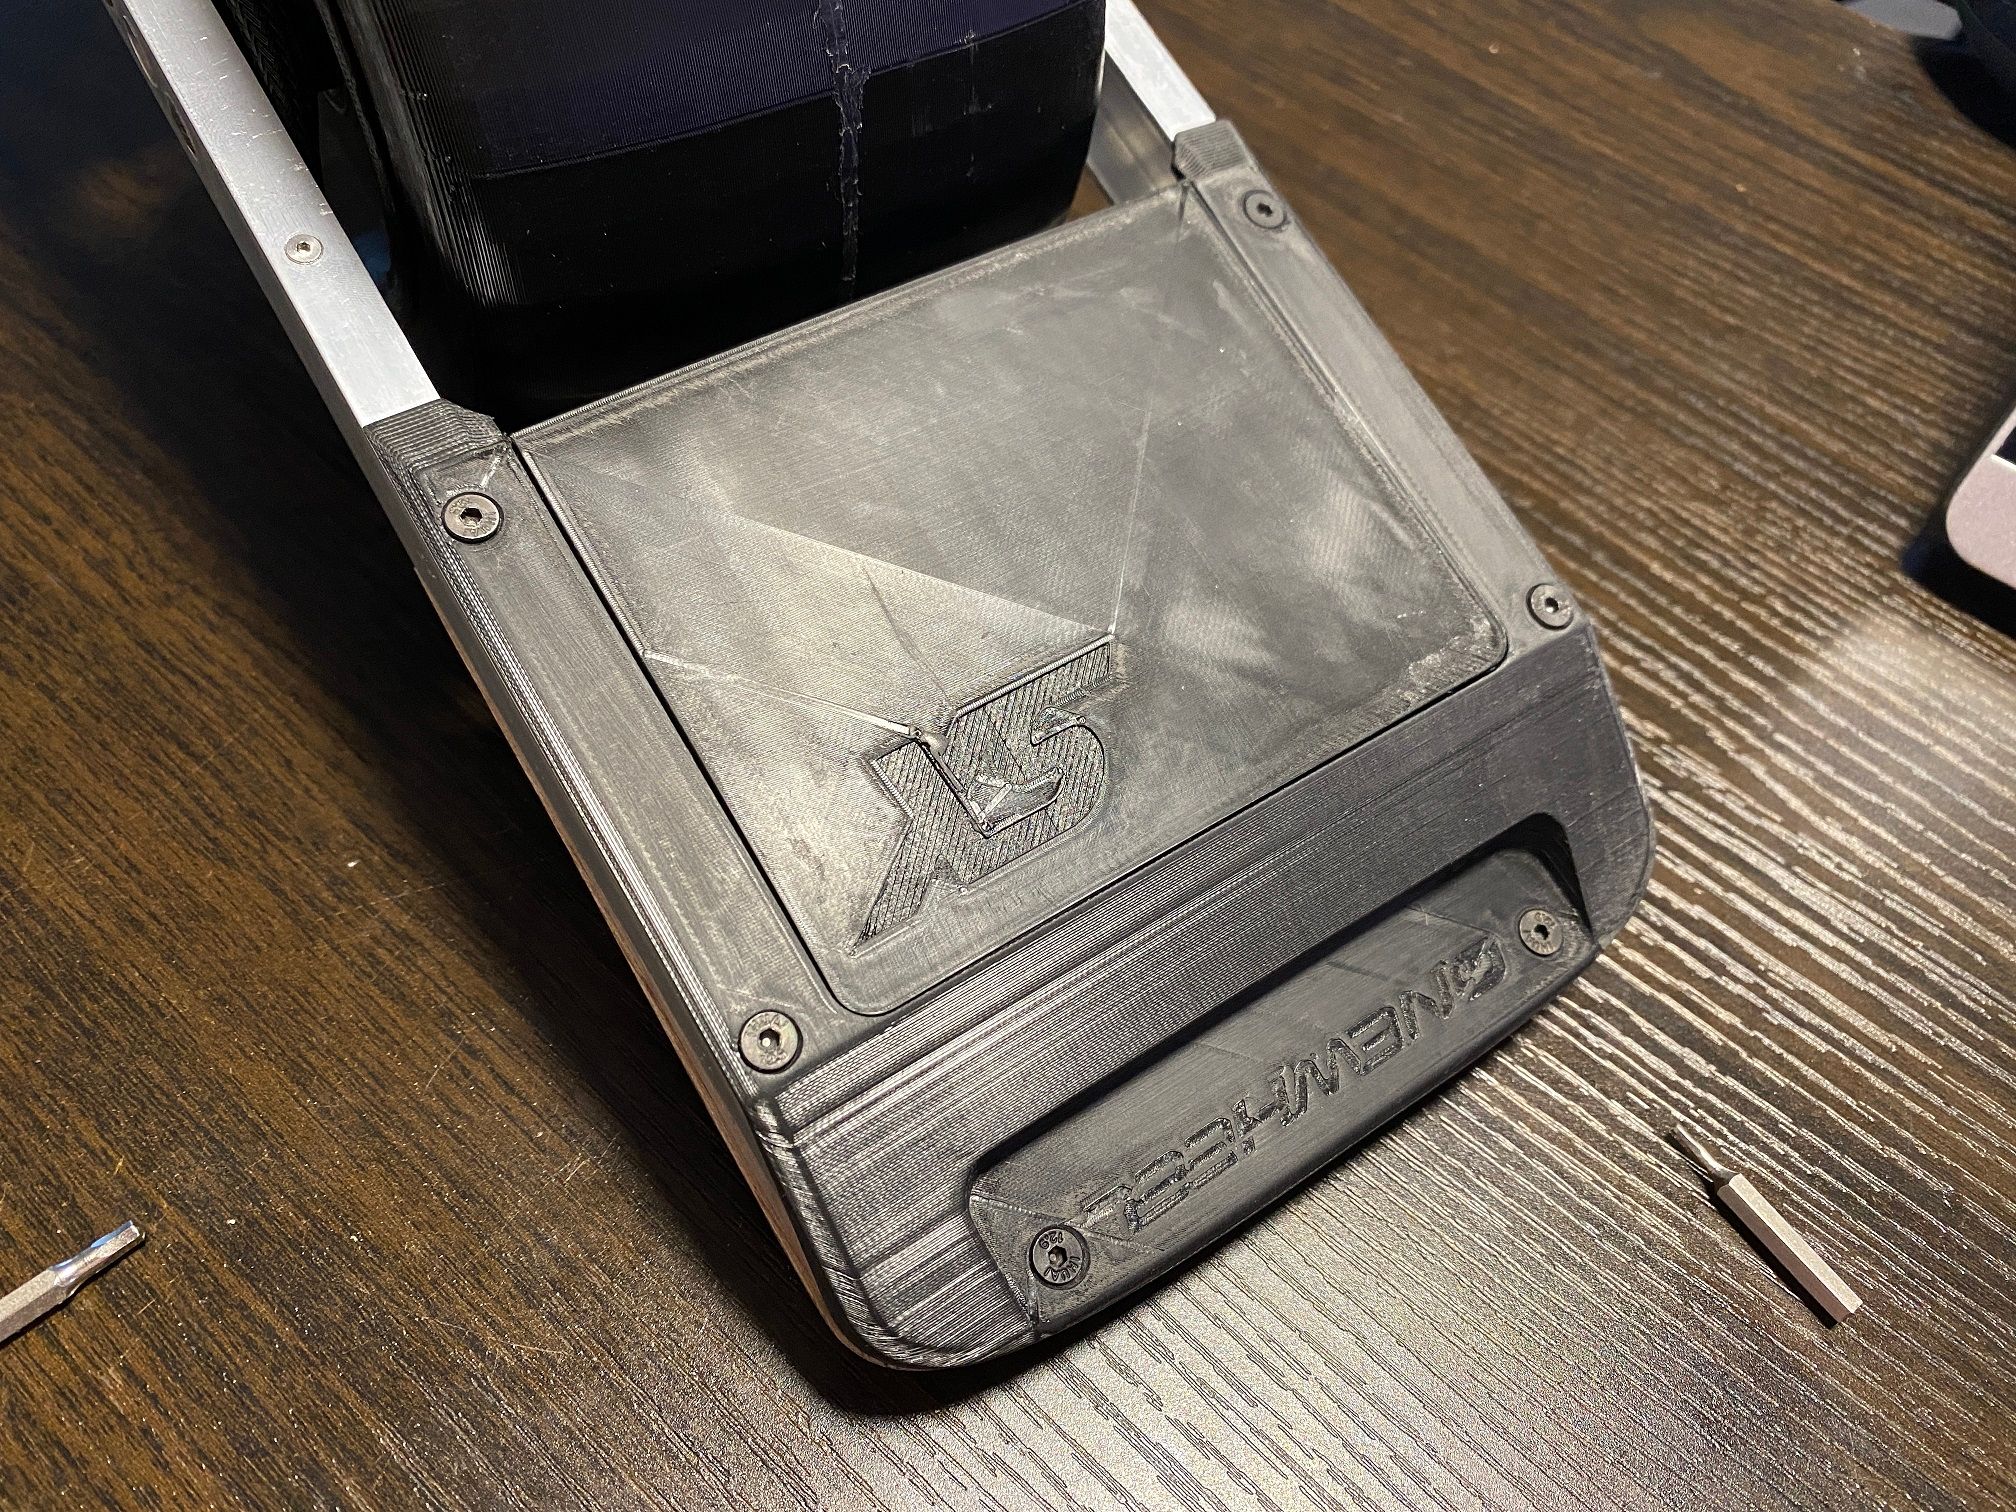
Redid the battery housing again, this time to make the underside prettier and to add some cups to stop me long-screwing the housing with the footpad screws.
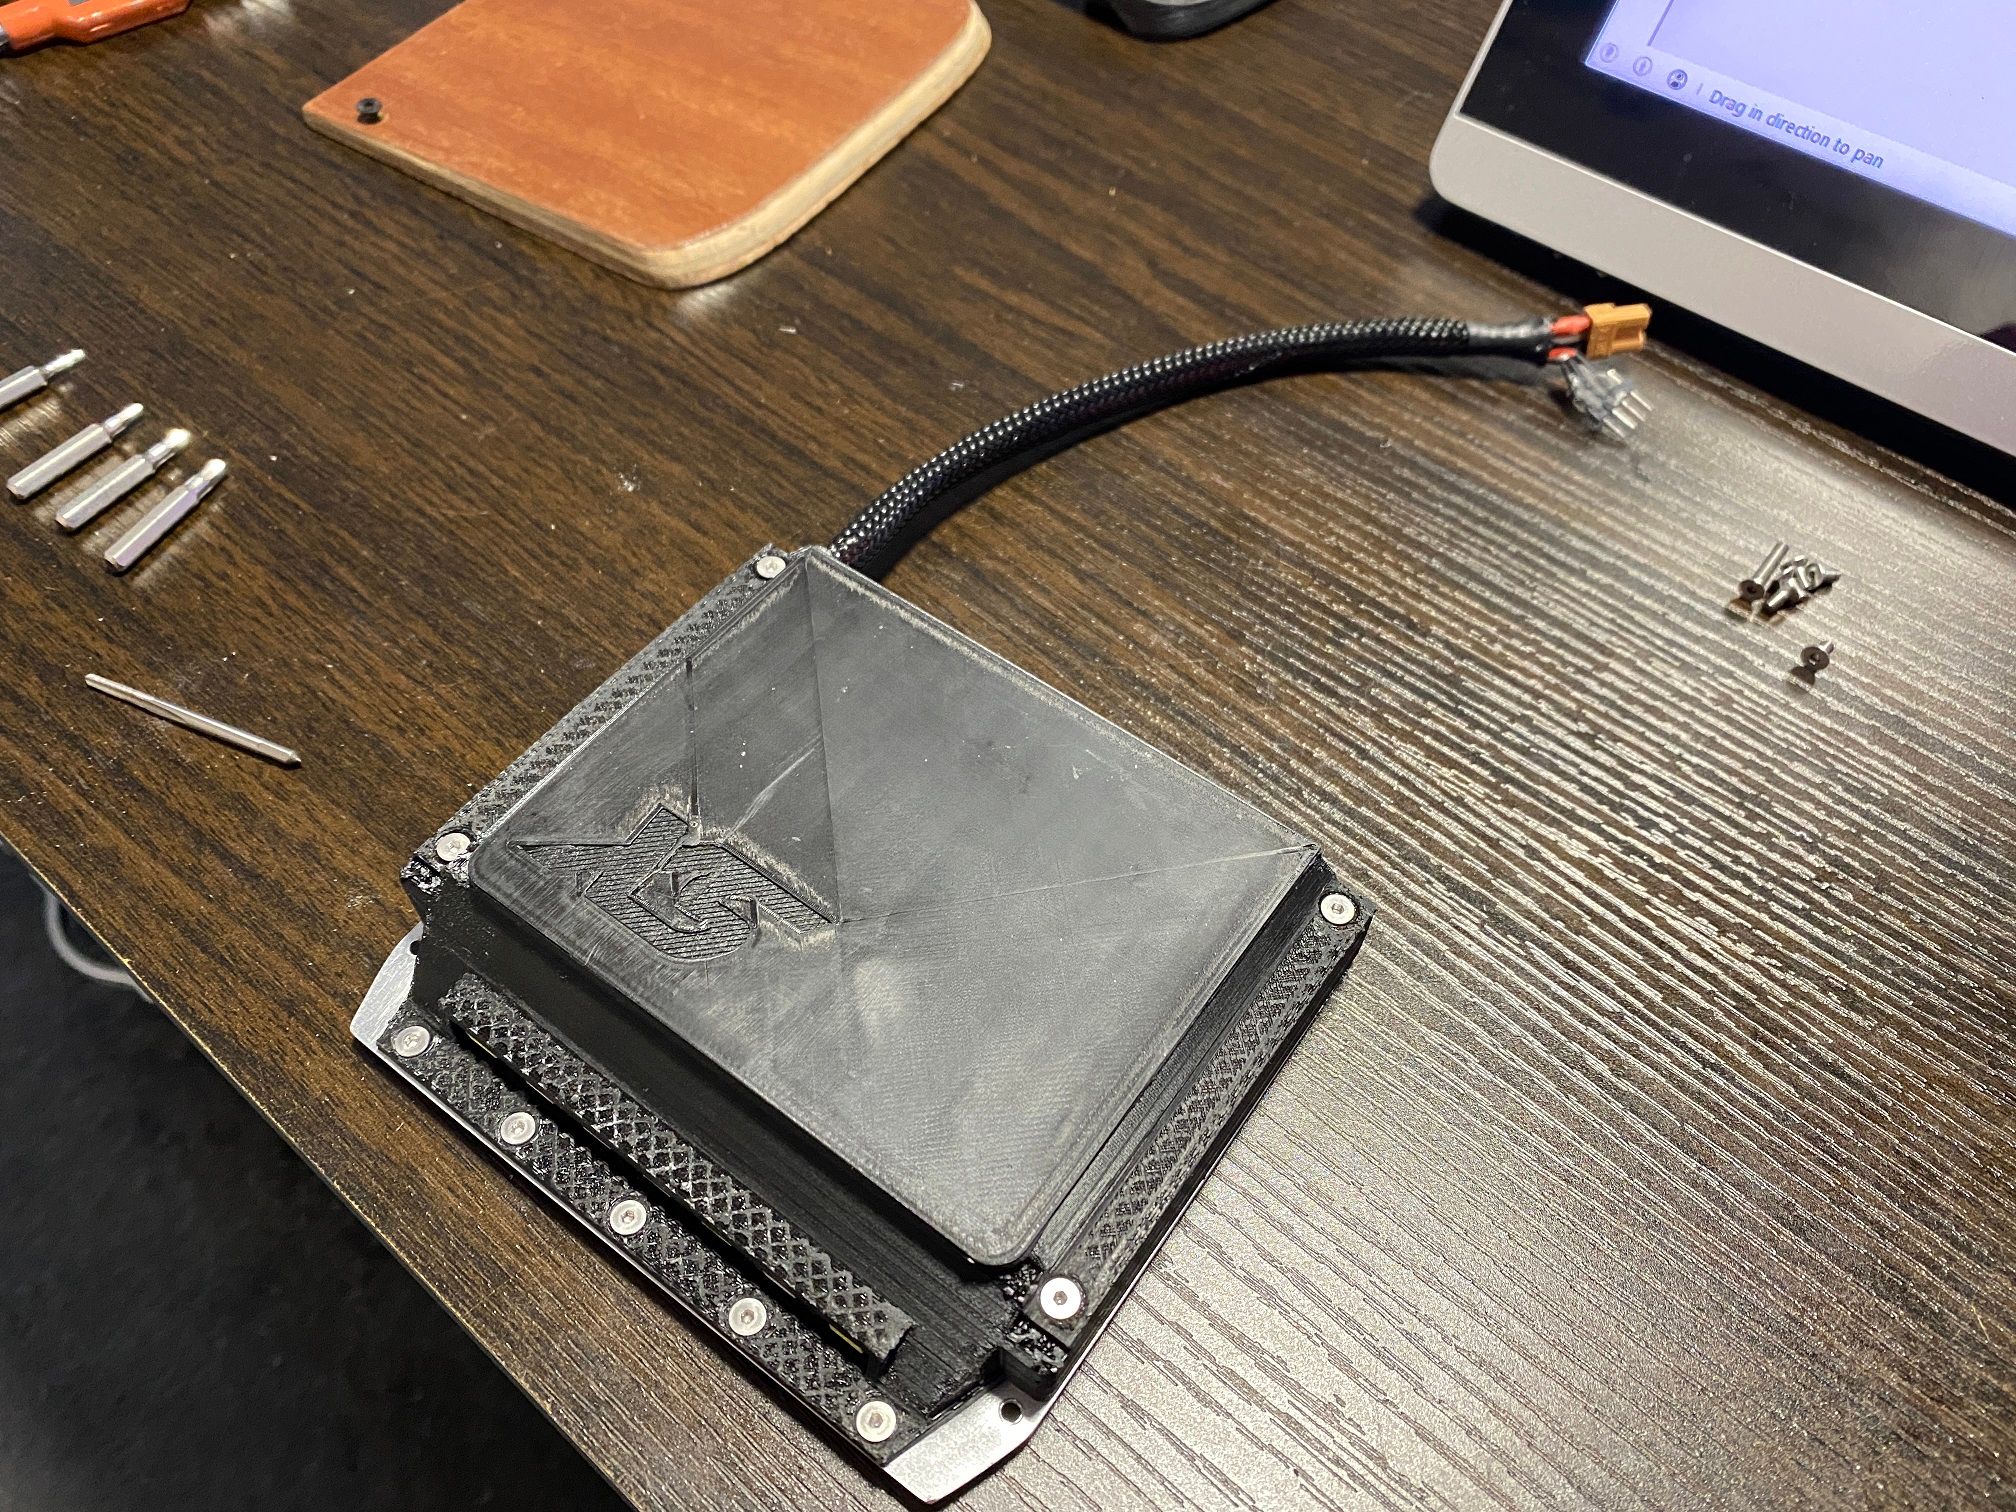
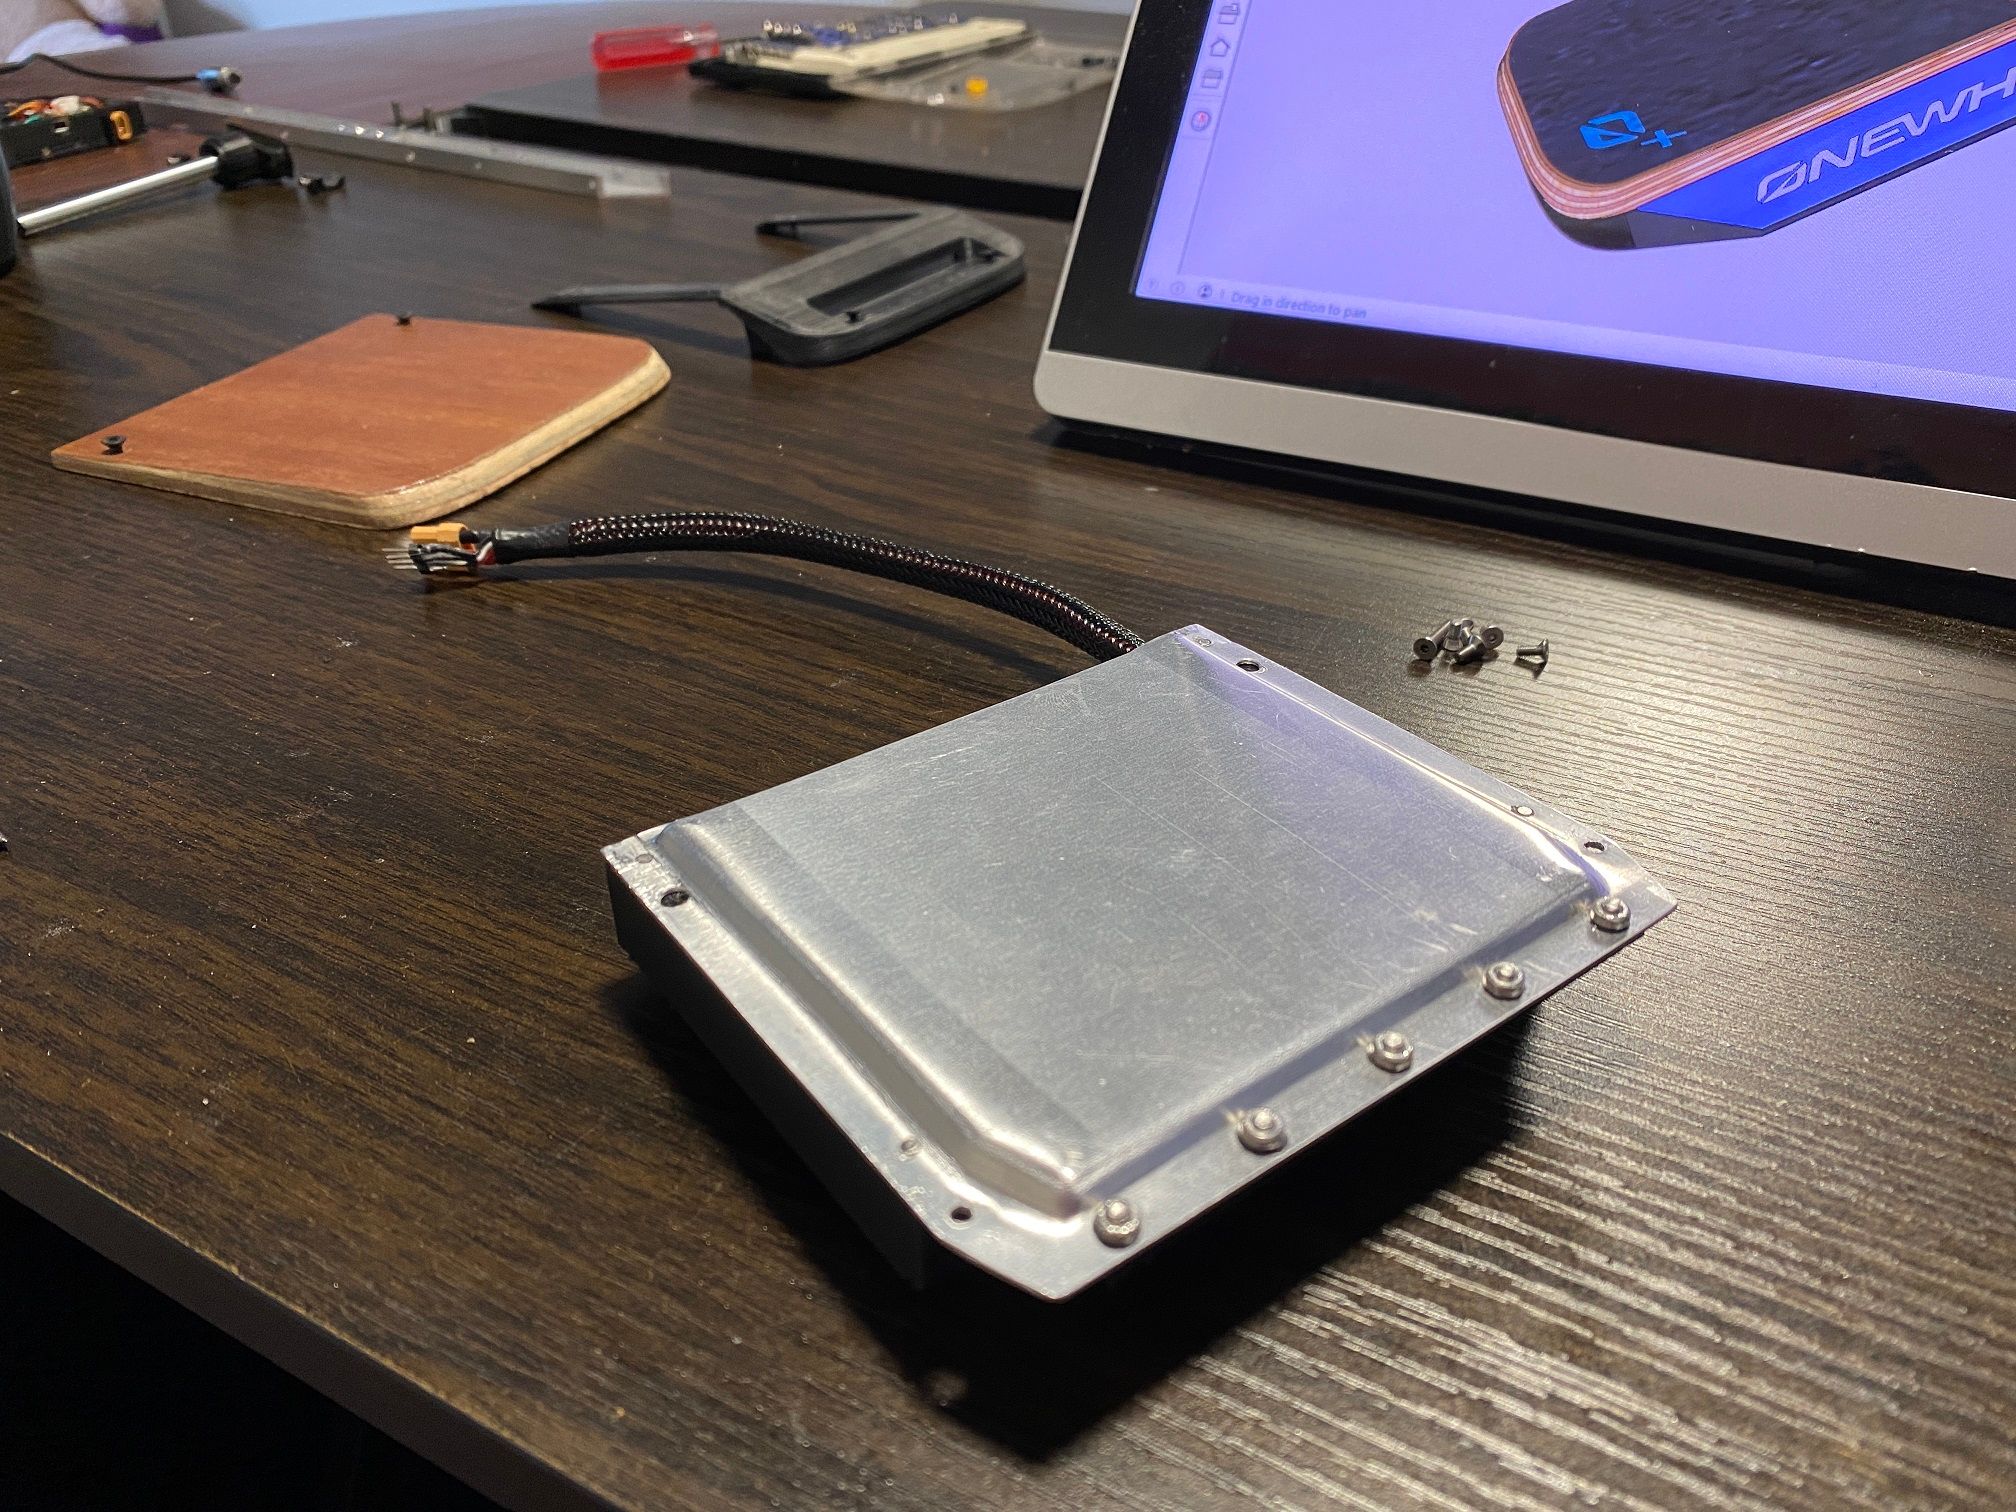
Totally replecated the same choice FM did with the battery lid because I wanted to and not because I didn't want to perfectly shorten the screws >.>
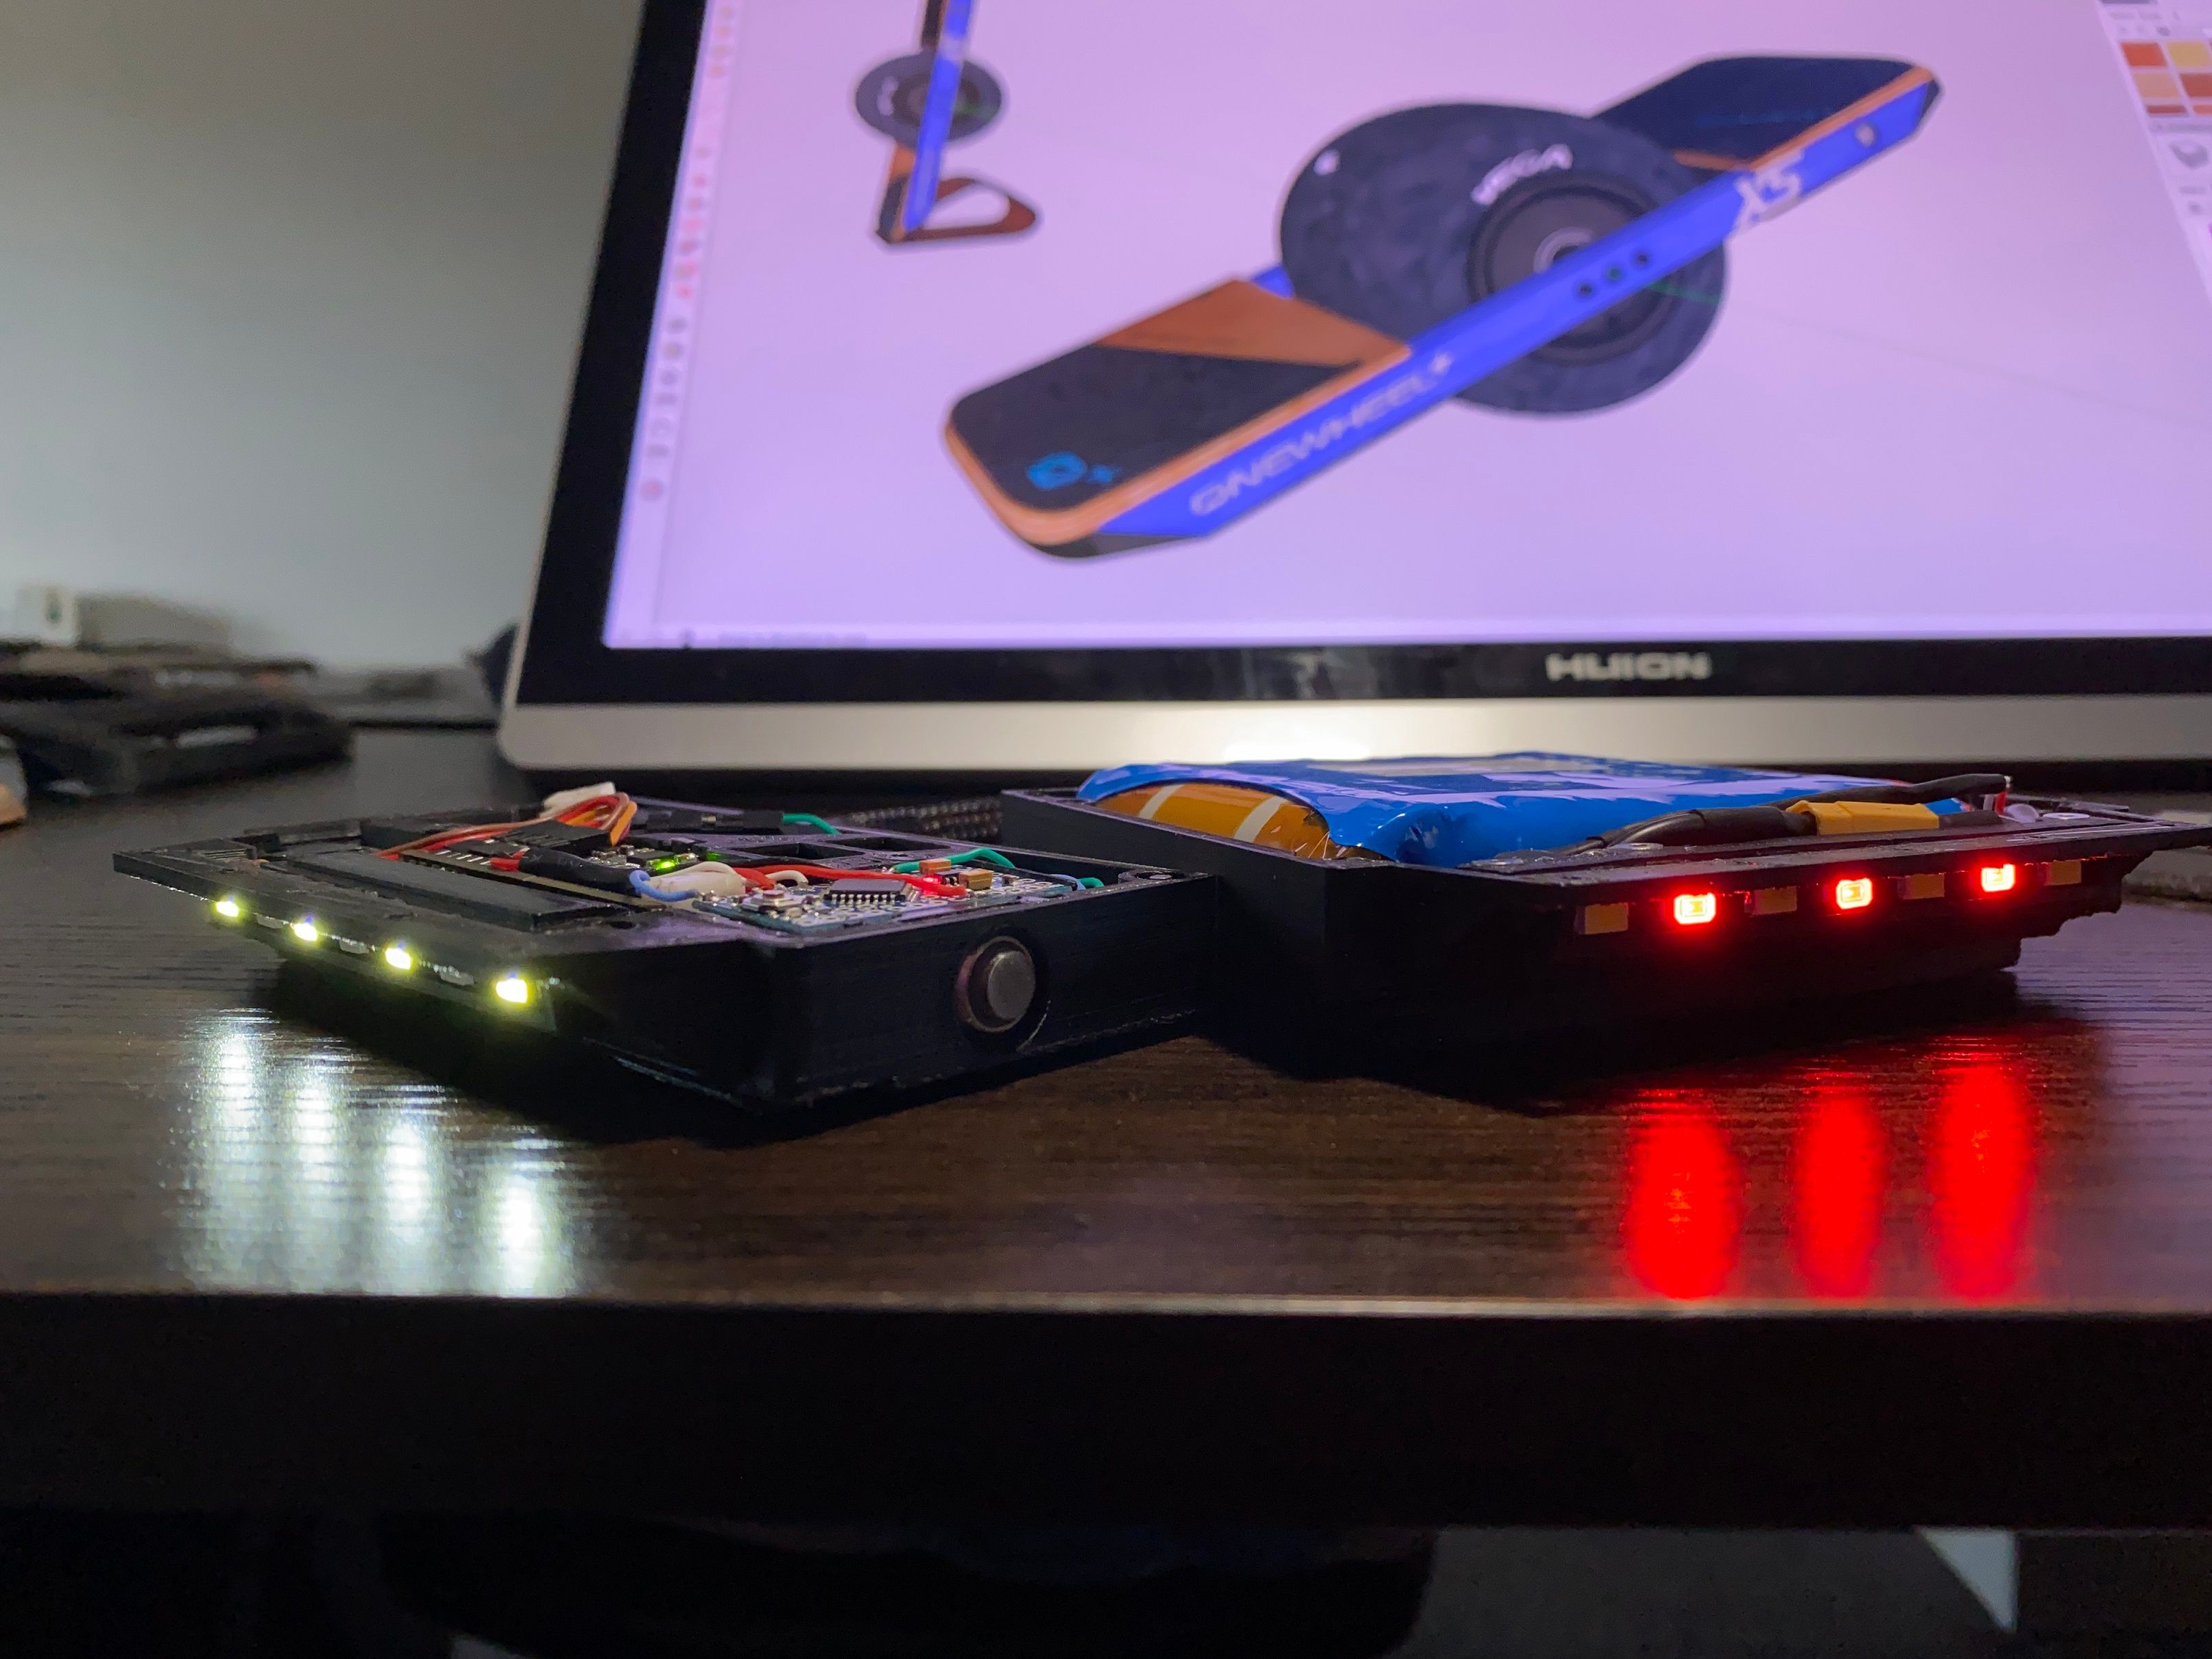
Got a nice pic of the 2 boxes plugged in next to eachother. Sadly the power button LED has died so I'll need to wait for another one of those to come from China :( Can't be too sad though when I have this eye-candy at my fingertips.
Coated the front footpad, sadly some got into the left pad somehow. I managed to remove lot of it with IPA and squeeze it out but there is now a noticeable dead-ish zone that isn't as sensitive. Woks fine but makes finger riding more difficult.
Final versions of the bumpers prior to hopefully getting them resin printed sometime look real good.
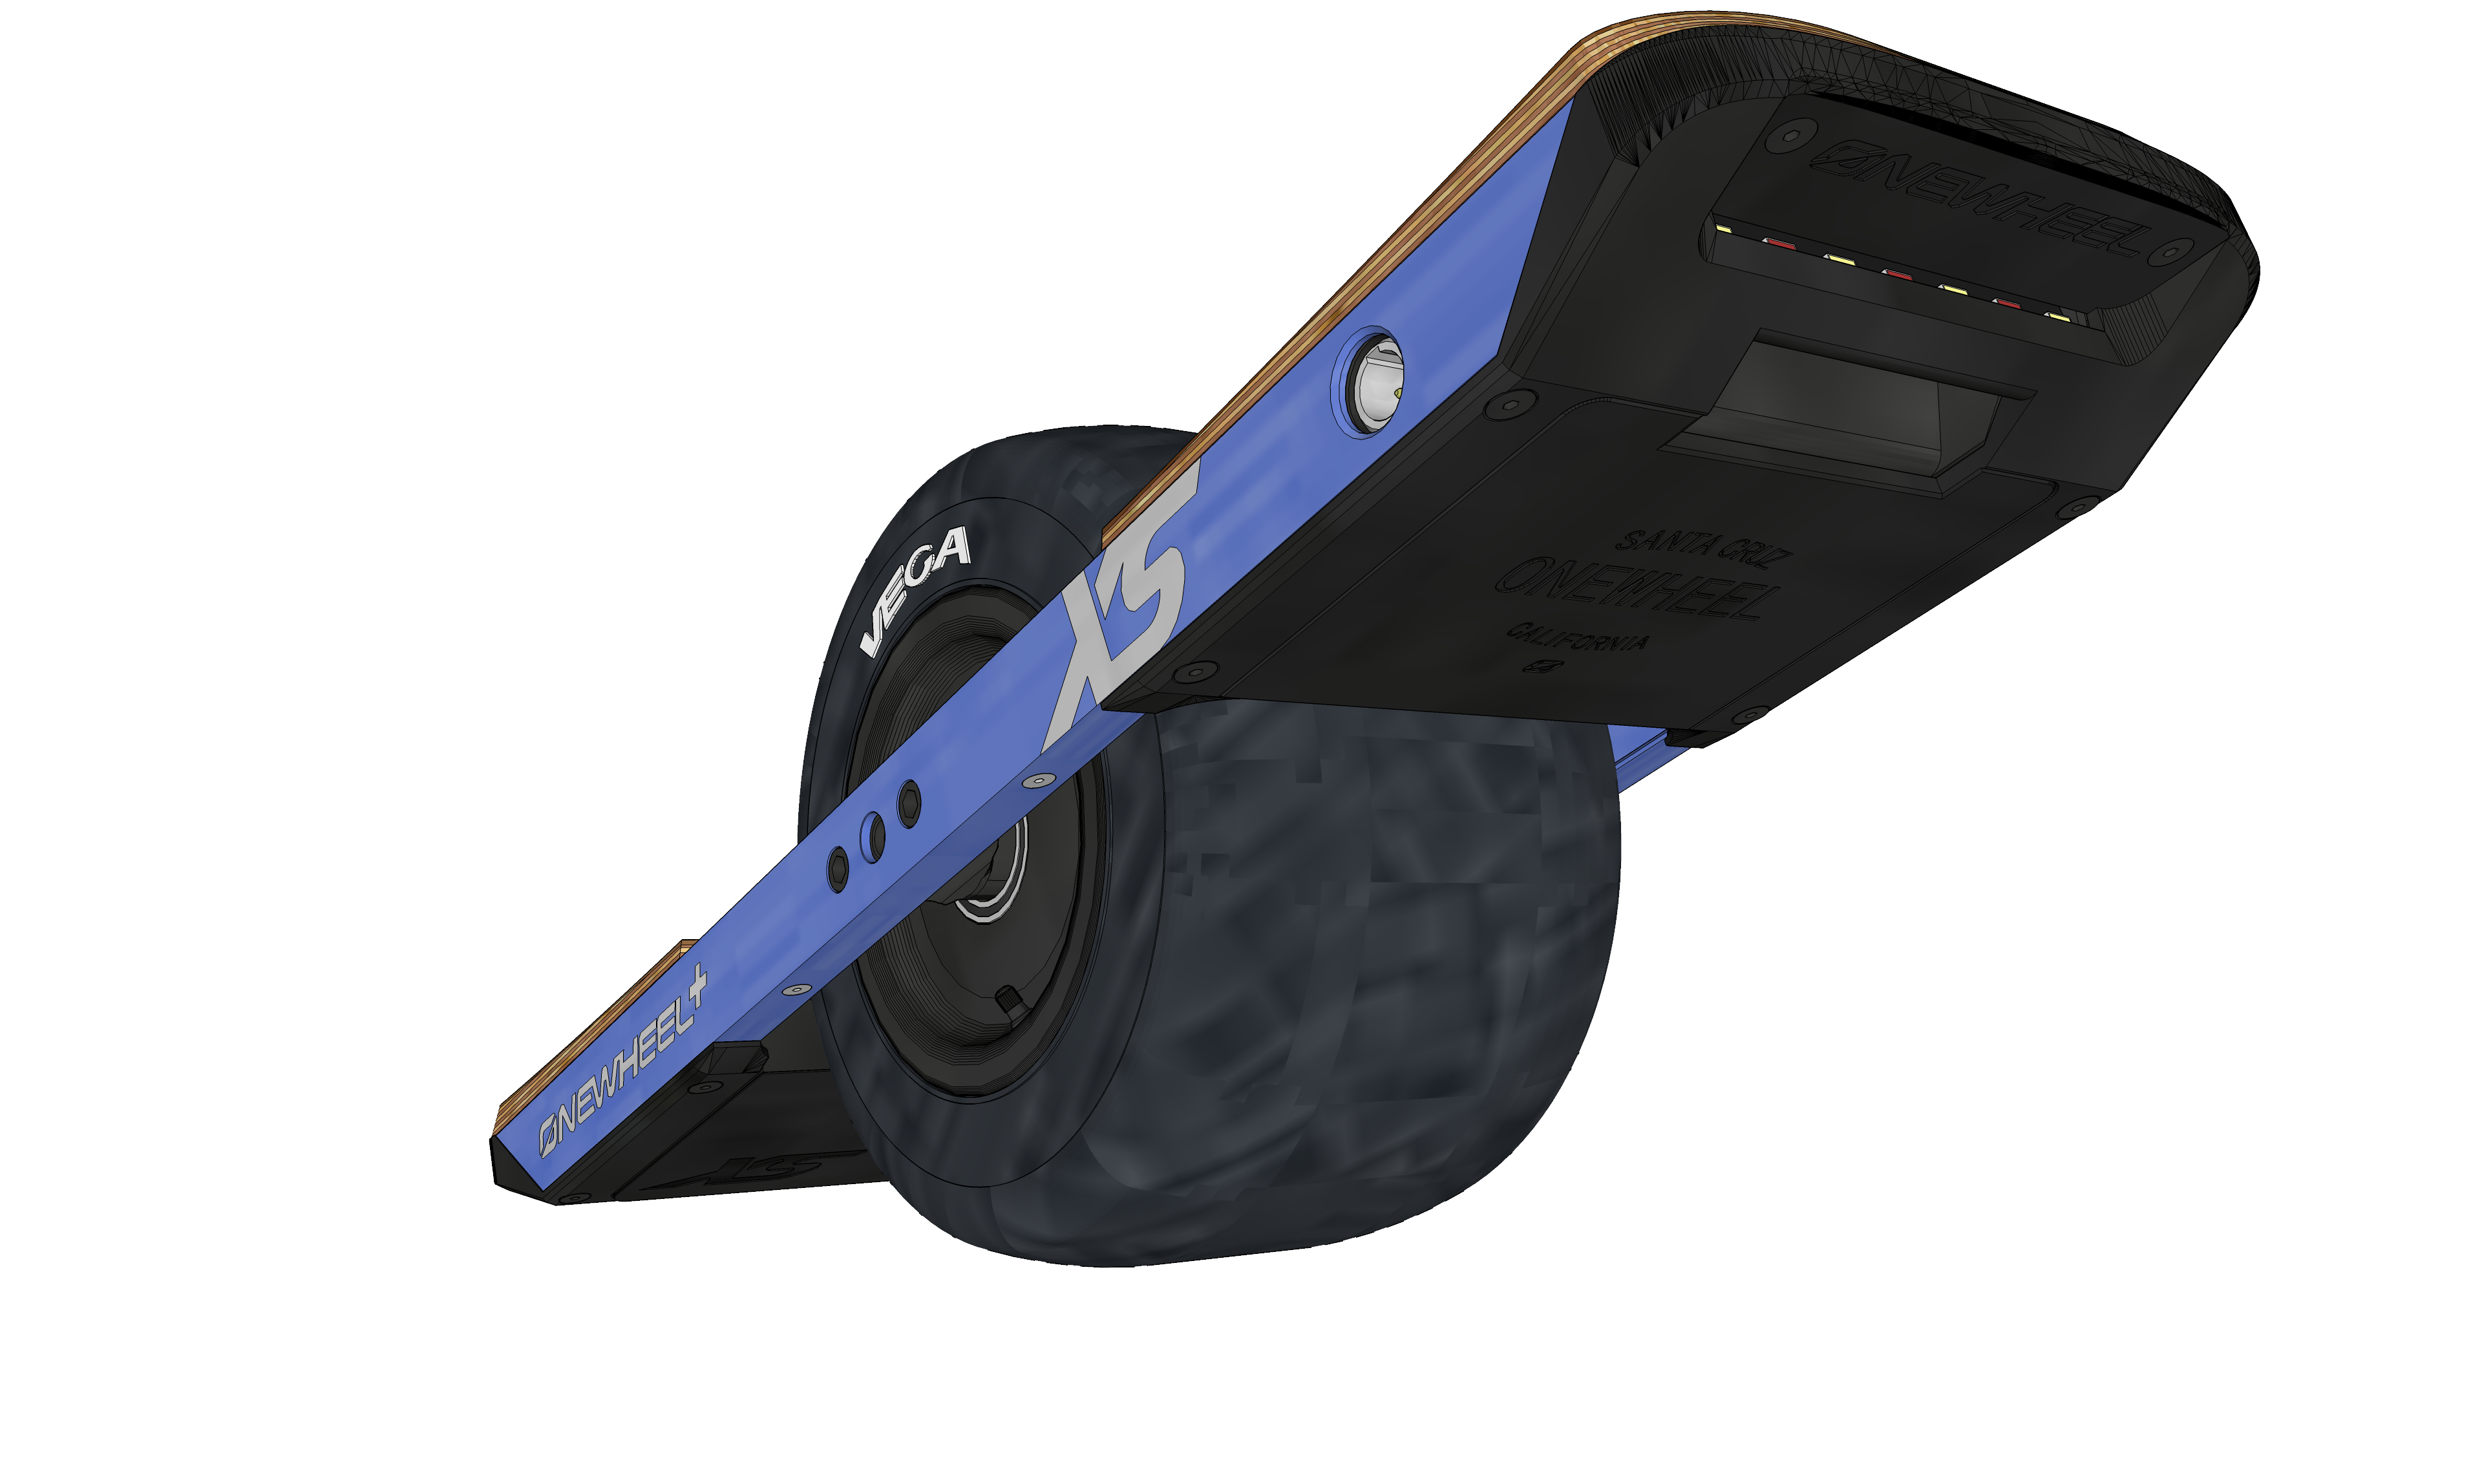
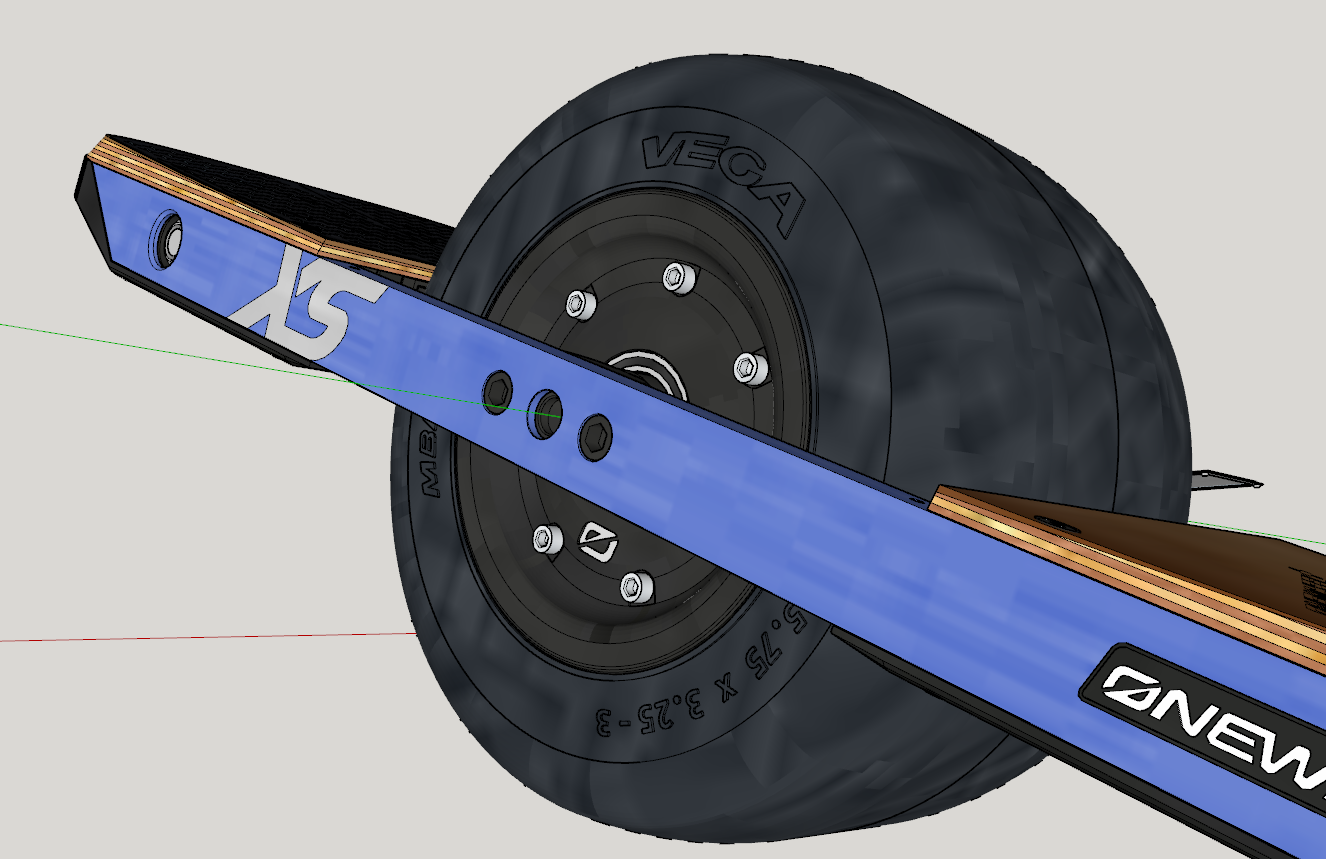
Finally have some more CAD renders :)


-
@lia -- A non-vital shell of a "model skateboard," seven inches long, that looks remarkably like your XS is being marketed by Matthew Shumaker of Tech Rails.
Edit: In the comments on Matthew Shumaker's post on the Tech Rails facebook group, @Lemur (as Fai Leong) posted a photo of a hand-sized XR he built two years ago. @Lemur, please share it here!
-
@s-leon Here's the scale model I built, I thought I posted it on the old site years ago.
I looked at an old picture of this model and the timestamp was July 2019, time goes by fast! First picture was 2019 and second picture is today. I had planned to put led lights in, but I lost interest.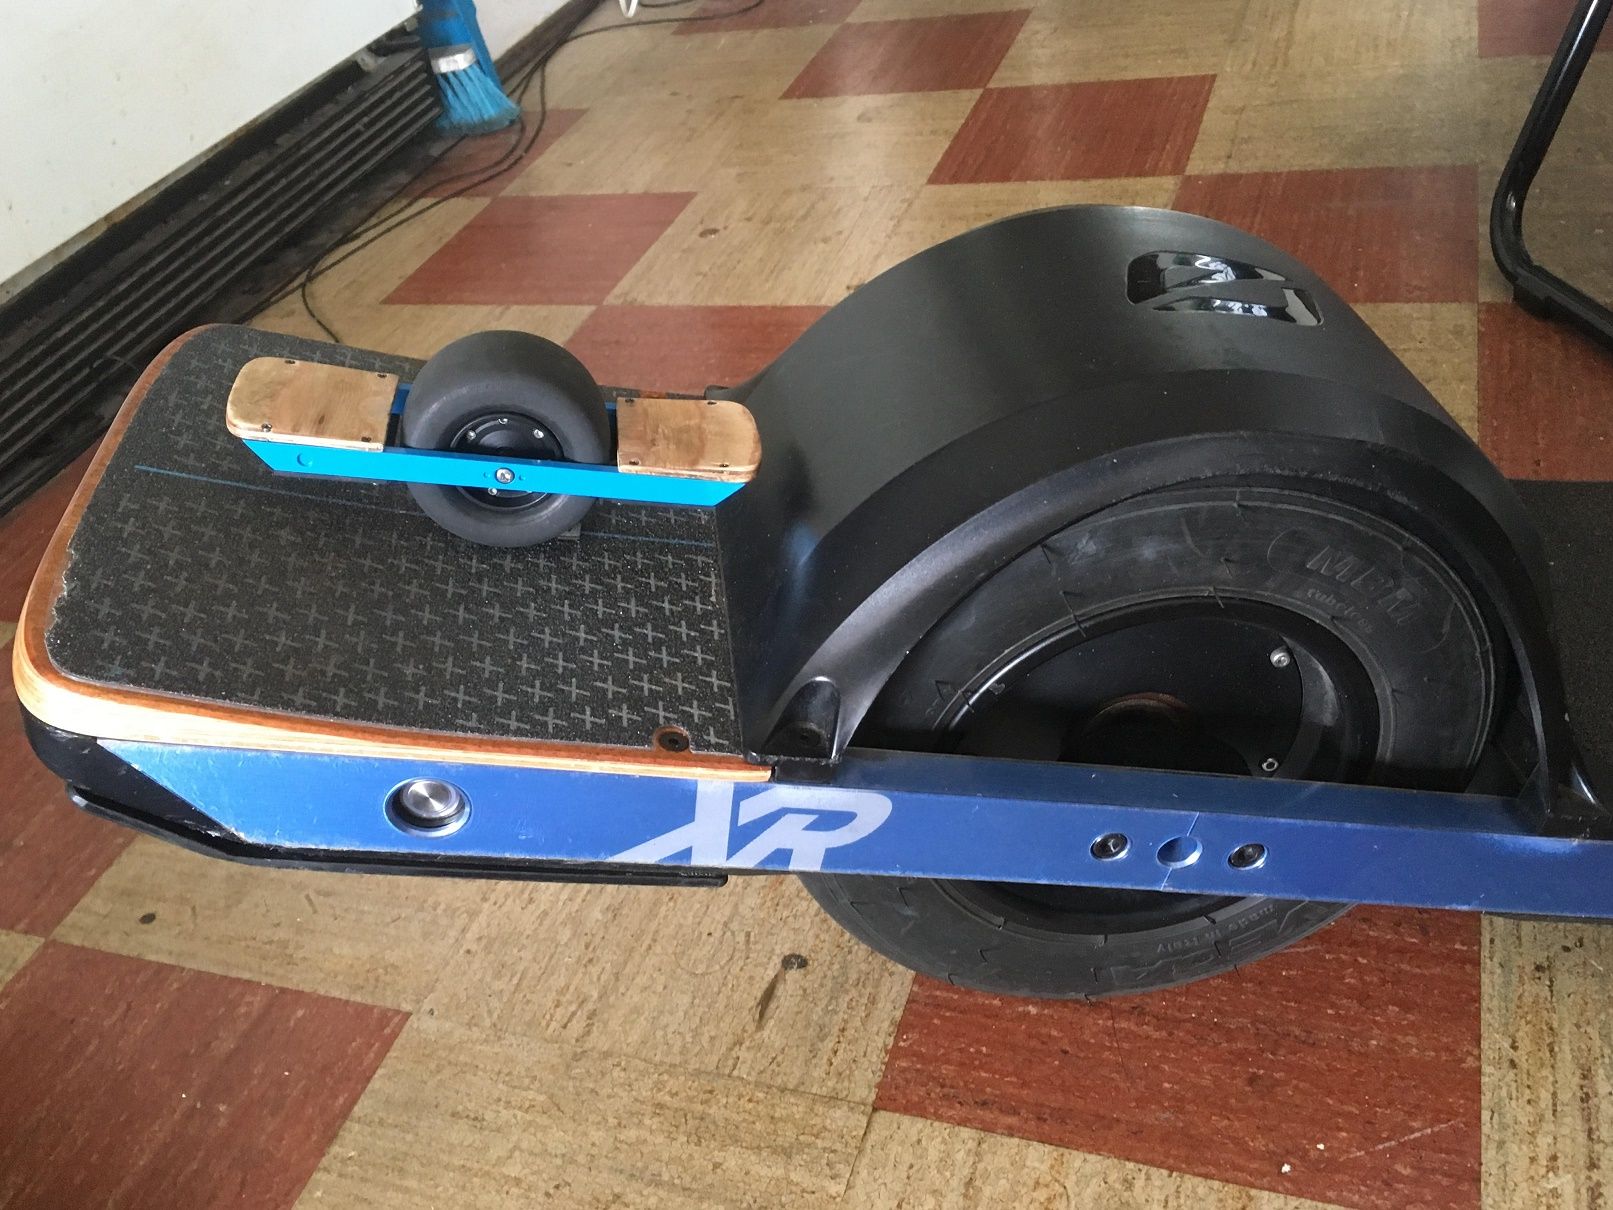

-
@lemur -- Very cute! ...And smaller than I imagined!
-
@lemur I love this, like an XXS. is that actual rubber for the tire?
I vaguely remember seeing this before and could have sworn I managed to archive it.
-
@lemur holy shit! that is tiny!
-
@lemur This is cool! Keep up the good work man!
-
@lia --In the background of the photo of Matthew Shumaker's "toy skateboard" are a surprising dozens of tires to fit it.
https://www.facebook.com/groups/179389331057850/ -
@lia It's a rc car tire that had knobbies on it that I ground off.
-
Don't get your hopes up but... the dust has been cleared off a shelved project once again.

With
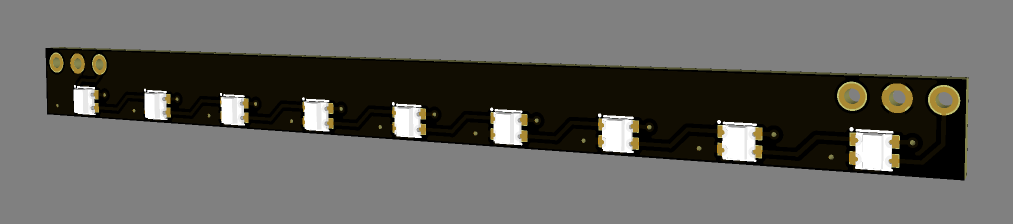
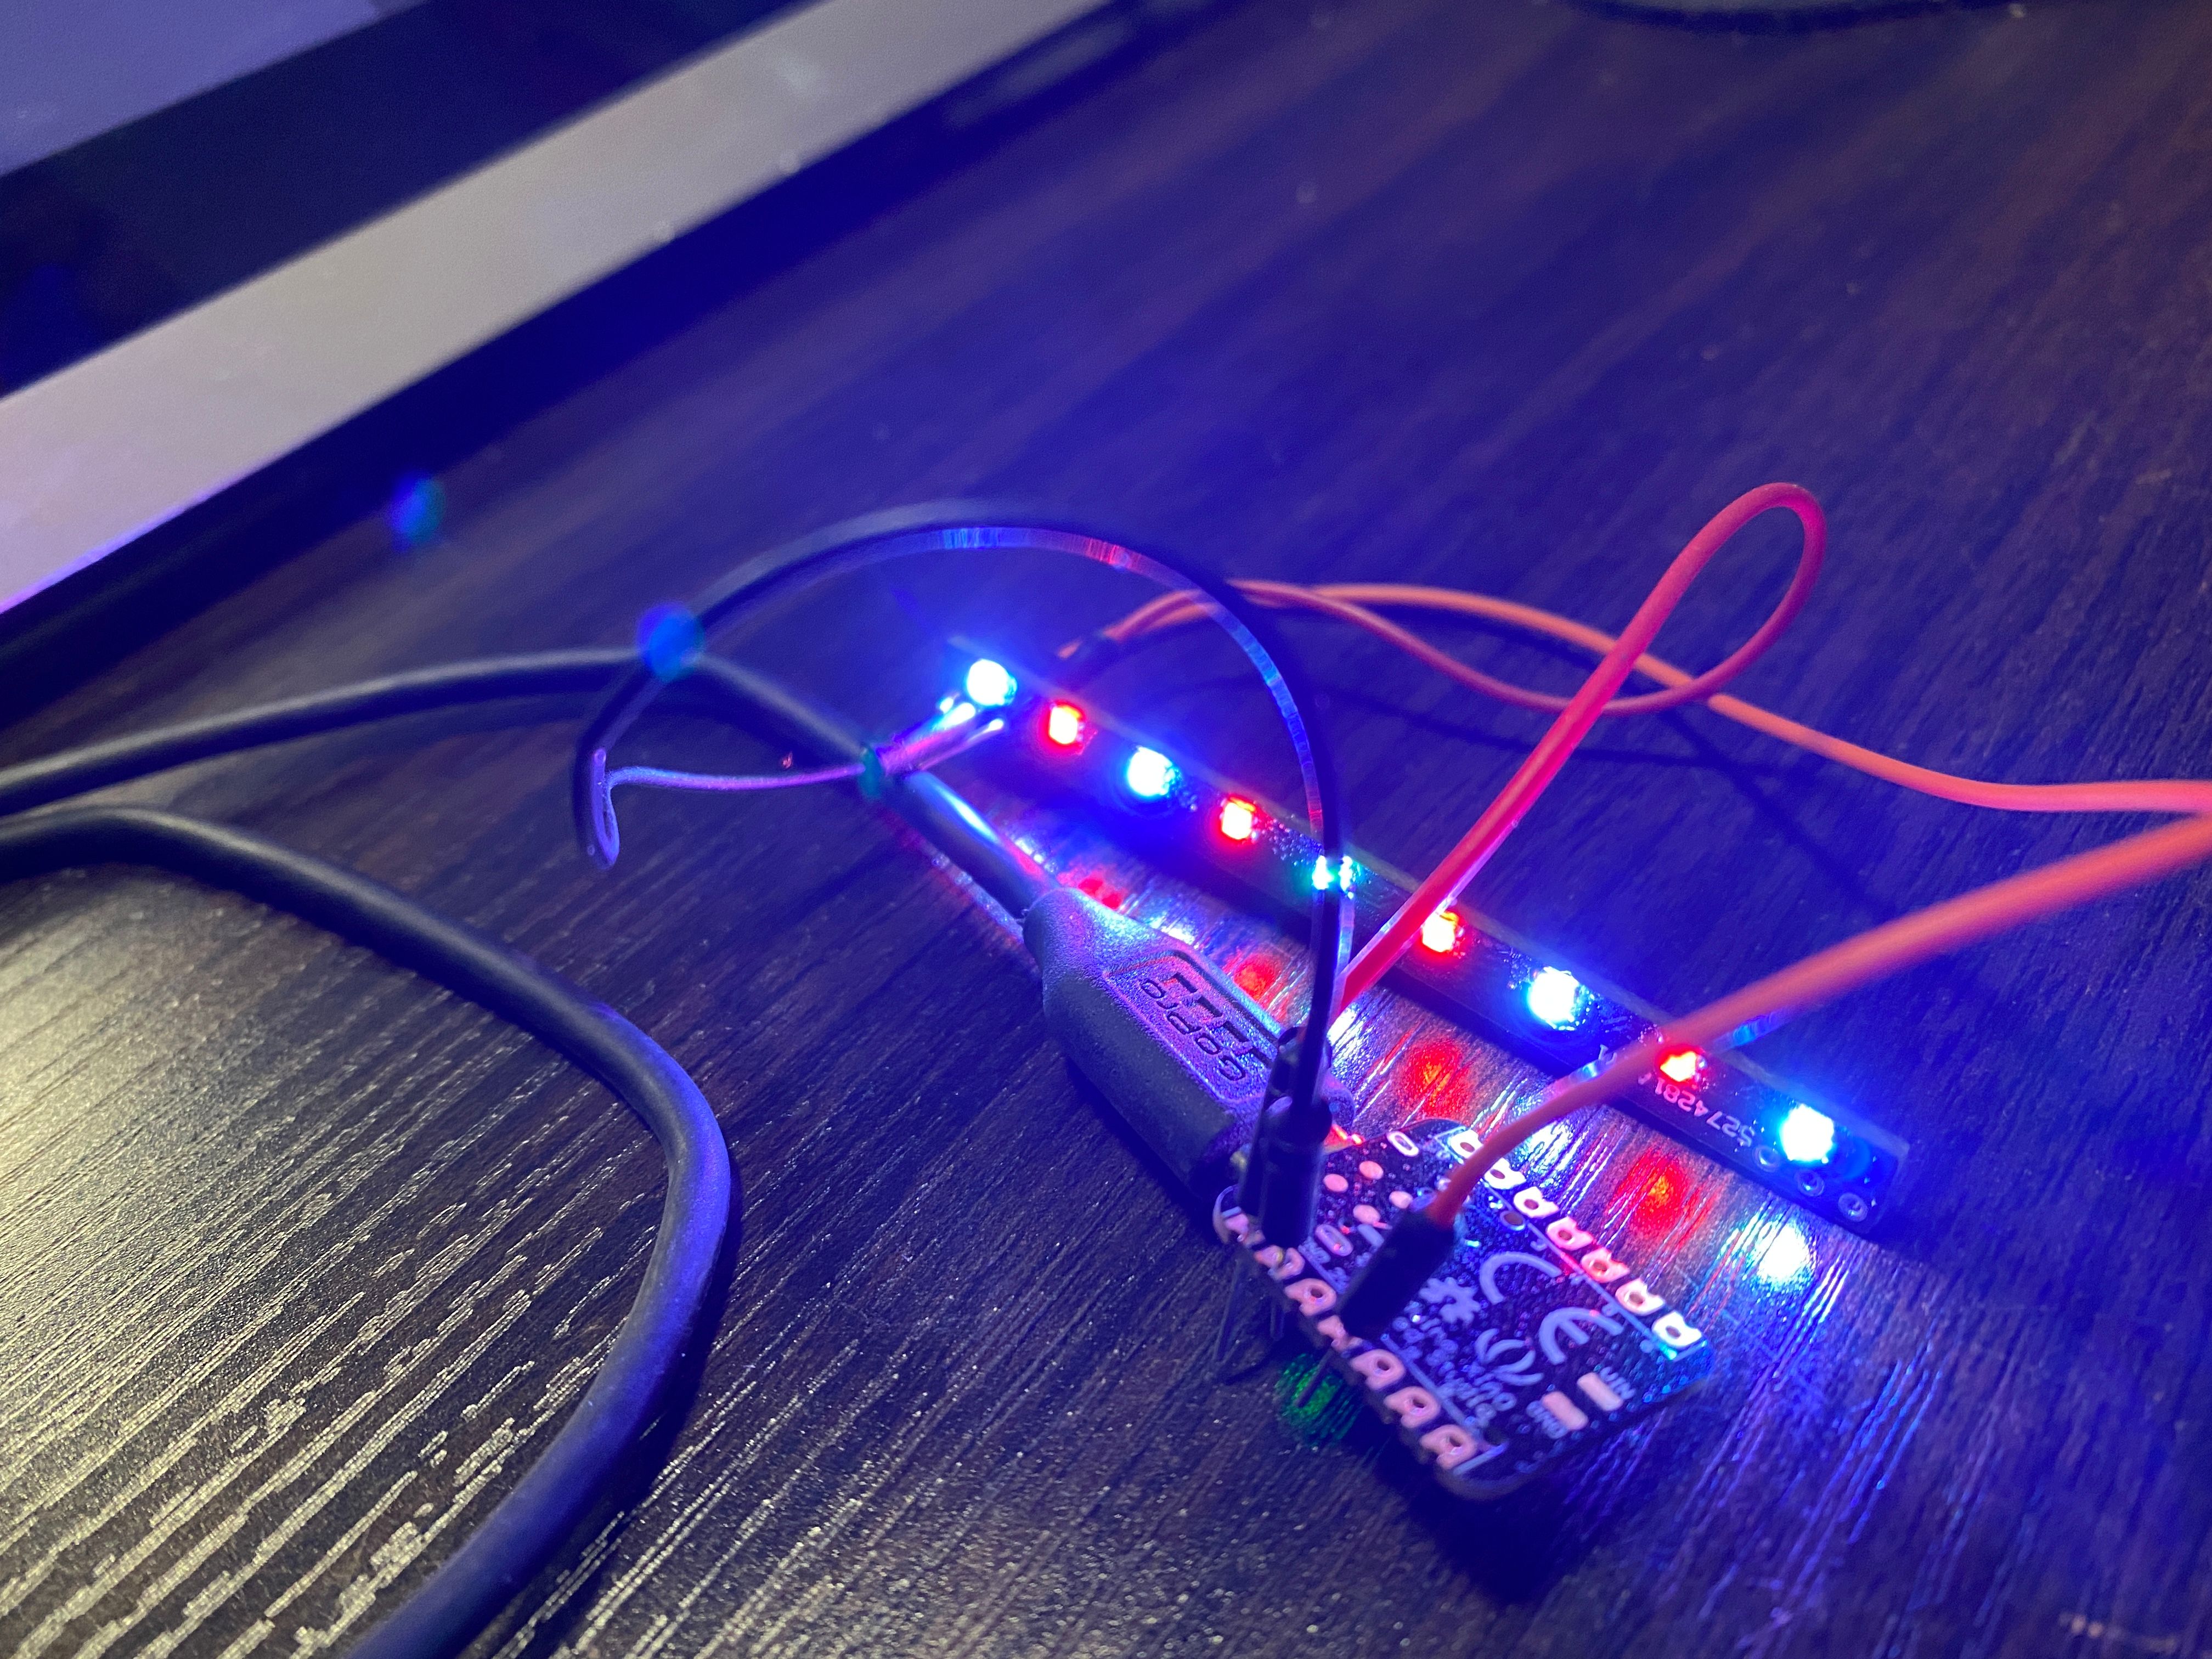
somea lot of encouragement from @cheppy44 I picked this up again and redid some bits I wasn't happy with. Namely the LED driving. I am however waiting for the parts to come since the LEDs and PCB are being shipped from China.Nick pointed out I could just use addressable LEDs which I'd formerly written off since I wanted to keep the style the same. Being the idiot I am I forgot I can just... program them to be identical to stock anyway. Duh >.>
This removes the need for my abomination of an LED driver board and I've been made aware if the Seeeduino which I'll use in place of the Arduino Pro Mini that's taking up more space than needed.
With the LED's being 5v and data driven I can run a single 5v line off the FSESC then use just a data pin to string the LEDs together. Big brain. I'll butcher the power button and put one of the addressable LEDs in it too to get the flashy blue light we all love once again since... I... er... kinda melted the first one >.>
In using smaller LEDs I'm also able to fit the full 5w 4r rather than just 4w 3r like before. Further keeping in theme of being an accurate as a working scale model as I can get.
I'll redo the CAD once the parts turn up. Wish me luck. I want the following done before summer.
- LEDs fully functioning (again) and responding to motor direction.
- Functioning power button.
- As close to colour accurate rails as I can get.
- Custom made rubber tire.
- Accurately etched/painted decals and griptape design.
- Resin printed bumpers and hub casing.
- A cute letter from Kyle asking for one (totes not happening but I can dream lol).
-
@lia I AWAIT FOR THE NEXT UPDATE
I now have something to look forward to, thank you
-
While waiting for the new components for the headlights and power button LED I've started work making a master tire to create a mould and later rubber cast a solid tire replica.
First up was redoing the tire model to be rounder and reprint. The entire thing was over 24 hours of printing because I was doing it at a 0.12mm layer height. Then I added some wood filler to fill the seam in the middle. Lots of sanding later I got a smooth enough surface.
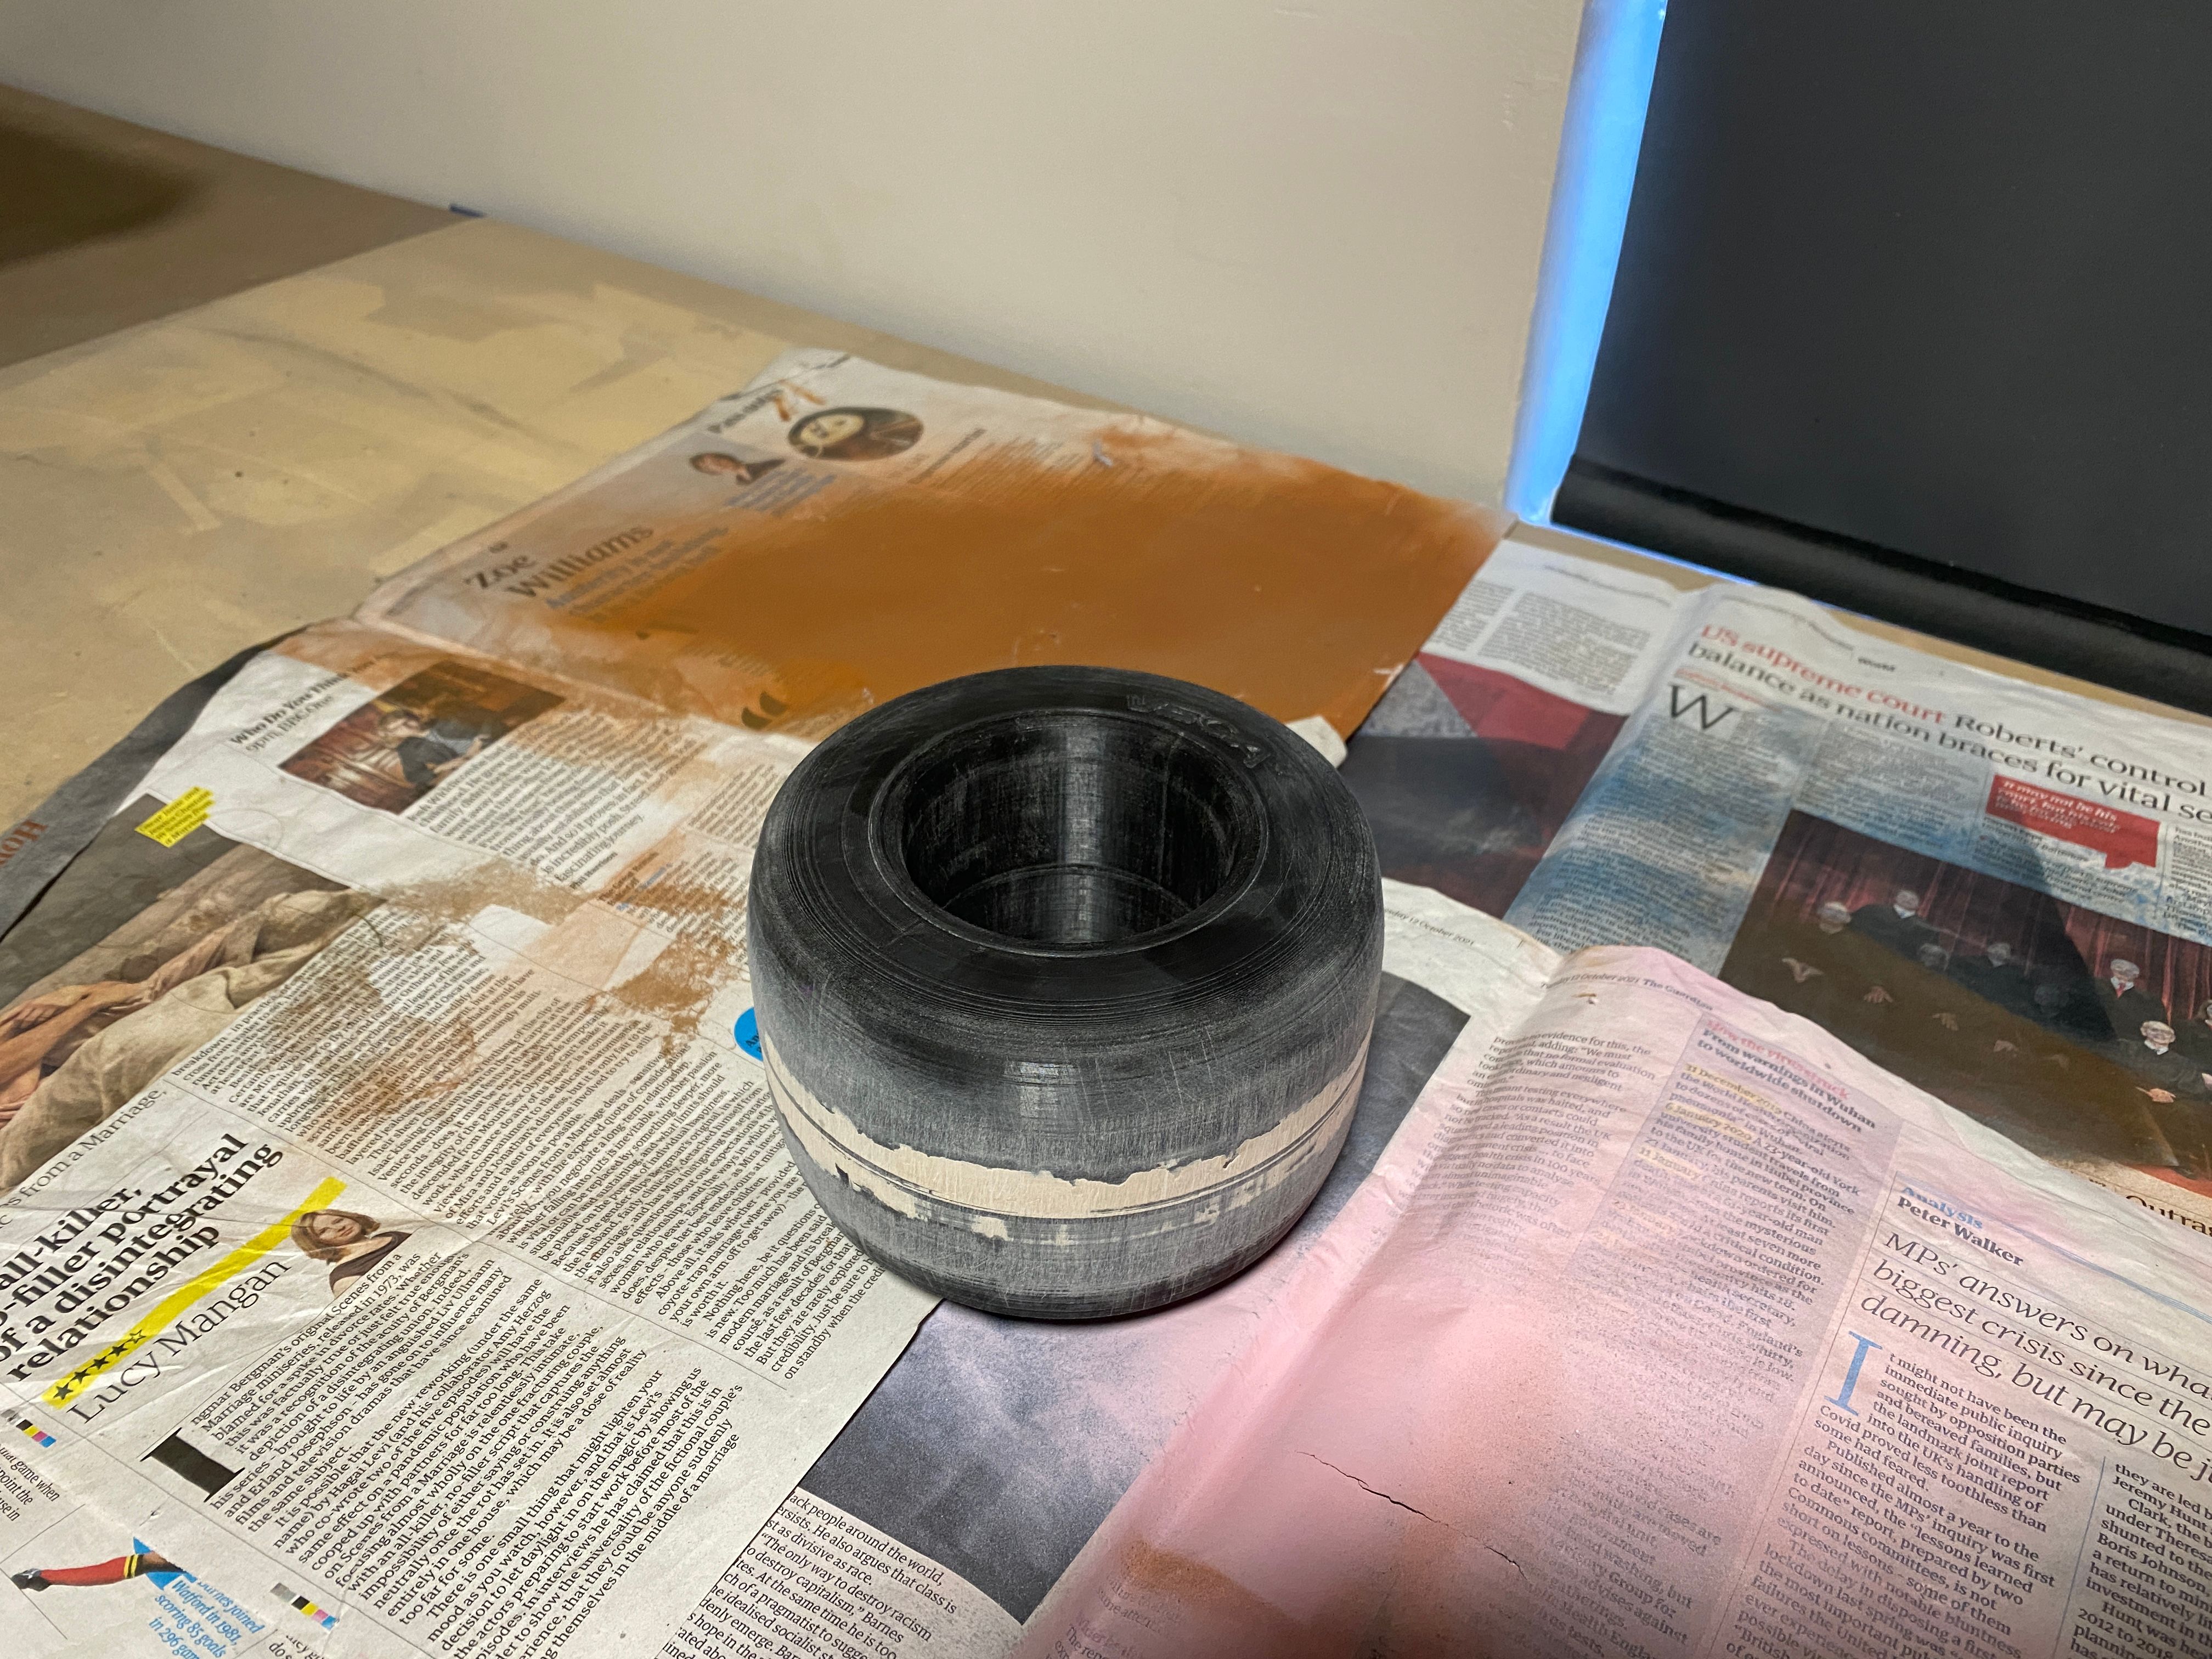
HOWEVER... that's not enough so out came the filler primer and I managed to completely smooth it out. The ics don't do it justice how smooth and nice this is to hold.
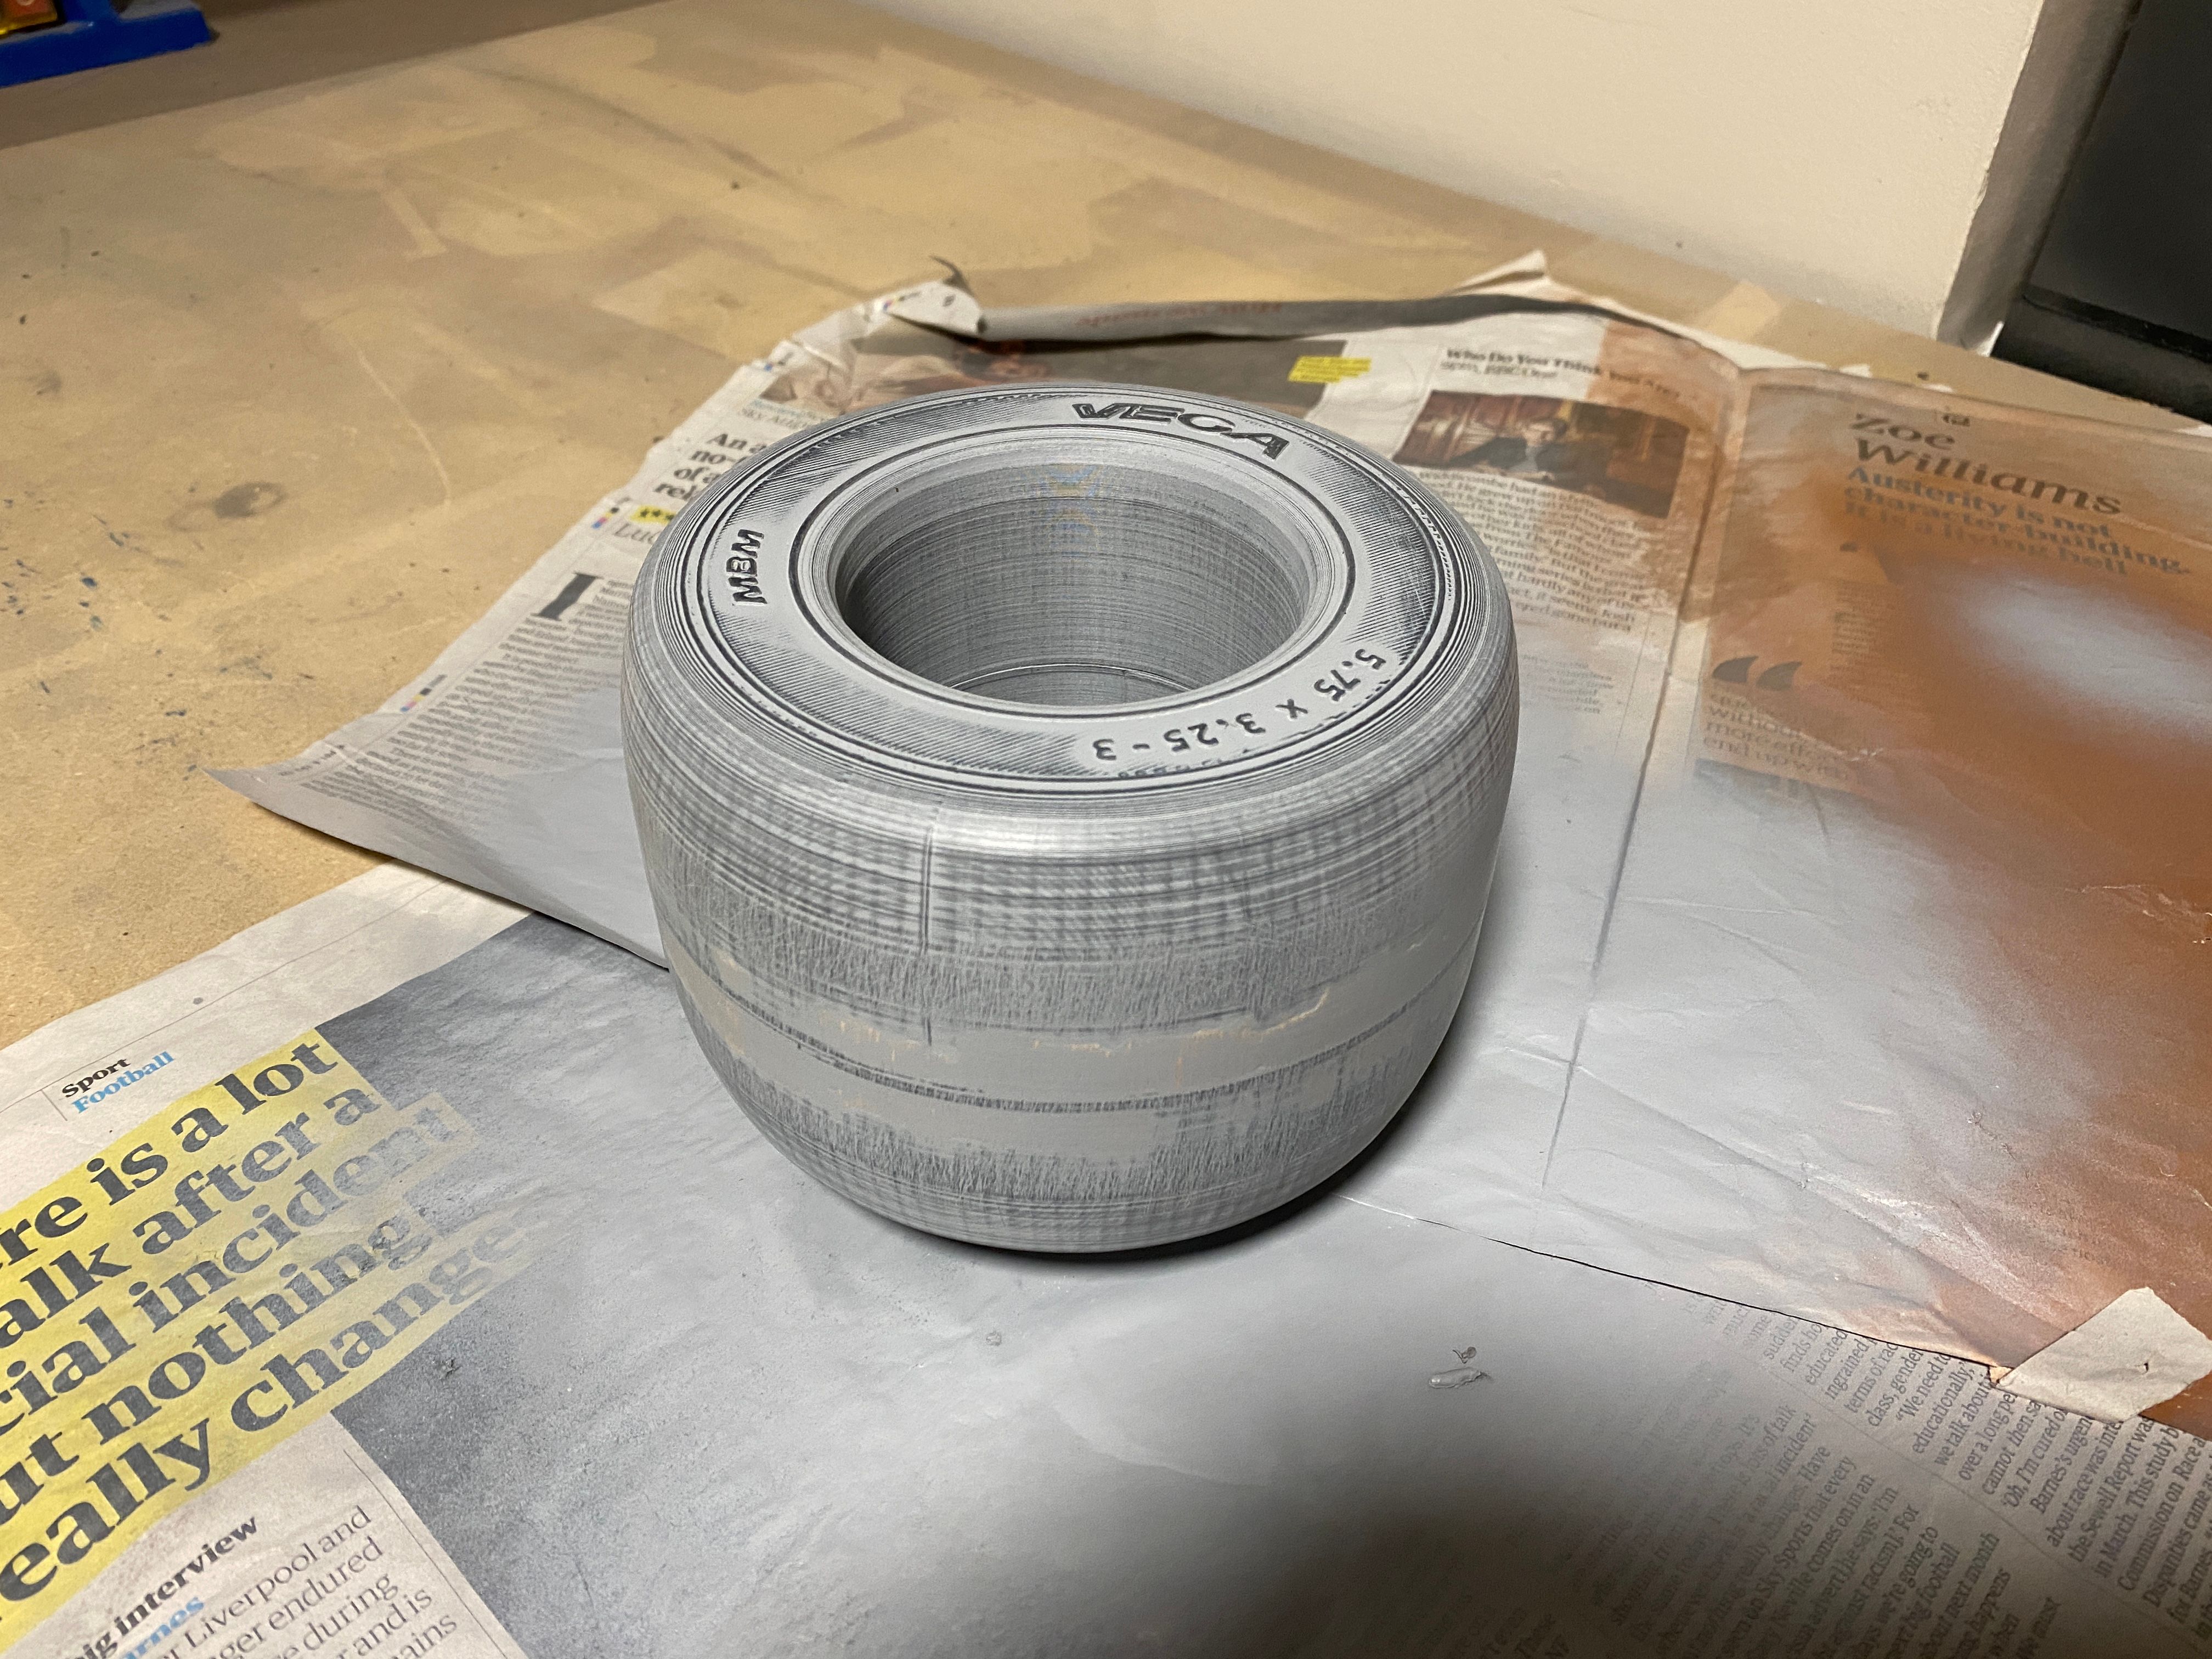
Trouble is I haven't cast anything ever and trying to figure out the best the best method while also not over-complicating a mould. Then I also need to decide on the best materials to use for both the mould and actual tire.
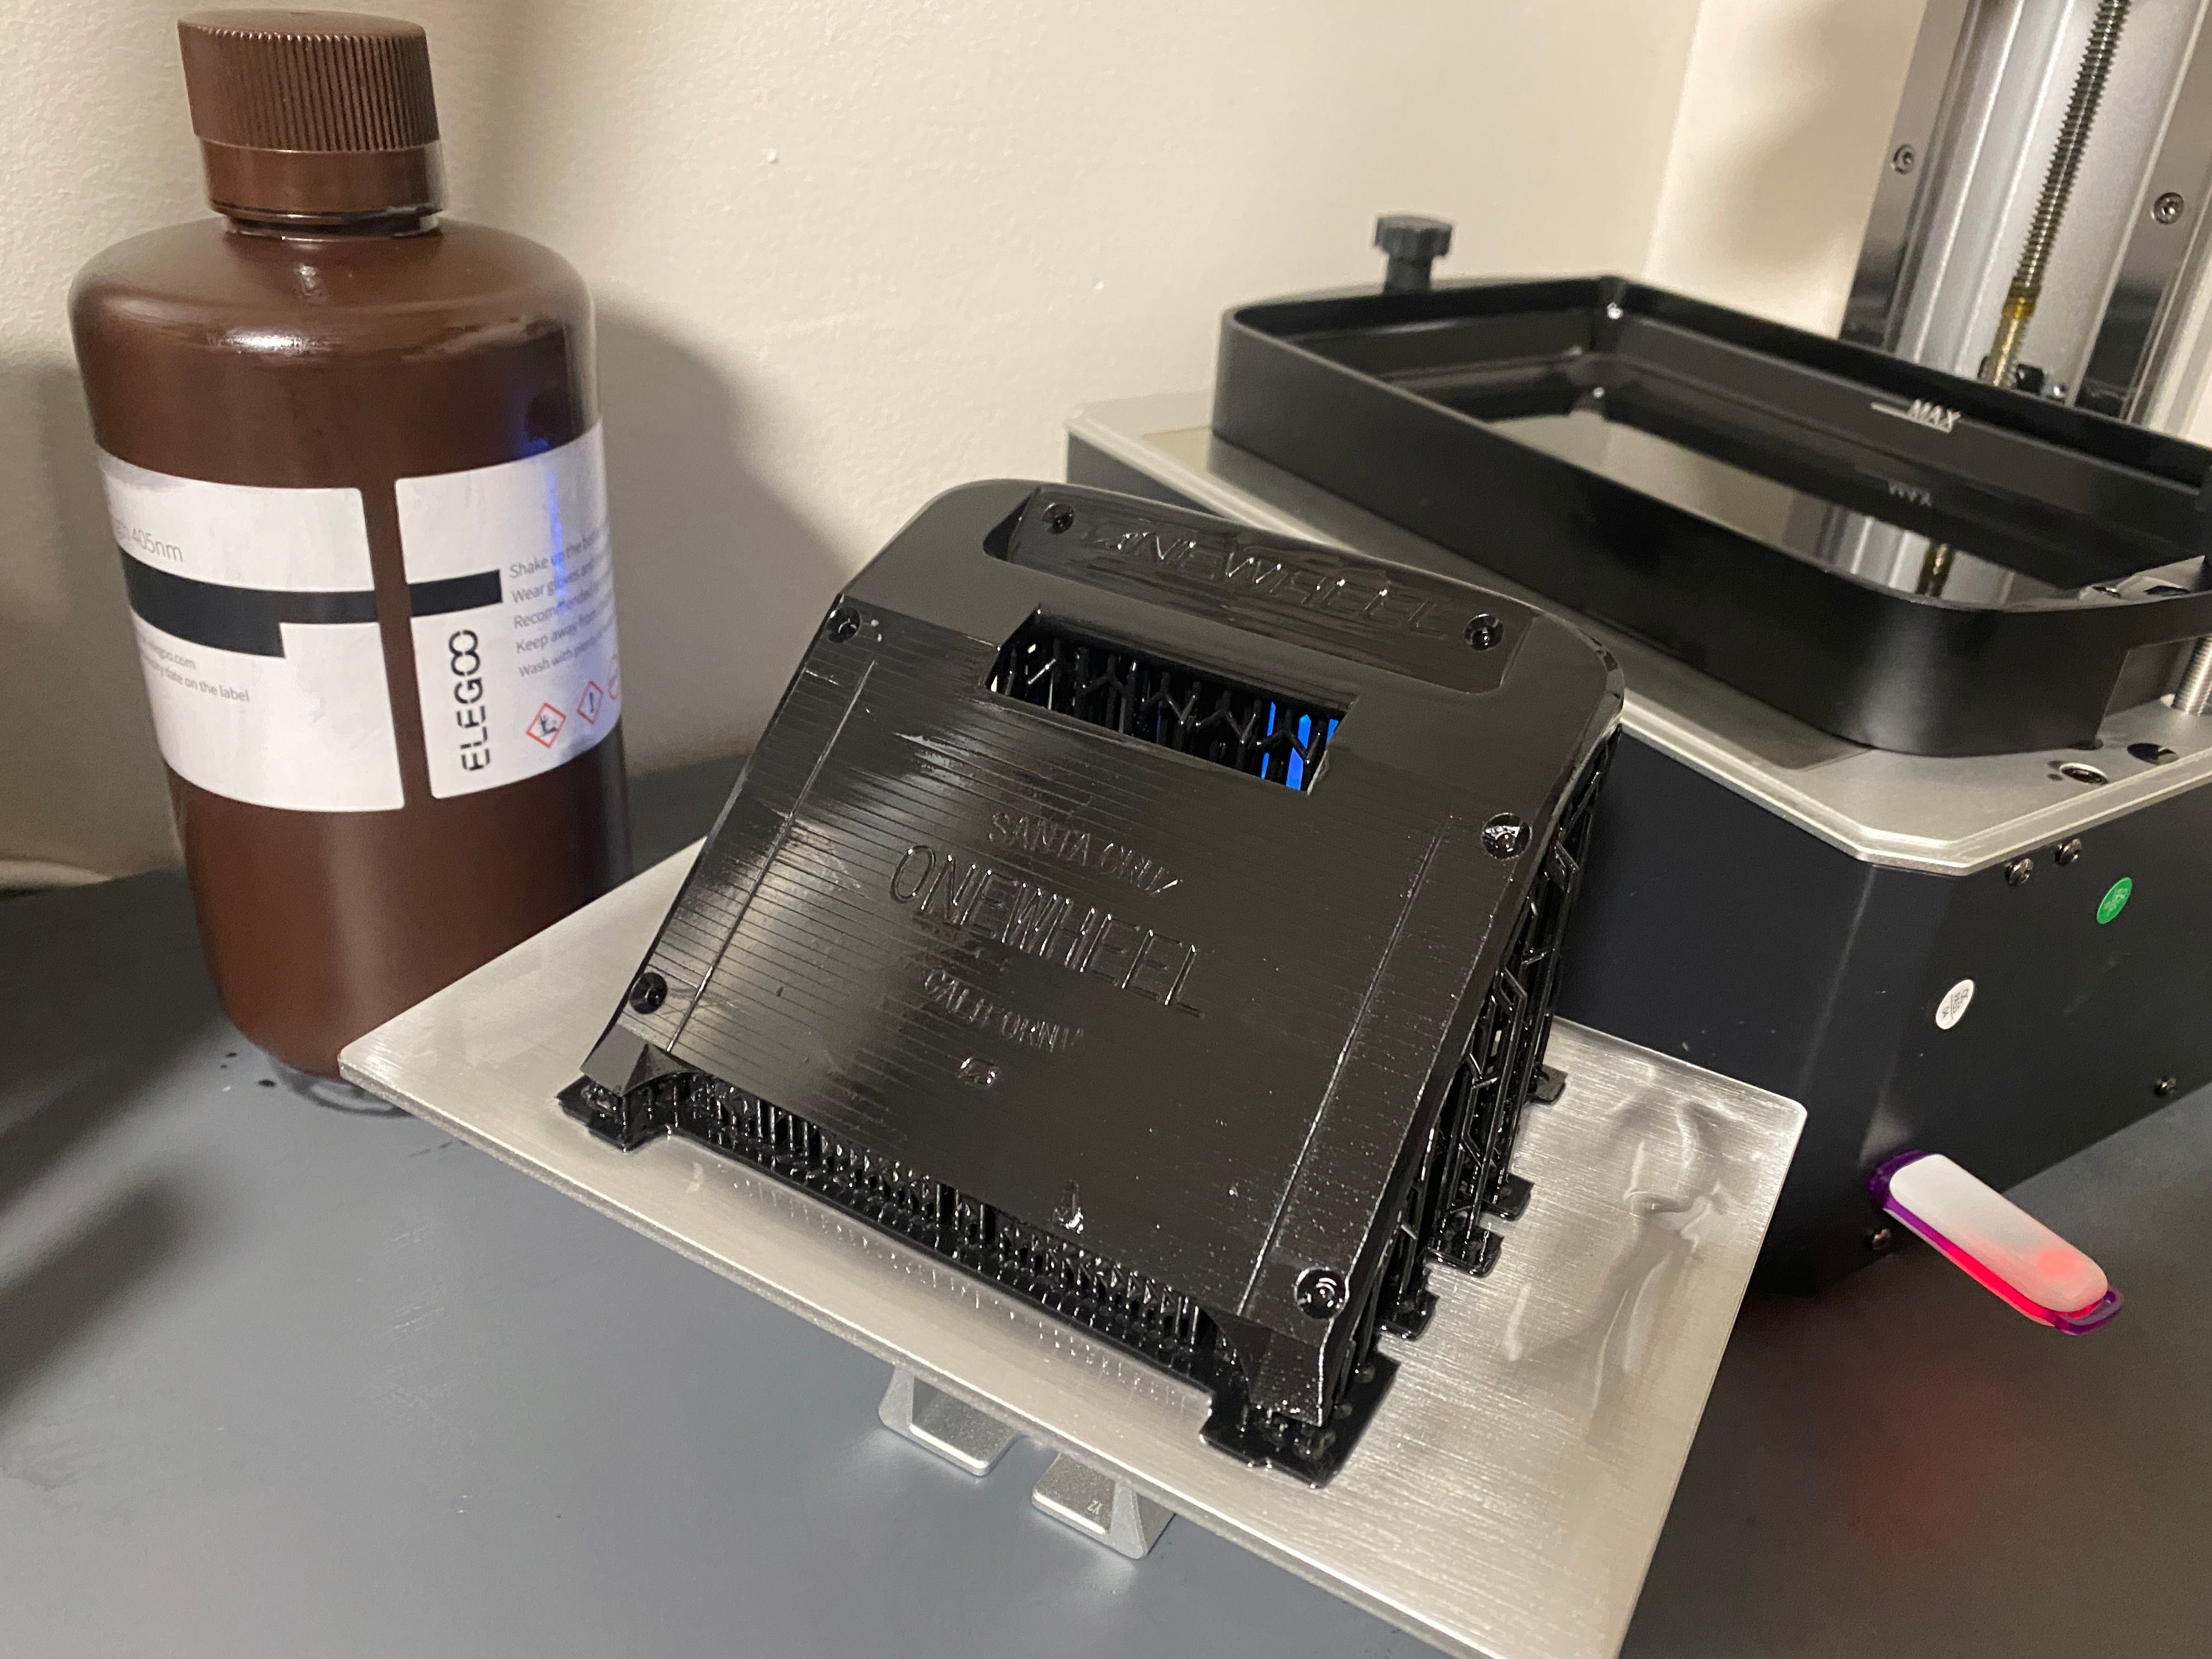
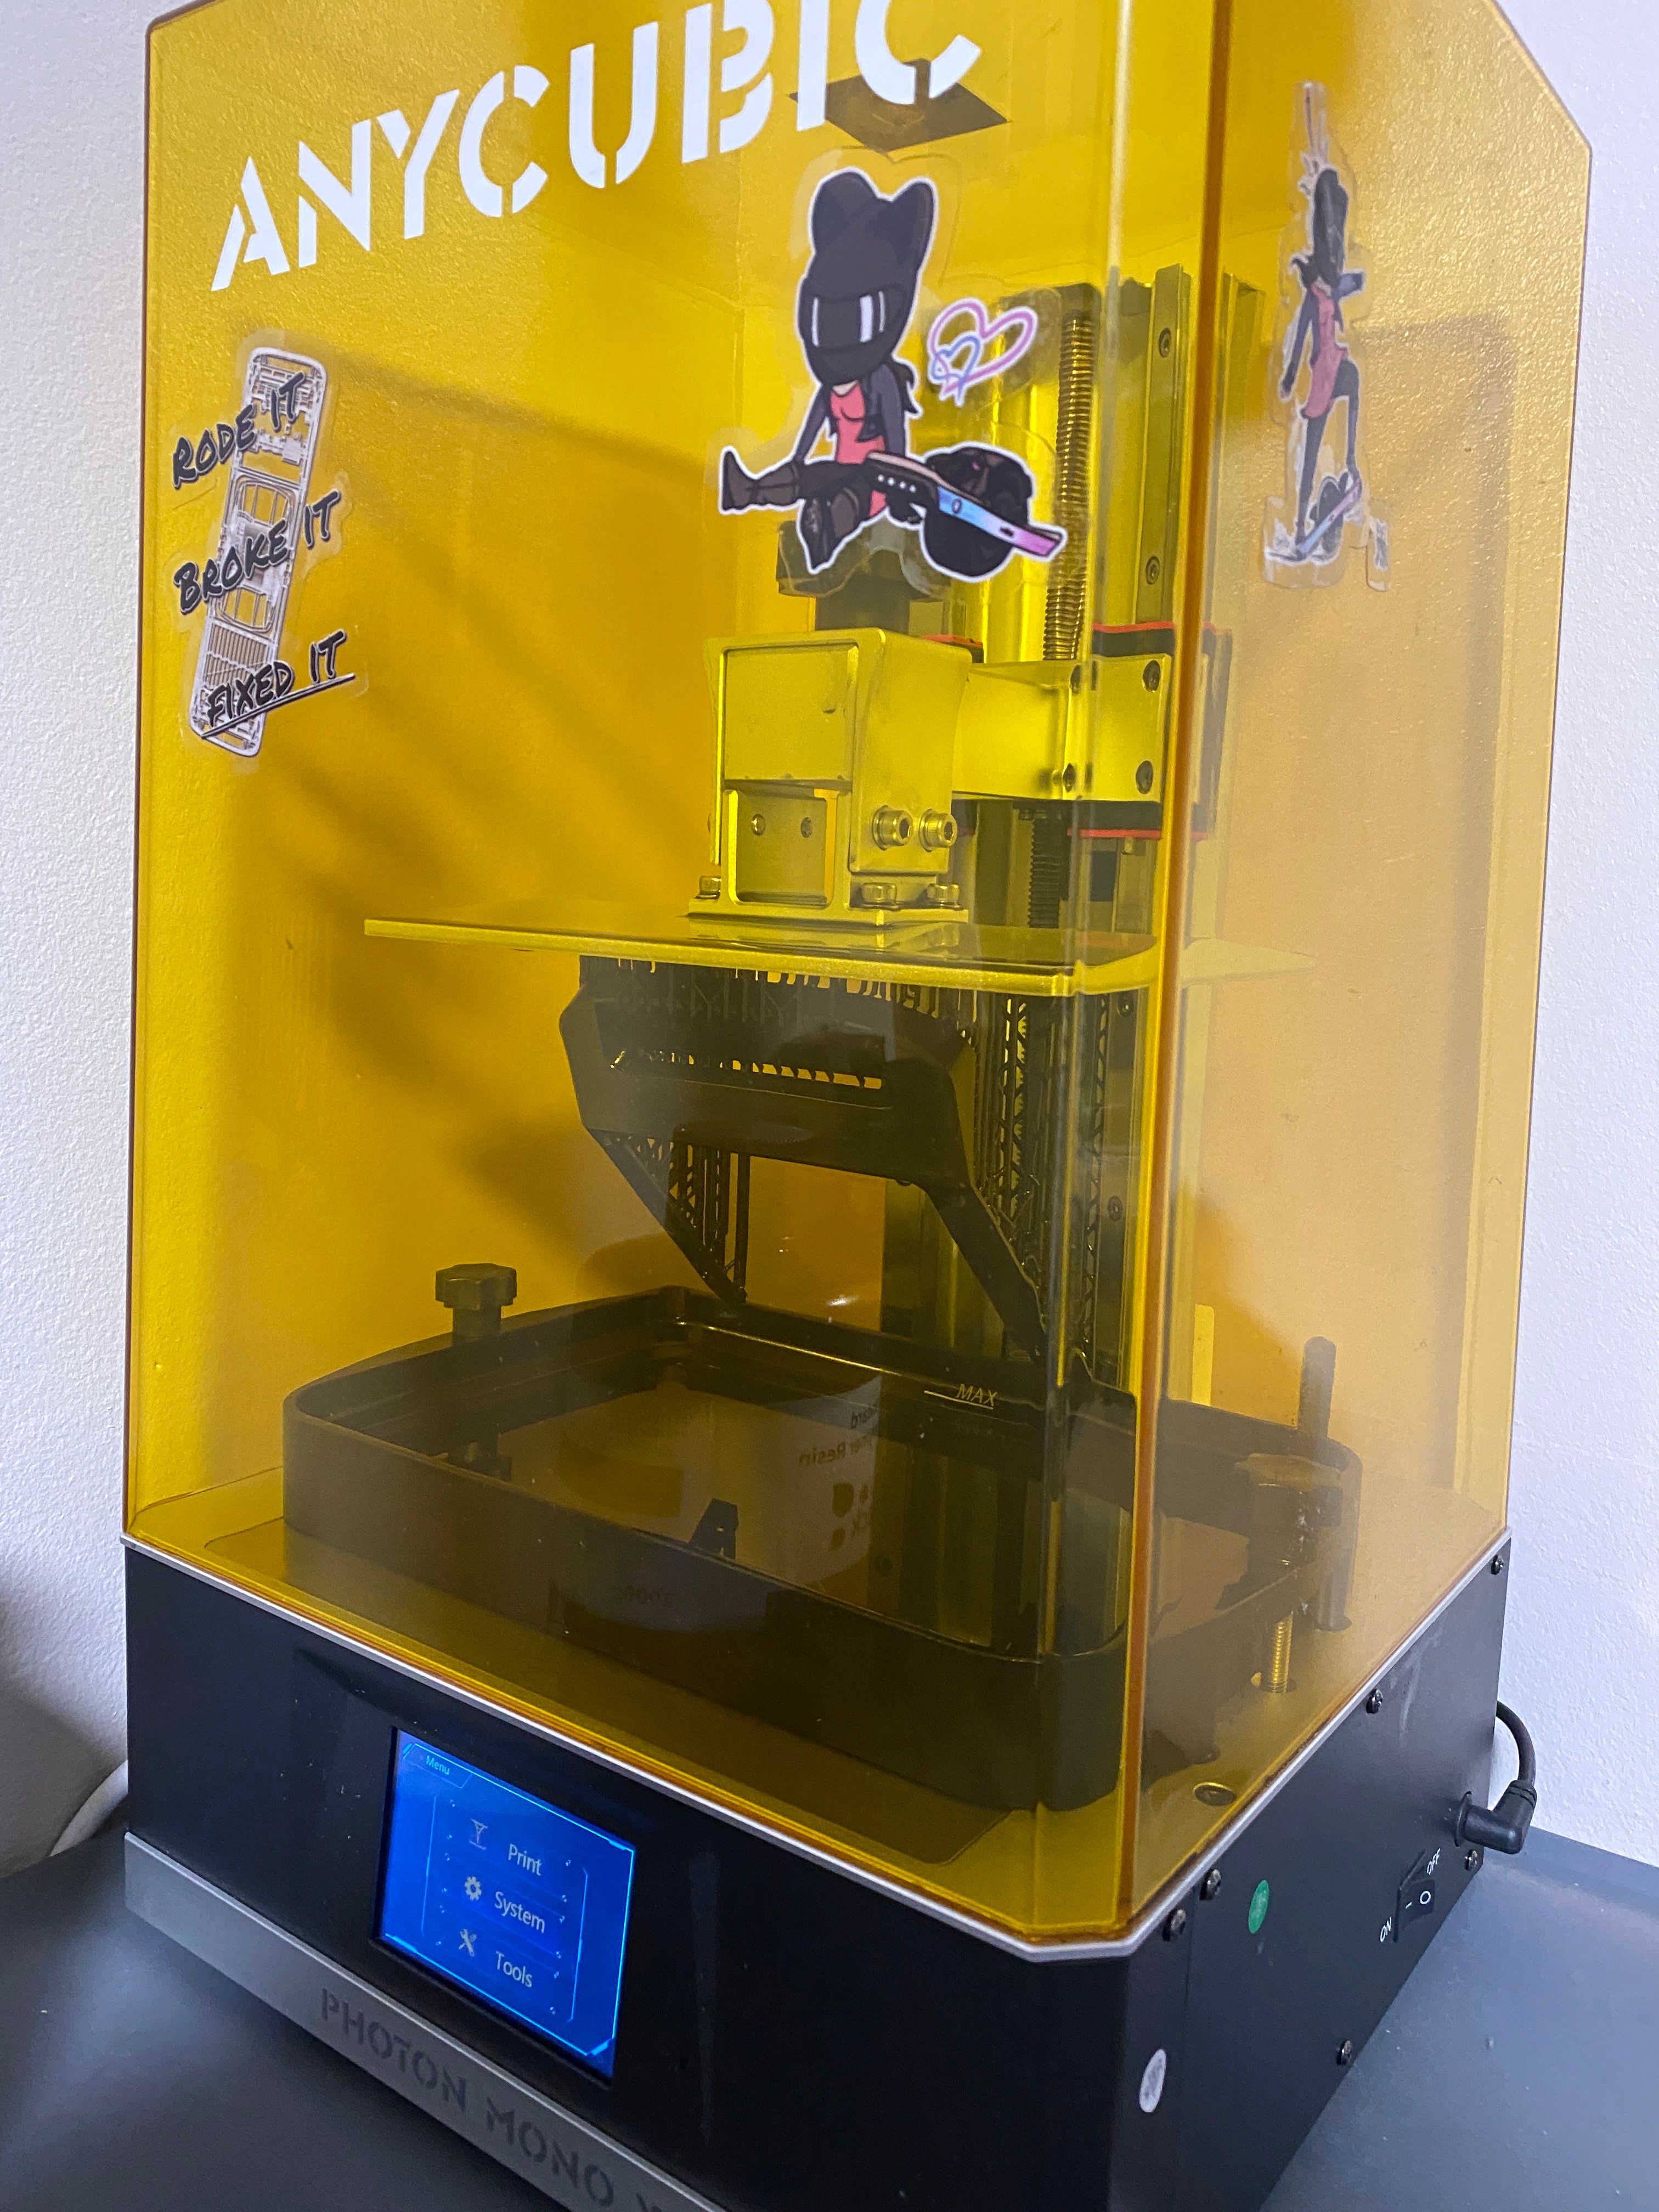
So while I figure that out @cheppy44 convinced me to give the resin printer a try. I've been holding off using it because the idea of getting in over my head on yet another CNC based workflow is daunting. However... I at least managed a successful print.
Woke up to find it finished waiting to be removed from the bed, supports removed, washed and finally cured.
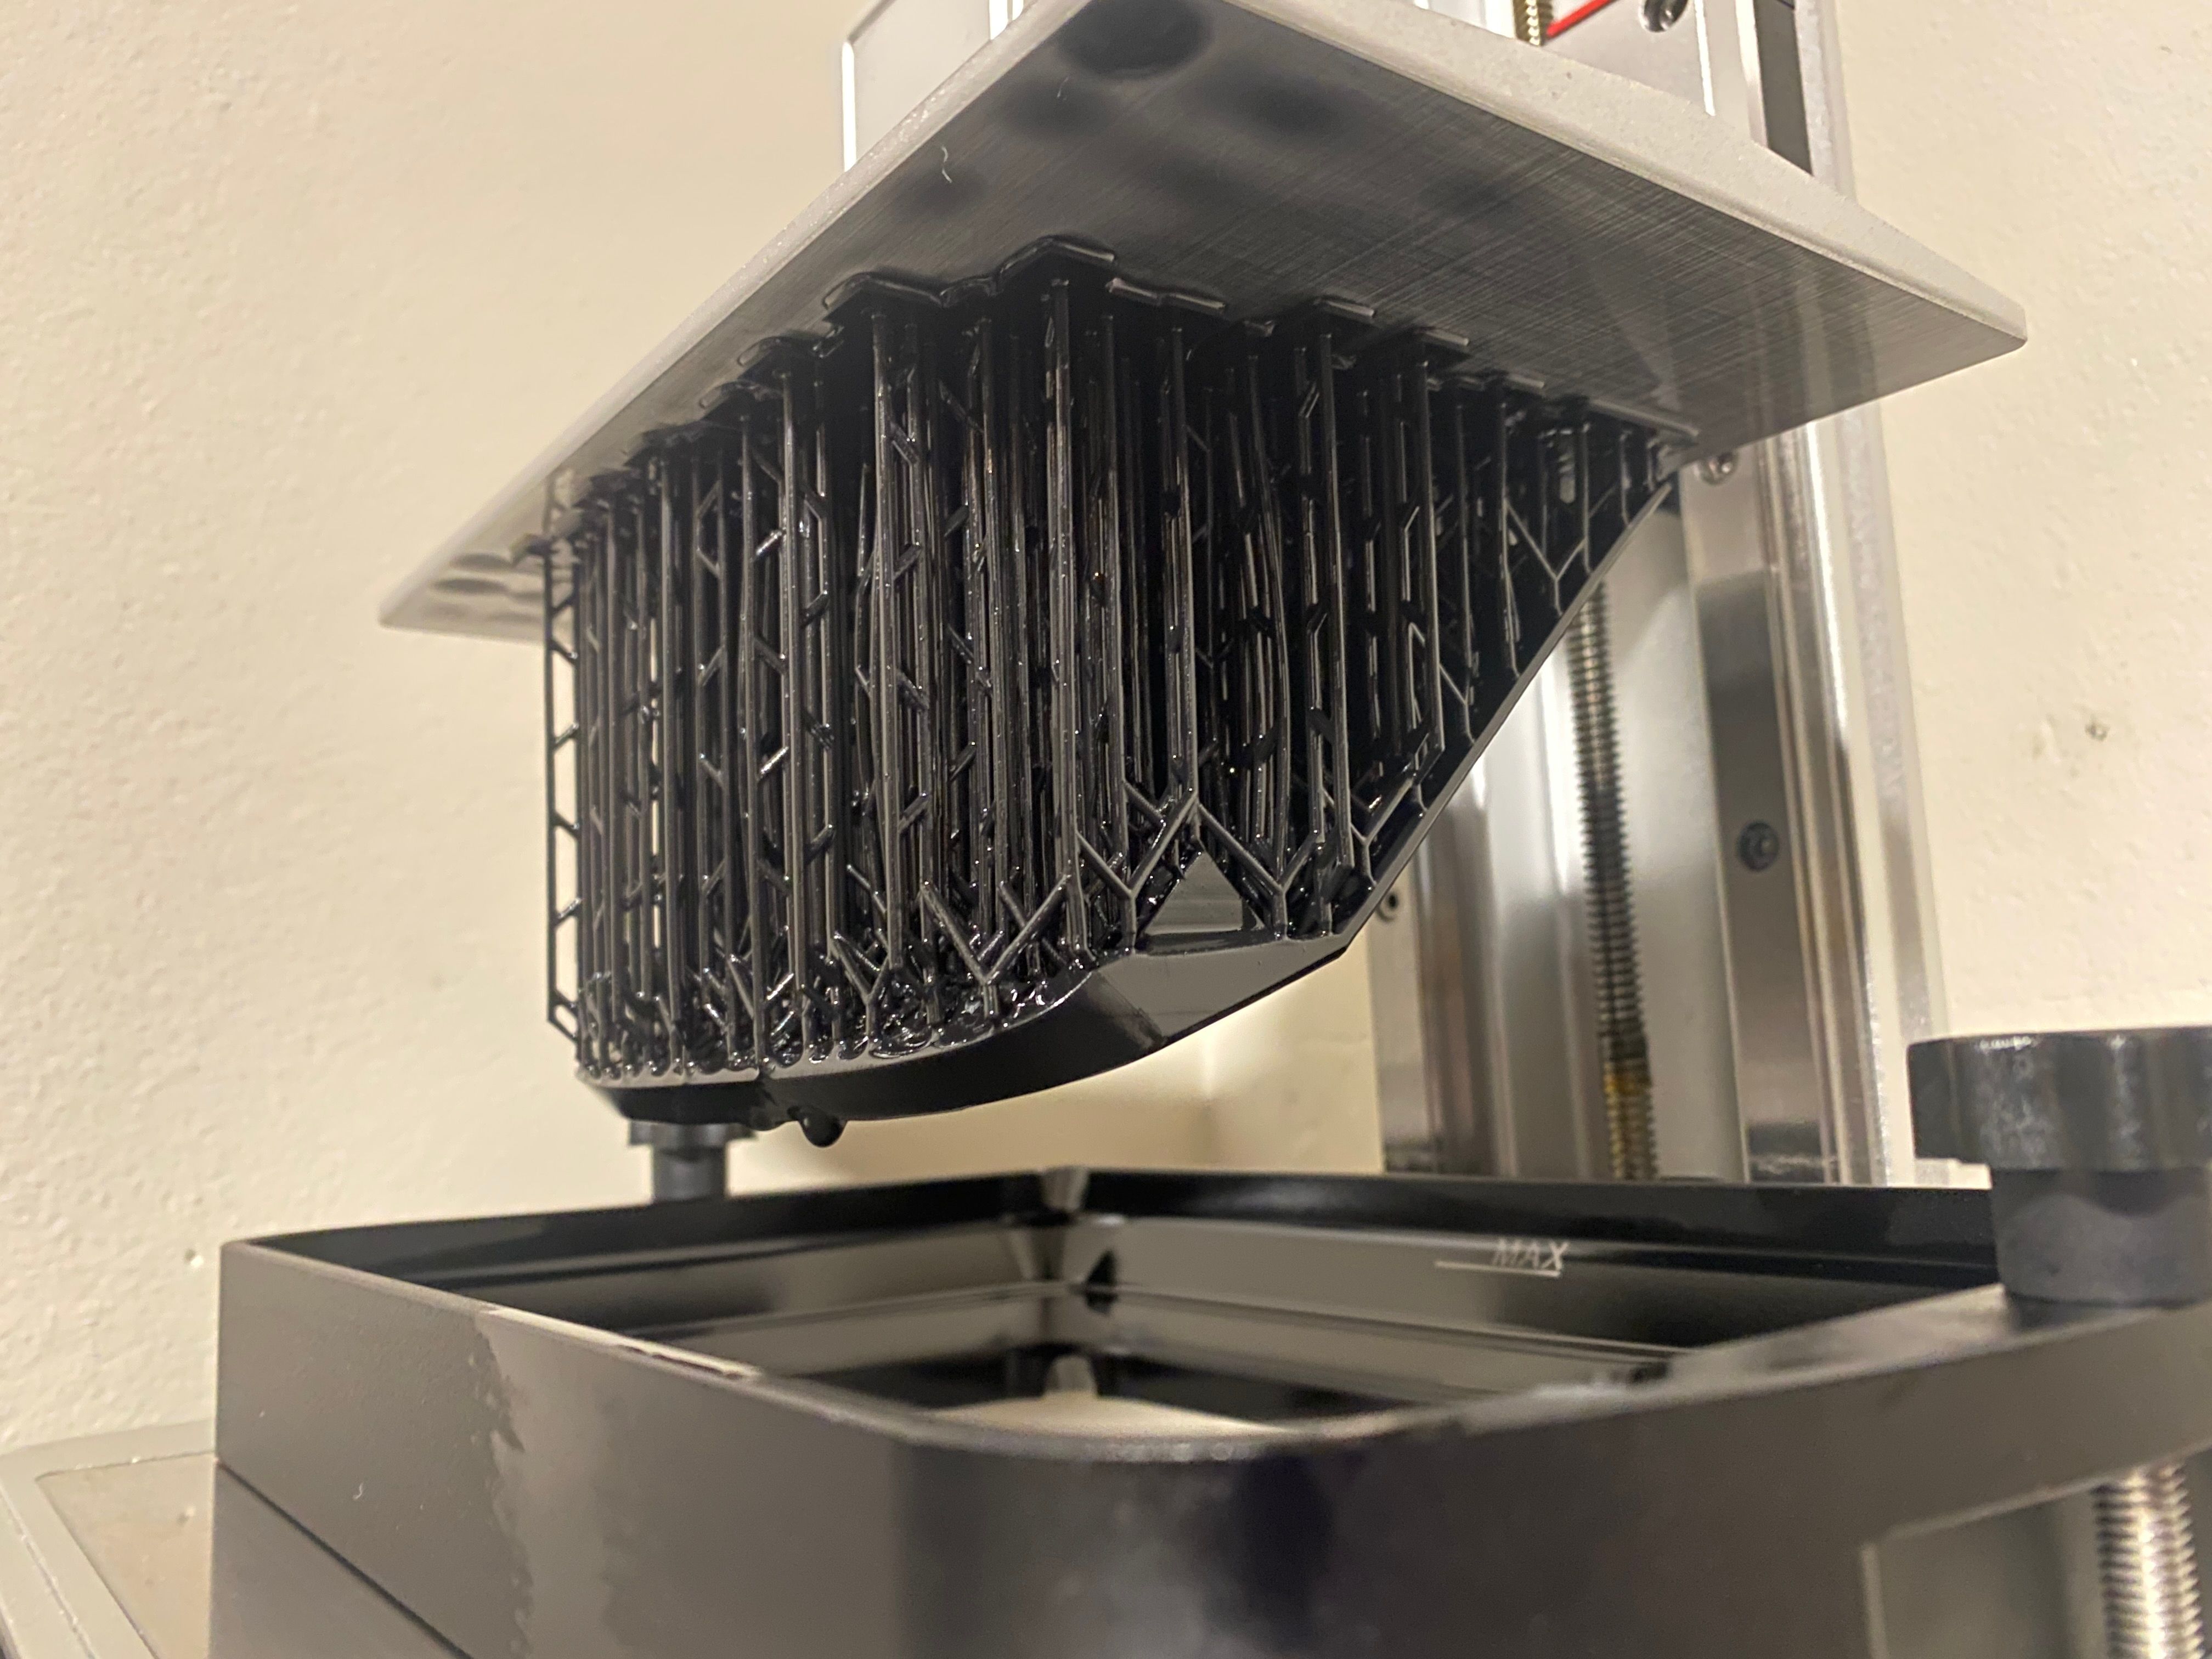
It looks good, other than some artifacting that I'll need to figure out.
Tore off the supports which went smooth and was oddly satisfying sliding your fingers through the supports to pull them off.
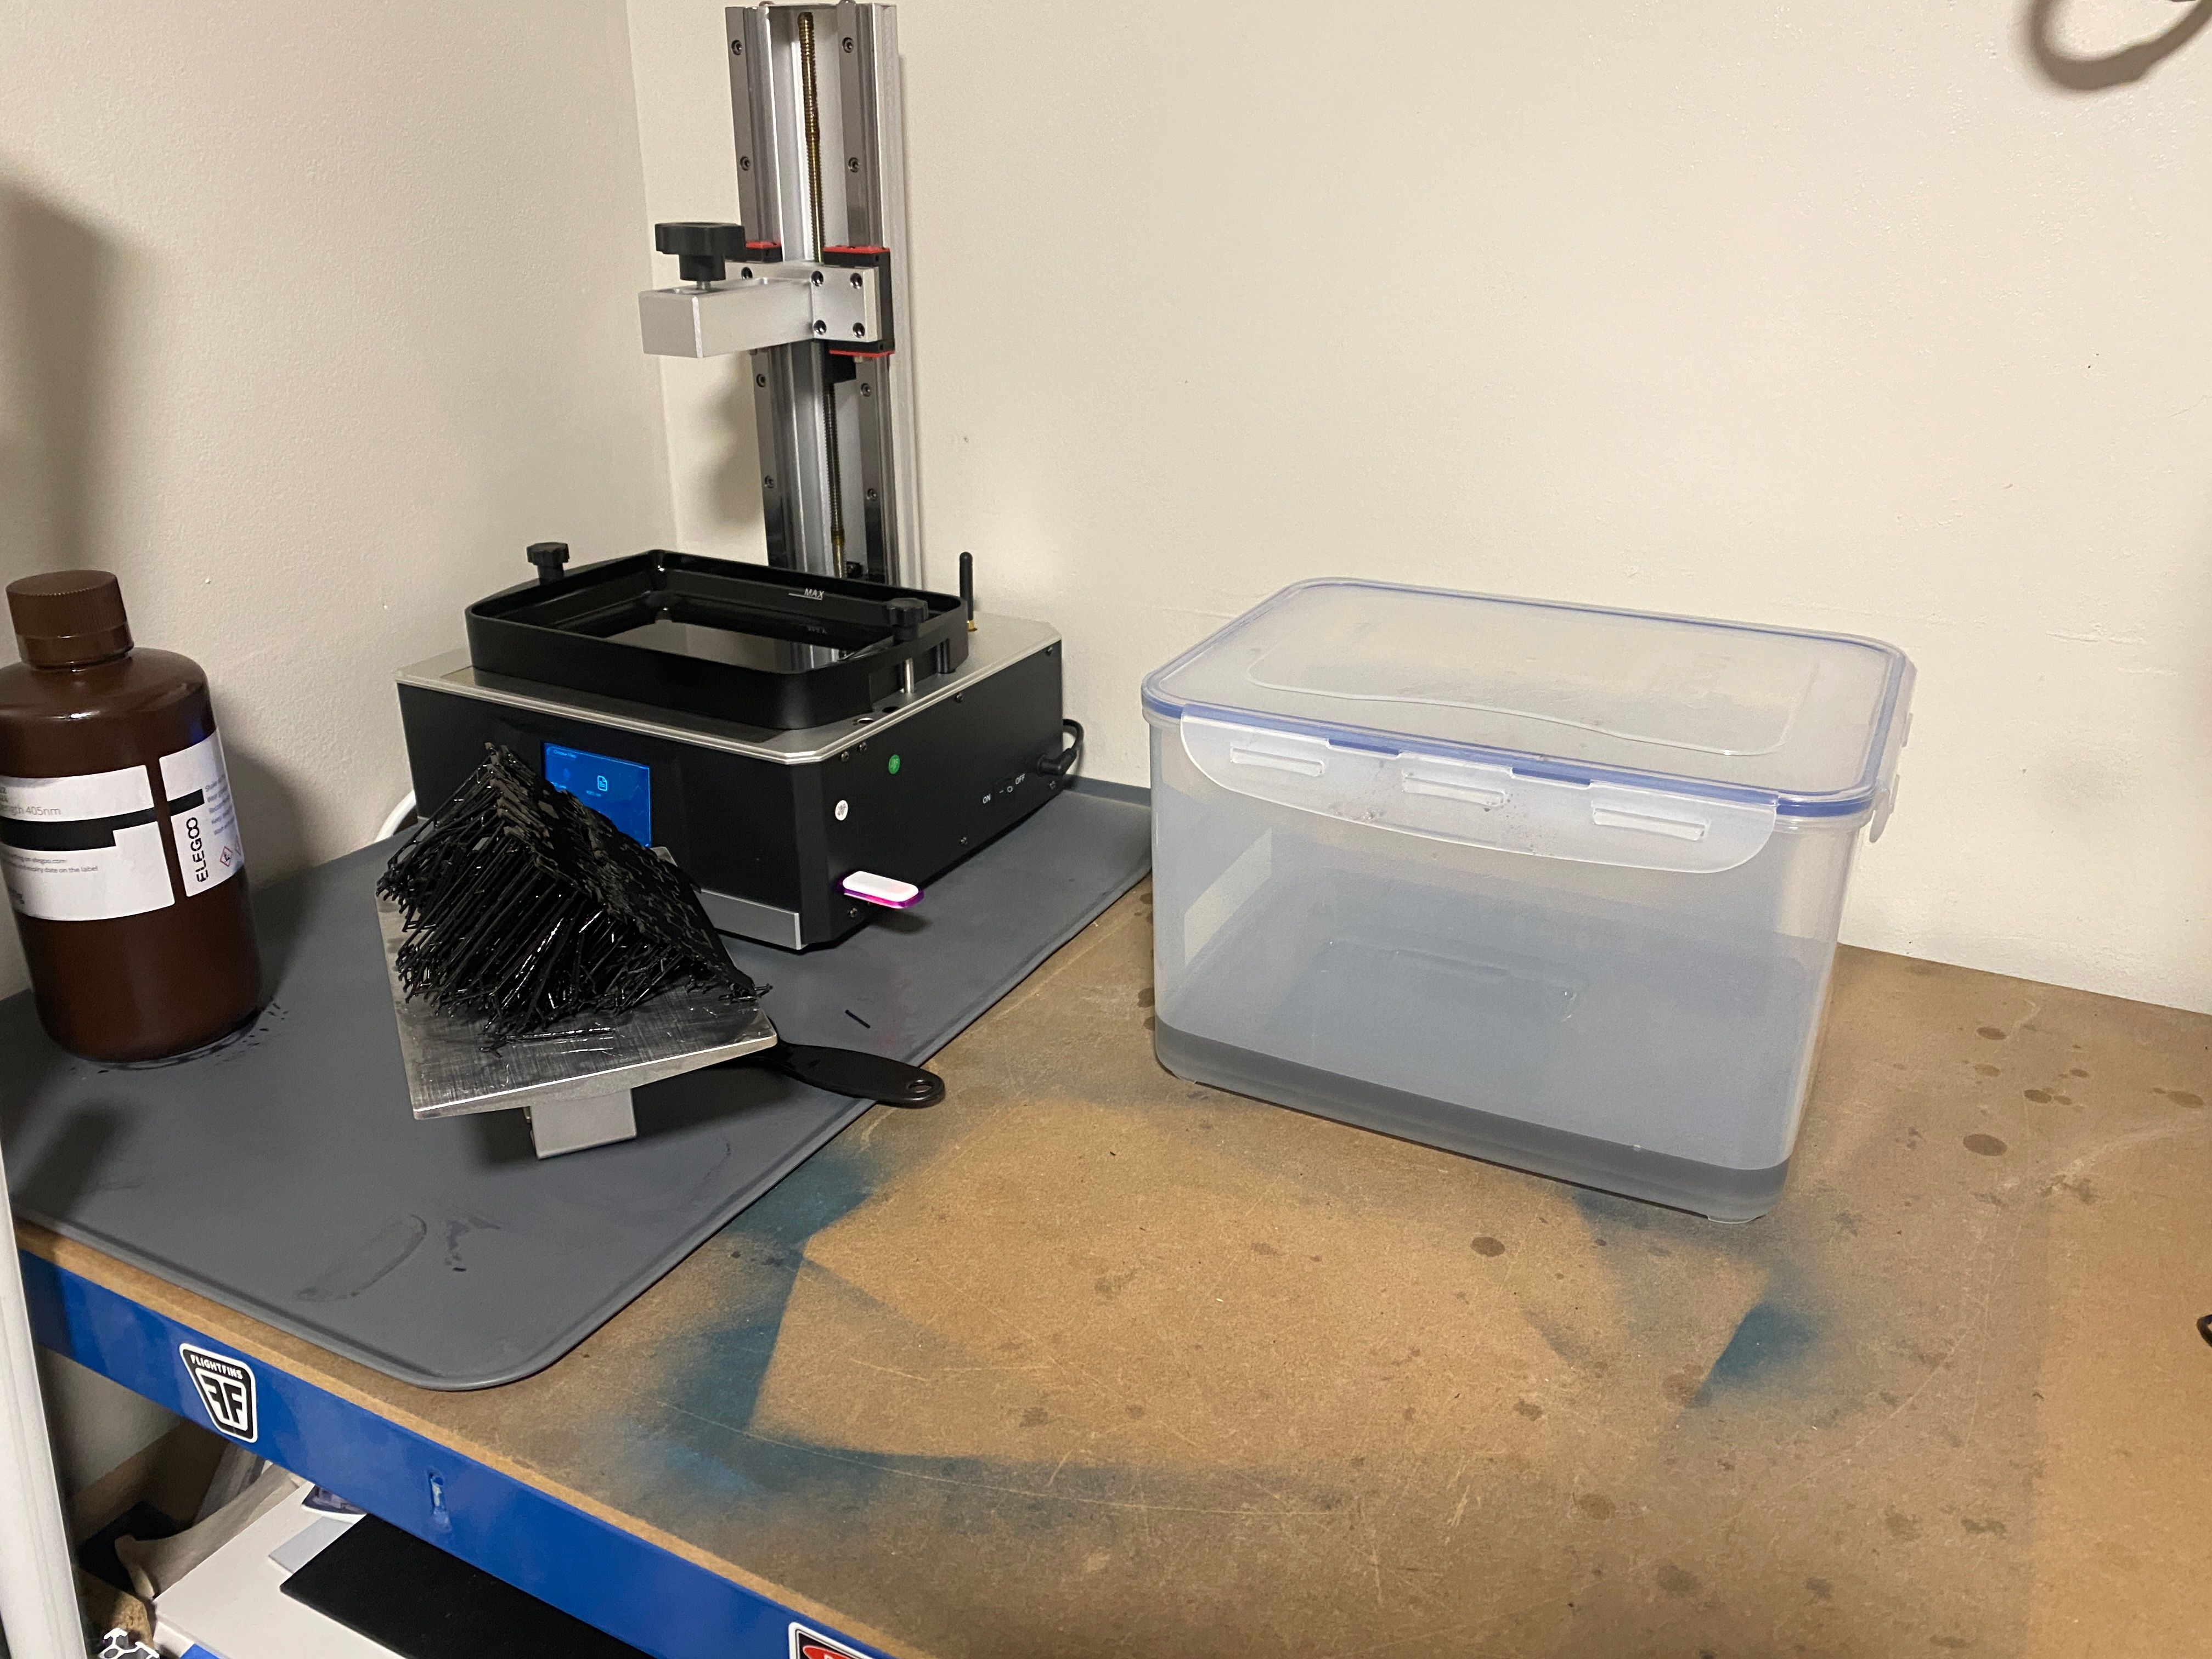
At this point I had noticed some odd white smears which I think was me not letting the iso-alcohol to dry before curing in my DIY cure station.
Wasn't prepared to pay like £200 on a wash/cure station that fits the models I make so £20 in some specific bits was fine for me.
You can see the difference, if not for the white smears this would be night and day in an improvement.
Sadly it looks like the print wasn't perfect. The very front appears to be warped and doesn't actually line up as per the CAD as shown with the wildly out of tolerance bits below.
For a first print though I'd say this is pretty good. I think the issue was the parts that warped don't appear to have any support.

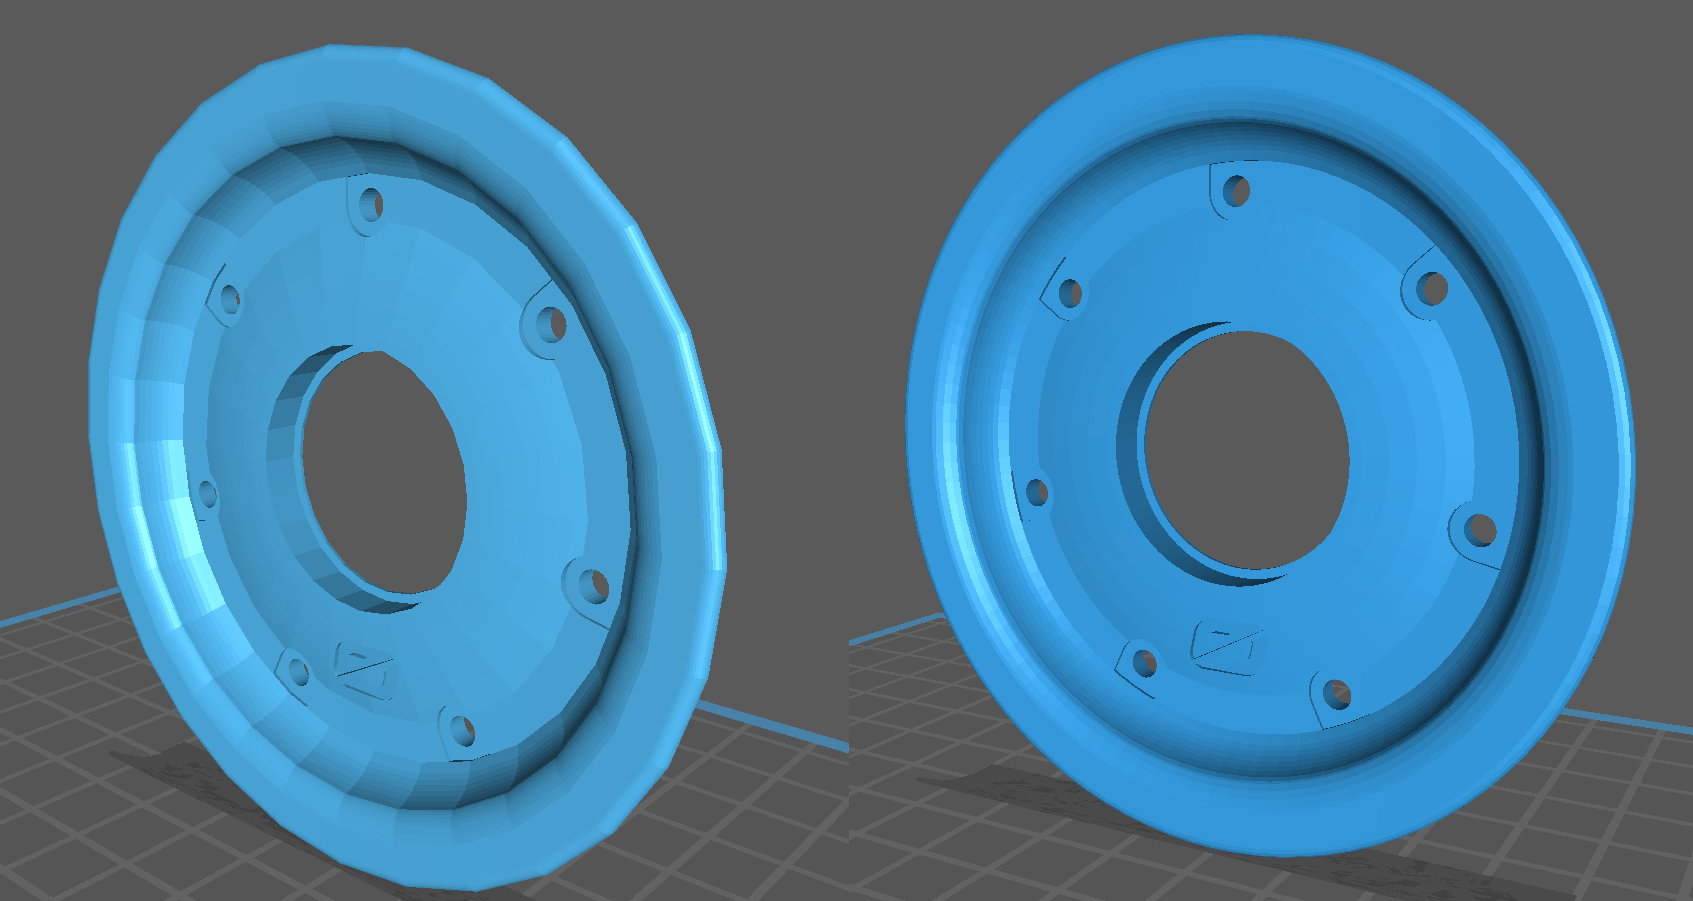
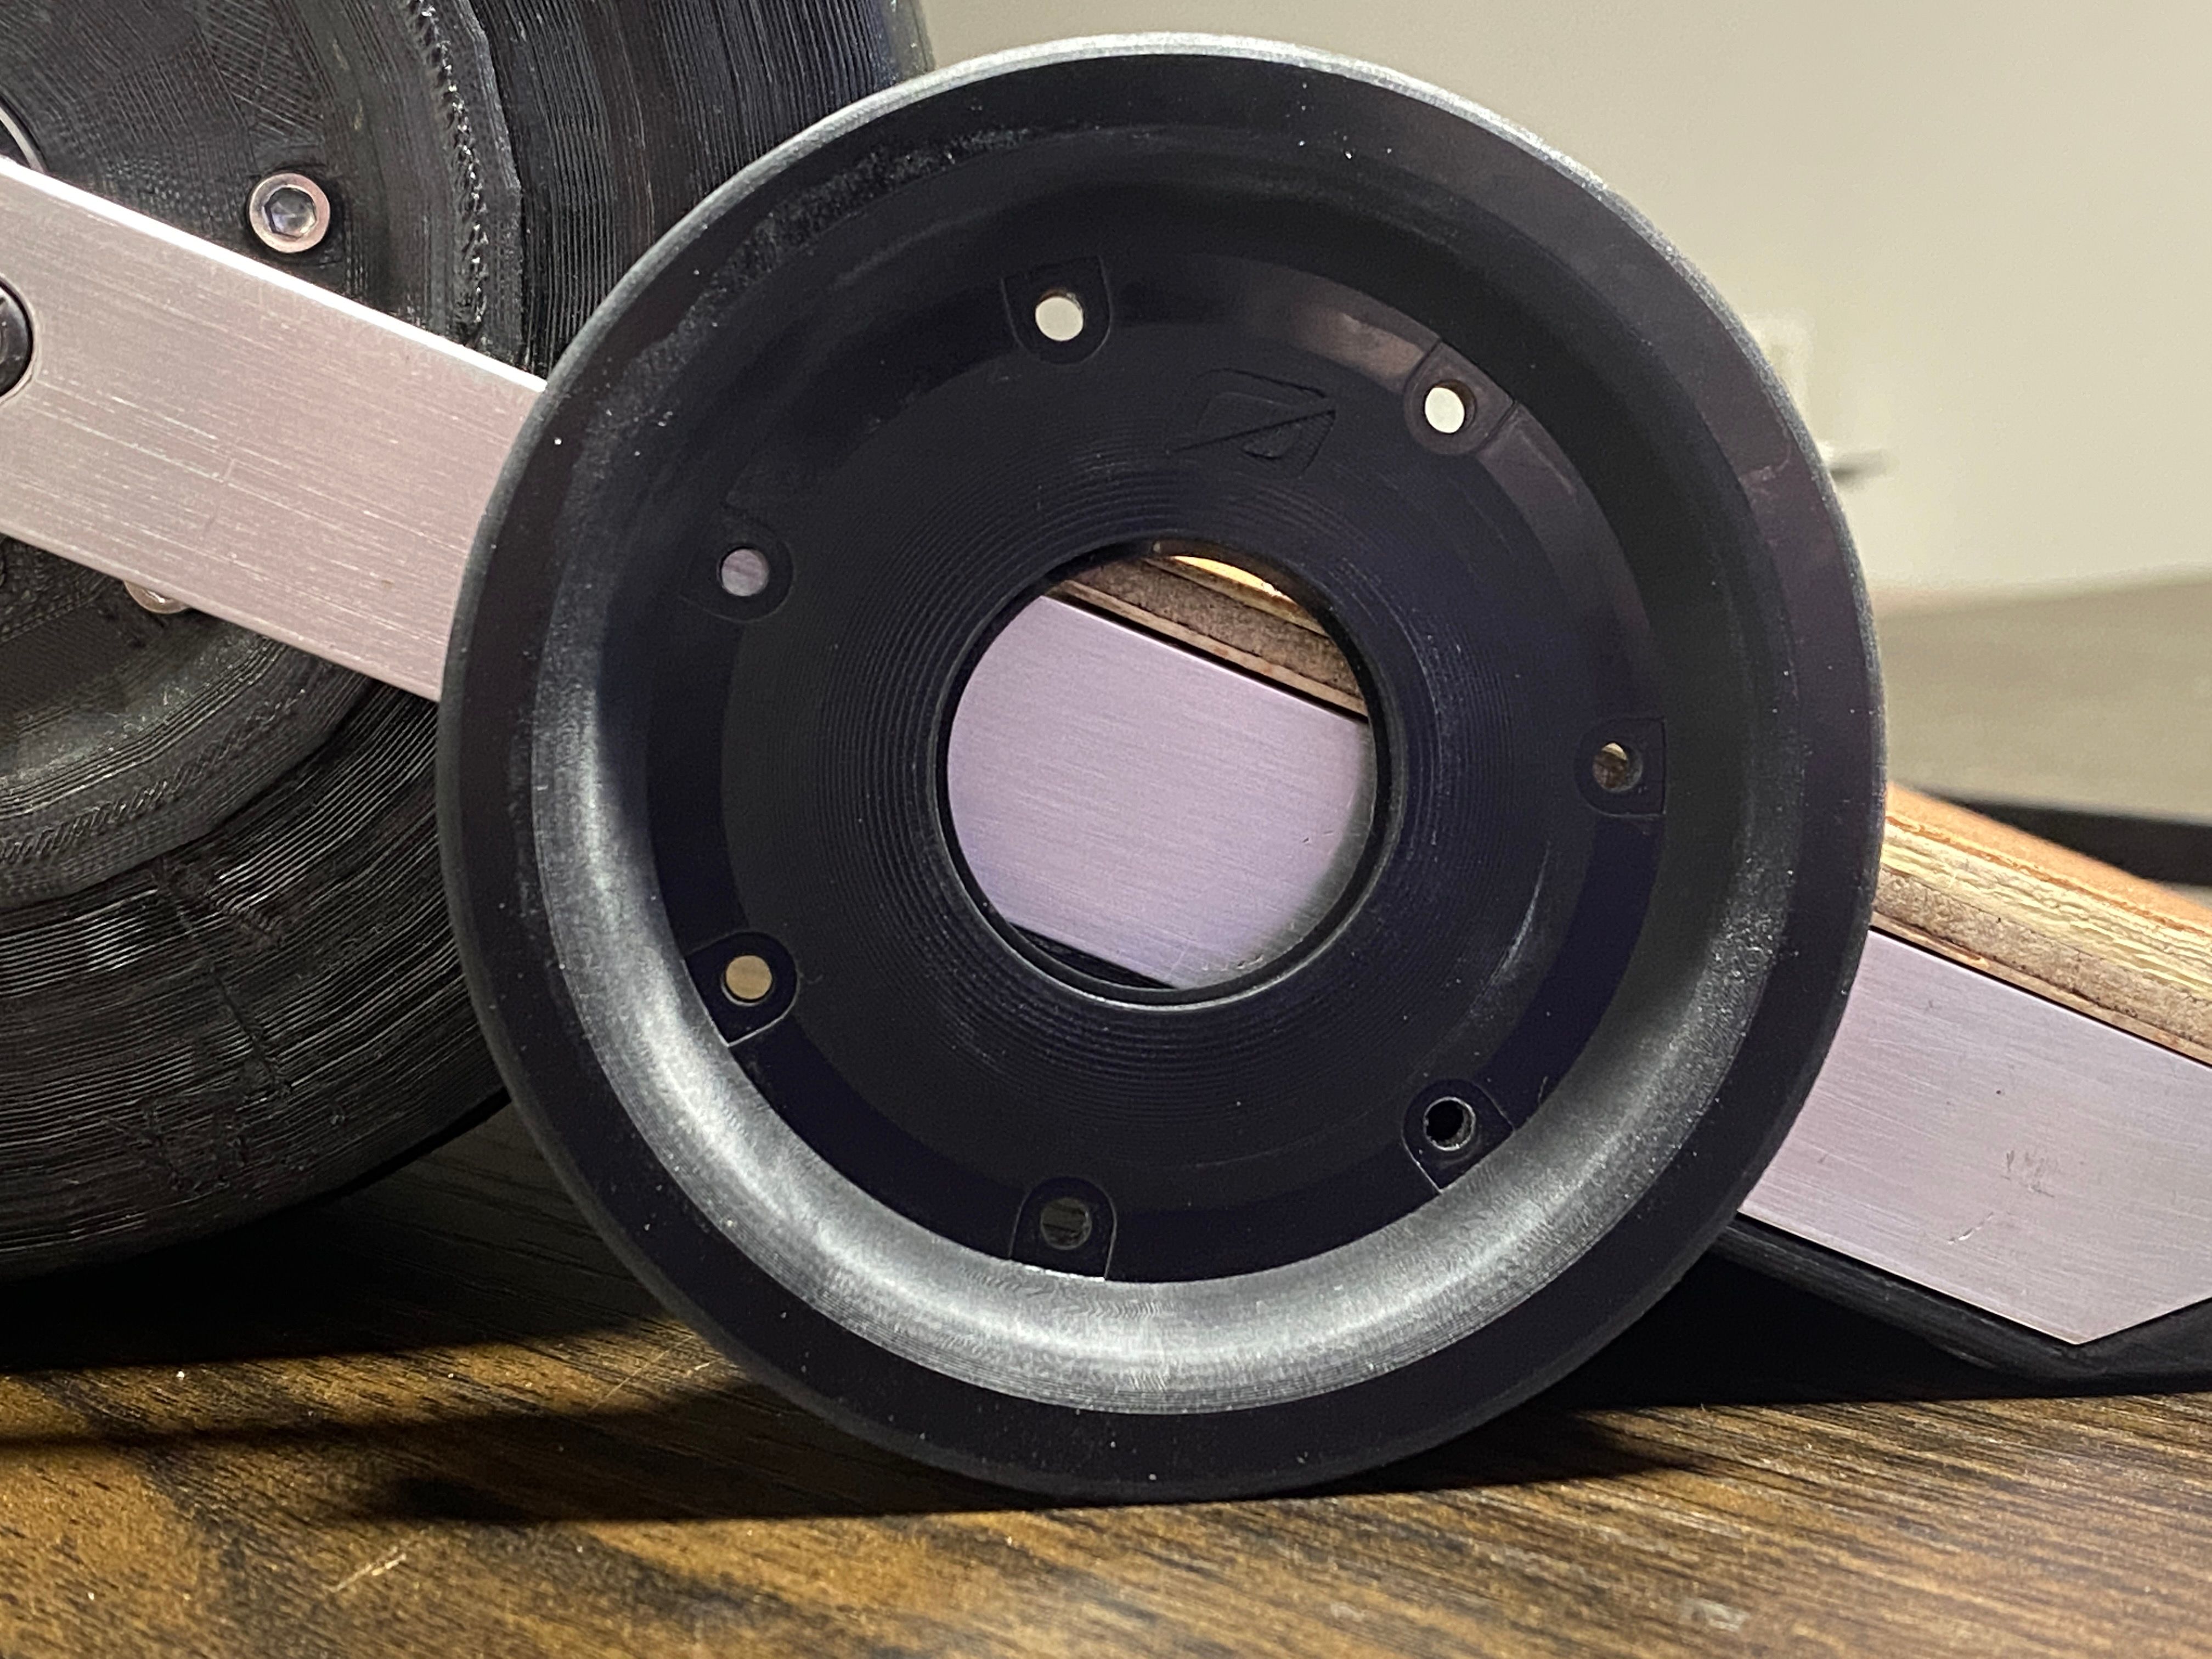
I'll try that again but since that took 9 hours to print I've opted to do one of the hub face plates which is only 2 hours. It did mean I needed to remodel it. See before/after (don't worry I wasn't printing in this orientation).
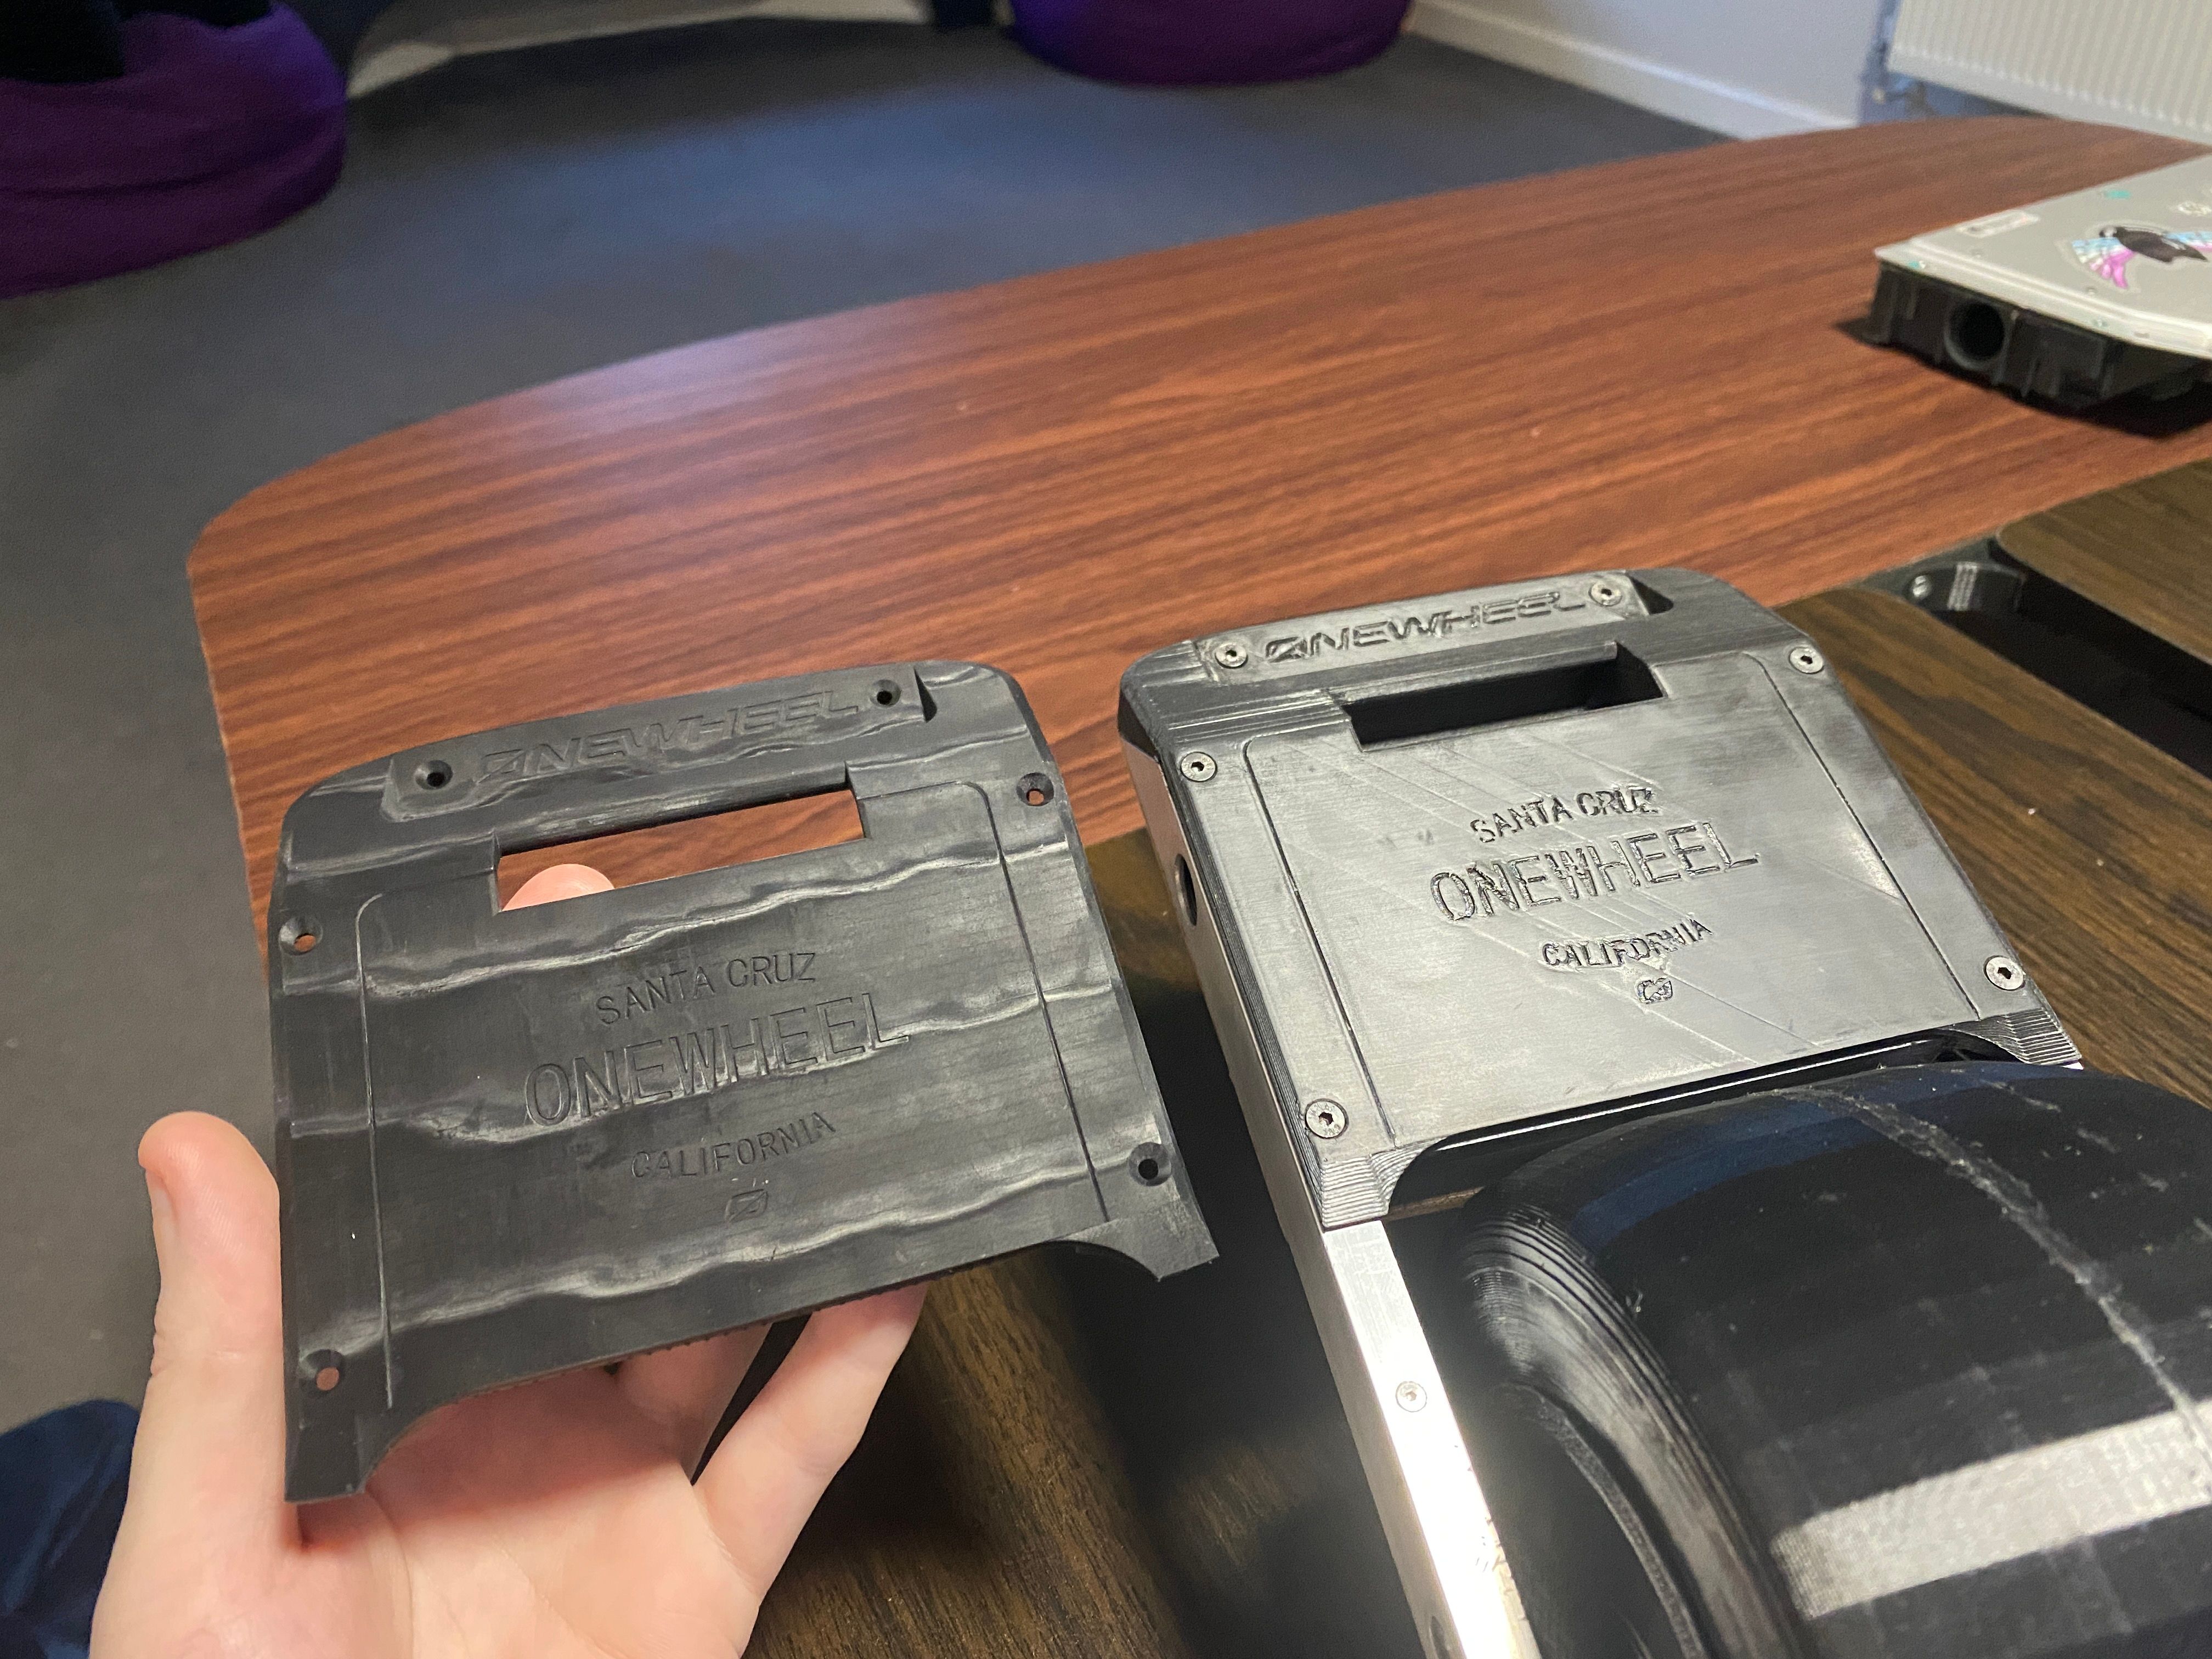
Edit: Left hub cover finished, impressed with how good the parts look!
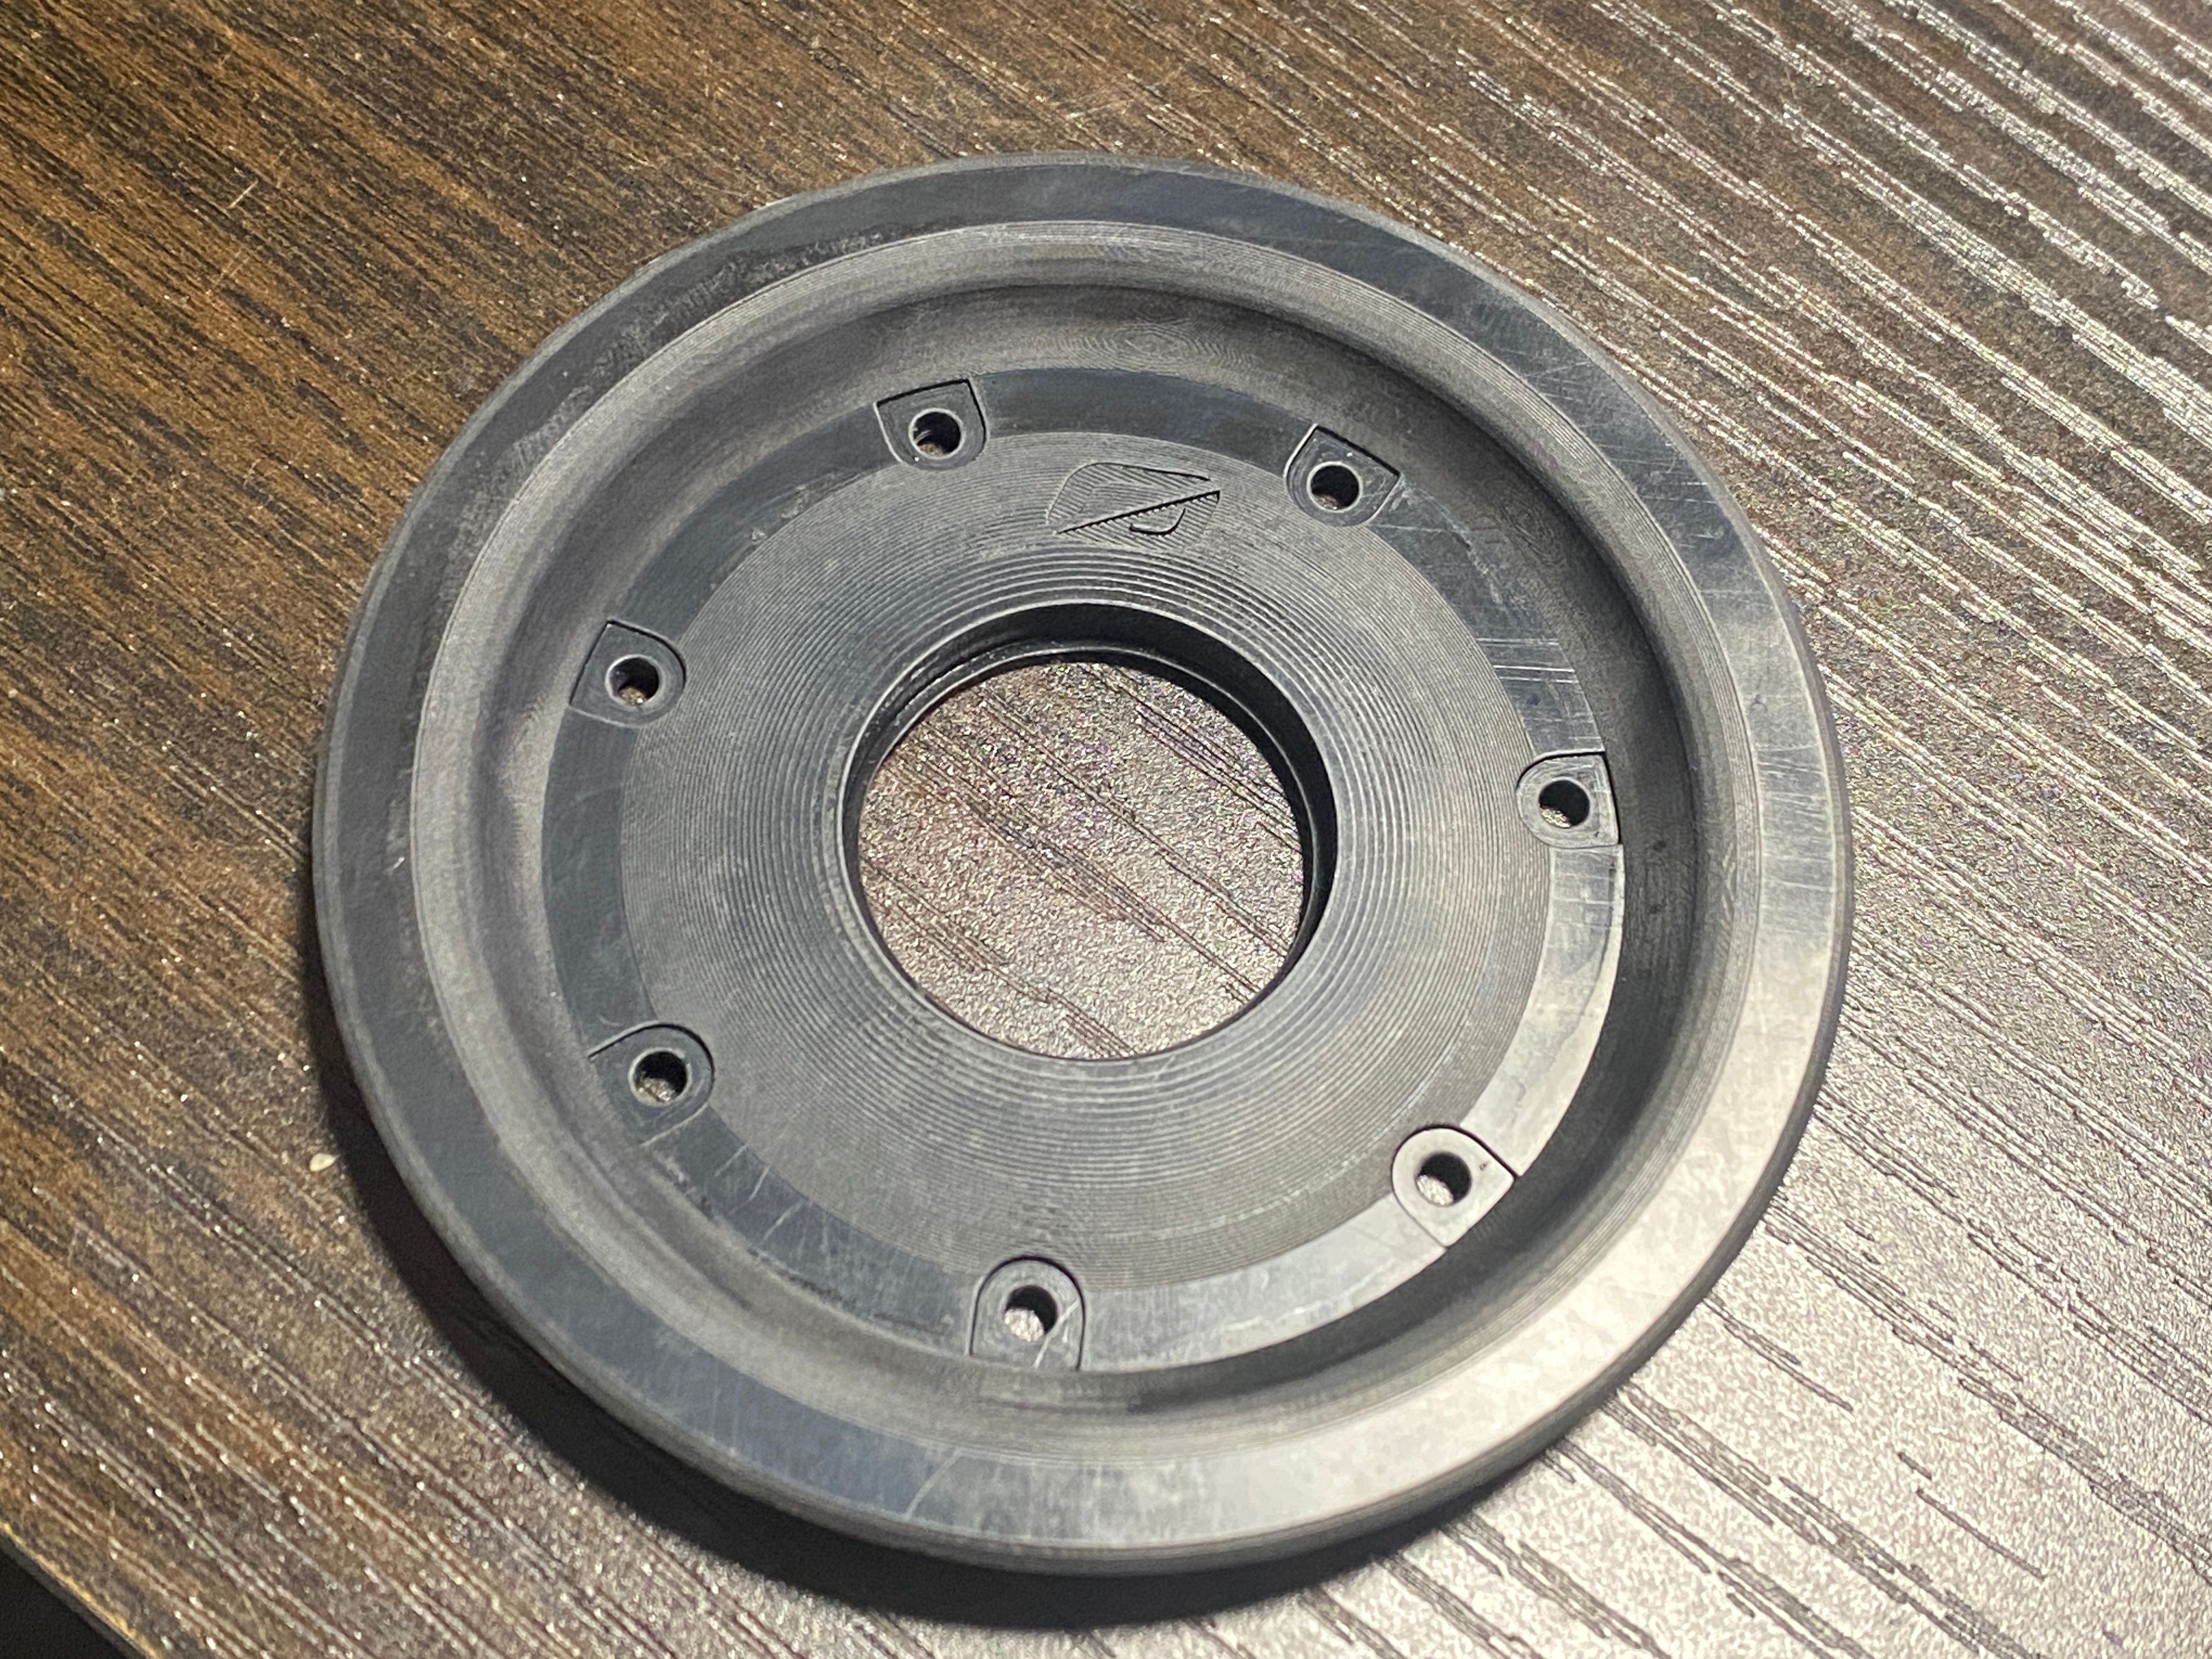
Next to the old one that's still on the XS. Waiting to get the other side done before taking the hub apart to add it.

-
@lia said in Followup to the Onewheel XS:
Then I also need to decide on the best materials to use for both the mould and actual tire.
But when will the aftermarket tires come out? Inquiring minds want to know!!!
GTS XL > GTS > GT > Pint X > XR > +
-
@onedangt Thanks to another project I'm working on with @cheppy44 The Enduro and Hoosier Slick D20 is getting modelled 👀
-
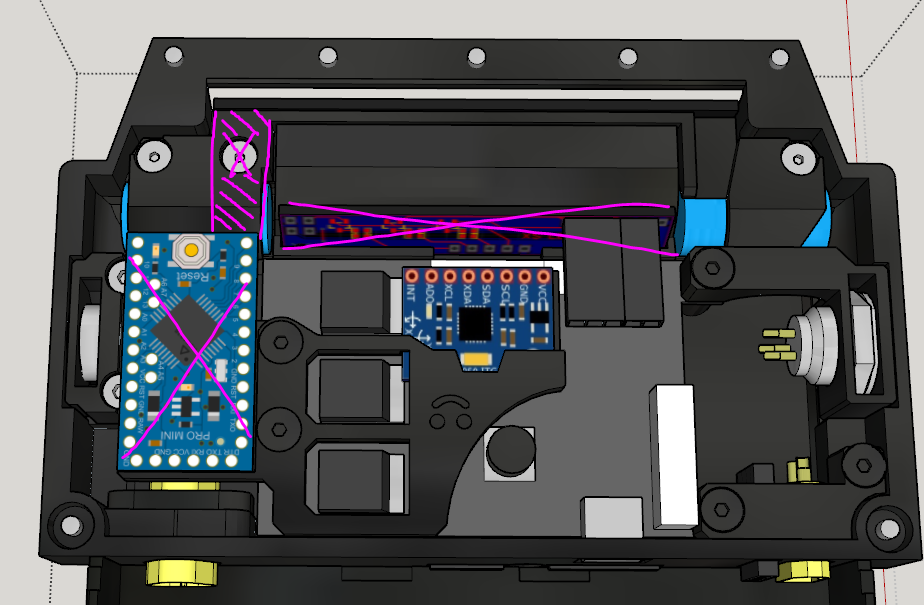
Much muuuuch simpler!
Also look at the bebe Seeeduino that will replace the Arduino Pro Mini :3
In the process of printing more of the bumpers now that I figured out why the first one warped. I feel like a mad scientist with this machine!
Tolerance dialled in to the point I'm happy with it :3

So with a replacement front coming I've decided I might just make a V2 of the XS since I kinda like how it looks as is in it's prototype unfinished look. Just by chance @cheppy44 is visiting again next week and wanted to make one together soooooo...
Looks like I'm making a little family of XS's. I might re-use parts from the original for my V2 since I did a BOM for the parts and just the materials alone is near £400 to build one at the current spec and that's not including the cast tire that I have yet to figure.
Non-functioning ofc is cheaper since there are no need for cells, ESC, motor, connectors, BMS and all the fiddly wiring although working lights would still be a must lol. -
@lia What are the dimensions on your tire? Would it just be better to design the new XS models around an 8x3-4, 9x3.5-4, or other tire? You could probably have everything working fine with a hard compound at 10PSI. Could your hub handle that? If it can't take the PSI, could you fill it with foam?
Instead of choosing the model ratio before fabrication, take something that is hard to replicate, and base the model ratio on what best makes that part work. Also, if it is a standard tire size, maybe there is a hub you can use as your starting point.
-
@lia said in Followup to the Onewheel XS:
I feel like a mad scientist
I can not disagree with this statement
-
@biell That did cross my mind when first looking at making one but I wasn’t able to find a tire that made sense at the time.
The motor just barely made sense for exactly 1/2 scale and I figured that was enough space to still make it work so settled on that. It at least made scaling parts easier since the xlr would have needed to be custom D: