Followup to the Onewheel XS
-
@notsure An enclosure is probably a must especially for the dust that'll inevitably get kicked up. I like what that guy did, very fit for purpose. I'll keep that in mind, might even use some foam like that in the server/printer cupboard.
Shame there aren't many maker-spaces in the UK, they usually have kit like that or at least are happy to have them at the location. I see a lot in various states that are always kitted with some pretty useful kit that you'd rarely find outside a business.
-
@lia said in Onewheel XS:
shame there aren't many maker-spaces in the UK
business opportunity perhaps? it would probably need to be pretty urban locale tho. low mkt volume in the sticks probably. a lot of room for improvement on that guys setup obviously. but the sound mitigation report is what i liked about it.
XR's got what plants crave!
-
@notsure Milton Keynes is a few miles down the road which would be ideal since it's huge and very urban. Future endeavour maybe if I'm still floating around on this island and not elsewhere.
-
@lia gym-like subscription model would be profitable assuming sufficient demand. single-use fee structure would be more difficult to predict. the mkt is capped tho on the higher end bc the more affluent ppl can just replace or pay others to repair stuff. that ties back into the sub model which allows others to contract their services using ur infrastructure. u need them to sign a waiver tho indemnifying u of legal liability. IaaS in a nutshell.
-
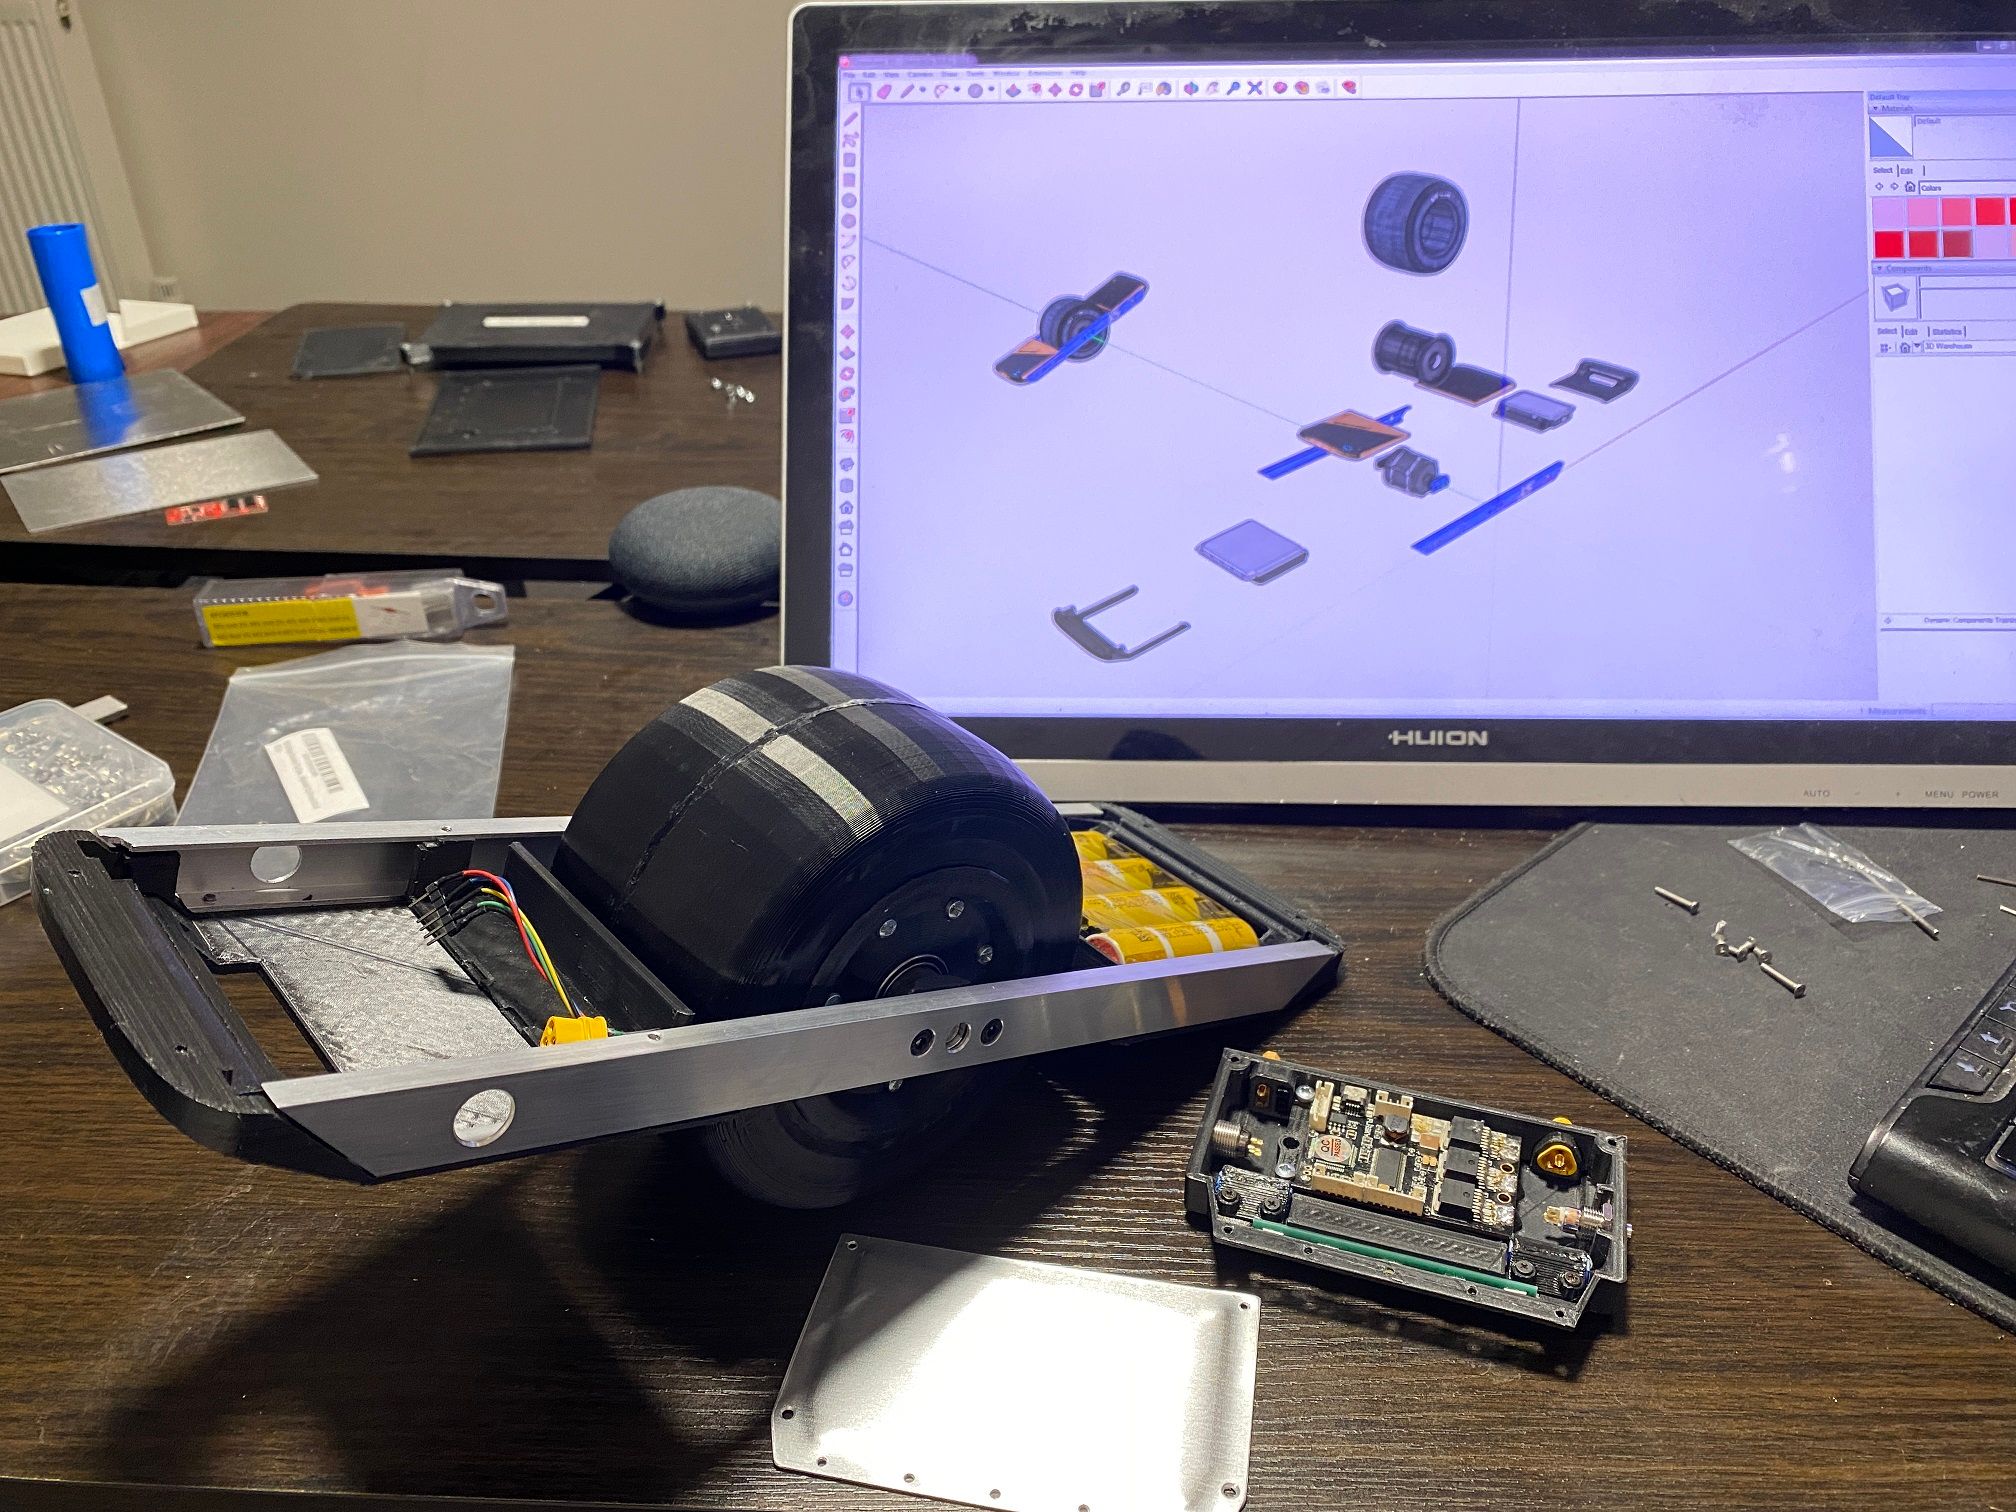
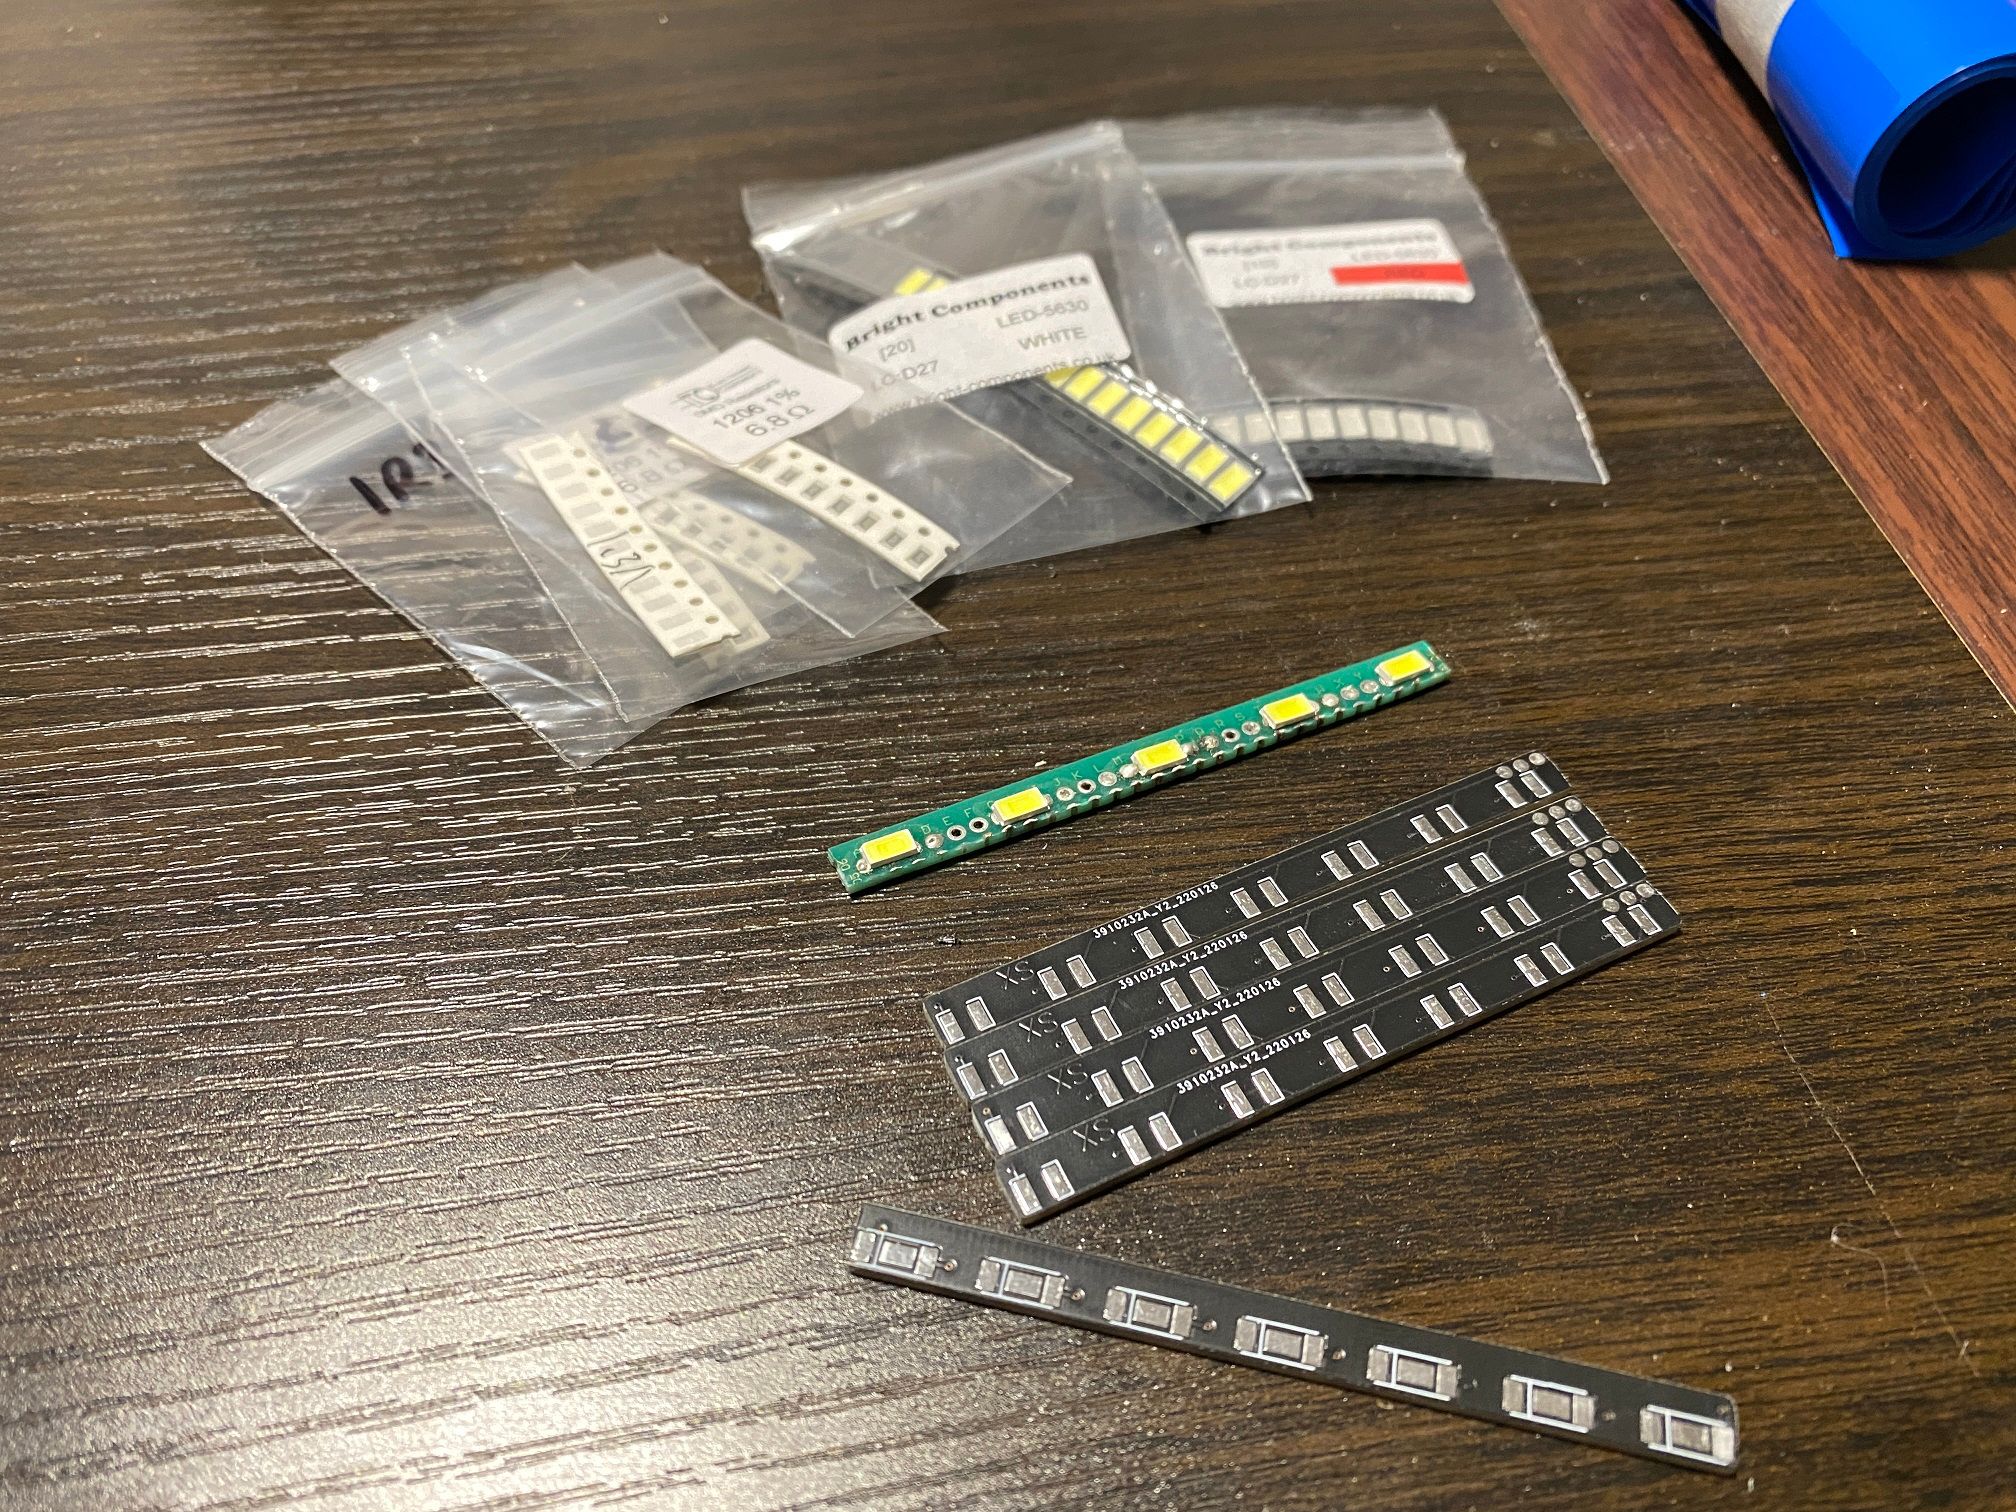
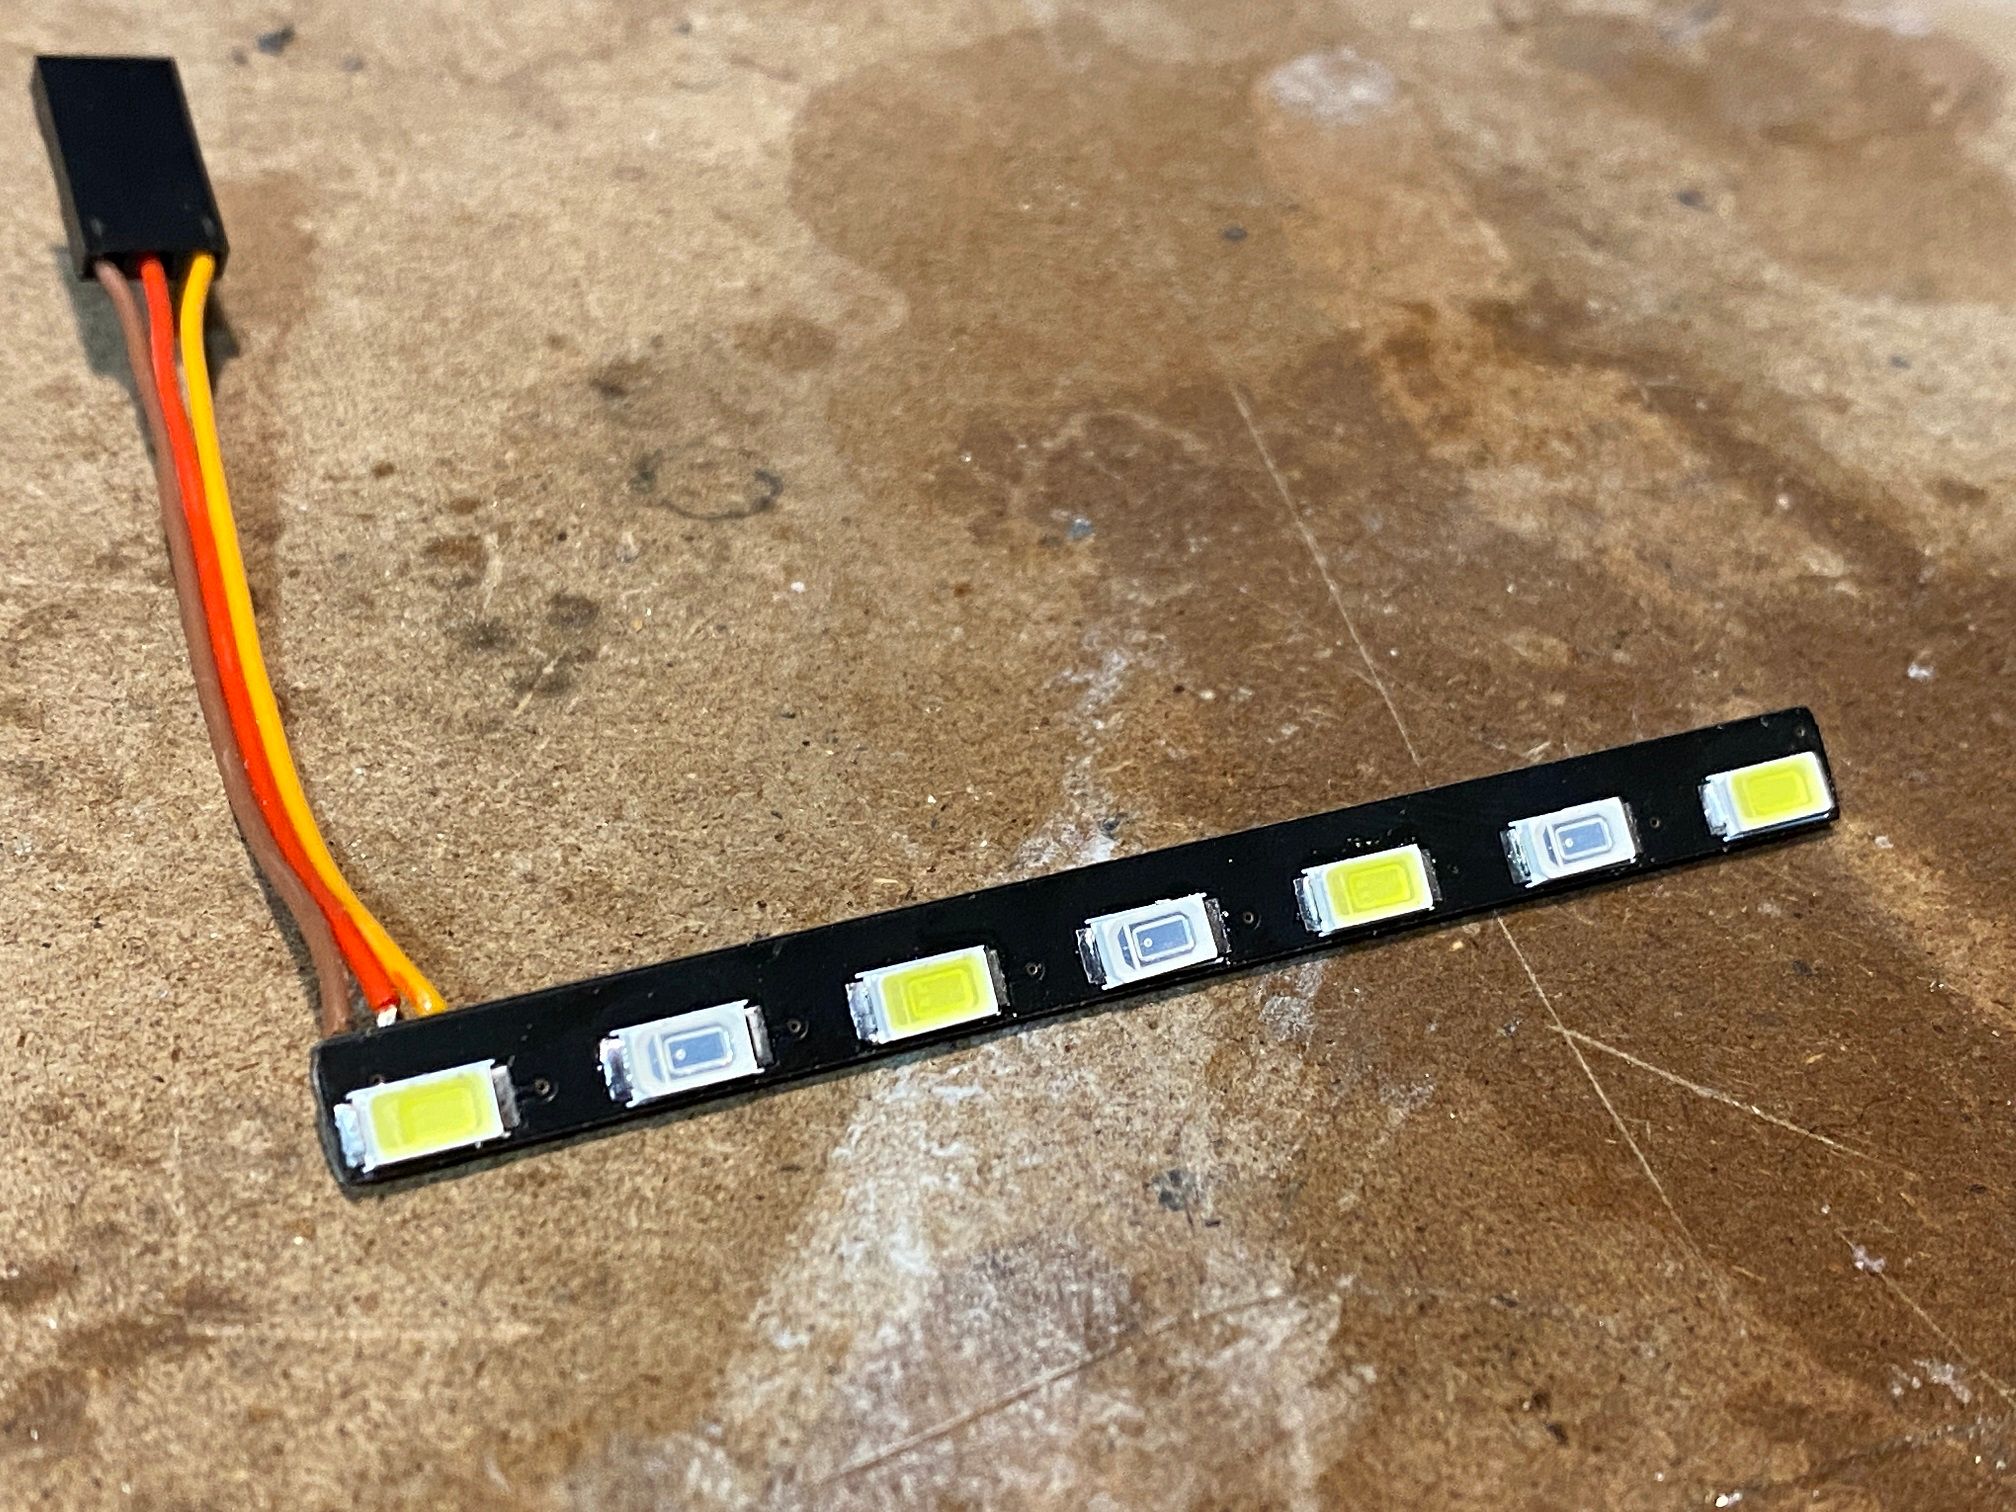
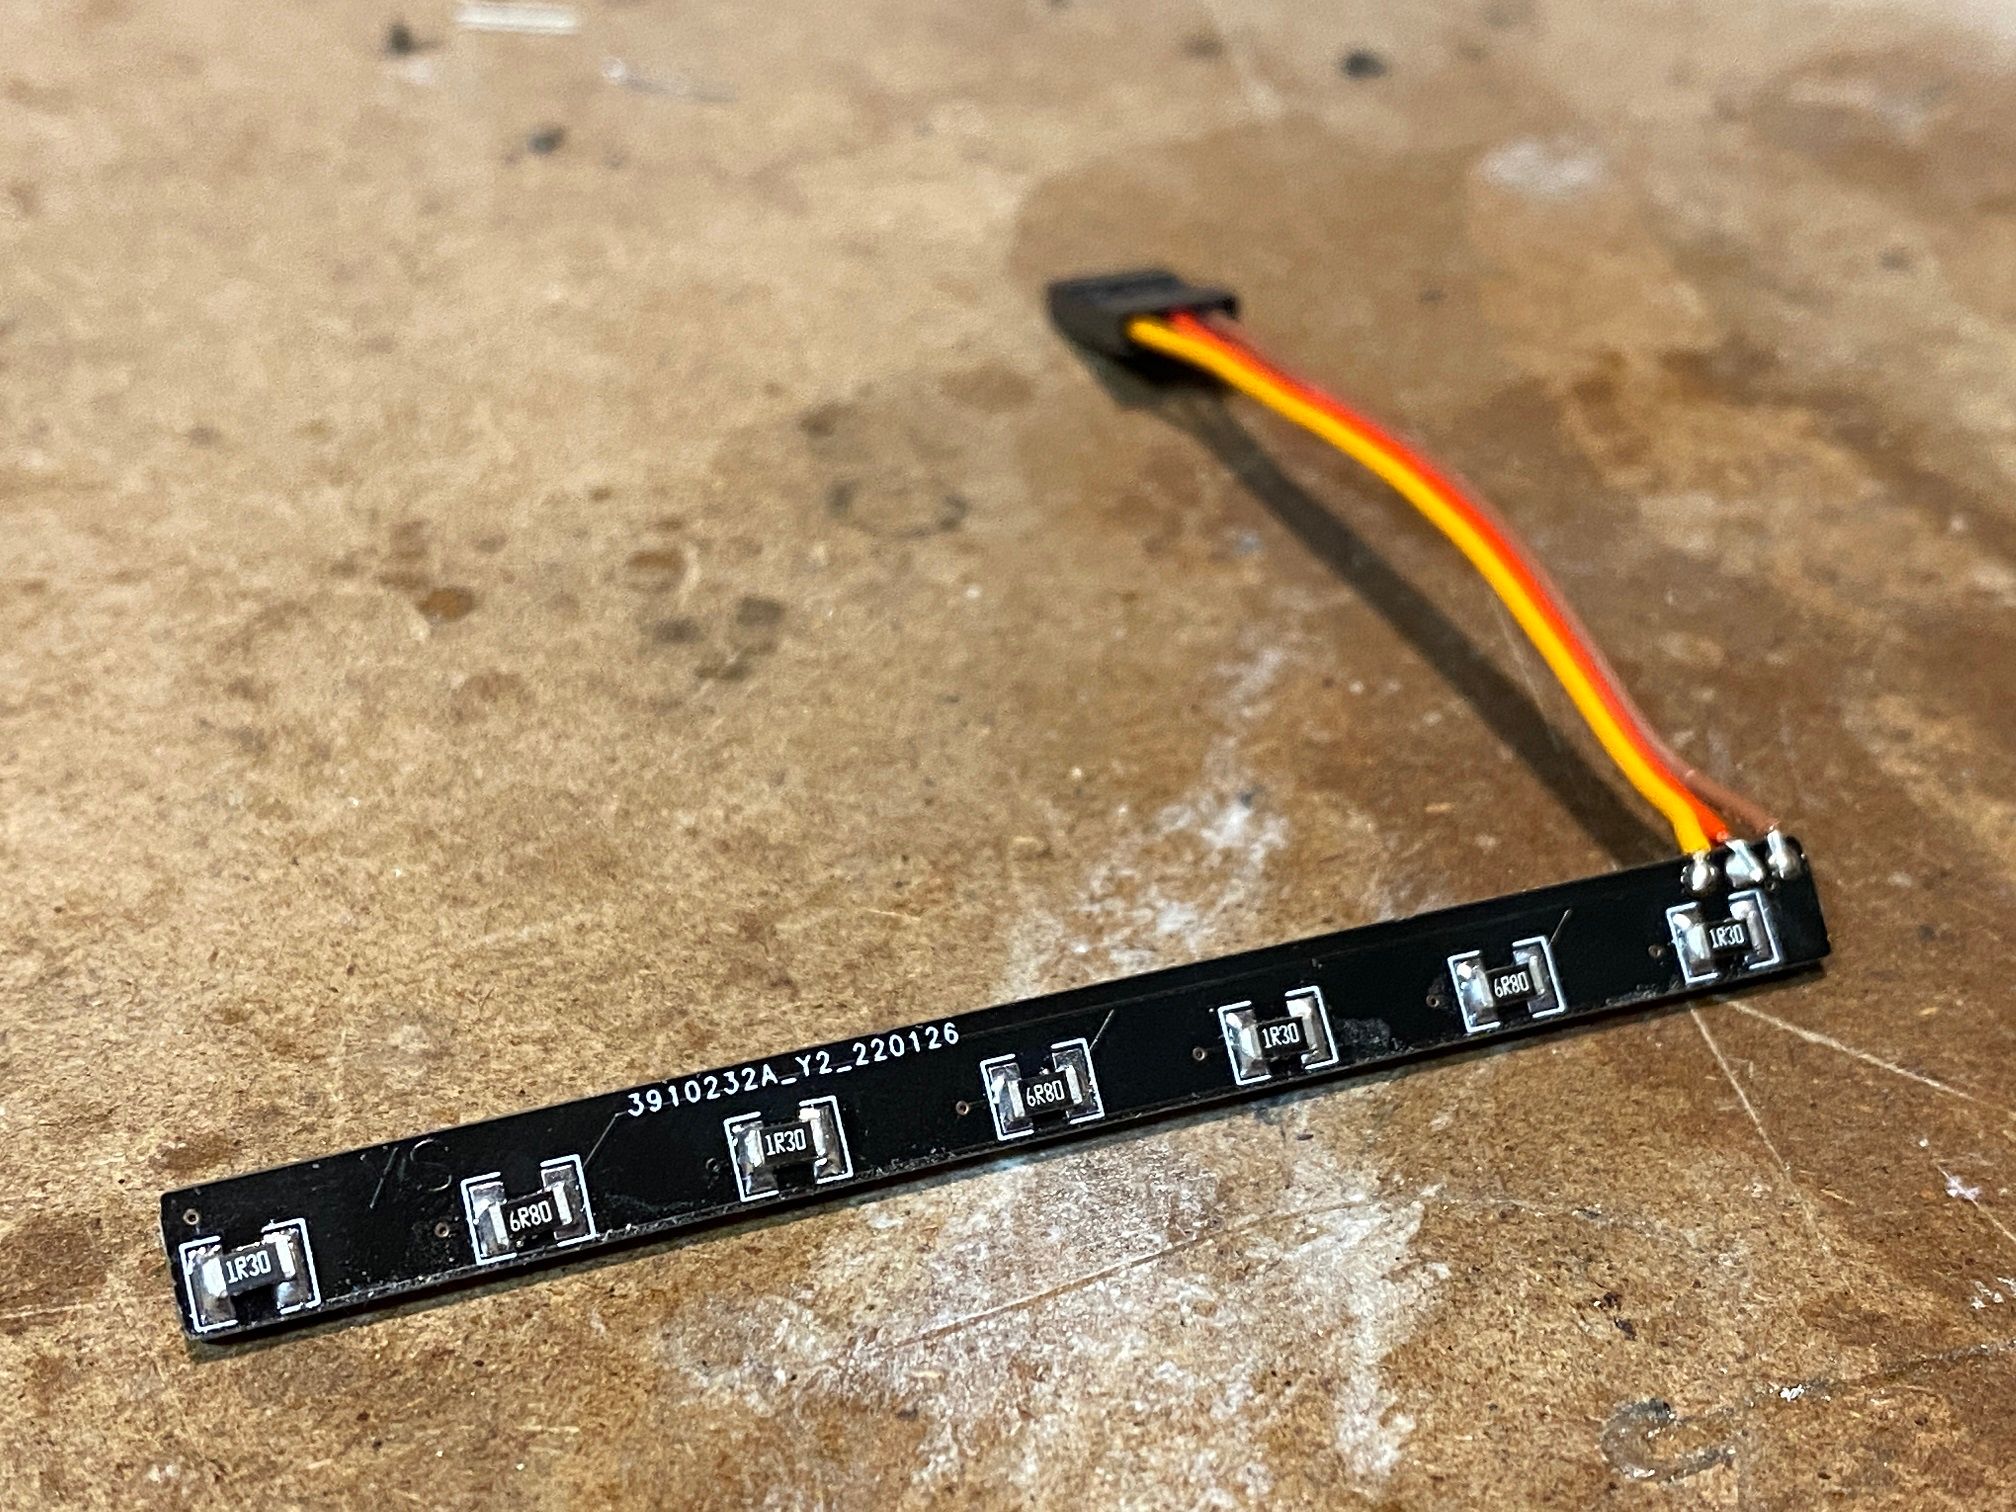
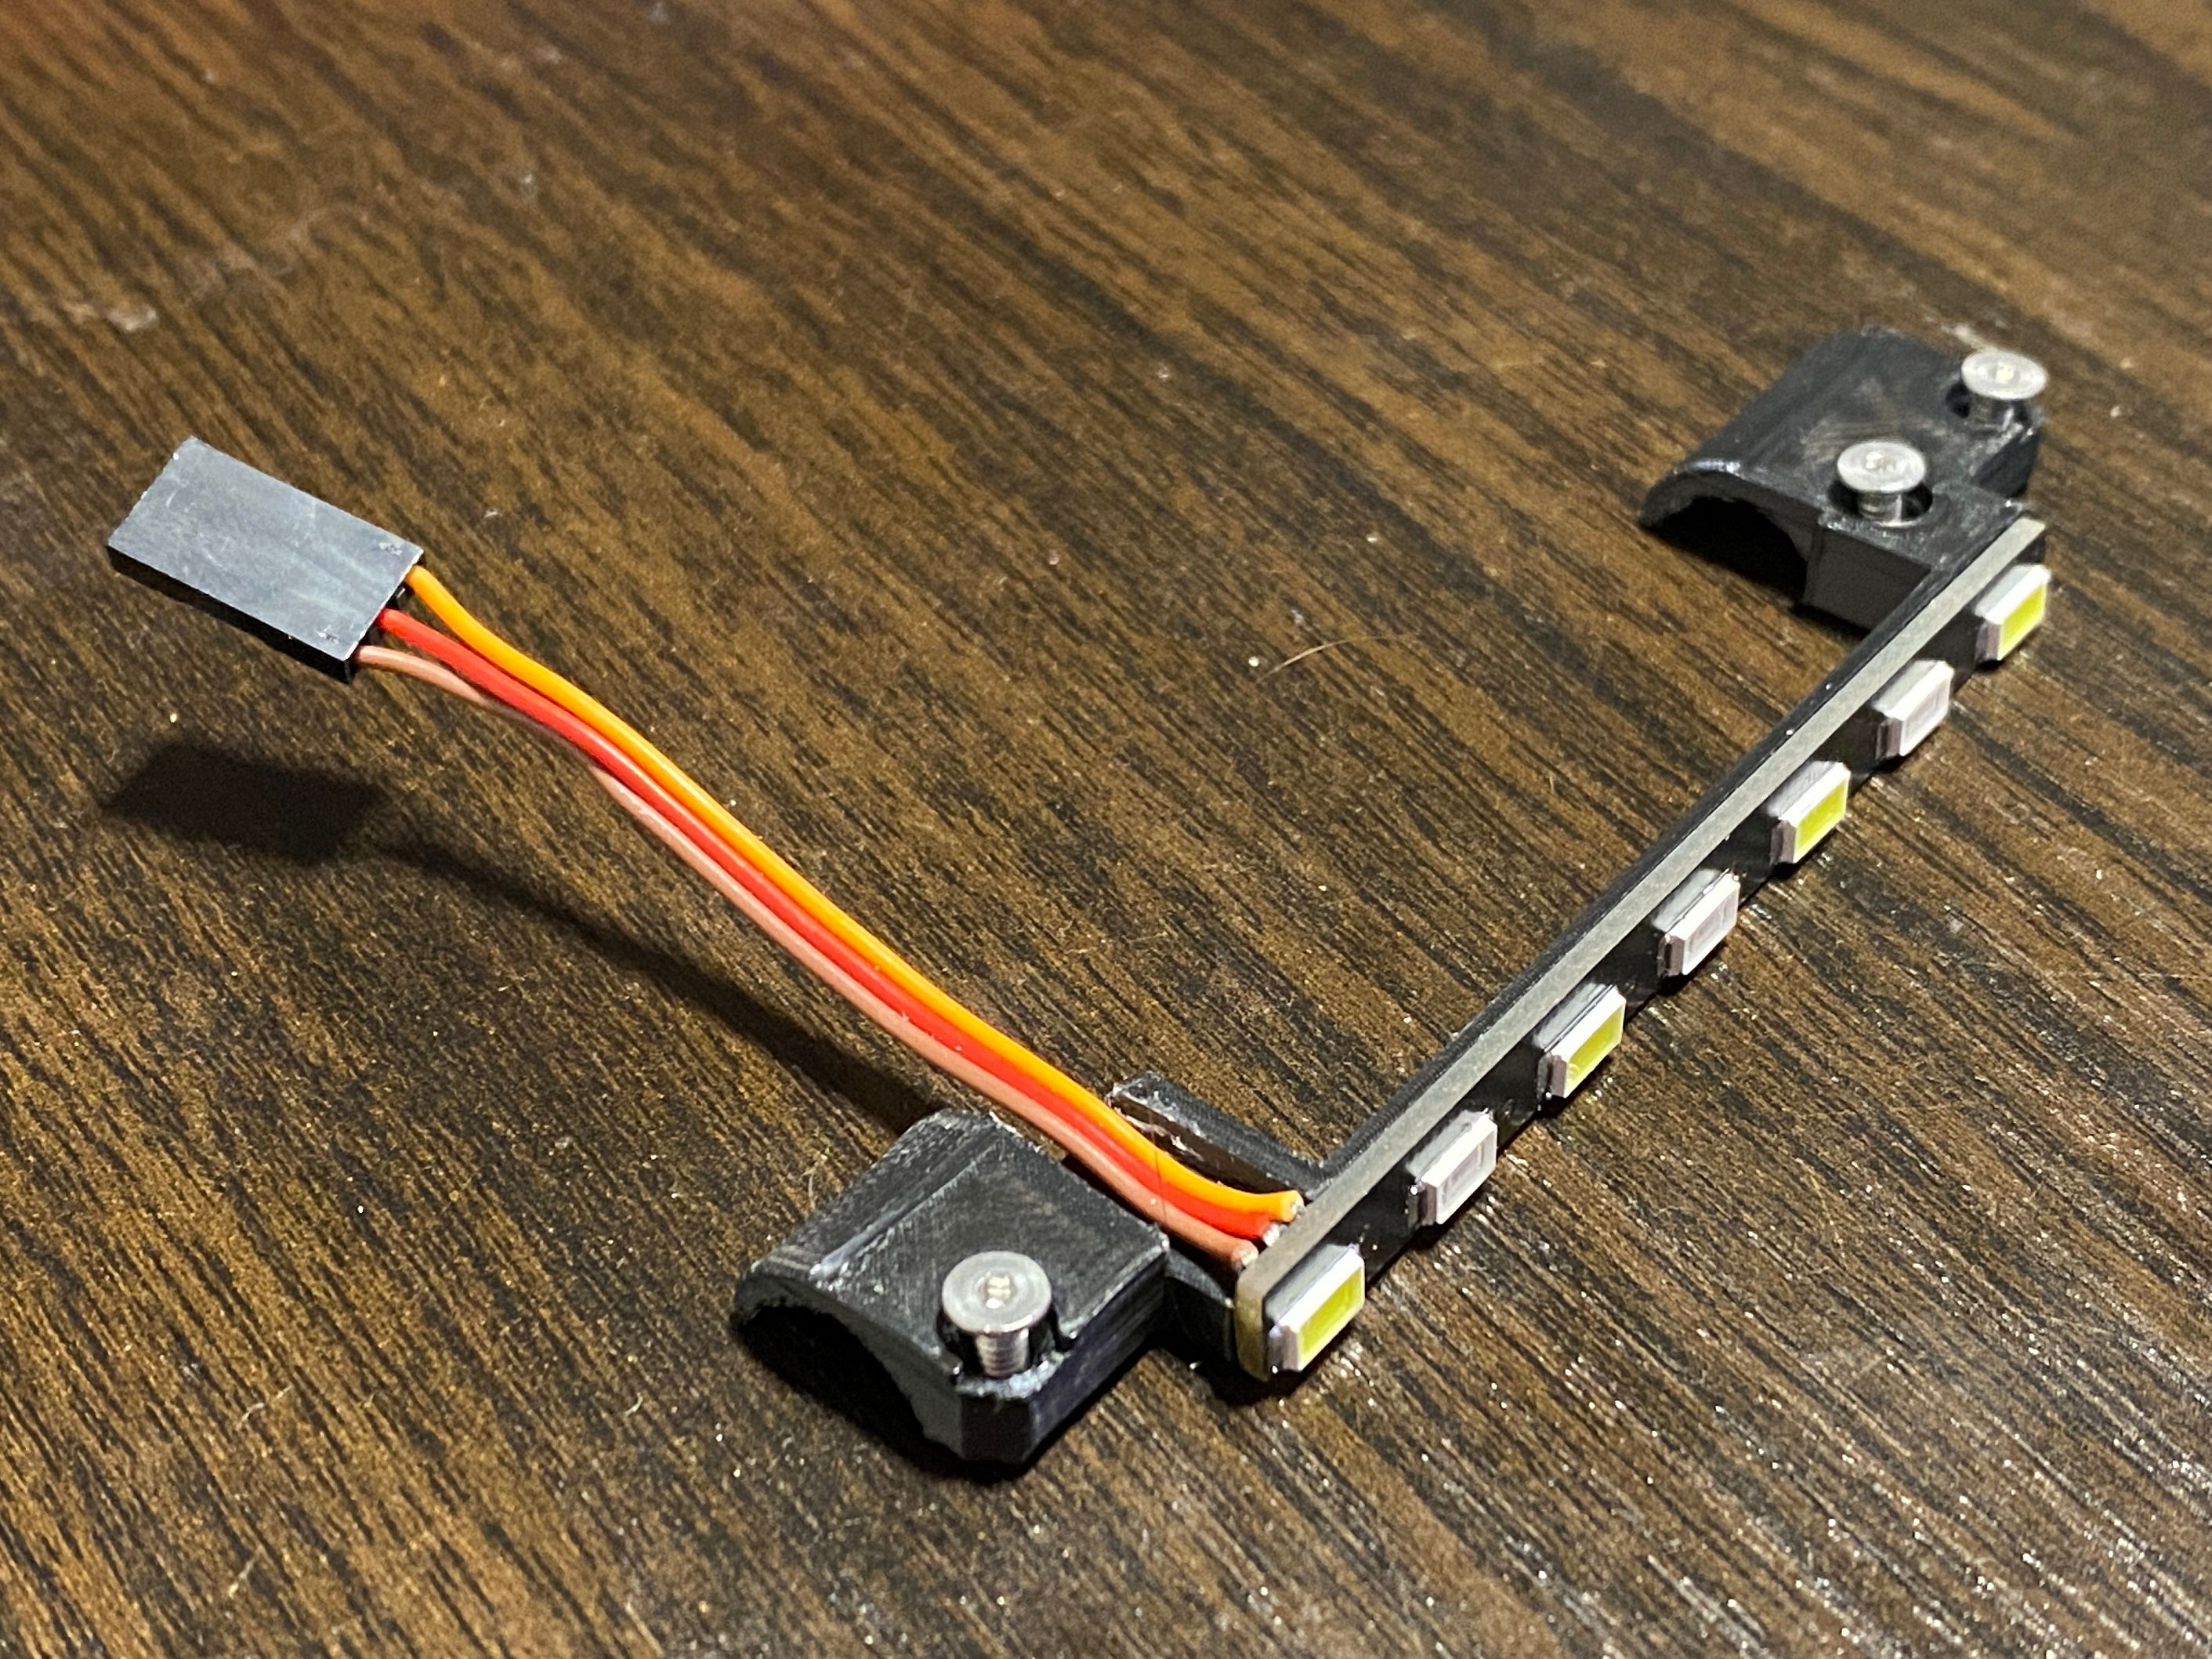
Started a little bit on the light bars, they'll be only 74x6mm so not a lot of room to work with.
Did a bit of prototyping which worked fine enough, never been good at soldering these little LEDs because I usually melt them before the solder. However I still had my big tip attached (the bulldozer) and that worked fine.
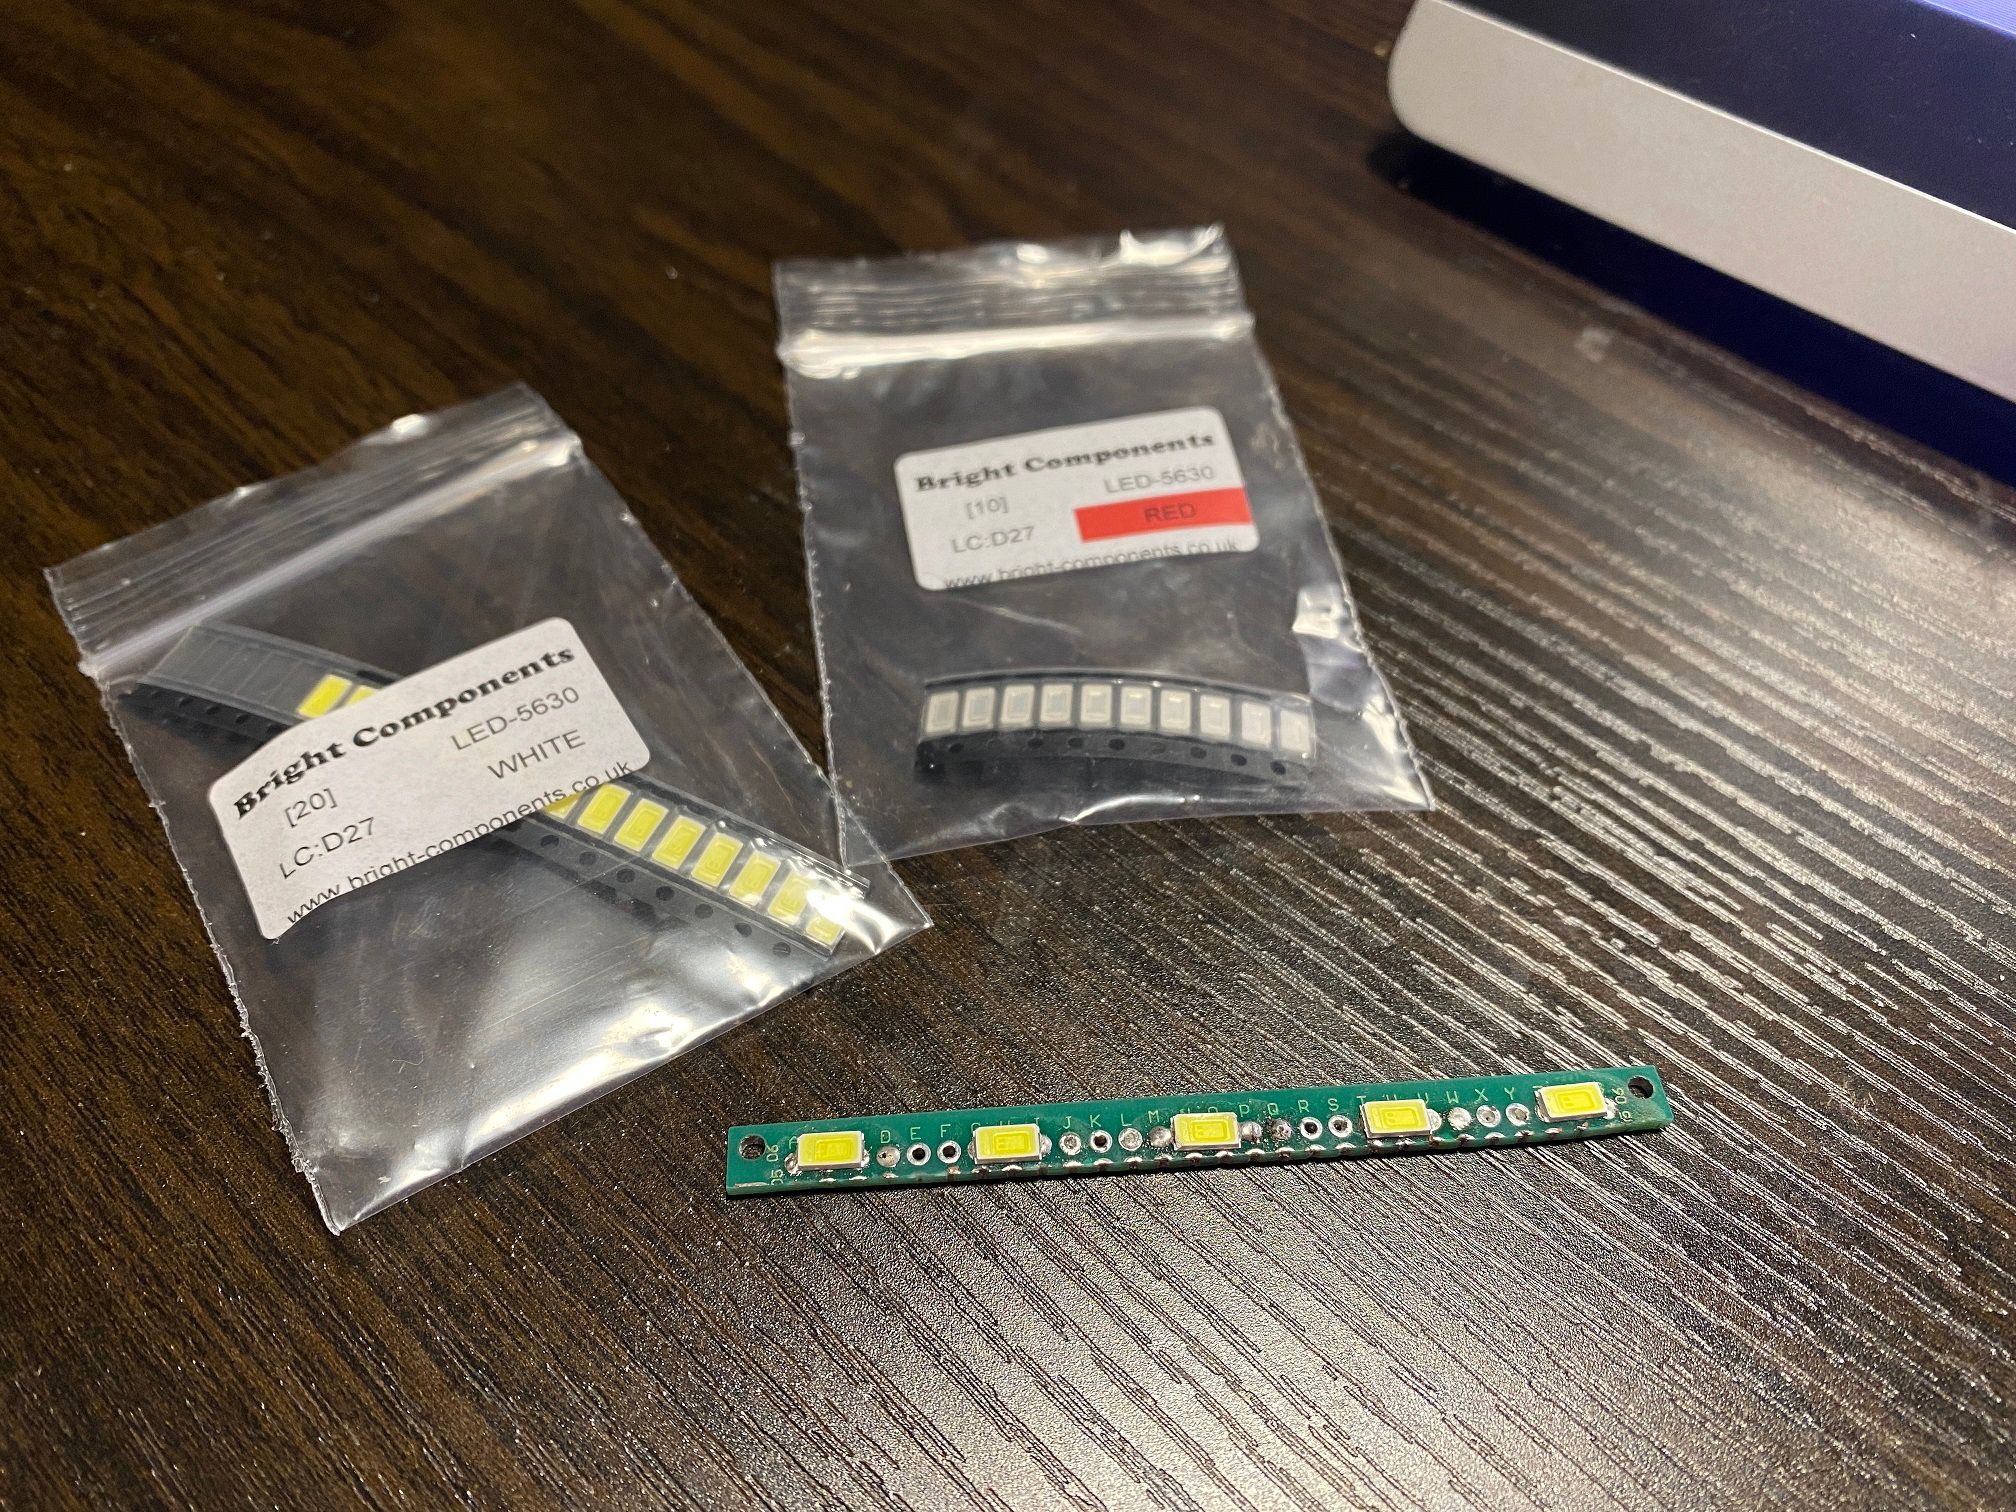
Forgot how bright these can be and shone it right in my face on testing...

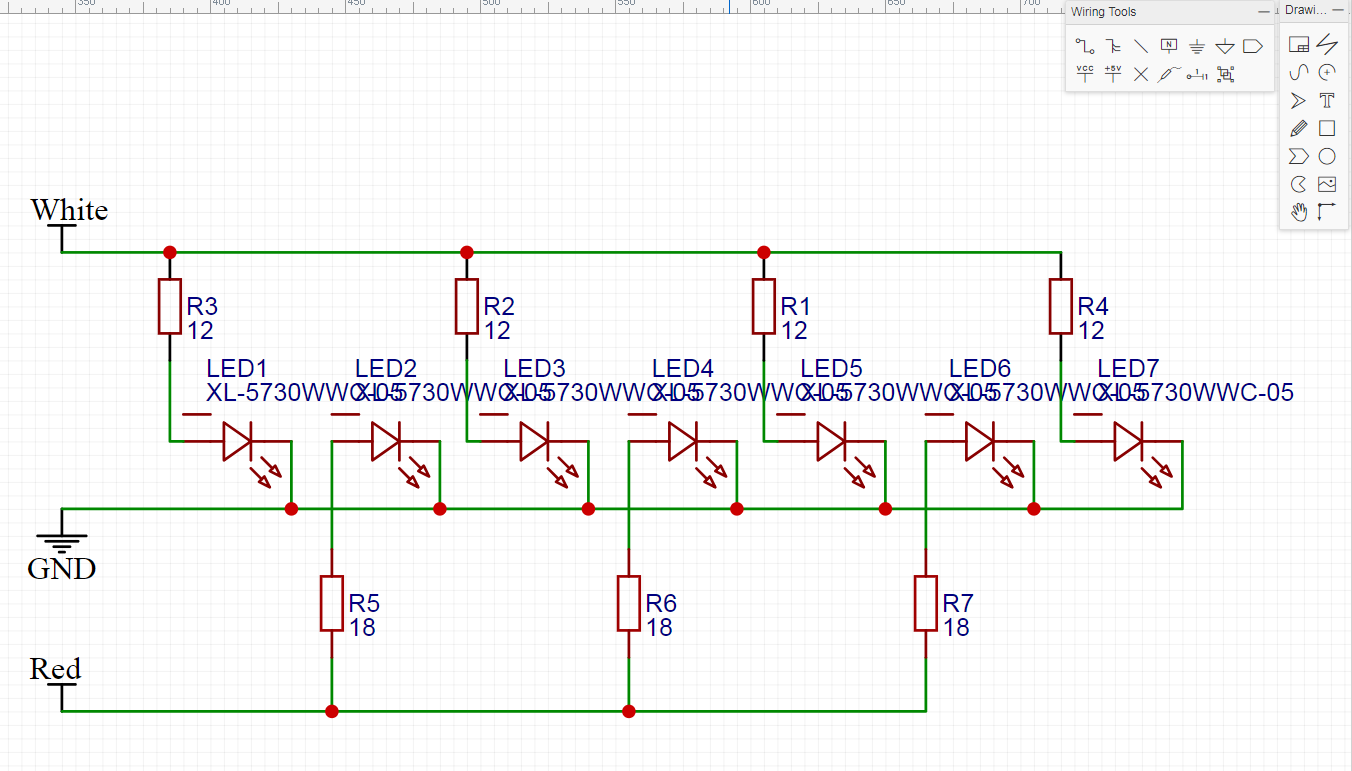
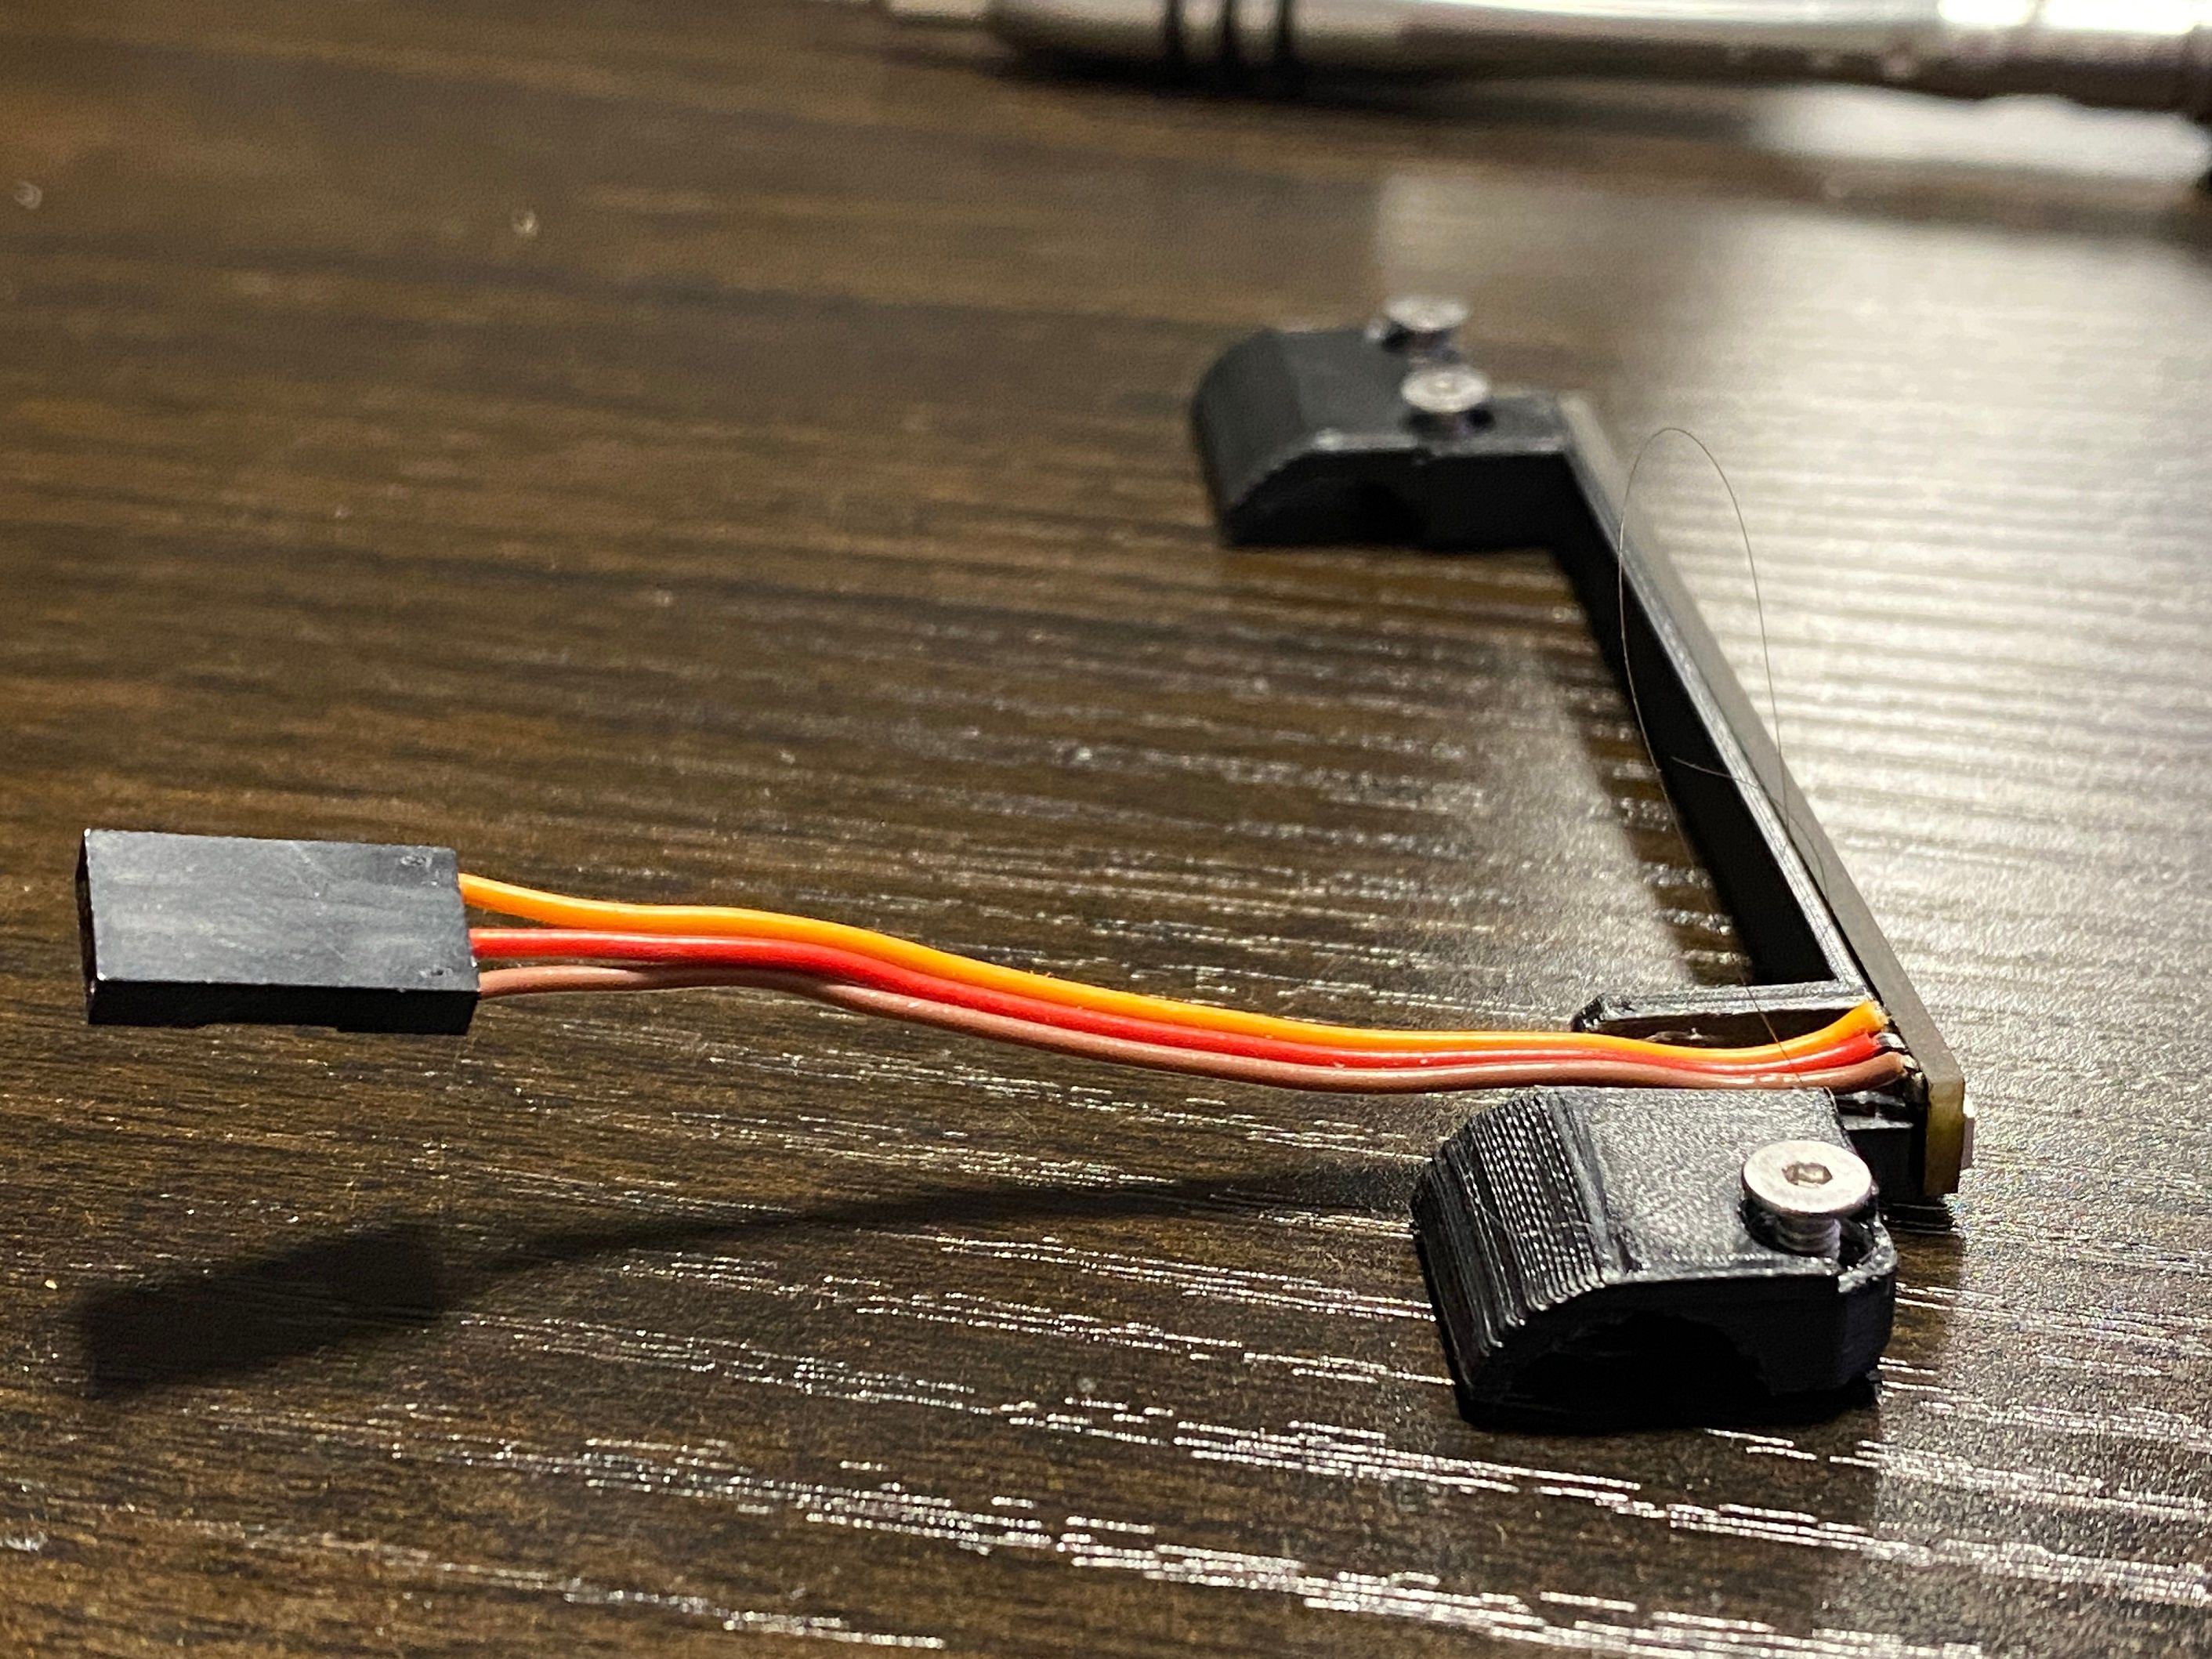
Trouble is hand wiring these traces along with some tiny resistors on the back to stop them frying isn't an option so for the 4th time I tried to figure out how to use EasyEDA (PCB design software)
3 additional attempts and a few youtube videos later and I managed to make it. Went from 5 white and 4 red down to 4 white and 3 red to make the design less dense, save on power and give me less tiny components to solder >.>
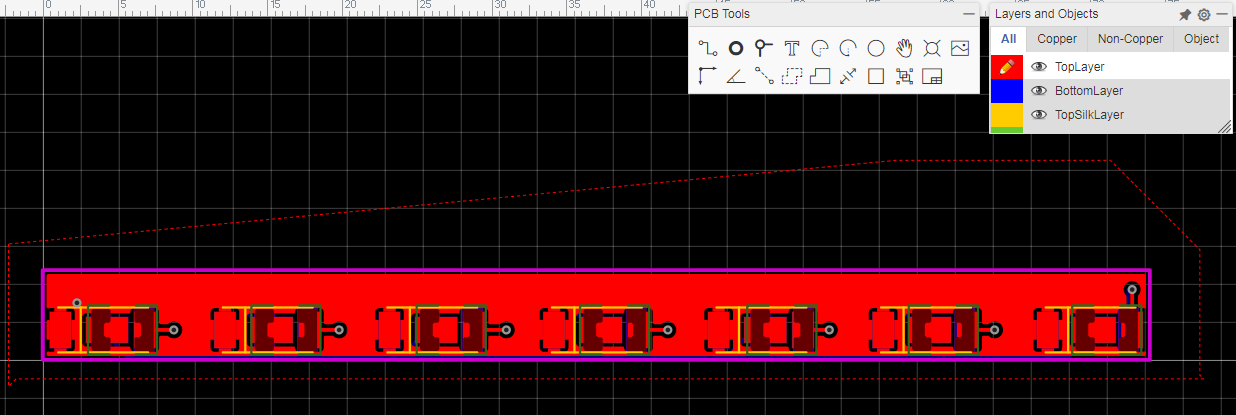
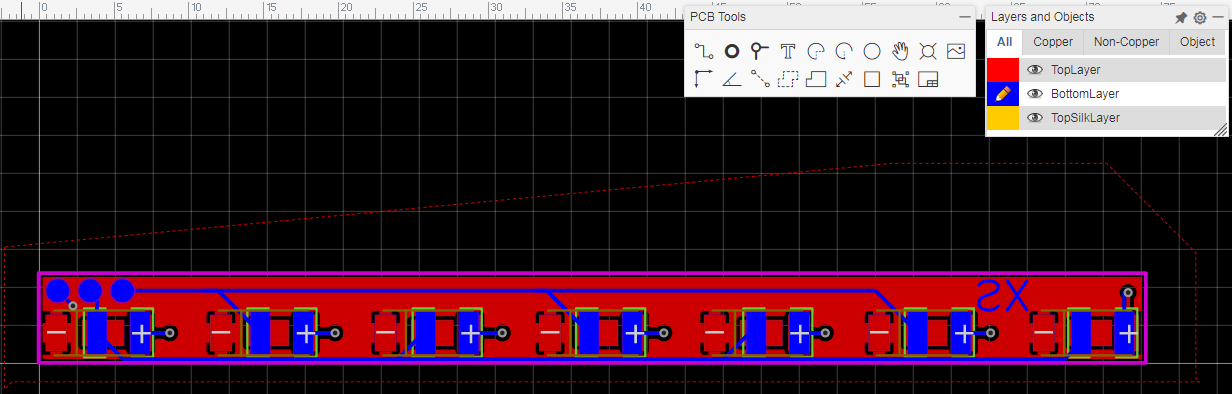
Off to JLCPCB to fabricate the board aaaaand
HOW MUCH??!?!
The most economy of economy deliveries will do guys, 8-14 business days for $3.94 will be fine thanks.So I guess I can get on with other things while I wait. Got the rail axle mount template ready to start cutting that out and eventually brazing to the rail itself.
-
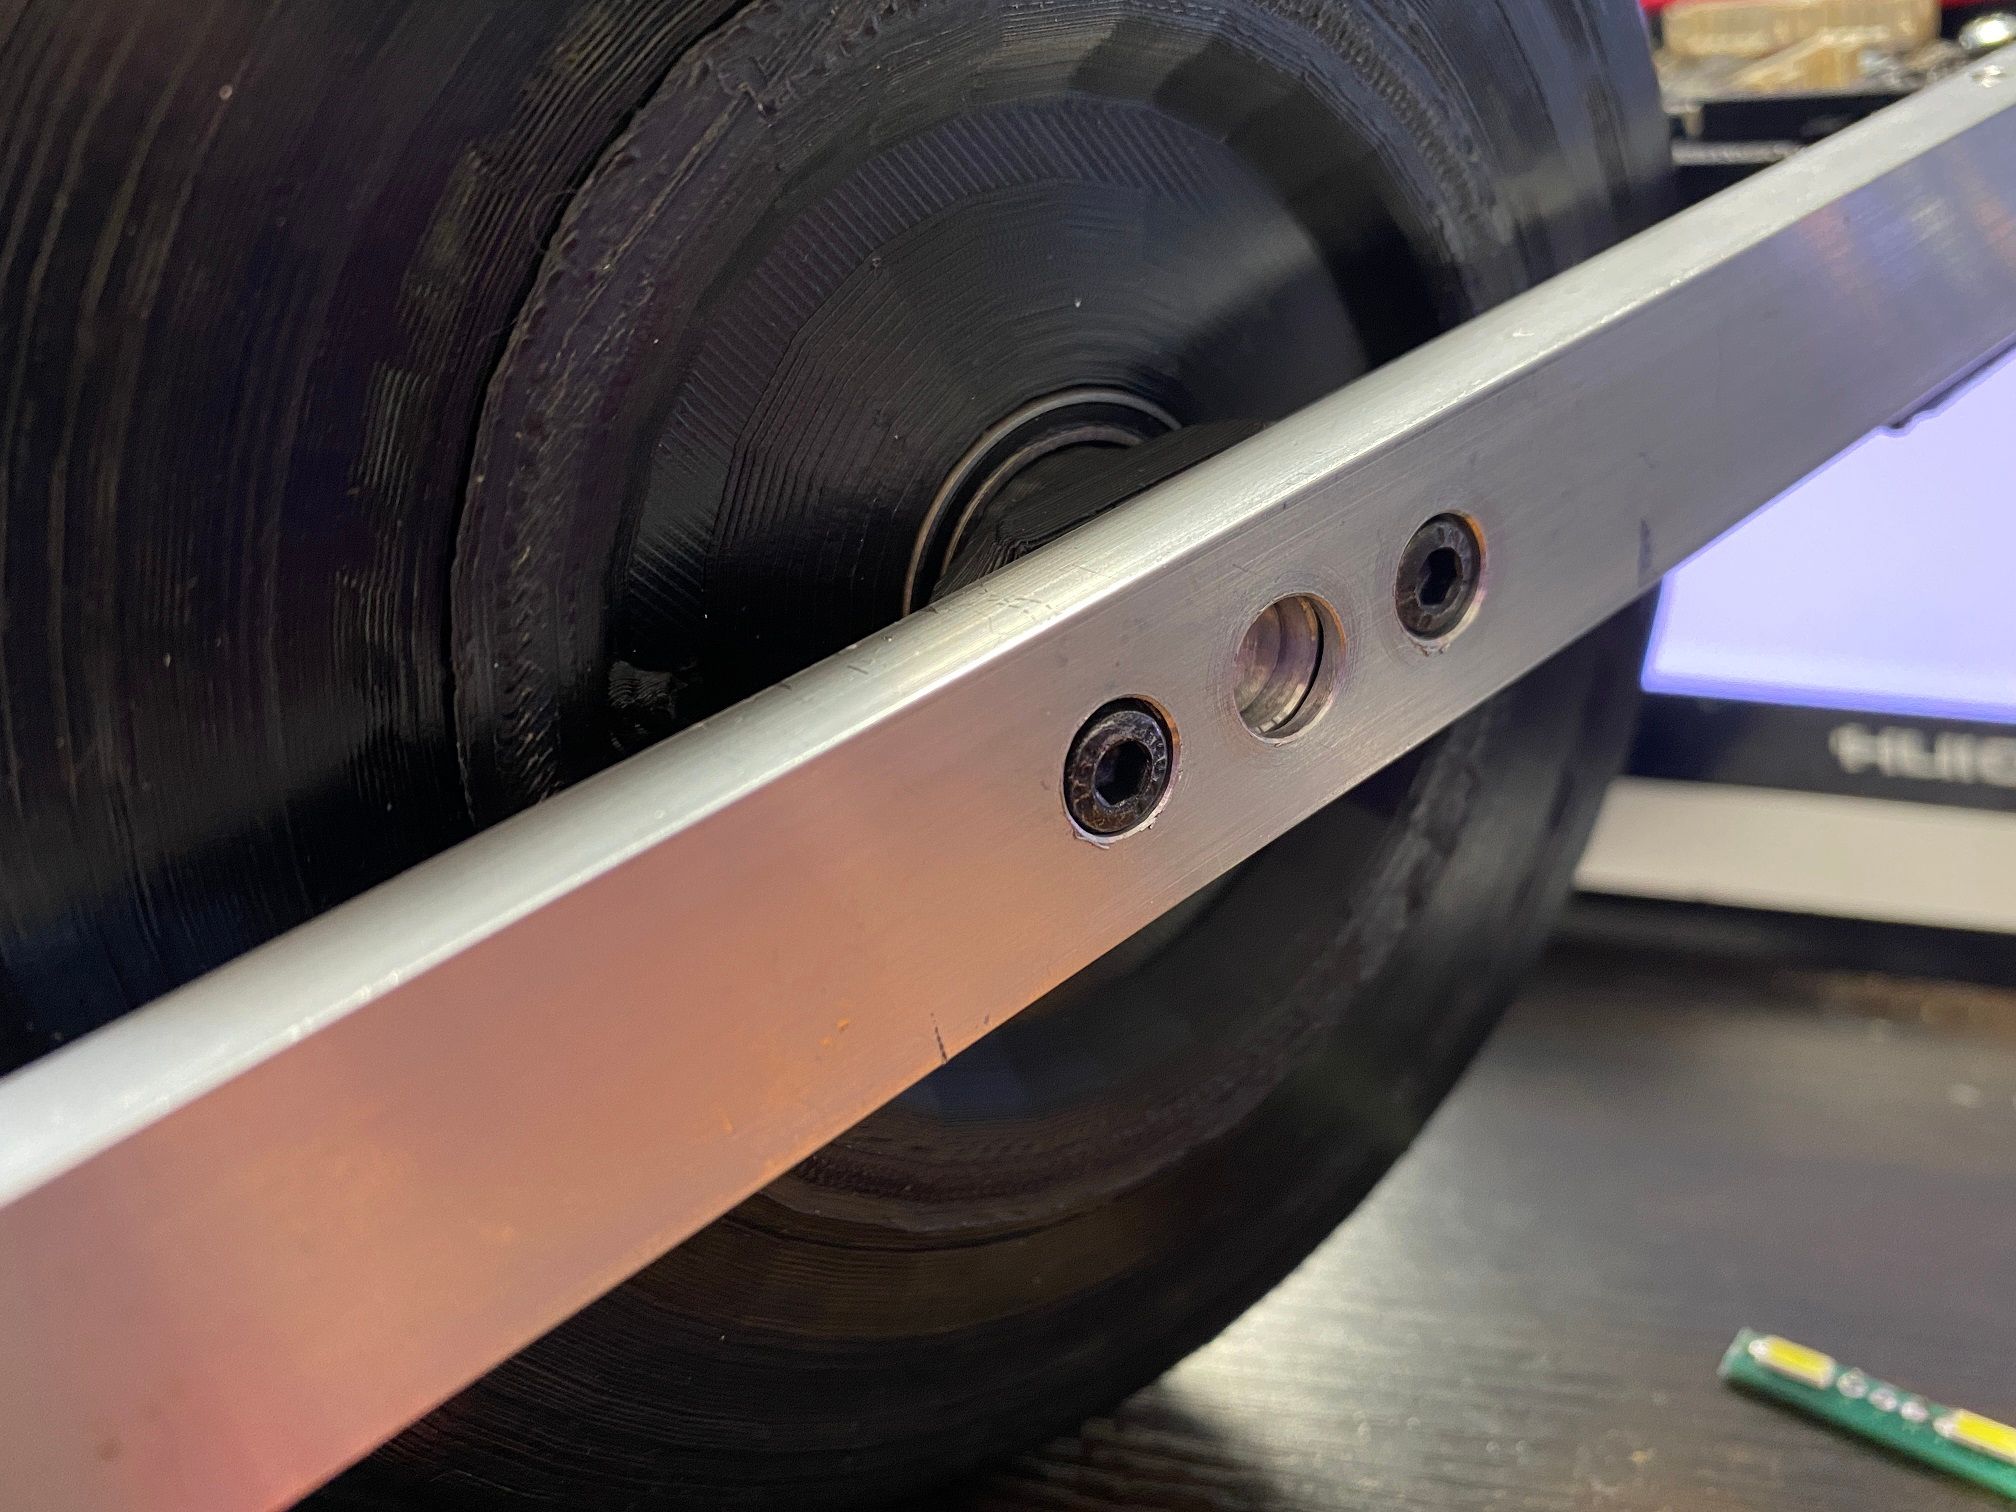
Both proud and embarrassed about the axle bracket. Got one done but.... it took like 2 hours to do D:
That said it came out really well and works~
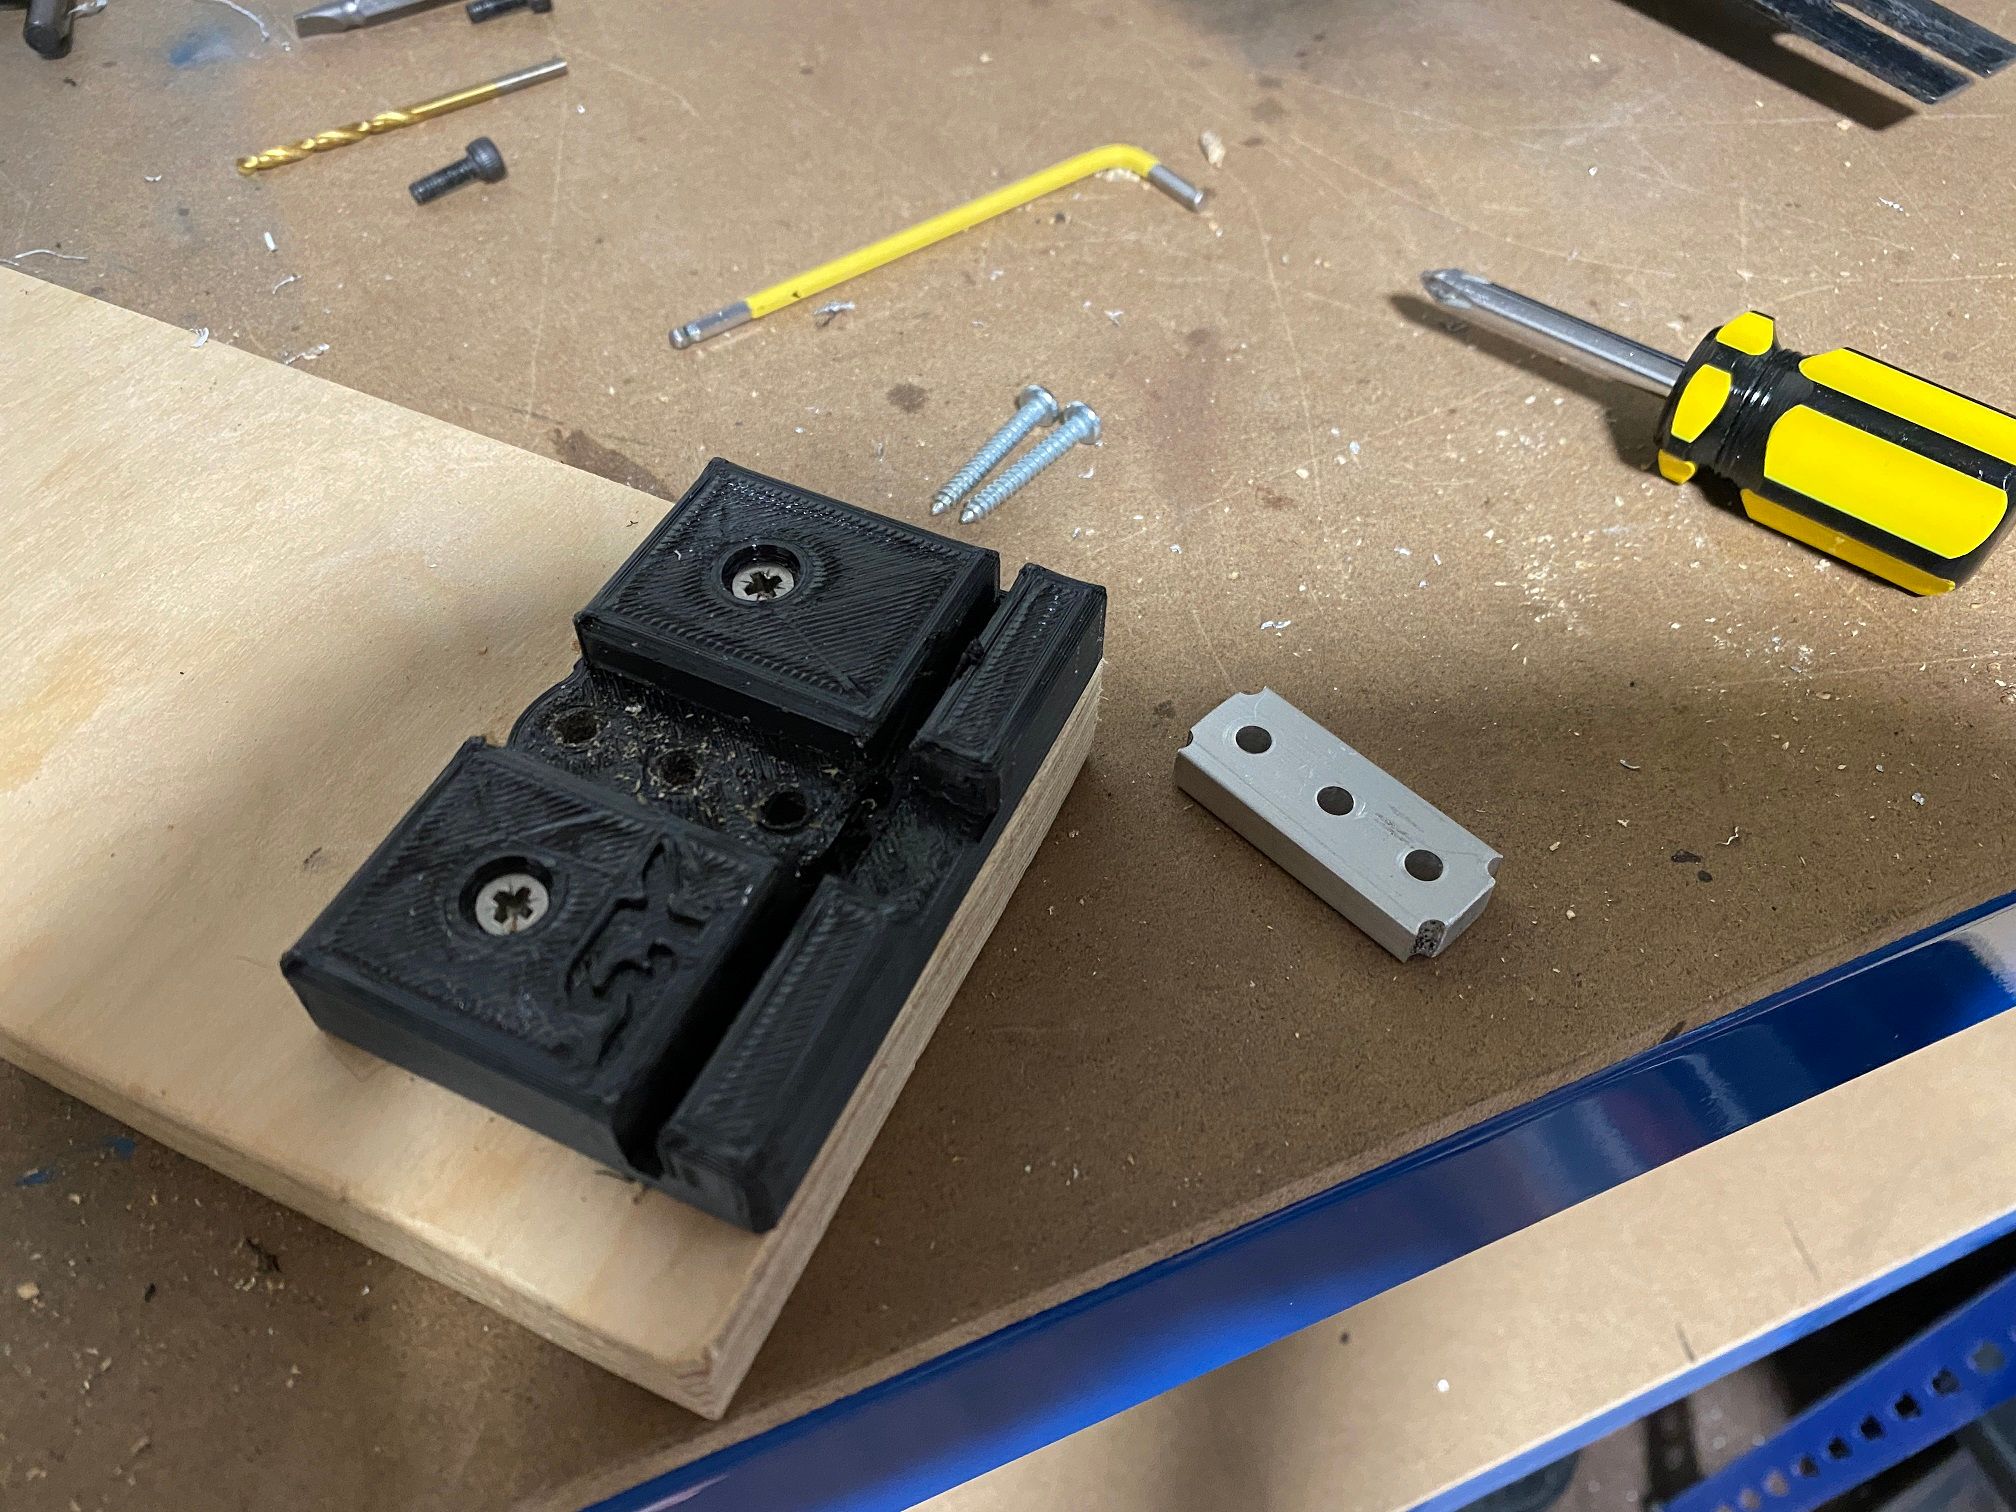
Doesn't look bad right? for 2 hours it's not a lot but it's worth it.... however I still need to make another but with a U shape cut into it to fit the keyed U channel on the left side. That is going to be a bit of a pain but I think I can do it with the tools I have :)
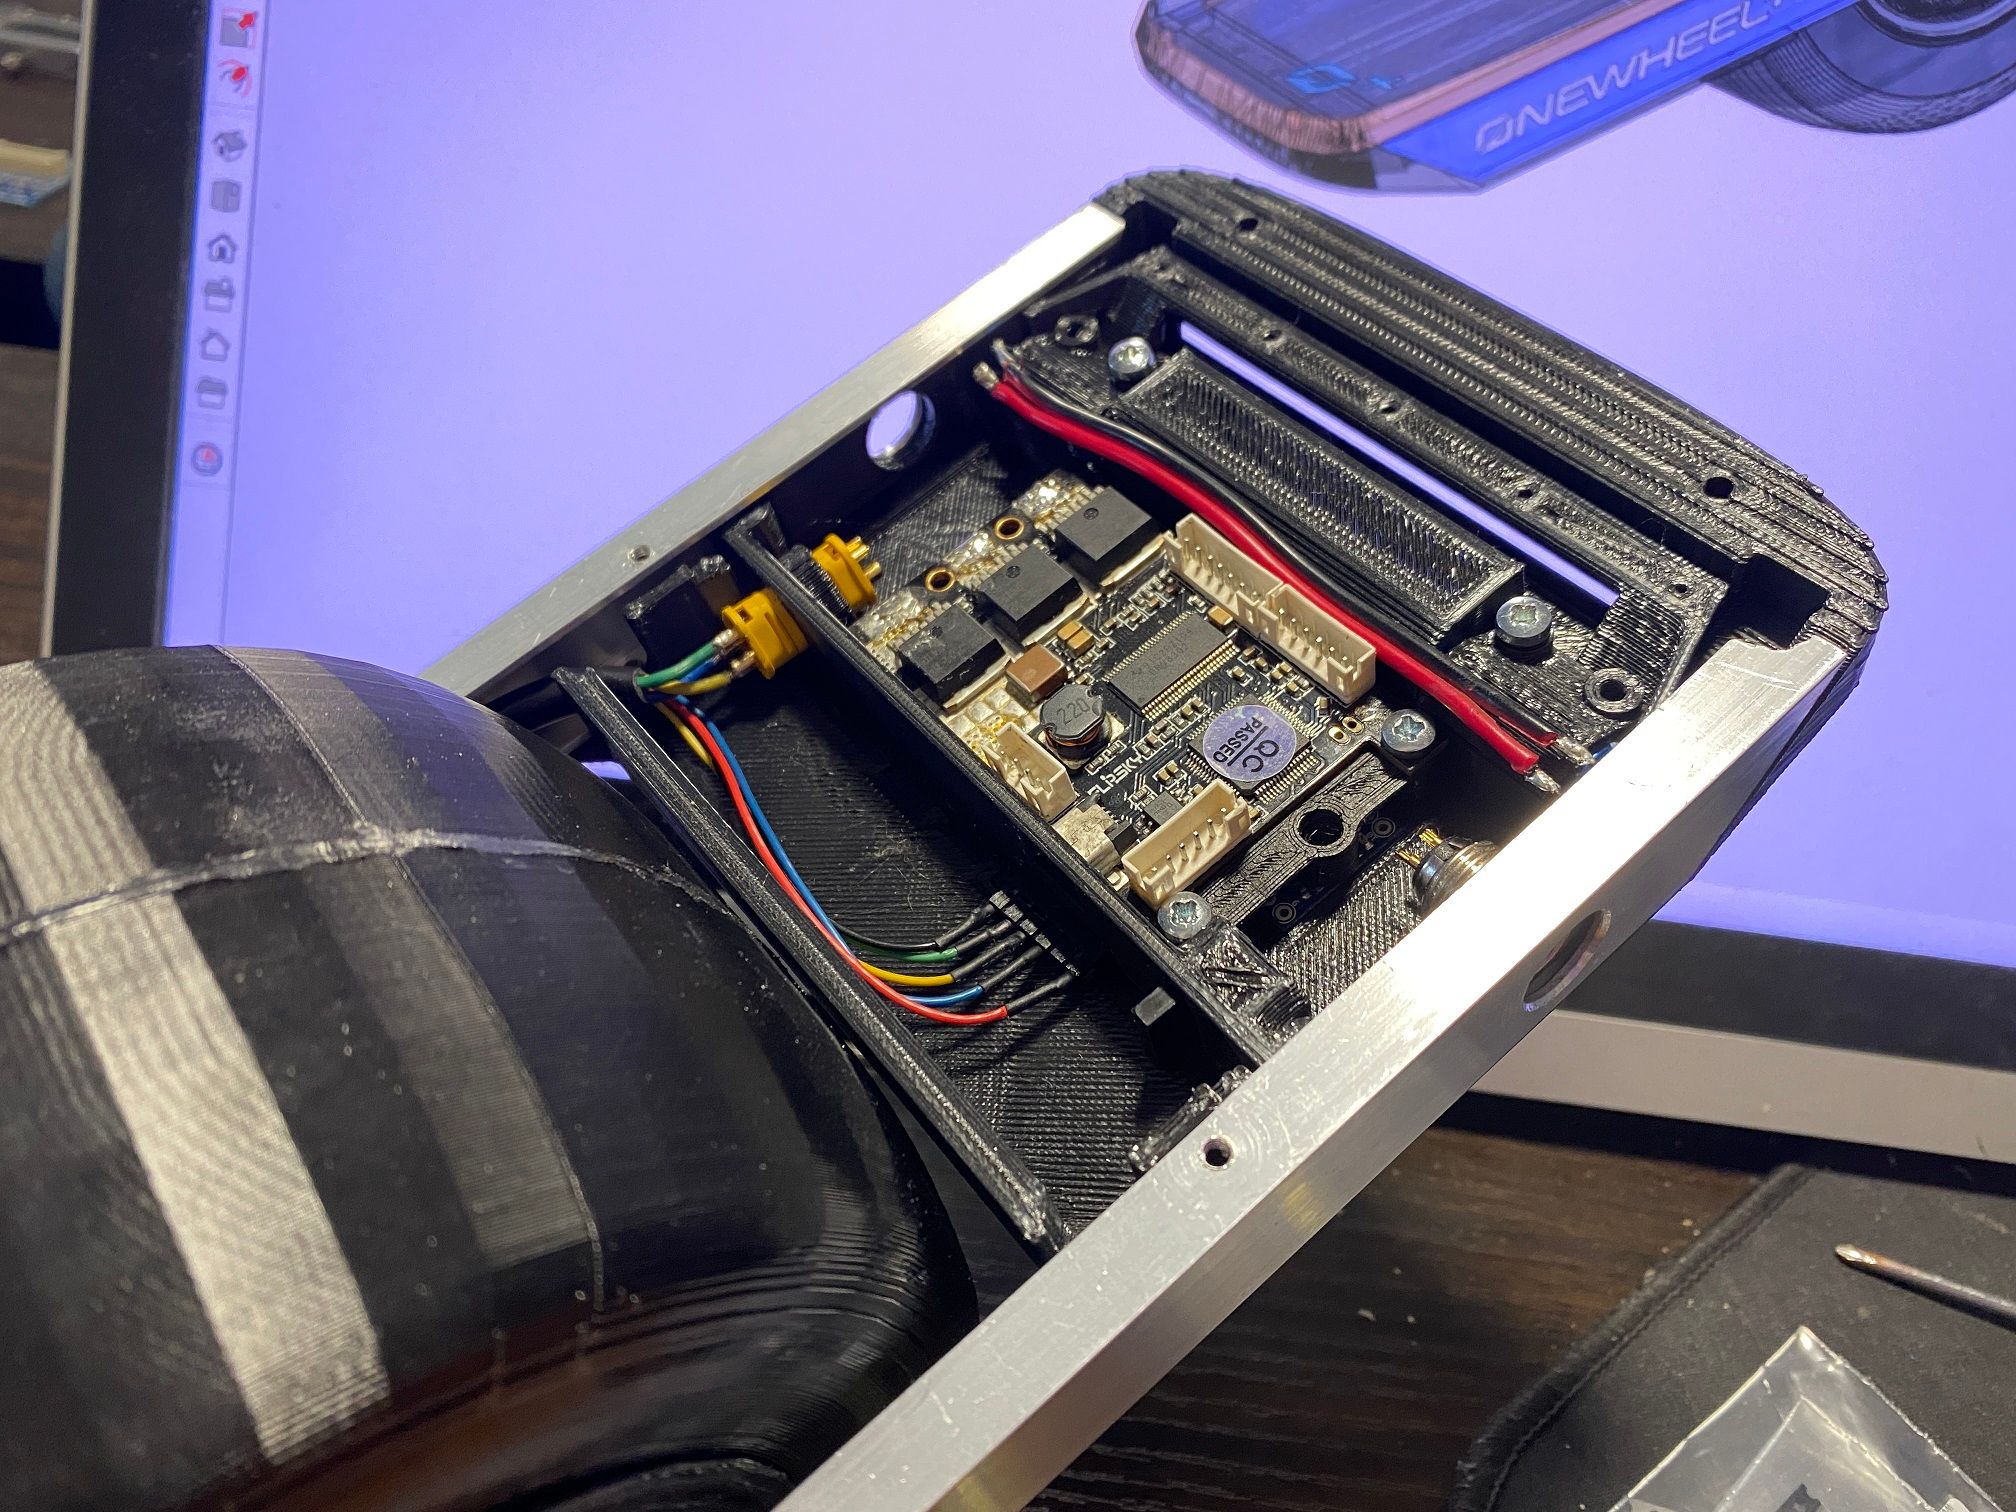
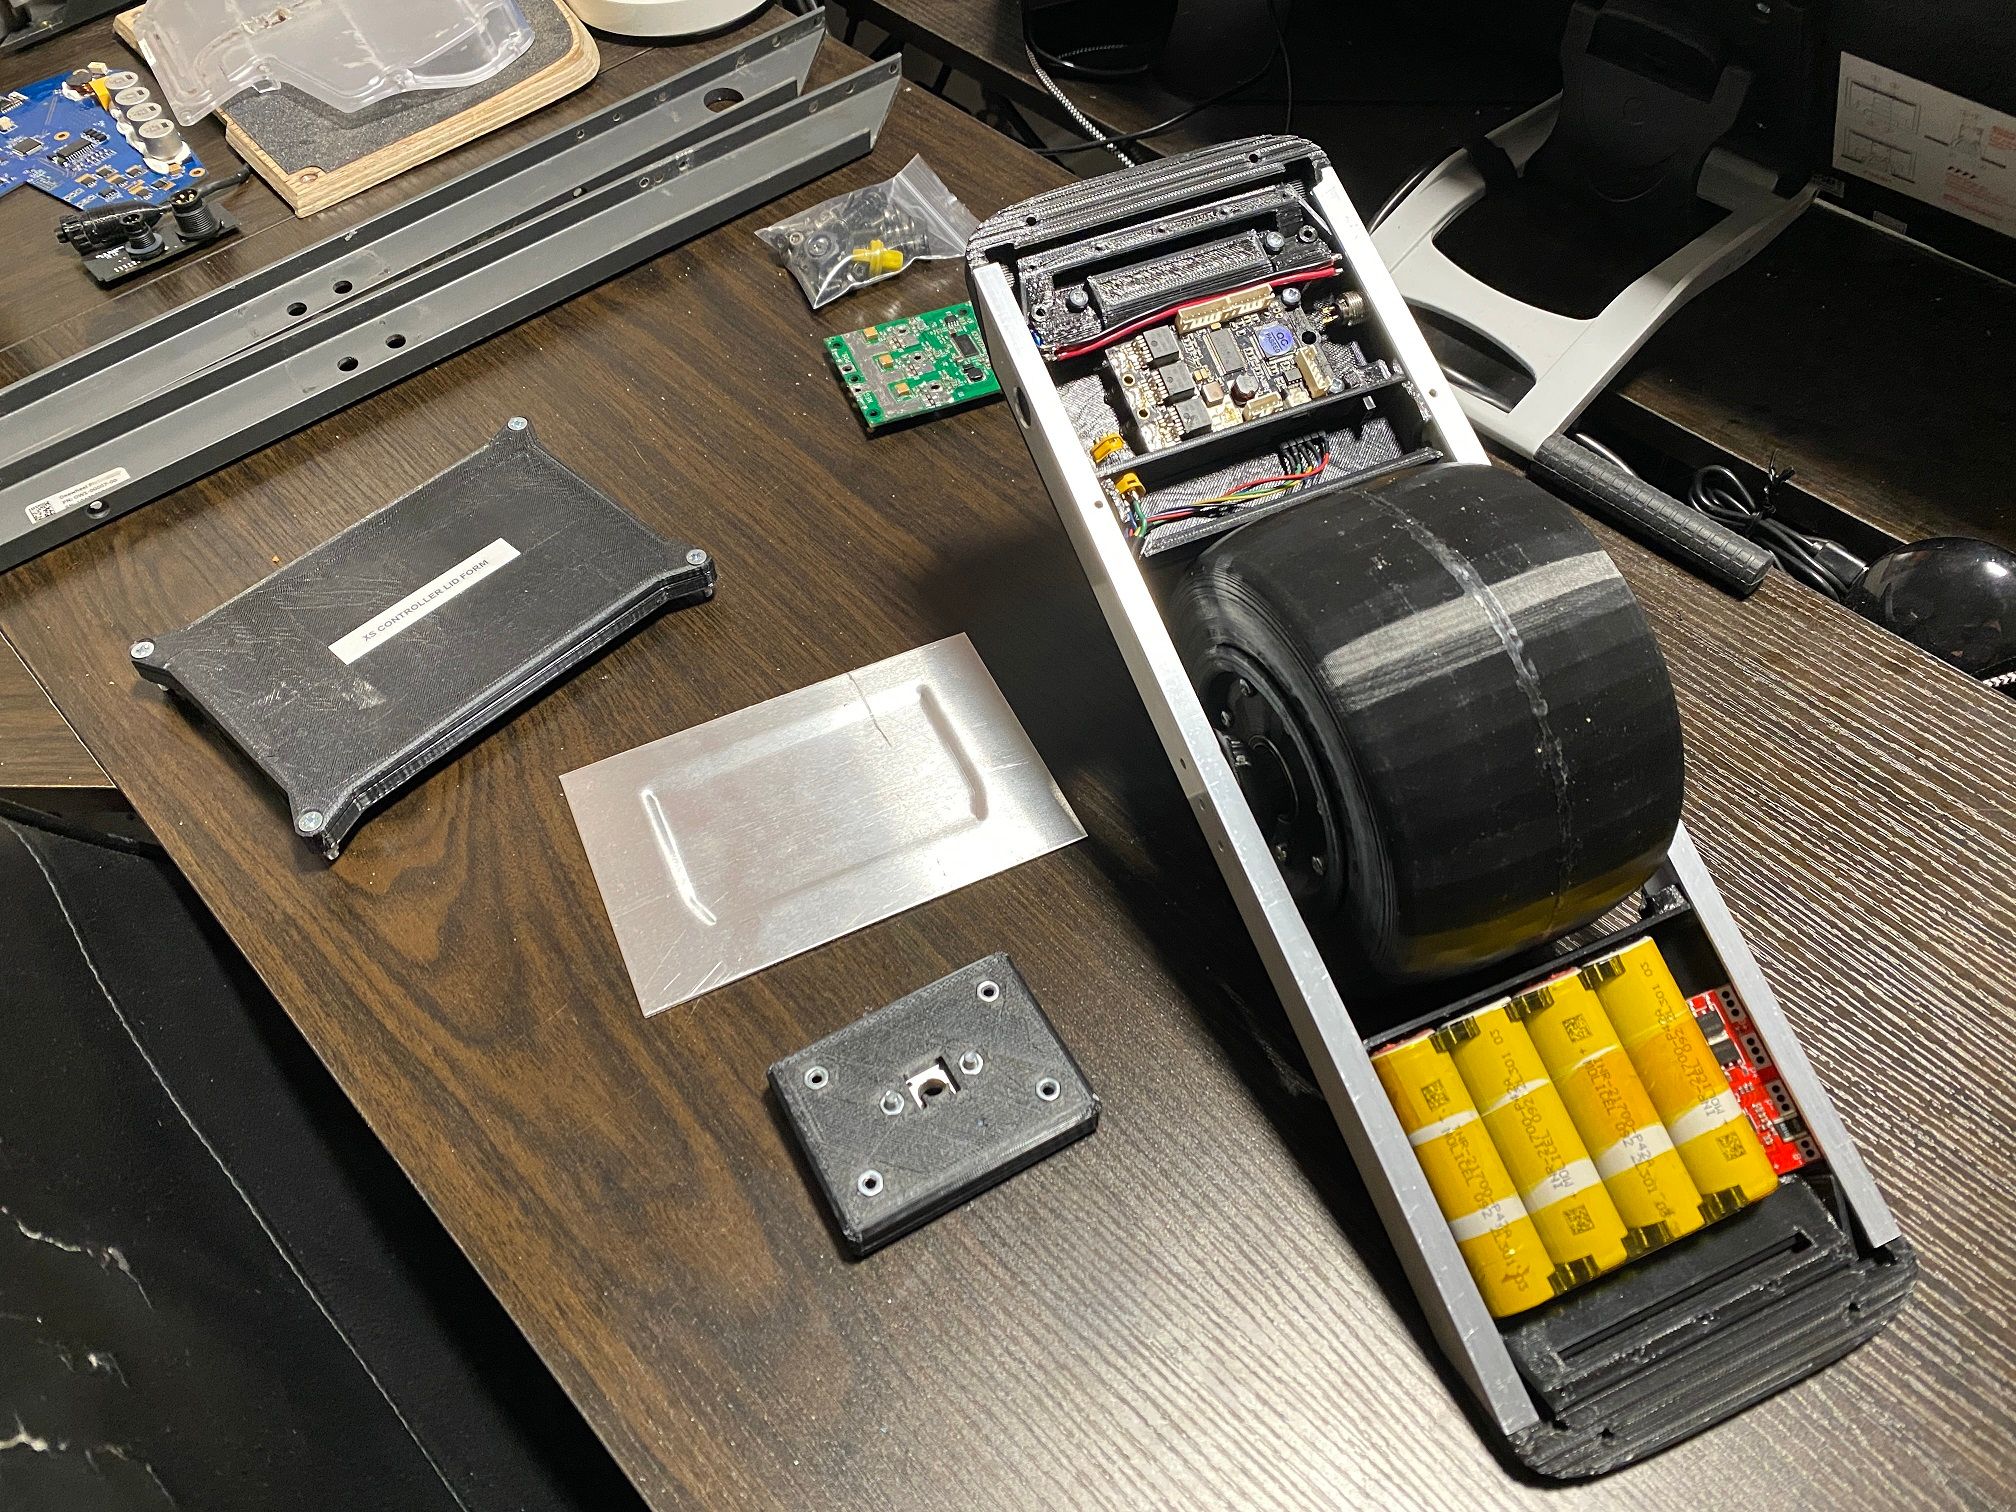
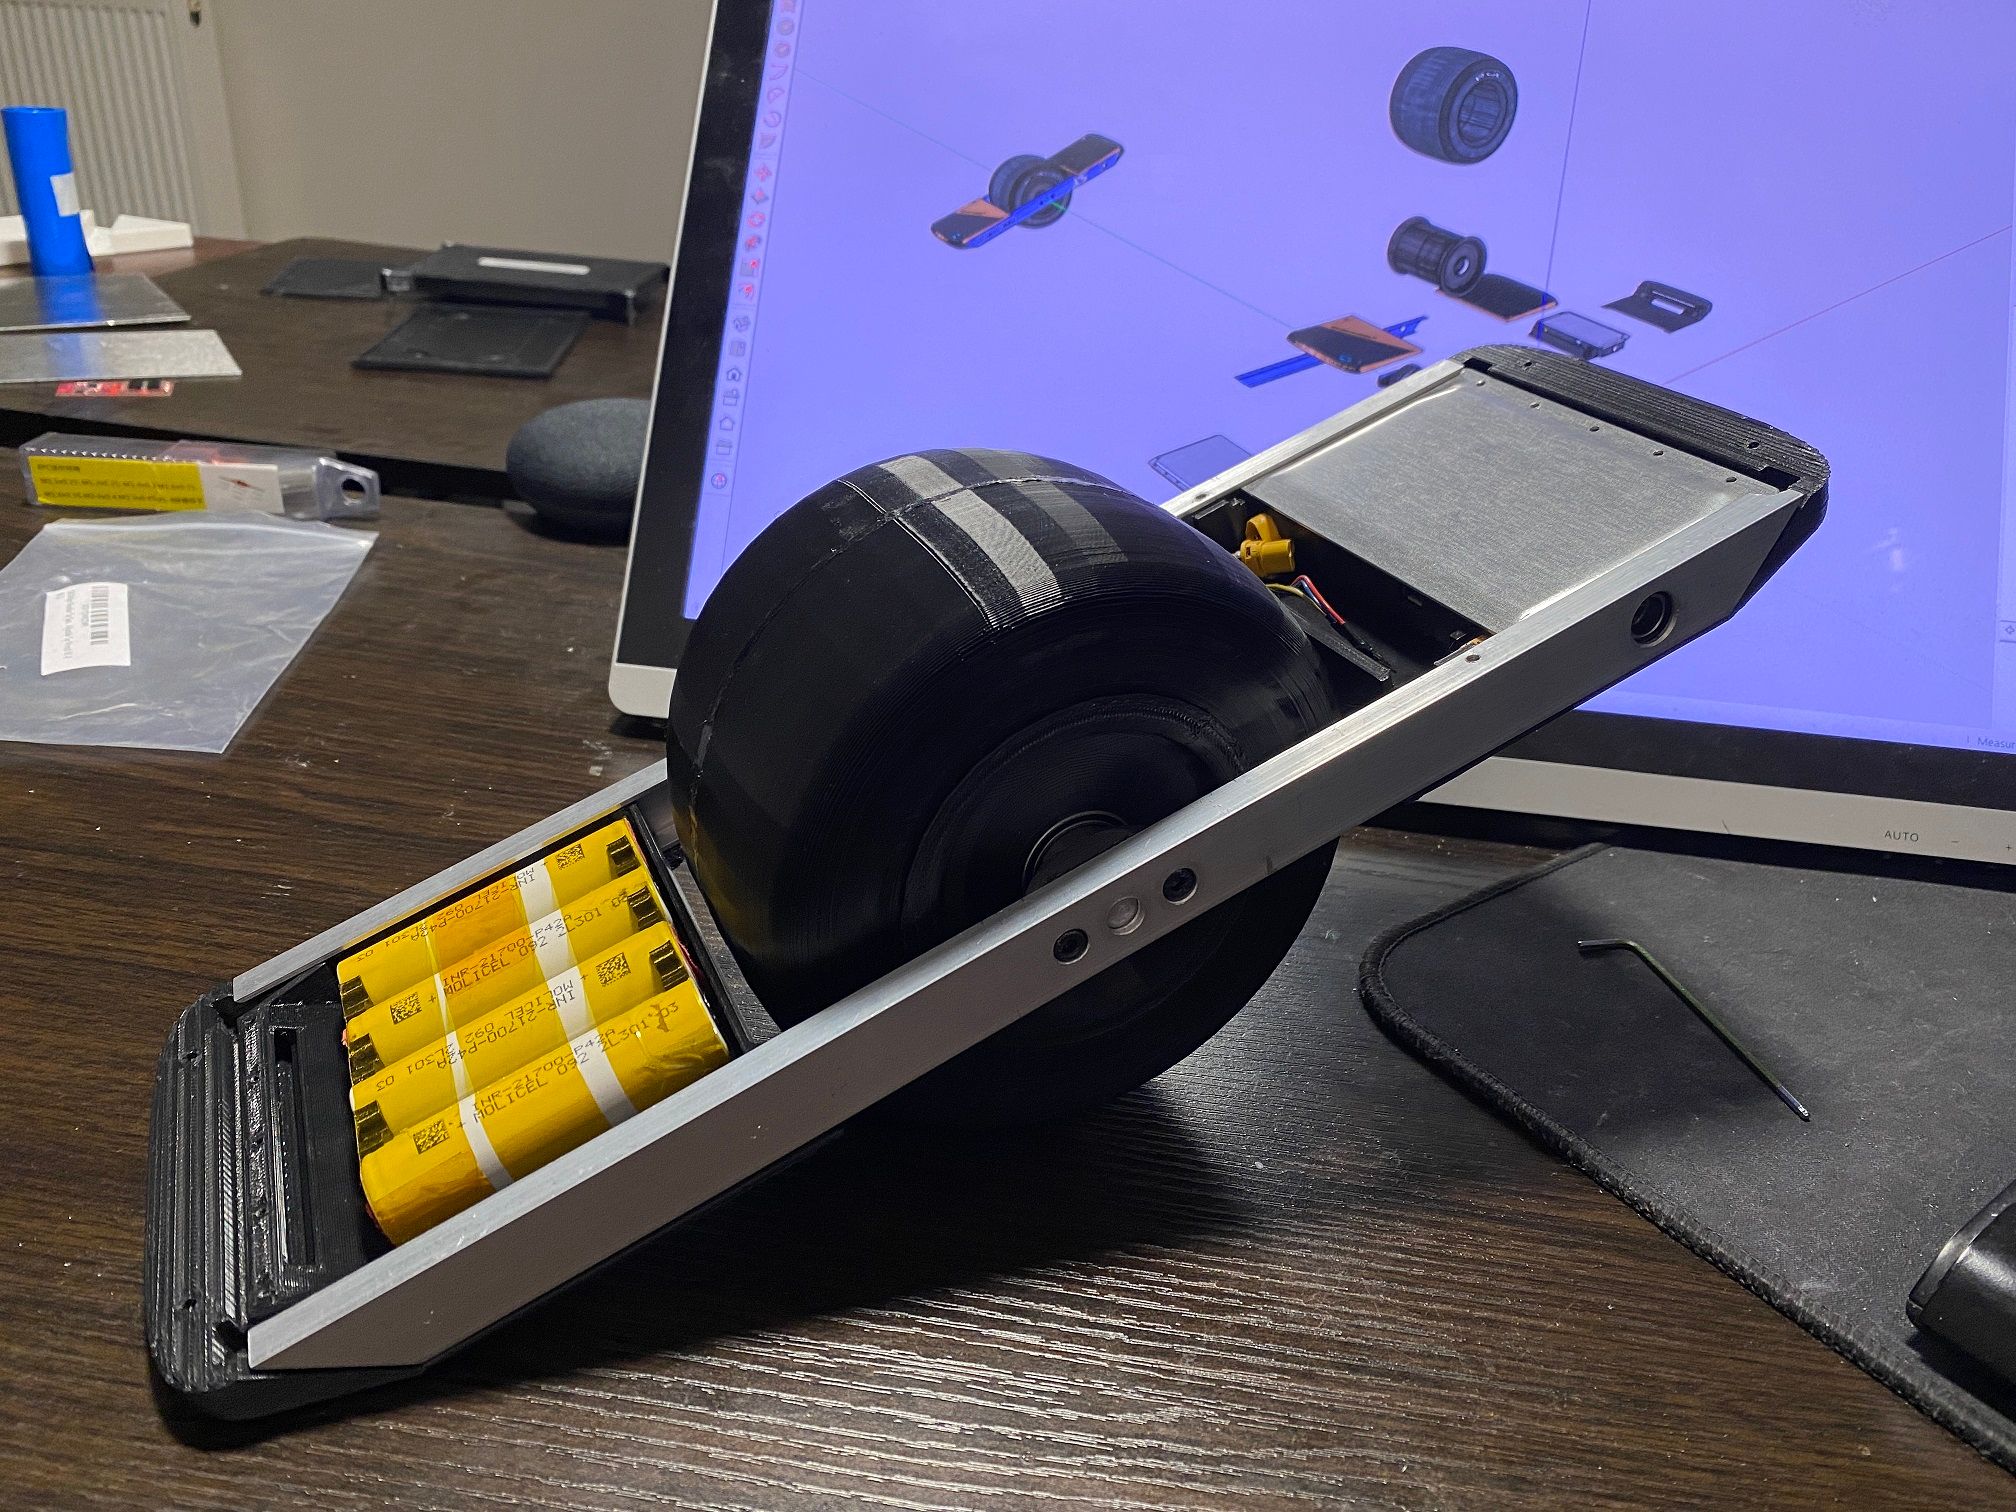
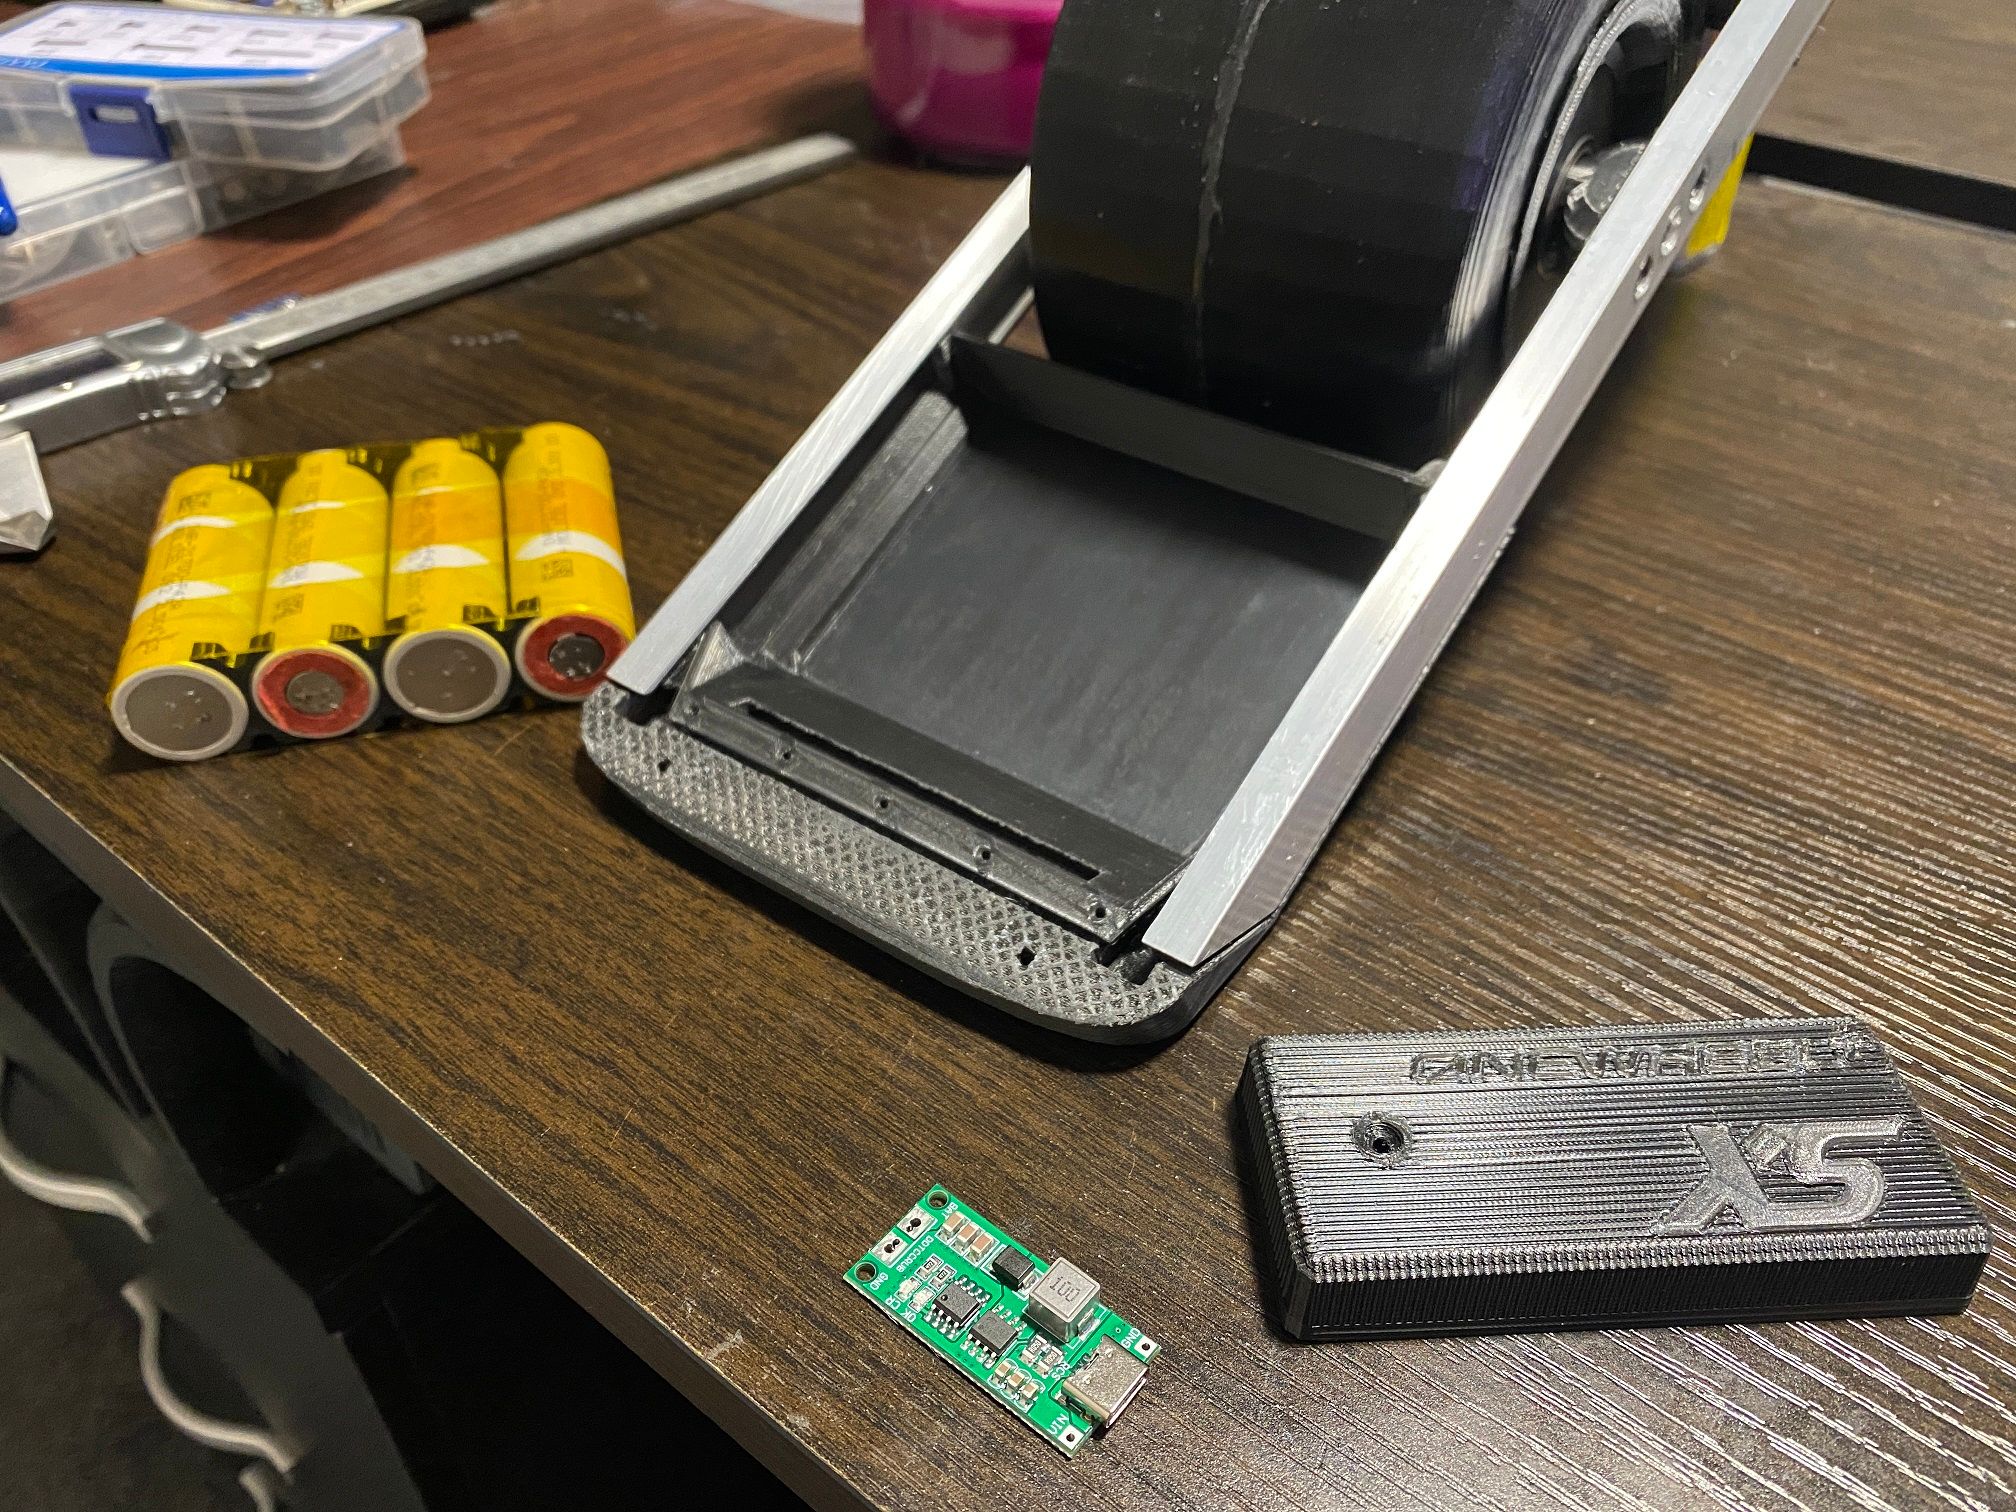
Put it onto the current prototype and it's really starting to look the part. BMS showed up too so I can get to work connecting up the cells, balance leads and arranging where it will all go. I'll need to add a few mosfets into the battery housing to switch the power on and off because the power button I'm using won't handle 30A.
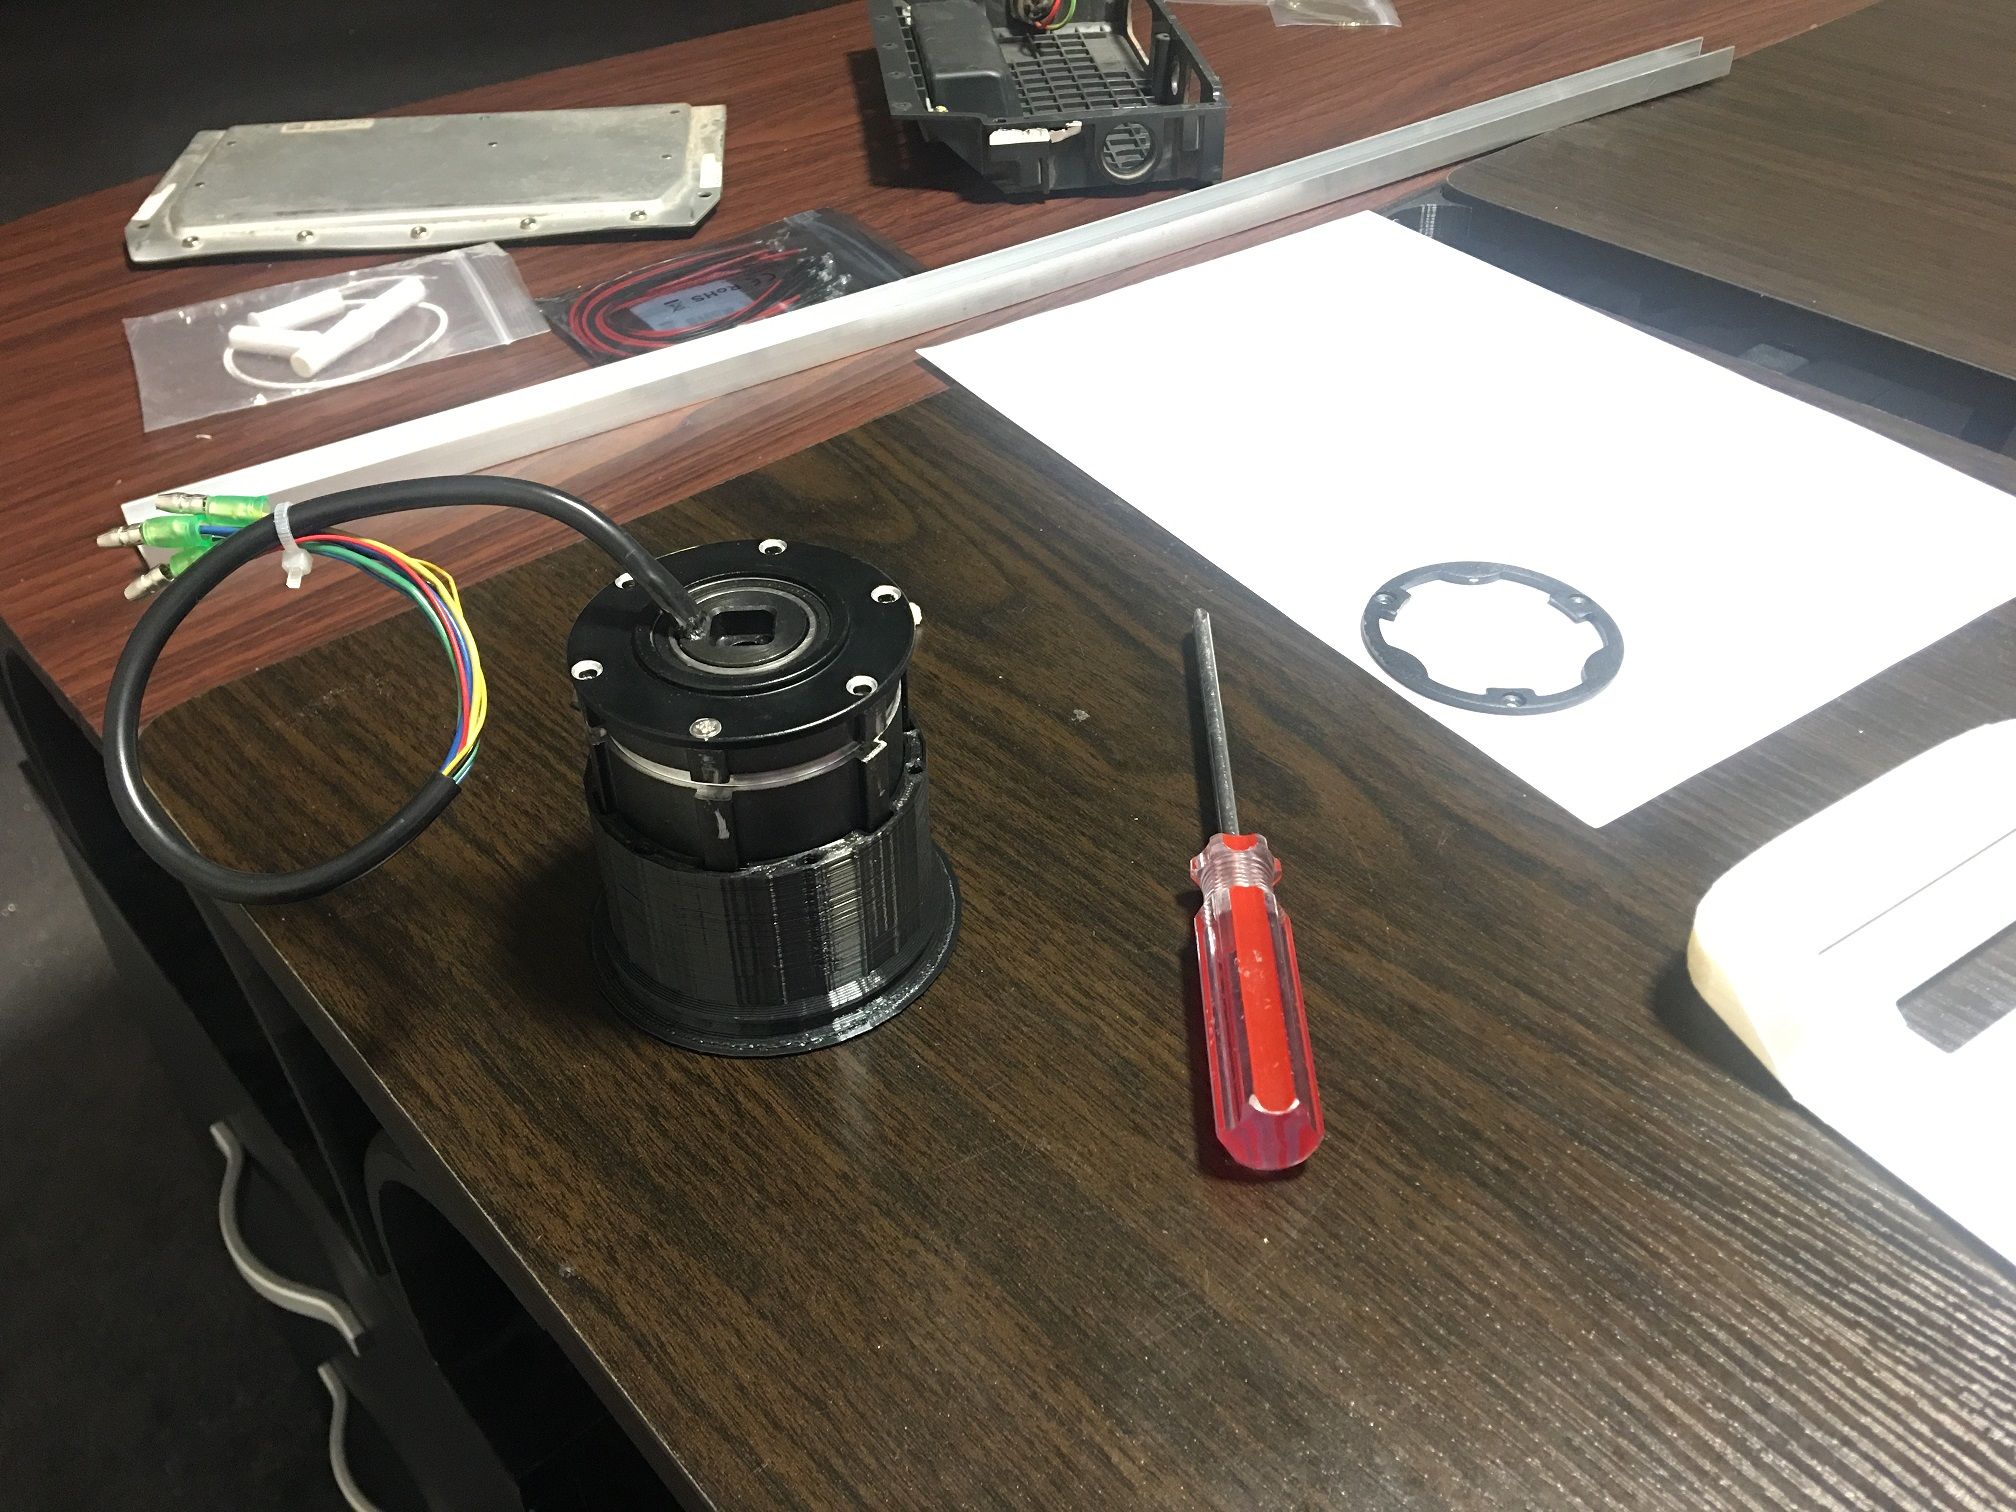
Cut the motor wire to length and got the connectors sorted. Motor sensor connector has been keyed by leaving the pin beside the red lead empty which would usually be a temp pin if used.
Just before sumbitting this a parcel arrived.... the power button I ordered like... 2 months ago showed up!!!
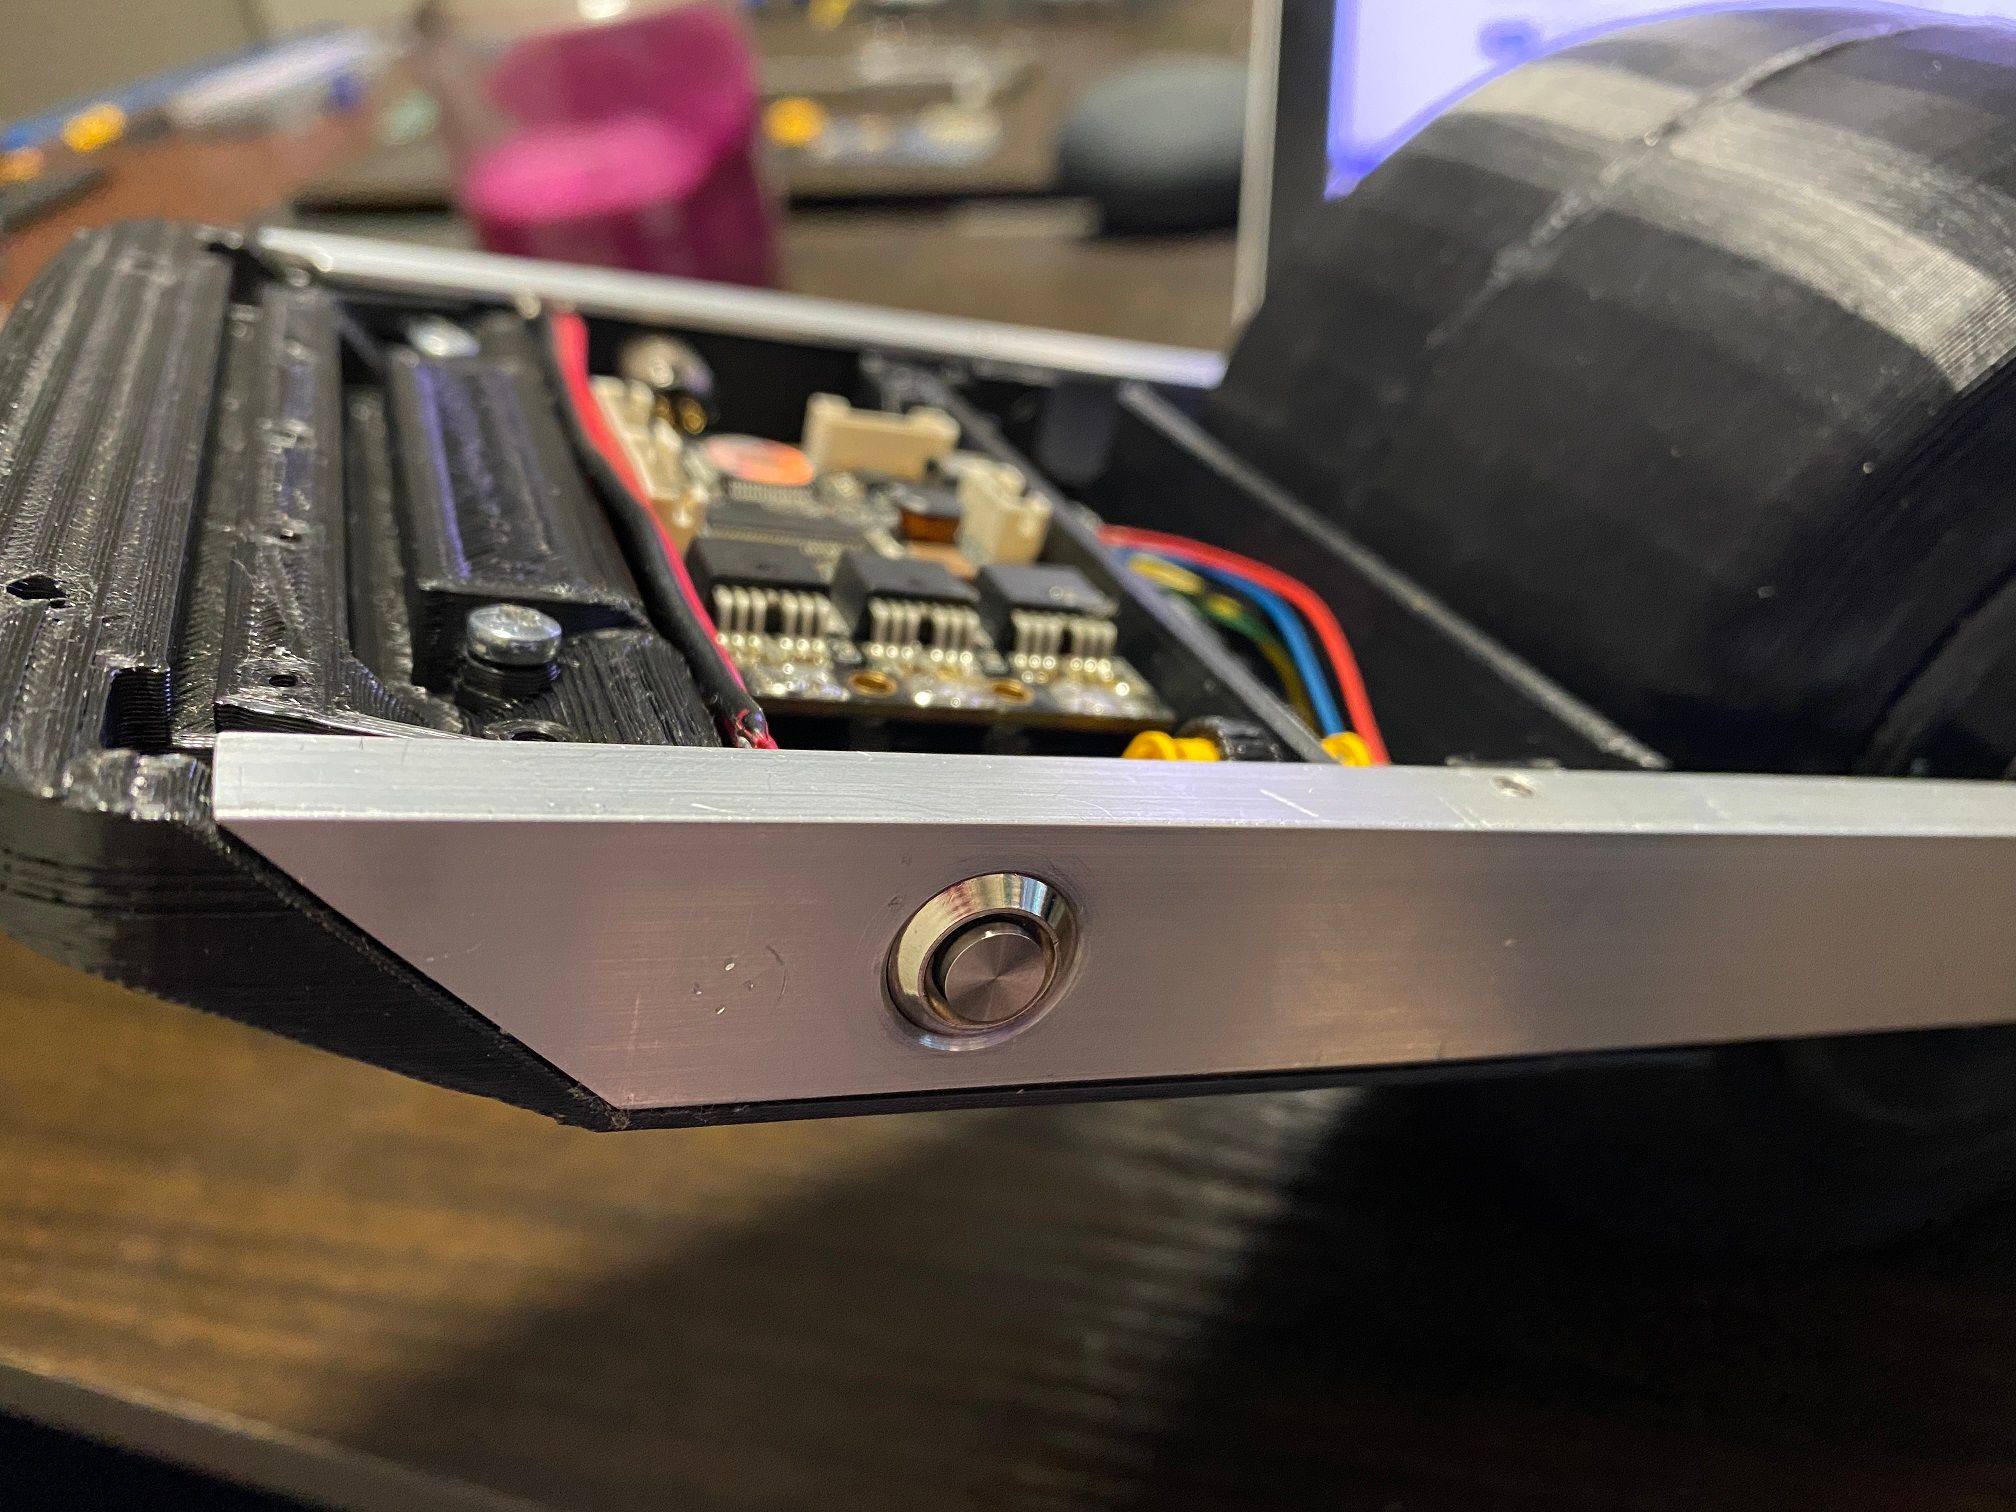
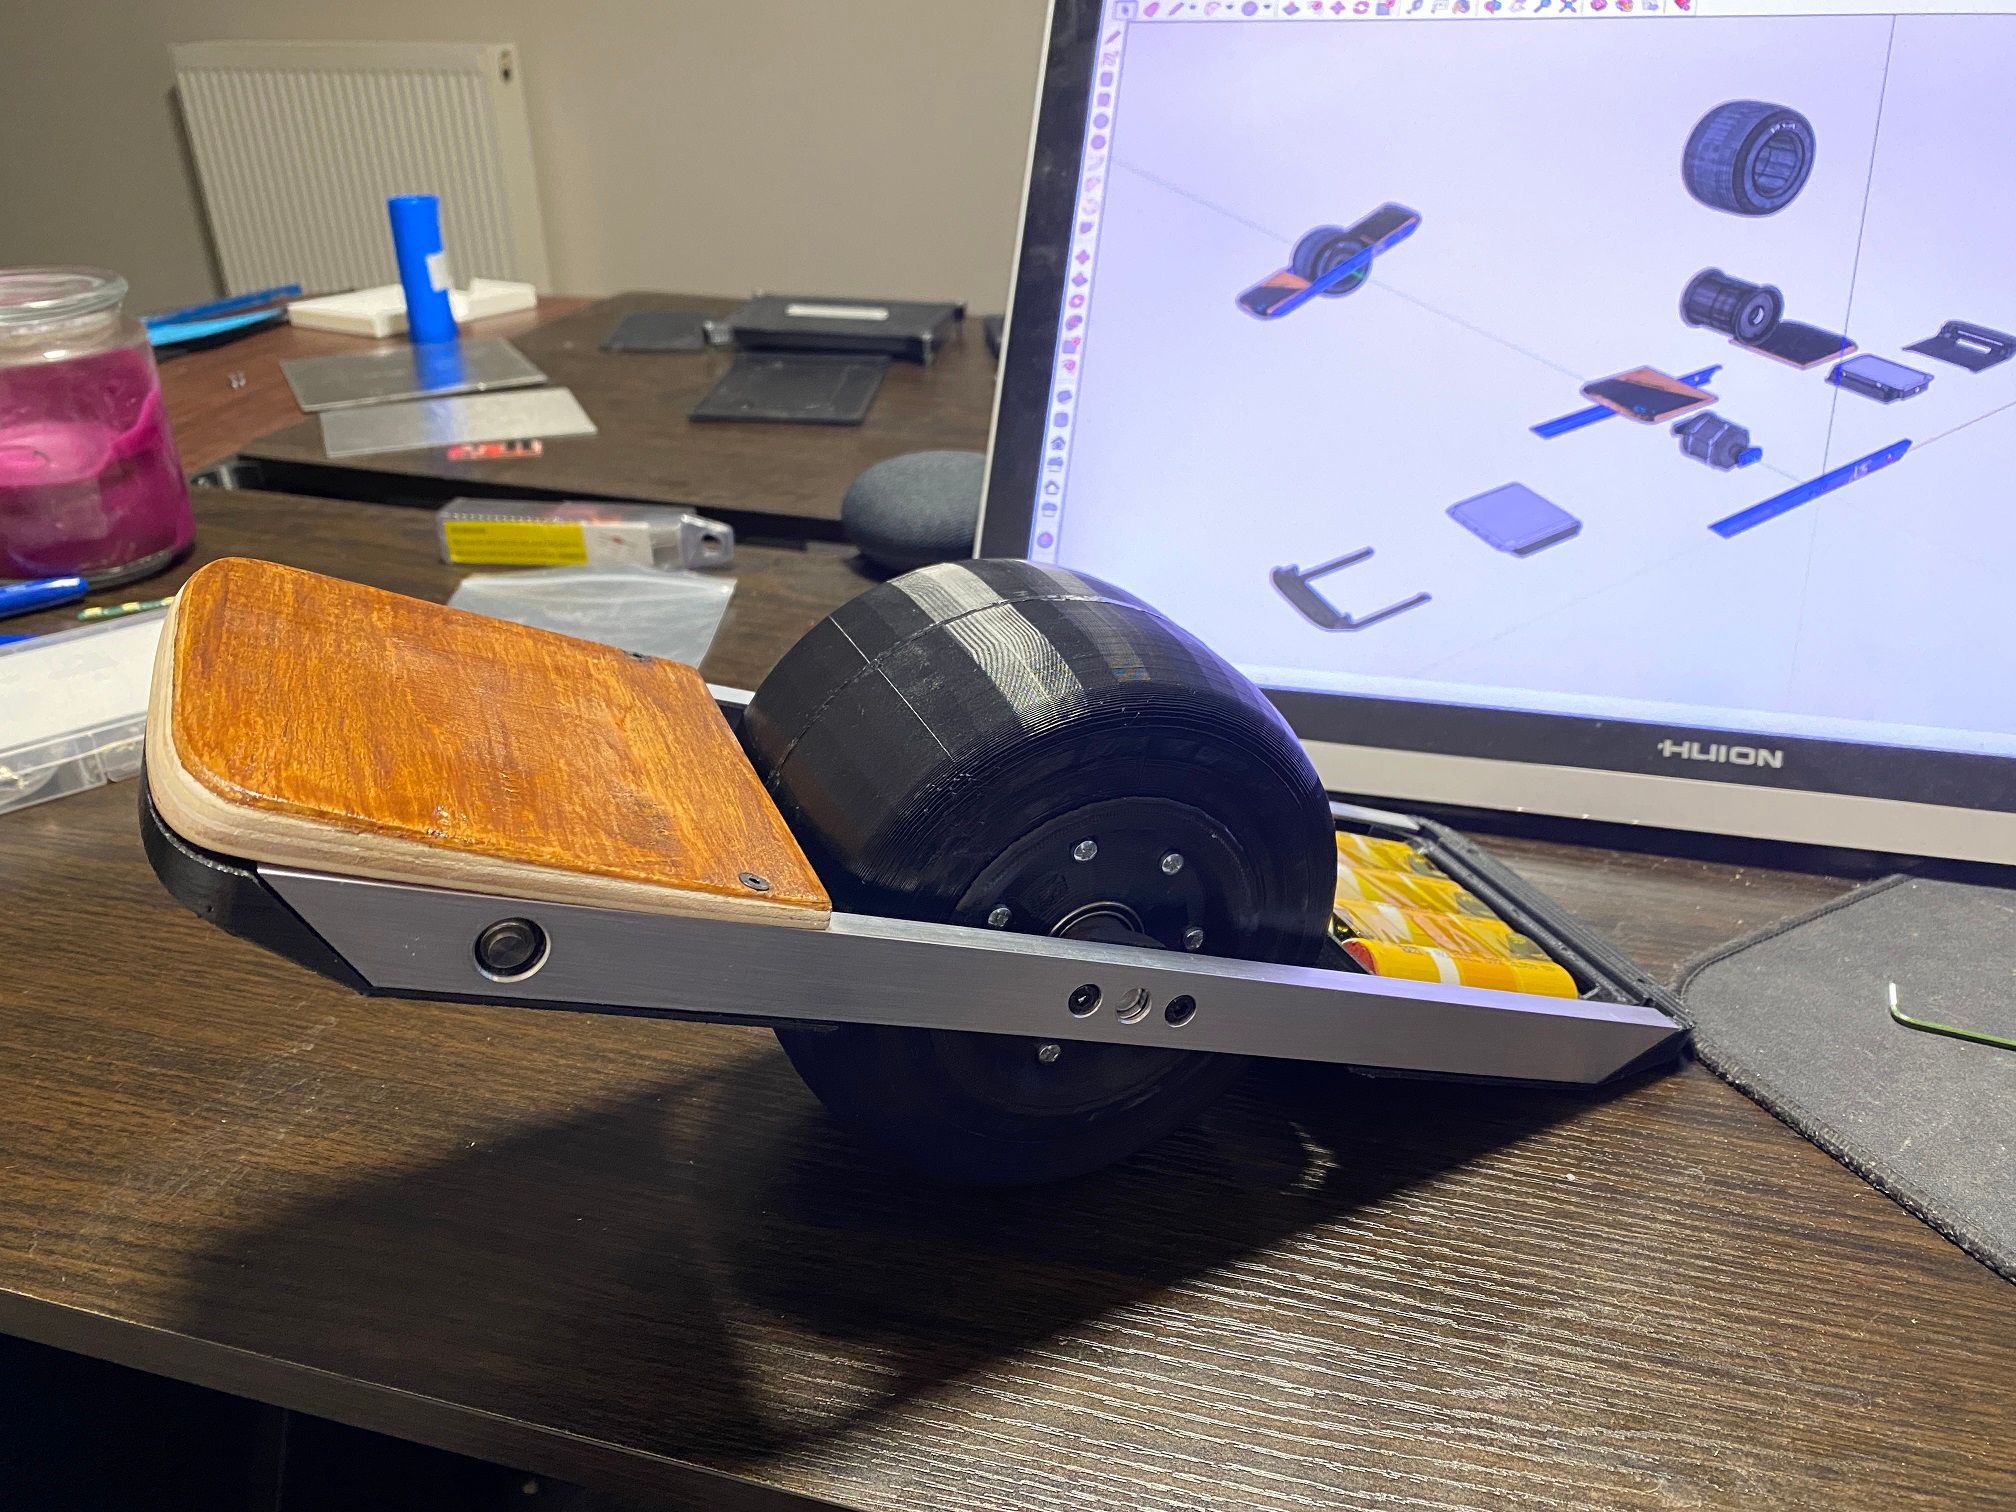
Needs a bit of modifying but it mostly fits and if you don't look at it too long it looks like the stock one. And yes... it does have a blue led in it to illuminate the ring around the button ;)
.
Edit : Didn't think this needed to be another separate post so appending today's progress :)
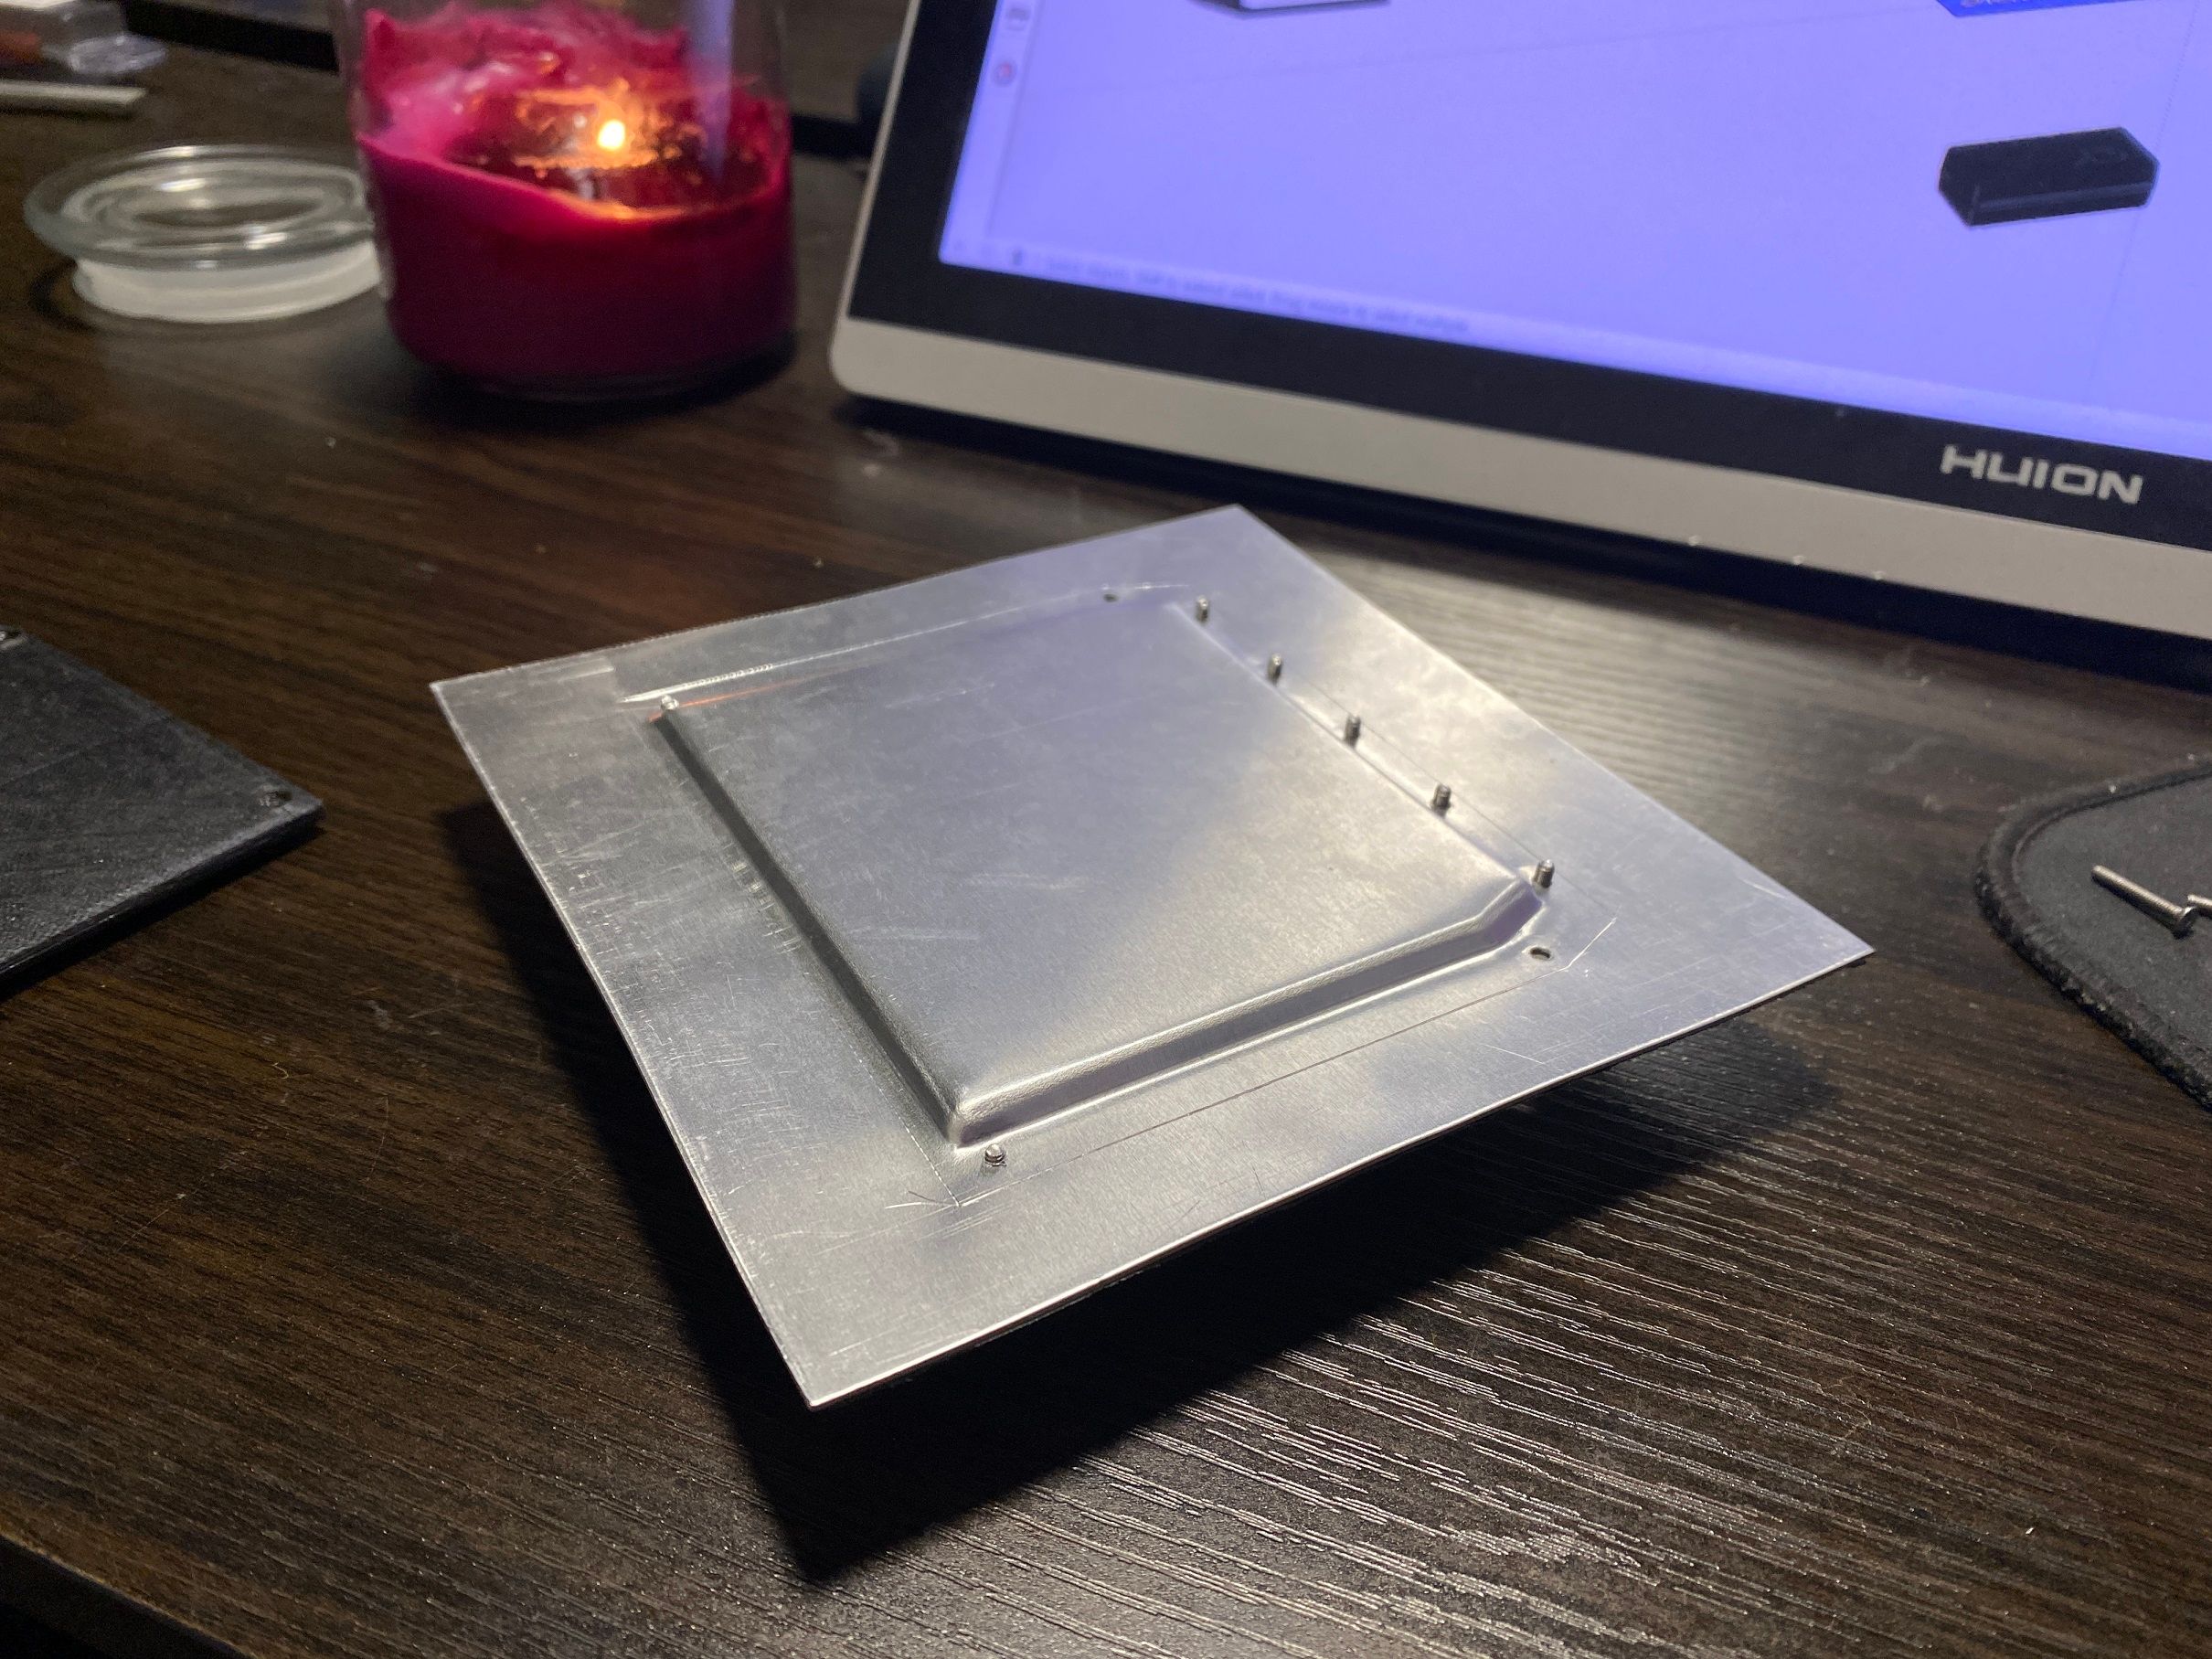
Made a press form to create the controller lid. it takes a 150x100x1mm aluminium sheet and forces it into the shape of either side of the form. Usually you'd use a hydraulic press for this but I don't have one, so my bench vice will do.
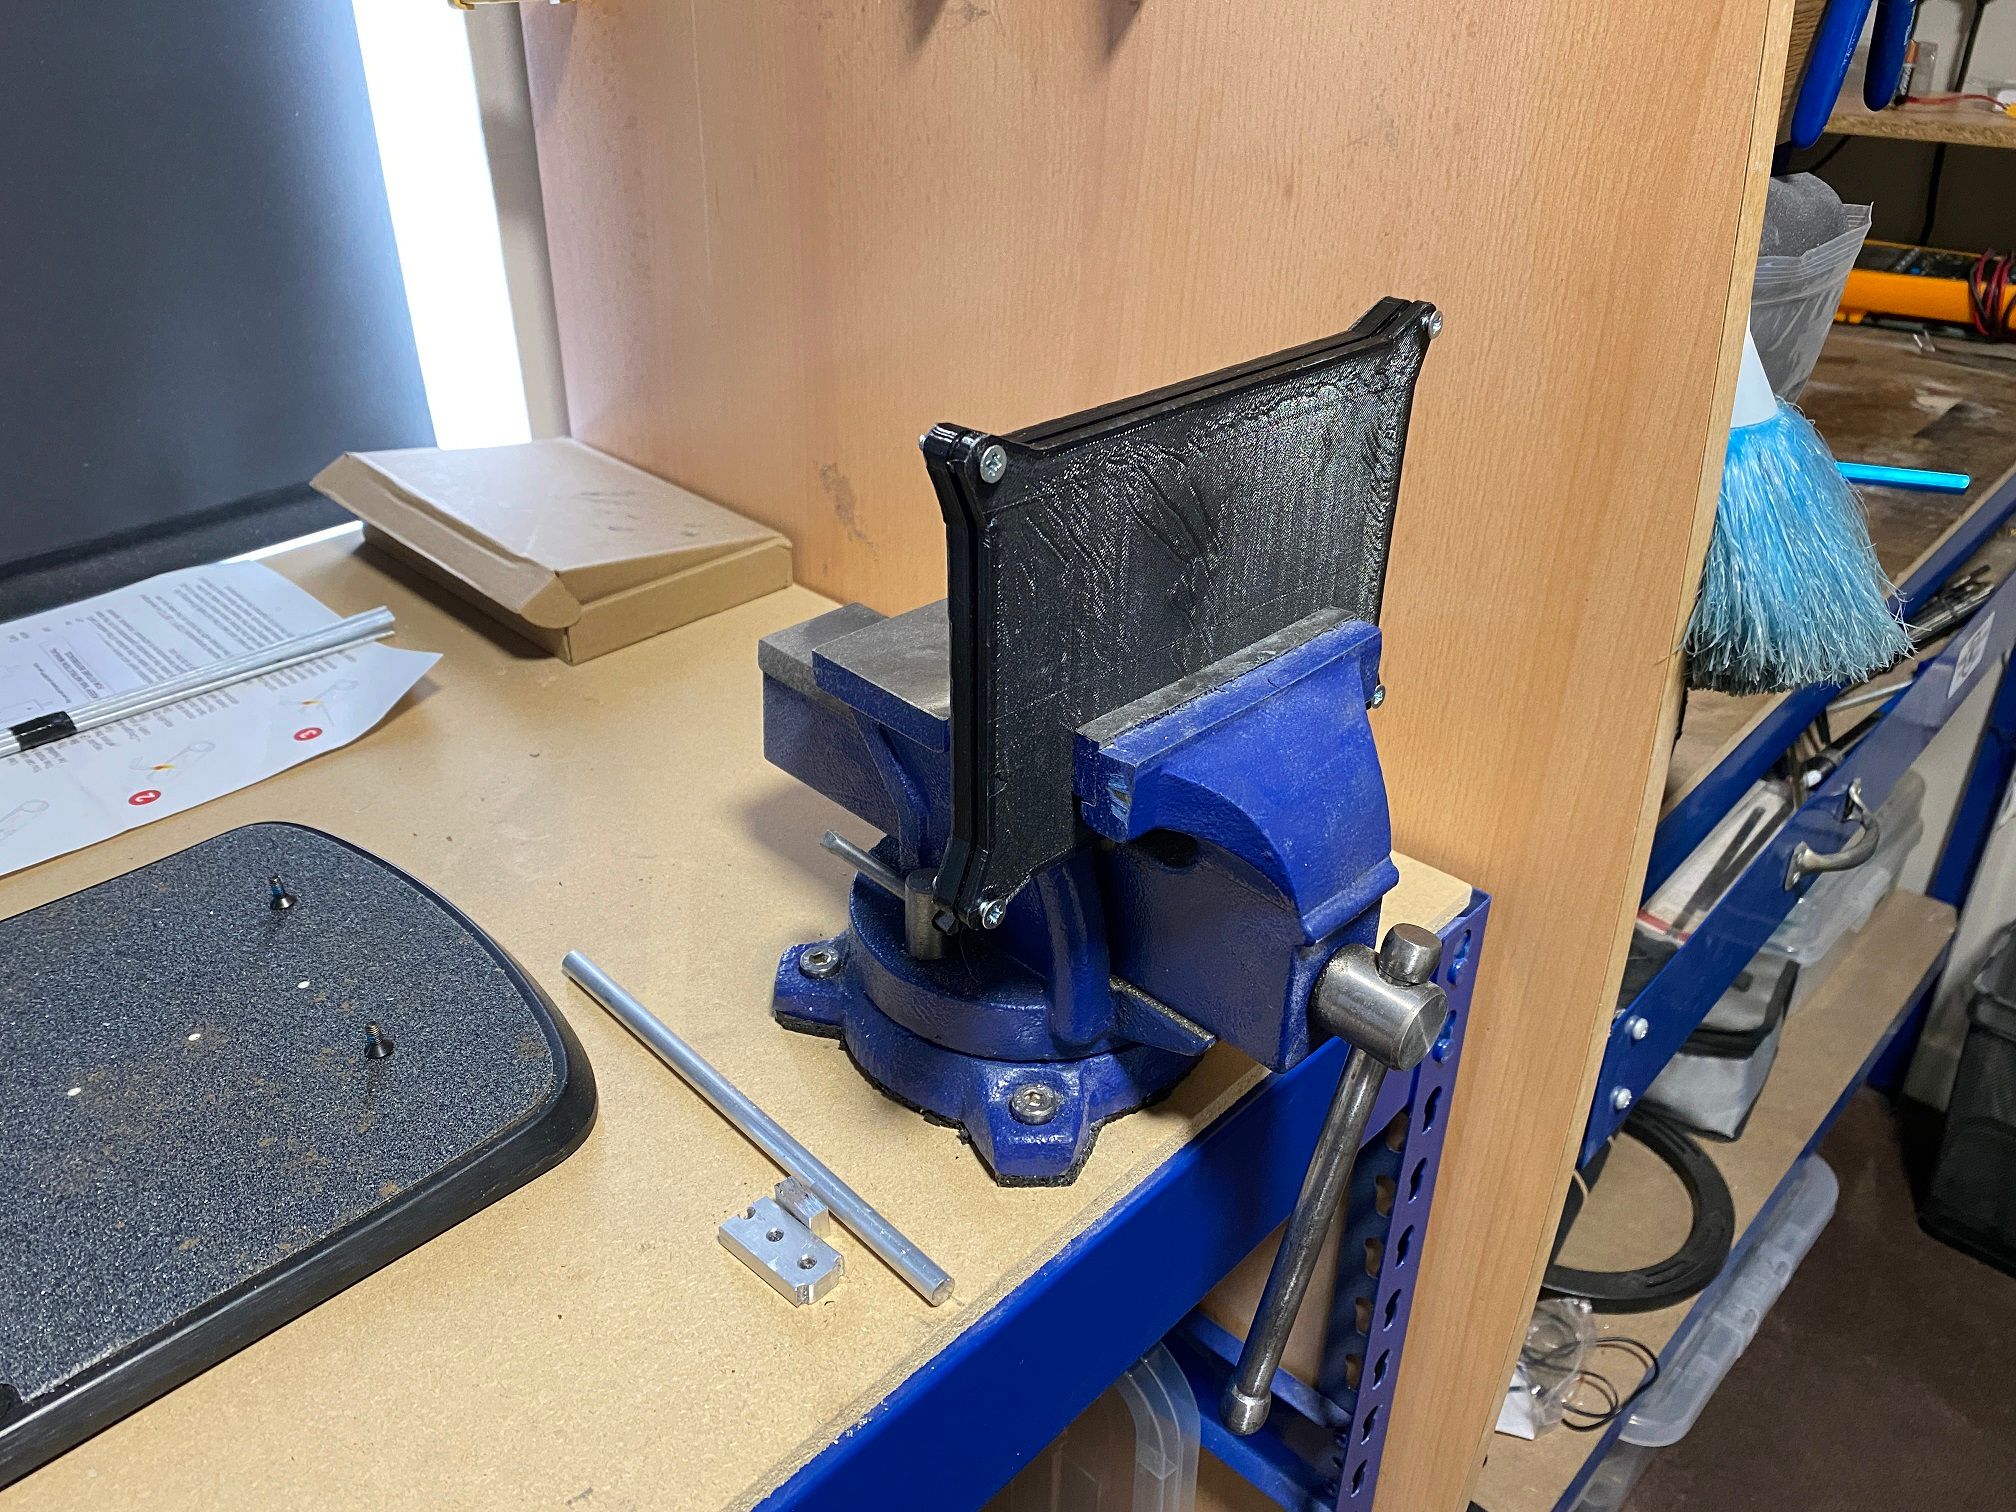
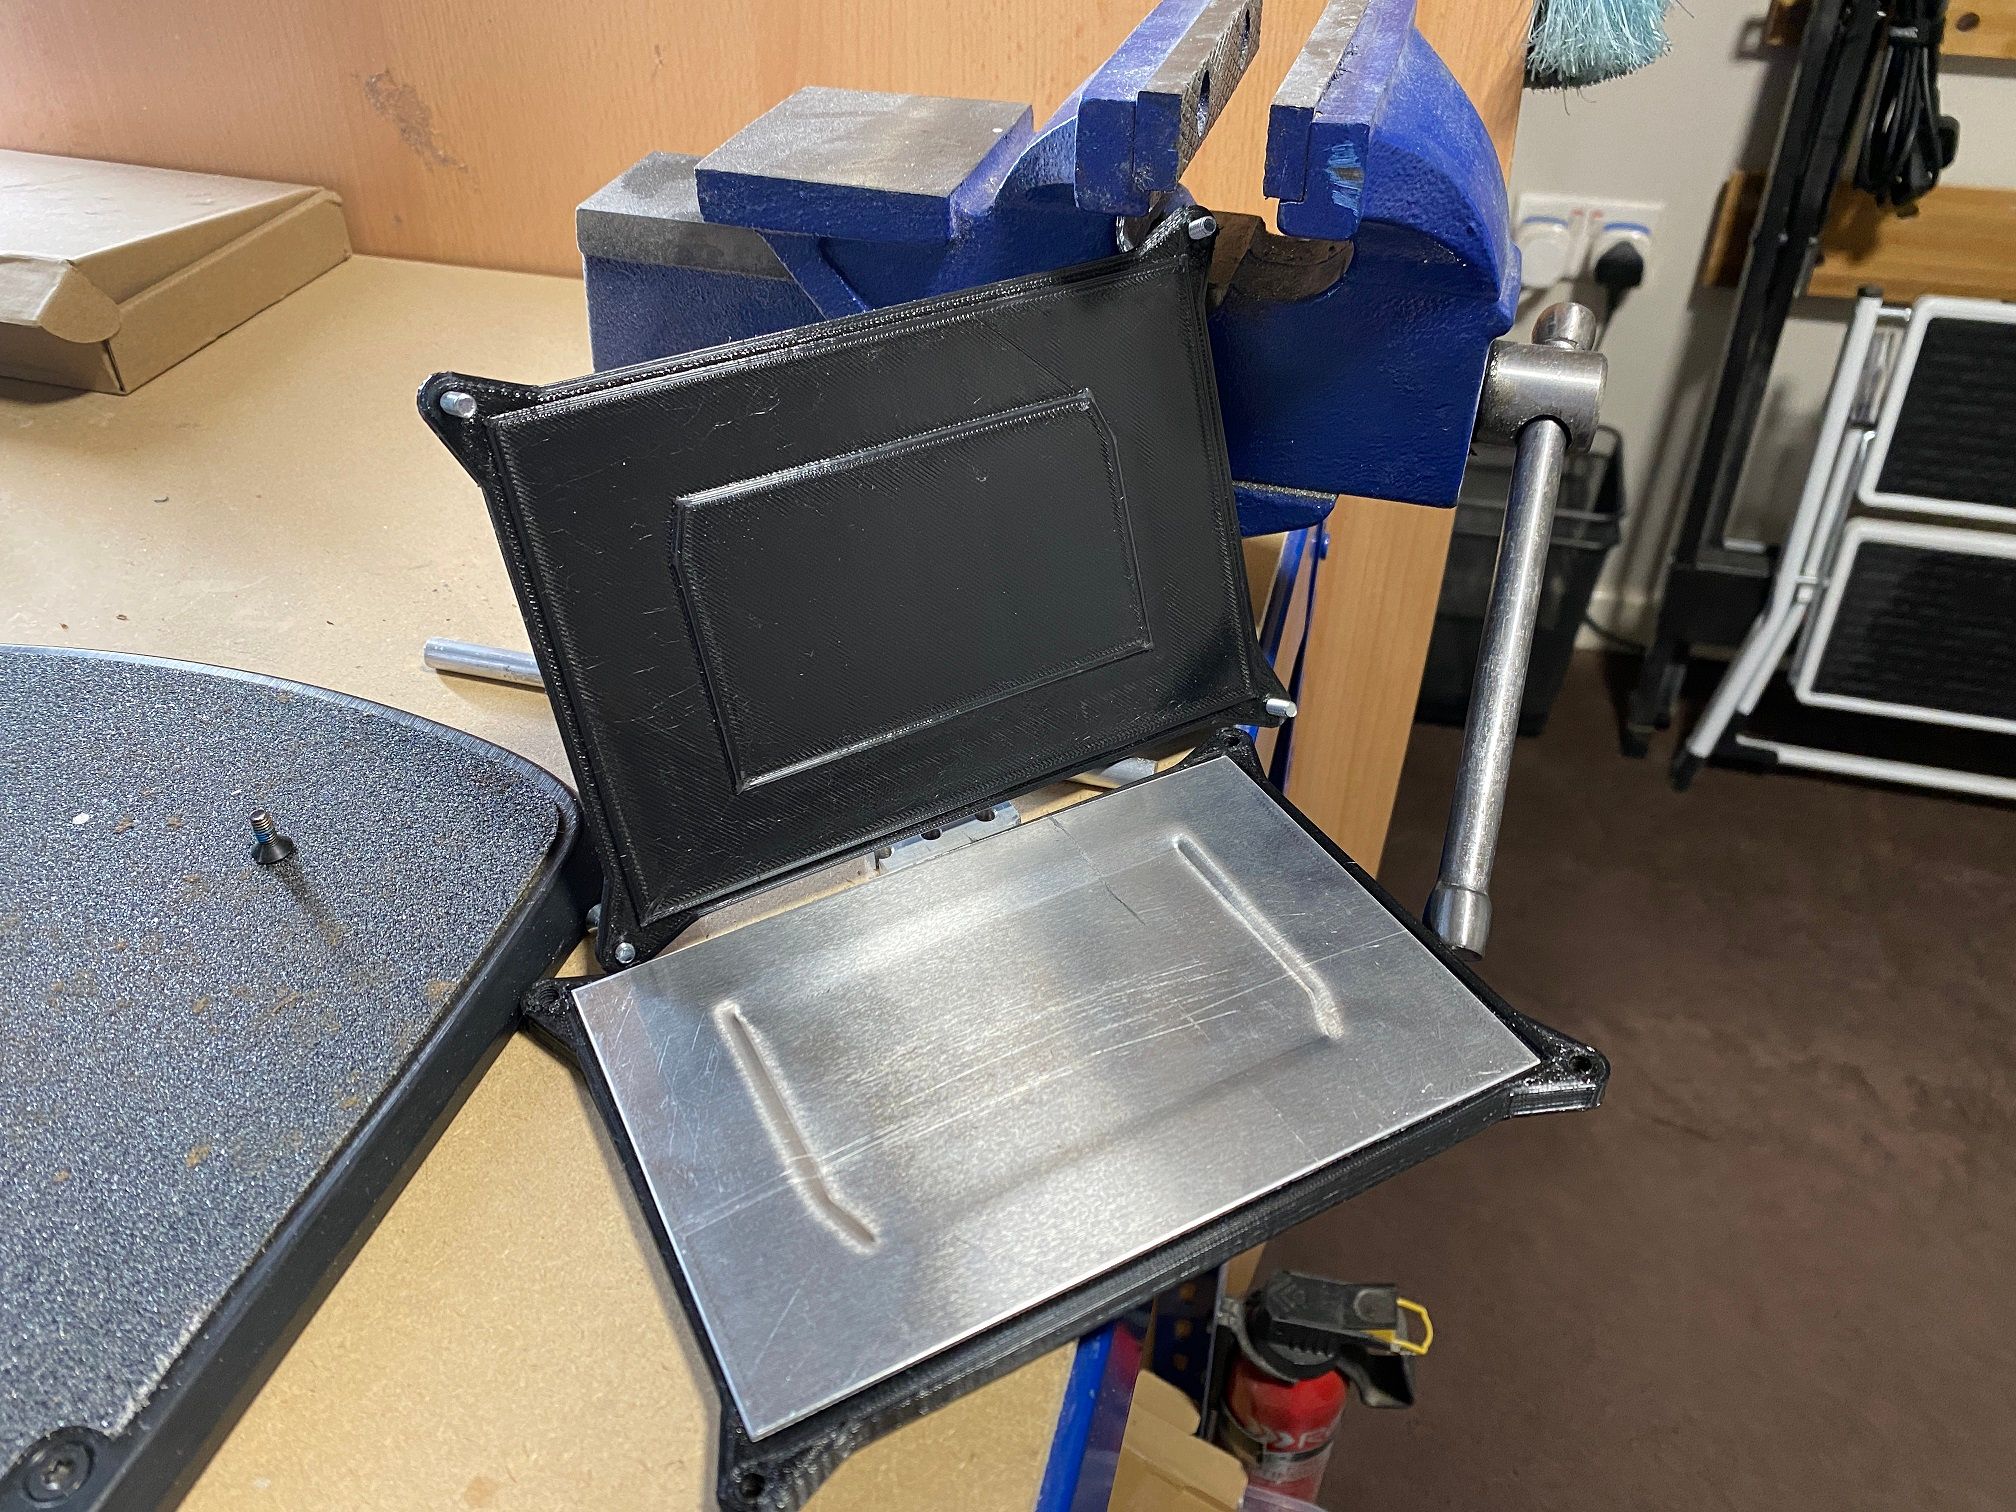
Took quite a while to get it to take shape, doesn't come off on camera too well but the deformation is about 1.5mm to create the shape. Will do the battery box which has a much deeper shape too it because of the cells but I need to do this with 150x150x1mm aluminium to make sure I can retain the shape properly. Will create a template to cut these to shape after.
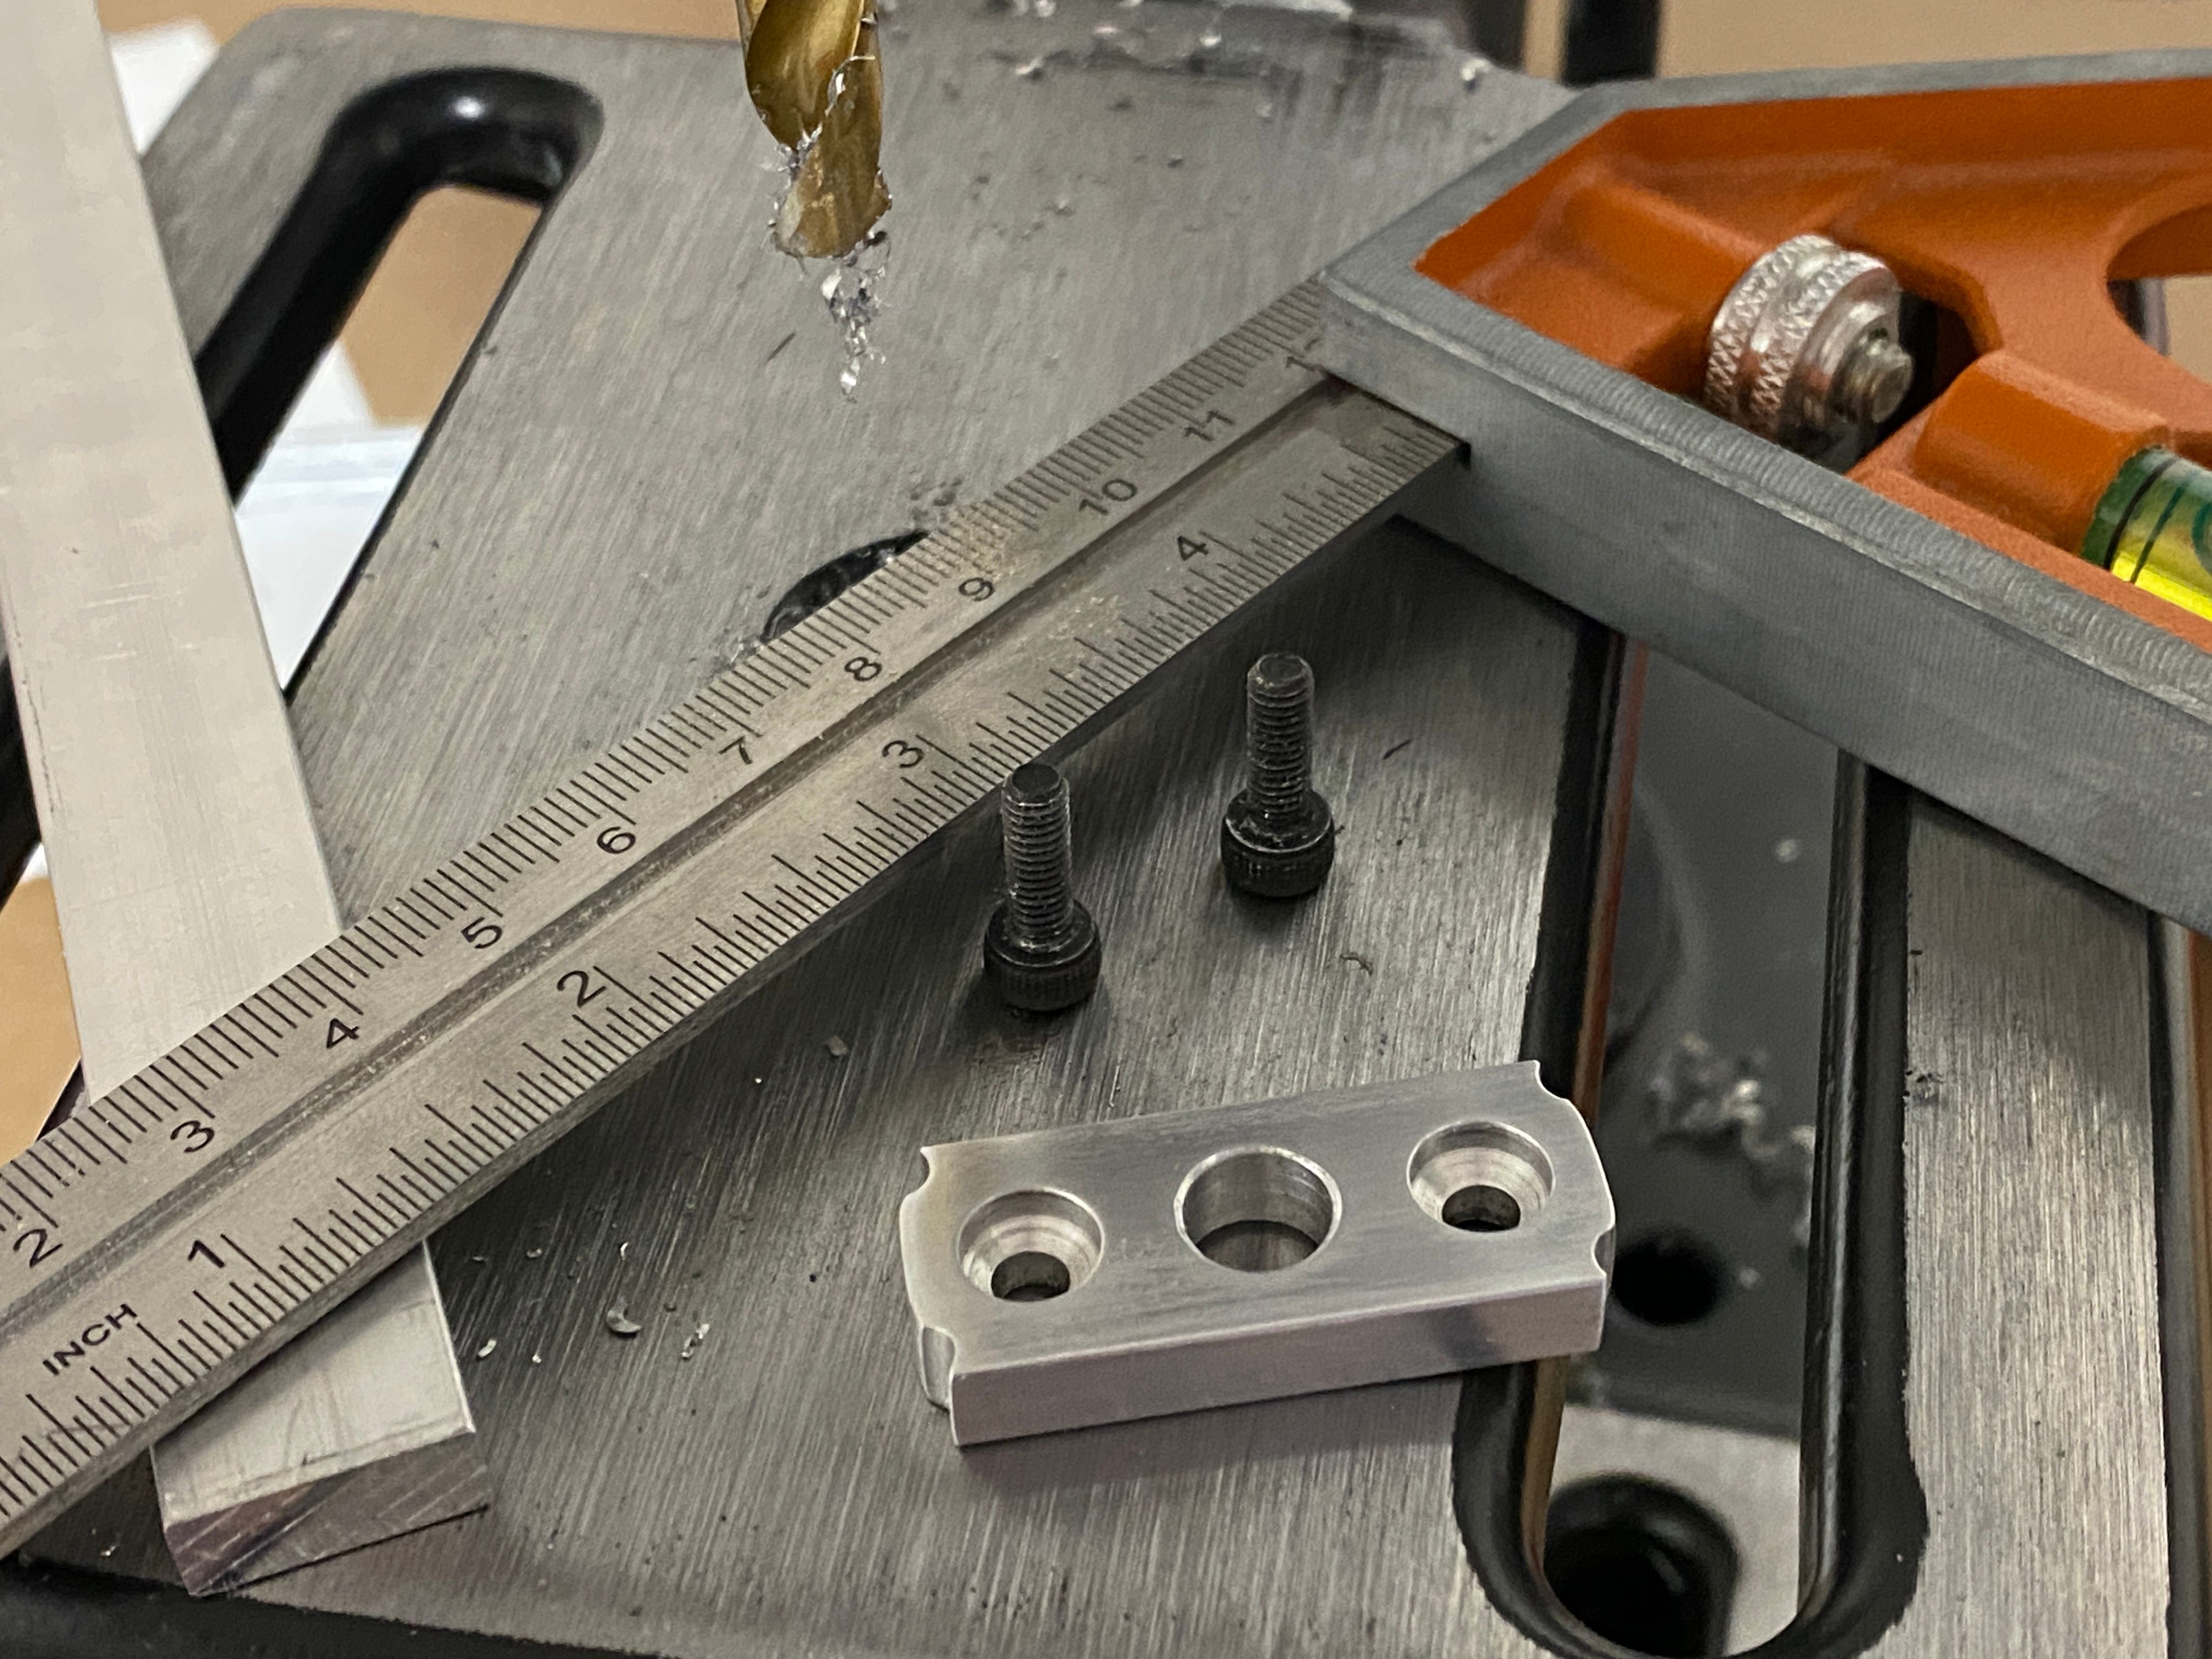
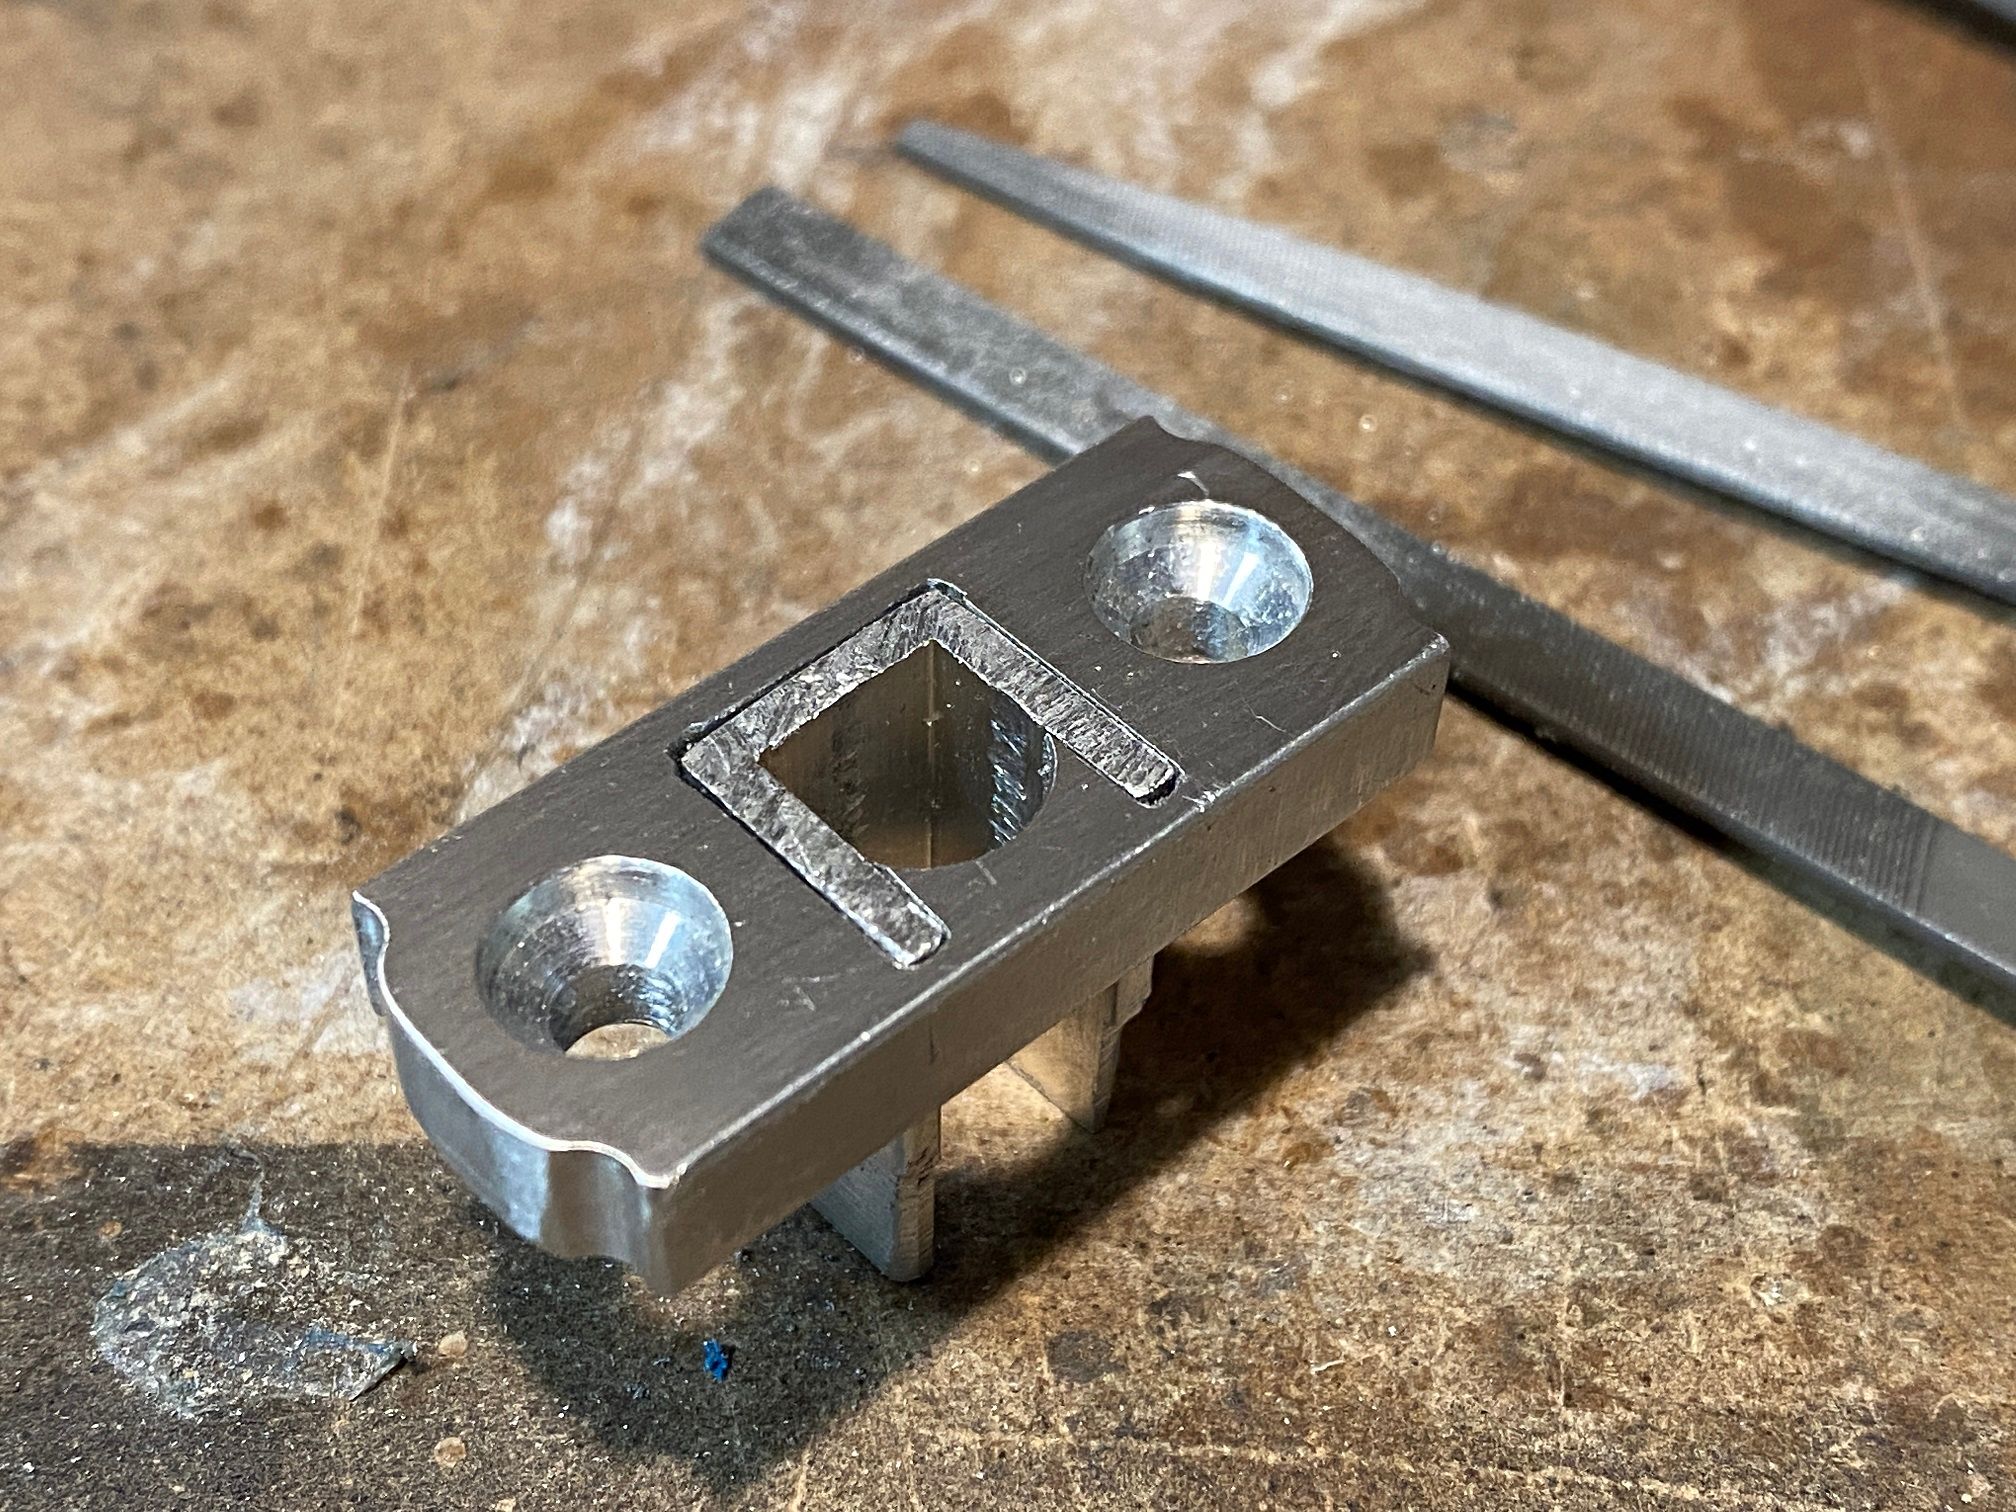
Did the right axle bracket minus the cutout for the keyed U channel because that needs the scroll saw which another jig was waiting to be printed.
As of now it's getting there. Made some cell spacers and taped the cells together ready for welding at some point later.
-
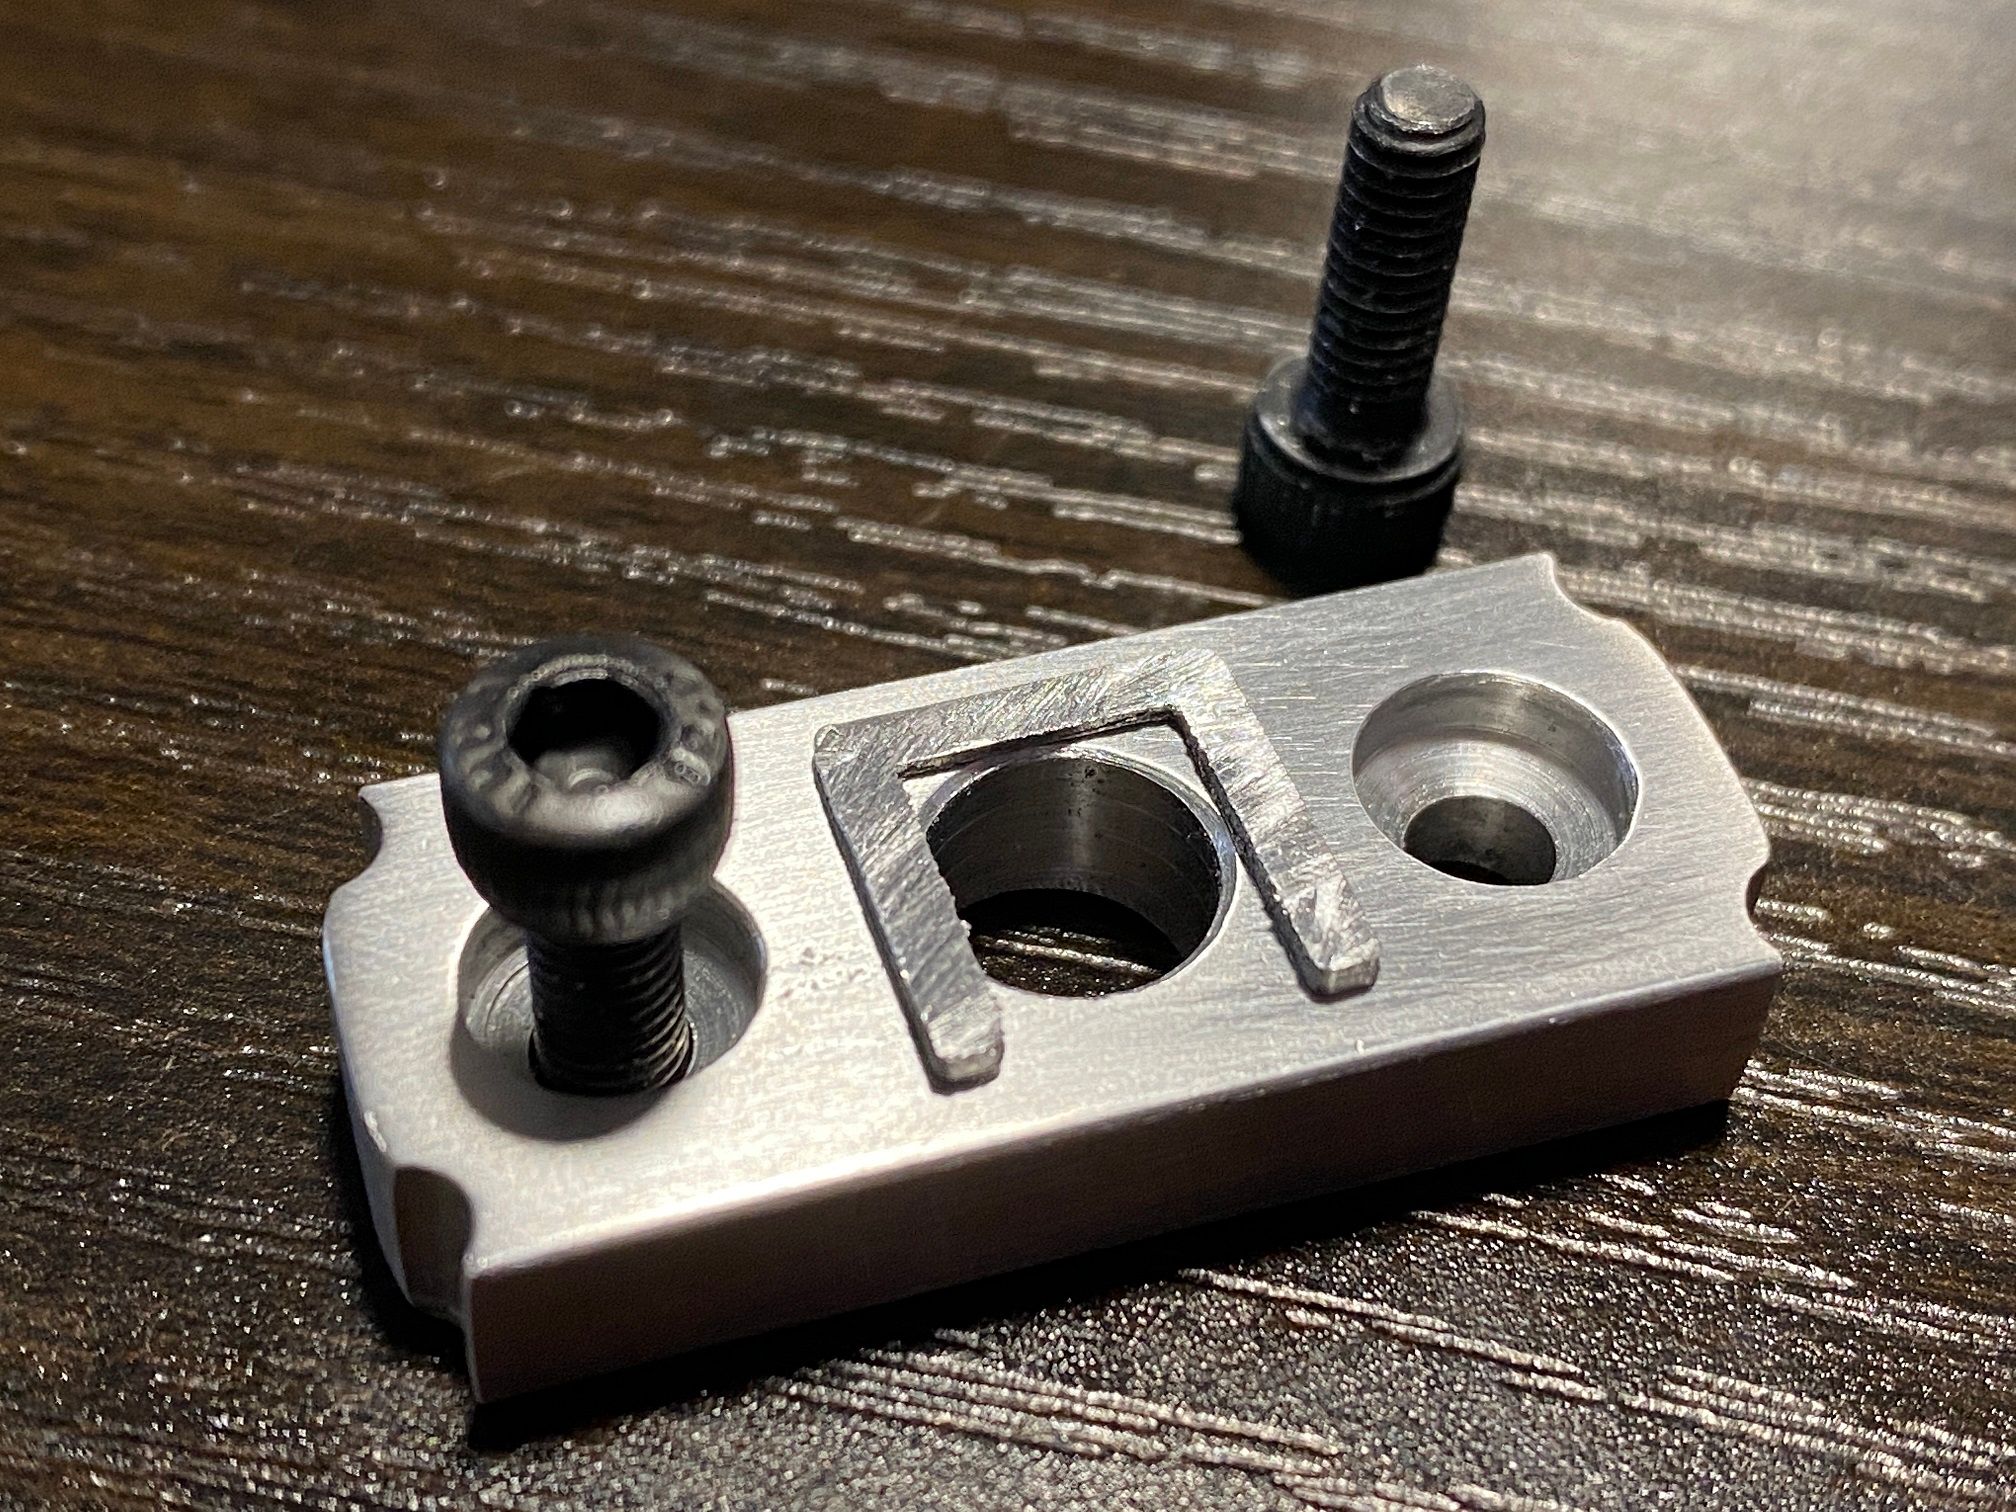
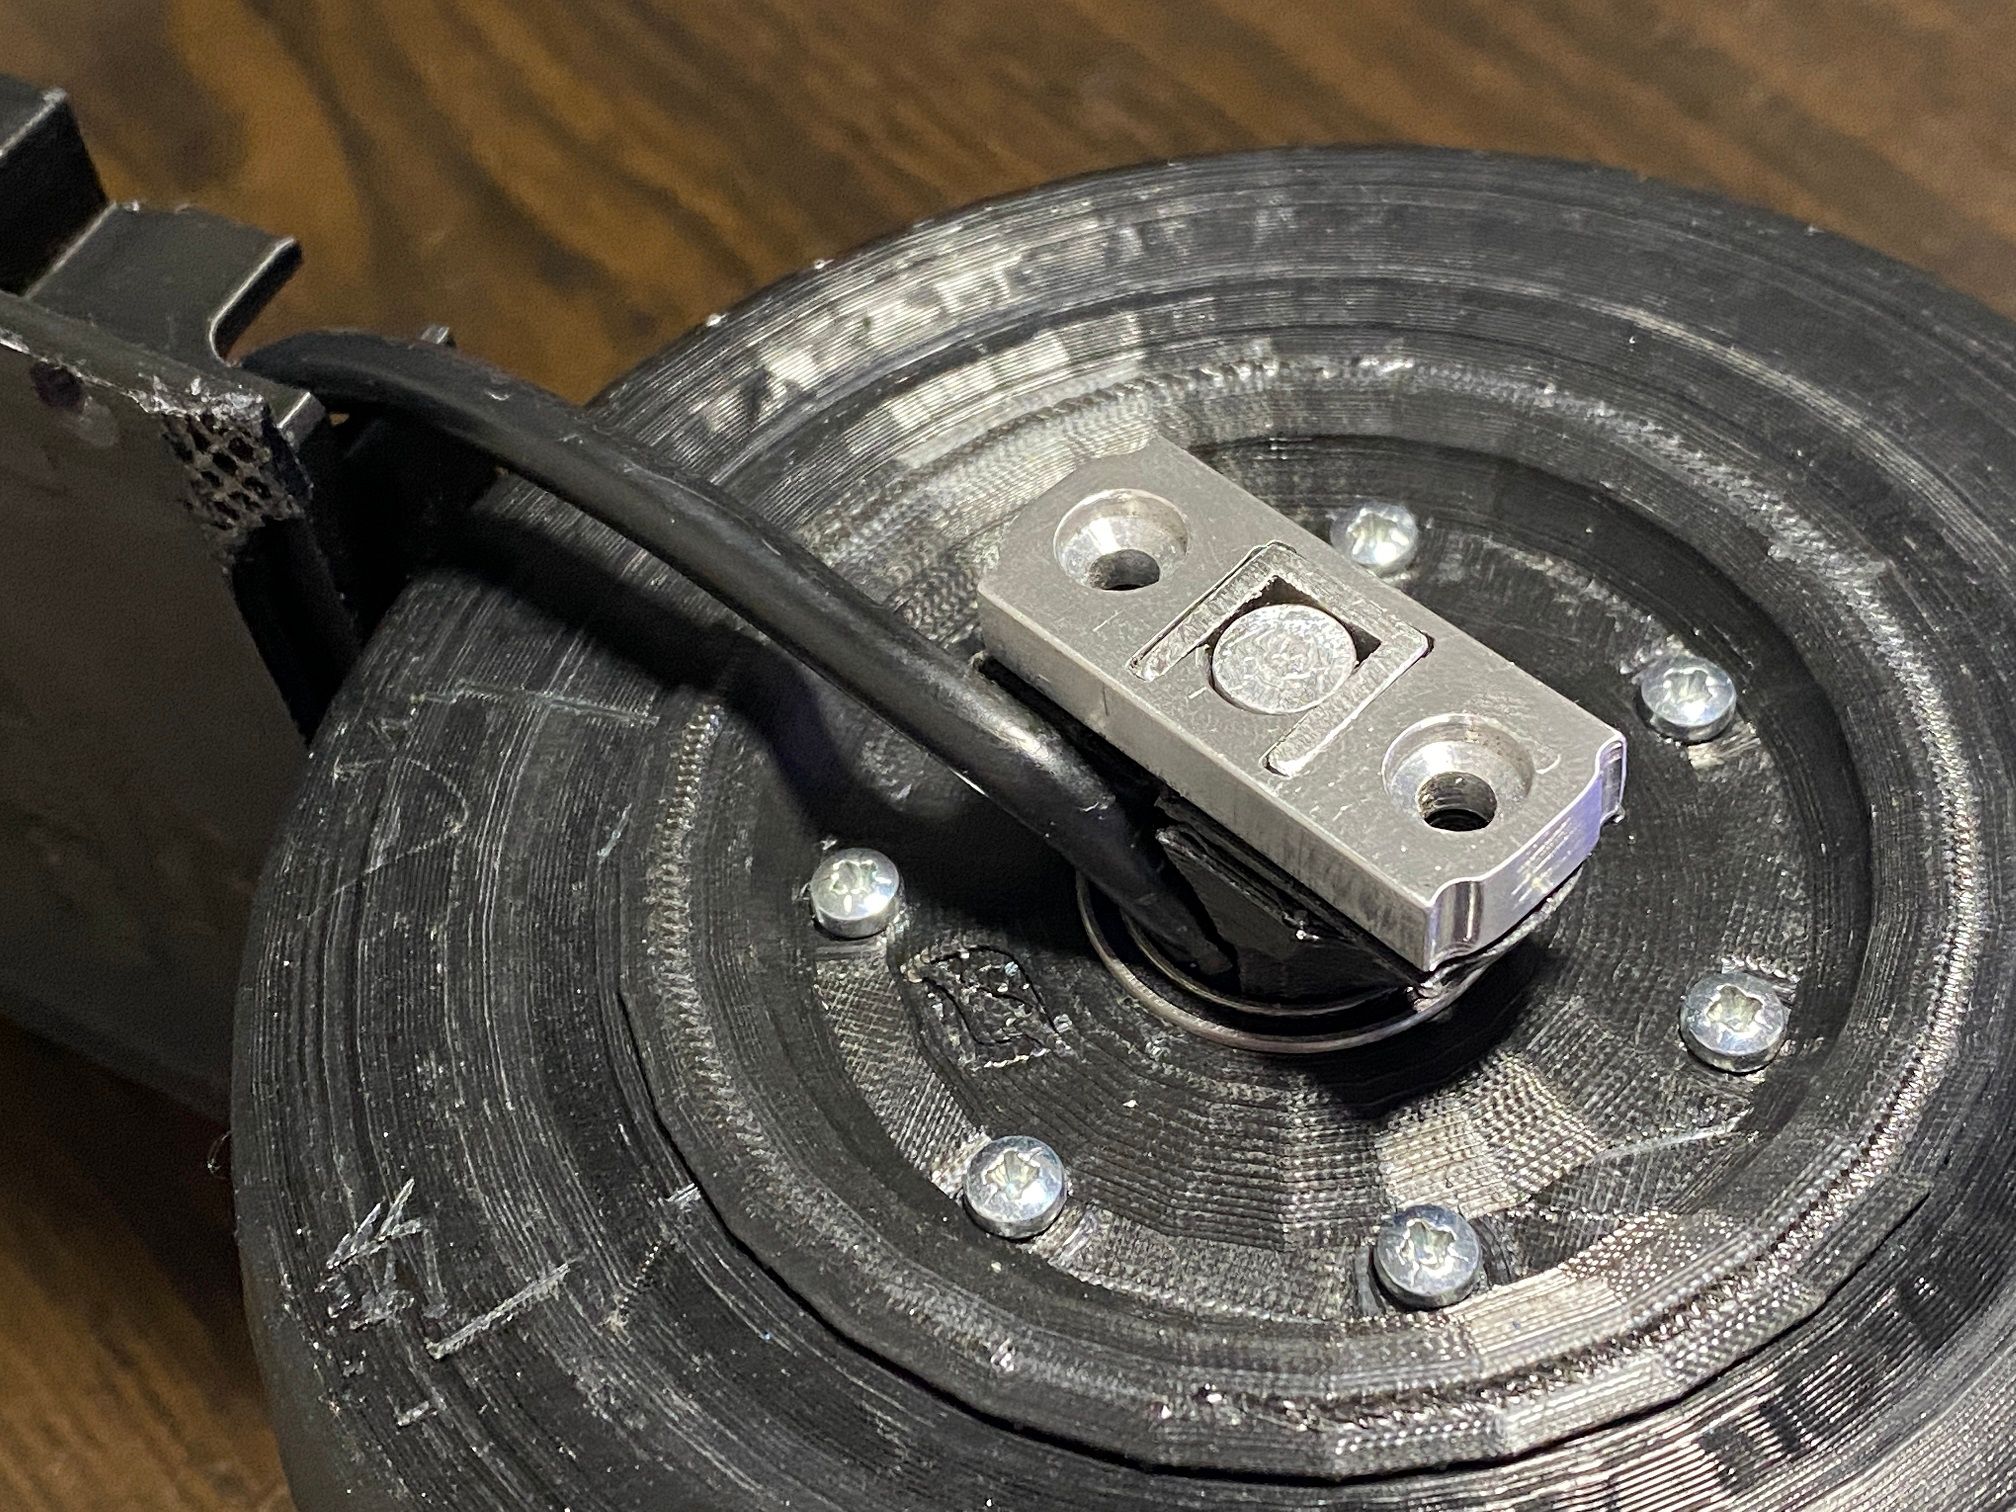
I tamed my scrollsaw and managed to cut the tiny U slot in the axle bracket then made minor corrections with some tiny jewellers files. Very very snug, I was concerned I would need to braze these together making dissasembly a bit of a puzzle however it's so snug that there is no play.
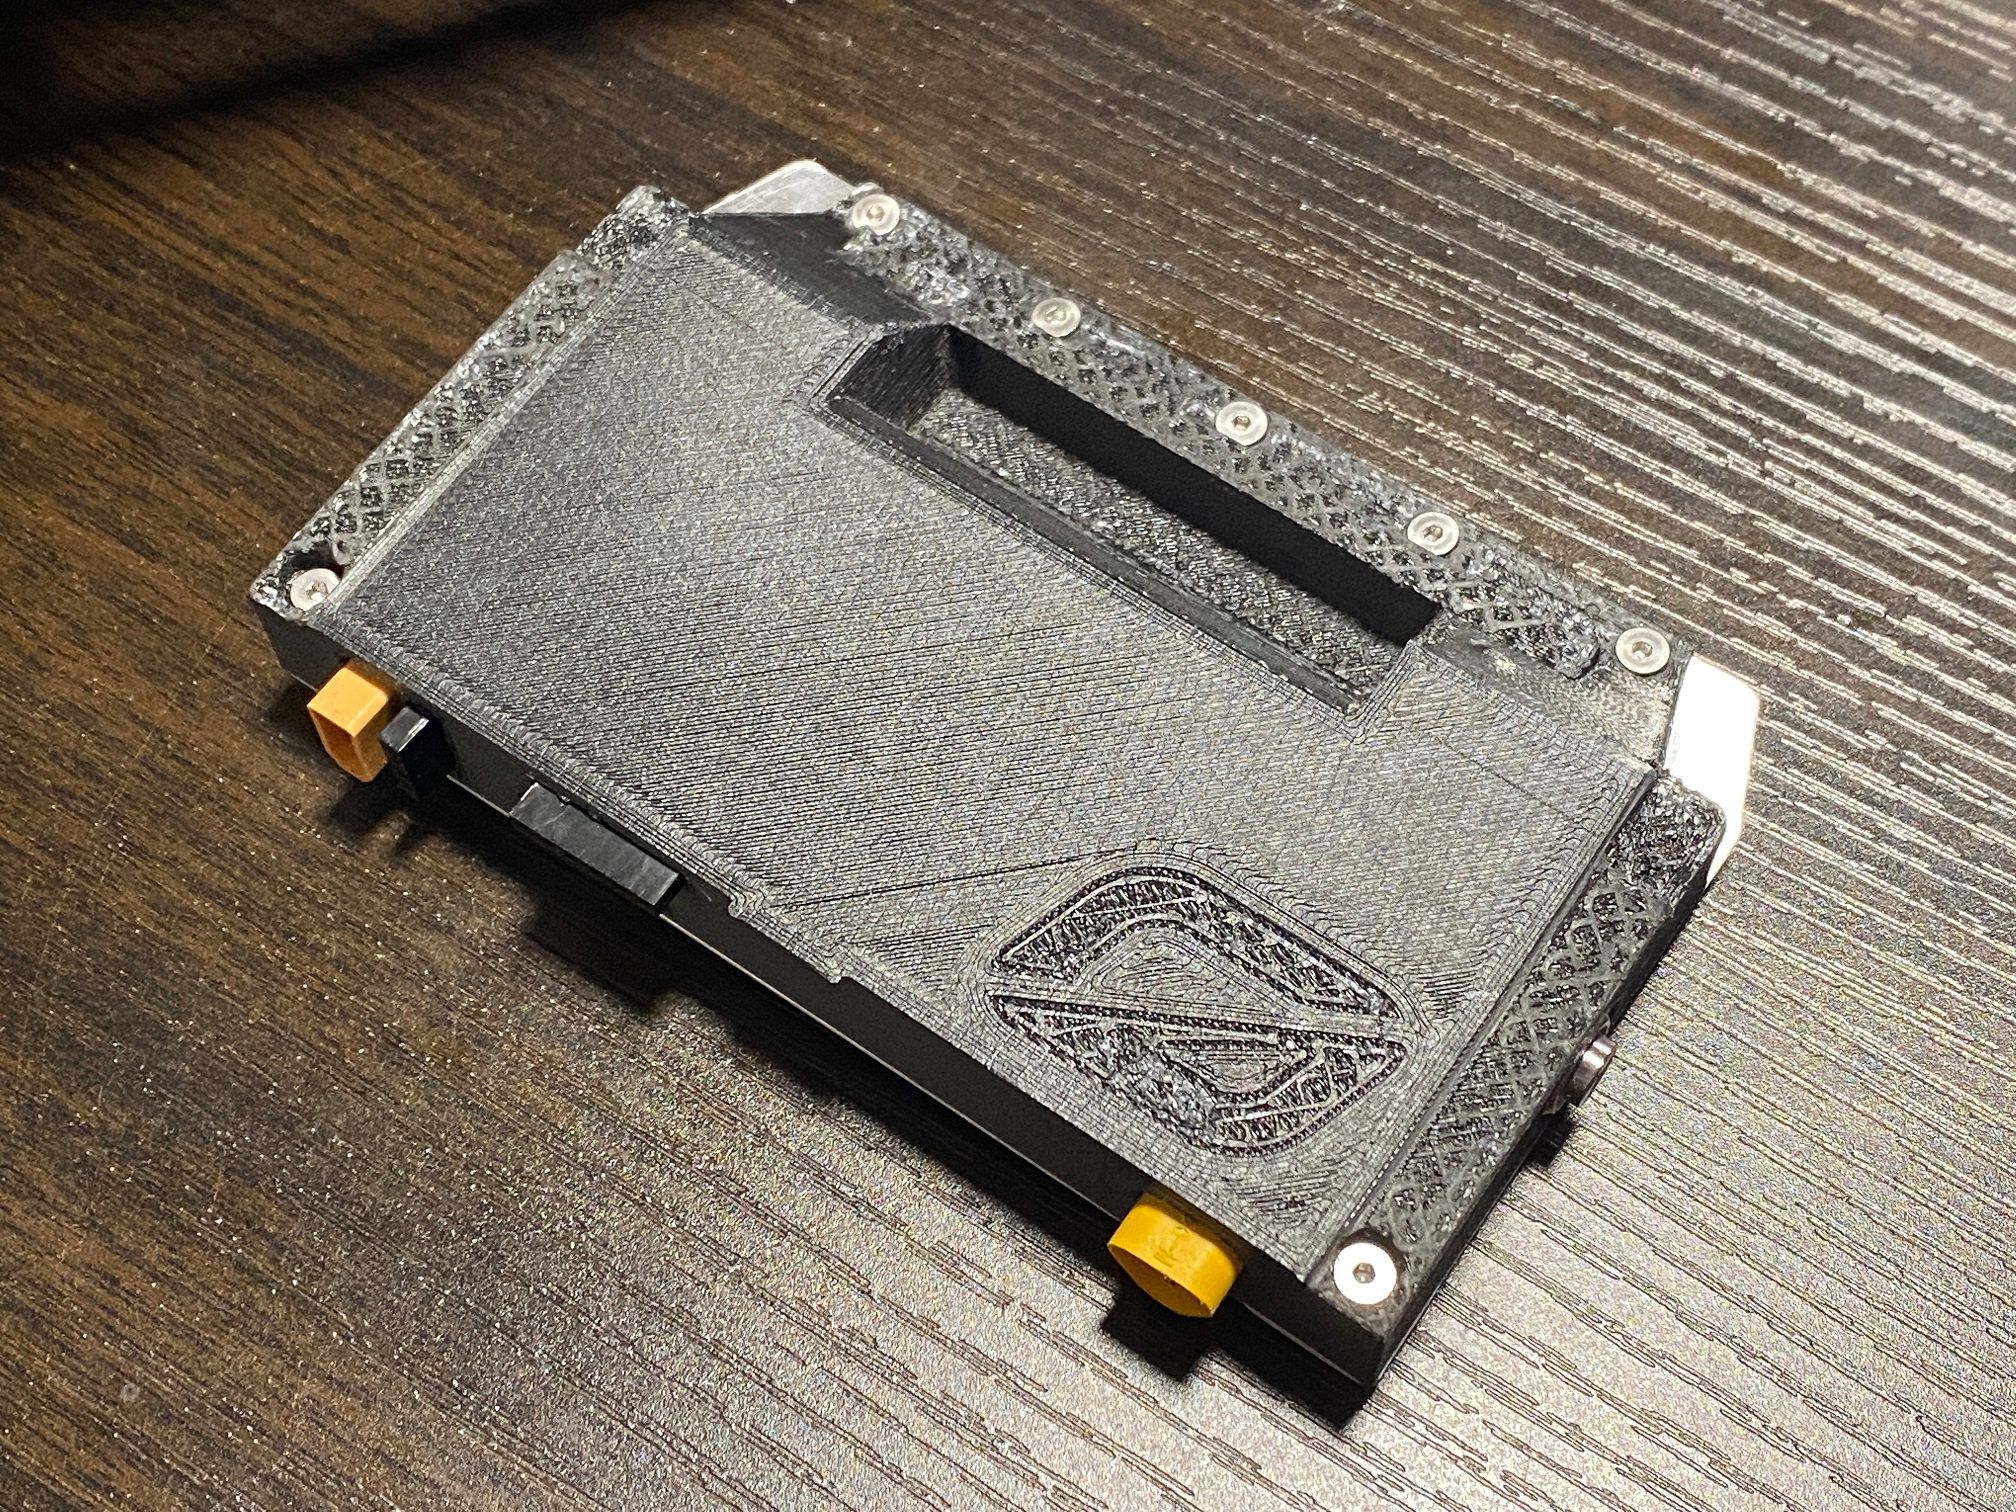
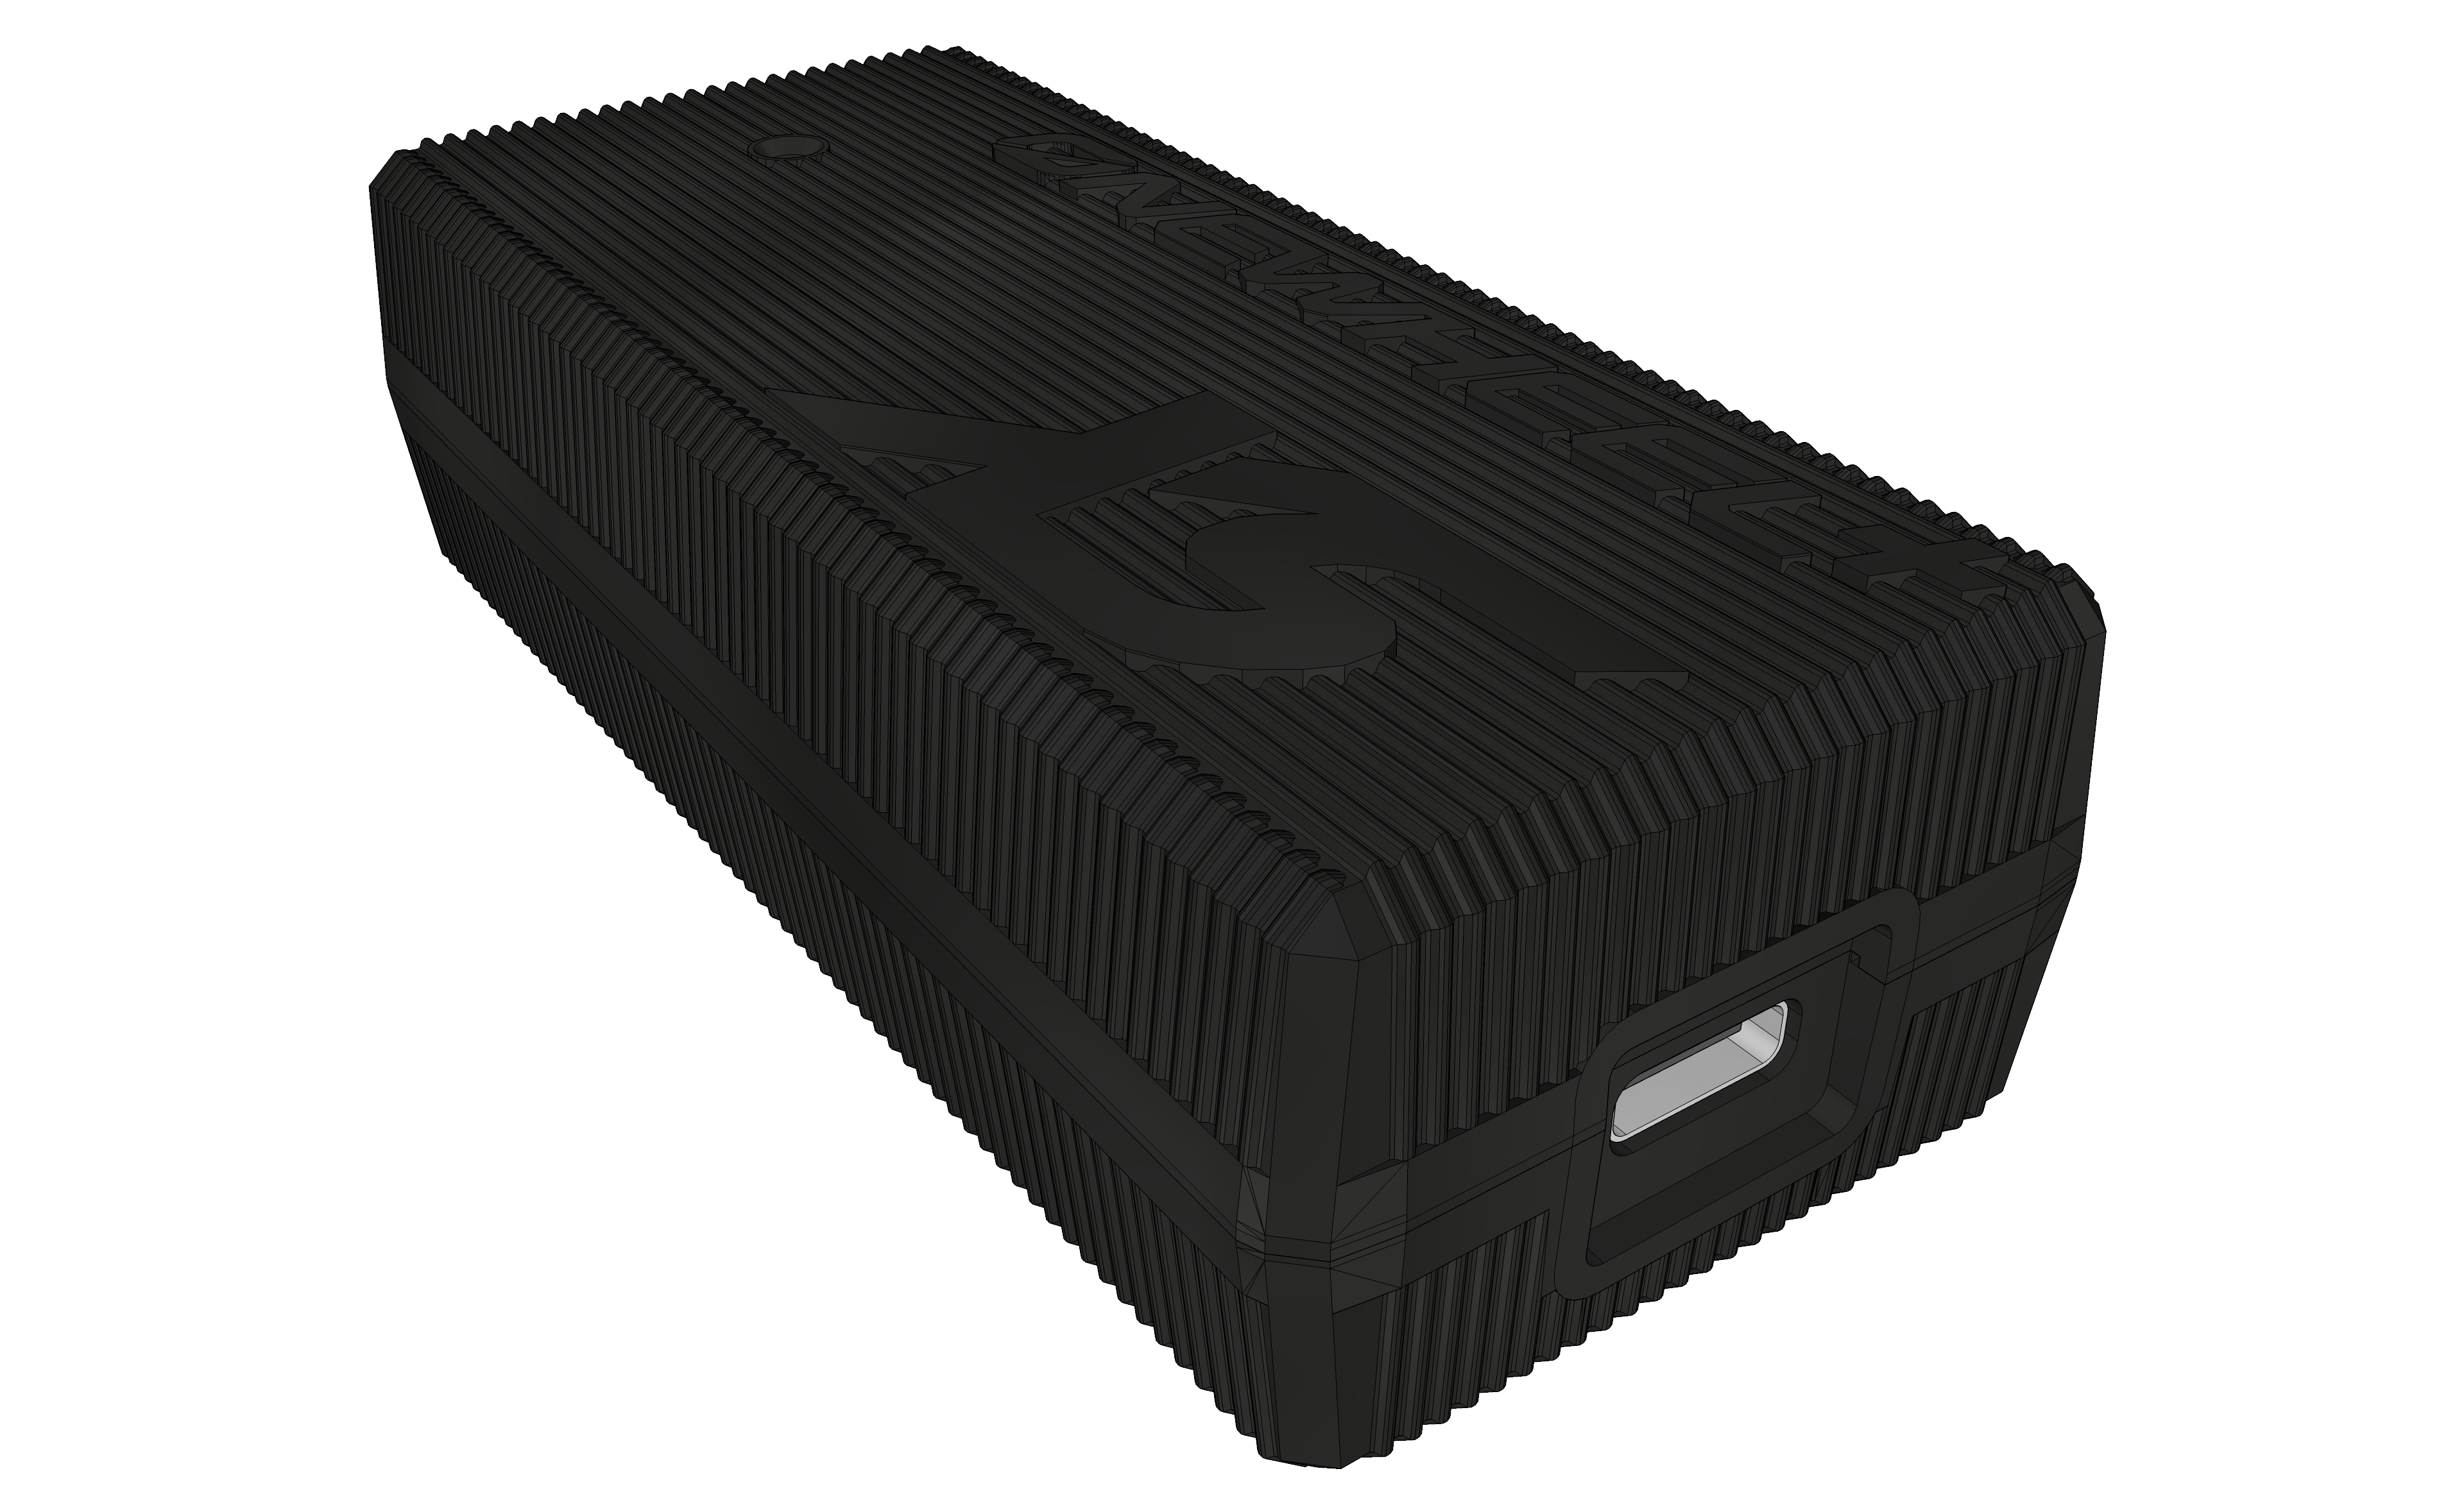
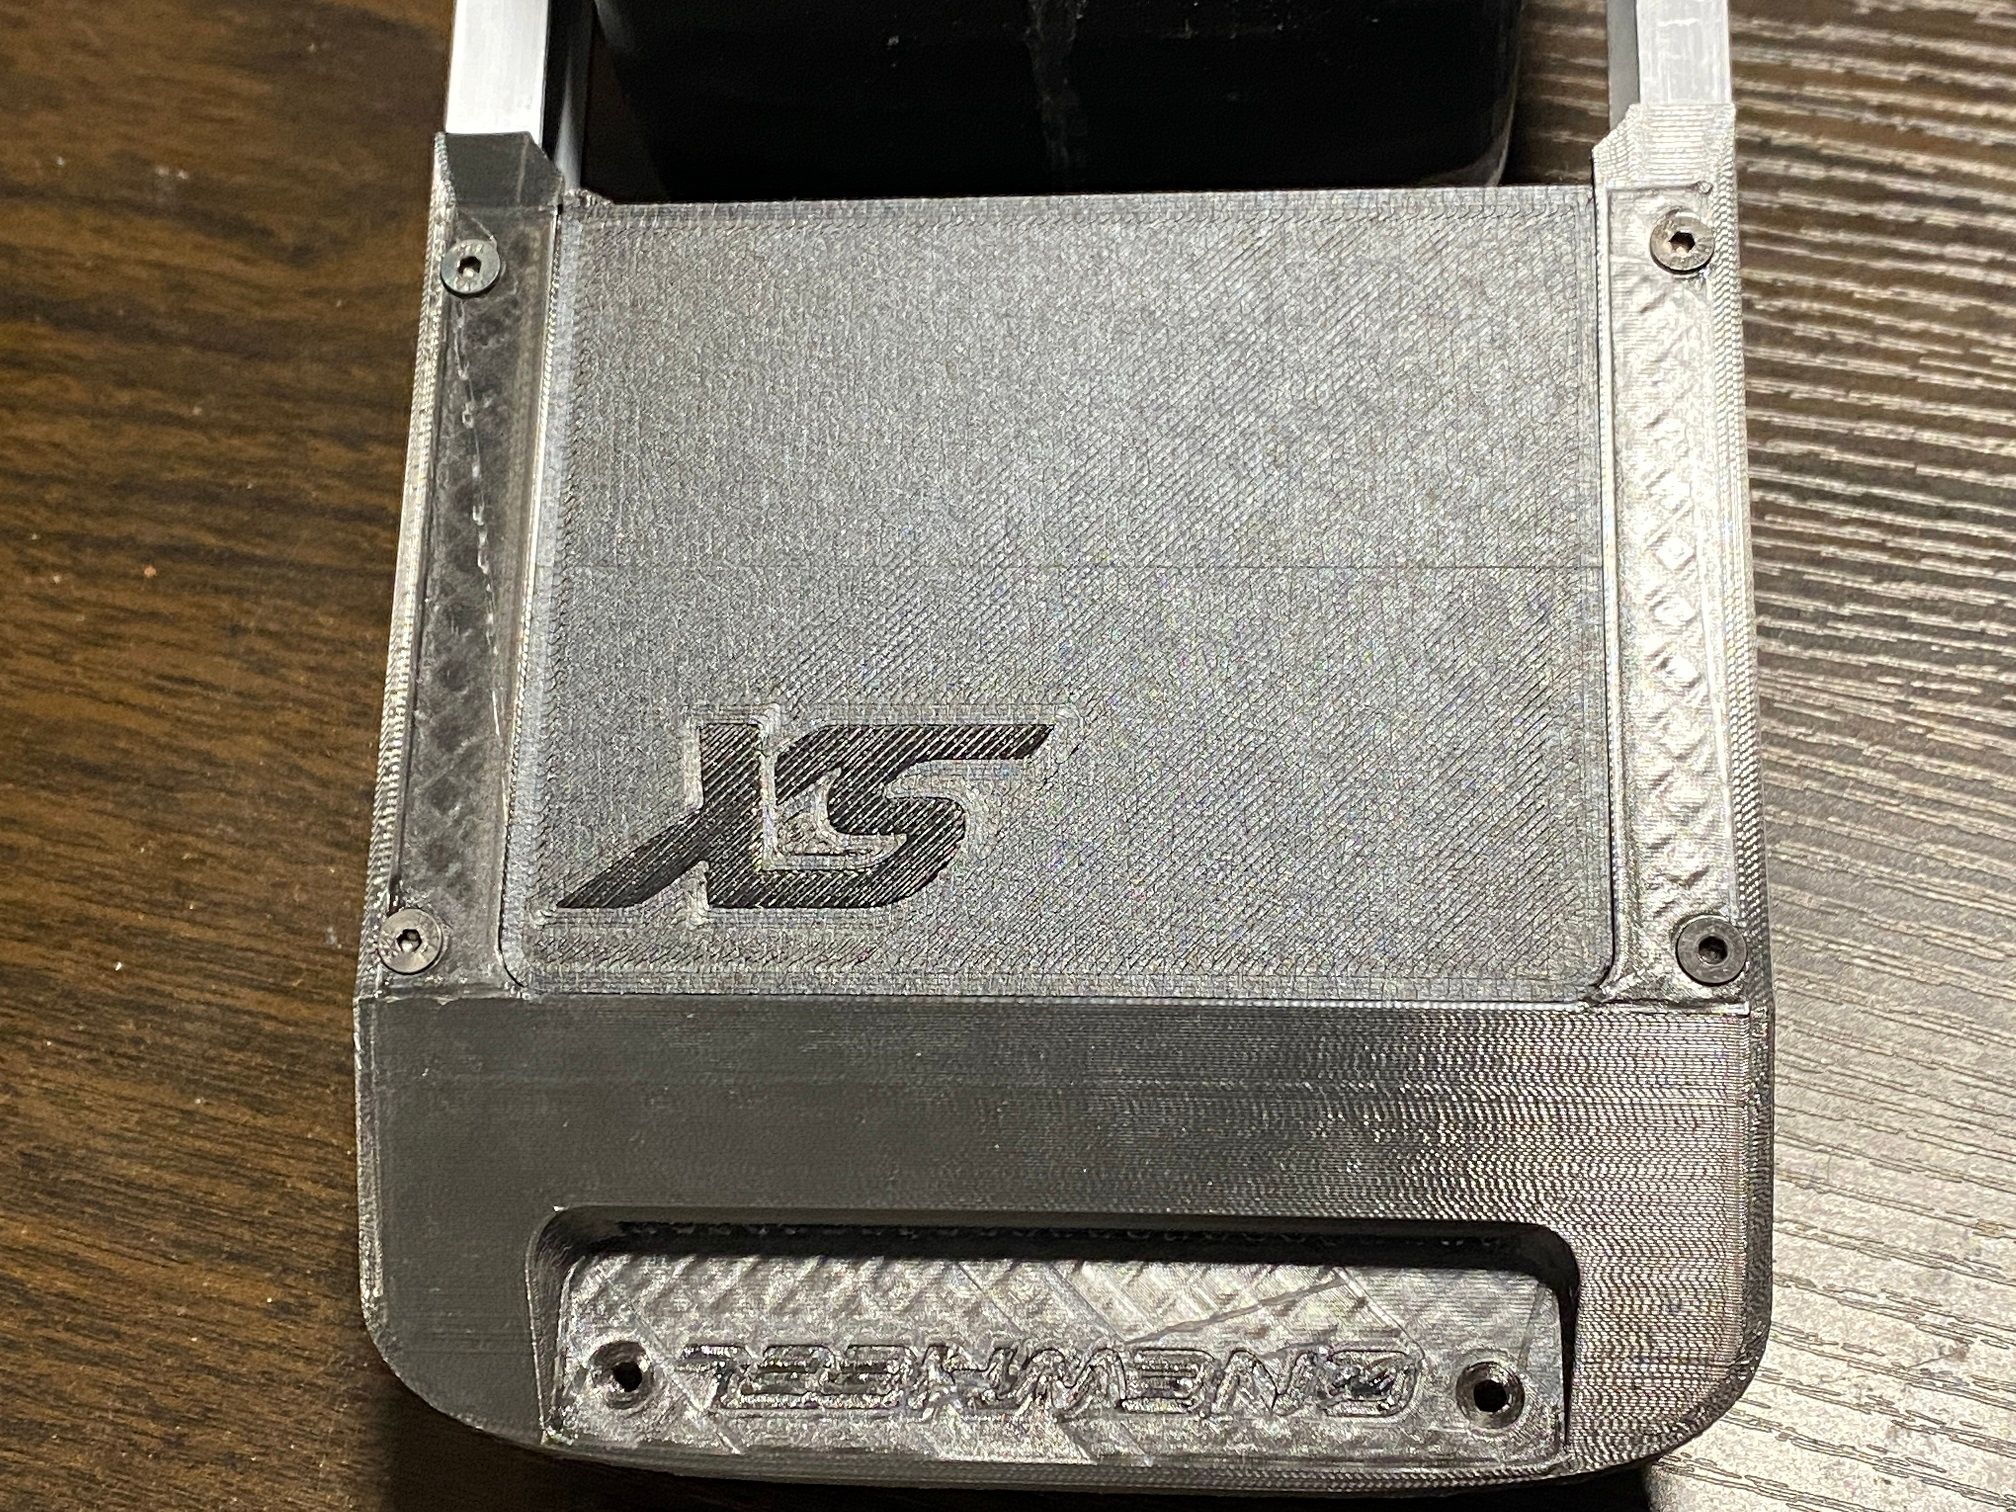
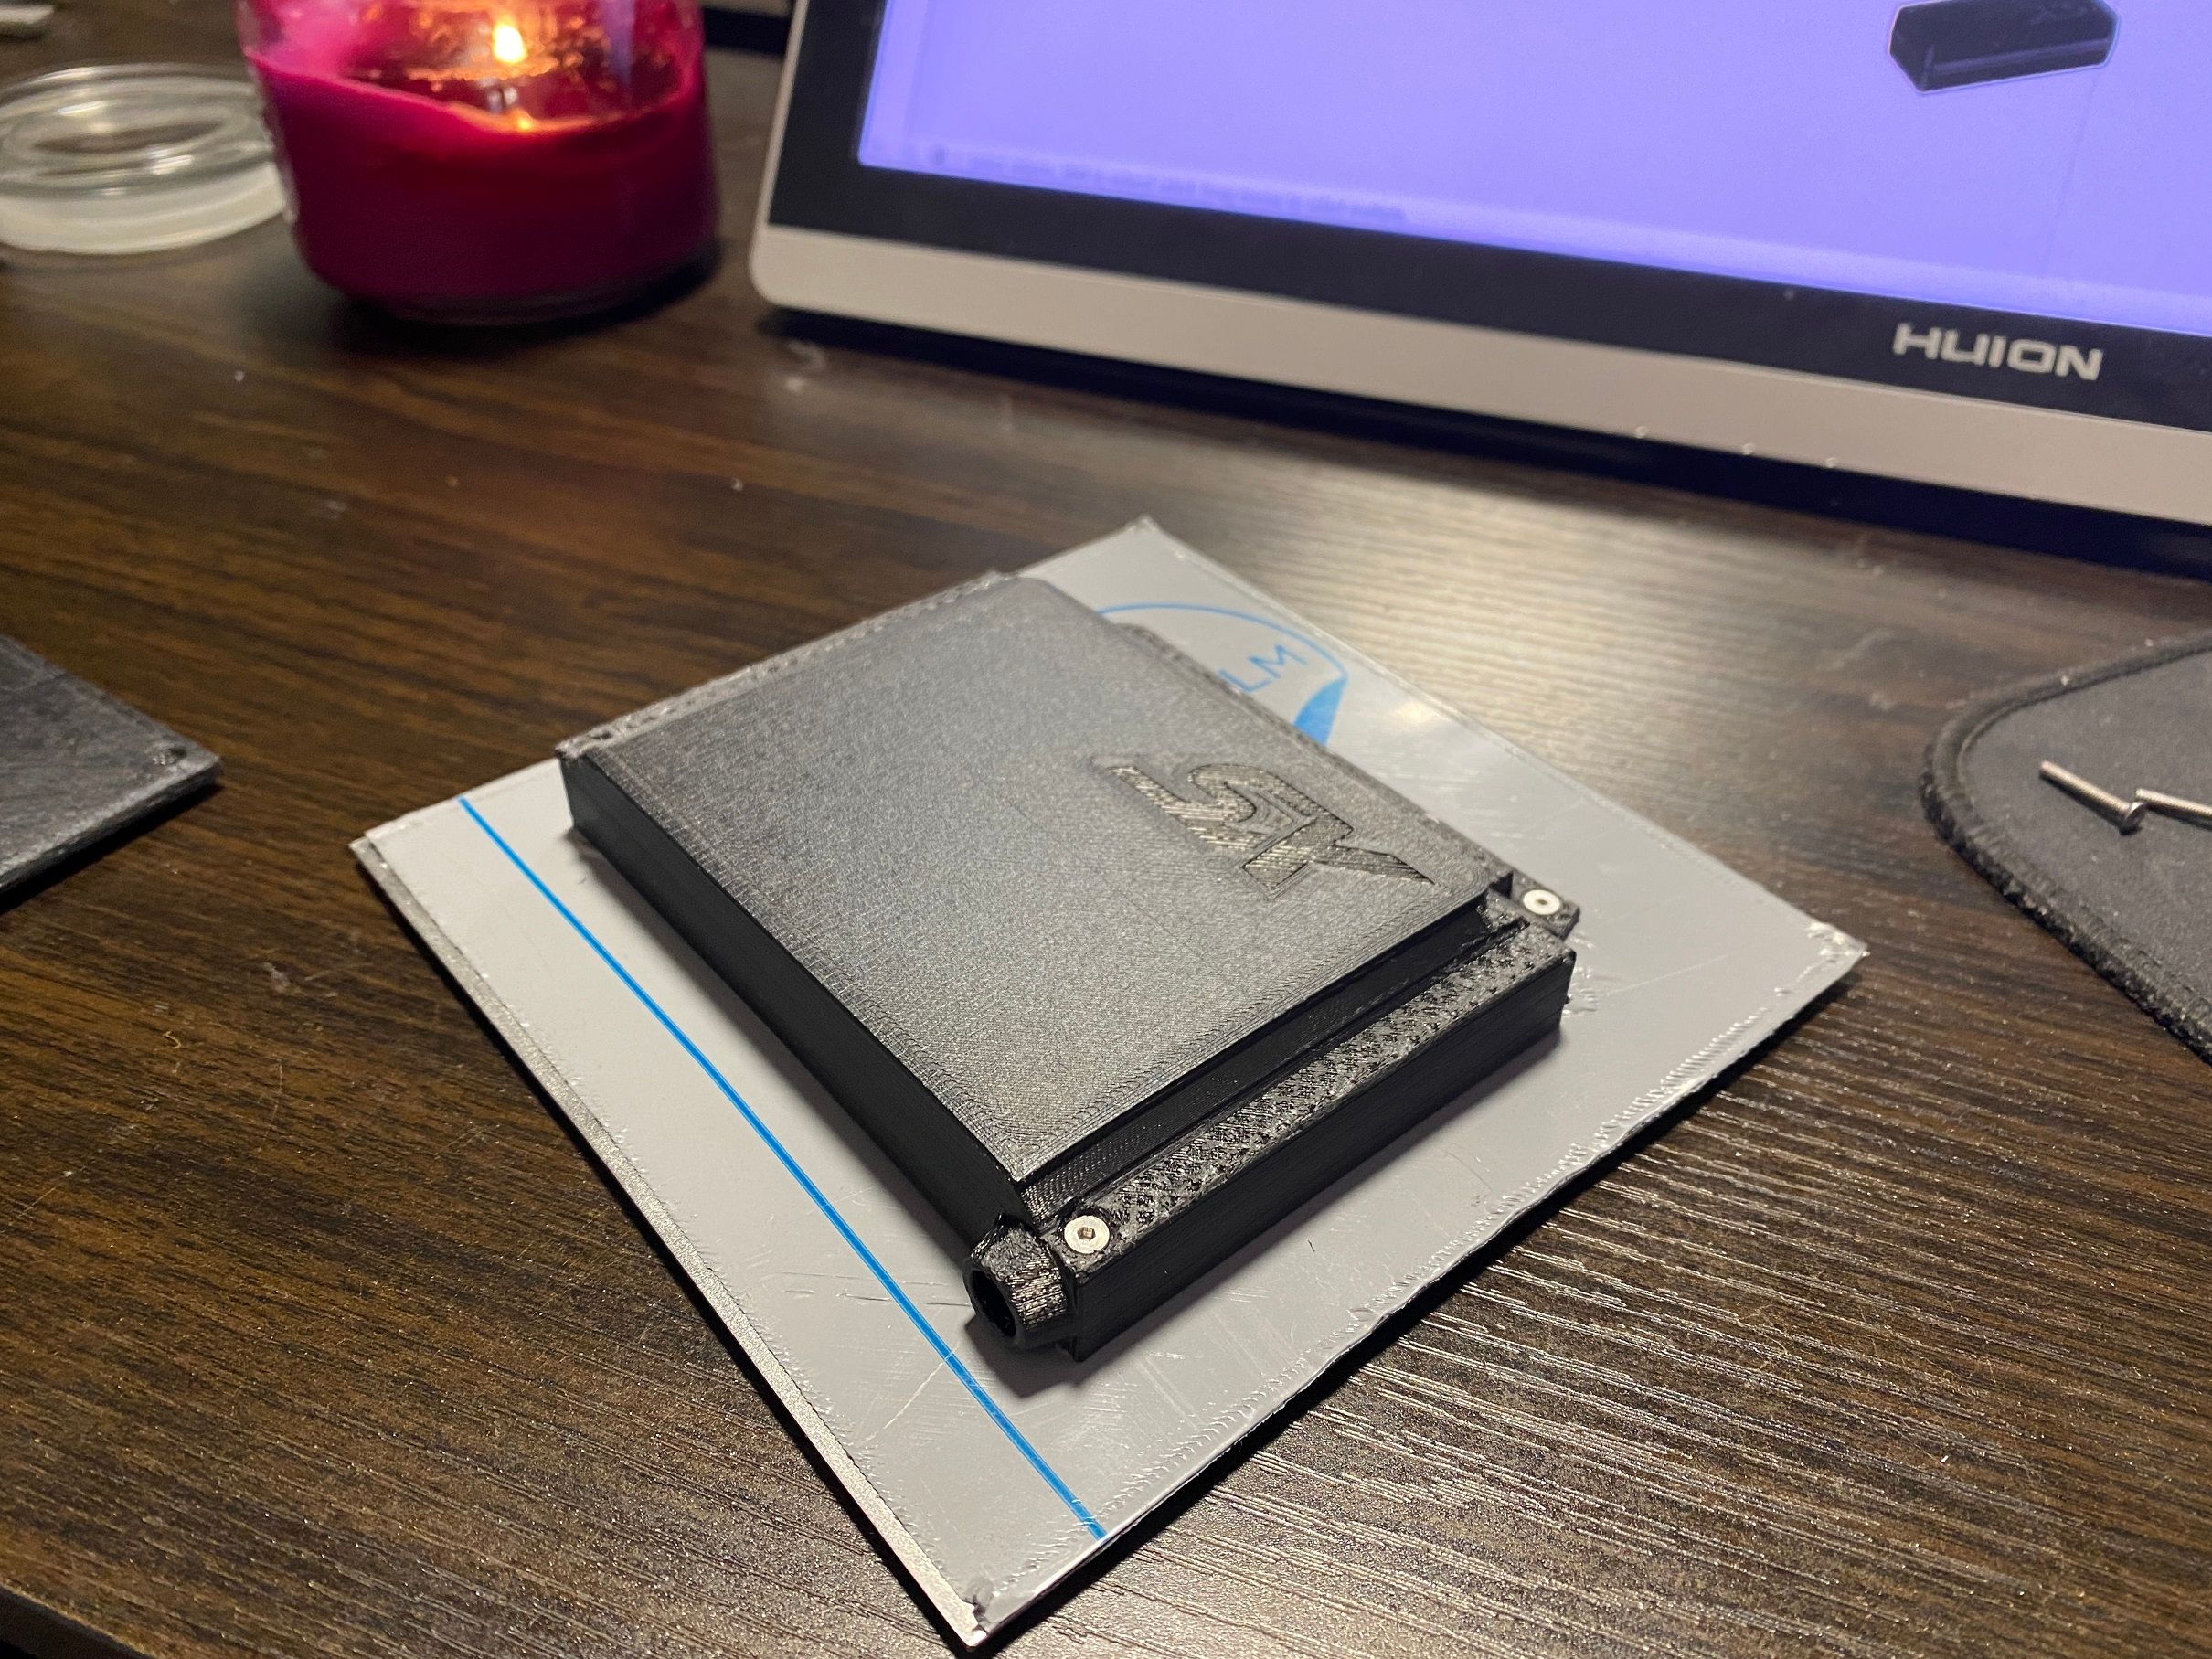
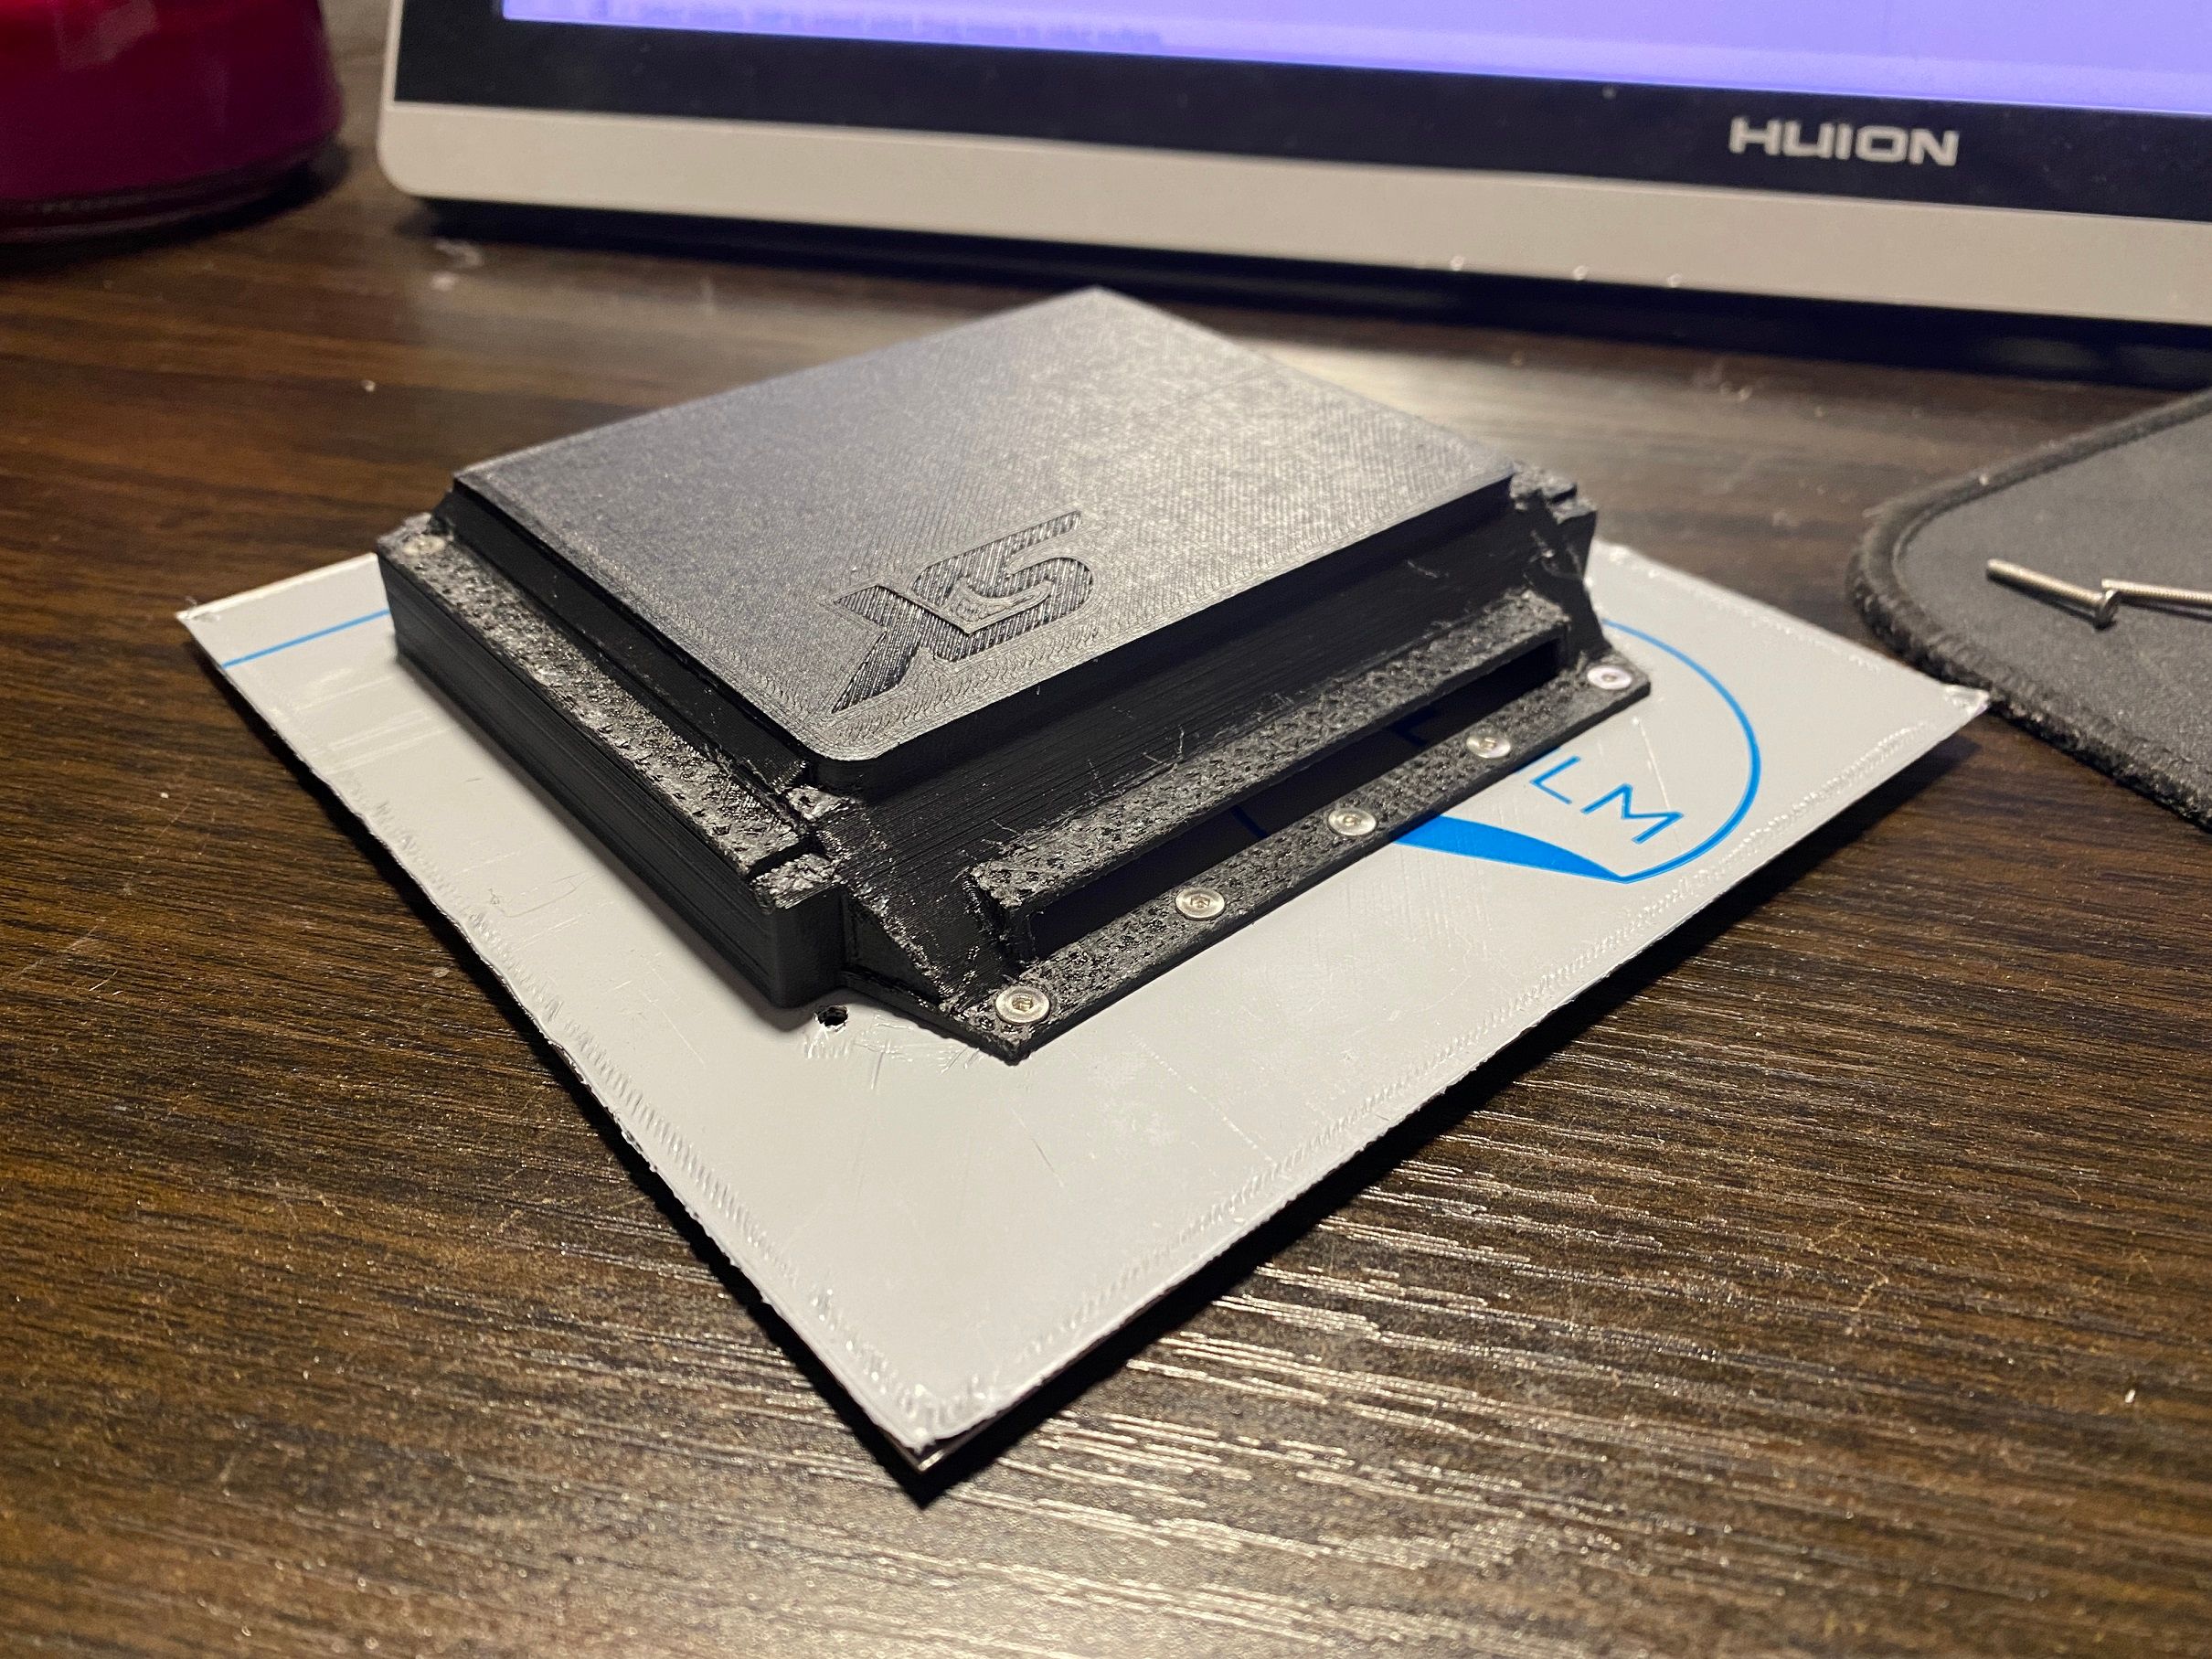
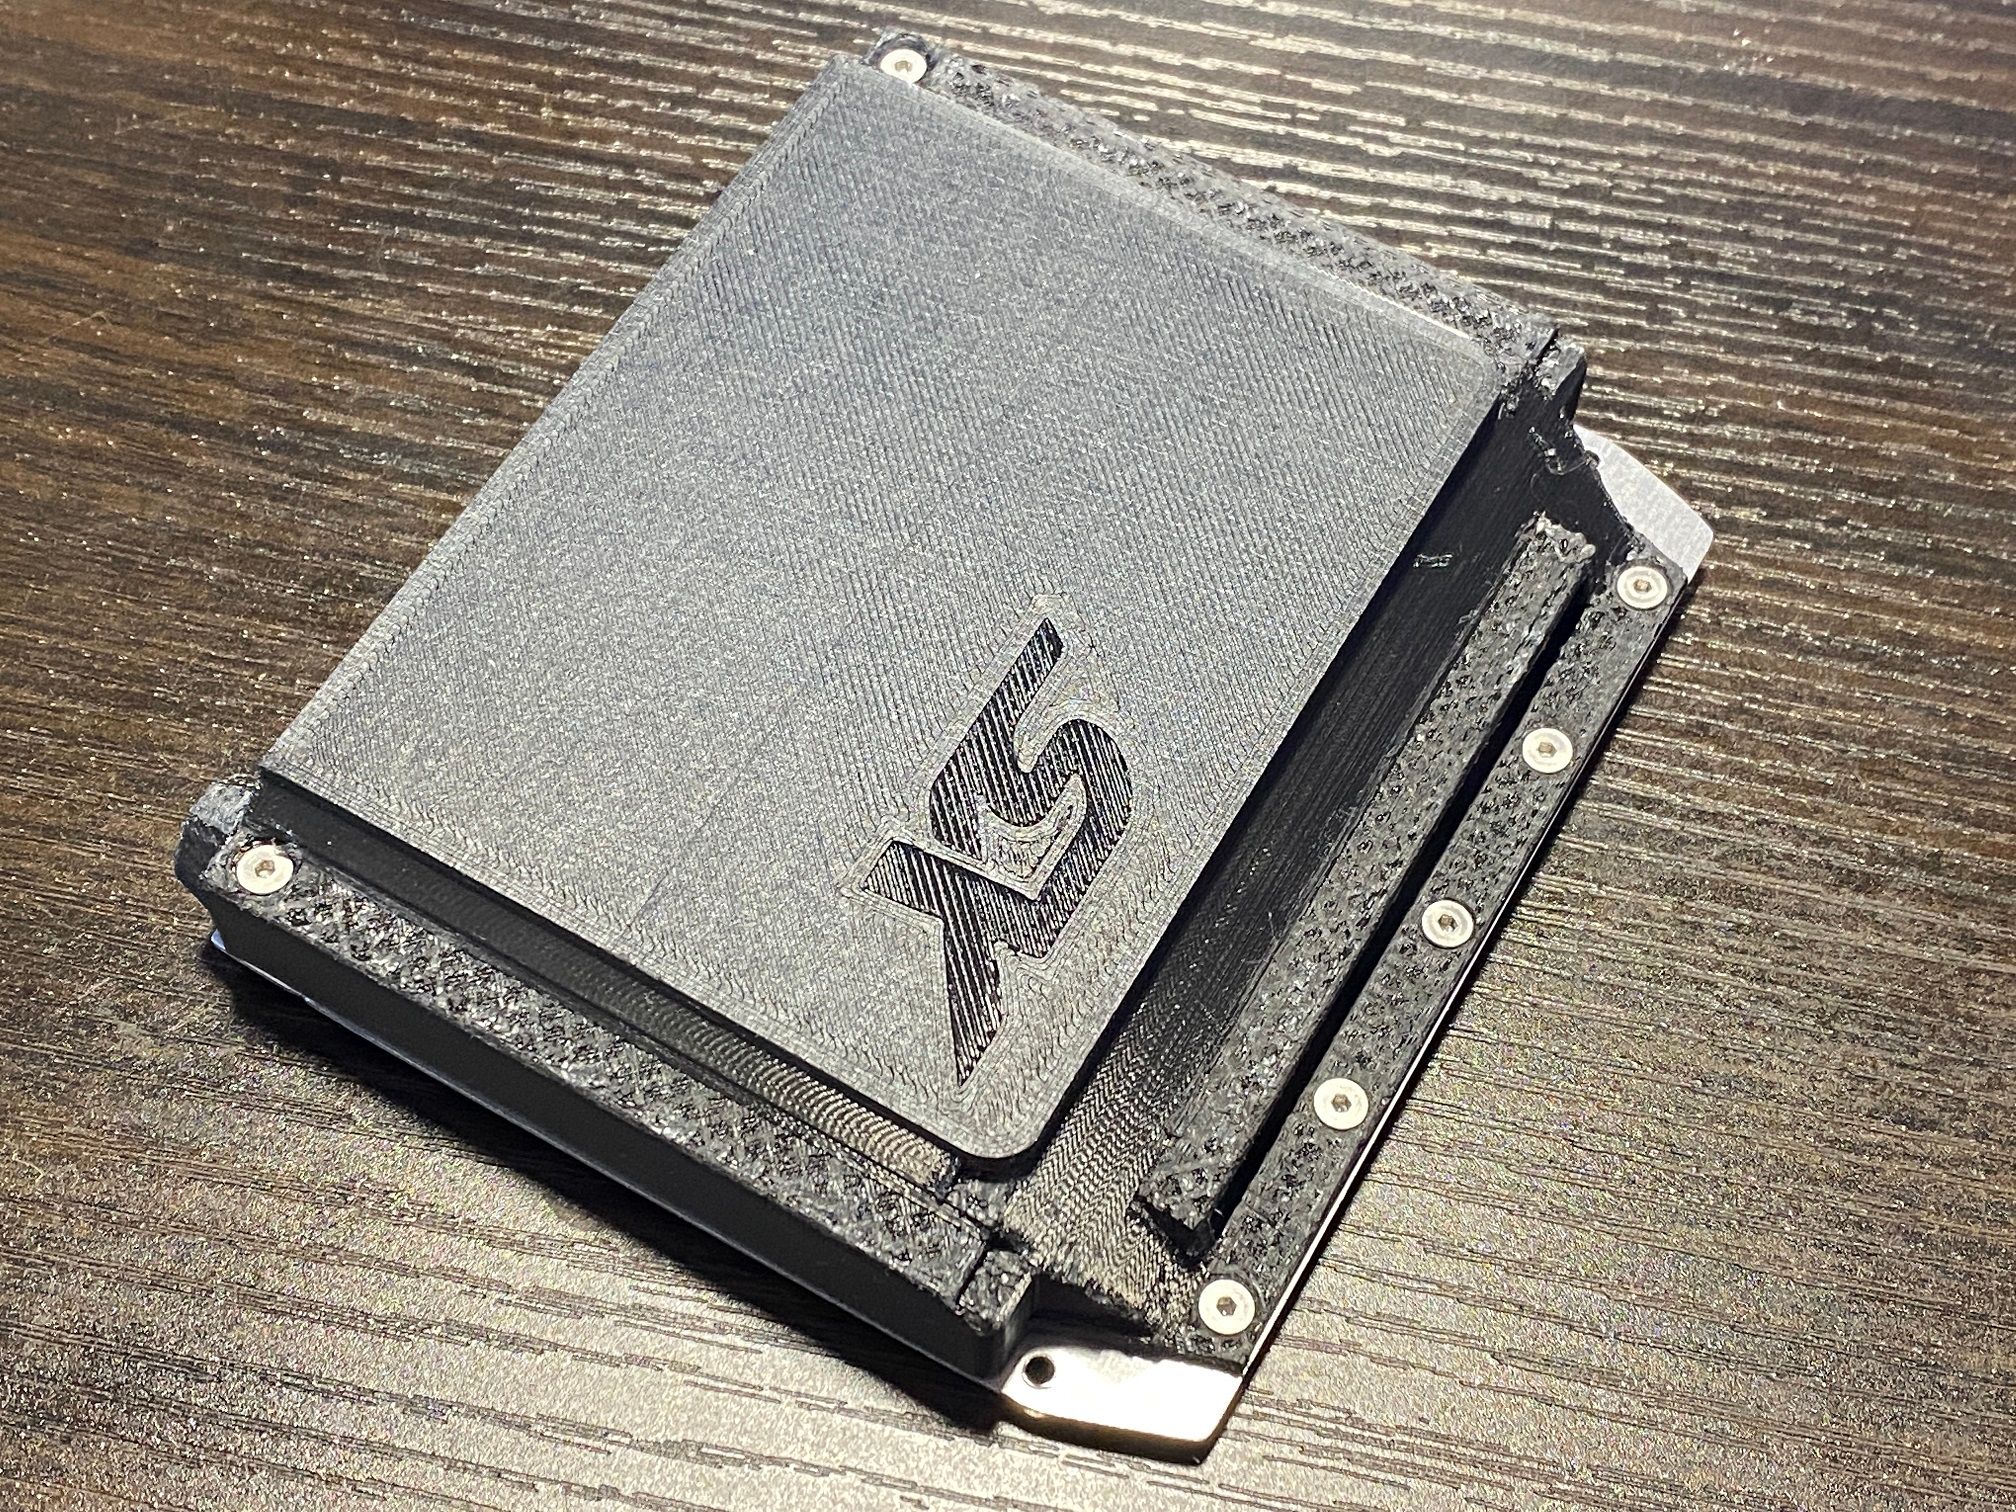
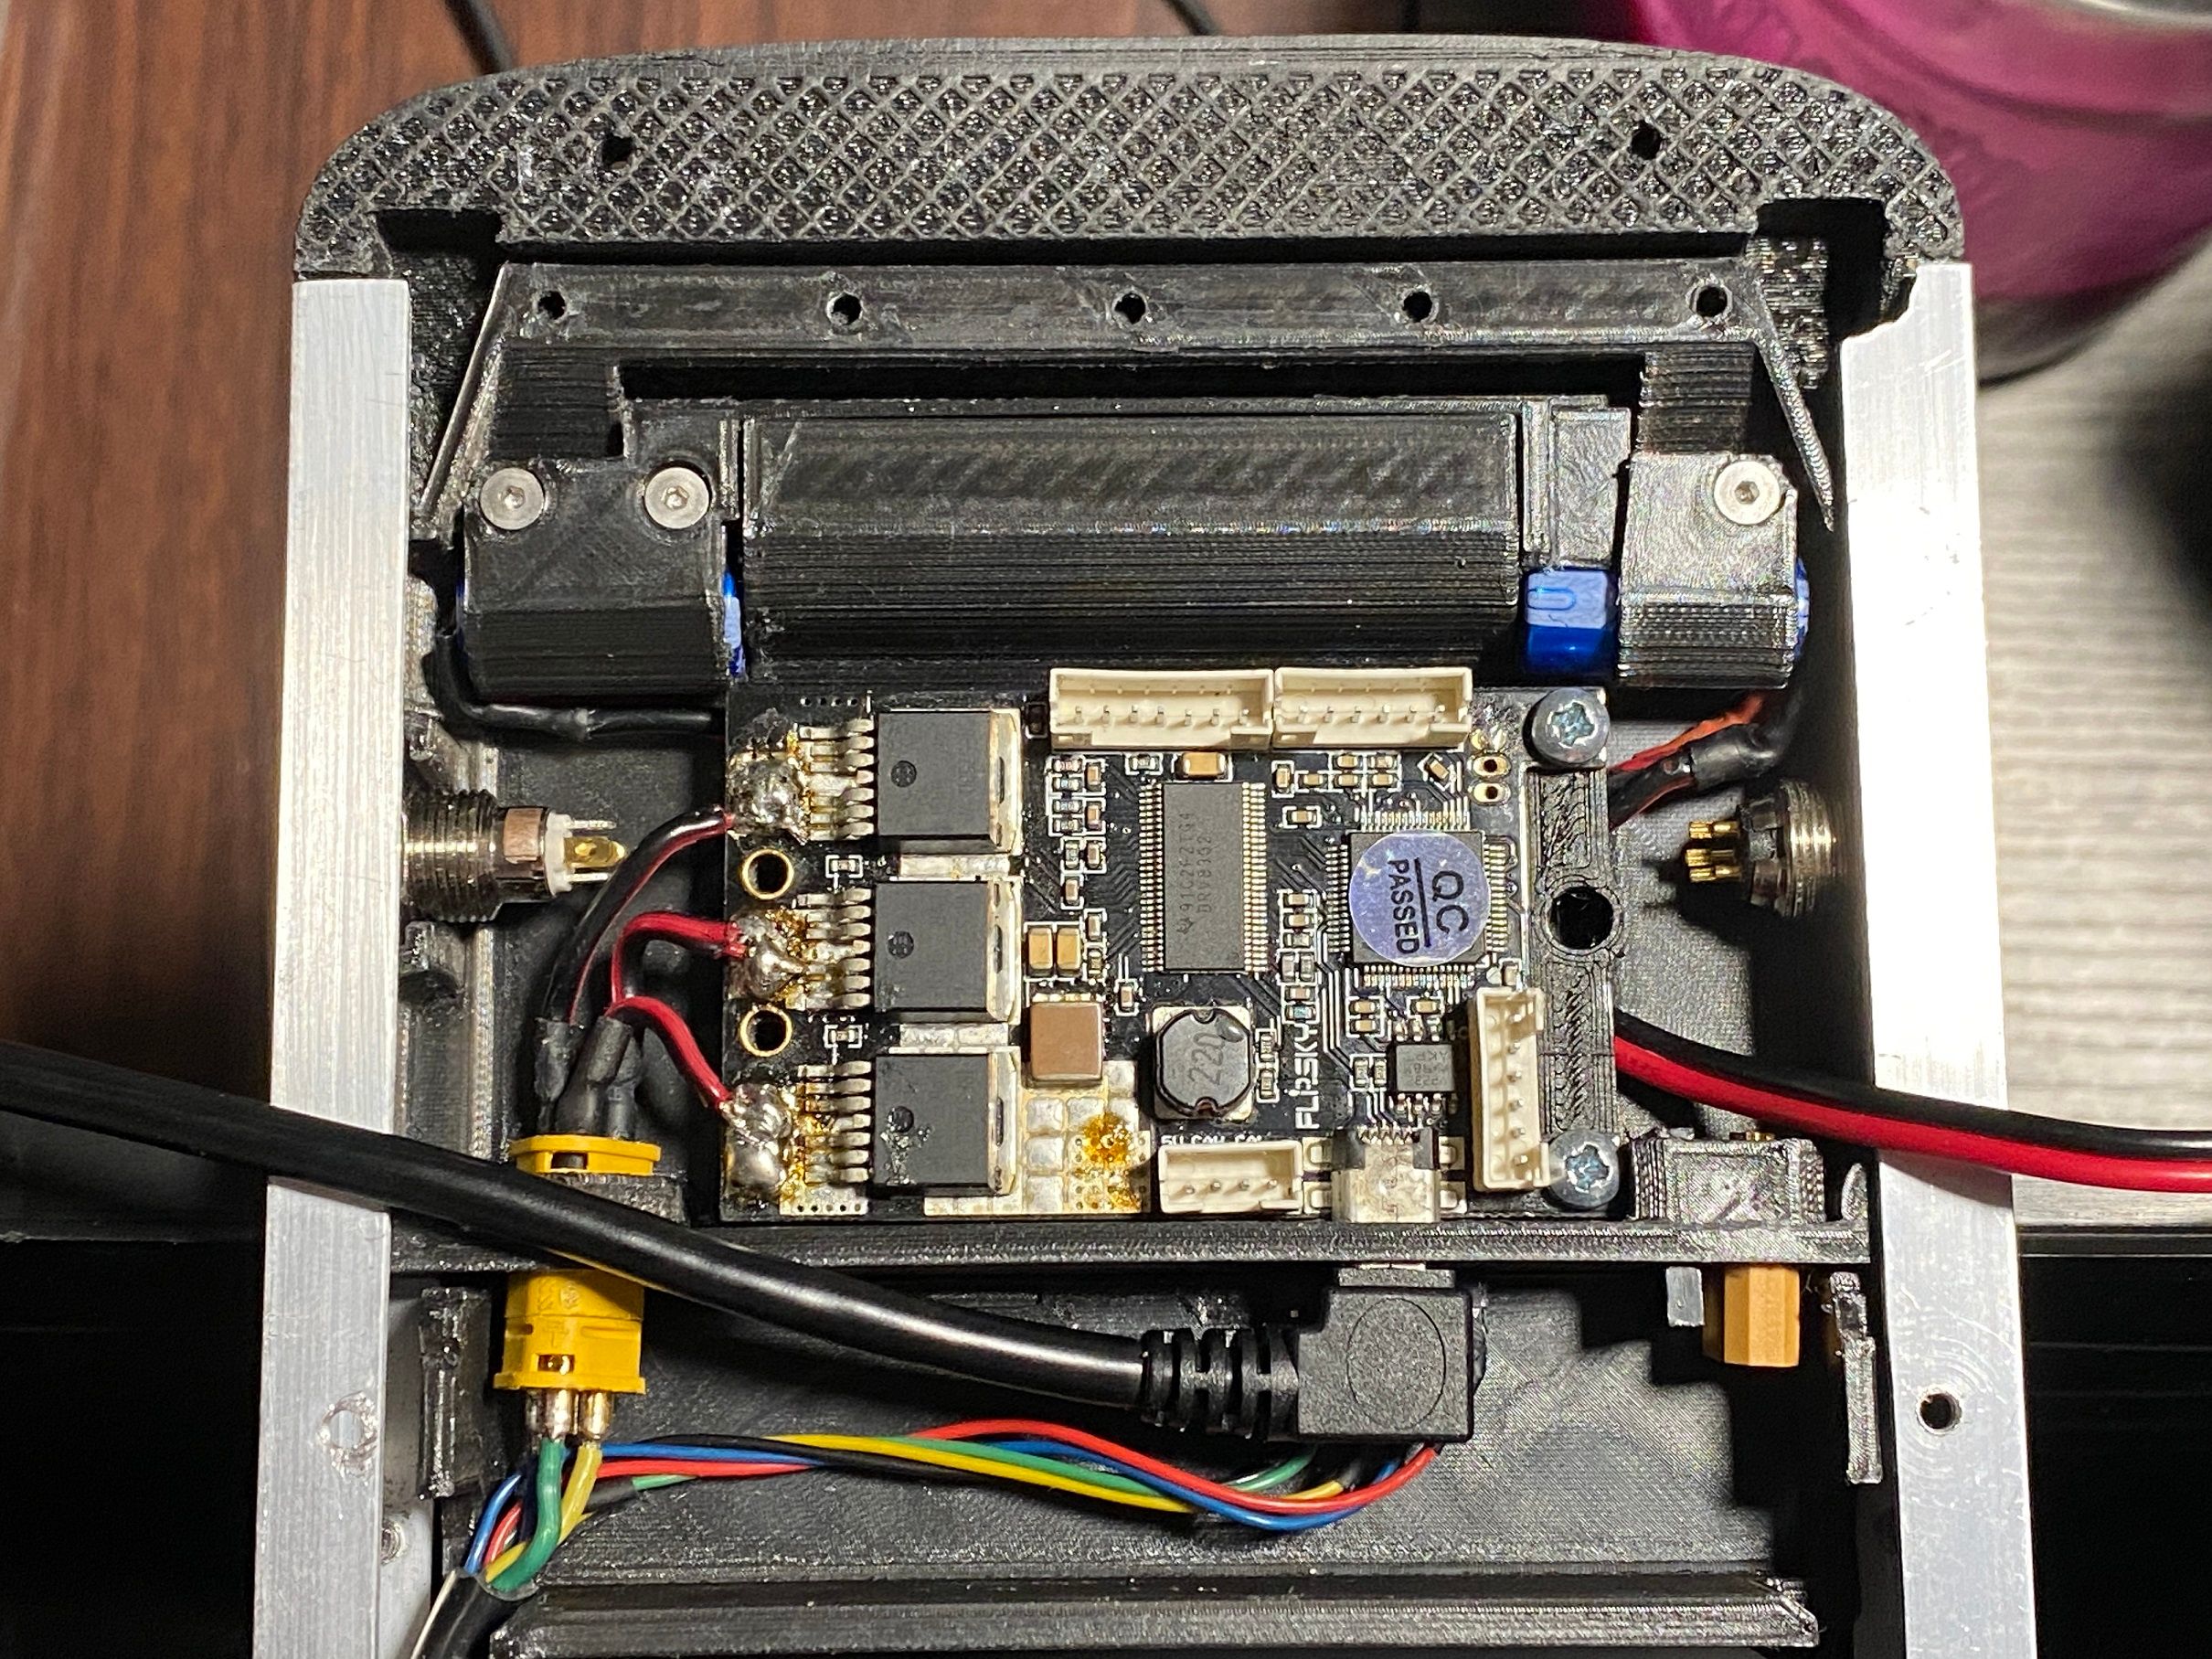
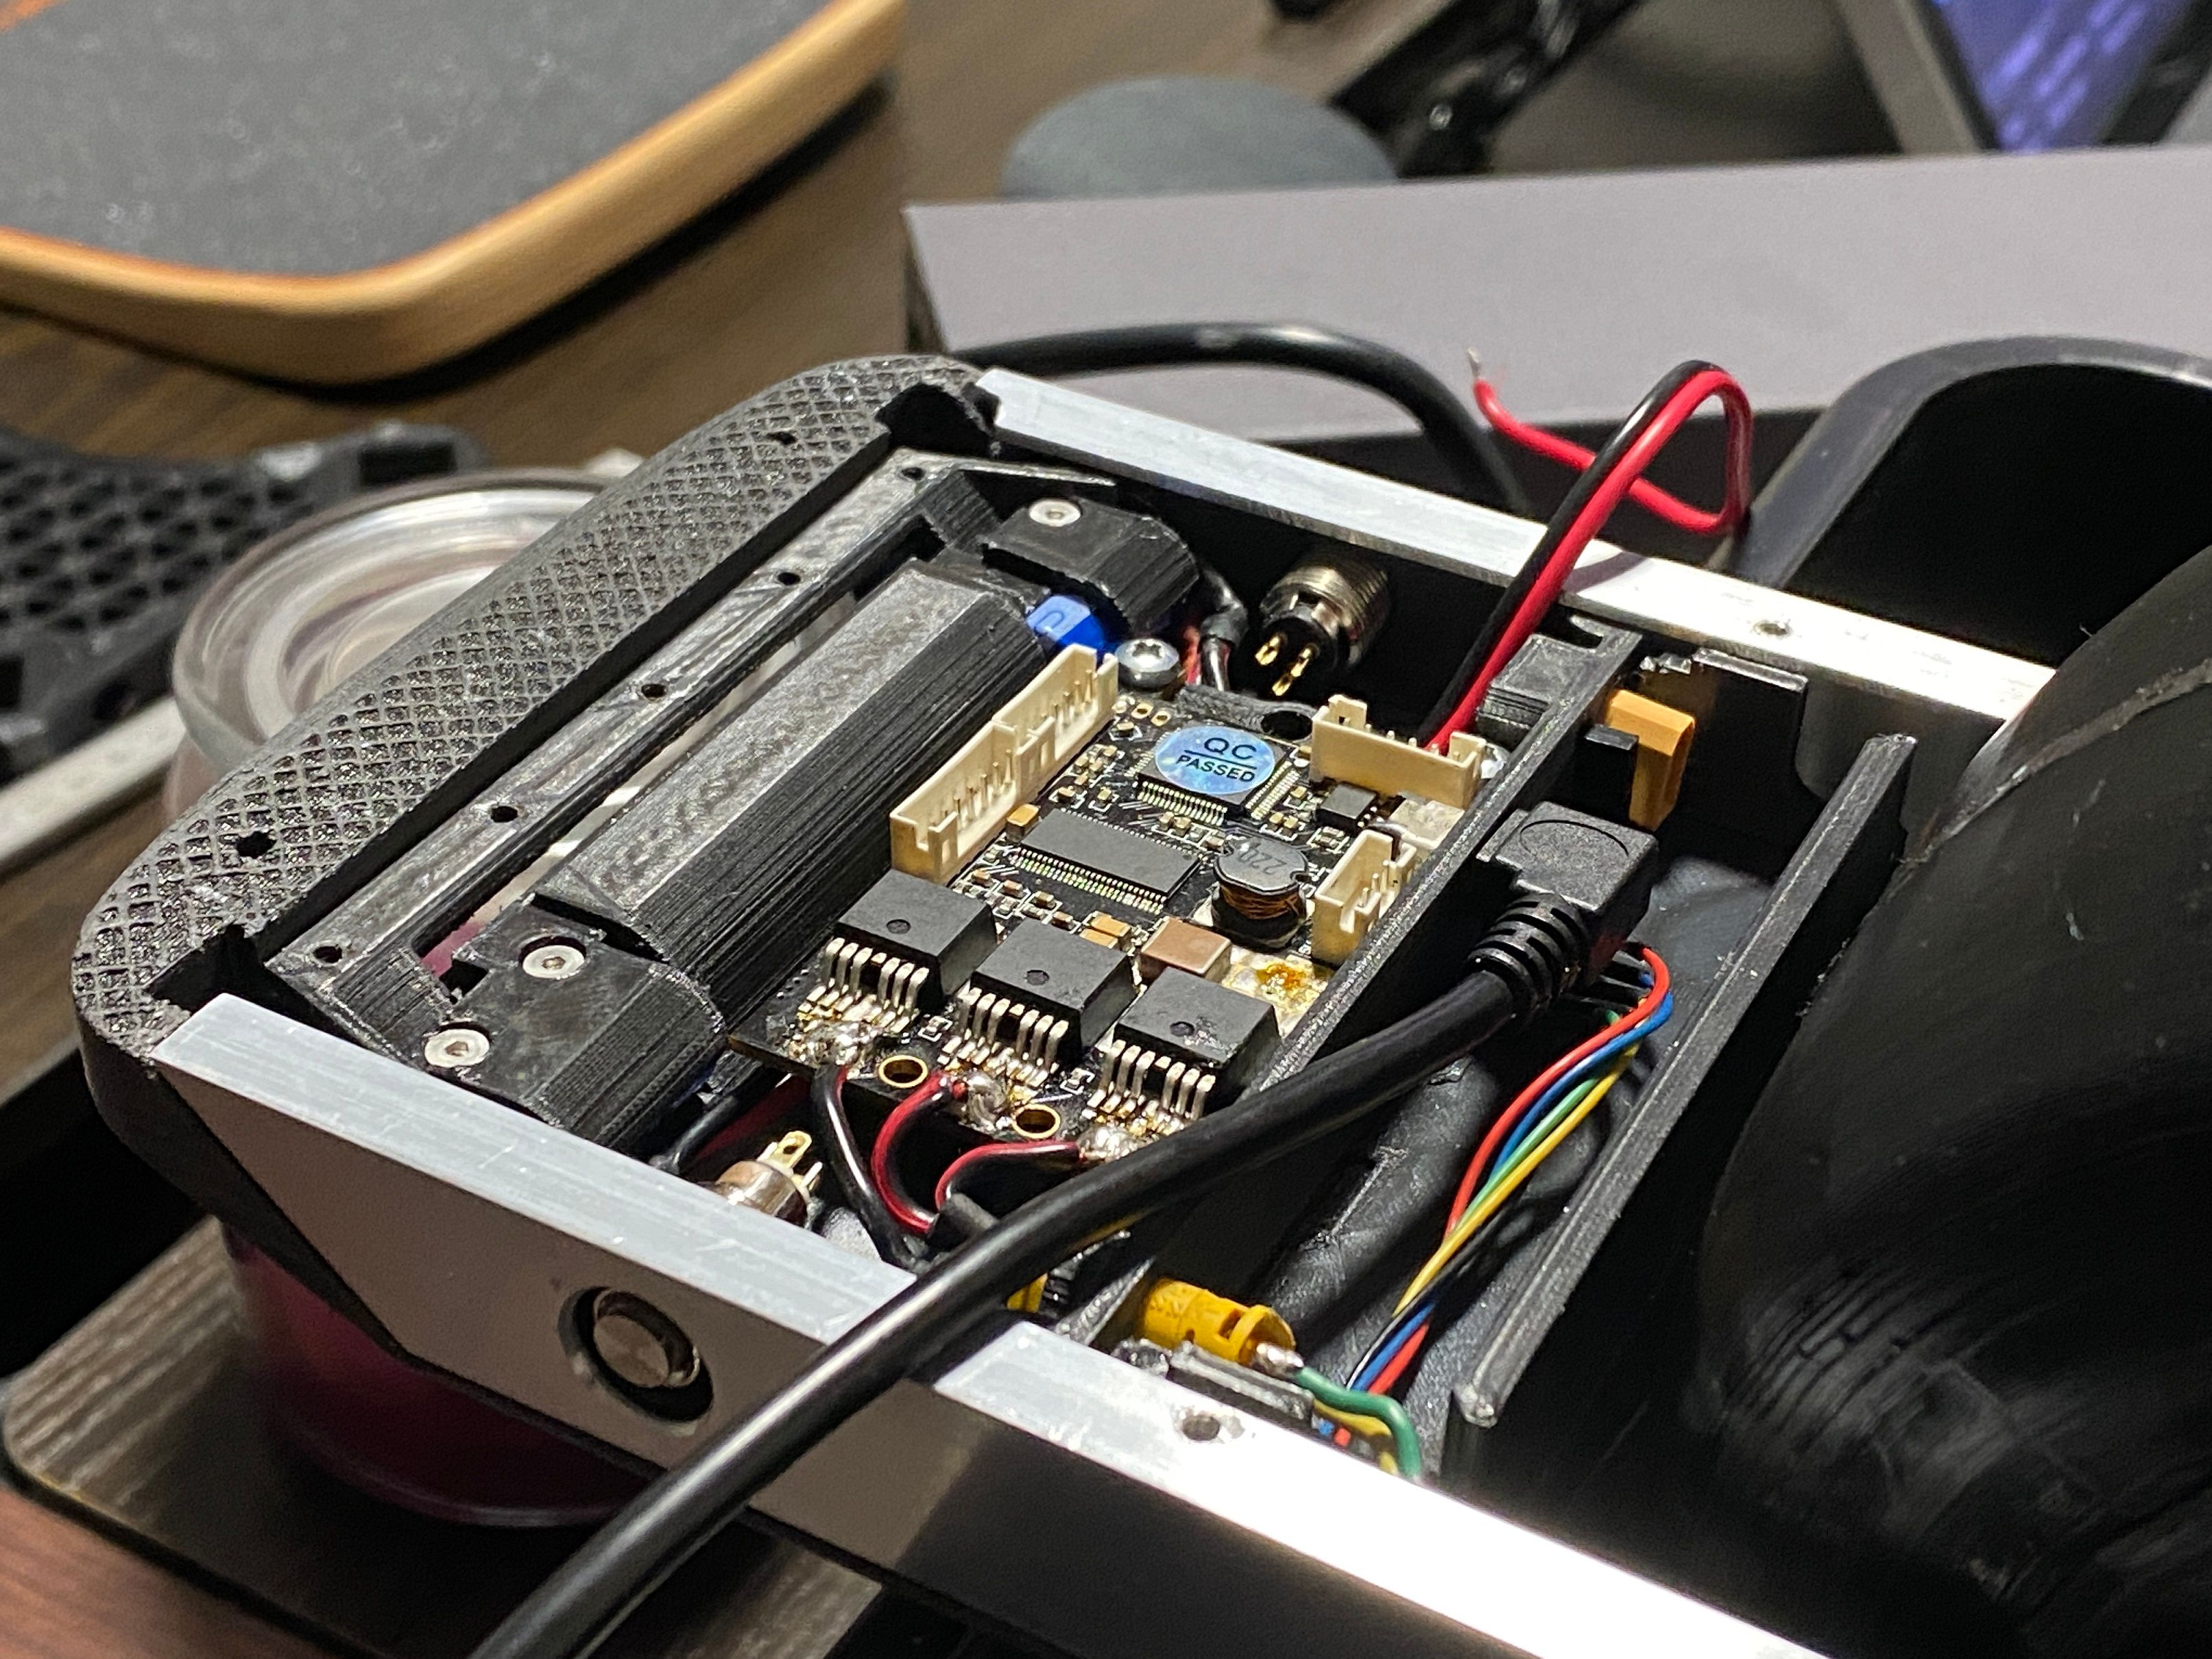
Managed to cut the lid of the controller and drill the holes out, genuinely happy with how it's beginning to look.
Redid the controller housing with 0.1mm layer height so it's capturing a lot of the minor details I needed for it to work. Sadly I left support on for the logo which I couldn't remove so I've left it there assuming this won't be the final version.
Tapped the holes in the lid, will probably have to extend the material there like on the stock one since there isn't enough for the threads to last many uses.
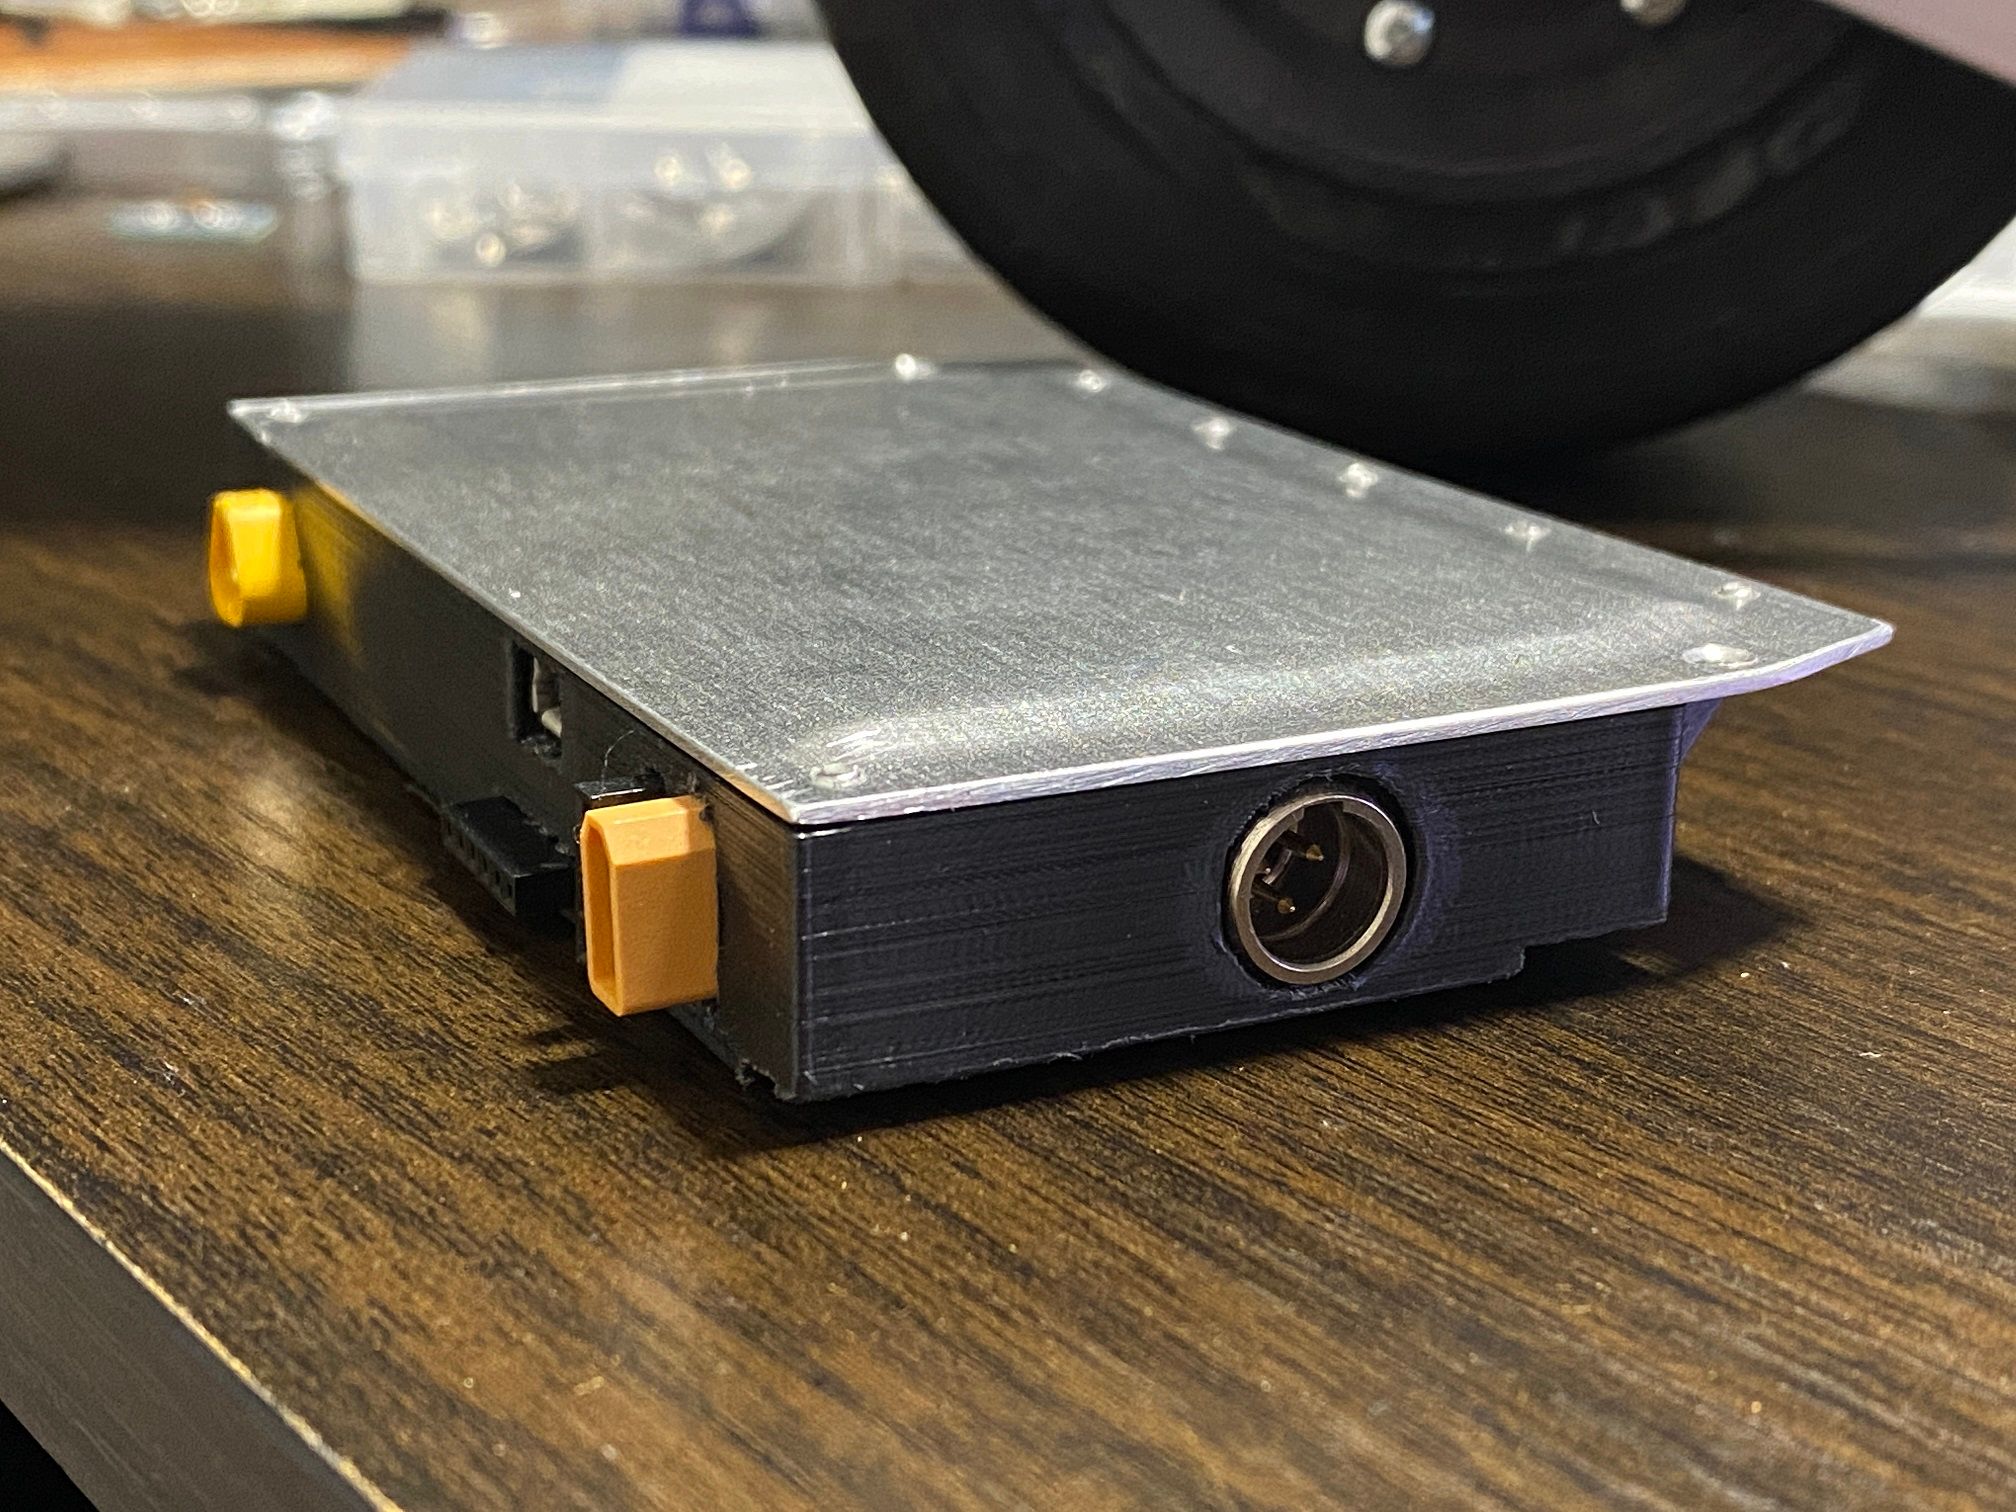
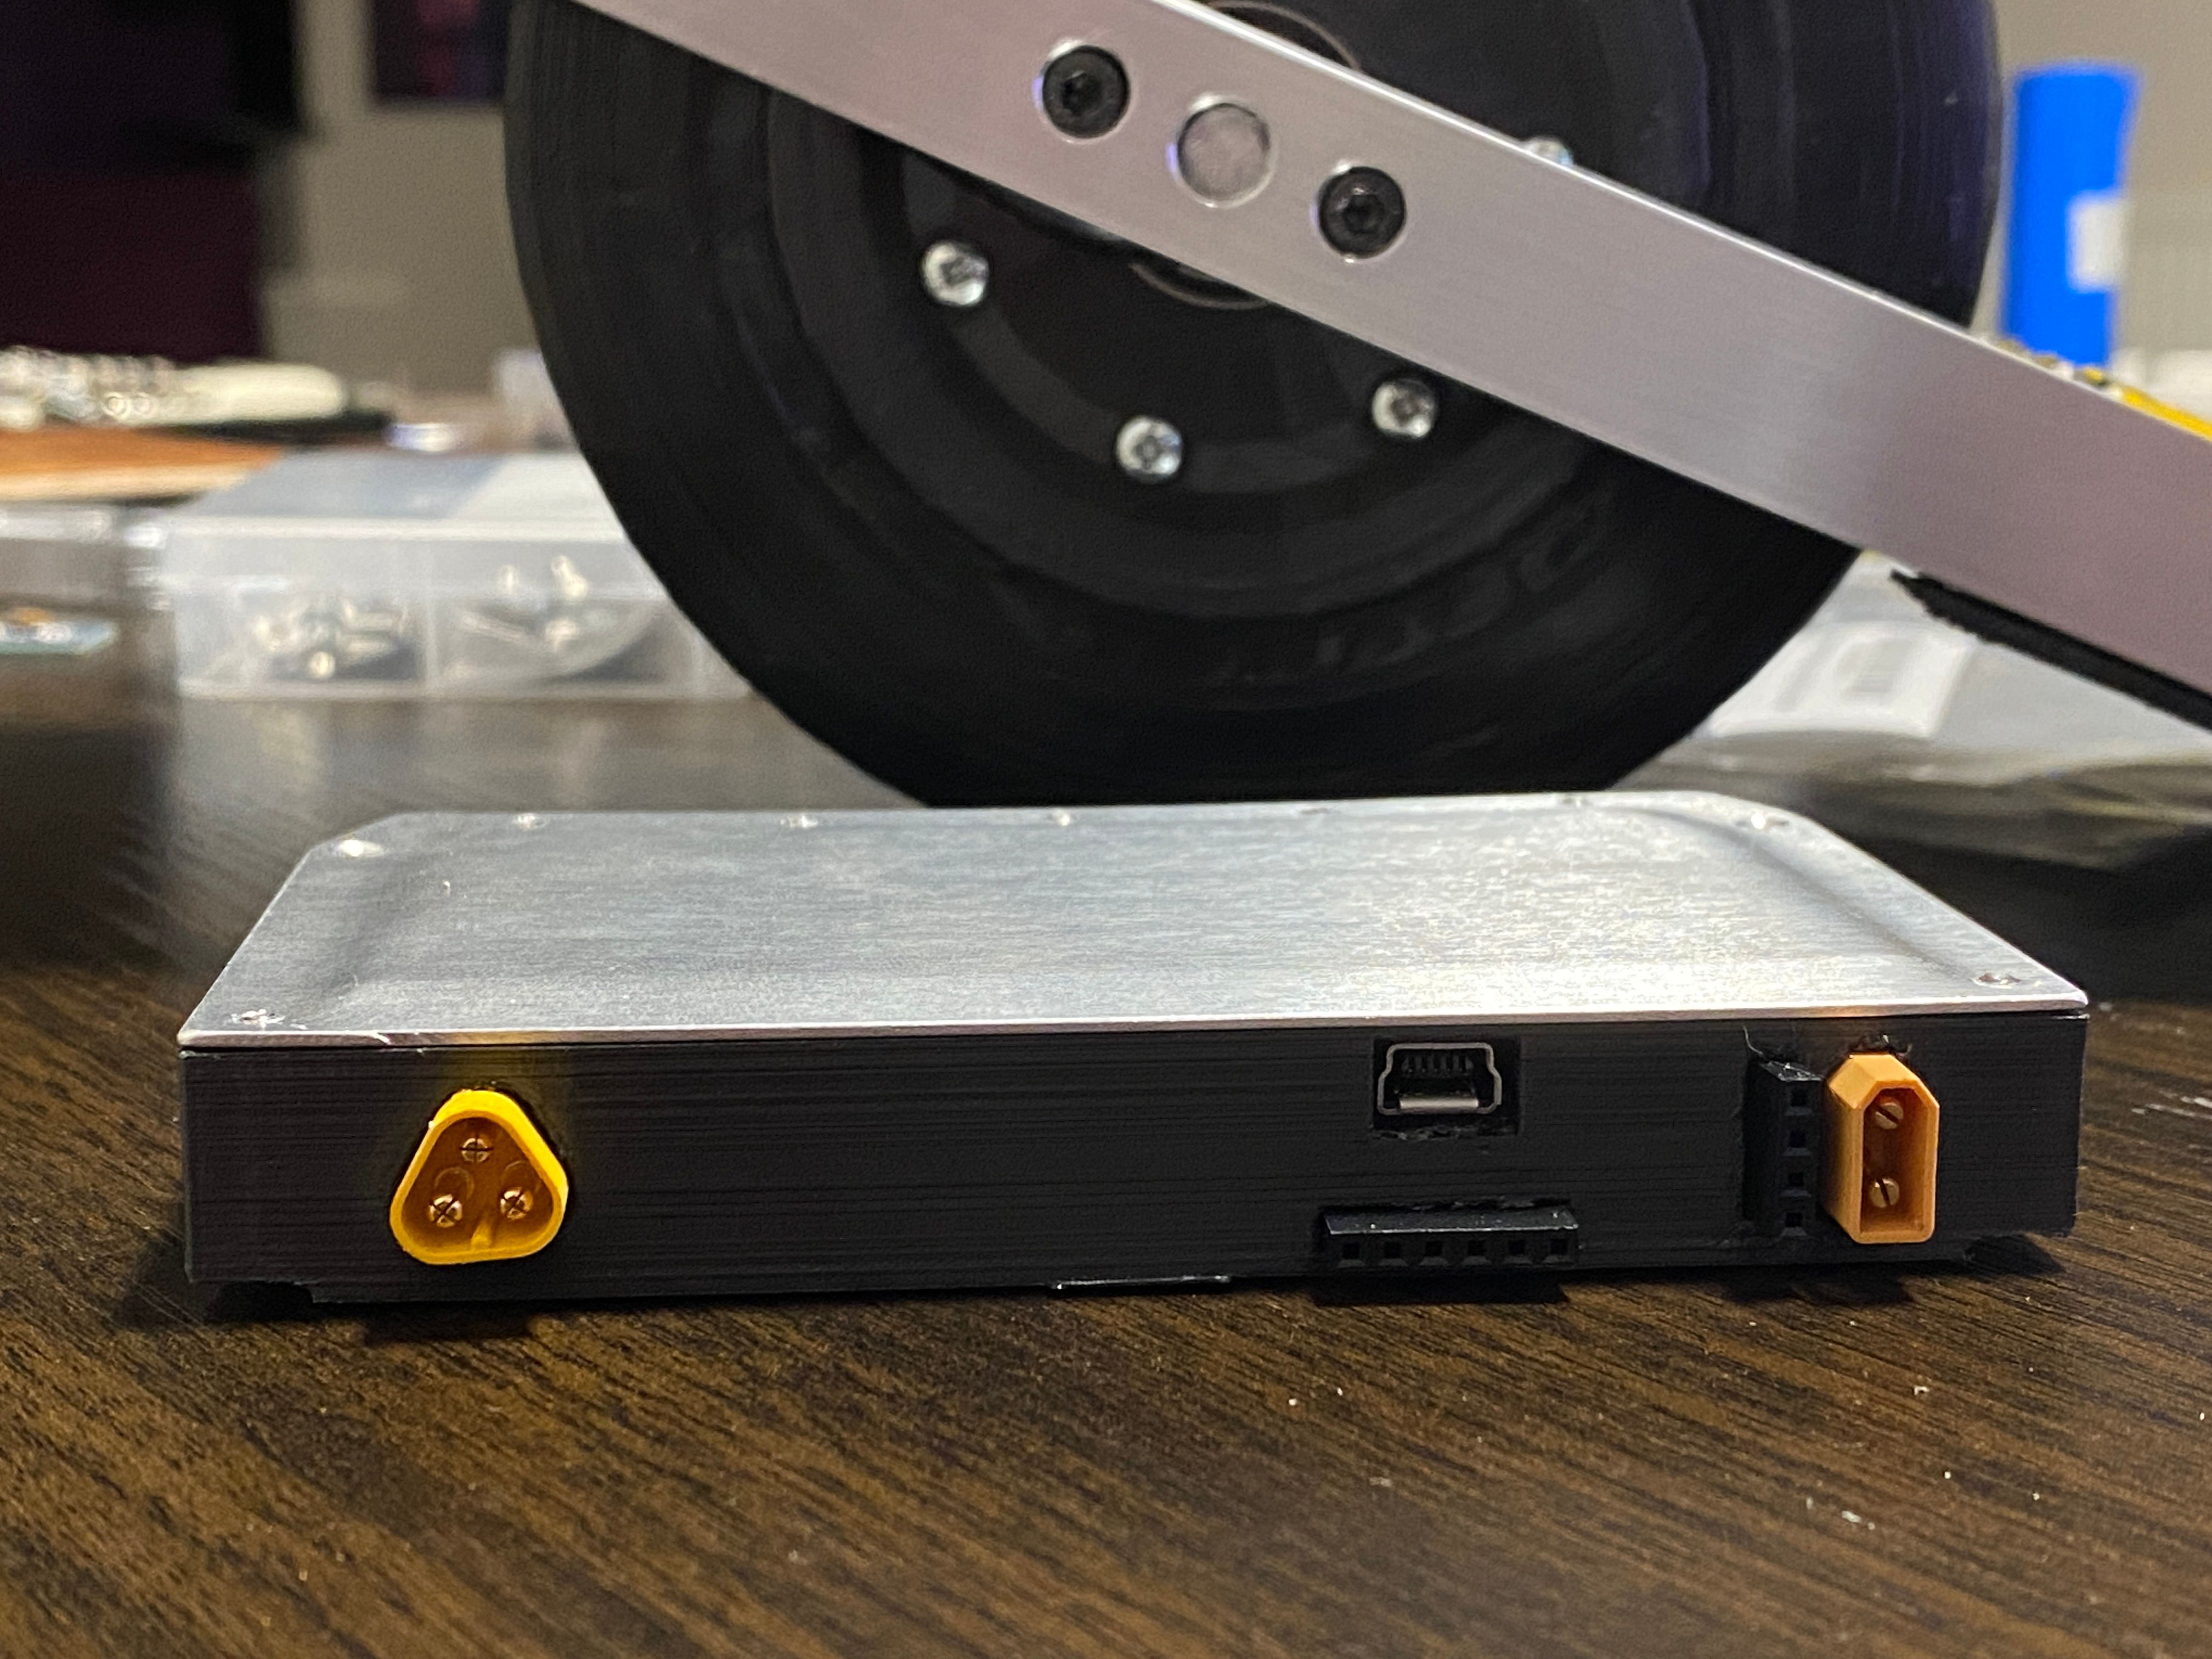
Inside I moved the battery voltage rail below the VESC because pins were getting too close to the lid for my liking. Fortunately I had room to have that run below between the handle bit and the PCB mount posts.

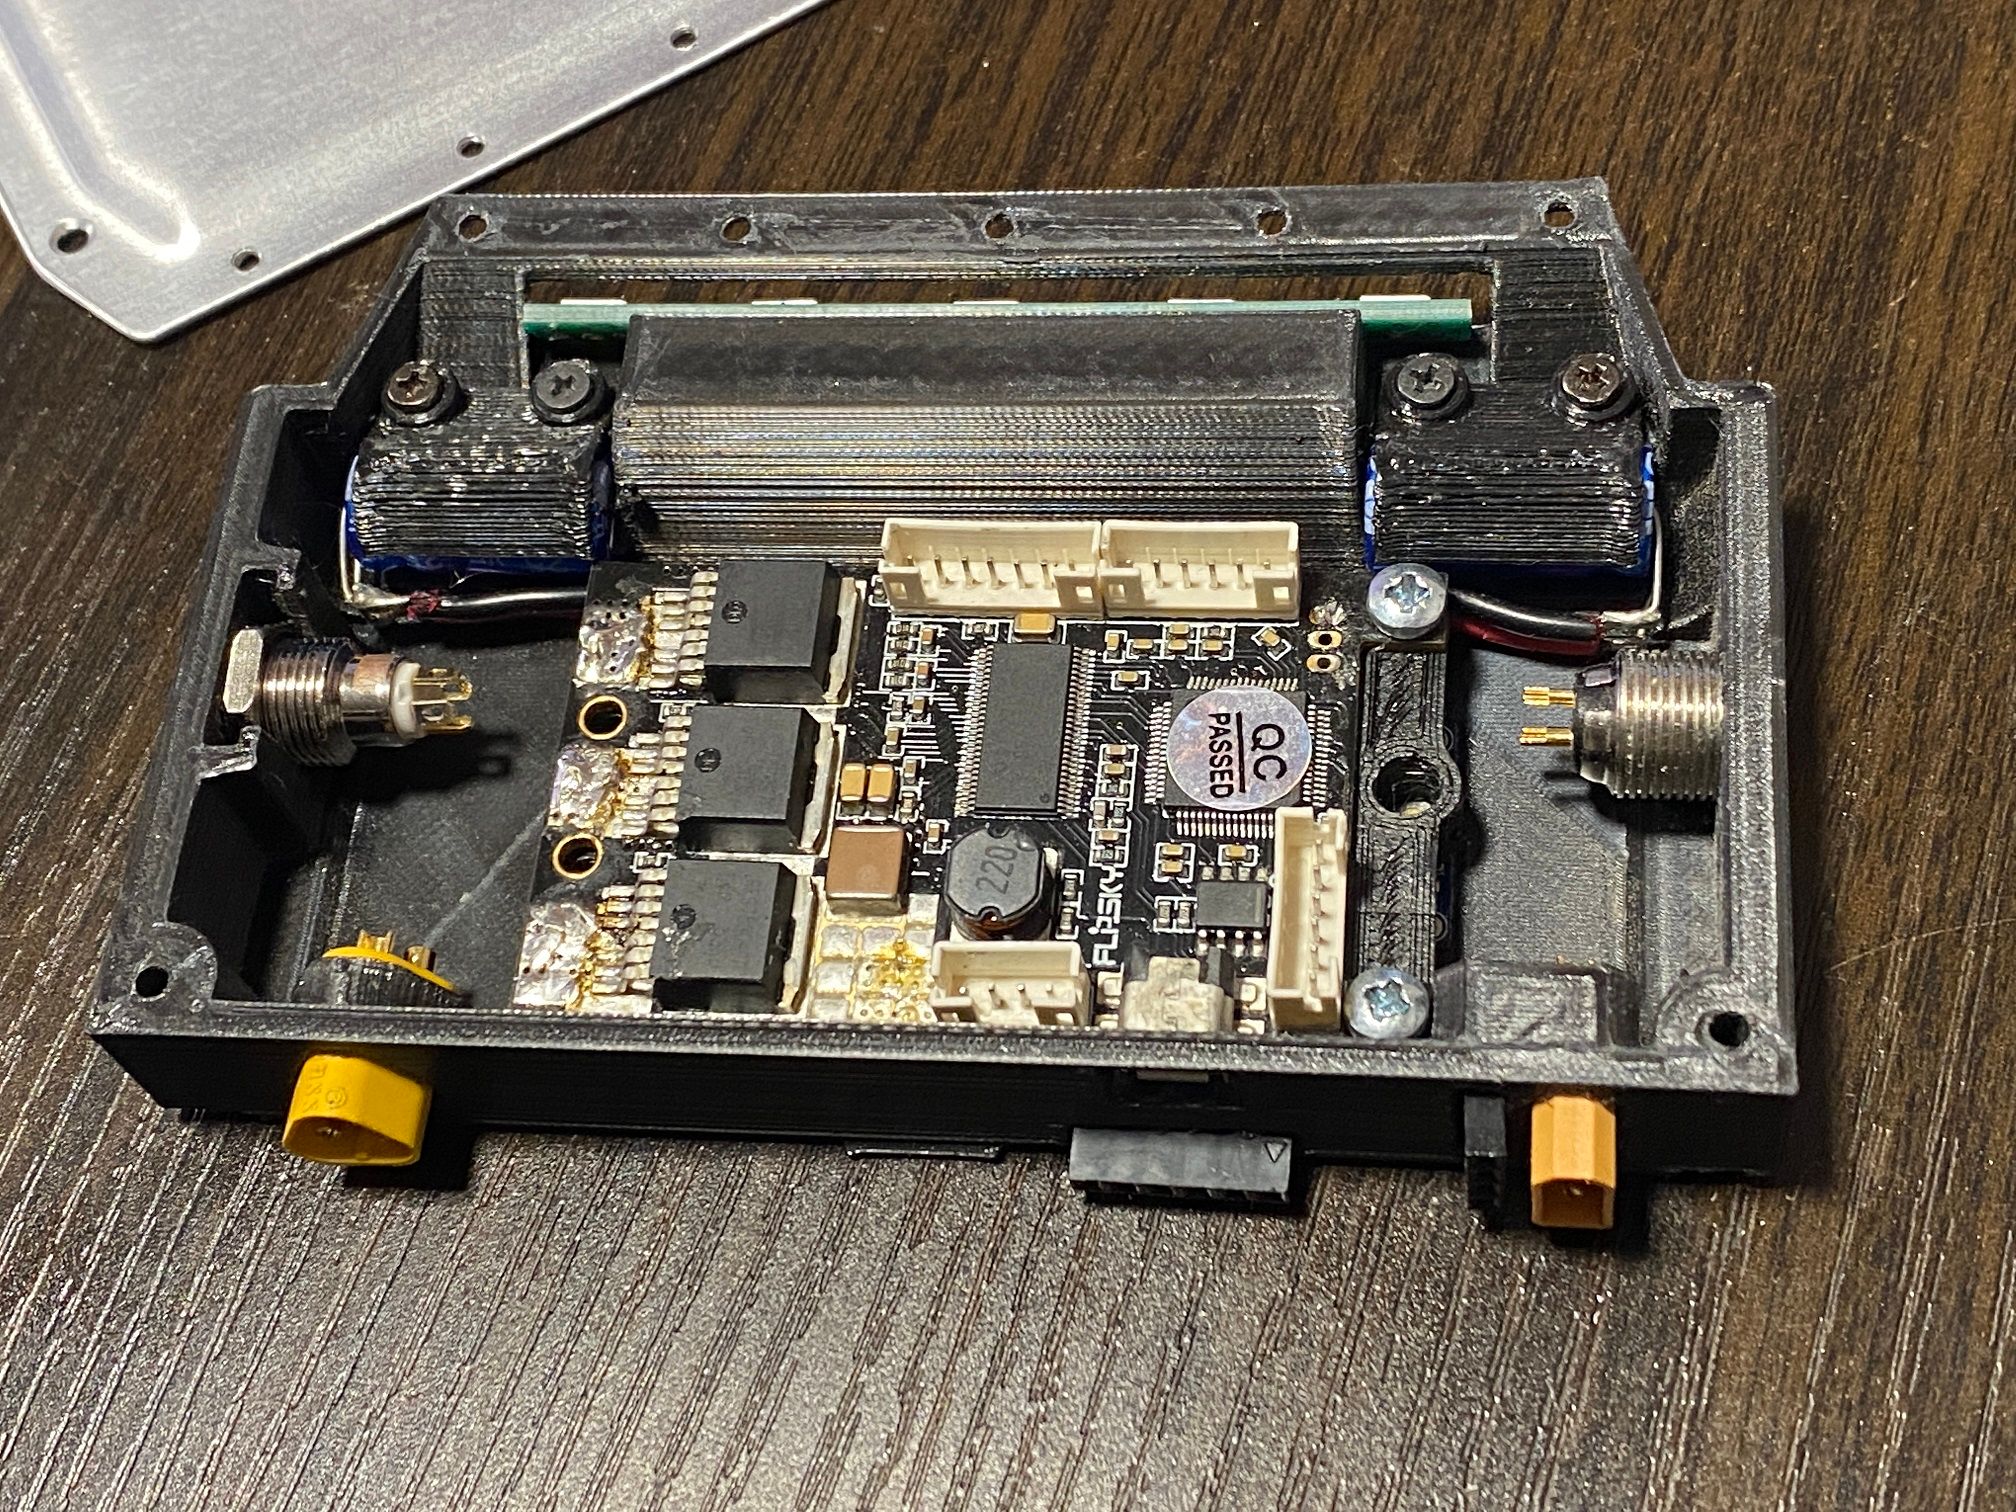

Ignore the mis-alignment on the front pad, I'm redoing that later.
Wanted to complete the battery this weekend but ran out of time D:
-
@lia That is a work of art! Great job!
I think I missed it somewhere, is the motor from a e-skate? -
@lemur Really appreciate that :)
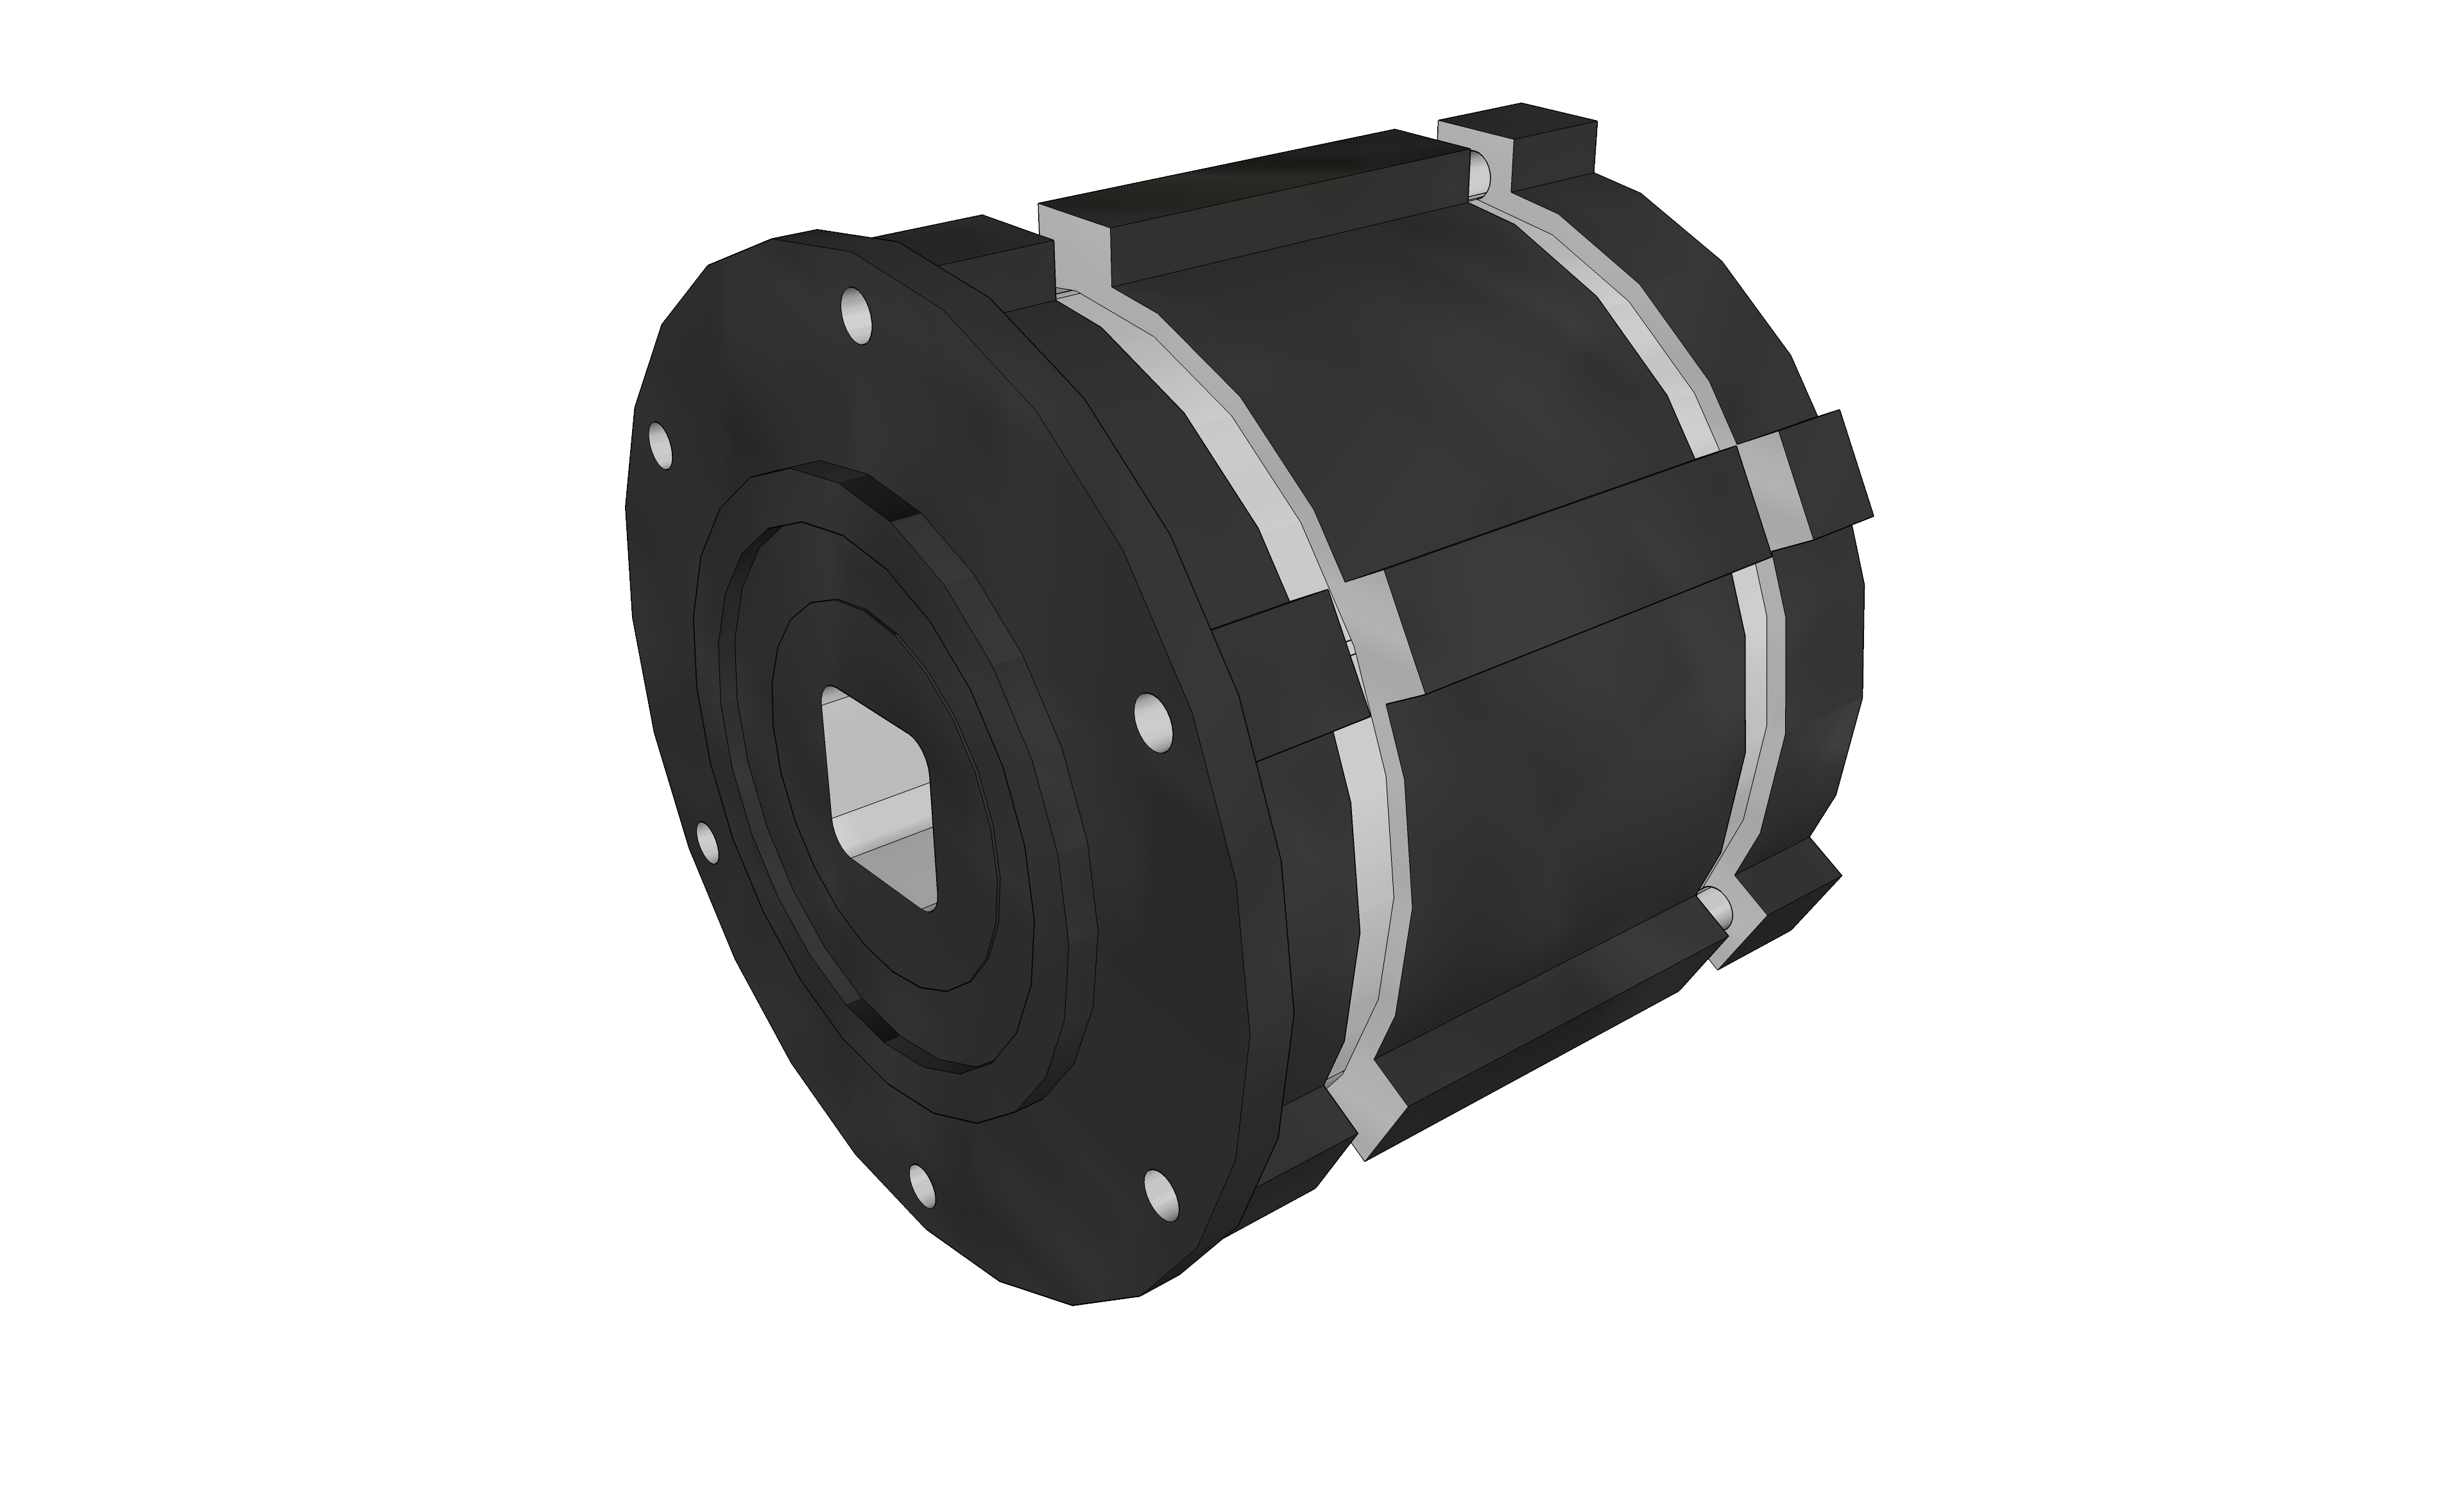
Correct, it's a 74mm 200w Esk8 motor what originally had a PU cover on it for the wheel. Here's an old pic of it before I encased it fully inside the hub shell.
-
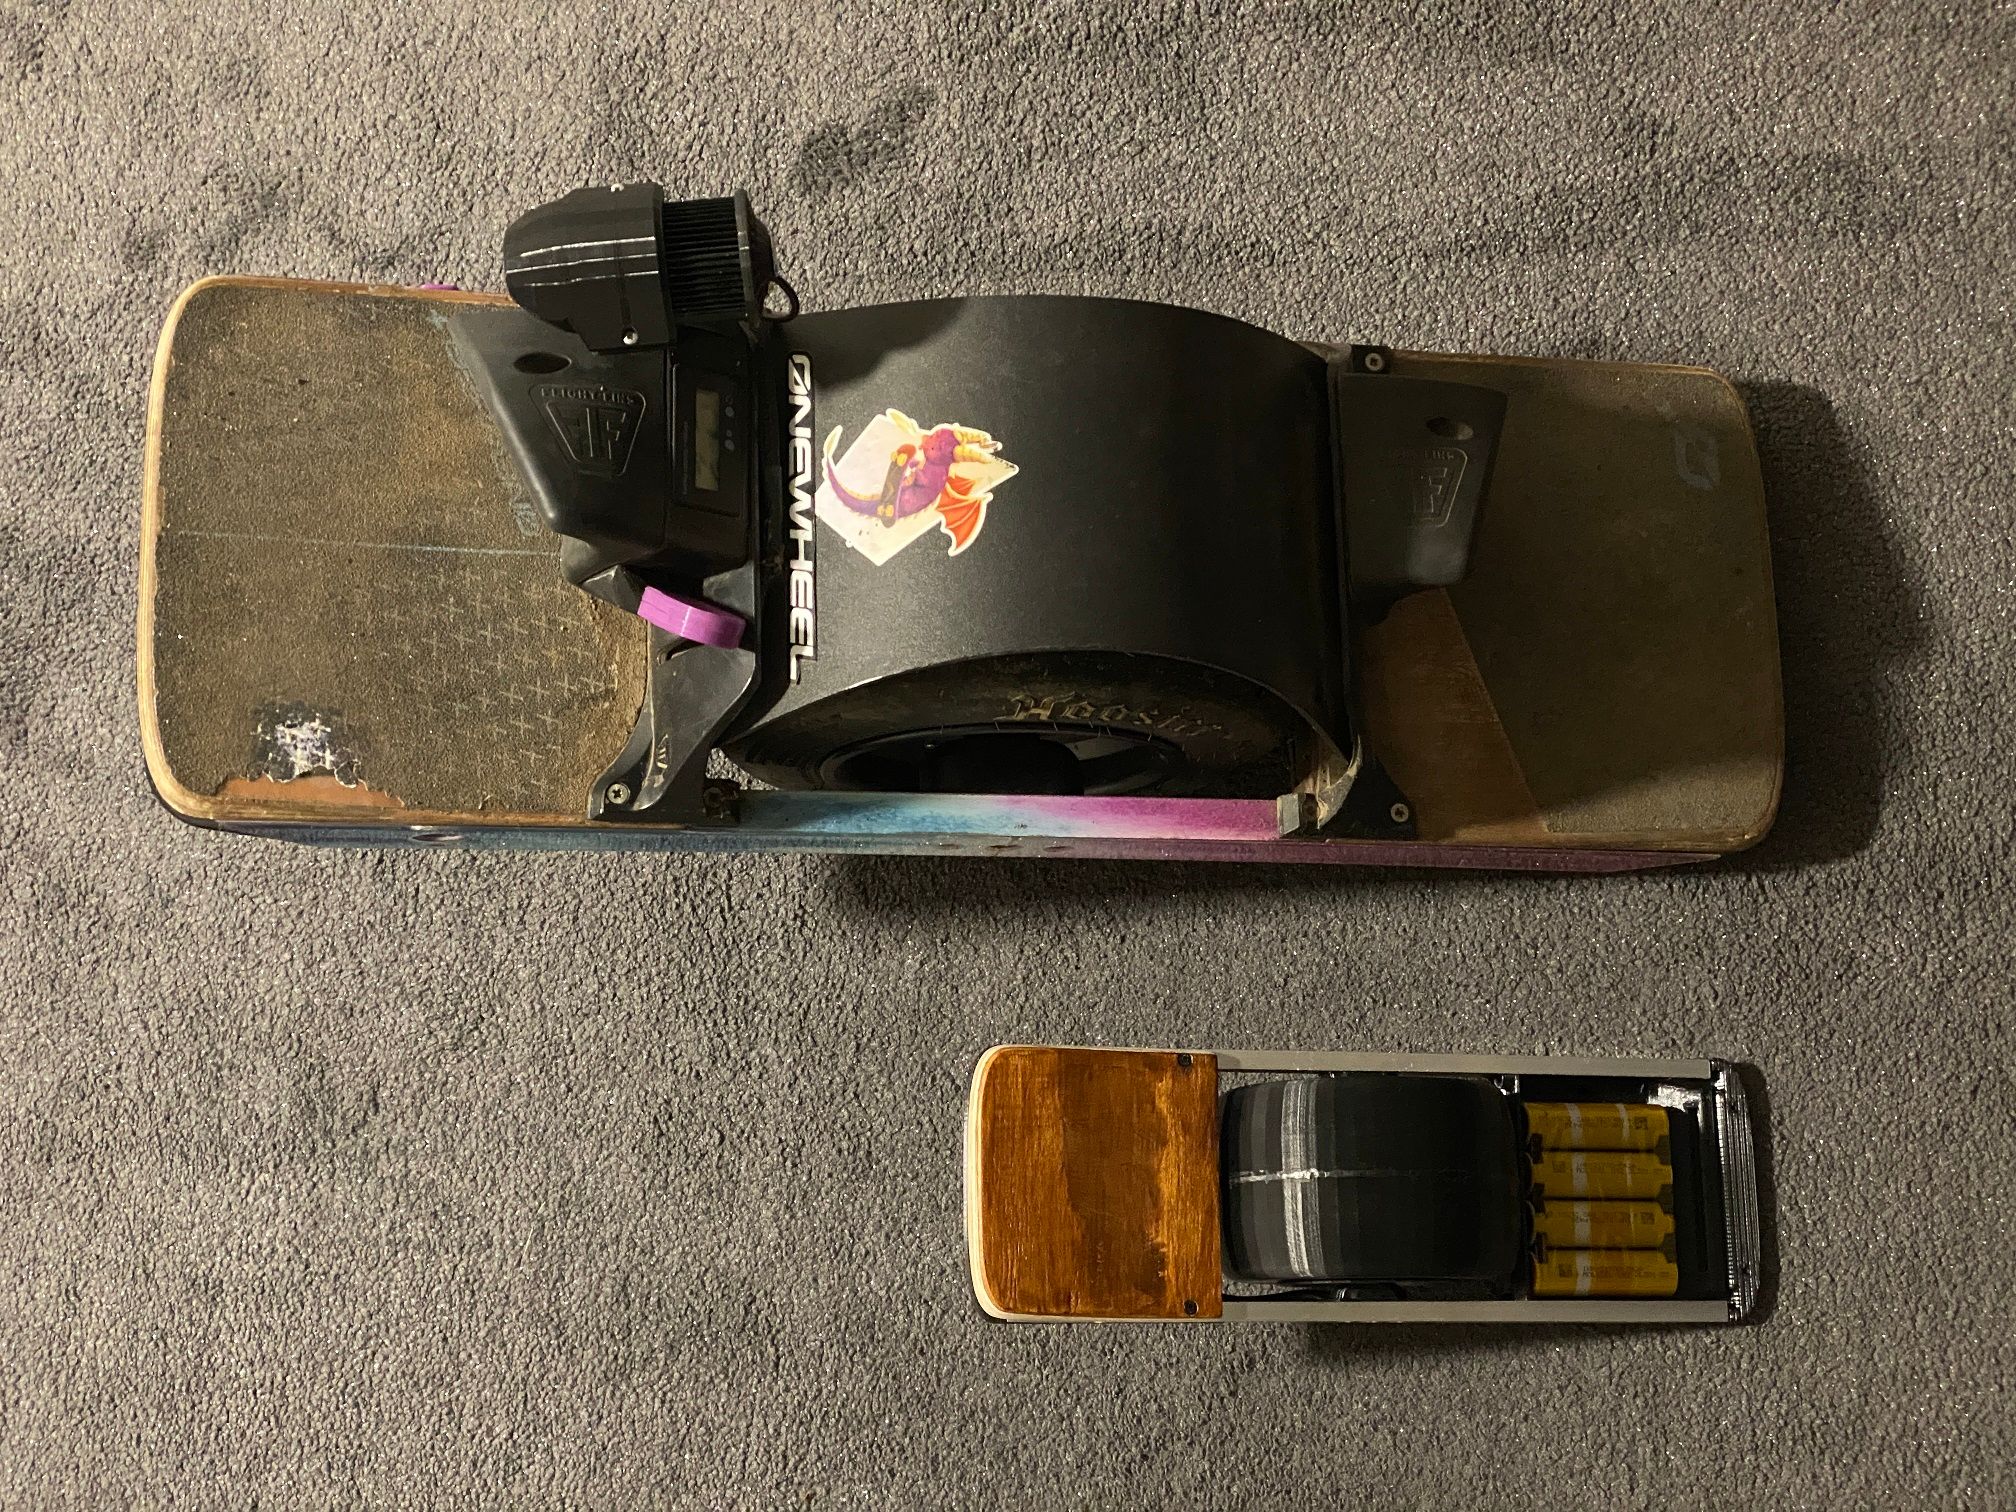
On reddit I've had a few people genuinely think the XS will be something they could use properly. I admire their optimism and praise of my work but I don't think they realise just how small half scale is.
(No banana for scale, sorry not sorry)

-
PCBs came for the headlights so will solder those up tomorrow (hopefully) :)
Min quantity was 5 so I have 3 spares for now.Also had the desire to make the charger so spent a few hours making a replica of that in Sketchup~

Will use a USB C interface in place of the normal C8 (figure 8) mains connector. Printed the top half and it came out okay.
Also you can see I re-did the battery housing and rear bumpers in 0.1mm layer heights which makes a huge difference to the surface finish and detail retention. Also printing the bumpers upside-down helps a lot with making the "Onewheel" wording show up albeit hard to see through camera.
.
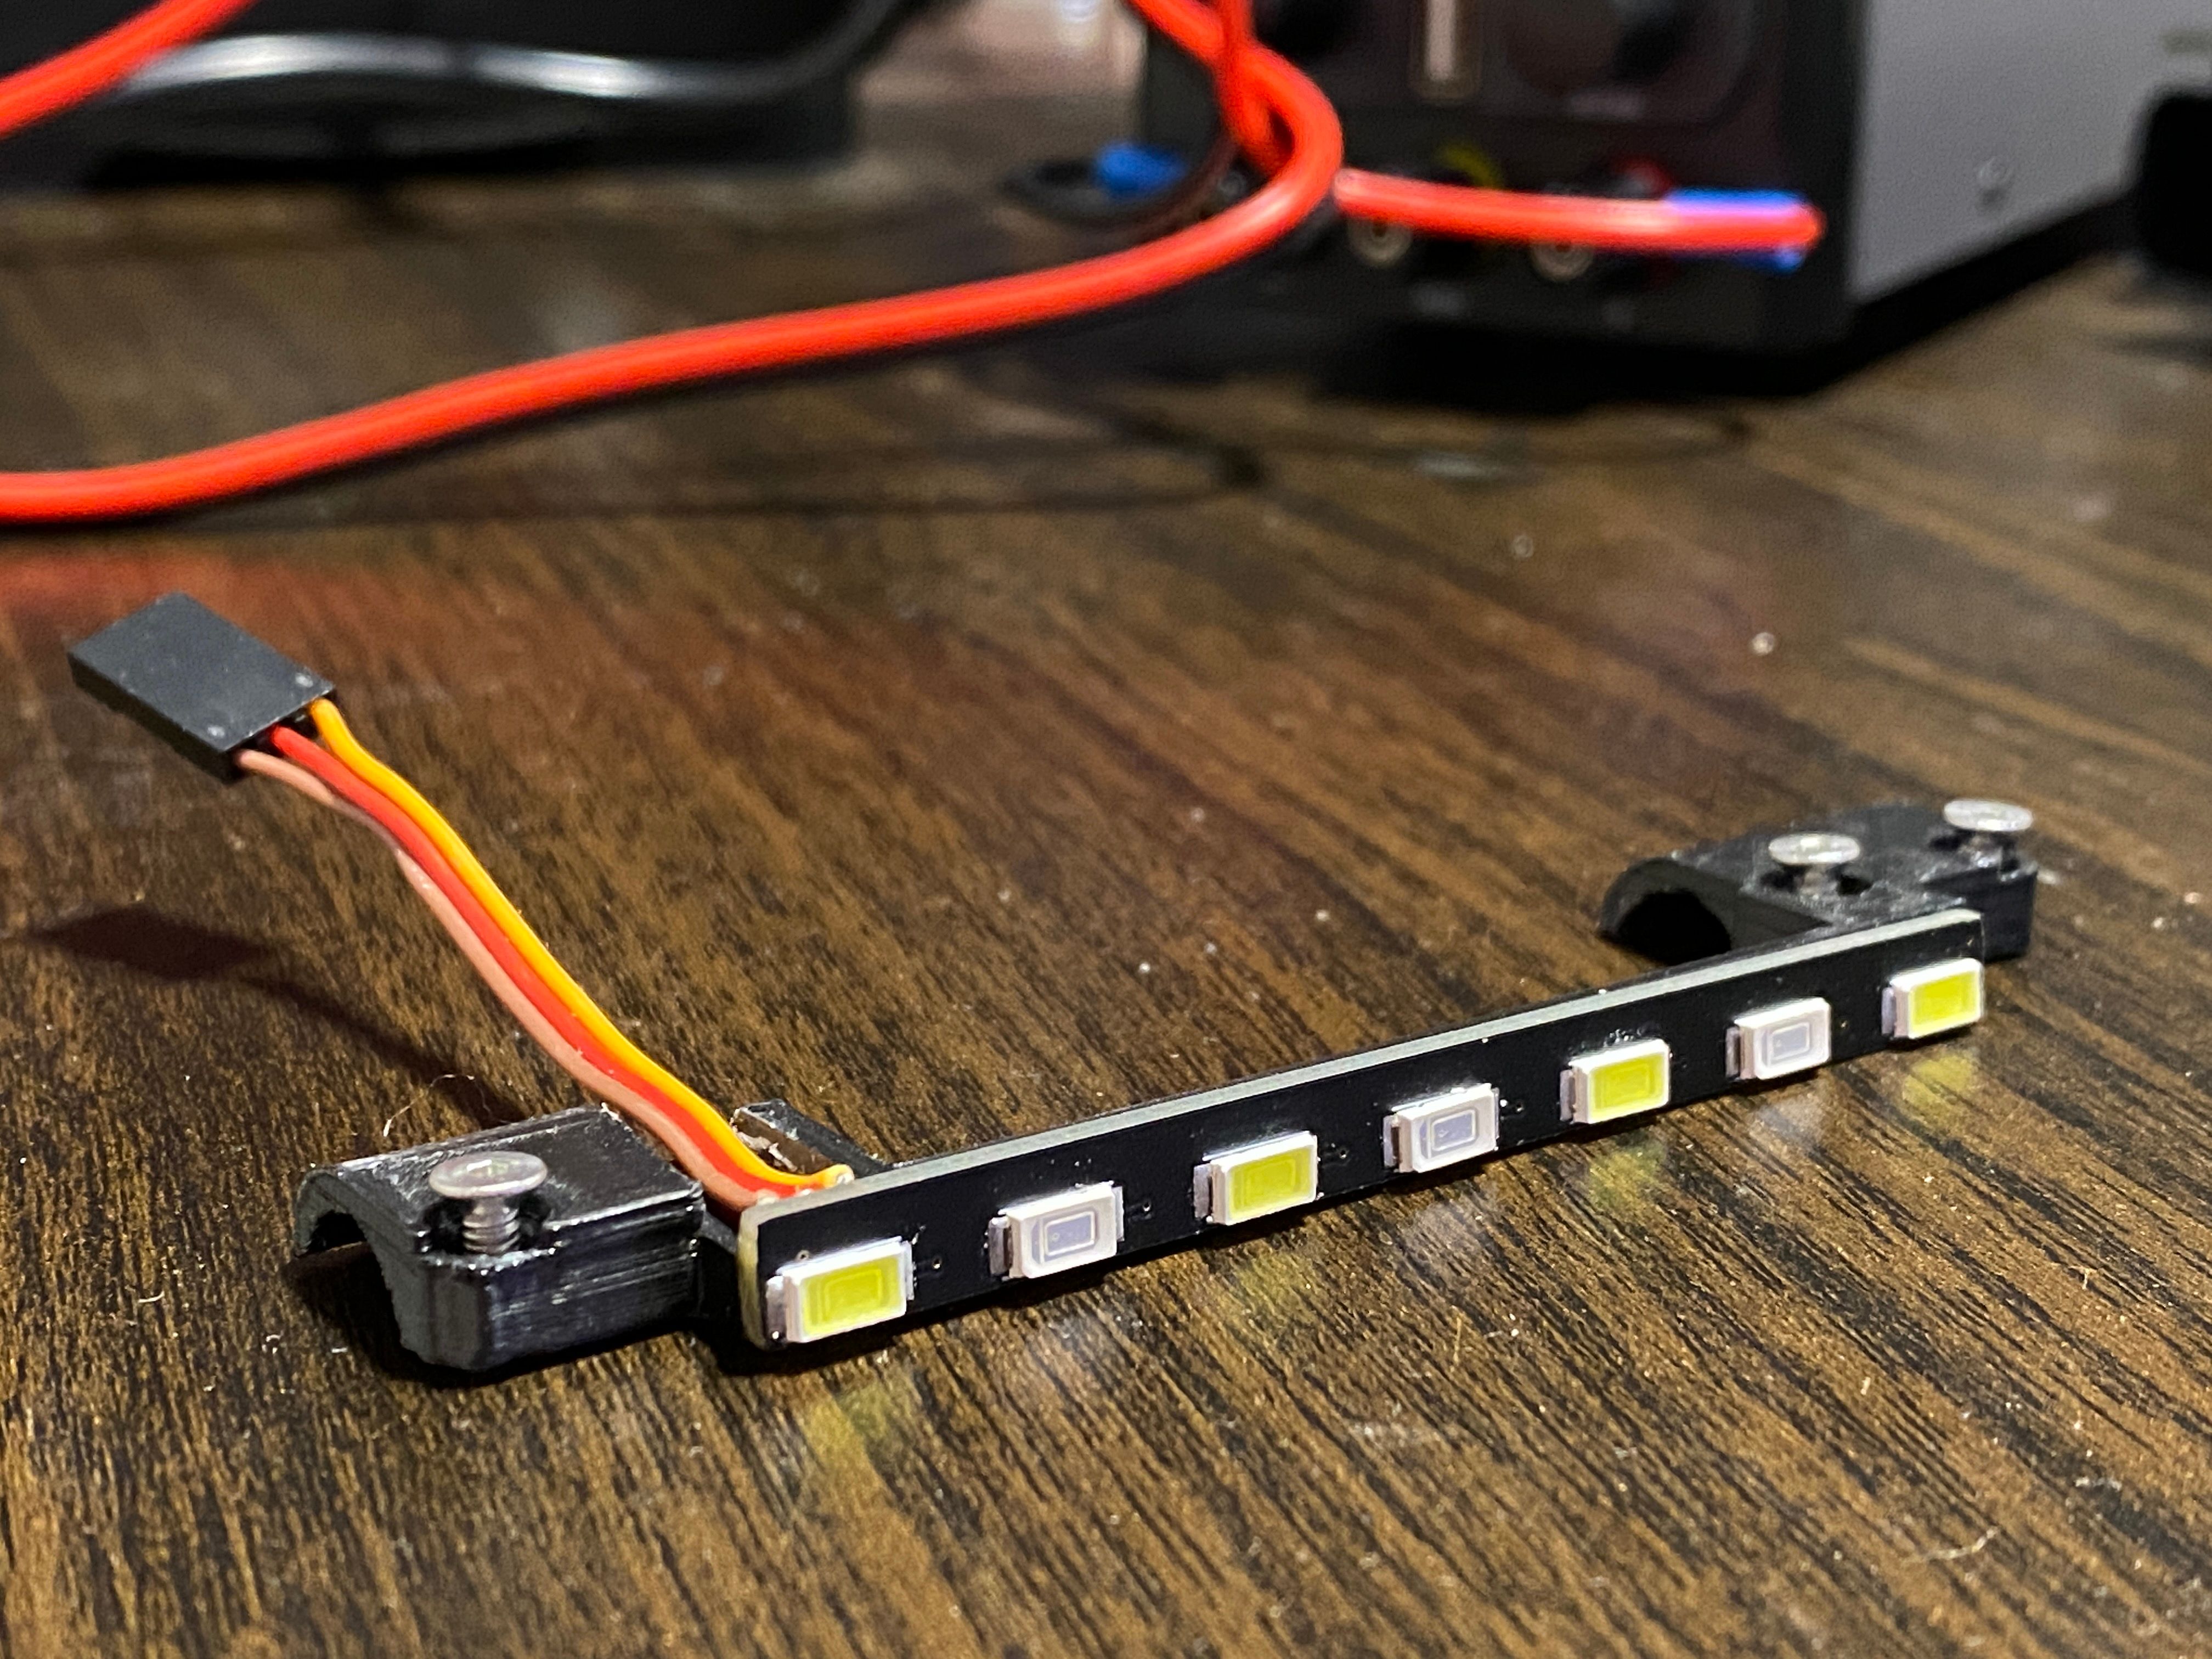
EDIT : Nevermind I had nothing else to do and flowing solder paste is quiet (minus my cursing as I burn myself). First time ever using solder paste and using the hot air part of my solder station properly. I don;t think I did too badly :)
Here's a vid of me testing it. Didn't have a 3.3v supply handy so I just borrowed an old Arduino Uno I have laying around to pinch it's 3.3v rail. I realy should buy a decent lab bench power supply but all the ones that have voltage and current ranges I want are hella pricey.
Connector is temporary, just needed something easy to poke a jumper into for testing :)
Originally I was going to drive these off 5v but the drop required to get the LED's running at a proper voltage meant the resistors would have to be much bigger. At the time I was using more LED's so didn't have space. I could go back to 5 white 4 red but I think this is fine for the scale version.
-
@lia Literally drooling over this project and the most fascinating one i ve seen to date. You must make a limited run of these cause i'm pre-ordering NOW with the money FM did not take from me yet .
Aka "Vommbat"
-
@Lia my brain be like:
... and yes of course its a png with transparent canvas! what am i? an animal?XR's got what plants crave!
-
@notsure Very trippy, nice work rotoscoping that :)

PNG is best format~ -
-
@maciak So happy to hear that <3
It is tempting, make a few commissioned ones for some riders. If I do have a change of heart and consider it I'll let you know ;)
-
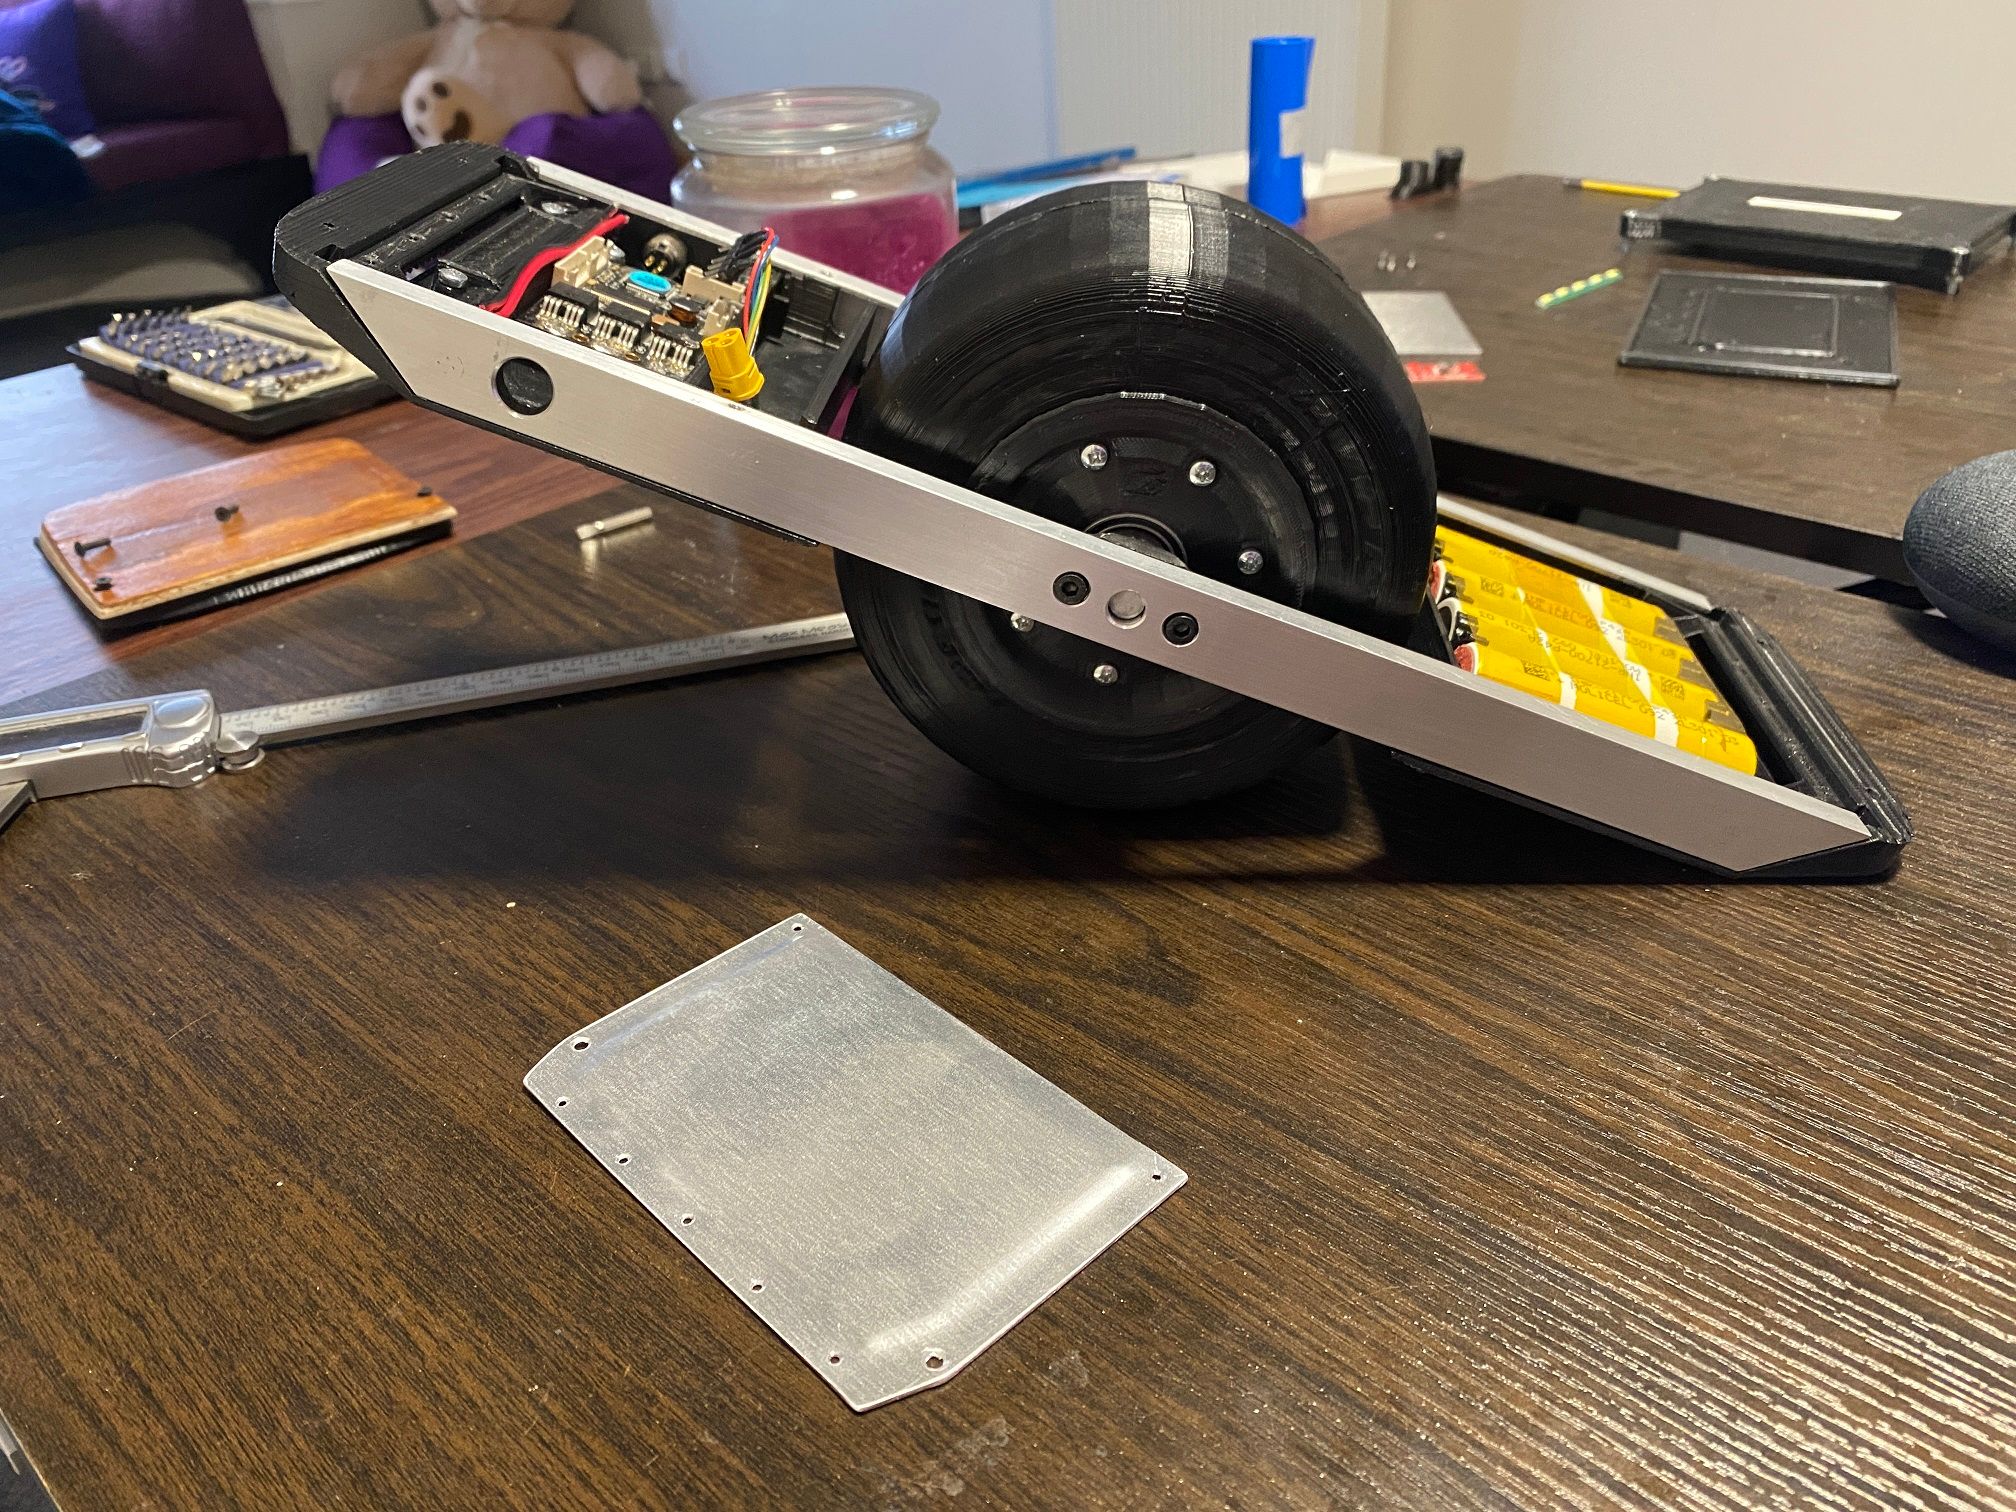
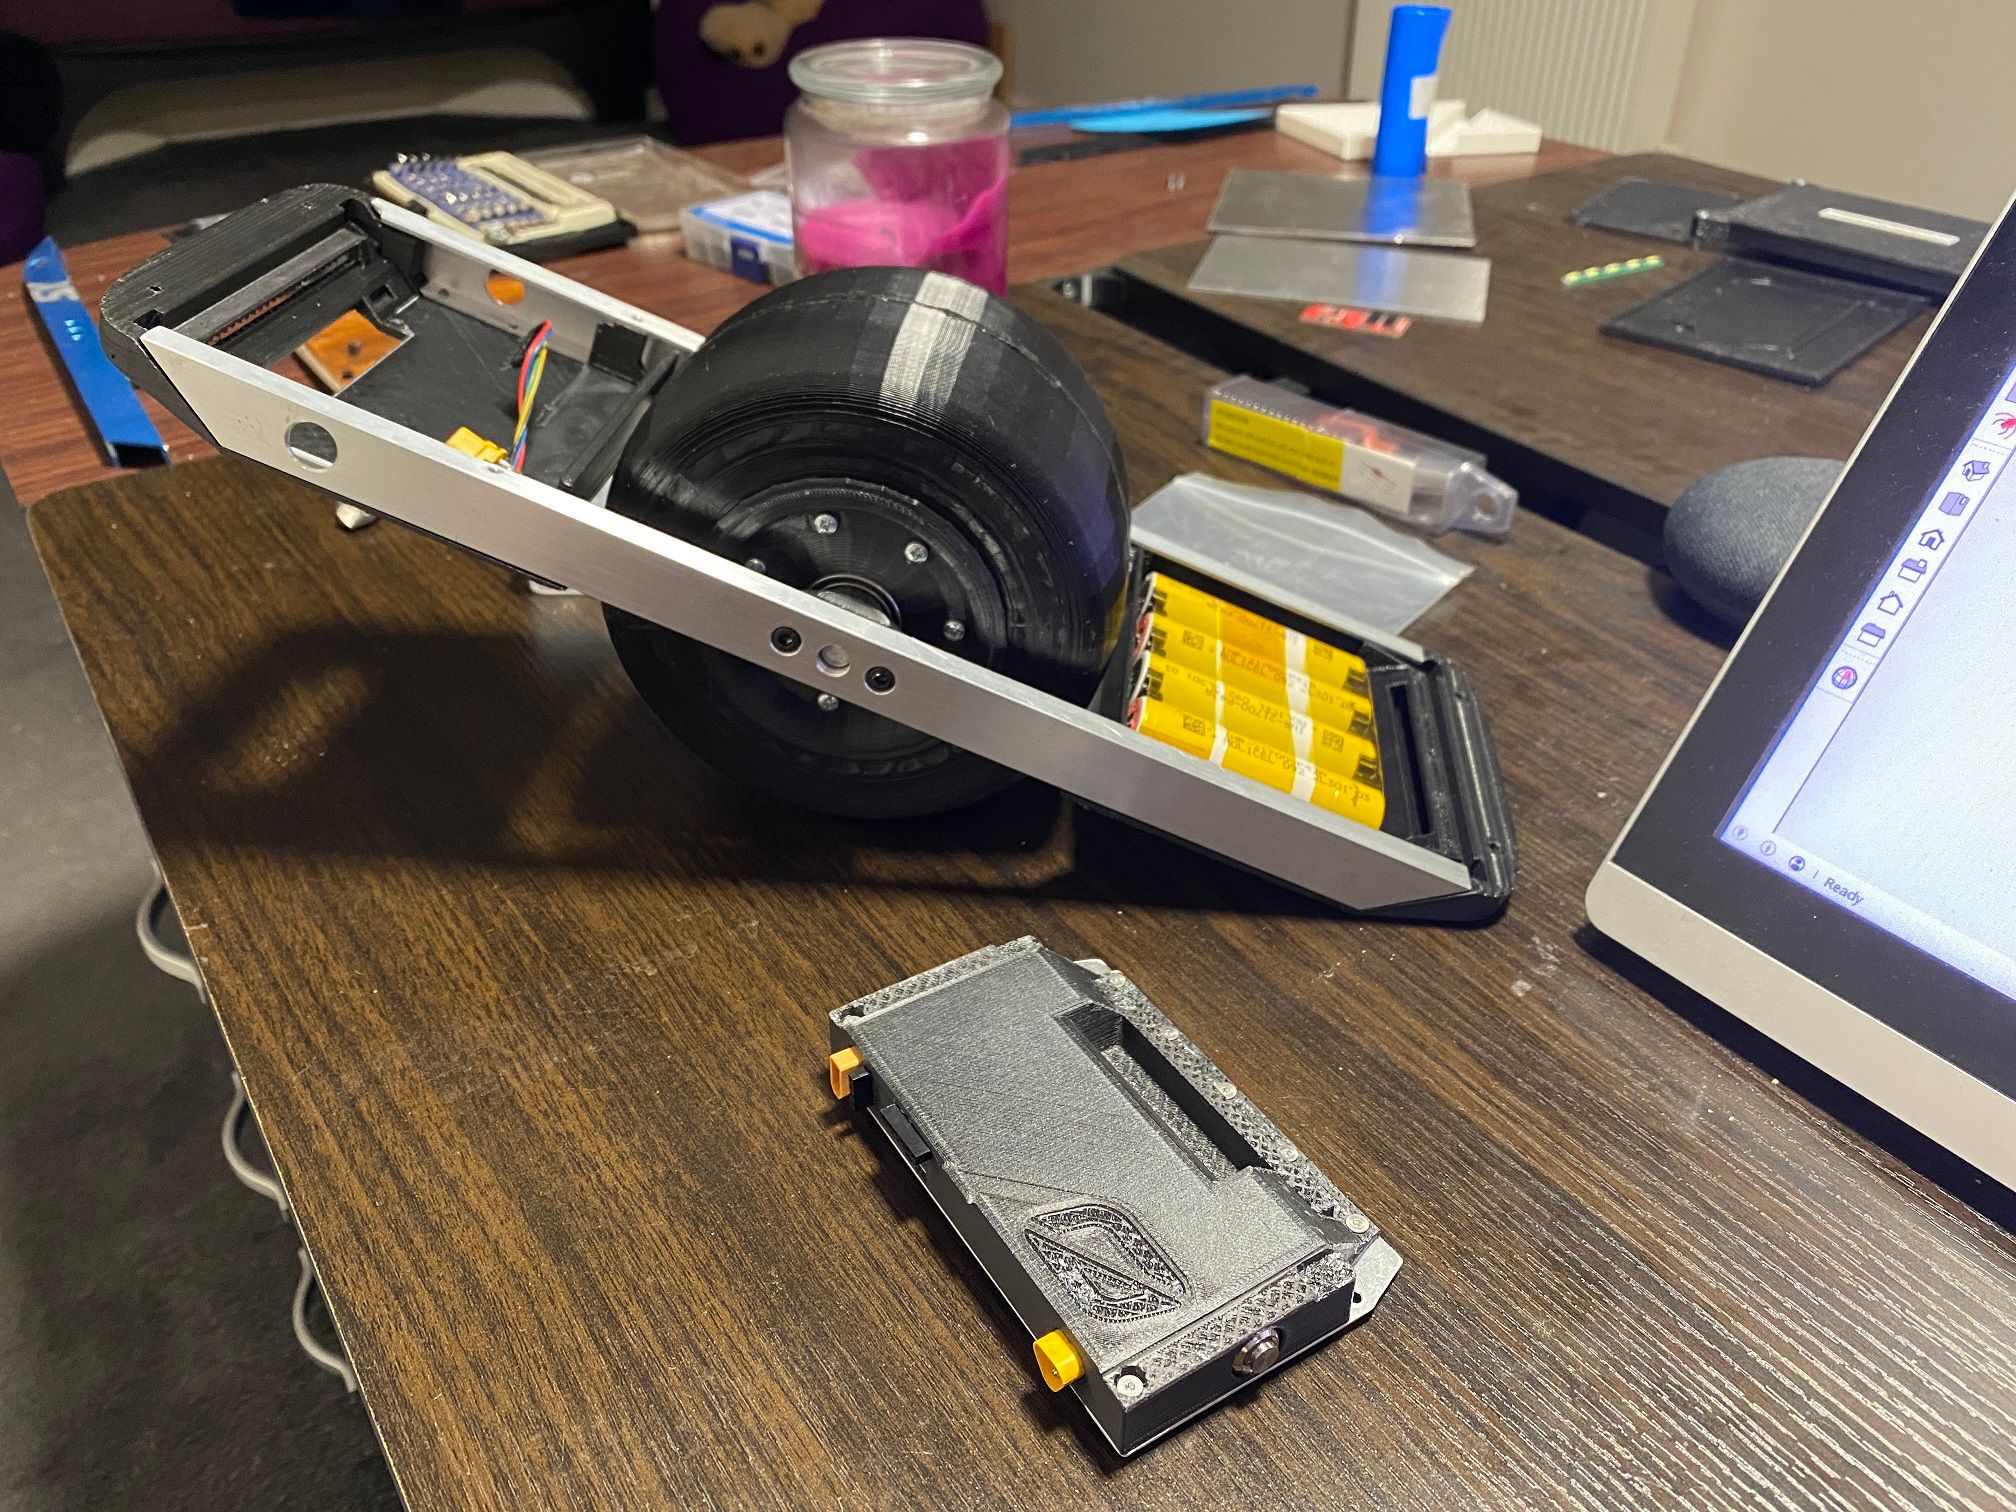
Everything is on a "go-slow" especially with work driving me insane. Feel like there's been enough progress for an update though :)
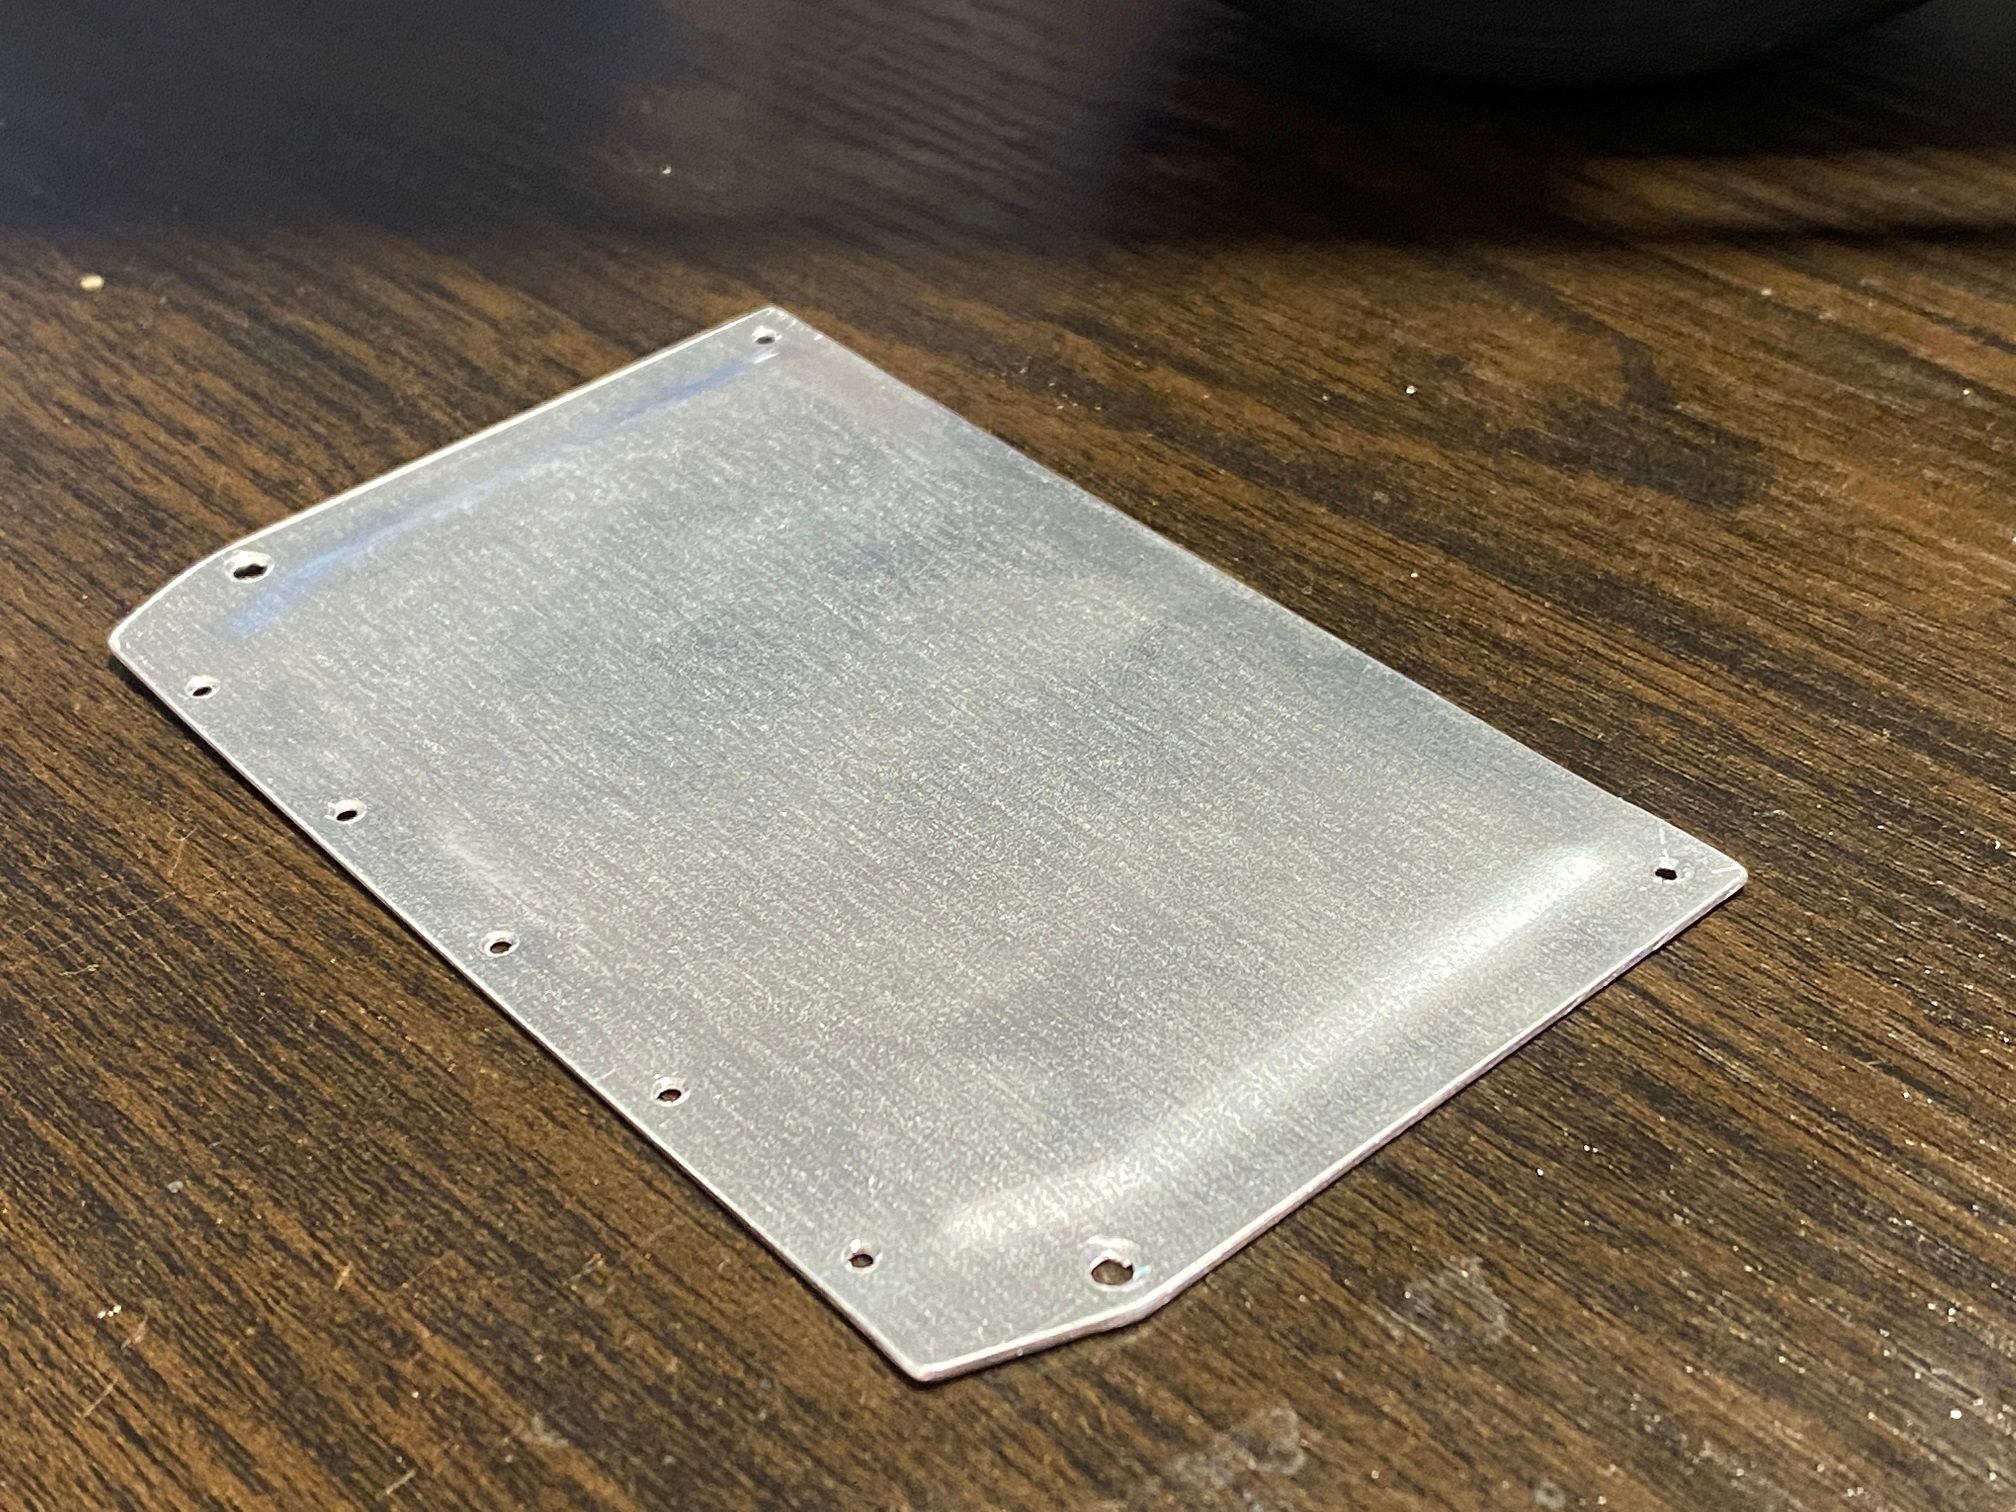
Battery housing lid before being trimmed to size.
Cut the lid to size, still need to add the extended threaded sections since the 1mm plate is not going to last.
Cells fit, need to push up the middle of the lid as it's deformed in a tiny bit but other than that it all fits :)
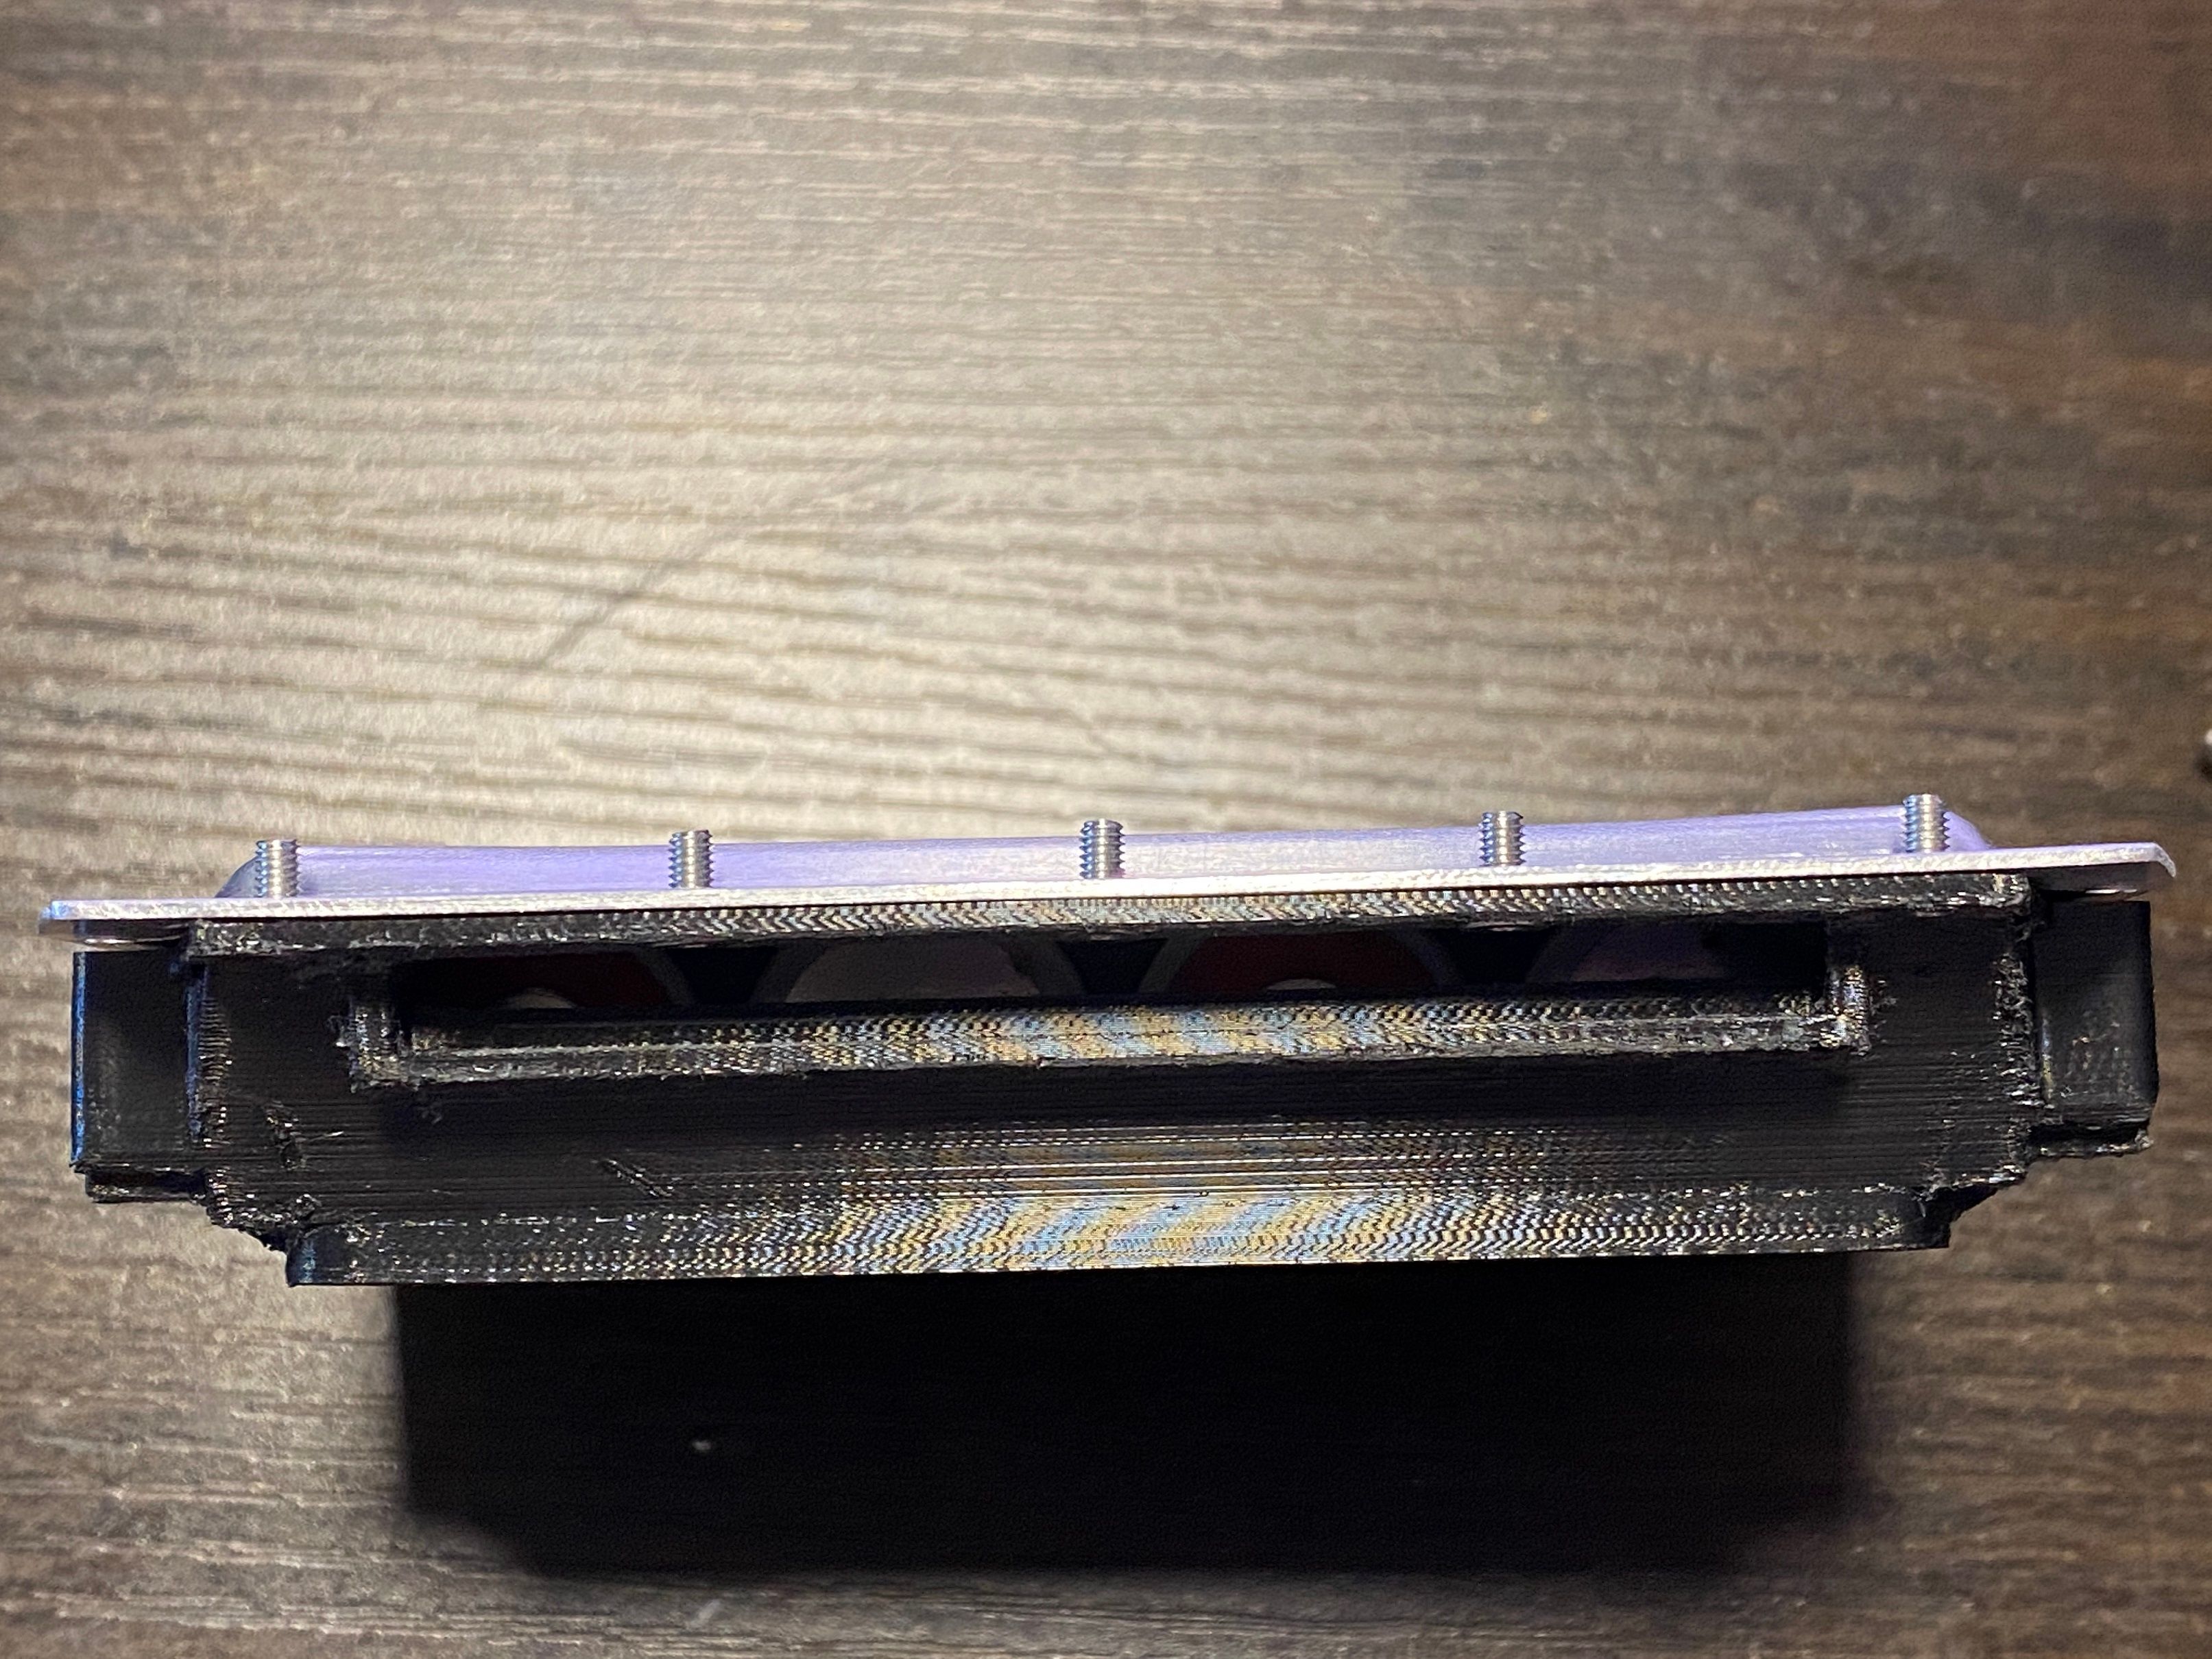
Made a new bracket for the capacitors that also will hold the front light bar. Got iPhone vibes from this part. Anyone that's taken apart an older iPhone and seen how things like the speaker look with the long tiny plastic brackets will know what I mean.
Unfortunately there is a 0.5mm clearance issue with the LEDs so it's hard to remove for now so I'll redo the lower controller housing to accommodate this.
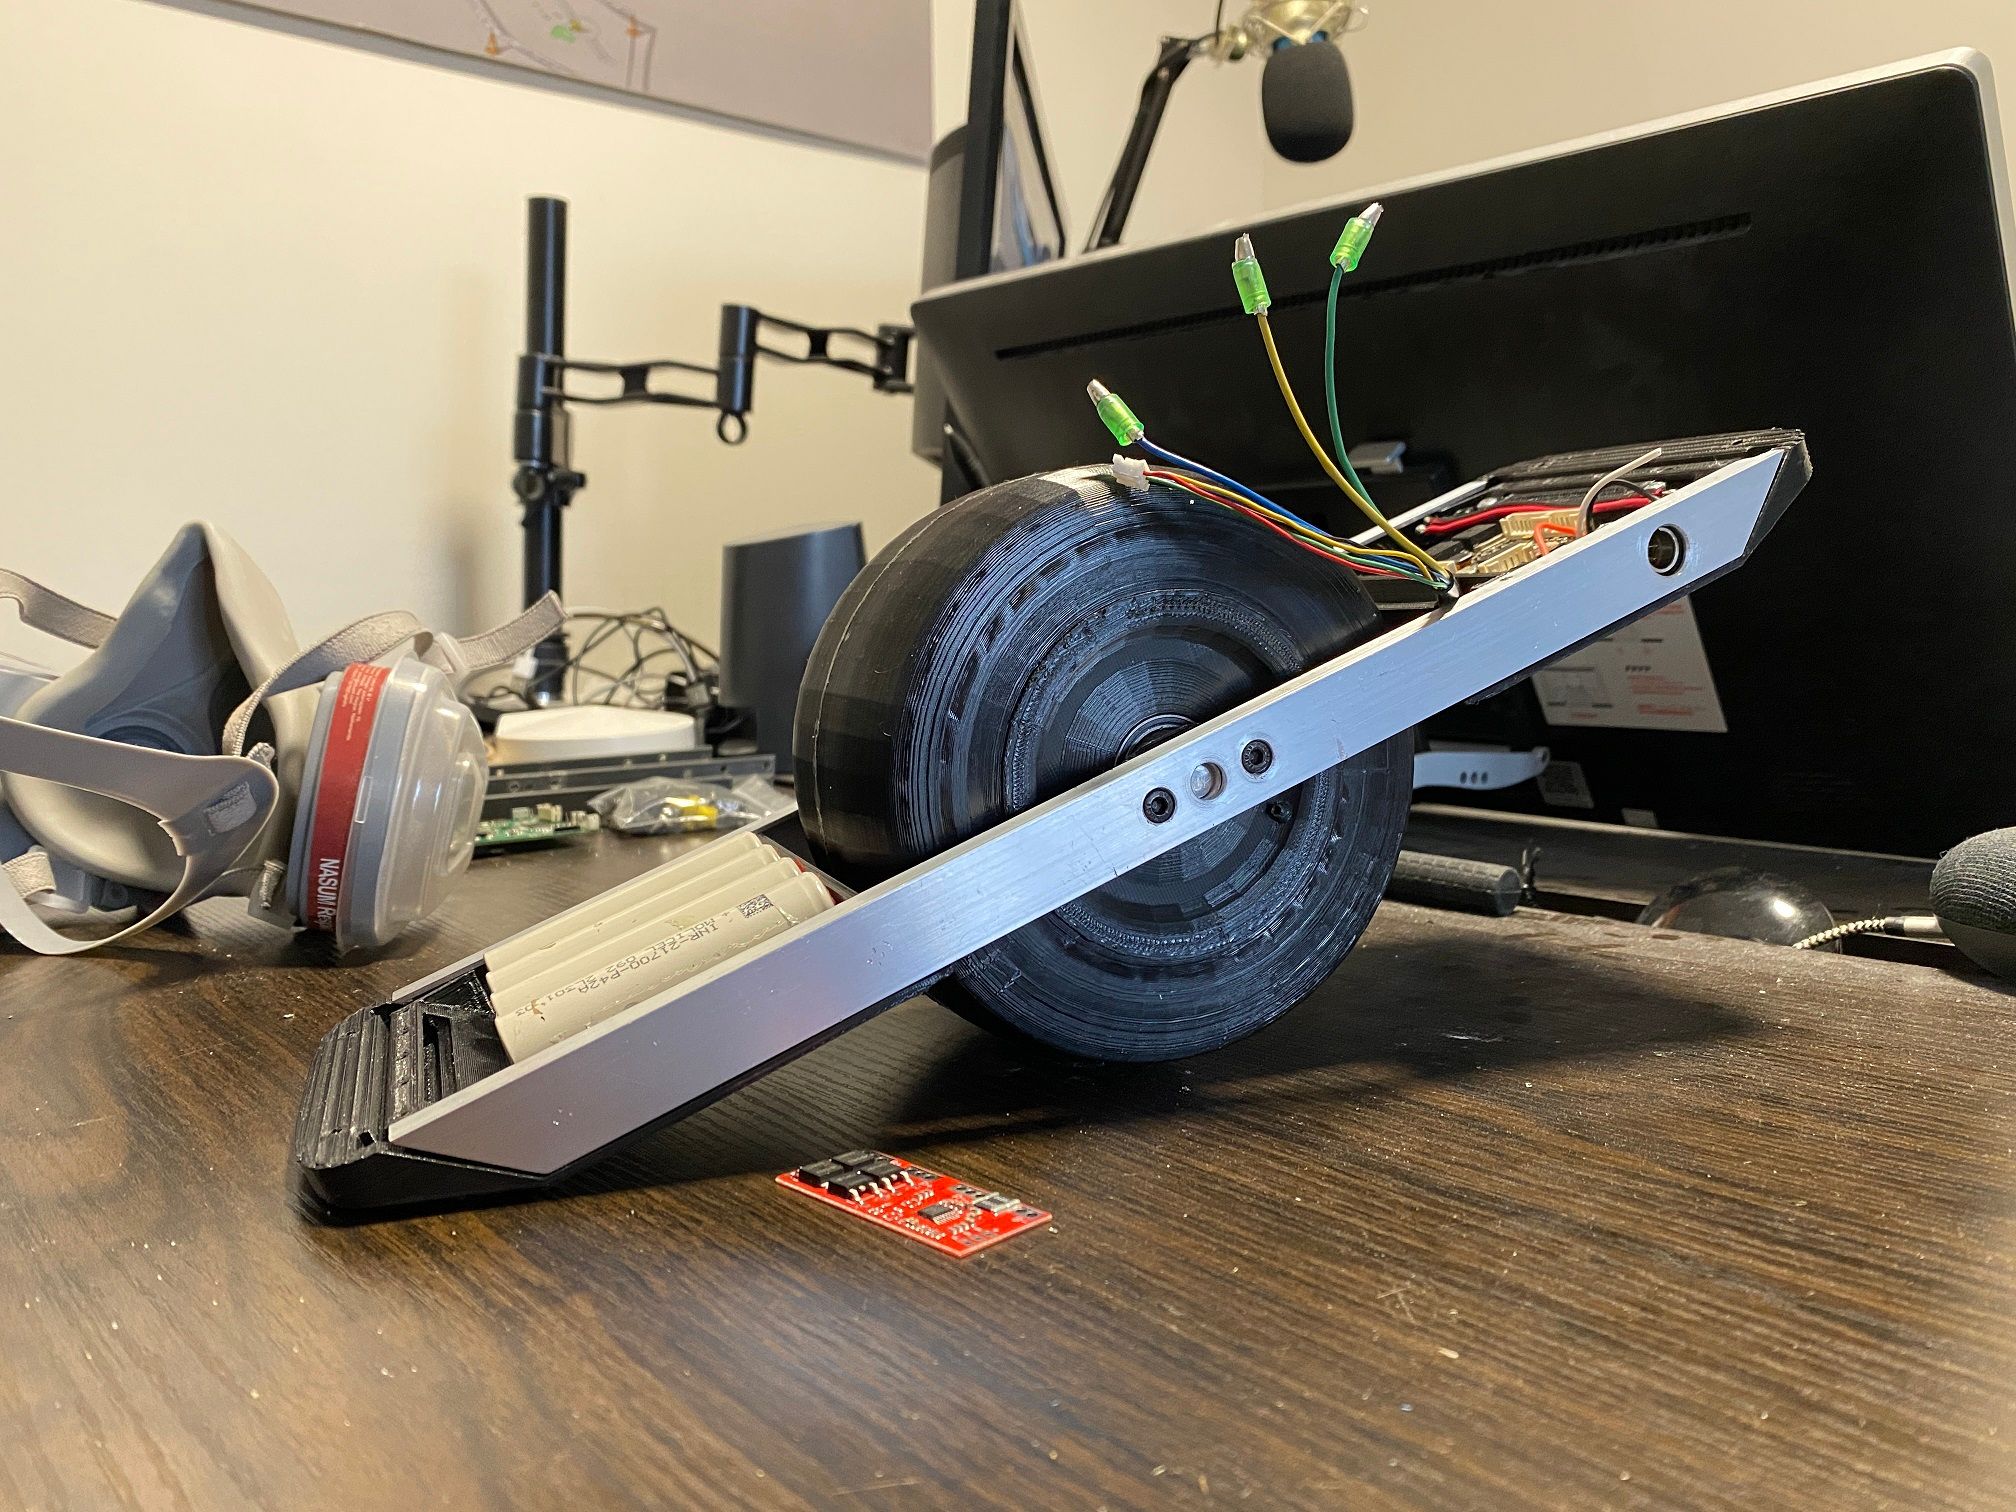
Finally it's come time to test the electronics... D:
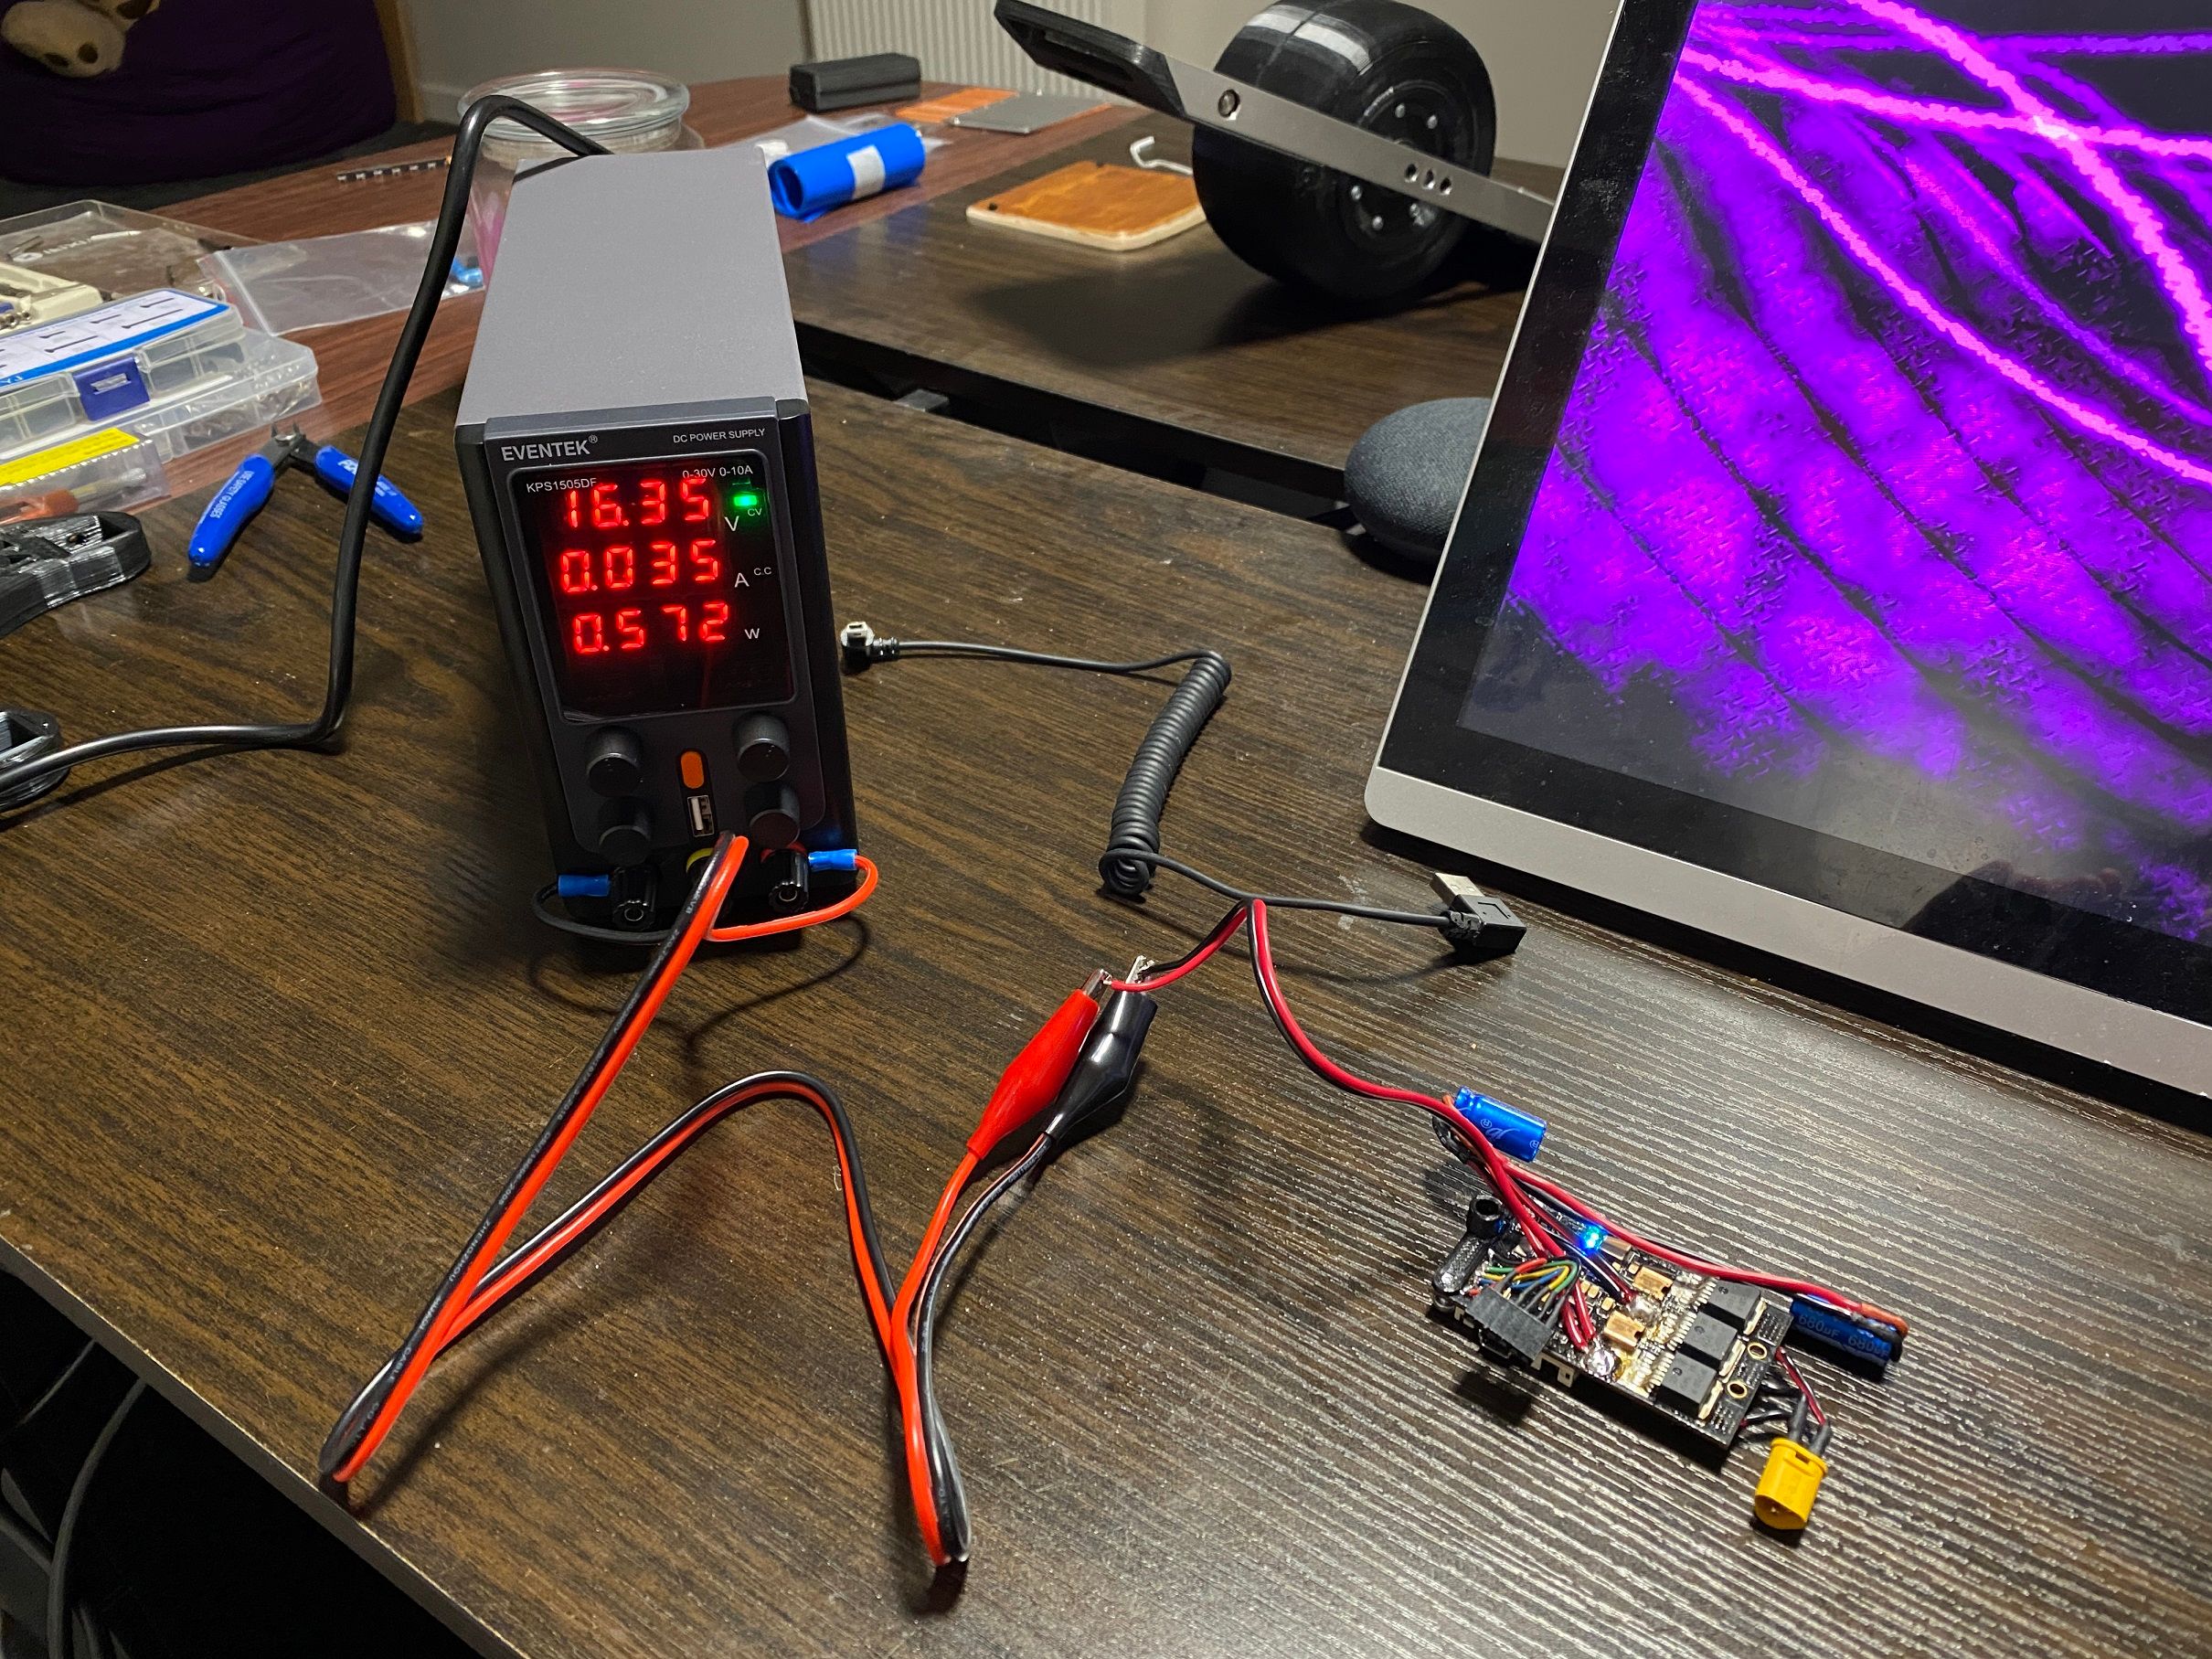
So far so good, no fire. Set the PSU to around 16v (4s) and only a max of 5amp rather than the full 10amp this can do. Time to mount it back in the XS and test the motor.
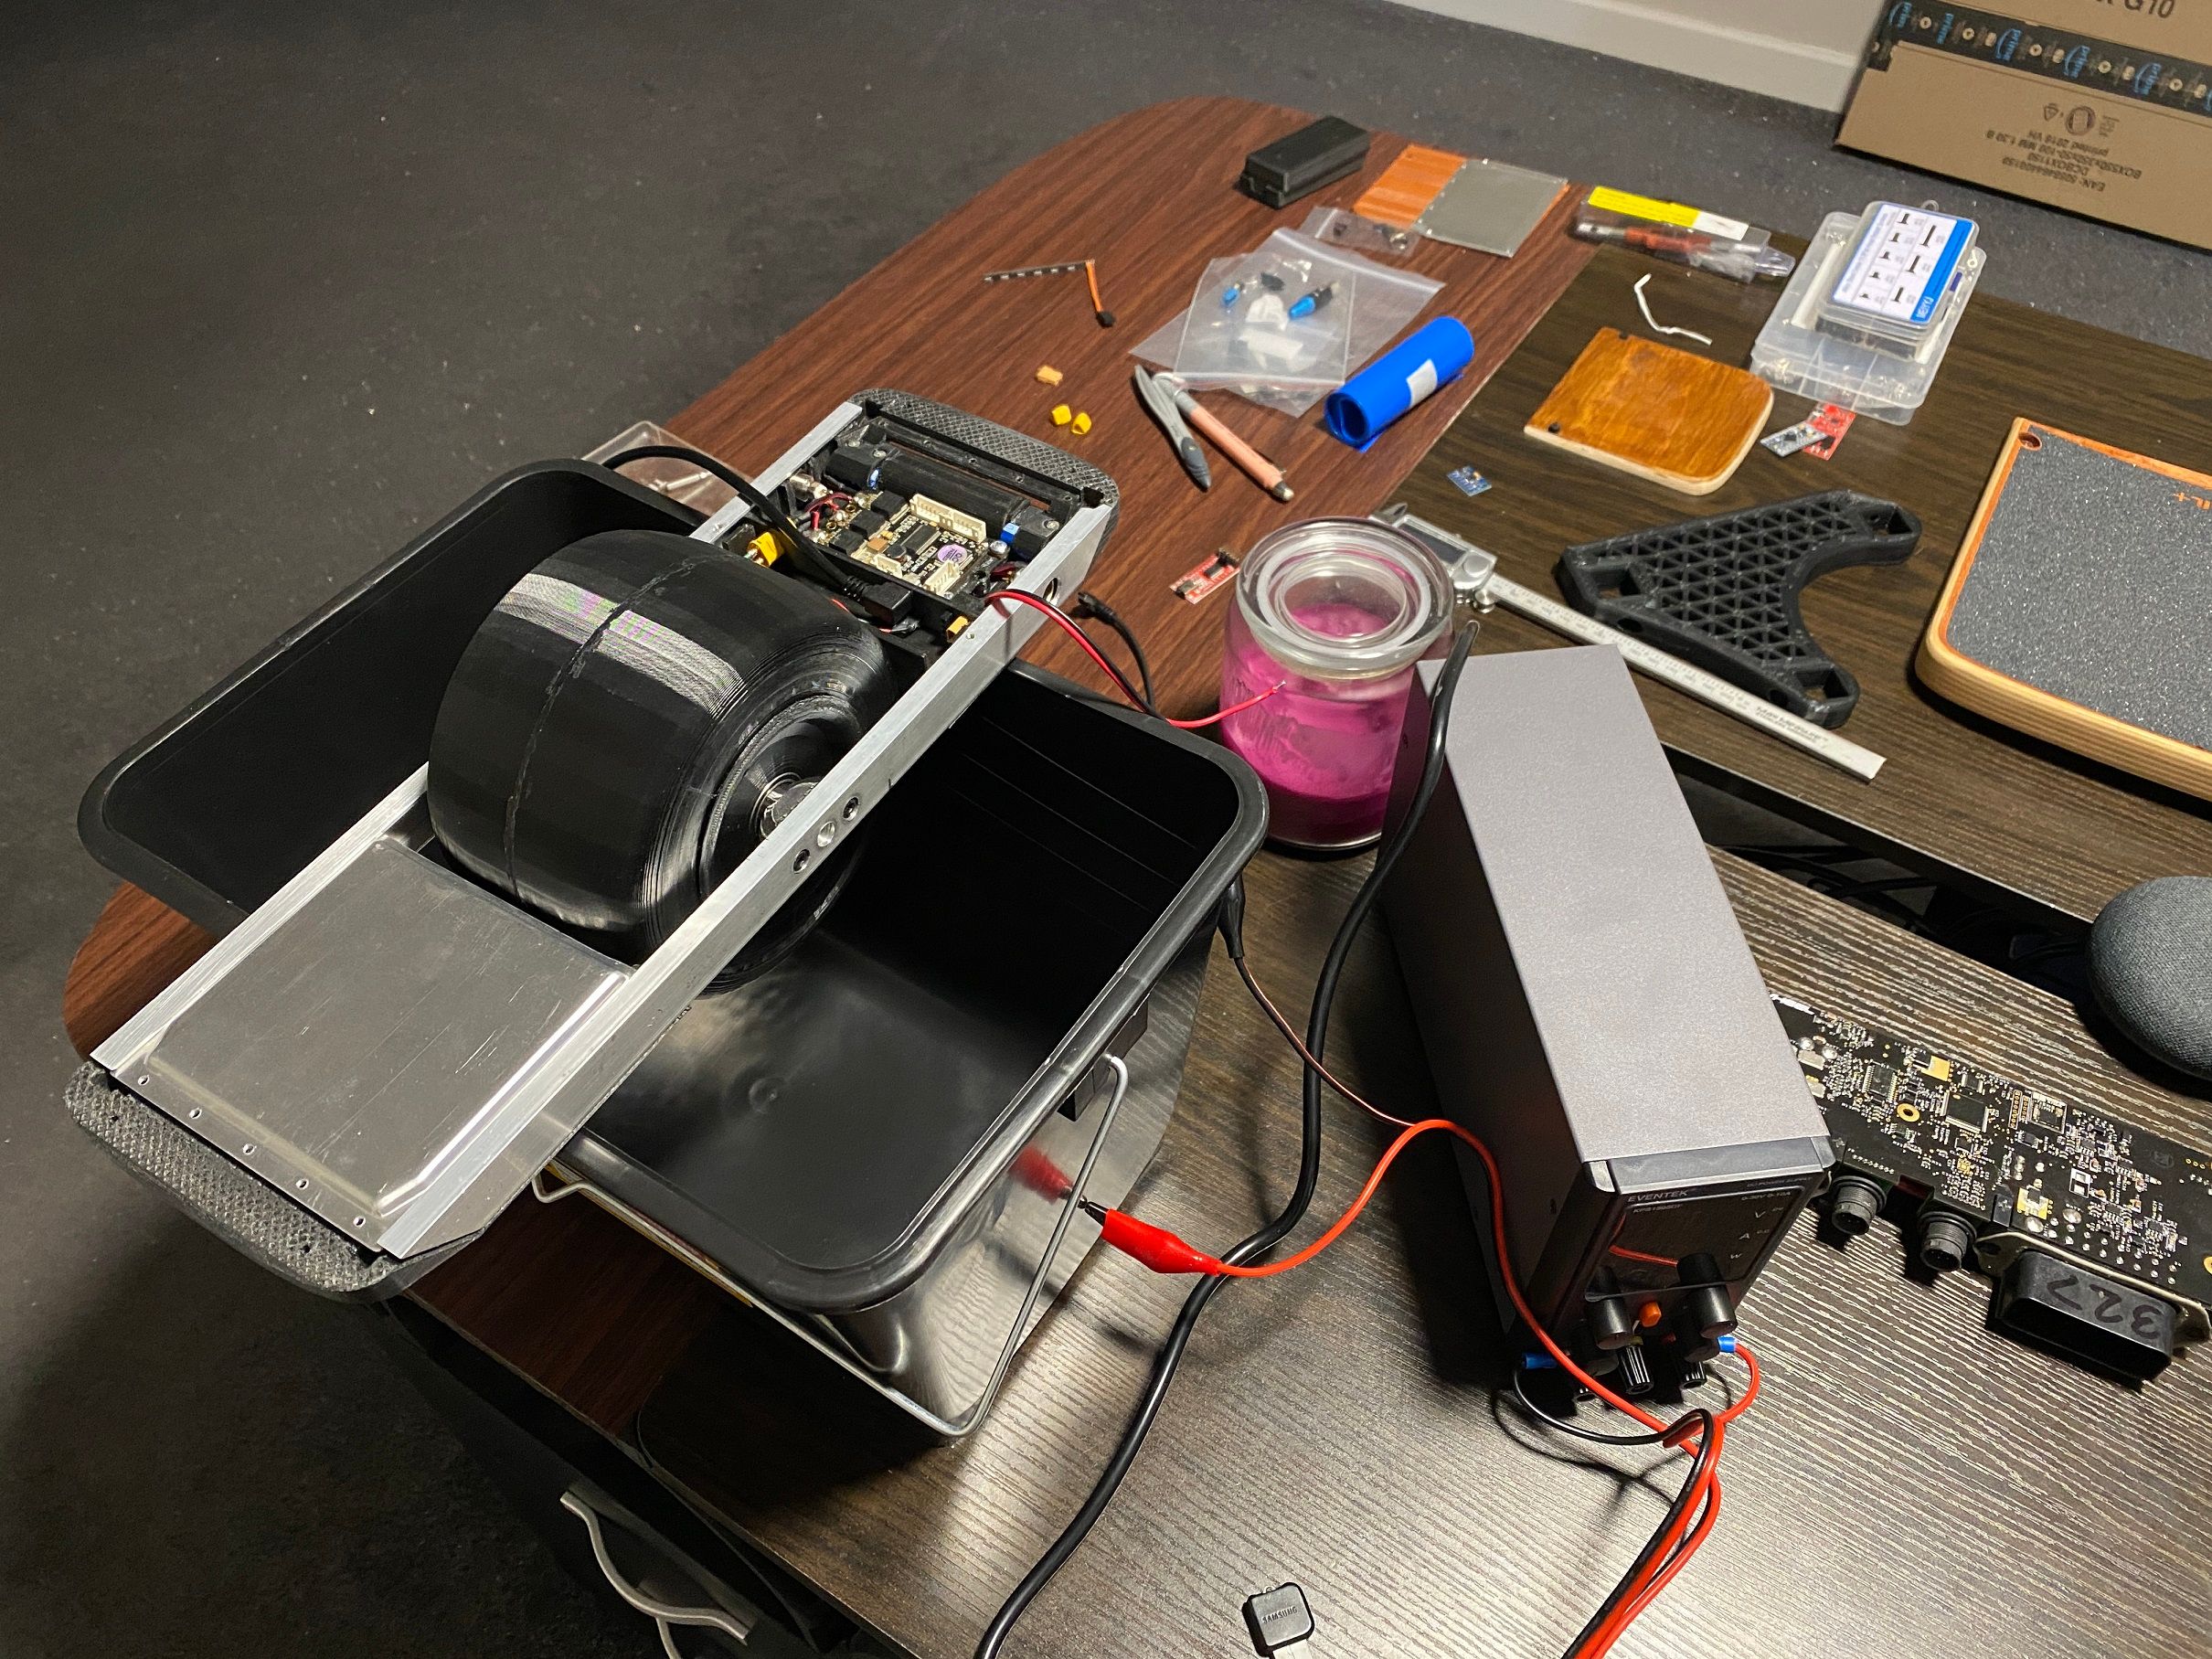

Time test see if it spins (sorry for the crap footage, the lighting mixed with a smudge on the lens makes it look hazy AF >.>)
It works~ :D
Rattly but works. Need to braze the axle bracket and rail together which will stop that since those are loose and definitely the cause of it. To be fair it only does it when spun up max speed (under current settings) so I'm happy with how it is so far. -
@lia I really admire your work, amazing attention to detail!
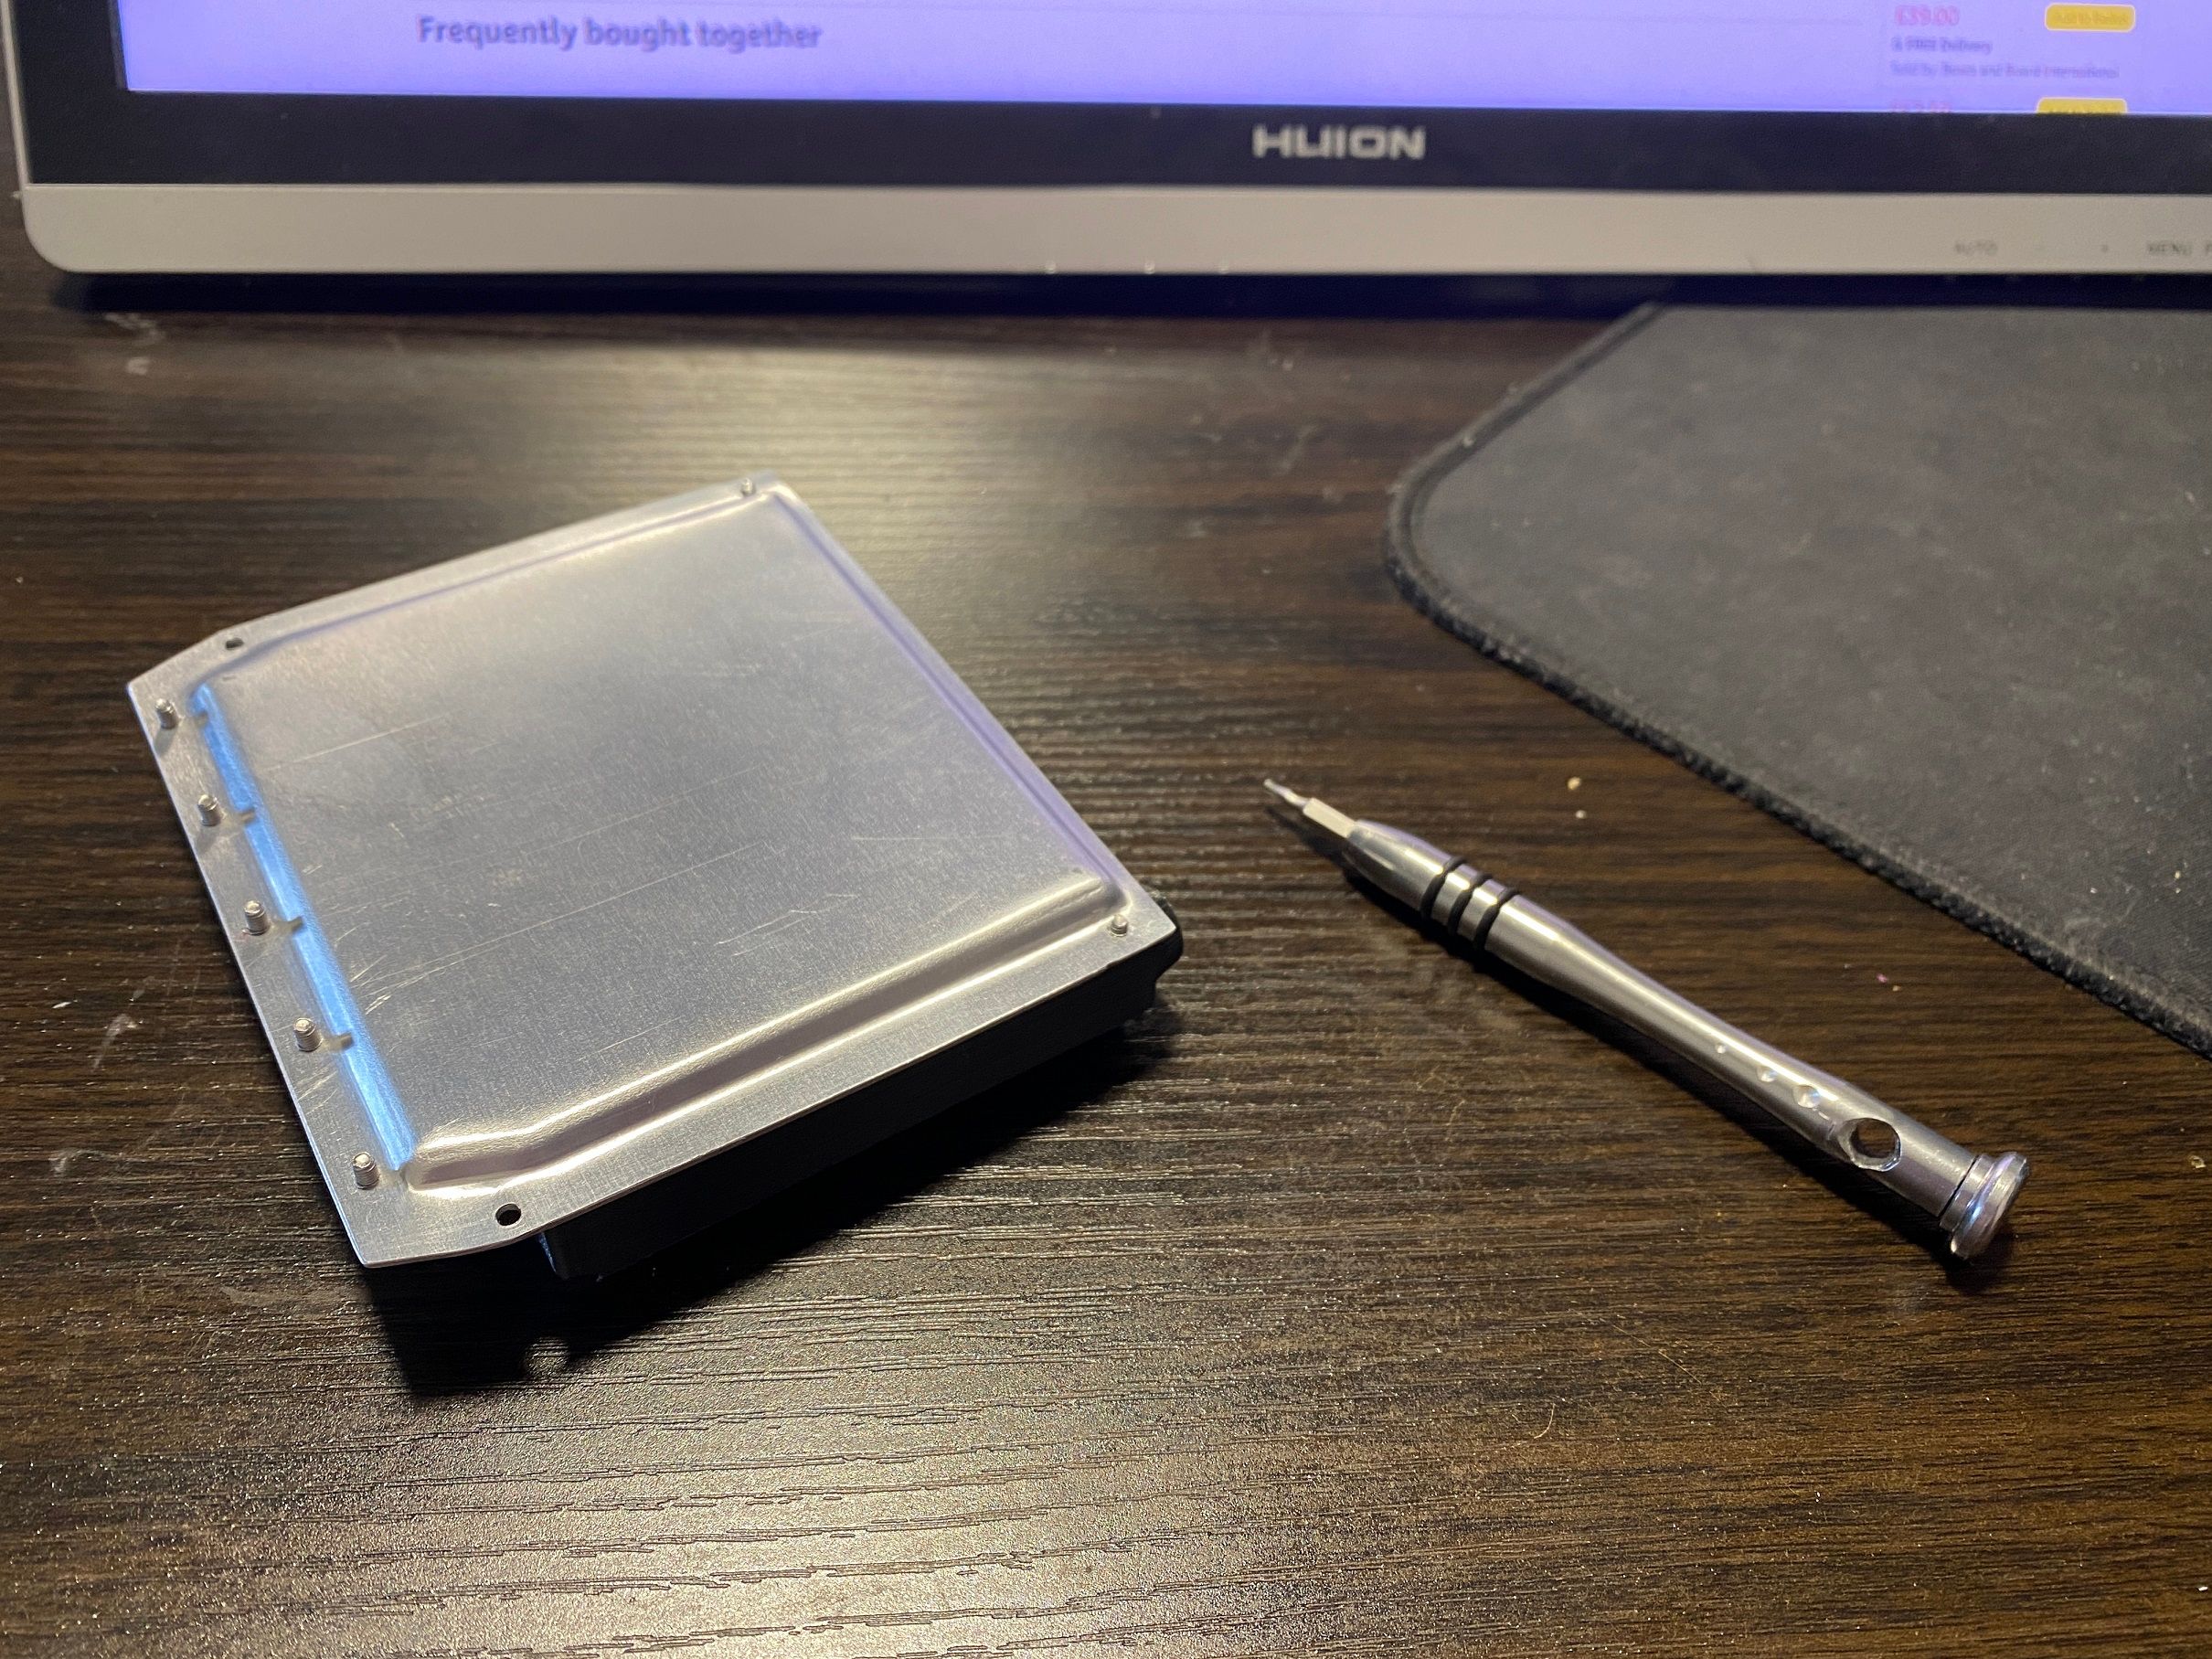
How did you fabricate the aluminum top plate ? Looks like it was pressed out with dies. -
@lia said in Onewheel XS:
So far so good, no fire.
This would be the pre-pre-alpha test . . . Good job!! ! :D
-
@lemur Thanks :D
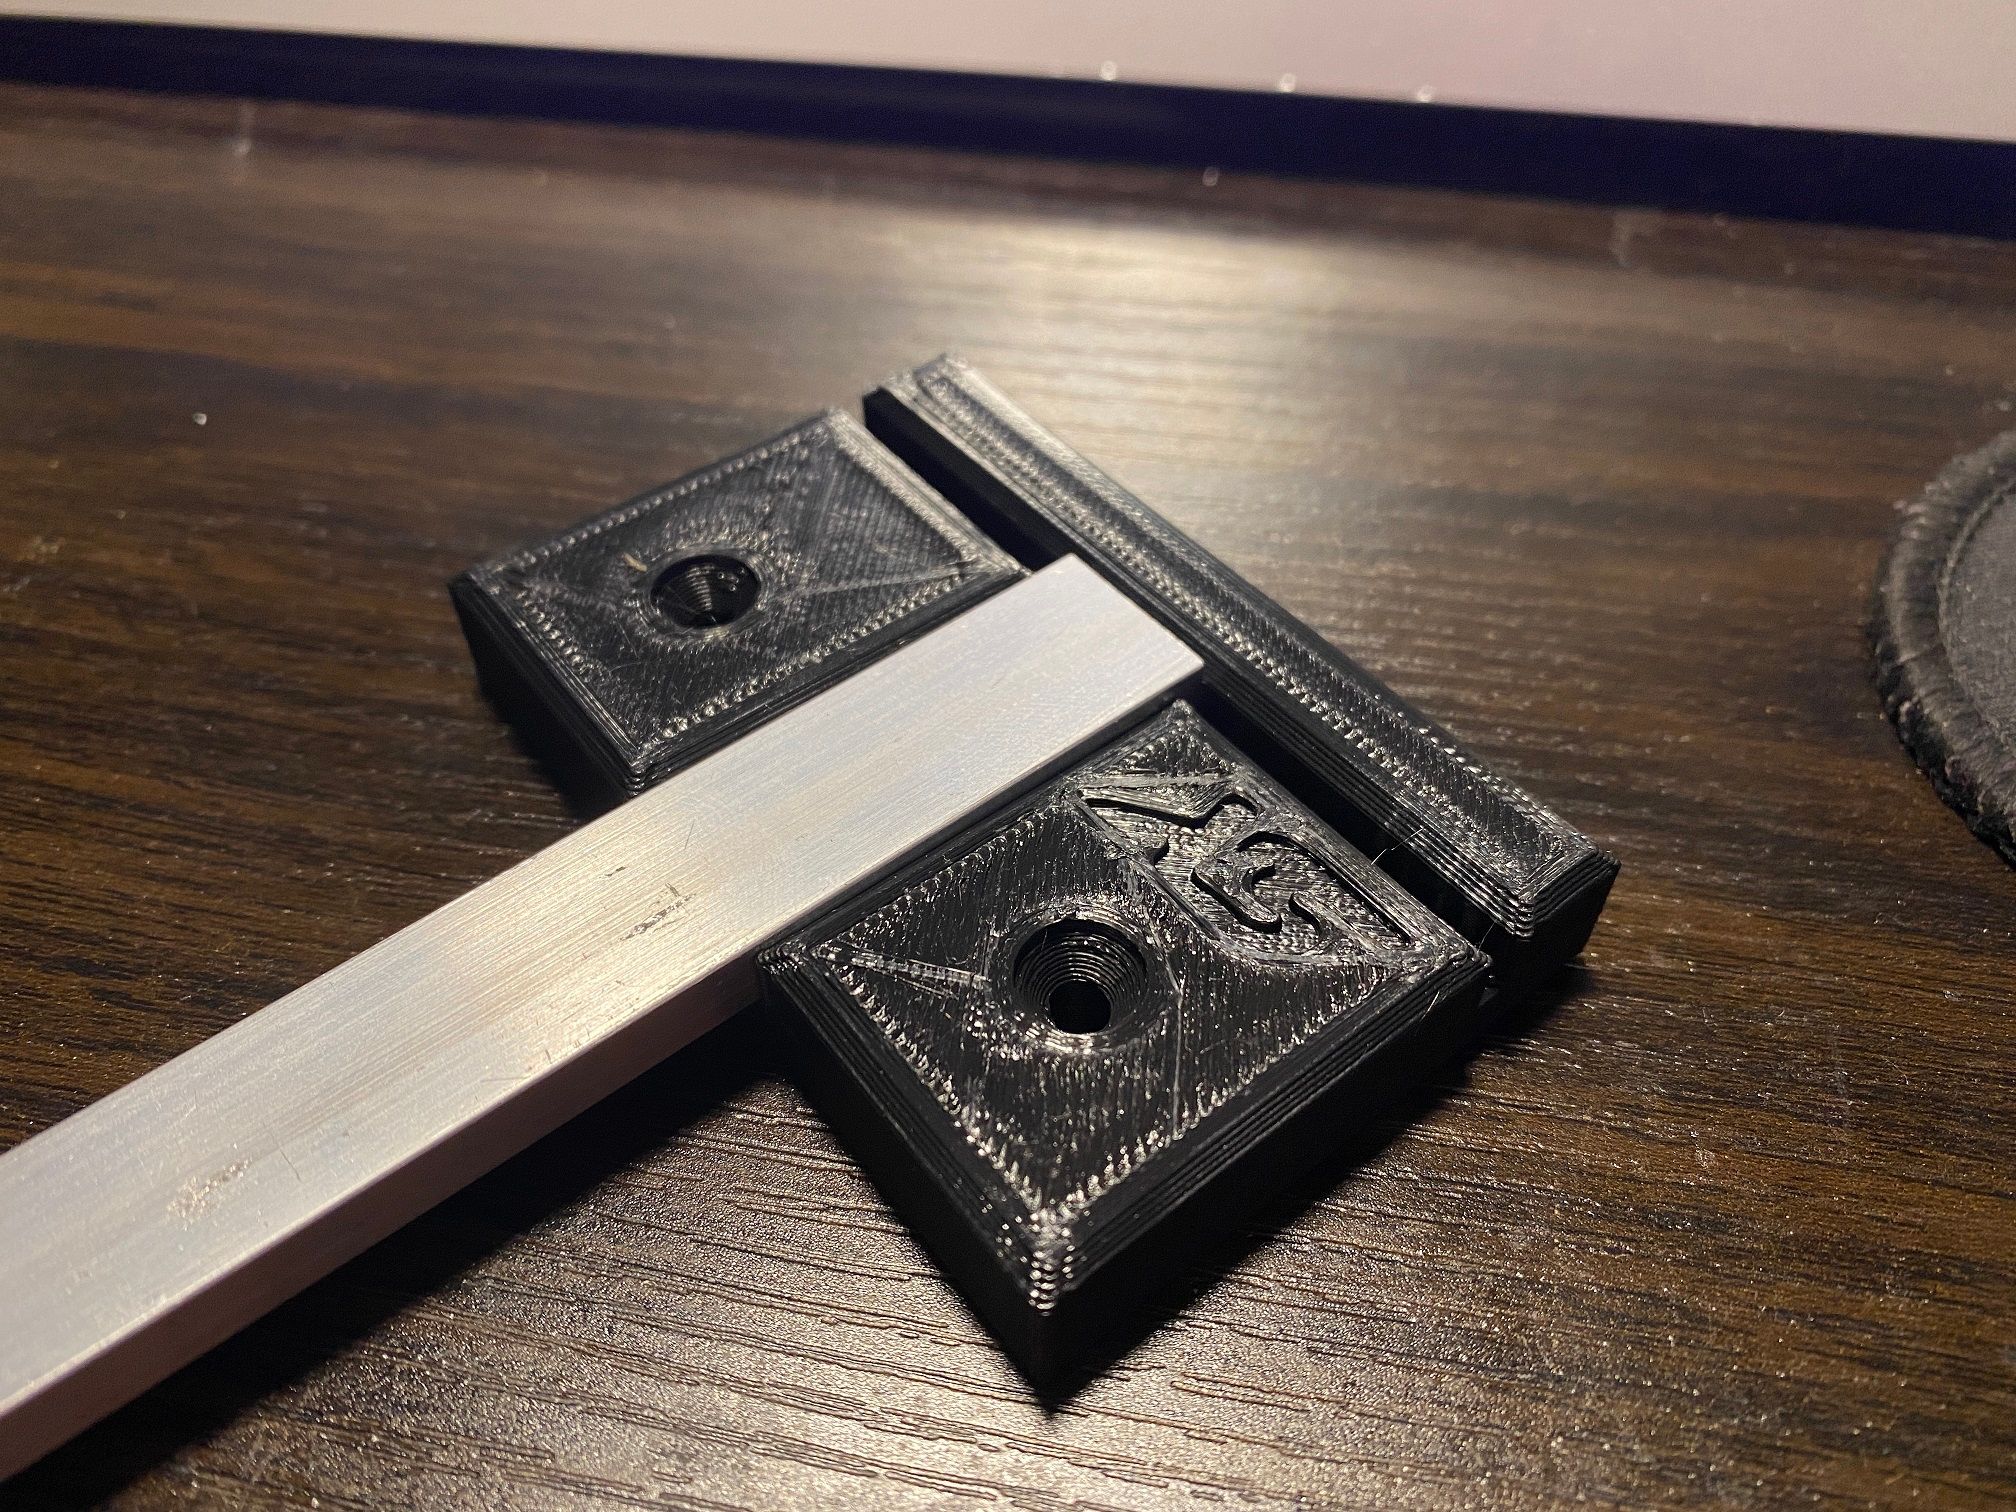
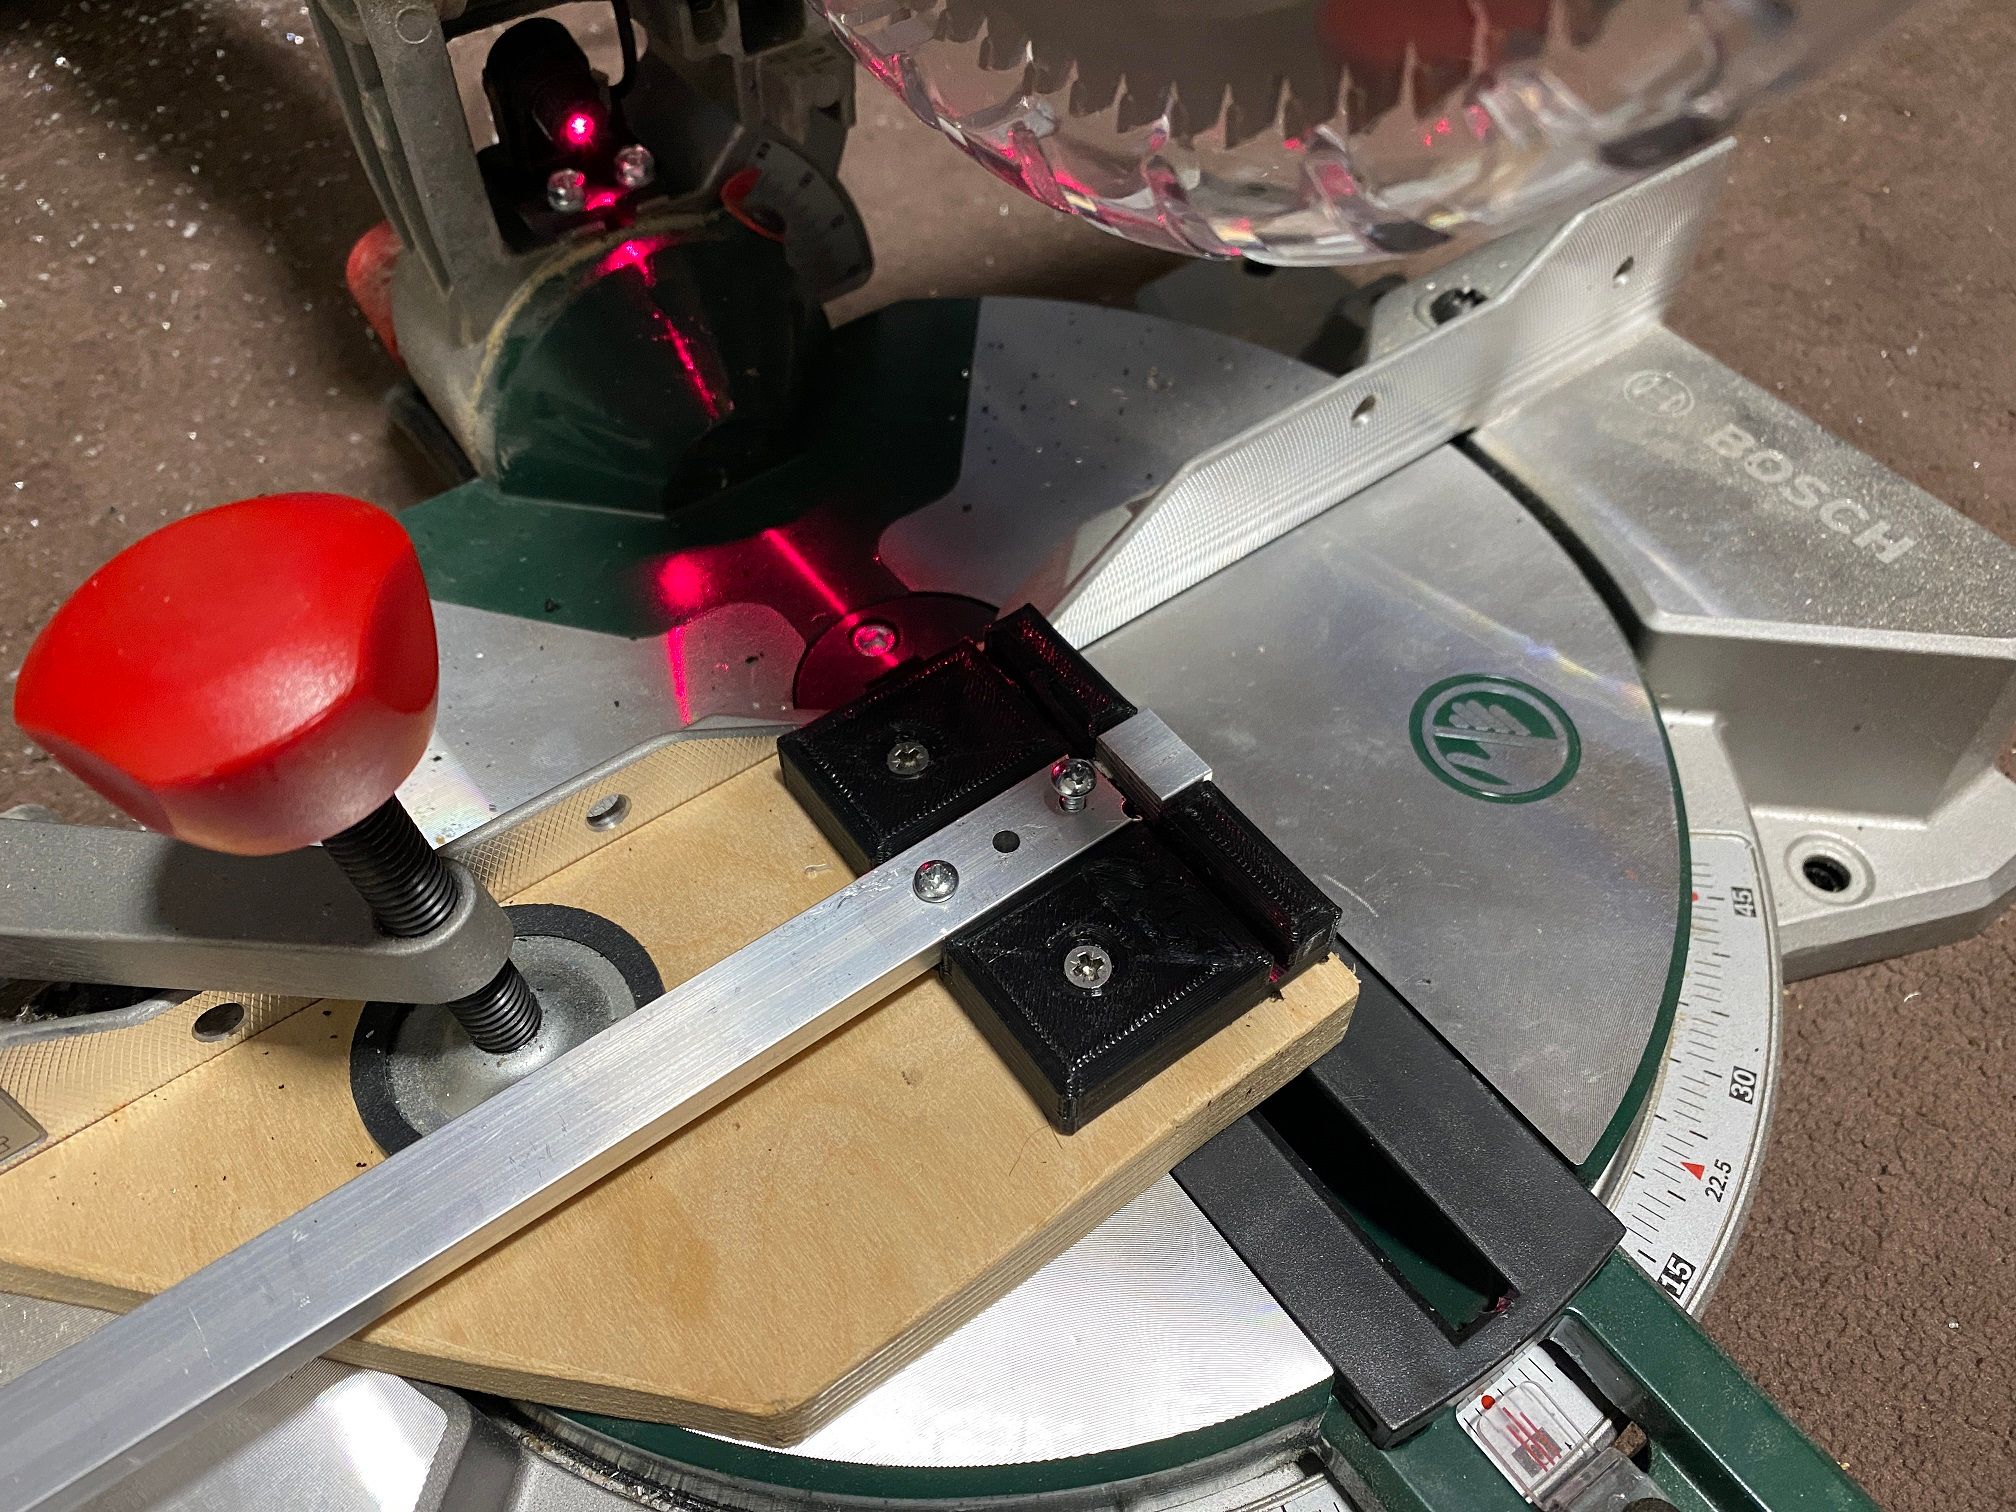
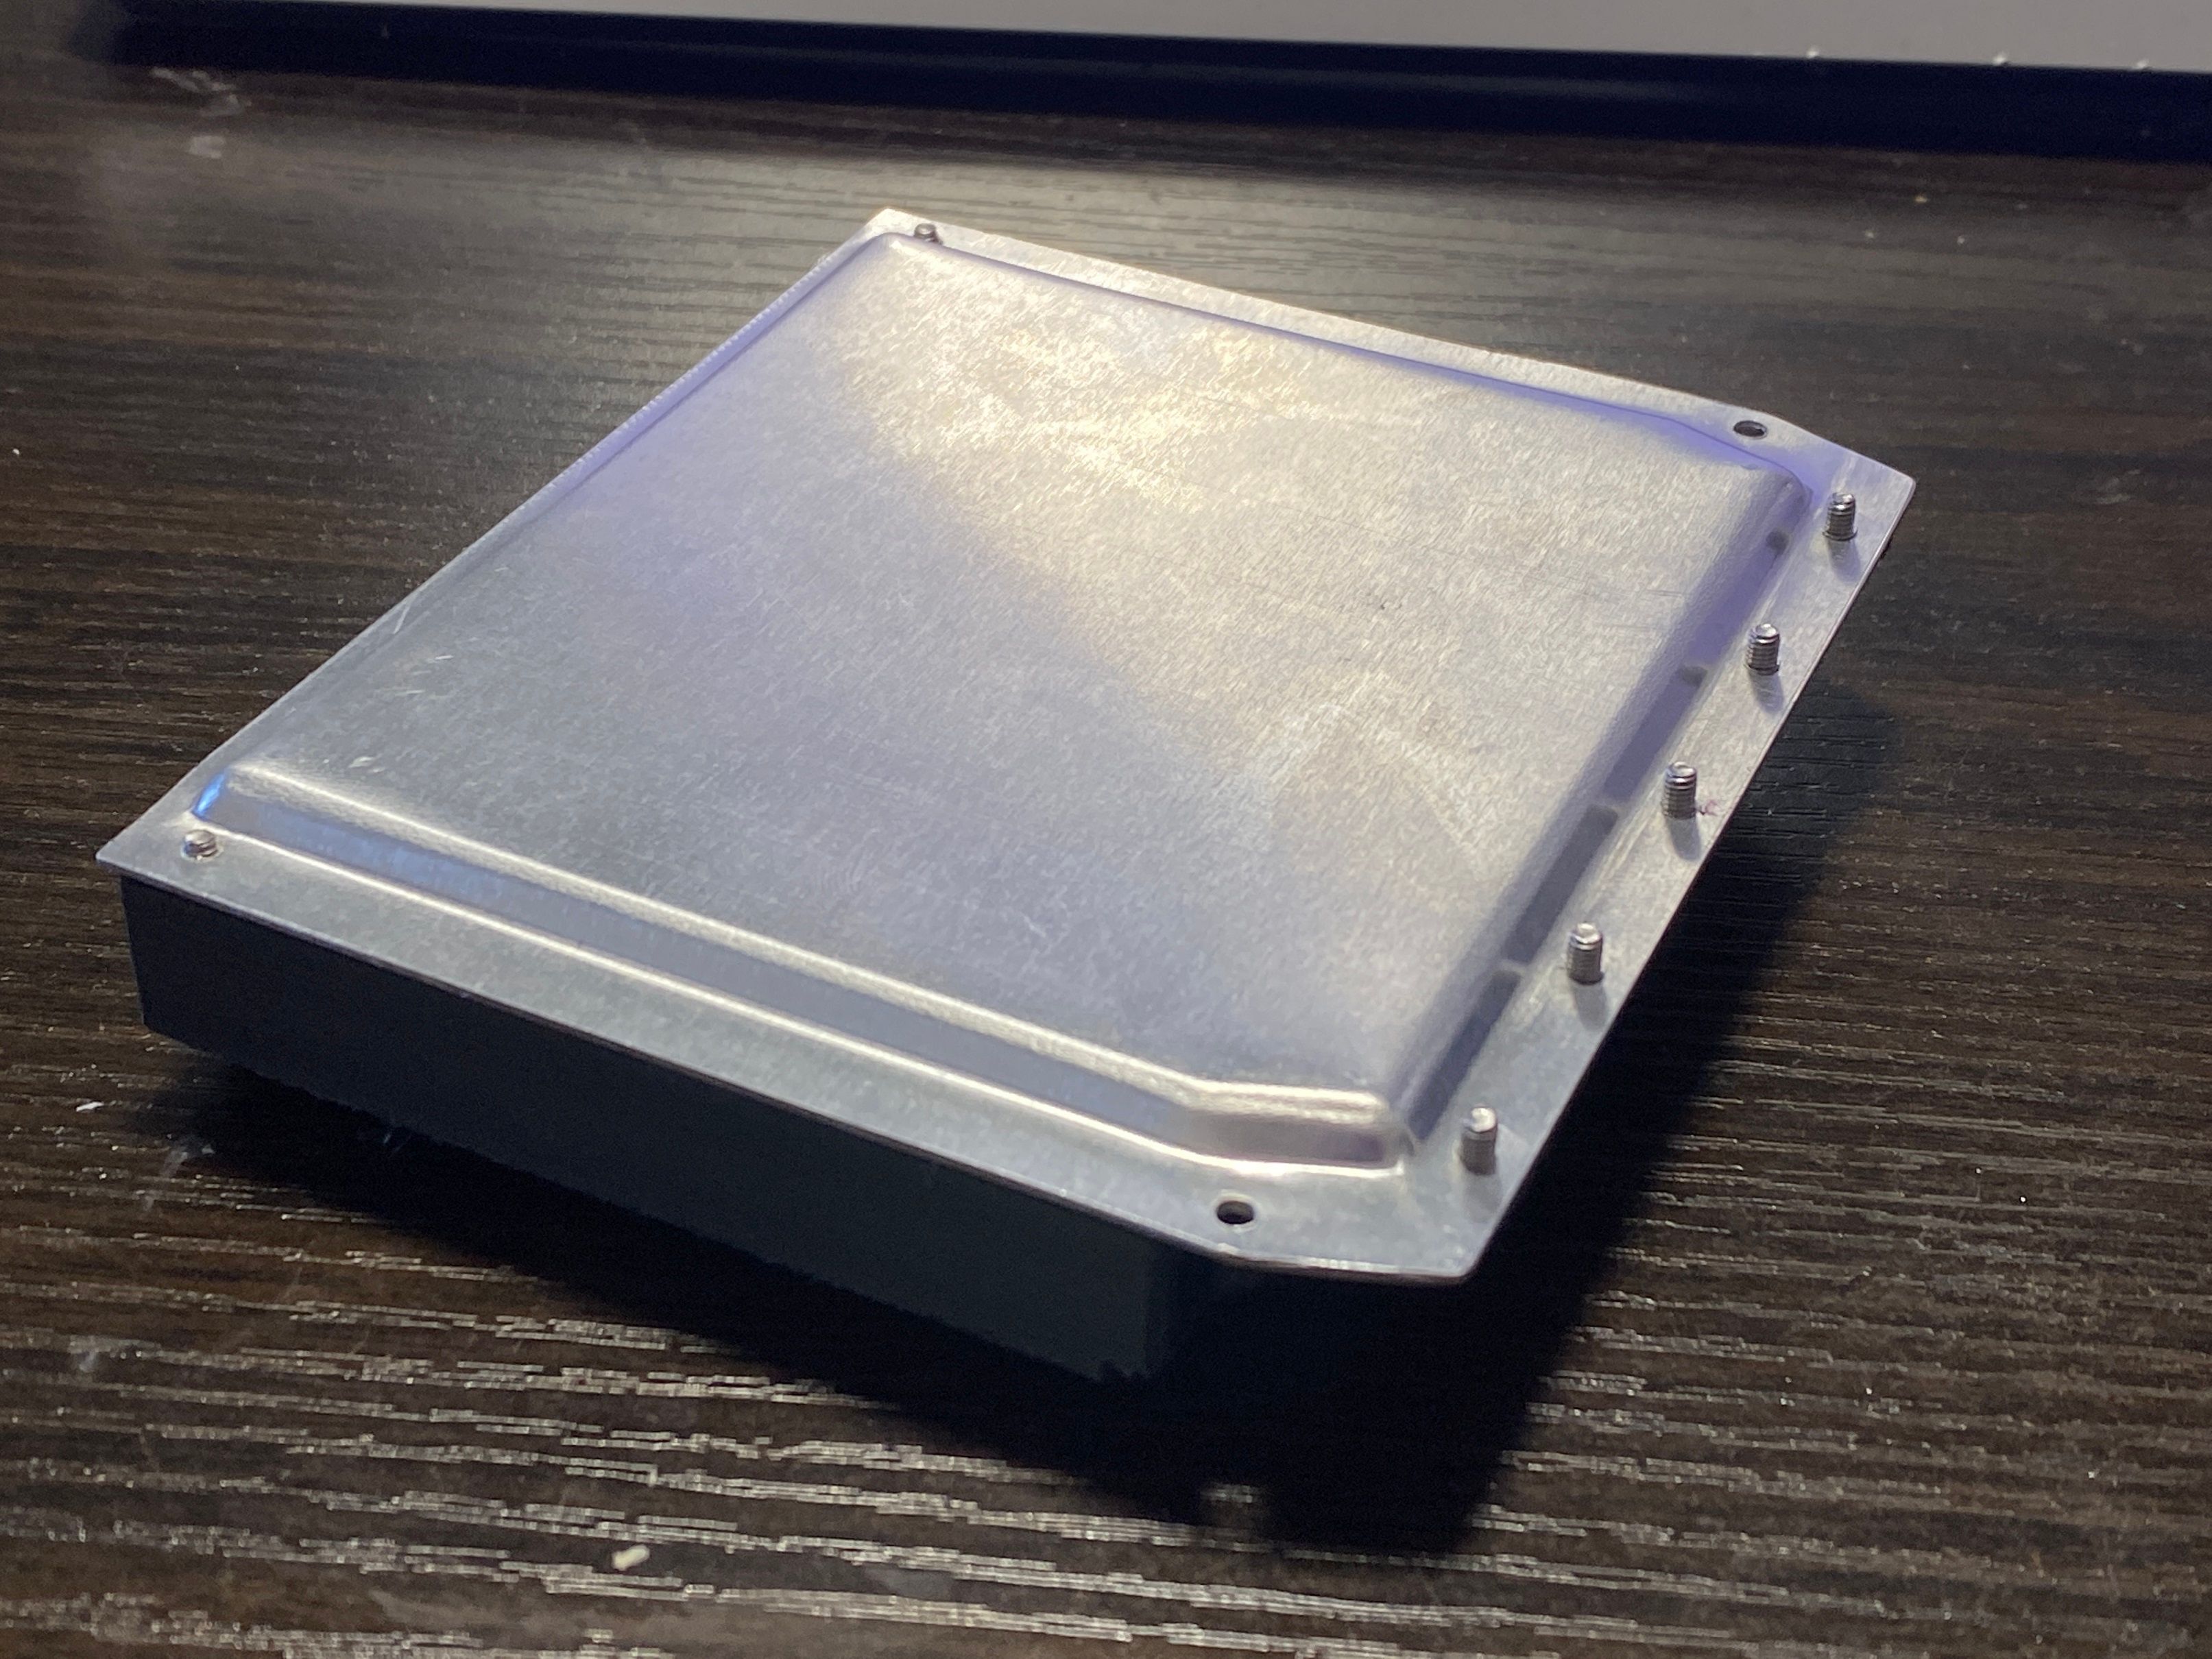
You nailed it, made 2x 3D printed plates to encase the 1mm thick sheet then over several repeated sessions of crushing it in the vice it got the shape from the dies. Once pressed I drilled through the guide holes then used a final template to cut them on the mitre saw.
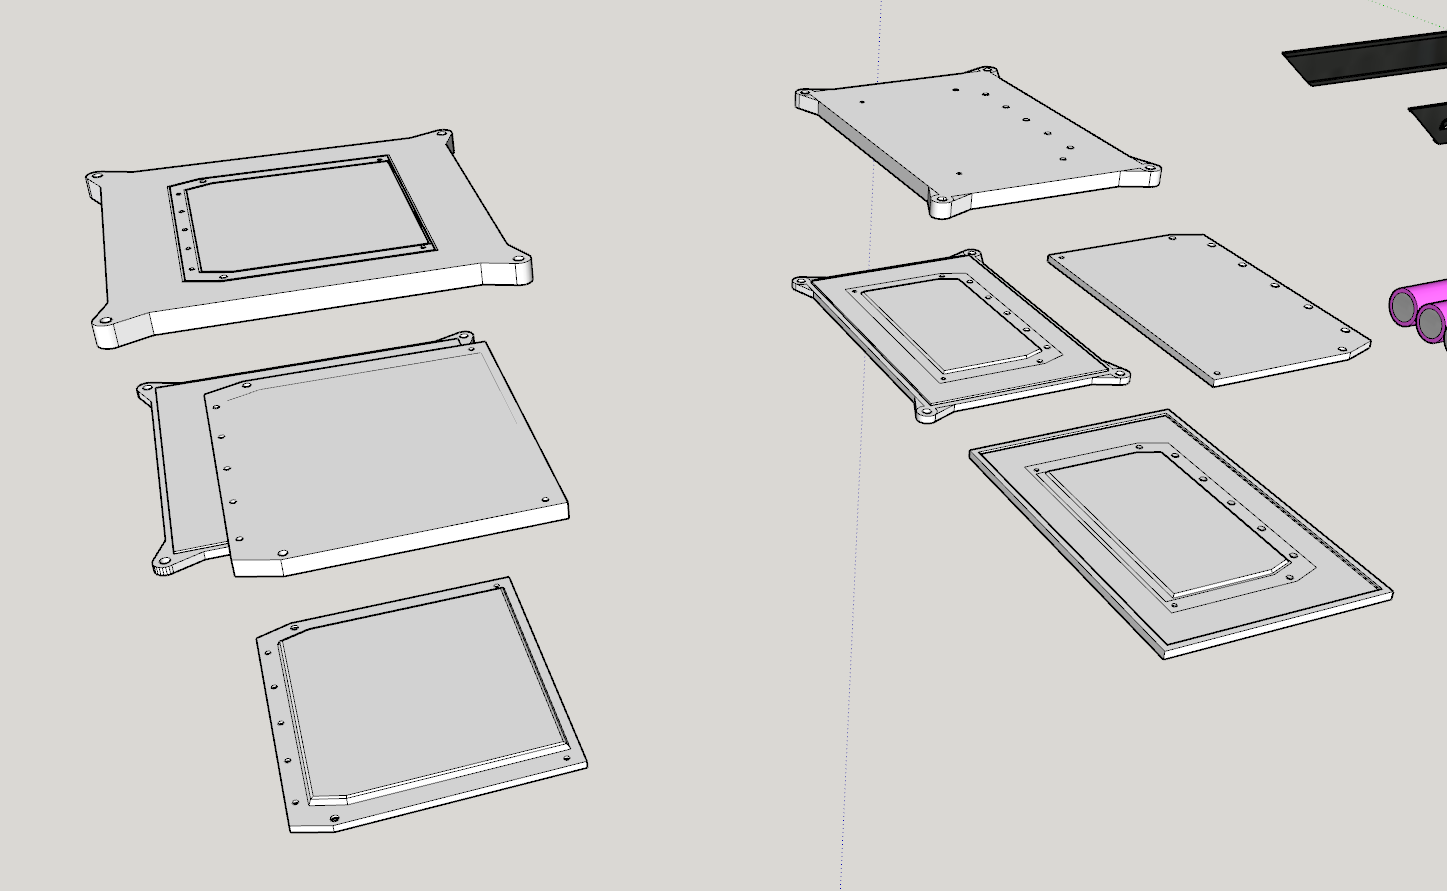
Controller was easy enough since I made that one correct to scale so it's barely raised. Battery side though I gave myself 3mm extra to work with since those cells stand no chance otherwise.
@OneDanGT Aha true xD Honestly was shocked nothing went pop like the caps.
