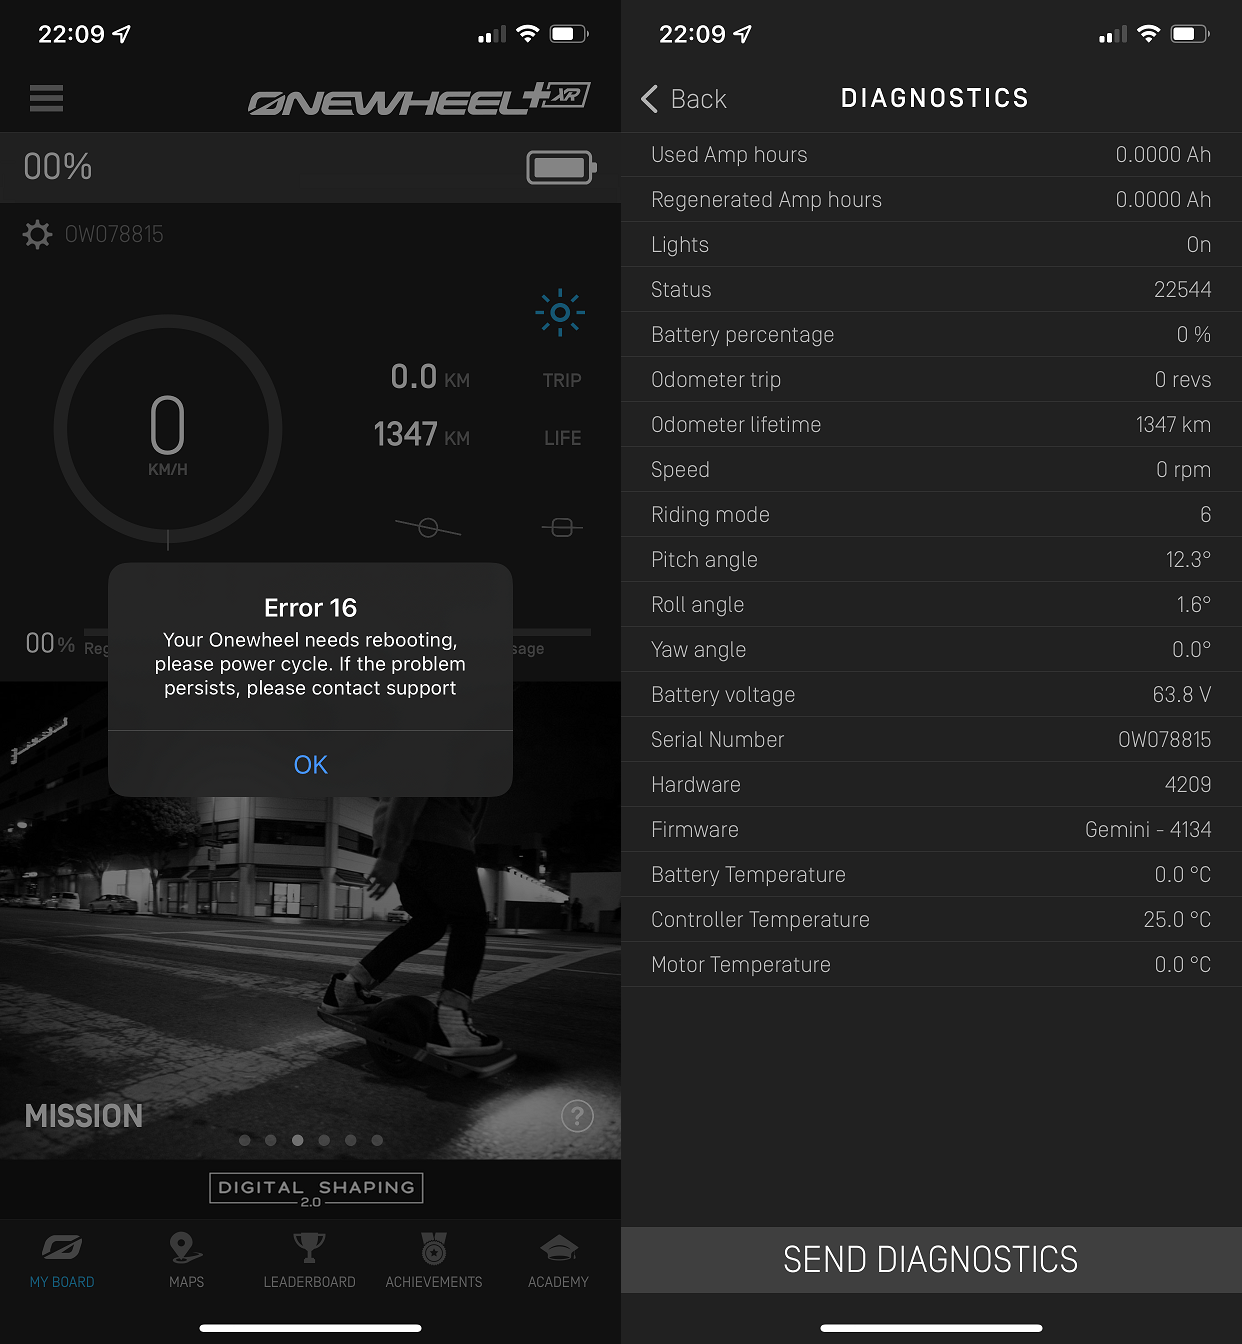
XR Error 21 (repaired)
-
@lemur Thanks :)
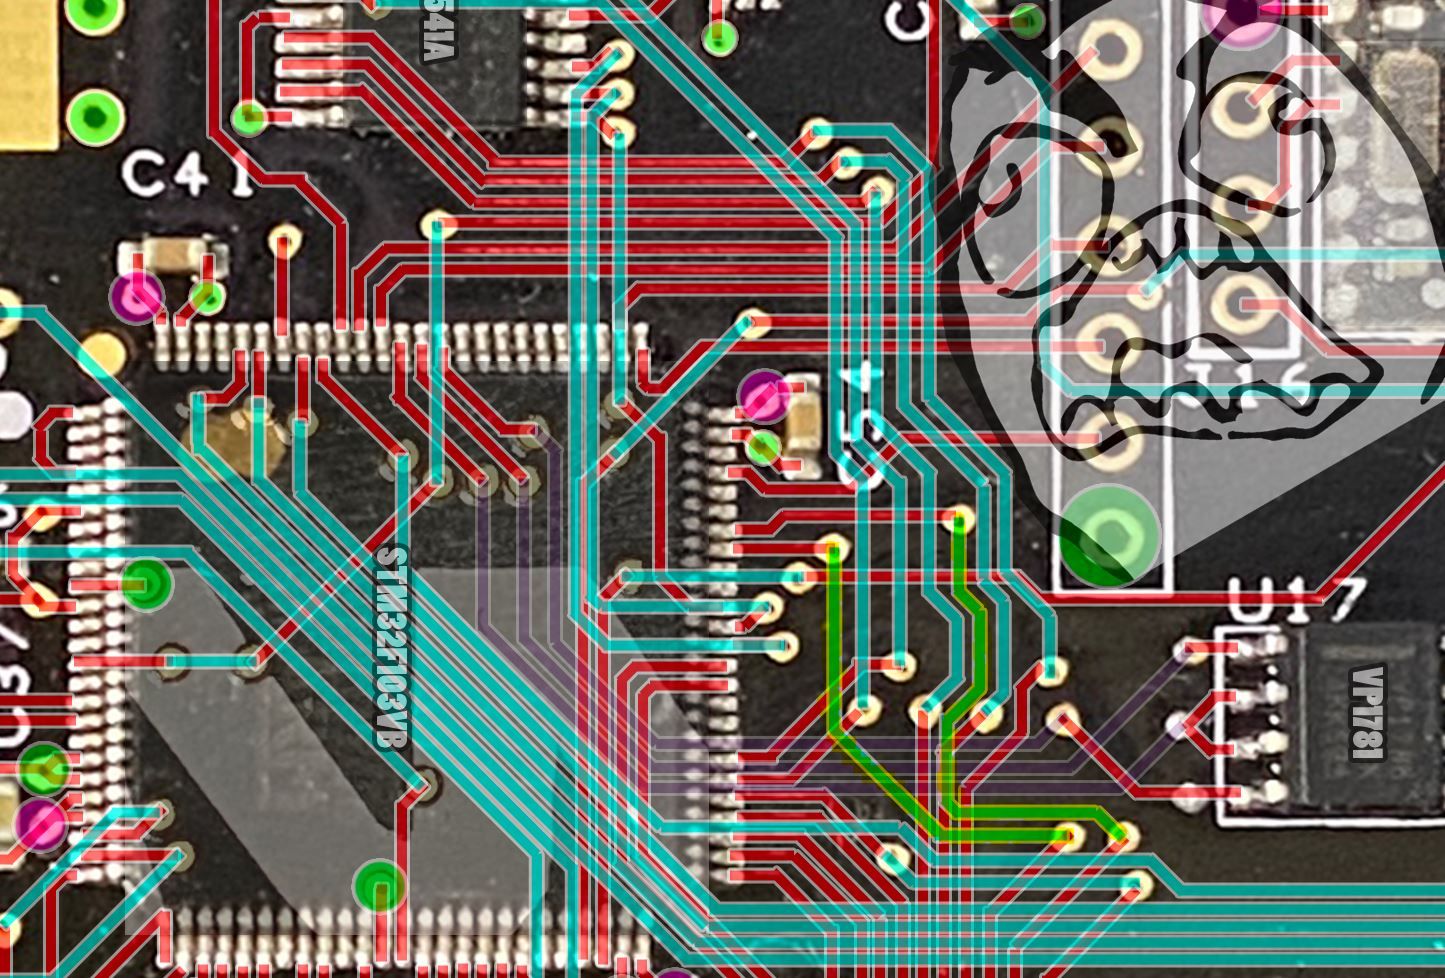
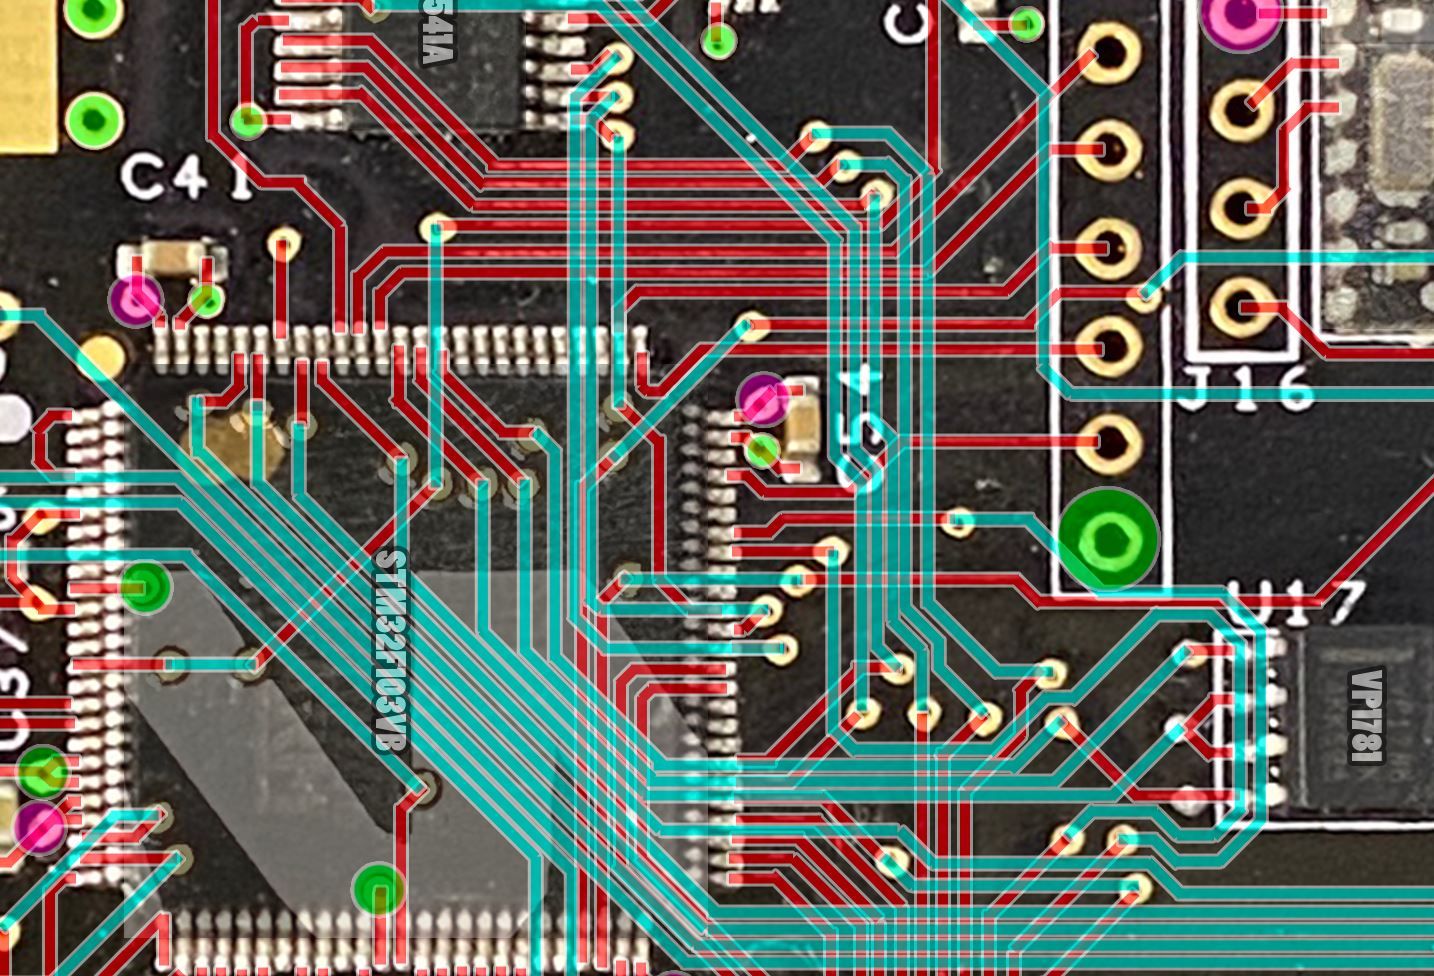
I know a schematic for the controller will allow 3rd party repair to get much better so putting in the effort seems like the right thing to do.Still working on the spagetti part near the ARM chip. Got maybe 1 or 2 traces not routing on appropriate paths making some other traces hard to connect however I'm nearly making sense of it all.
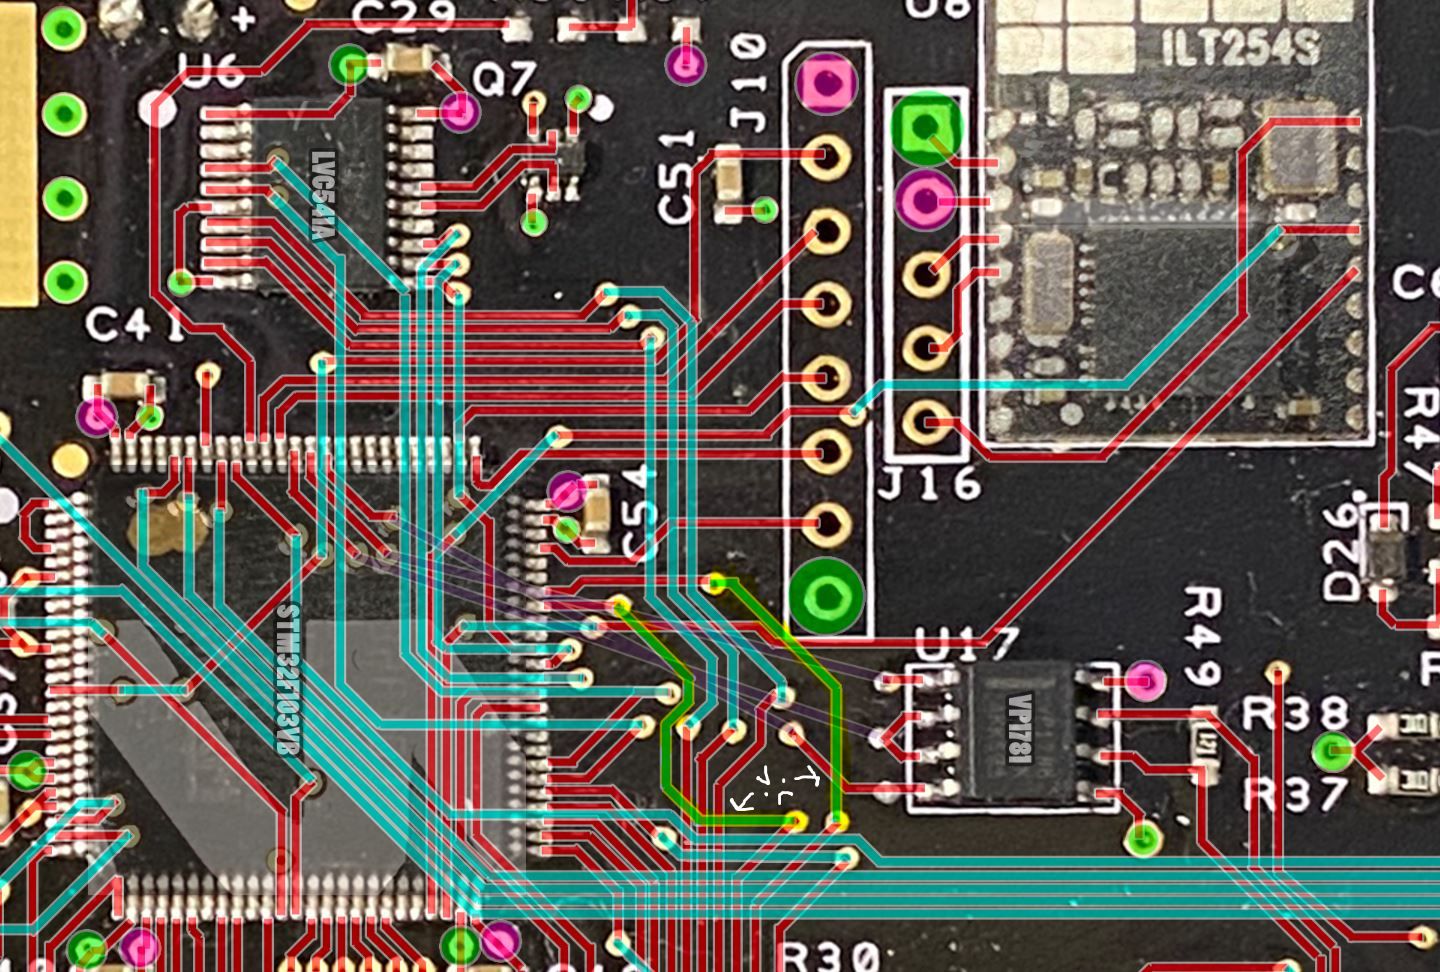
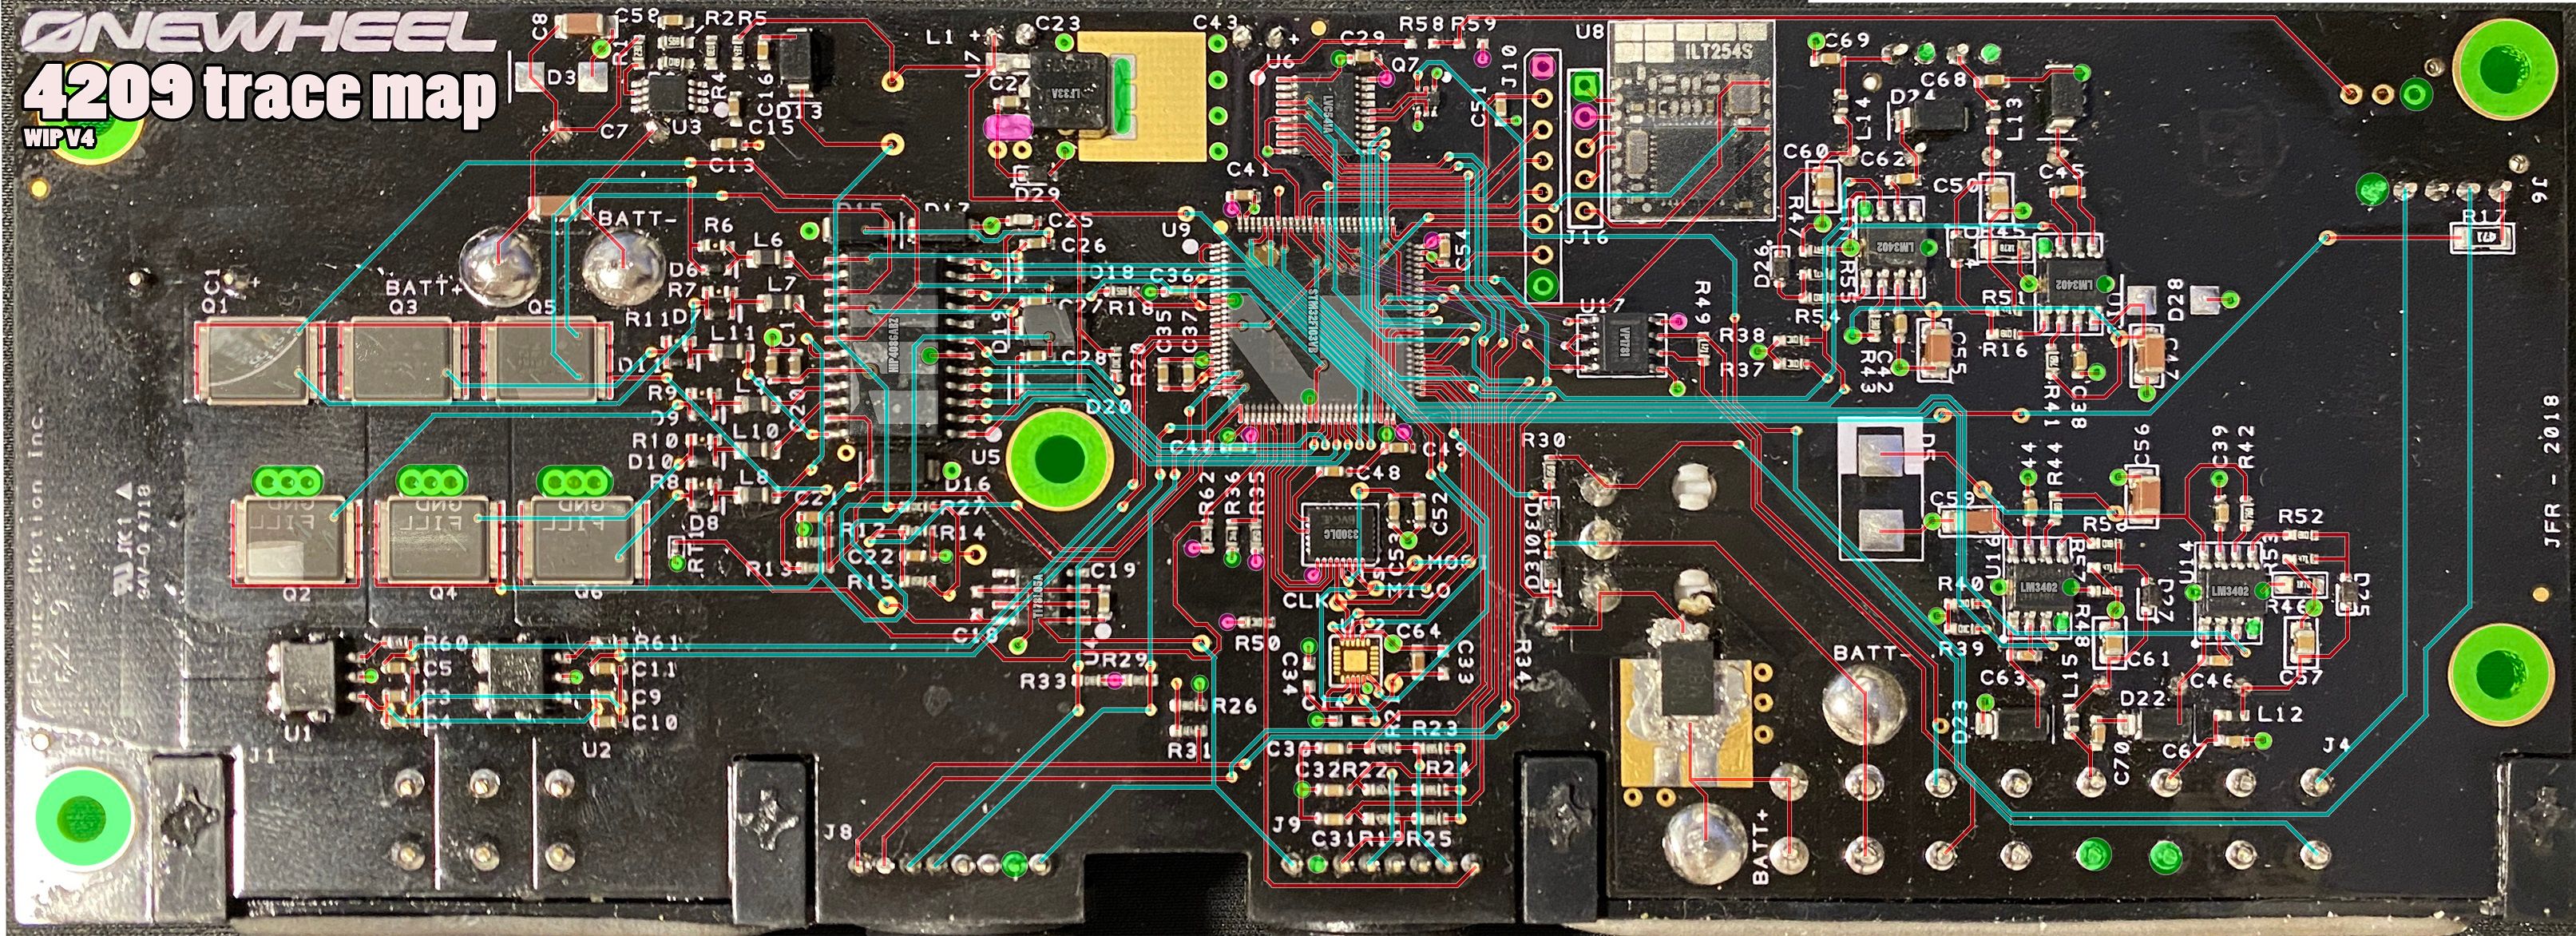
Highlighted 2 traces I think are wrong (yellowy-green with the angee face pointing at them) that is stopping me route the 3 traces for the BMS/Controller communication. Hats off to whoever painstakingly routed these traces, no way did an automatic tool do this.Full image for V4 below.
Red is the bottom layer
Blue is the middle layer
Green is the top GND layer
Pink is 3.3v that I haven't decided how they route yet
I can safely say I am much more familiar with how this works even if I don't understand what some parts do exactly. Will probably be able to give a full pinout for it soon or recreate the PCB as a gerber file for 3rd party manufacturing 0:.
Edit 1
Thought I had it... AAAAAAAAAAAAAAH
.
Edit 2
Okay I figured out a way to route the blue traces that makes sense and isn't too weird. There are definitely ways the via's could have been placed to be more sensible but... oh well.
-
@lia In awe, I am, at your ability to figure these workings out!
-
@s-leon Thanks :)
I like to think of it like those games where you try to arrange pipes to connect the inlet to the outlet. Just in this case there are lots and I have to find where the inlet and outlets are. -
@lia I reflowed the solder on a ASIC miner hashboard today and fixed an intermittent issue. Was feeling awesome then read this post and reaffirmed I'm not even on the same playing field as you. 👏
-
@stinkyface Congrats on the repair! Reflowing isn’t nearly as easy as they make it look on YT.
Funny side note, a few years ago I absolutely toasted a Toshiba laptop that had a lifted CPU… but because I’m a moron I used a heatgun @400c and some tin foil to try protect the rest of the board from the heat.
That day I learnt what popcorning a pcb looked like.Since then I got myself the right tools for some reflowing. CPU reflowing is still out of my league.
-
I have spent this entire time trying to find where the LED drivers get their power from.
Thought I already checked this but apparently not since I accidentally discovered they're driven straight off the main battery rail. I am omega dumb.I now somehow have to figure how Batt+ reaches an of the vias on the LED side
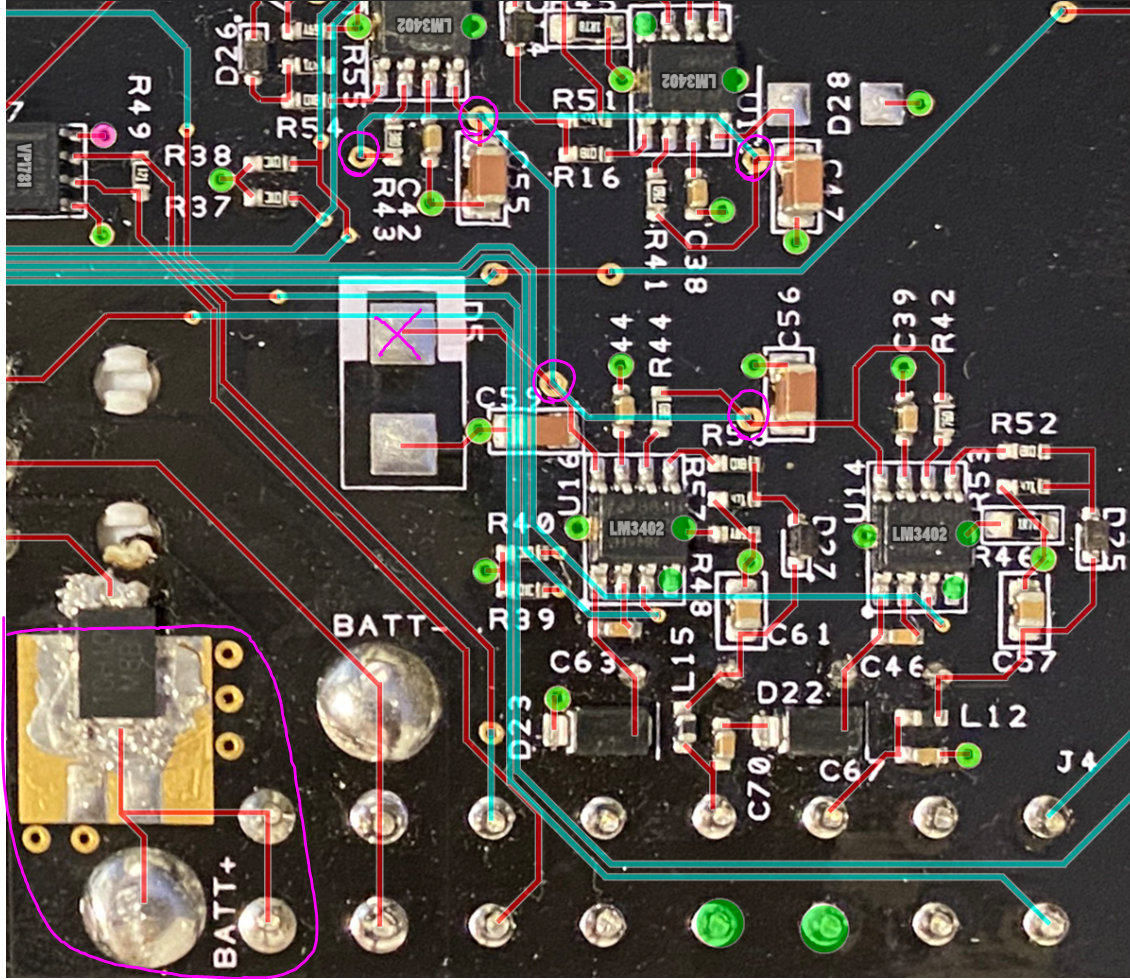
Can't go to that pad for D5 since there is no surface trace leading to it or a via under it to connect to.Presumably the 4 blue traces going vertical between them route differently but I can't see a valid way to move them in a way that exposes a direct path between them. I imagine there is a sensible pathing that's just been clouded by my existing guesses, sort of like trying to solve a Sudoku by guessing a few numbers that later comes back to haunt you on the last few empty squares.
-
Still can't quite sus that routing so I'll sit on it a bit longer. In the meantime I've created a key down in the bottom with links to datasheets for each chip I've been able to identify.

Q1 - Q6 : IRF7759
U1 - U2 : ACS781xLR
U3 : LM5007
U4 : TI 78LO5A
U5 : HIP4086ABZ
U6 : LVC541A
U7 : LF33A
U8 : ILT254S (CC2541)
U9 : STM32F103VB
U10 : LSM330DLC
U11 : N/A
U12 : N/A
U13 - U16 : LM3402
U17 : VP1781Edit : Thanks to ChunkDunkerson for U1- U3
Thinking of posting this on Reddit and seeing if anyone's got any ideas on U1-U3 and suggestions on the last missing traces.Nevermind I posted it anyway :)
EDIT : This has been continued in another thread
-
-
so what was the final solution to end error 21? new lightbars?
carving turns all year round
-
@b0ardski Nothing yet, still sitting waiting for me to pick it up again. I'm going to remove the LED drivers to see if that fixes this one since the error occurs even when nothing is connected.
-
@lia isn't there a chip added to the 4209 after 4208 to defeat charge n ride? was thinking that was a likely issue.
carving turns all year round
-
@b0ardski They added some extra bits, this is what I've seen when comparing a 4206 to my 4208.
Here's a comparison I did on the former forum when doing the E16 issue.
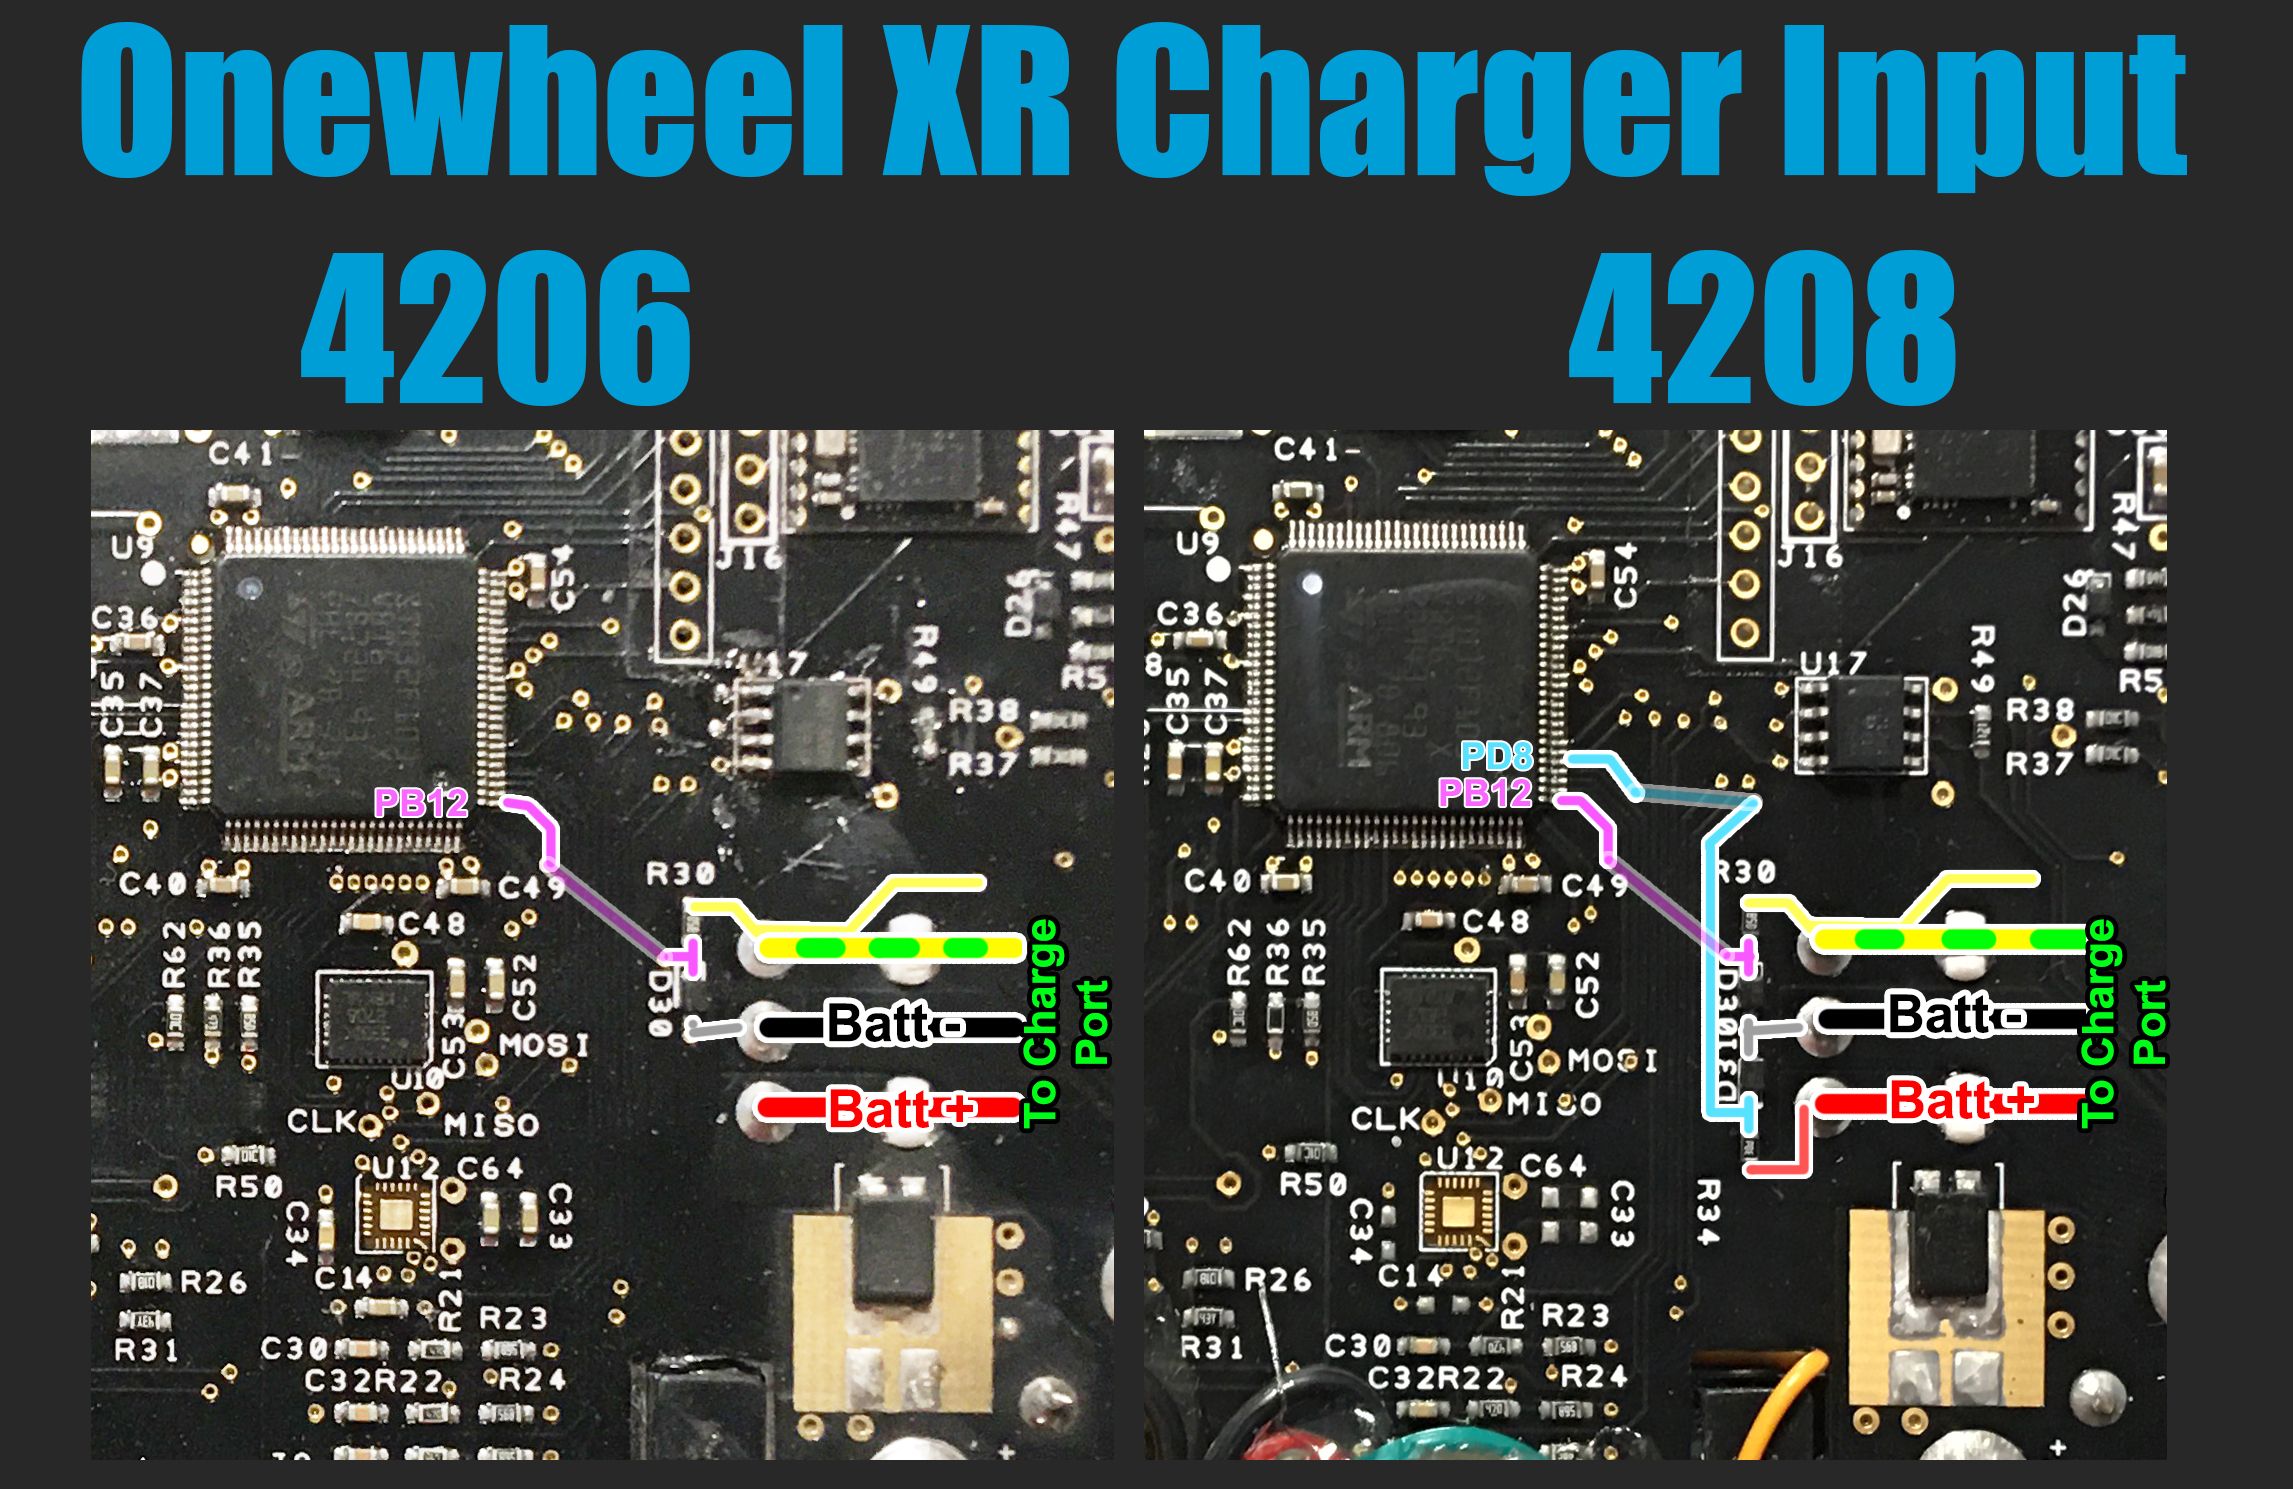
Apparently removing R34 restores the function on later revisions. -
Don't you just hate it when you dink about and things just work? Not even any smoke?
Figured I'd give the LED drivers a bit of heat in case something wasn't connected up right. I don't know if that was it or I accidentally fixed it while probing it for hours but she lives!
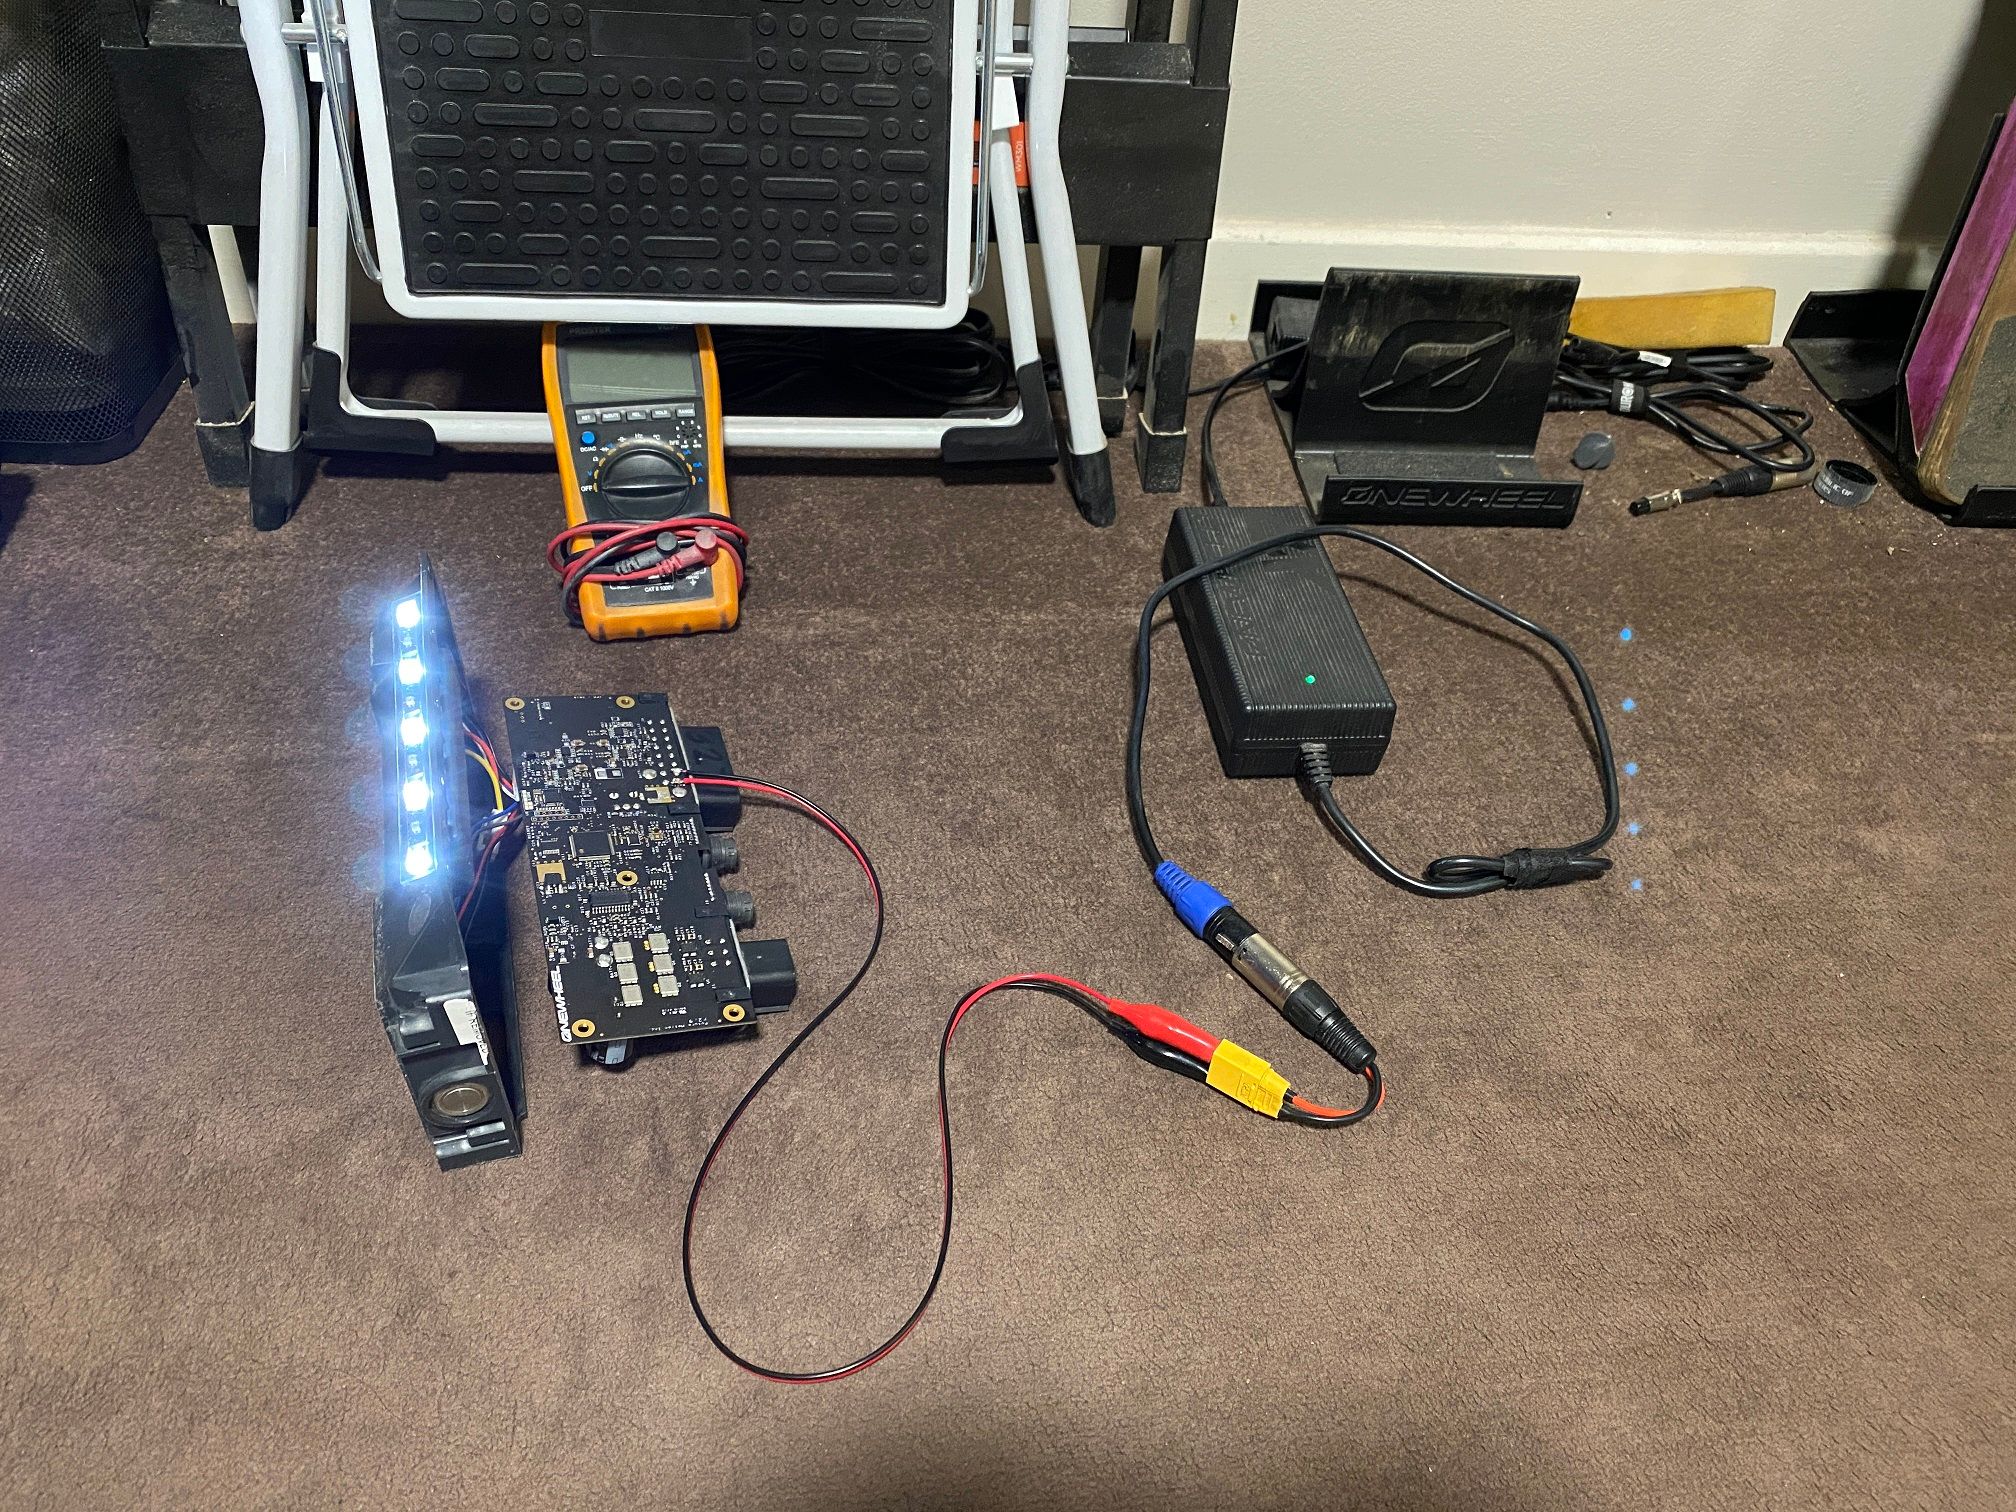
Nothing proper to hook up so piggybacked off my charger and soldered some leads onto Batt+ and Batt-
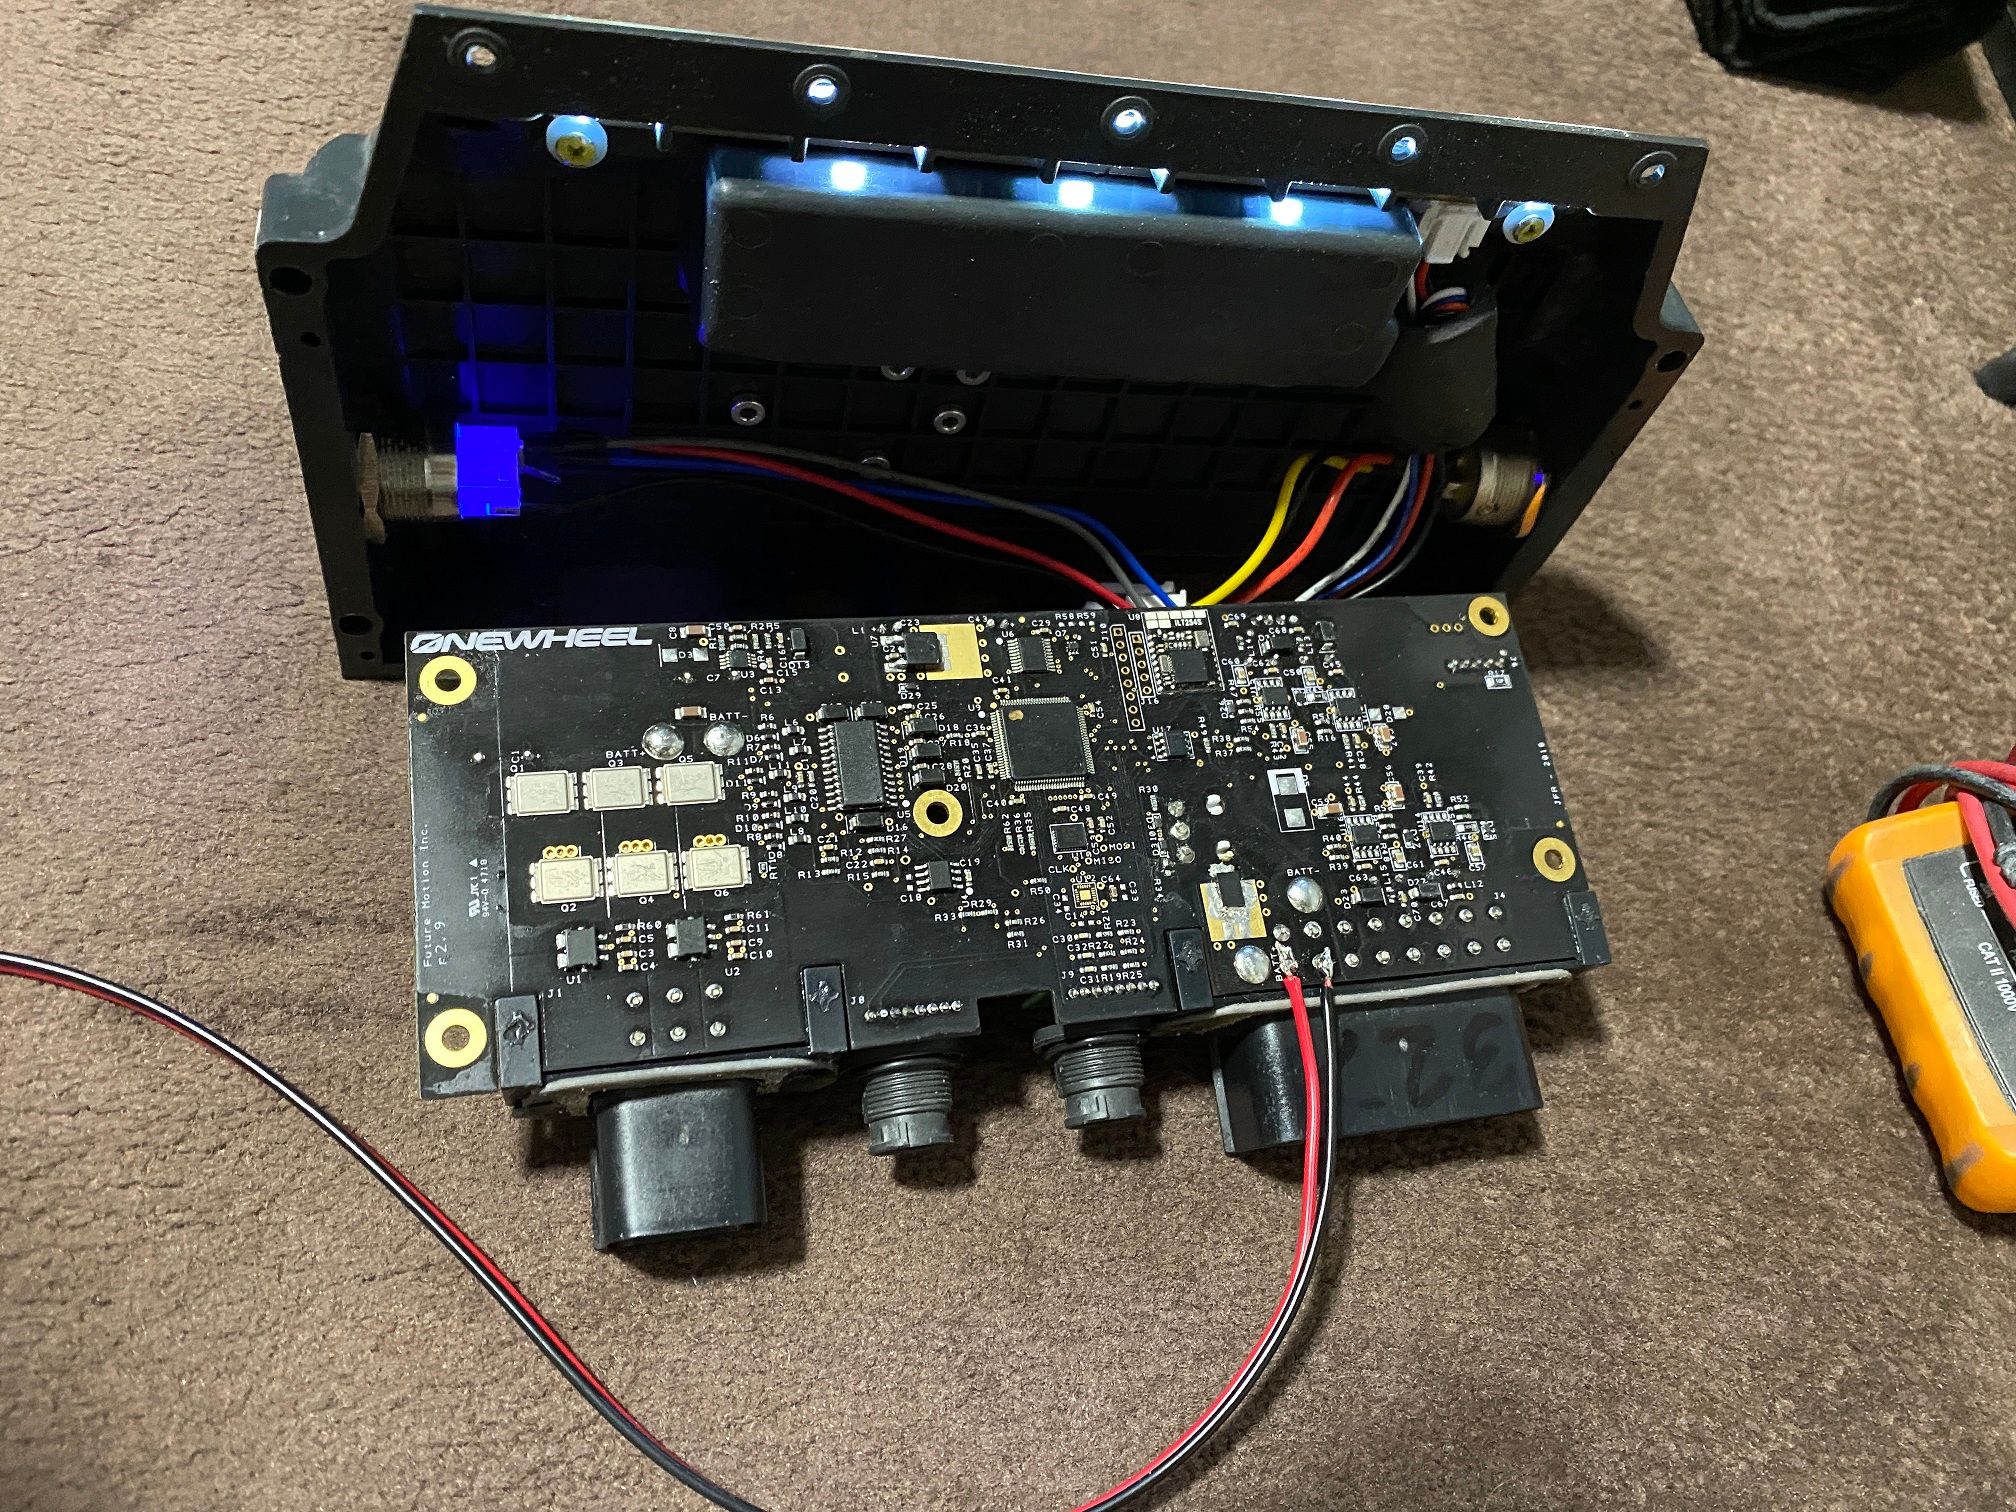
Still gives E16 but that's kind of a given since it's only the brains.
Guess it now needs a body. Another project?
-
@lia a few parts here a few there and ... maybe a growler to stretch the quiver.
that doesn't help me much though I don't have your magic touch with electronics and I'm all thumbs with a solder iron or voltmeter probe. maybee I can hook up test power with the spare harness plugged in instead of soldering on the leads?carving turns all year round
-
@lia said in XR Error 21 (repaired):
@b0ardski They added some extra bits, this is what I've seen when comparing a 4206 to my 4208.
Here's a comparison I did on the former forum when doing the E16 issue.
Apparently removing R34 restores the function on later revisions.so just removing that resister would allow charge n ride on the 4209? I like that Idea.
-
@b0ardski said in XR Error 21 (repaired):
maybee I can hook up test power with the spare harness plugged in instead of soldering on the leads?
That would be my first step if the board still errors with the headlights removed. Take out the controller with nothing attached, not even the charge port or power button just for good measure.
If you can then feed power into the harness with as little else connected as possible we can see if the issue remains. If it goes away we can start connecting parts again till it shows up thus telling us what is broke :)
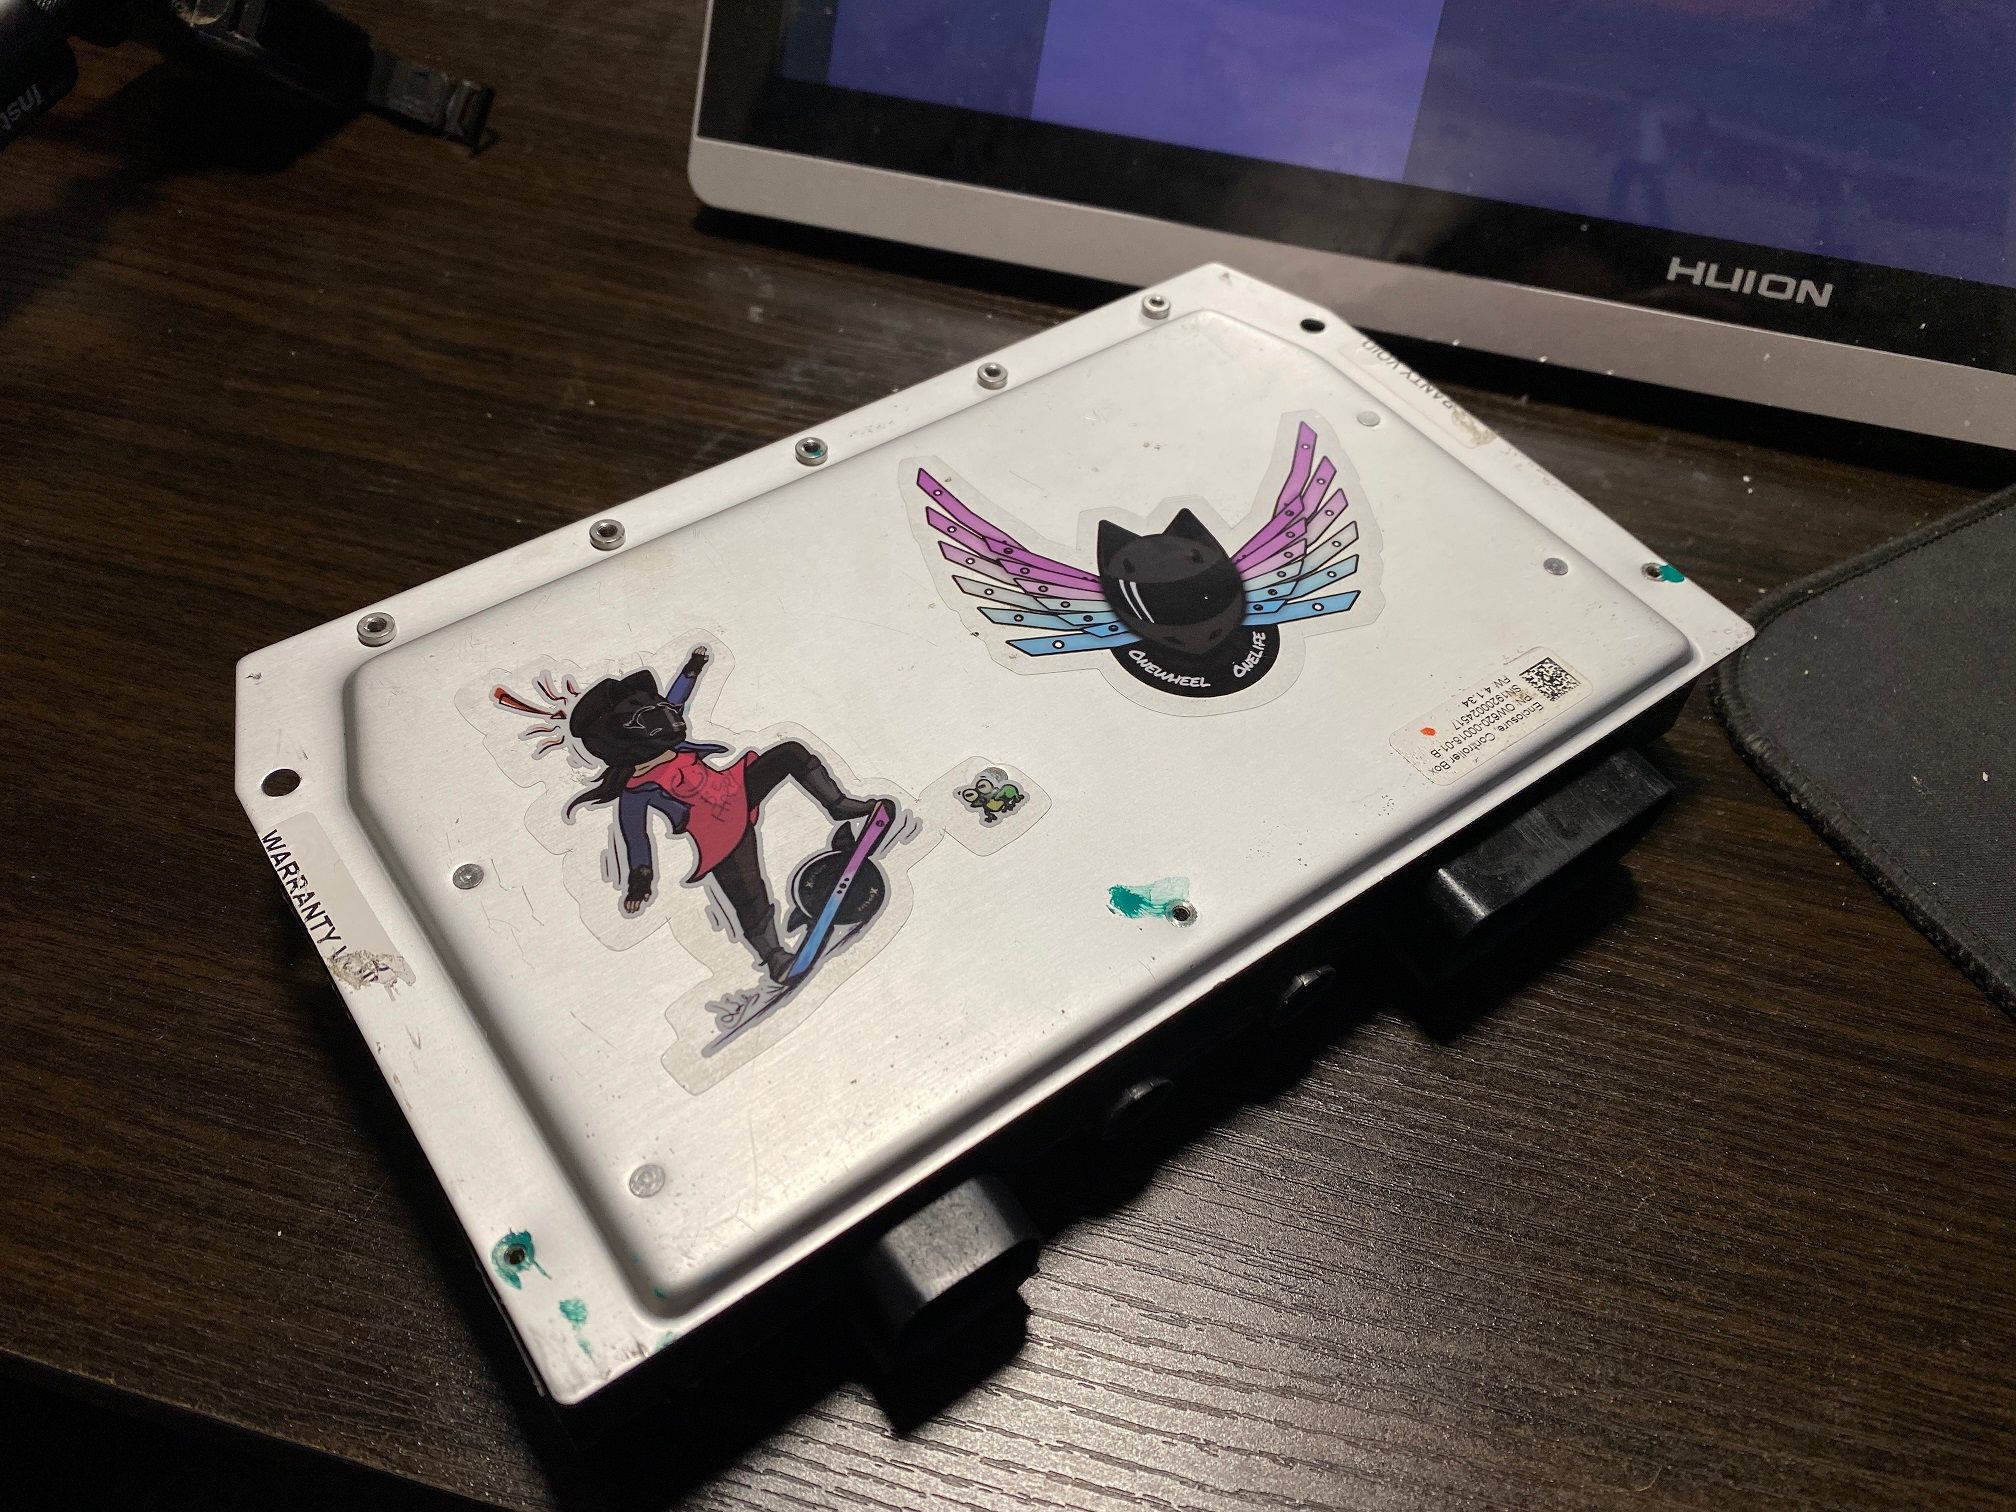
However if it remains then we need to start digging a little more. If you can take a HD pic of your controller’s component side I can cast an eye over it for anything sus.
-
@lia thanks for that i'll get pics posted later this evening, after I open it up and rig up the spare battery
-
@lia will upload pics tonite, on the way to last day of the season party at the ski hill.
plugged in the spare battery to the control box , unplugging lights button and charge plug made no difference.. the mastic pads on the components felt damp but no sign of corrosion.carving turns all year round
-
@b0ardski Sounds like a sneaky problem. Hope you enjoy the party :)
-
@lia Is that component with the messy soldering some kind of fuse?
I repaired a Xr bms with a blown U1 chip(I249a1) chip, it works with my good Xr 4208 controller, but when I connected the repaired bms to the original controller, the controller would blink blue once and not turn on.
When I connected the charger to the original controller and the repaired bms, the same U1 chip blew again.
Luckily, I had a few new U1 chips around and the solder pads were still intact, with my fingers crossed, I connected the charger to my good 4208 controller and the repaired bms( second repair) and the charging went fine.
I'm just going through your excellent pictures to learn what about all the components on the controller.