Vesc Conversion Status (Rose/Mika)
-
Here's a write-up of my current work on the XR to VESC conversion.
I'll go into detail on what parts I've ordered, what I've learned and what tools I needed.BOM:
-
Ubox 80V 100A VESC Controller (fuse and bluetooth adaptor included) (1x)
-
- Not required, but looked a lot cooler than stock switch. Welded itself shut though, and is no longer usable.
-
4mm Banana bullet connector, F -> M
- Ubox had female plugs which were short and all the same color. I did not wish to modify the VESC in any way, so I chose to add extenders. (Probably not required.)
-
- The Ubox 80V comes with a humongous XT90 connector. Soldering to the stock MOLEX connector was a pain though, since the gauge of wire was bigger than expected.
-
- This was originally intended to help with mounting the Ubox to the board, but I realized that the Ubox was going to be a tight fit, and wasn't gonna move. Thankfully, I was able to use the screws to replace the hex screws used for holding the lid onto the controller box. Hex screws suck, and the phillips is easier to work on, for me at least.
-
- Was used to help conduct thermals from the VESC to the controller lid. More for longevity and for peace of mind. Will use later on to test if thermal paste helps with motor thermals.
-
- Not required, I'd say. Charge only mod (Will get to shortly) is the only use for these.
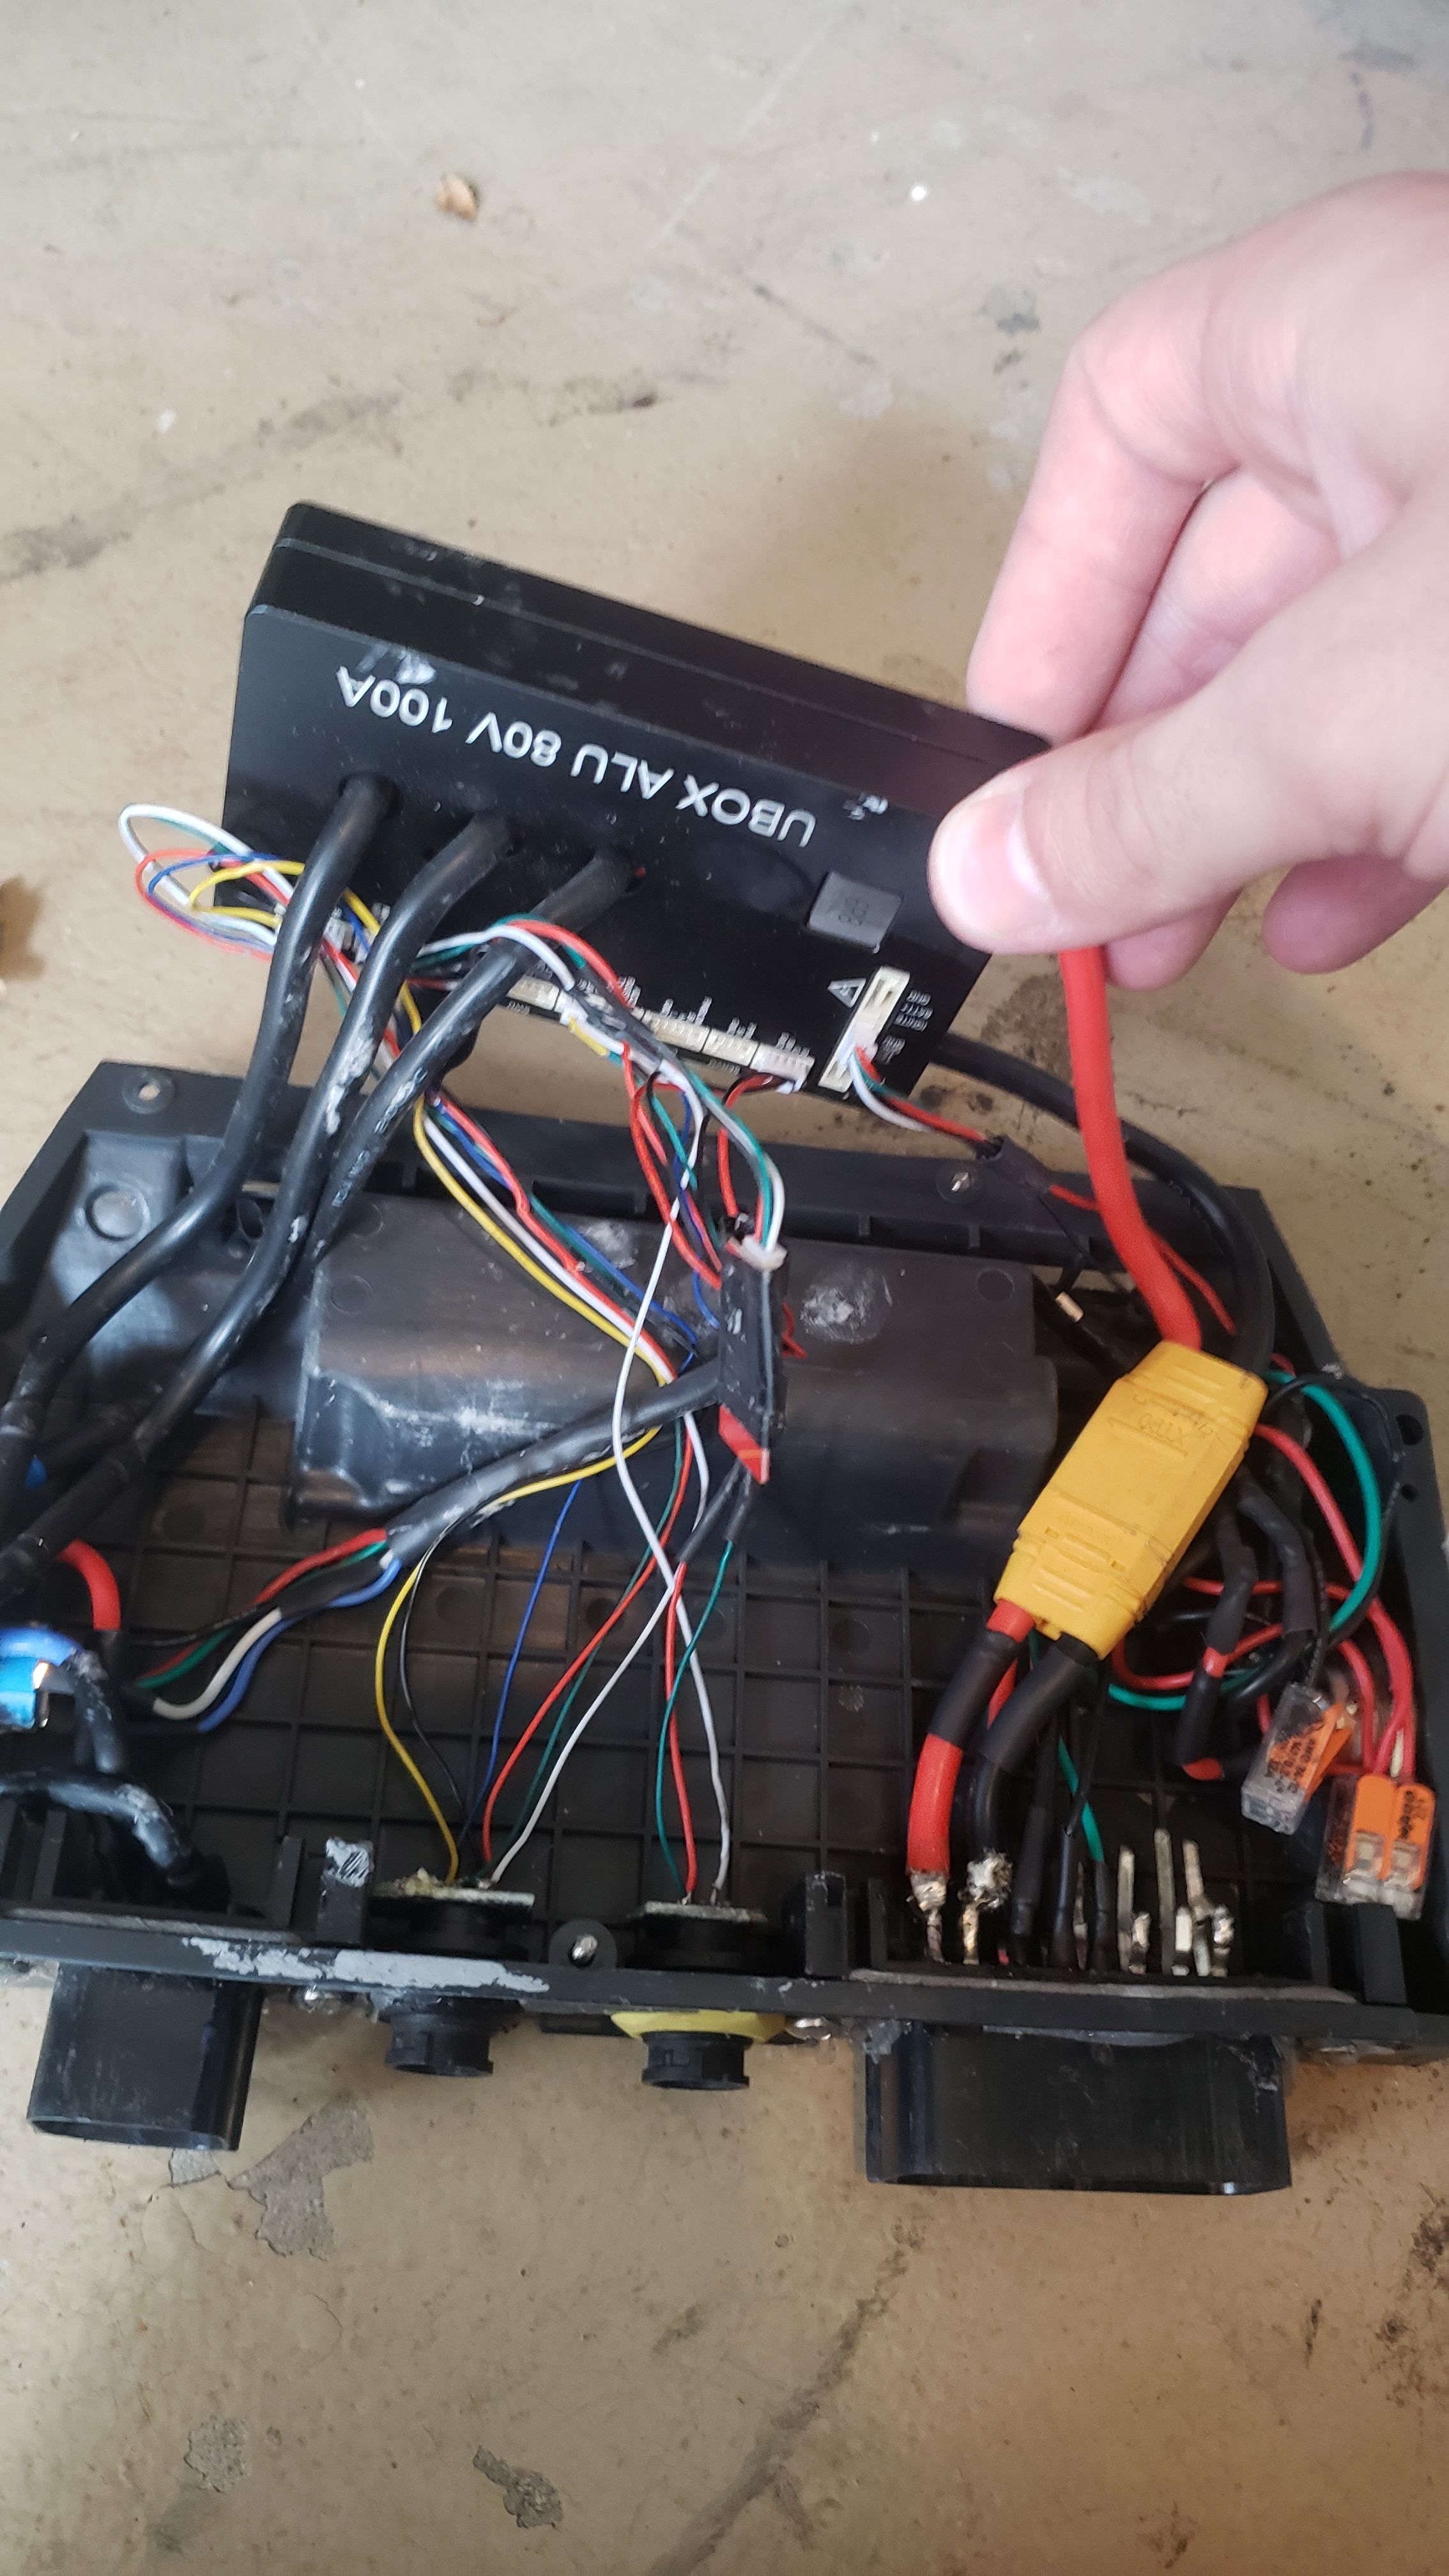
THE LAYOUTThis vesc conversions job was simple: Be cheap, quick yet durable. So far, most of these boxes has been checked. The Ubox sat in the middle, with the motor plugs being bent towards the motor plug, which was re-used. The motor plug only requires the three large wires. I'd reccomend joining the top three pins to their bottom counterparts, and soldering the wires to them. Cover with heat-shrink.
The BLE module, currently is stuck where the LEDs used to sit, and is covered in tape. This is to keep it from rattling around.
The XT90 connectors are shoved next to the stock XLR plug, which is unmodified. To note about the large wire gauge of the XT90 connectors: Soldering to them is a massive pain, especially to the 16 pin molex. I'd reccomend trying to get the wires connected to their respective pins, then dousing them hot glue or something.
The switching button that comes with the Ubox is not a good choice, as it won't work with the stock BMS, since it's designed to use a momentary. Using a momentary instead of a switching works, and lets you turn the board on and off by turning the BMS off and on.
The stock plugs for the hall sensors and footpad were used. Another note, both the BMS and controller is covered in a generous amount of conformal coating. I'd reccomend cuttong anything you want to reuse off of the stock controller board off instead of desoldering to save time. Pins 1 and 2 are used for the two zones, and pin 5 is voltage. Ubox requires 3V, and needs pulldown resistors for both footpad zones. (I used 4.7 Kohm)
(A thank you to Joe Z. on the Vescify discord server for posting this image.)
Here's the wiring diagram for the hall-sensor plug
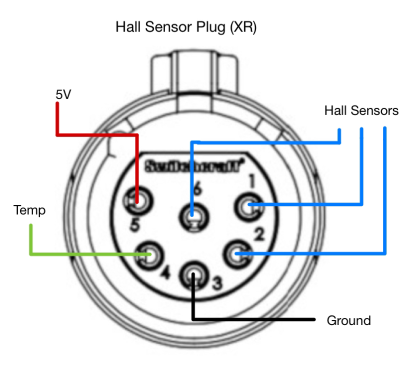
The article by Spinmagazine was helpful in getting the wiring correct. They provided the best step-by-step instruction guide on how to do a VESC conversion.
Note: remove the white plastic sheet and the two thermal pads from the lid of the controller box. They will take up space, and the white plastic sheet will limit thermal transfer. I used thermal paste on the Ubox to help transfer heat into the lid and rails.
Here's a completed look of the inside of my XR.
Special Notes/Considerations.An important note that I wish I was told was that a Charge-Only mod is not required, only reccomended. The charge only mod bypasses the BMS's ability to shut off current flowing from the battery to the board. This means that you are bypassing safety features that would keep the battery from being damaged while riding (Overheating protection, overcurrent, ect.).
However, a charge-only mod is stressful and difficult. It requires lots of re-wiring, and a Y-spitter to be made. Fitting in the y-splitter is difficult, as the XR battery box is already stuffed, and there is not much room for the splitter. If you don't ever push your battery to the point of it being over-heated, I wouldn't reccomend. You seriously risk causing shorts and damaging your BMS.
However, do what you want.
The Ubox is a tight fit. Very tight. Maeve on the Vescify managed to fit hers and keep the wiring tidy in hers. Either God has blessed her with a controller box that has just the extra amount of space to fit the Ubox inside comfortably, or there's magic involved.
I had to sand down the sides of the Molex conenctors to make space, and bend the pins on both molex connectors up to fix the Ubox in barely.
Stock wiring harness was re-used.
Surfdado's 6.0 firmware video was used, however I'd follow this advice from Nico Alemen from the Vescify discord:
First, invert your motor direction from what it is currently, under Motor CFG -> General -> General

Second, go to the IMU Wizard, do IMU Orientation, skip pitch and roll, and once you get to IMU Yaw, raise the NOSE of the board up, NOT the tail. If you watched an old video, raising the tail was a workaround for a bug, but you should now raise the nose like the wizard says to. The offset should say either 180 or -180, indicating you are flipping your yaw 180 degrees from the current value, which should invert it back to how it should be.

For clarification, the reason this is done in the IMU Wizard instead of manually is that it will automatically adjust your gyro and accel values as well to match this change. Otherwise, you would have to recalibrate Gyro and Accel afterwards.

You can confirm success by doing two things. First, go to AppUI, Controls, and use the Fwd and Rev buttons to confirm correct motor direction. Then, go to the IMU section of the RT Data tab and confirm that when the tail is on the ground, the roll angle is near 0 and the pitch angle is positive 20-30 or so, not negative.

If you clear both these tests, it should be safe to test by hand, then if that checks out fine, it should be good to ride."
This will fix the negative speed, which will cause your board to go flying across your backyard, crash into your vintage sony boombox, bust a knob off and scare the shit out of you.
Don't mind the specifics.
it totally didn't happen to me, no way.Someone made a very friendly GUI app for Android phones to monitor their vescs. It's called Floaty, and it is free. It's still WIP, but it's a friendly way to get a quick glance at your board. It tells your range, speed, motor temps, controller temps, and battery amperage. A thank you to Siwoz on the Vescify discord for the app.
FUTURE PLANSFor now, if the board continues to operate like it SHOULD knock on wood, it won't be opened any time soon. I plan on adding WLED, and working to see if I can add a little... funny thing.
Just..
A smallfunny thing.
I wanna add engine noises to the thing.
there's a github project up SOMEWHERE that's designed to be used on RC cars and other PEVs, but I'm no programmer, and I don't wanna learn programming.
I'd also like to incorporate the signalling LED idea I had, but to simplify it to small LED diodes that would flash to keep complexity and cost down.
I'm also looking to water-proof my board. I am planning on filling my battery box with an ungodly amount of hot glue and sealing the lid with some adhesive to keep it water tight. I'm not touching that battery. If it goes bad, I'm just buying a whole new battery box.
The controller box is more complicated. I'm suspecting that I may be opening it open a few more times, and would like to keep it serviceable. I'm looking to see if there's an epoxy or glue that I can use to seal the lid to the body that can be softened up or remove using heat. I may look into sealing the ports with some silicone of glue to keep it watertight, and I am looking into how to waterproof the electronics themseleves. Maybe a conformal coating that can be removed easily, idk.
If there are any questions, or if I need to elaborate on something, let me know and I'll add it
-
-
UPDATE 2:
Figured out my footpad was busted. I'm out 150 but it means I have a working board now.
Board rides great, with a top speed of around 22-23 MPH. O figured out the hard way that certain tunes affect the top speed, so if your having trouble pushing 20 with a high duty cycle, check your tune.
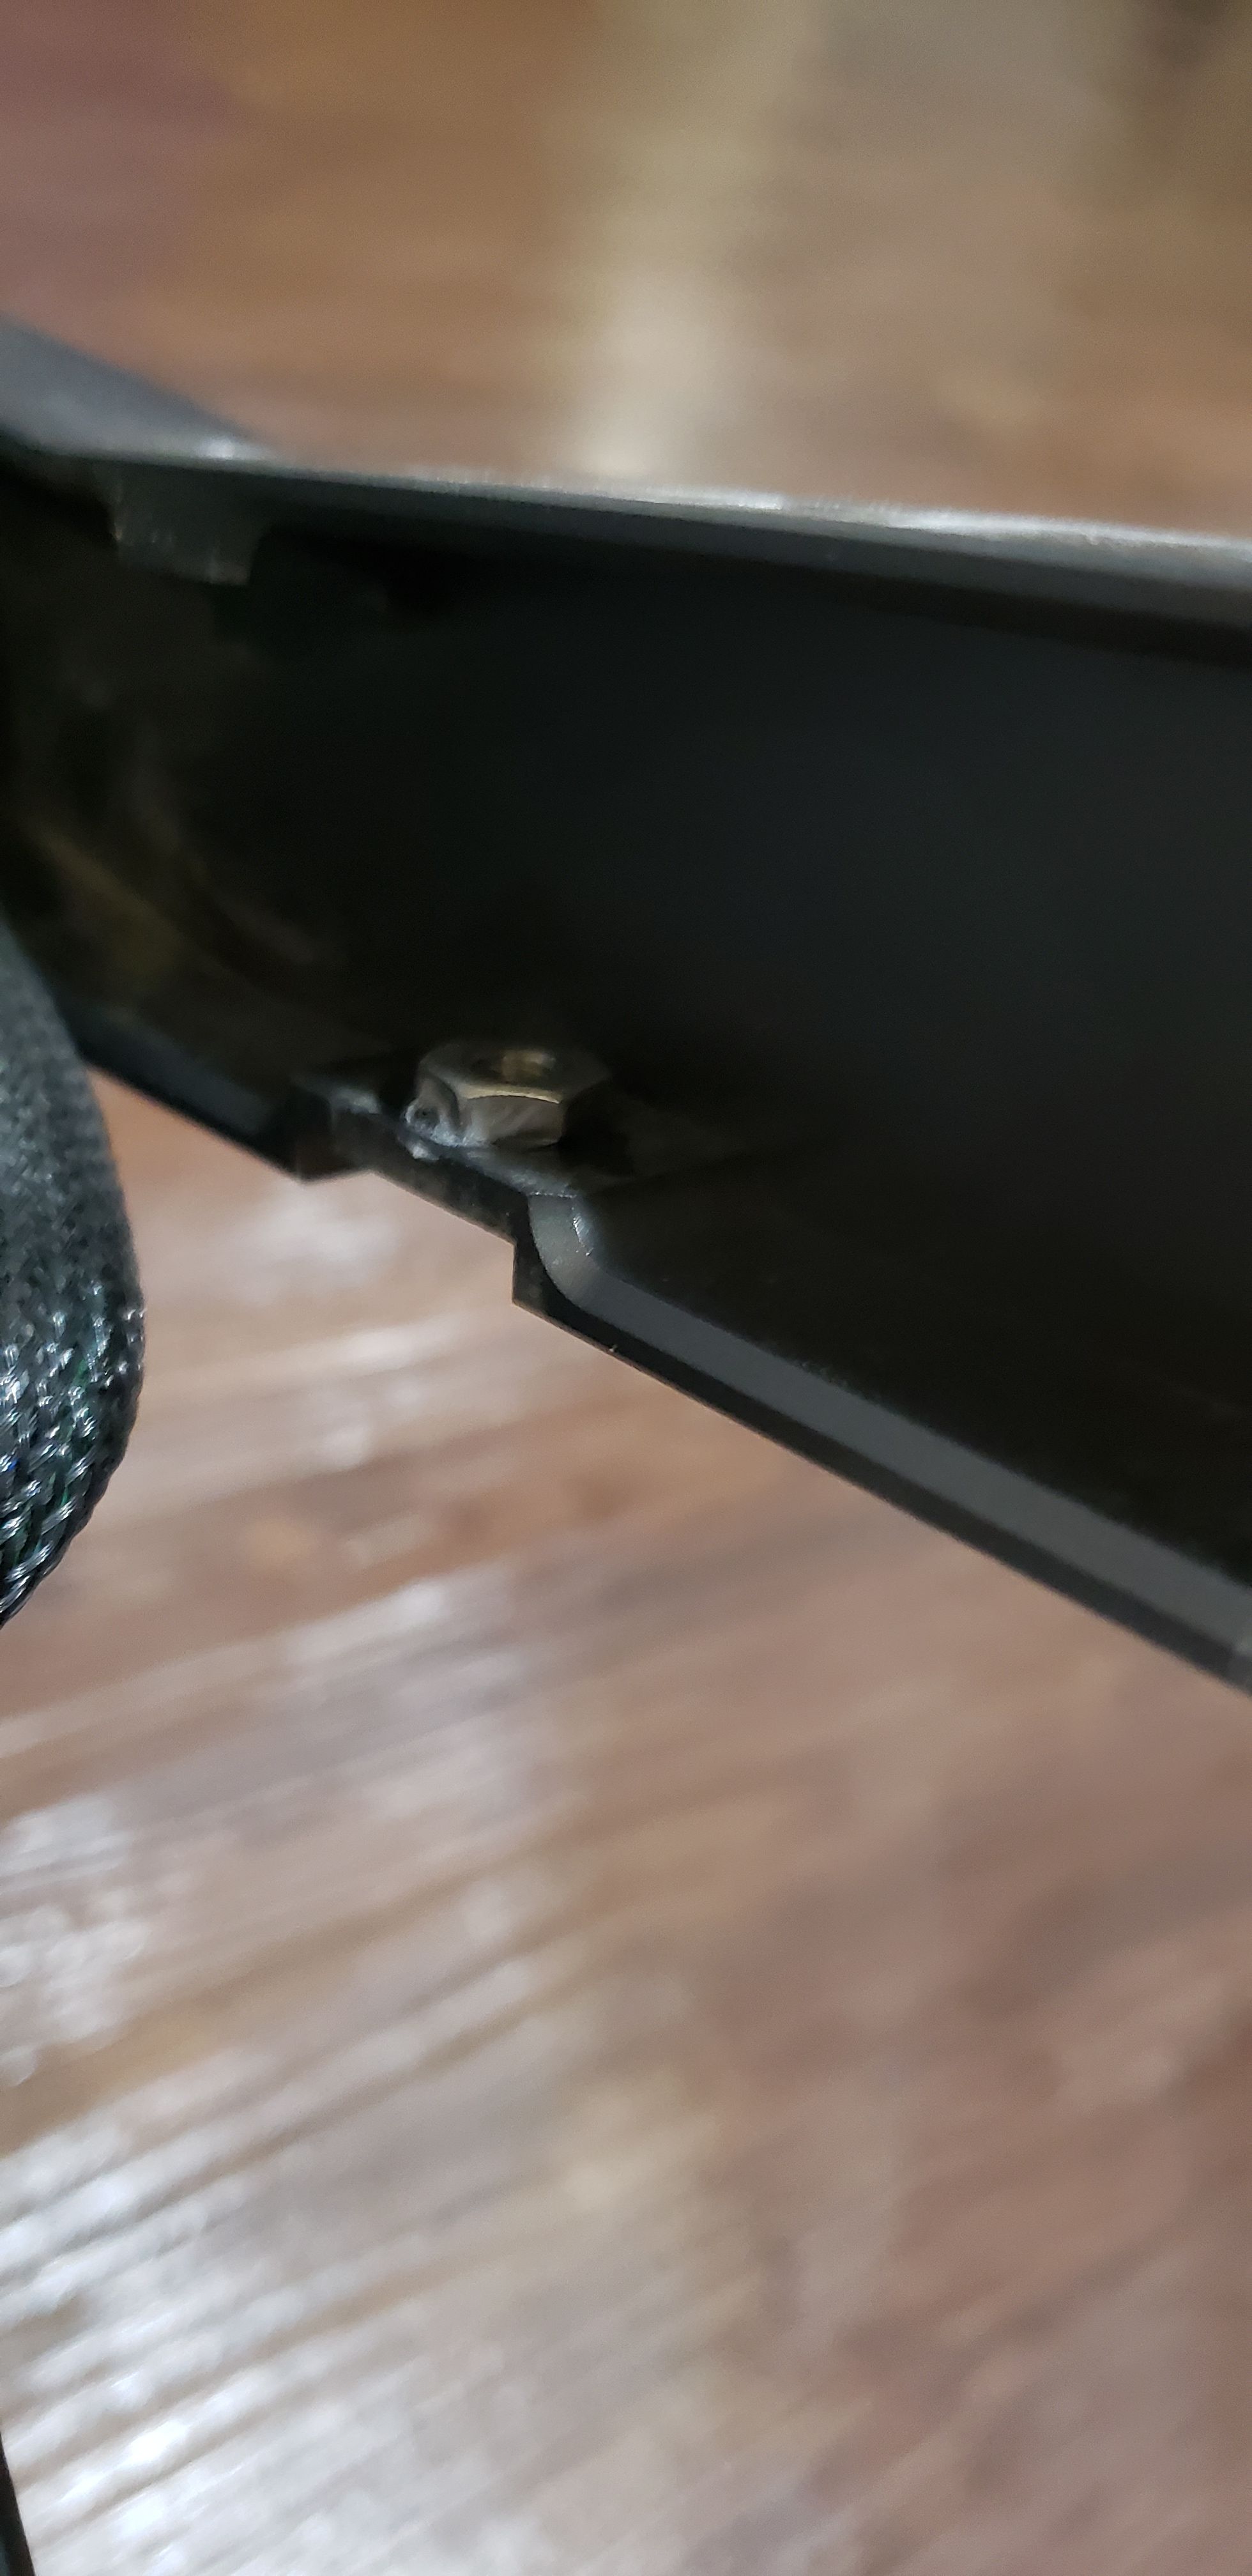
Also, my rails are having stripped screw holes. I don't want to drill holes into my rails, so I got some 10-32 nuts and adhered them to the inside of the rail to act as a new set of threads.
-
@loaffette UPDATE TIME!
Hi, I'm alive and back! Finished up online school for the summer and going on my internship. (Paid, working on fixing 3D printers and working on a large-format 3D printer. If anyone is interested, I may post pics or vids. of each one if interested.)
So, I'm here to follow up on some things. The screw hole fixes with the bolts and superglue doesn't hold for long. After a month, they all have literally rattled out. Getting press-fit threads or whatever is going to be a better option from here on out.
On other news, my board cutting out when trying burnouts has suddenly... not been happening? I had a problem where my board would turn off whenever I do a burnout. Now it doesn't do that. Weird.
Found out that Craft and Ride rail guards are AMAZING. Nice quality, nice packaging and got here at a reasonable time. However, the adhesive seems to be a bit weak. Within a week of having them, the tips (part that faces the nose of the board) was already peeling up, something I did not experience on my DIY. I ended up tearing them off since I went with my previous artwork, but didn't feel comfortable carrying around a board with artwork like that, especially with the college I'm going to. Maybe down the road when I'm out of college or I somehow get multiple boards, I may end up adding them back on.
Flight fins: This has been a long time coming. I bought flightfins, and liked/hated them. I ride goofy and with my feet on the outside of the board, not on the inside. Meaning, my feet are on the ends of the board. Riding with my foot hooked to the fender does not instill confidence at all. I've finally got some time and cash, so I'm going to work on designing and working on nose mounts for the flight fins. I've found out my 3D printer indeed still works (I dropped it when moving it out of my dorm room. oops.) so I'll be 3D printing some test pieces then trying to get metal parts made. Don't know if I'll sell them, probably won't since I'm in college, and I don't wanna deal with the selling....lifestyle. Idk
Oh, headlights!
Using LED strips for headlights is a horrible idea. You only get about five feet of visibility, and it's not bright. Plus they get hot and holding them in place isn't great. I don't want to touch my controller box, so I'm gonna work on making magnetic rail-mounted lights. I just need to find some bright LEDs and need to make a few designs -
@loaffette Great to see you again and some more progress on your build.
With the flight fins I also ride wide so my feet are not under the fins. I have leant to slightly hop and slide them under when I want to try using them and then the reverse to unlock my feet.
-
UPDATE TYME
So, some news on the board!Got inserts put in, and the board no longer sounds like a maraca on trails or rough terrain. No more bouncy/floppy bumpers! Rent EBoards did them, and they did them well!
The headlight situation needs to be solved. My headlights are dimmer than an iPod color screen in the sun. I'm thinking of making external lights that clip onto the side of the rails via magnets. The only problem is finding bright LEDs that won't require their own cooling solution. I would like something as bright as my phone's LED, but with a more controlled spread. I'll probably run it off of either AAA batteries or something that won't burn my living situation at college down. If anyone knows where I can go to find some pretty bright LEDs and figure out how bright they are, lmk.
Oh, one thing
Remember the Charge-Only mod that I wanted to avoid?
It's come to bite me in the ass.
And it took a chunk. Learned that the funny problem with the board completely shutting off during curb nudges and freespin?I learned that no matter what amp level or max you set in VESC tool, whenever you go up a curb or go up a steep incline, you naturally draw more amps than you would normally since the board needs to do more work. The FM bms, being the spoiled, idiotic little brat that it is, will freak out and cut the power. Now, I'd try and charge-only mod again, but I'm not feeling like getting down into another bad project, so I'm at a crossroads
Risk-it biscuit and do the charge-only mod and hope to God it works
Or wait until I can get my hands on the unobtanium ZBMS since apparently those like to re-create the 2020 silicone shortage.
Personally, I'd like to throw the FM BMS out and buy a ZBMS, but I don't think I'm lucky enough for that.
Also, I'm starting a small project on the side.
Remember the flight fins? I'm gonna re-use those. But I'm gonna have them mounted on the nose and tail of my board instead of the fender. I ride goofy and with my feet on the edges of the board. It would be better to have them mounted there. I'm currently trying to reverse-engineer the measurements and dimensions of the flightfins, which hopefully won't be too much of an issue.I'm gonna make a 3D printed mach-up of the finished product to see if it works or needs fixing, then I'm going to attempt to get them made out of metal using CendcutCend
I just need to learn how to model and made parts for sheet metalthat'll be fun!I will see about trying to release any stl/source files, though I am a bit nervous about making the FlightFins peeps angry. It would be interesting to wake up one morning with a C&D letter in the mail, but I don't want that kind of stress right now.
-
@loaffette I thought with "charge only" the FM bms is bypassed for discharge and the battery is directly connected to the vesc?
-
@lemur it is
Sorry, I wrote the update in the middle of the night with barely enough sleep
The charge-only is to bypass the FM BMS's ability to cut power to the board
-
Hi again!
So, it's been a while. A long while.
About... Eh, two months?I've made a couple of notes and changes to the board while I was gone!
Let me catch you guys up.First, a slight problem.
My battery voltage is reading a lil' low. It usually stops charging at around 90%, according to the VESC tool. It never goes past 61-ish volts. My new top speed is 22, barely pushing 23.
For reference, I was able to comfortably push my board pre-VESC to mid-24 before nosediveAlso, in the past two weeks, I've had to take my board apart three times due to it refusing to charge. Either the 5-pin connector on the BMS comes loose, or the charge wire will come loose.
I'm in college now, and I don't have a good workstation or all of my tools, making repairs very janky and temporary. Normally, I'd buy my way out of the problem.
I can't really do that. I'm having to save money since I'm now in college, and I can't spend extraordinary amounts of money on new parts. Plus, ZMBs won't be available for a while, and I could go for the ENNOID 24s-V3, I don't know what that lead time is and I don't want to have to deal with a smart BMS and configuring that.Another slight problem:
The battery box lid's thread inserts are coming out or spinning. That means I need a new lid, but I don't know where I would buy or get that. I also may need new rubber seals.That's about it, really. I haven't made any major changes, apart from adding WAGO connectors to everything which adds some peace of mind.
-
@loaffette Mario recommends a bead of hot glue to those connectors to help keep them in place.
-
@biell I’m using superglue since it’s what I have
-
@loaffette said in Vesc Conversion Status (Rose/Mika):
I’m using superglue since it’s what I have
"This is future Loaf's problem" :3
-
@lia Future loafs solution:
just solder the wire onto another connector and use that one!
-
@lia lol
-
Back again!
Remember when I said that future loafs problem would be the super-glued jst connector on the bms?
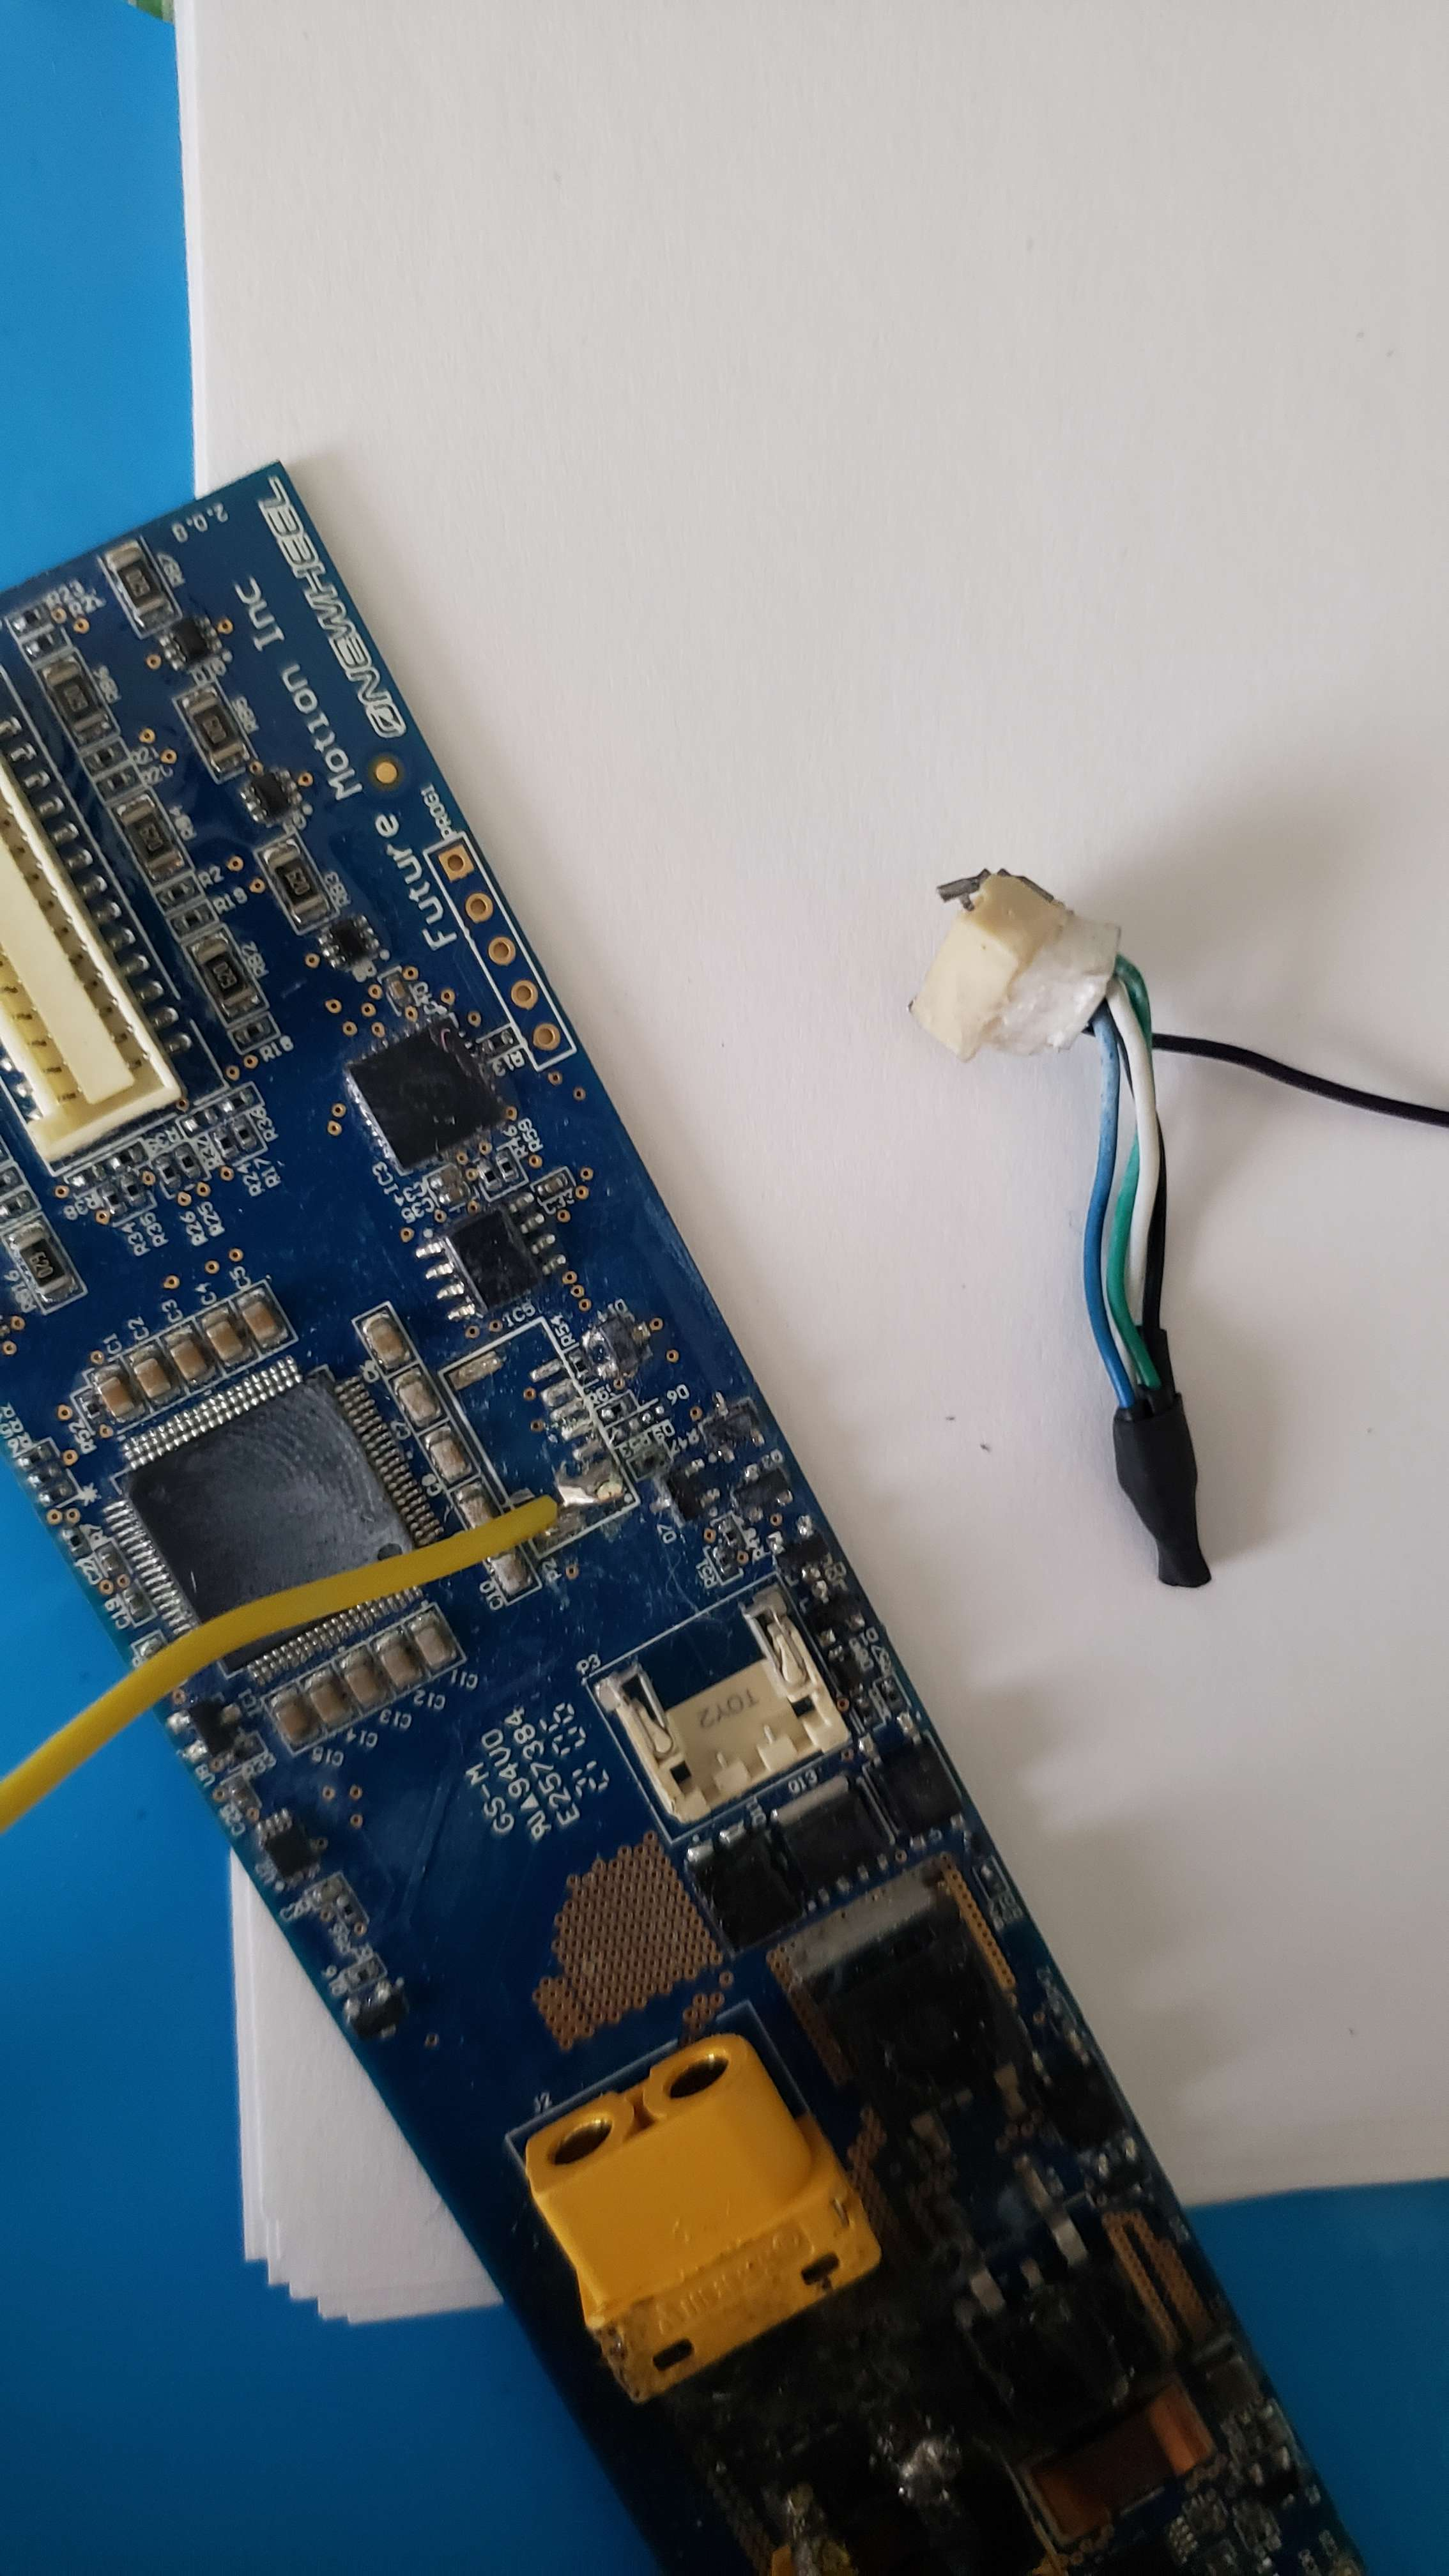
No longer. I switched to a torque box. I the JST connector came off. Completely. I didnt want to deal with it any longer, so I soldered the purple bms wire directly to the same pin on the board. And it worked! The board charged, fully actually and the charger didn't throw a hissy-fit!
That was until last night, when the board stopped charging mid-way after a long ride on campus. No clue why, and I'm getting tired of this really.
I'm starting to seriously look at what my options are now if I can't fix this soon.
-
Ennoid is the safe and immedeite solution, but I don't want to deal with setting up a smart BMS and I don't know how I'd wire that for a stock XR battery. I'm considering this the last ditch effort just behind buying a used pint.
-
ZBMs would be the obvious choice but they aren't going to be in stock for a looong while. I haven't found one that anyone was willing to sell me. Not an option currently.
-
someone on the vescify discord is working on a BMS, but it's about 3-4 weeks out. An option in the future, but I am not sure if I could buy one in time before they go out of stock, as ZBMs usually sell out quickly, and this could be the same situation for the pickleworks
-
BMS-less is not an option, I live in an apartment, and I'm not going to be the reason that it burns down.
-
buying a used XR BMS and trying to work with that could work, but I'd be spending money on something that will get rid of in the long run anyways, so it's not worth it.
I shuold have honestly done this during the summer when I had a job and lots more money, but hindisght is 20-20. I may have to talk to my parents about this, but I'm worried about the conversation that will come with that.
Man, adulting is hard. :(
-
-
This post is deleted! -
@loaffette follow-up:
Will check the BMS tomorrow and make sure it still works. If it's busted, I'm going to be very very sad.
Would like to hear from the wise @TheBoardGarage and what he thinks, but I would assume the worst. -
That's weird, shutting off mid ride. Were you able to turn it back on after at all?
Let us know if it's working or not when you can. I'm fine to do some diagnostics with you.
-
@lia not mid-ride. It stopped charging mid-charging
the BMS is bypassed so it runs charge-only.going to look at it later today
-
found the problem
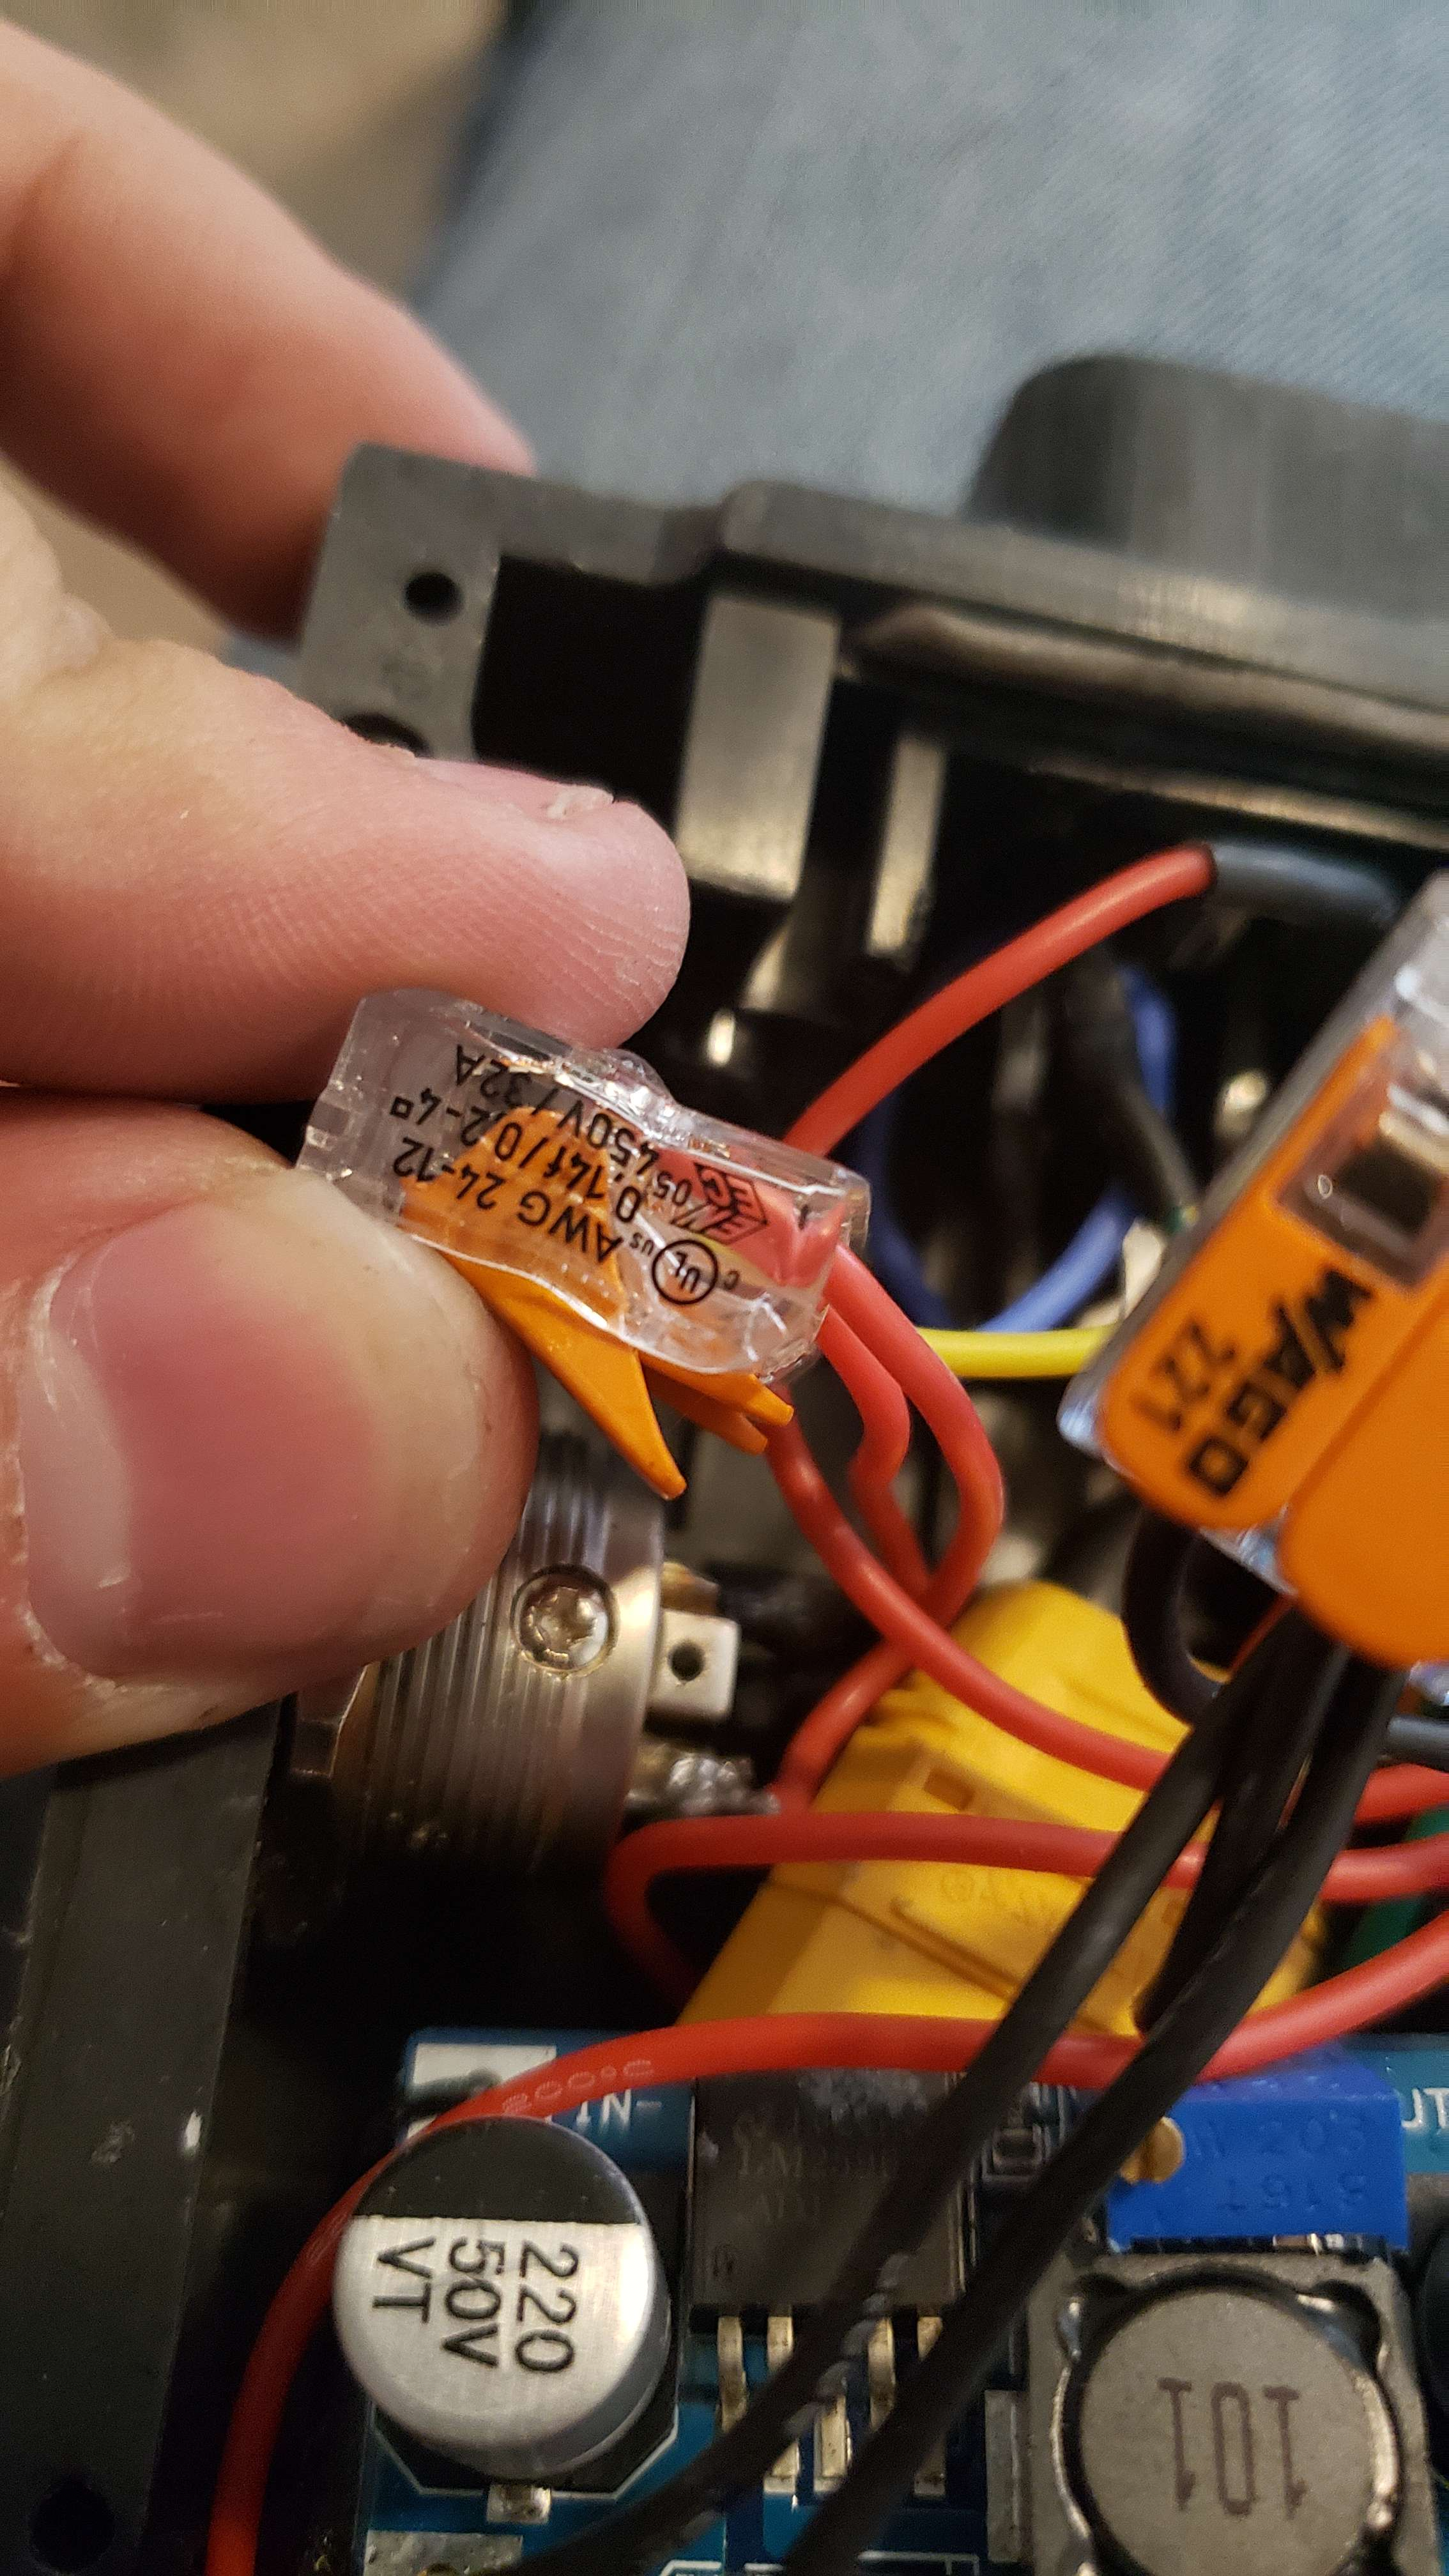
-
@loaffette That looks misshapen, did it melt?