Vesc Conversion Status (Rose/Mika)
-
Update
No bueno on that old controller, it's deader than a doorknob. I held on to it for measurment references and to recycle the XT-60 on it since I was out of those. Spent the rest of my time experimenting with COB LED strips
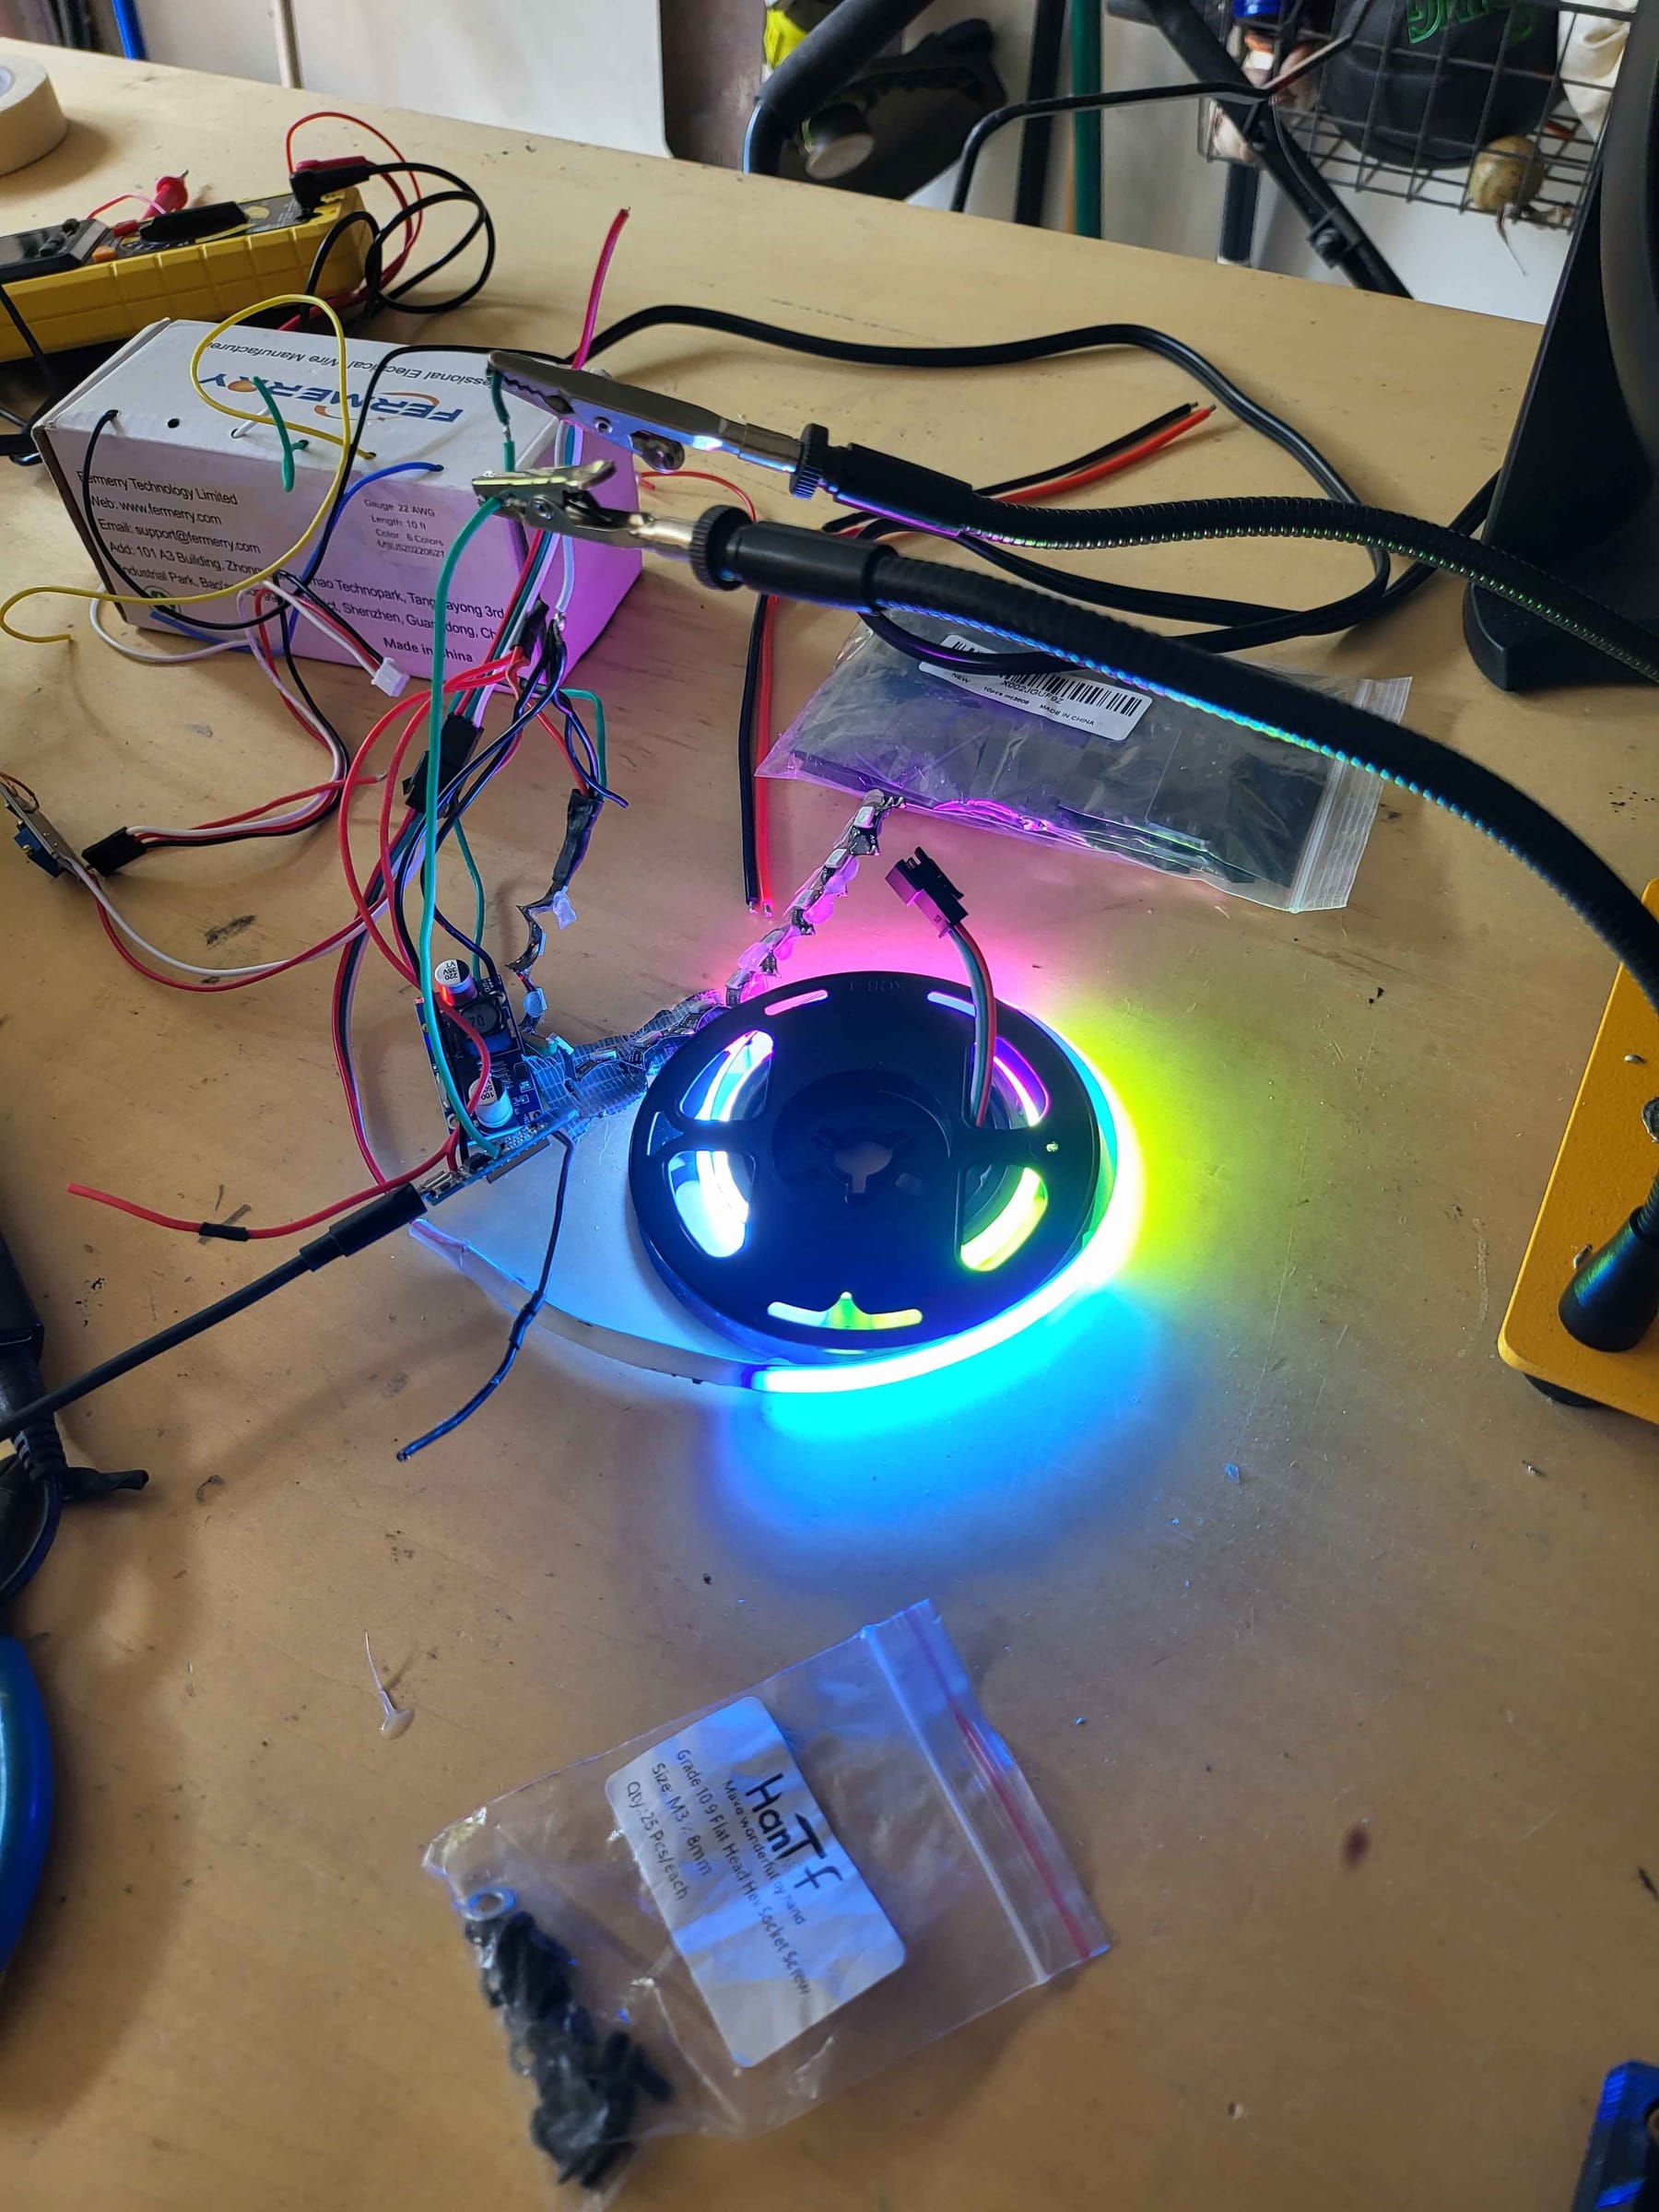
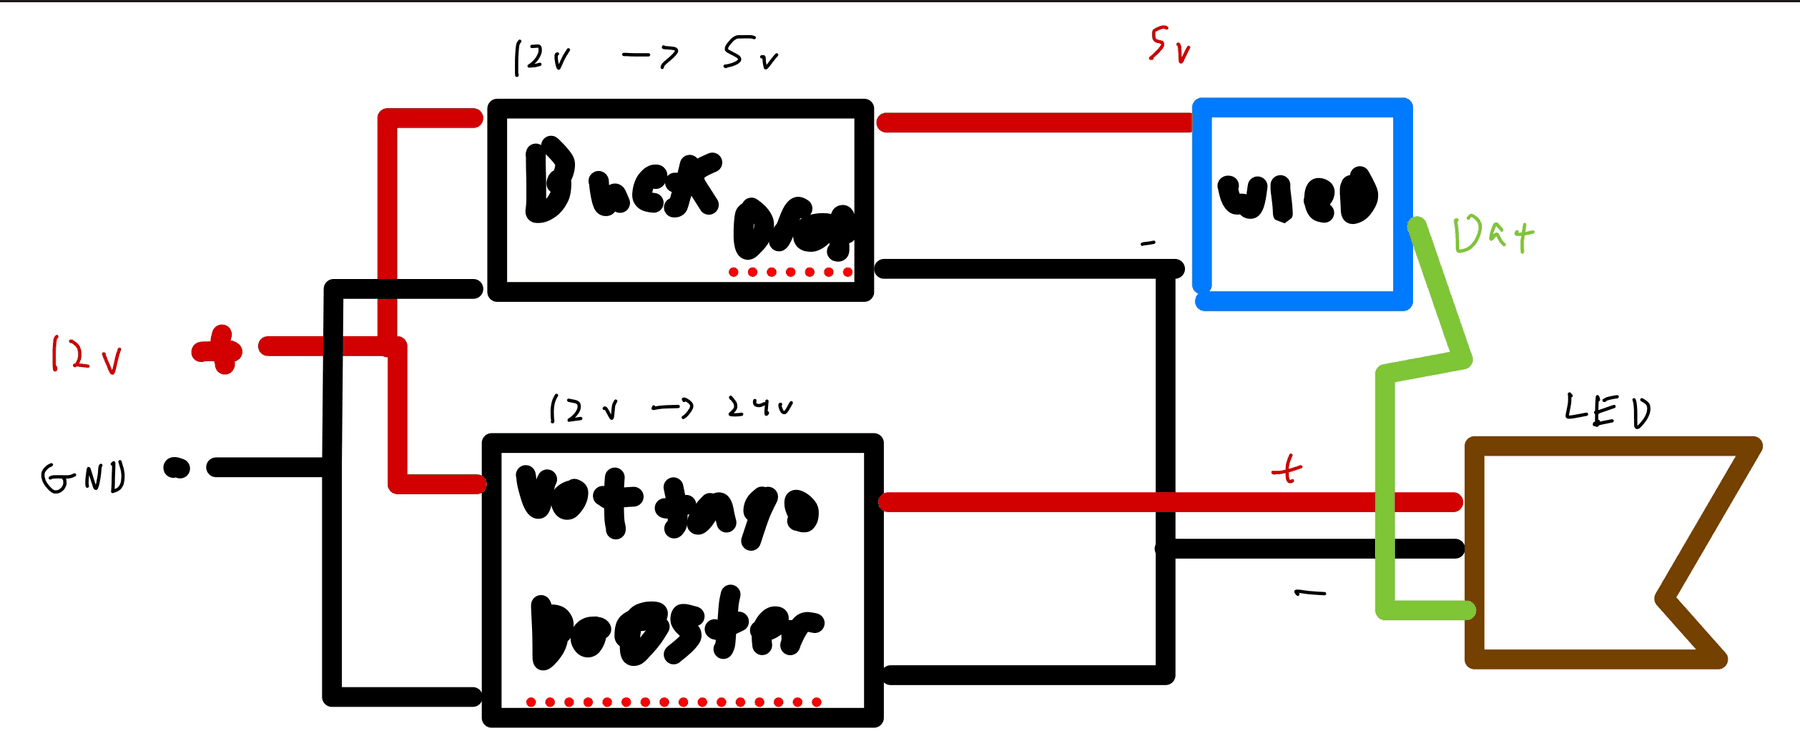
They seemed bright and worked well. The idea is to utilize the 12V (1A assumed) power output from the Ubox 100v. Split it so two of the wires carrying the voltage goes through a boost converter to bump 12 to 24v for the LEDs. At the same time, run the other two wires to a buck converter to drop it to 5V for the Wemos D1 which will use WLED. That will let me control the LED's colors and brightness.
It worked on the bench, so I buttoned the rest of the board up enough so it could be taken back to college
Re-terminated the wires on the motor just so it was cleaner, and covered it in heat shrink. I might end up peeling that heat shrink off and re-doing the wiring again because it was a pain to fit through the cable gland, and I think I could make it look cleaner.


So, remember how I've been having trouble with the screw threads on my rails?
I took the Easy Access box STEP and pulled it into CAD. I added these little legs that extend out enough to cover the back screw holes for the bumpers. There's a hole for 10-32 heated inserts to go in, where it should give me new threads. I had to sand it down a bit, but I got it to fit and it works well!
After I moved in and my new controller arrived, I got right to work placing in the new controller. I had some fun with my iPad automatically updating to Vesc Tool 6.05 which made connecting to the board impossible via iPad (
stupid thing) so I did it on my Galaxy Fold, which hadn't updated the app.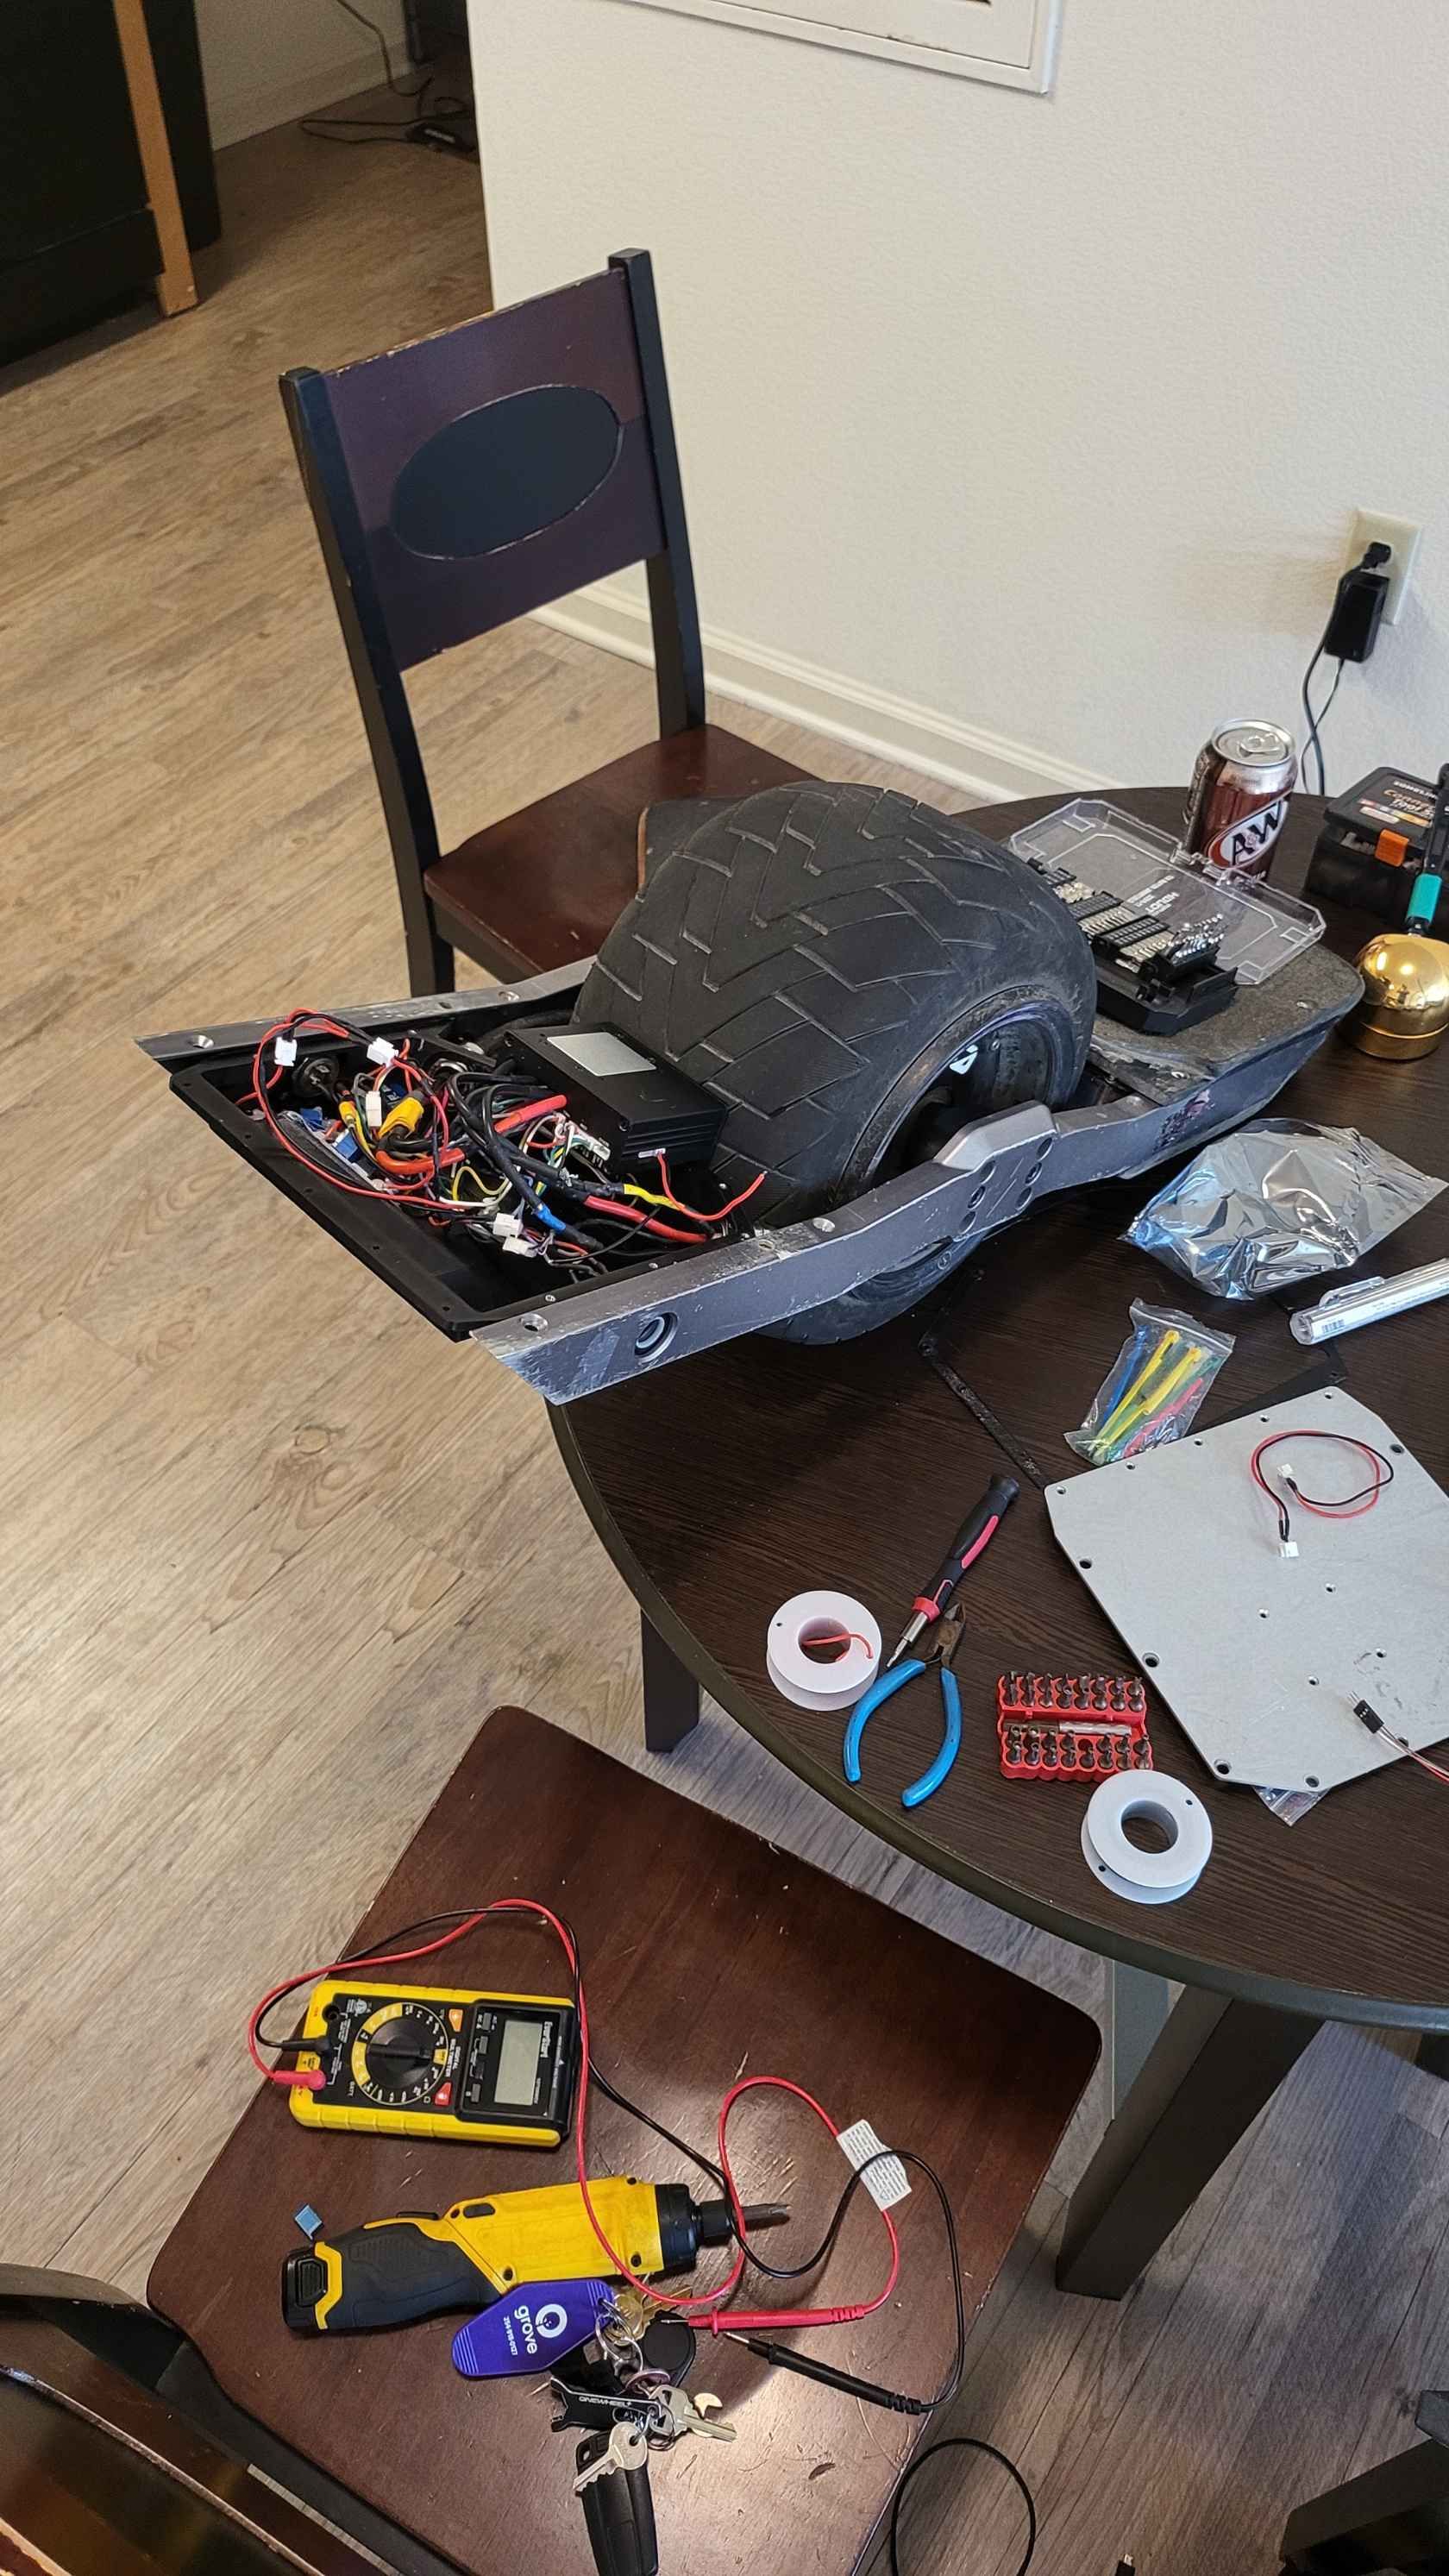
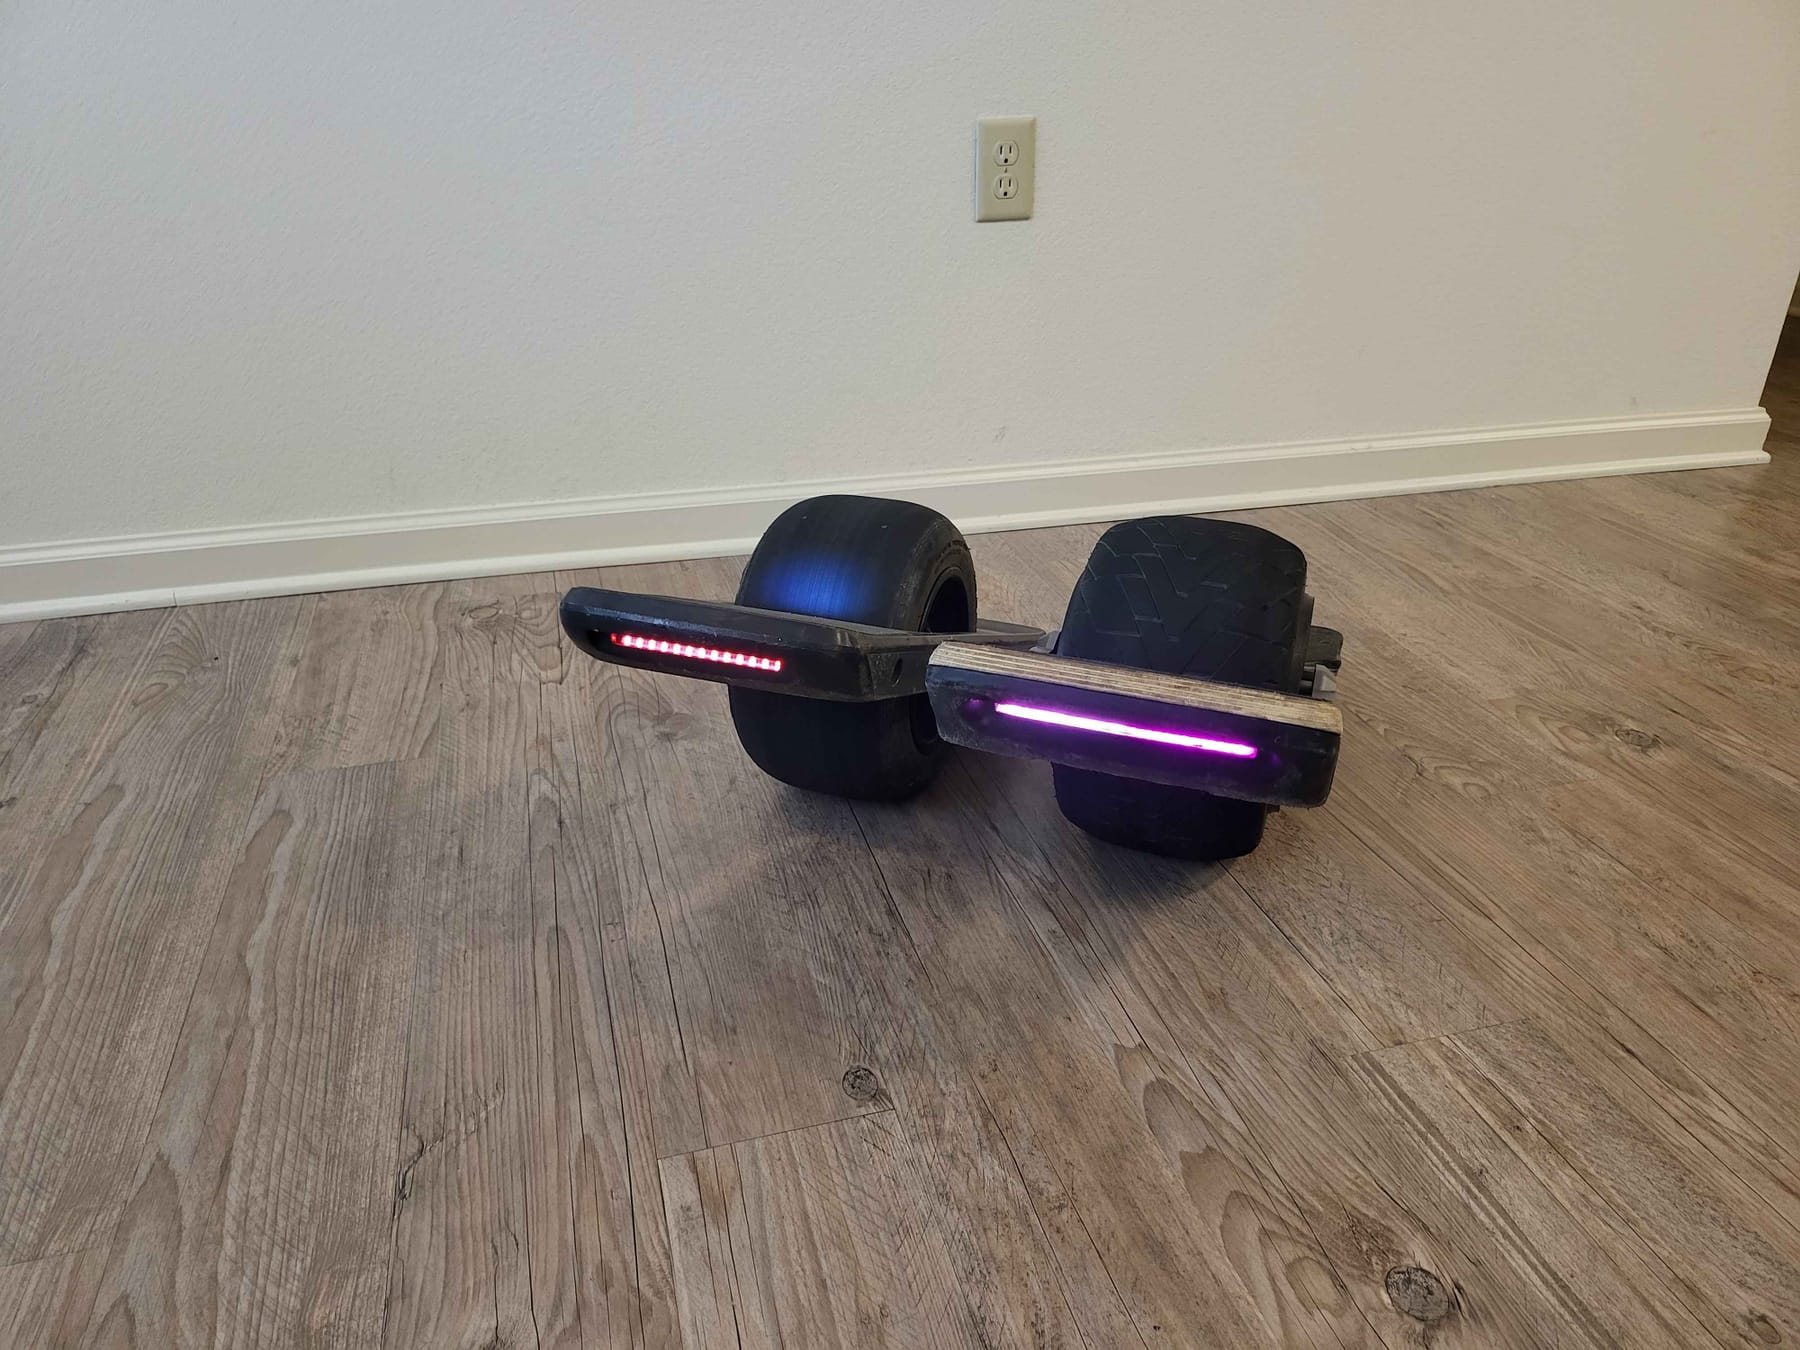
After too much work, I got it all put together! However, the LED bar on thr front started to flicker like crazy. I checked the wiring, checked for any shorts via continuity across the wires and even swapped out the Wemos D1. I even ran the LEDs with only the power and ground connected, and it still flickered and changed colors.
I was going to replace the LED strip but I can't find the rest of mine, and I don't feel like ordering new ones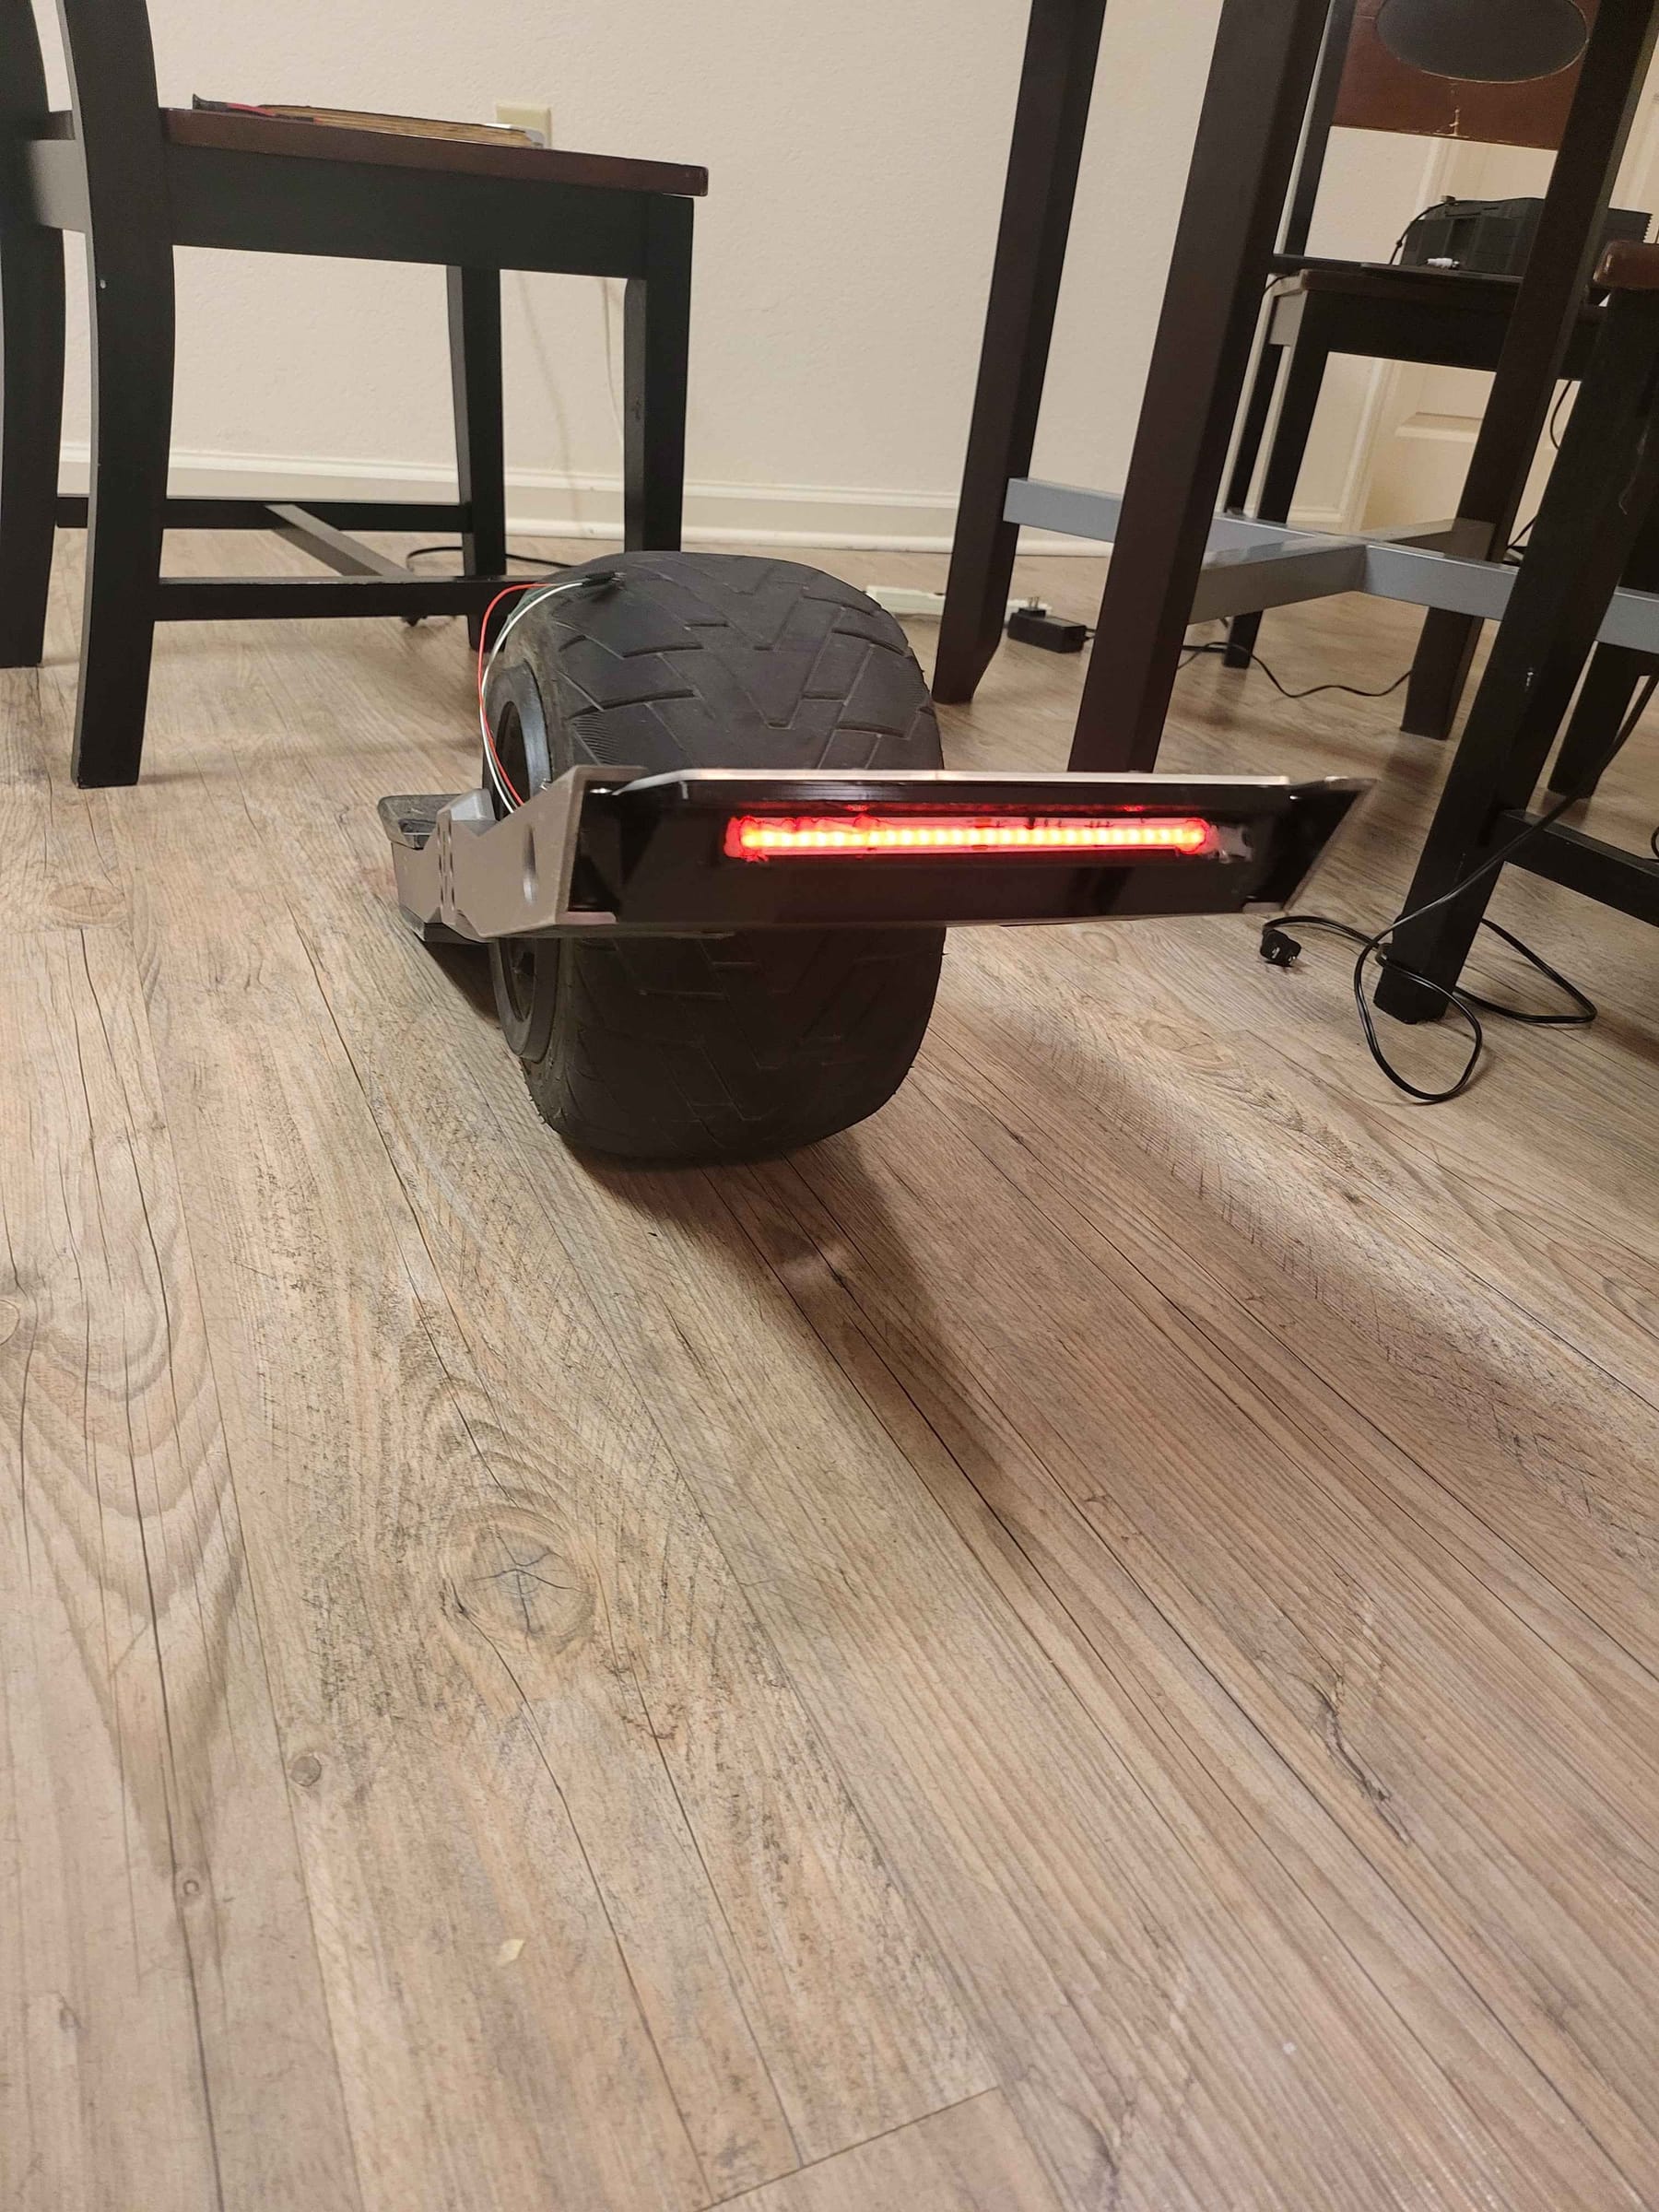
The board works now, and is working great! I'm hoping to waterproof it soon before it rains. I printed the controller box out of PETG with a 5 layer thick wall, so hopefully that should keep it sealed.
Fighting the pavement since I started this hobby!
-
The board compared against my mom's pint. I'm hoping to soon replace the tire after 500 miles and to get her an enduro. She can ride the board and balance on it, but she goes very slow and her feet and ankles are shaking on the round tire of the pint.
That's a later project though
-
@loaffette said in Vesc Conversion Status (Rose/Mika):
No bueno on that old controller, it's deader than a doorknob
Nooooooooo 😭 Anyone nearby who's handy with a reflow station that could take a look?
still flickered and changed colors
Are there filter caps on the LED strips. It's possible there's enough noise from the run length to cause it. -
@lia Nope, not yet on the reflow station
Everyone I knew who had one left for greener pastures (They're all smarter and crazier than me and got scholarships to better colleges)The LEDs flickering might have been a good thing too. It made me realize that those strips weren't bright enough for what I wanted (even though they were 24V)
Though I may end up putting my old stock XR headlights back in for now -
New update:
The motor has started to vibrate whenever I apply breaking. It's like haptic buzz vibrating. Updated firmware, recalibrated the motor and went through motor crunch troubleshooting.What fixed it was unplugging the Hall sensor plug in my veac and plugging it back it.
A little confused now
-
I'm ALIVE!
So, found out the reason why my LEDs were freaking out was due to EMF from the phase wires. Will spend some time this weekend to cut up a spare USB cable to shield the headlight cable.
Also, I am considering seeing if I can look at waterproofing my board completely
I have a feeling the rain this year is going to be insane
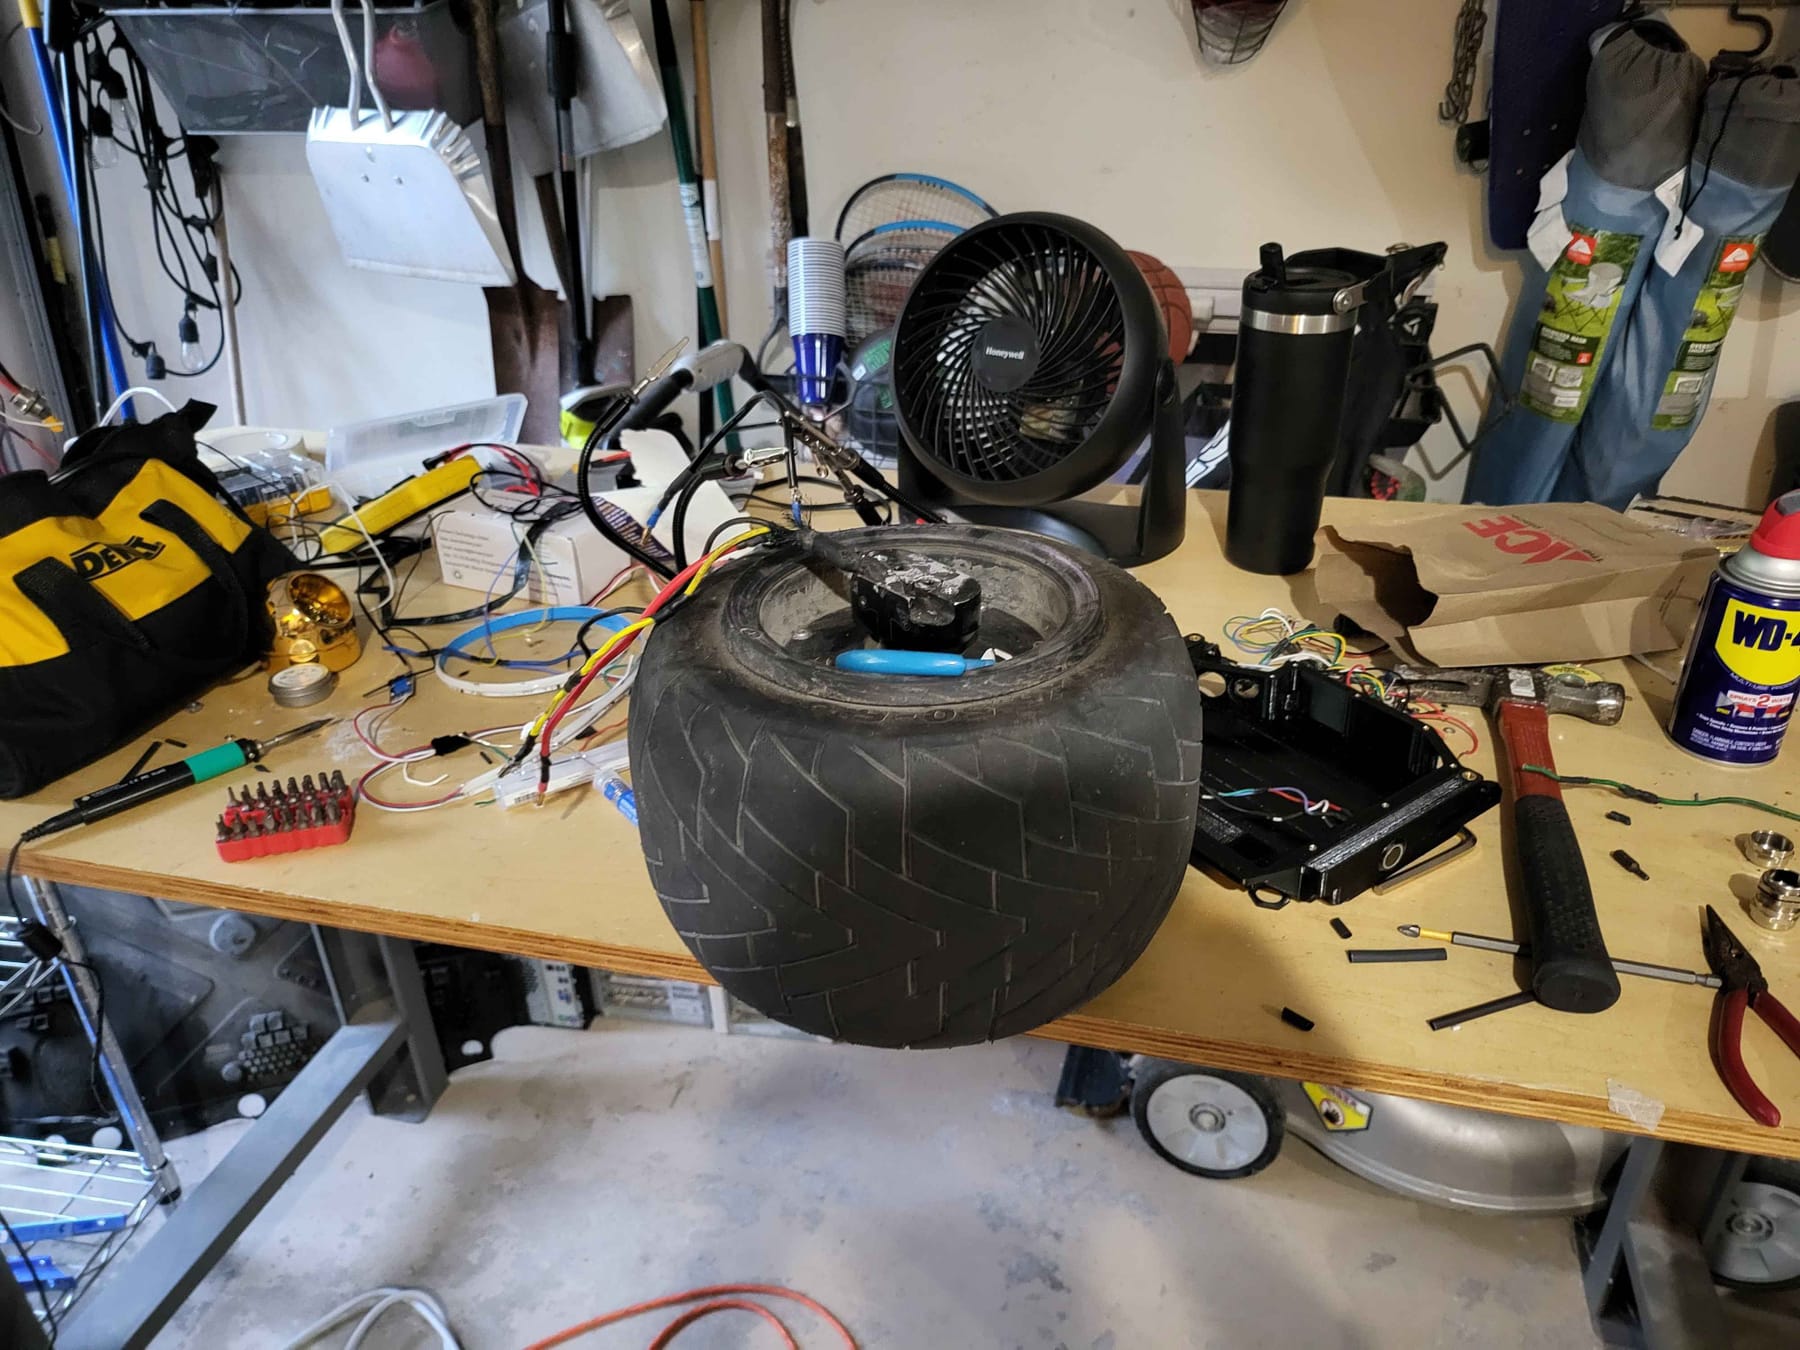
I also built a trunk thing for the onewheel
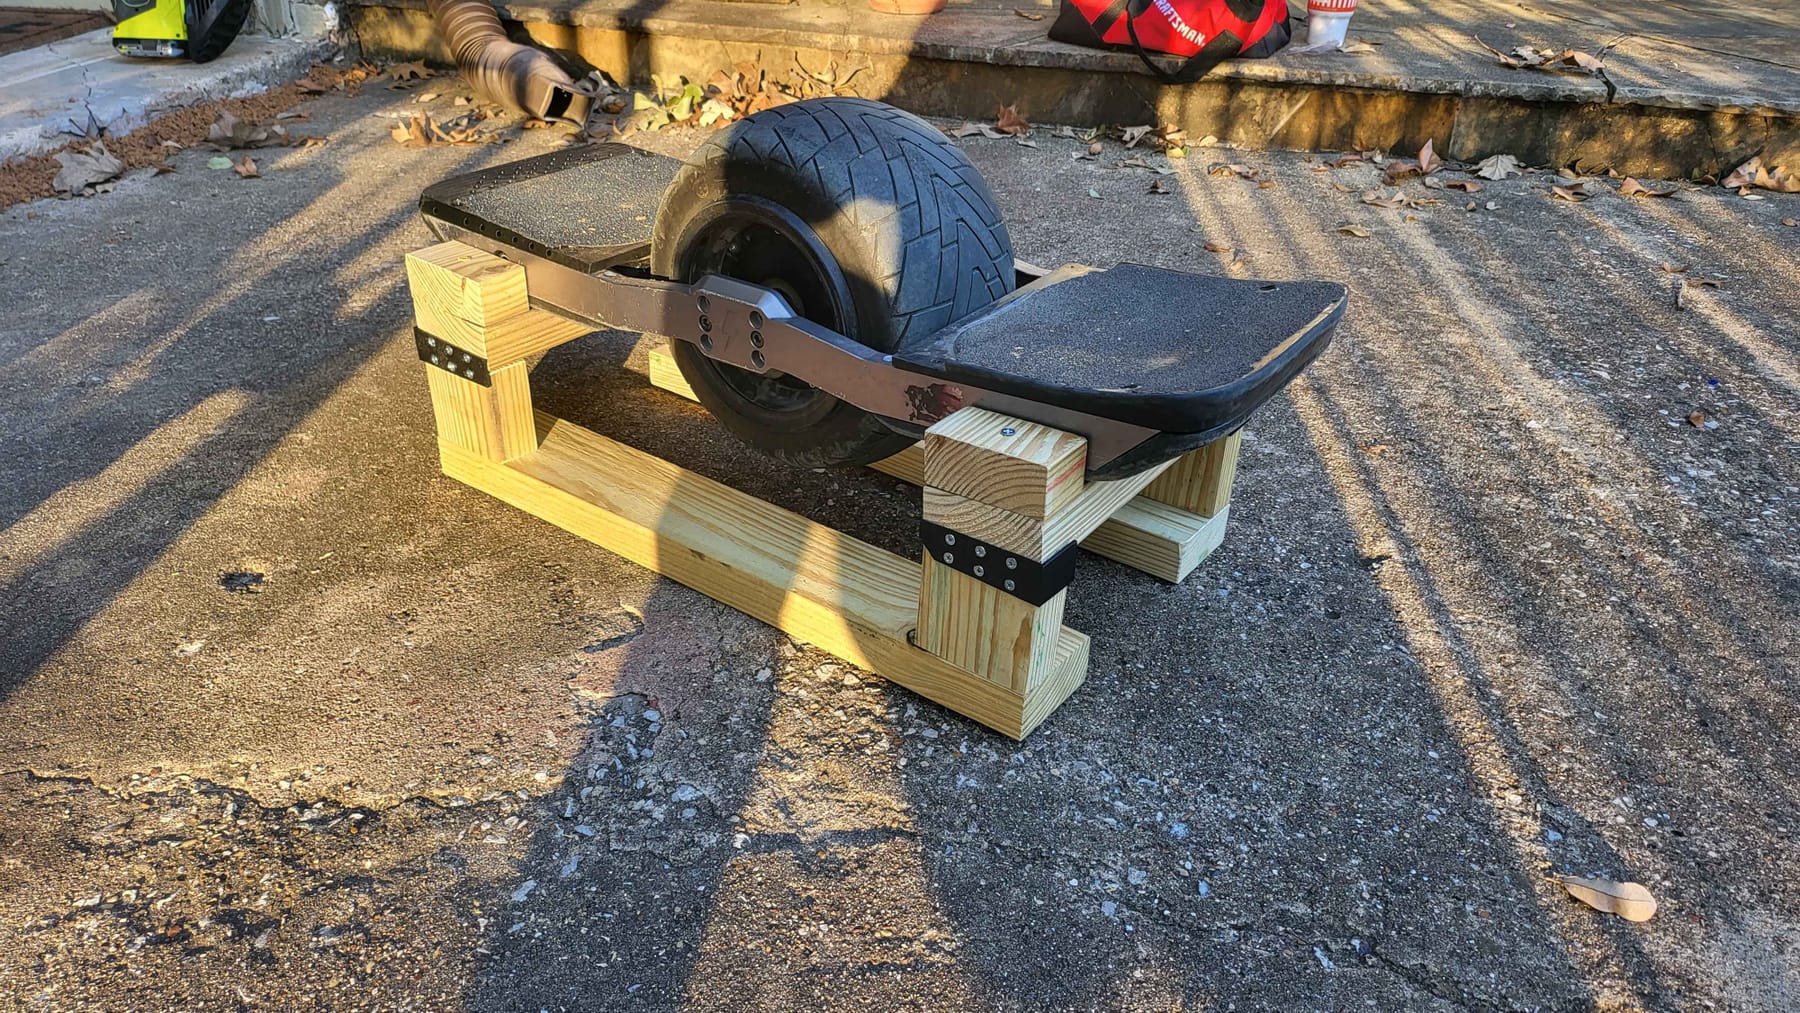
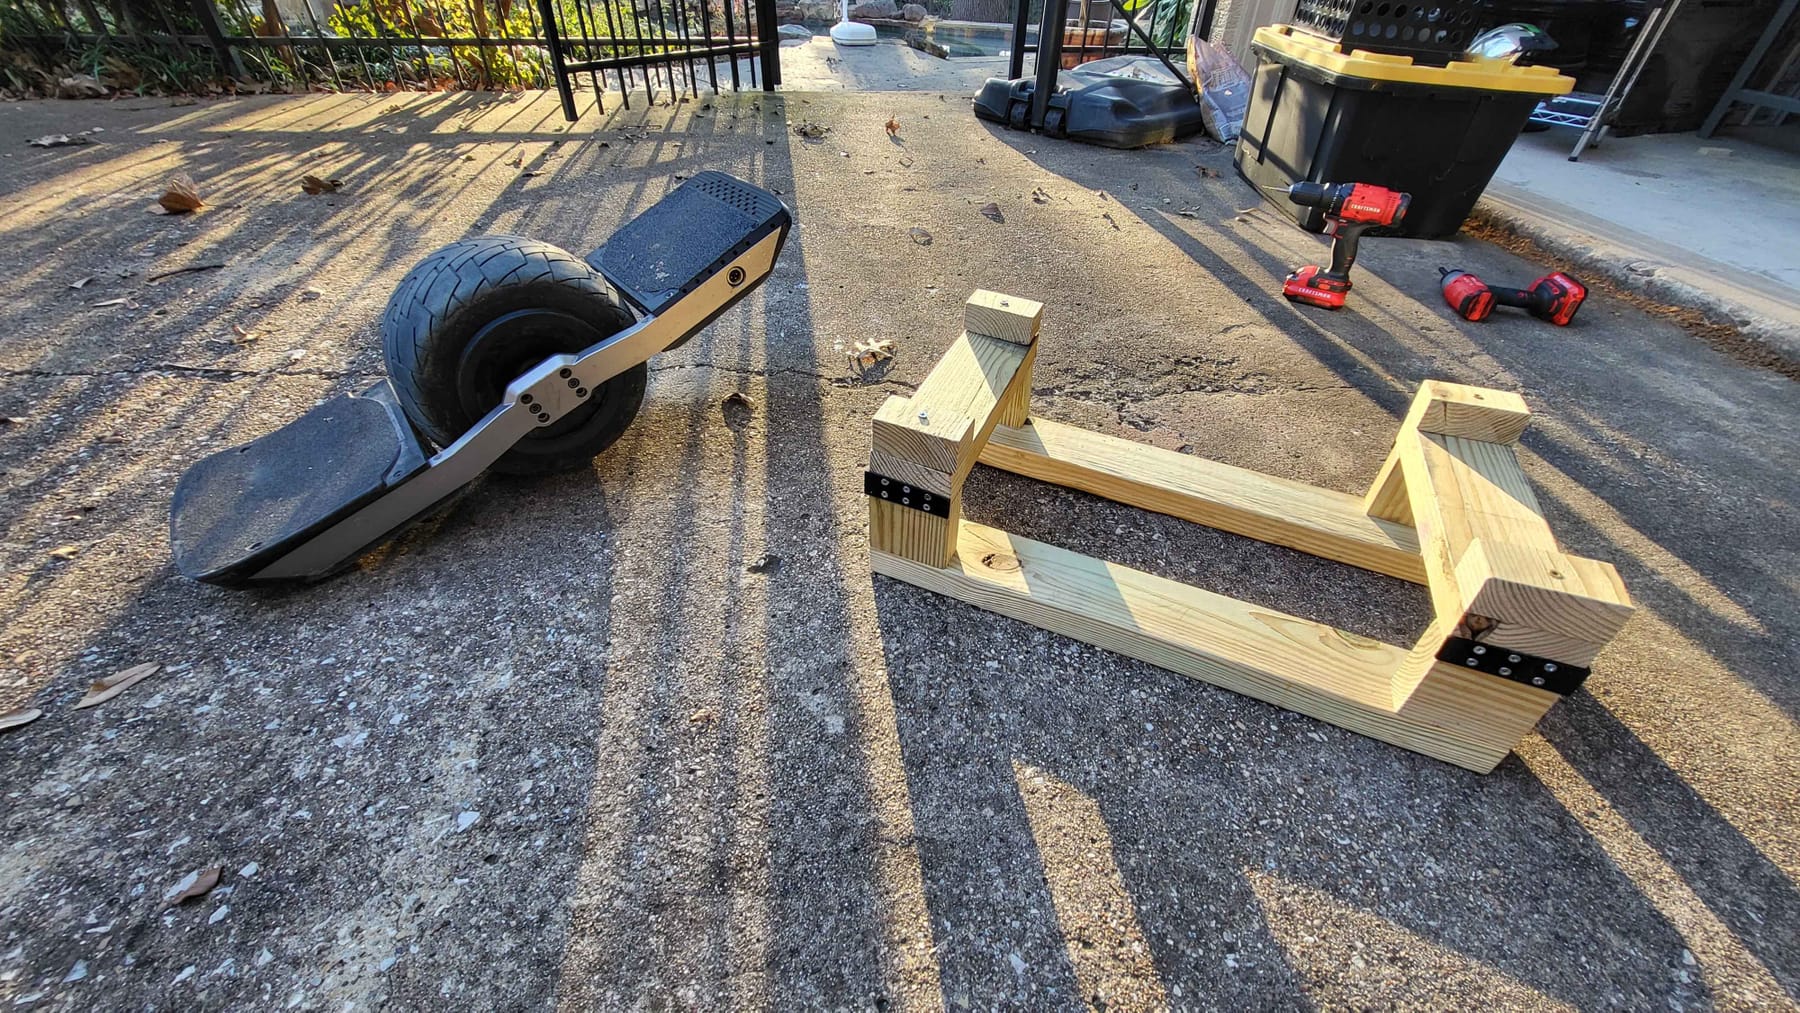
I was gifted actual power tools and so I used them!
-
hey, you wanna hear an idea so stupid it rolls around to being absolutely genius!?
No?too bad
I went to Houston this past week. It was fun, and I got to ride a really cool bike path! However, I forgot my charger in Dallas.
While I was sitting in the park, waiting for my dad to pick me up from my ride, I was looking down at my phone powerbank. It has PD that could easily power a steam deck or a macbook. I then looked at my board.Then the part of my brain that everyone wishes would stop working turned on, and I had a really cursed idea.
What if you could charge a onewheel off of USB-C PD? The idea is simple: You have a Type-C port that automatically demands 20V/the highest PD that the charger can support. You then had a DC converter that steps 20V (or whatever voltage you can pull out of your macbook/ipad charger) and step it up to say.... 75V?
Have an XT-30 plug that you can plugin GX-16, XLR, XT-30/60/90, Pint/GT, or whatever cursed plug your insanity-tinted glasses head likes to use!Would this be useful? Probably! It's going to be ~$60 to build in parts, not counting filament cost.
I'm waiting on this for now as I have a couple projects I need to finish up.Fighting the pavement since I started this hobby!
-
@loaffette Nick and I thought about something like this but I've never seen PD outlets in the wild (at least in the UK). Especially any spec'd for high wattage.
I know the spec can go to 240W which is insane but other than a few premium battery banks that might give you 5-10% charge after losses it's not something you'd see a lot to make work in a pinch.
-
bought a Superflux HS Mk2
Will drop it in soon
Also working on a couple things rn, will keep ya'll posted once I finish it -
Got the Superflux on, currently don't have a picture yet
Things to note about installing a superflux-The thunder tire is literal landfill. Just throw out the tire, it's not worth it. I had my tire for about two days, went on a trail ride and the tire developed a flat. Swapped it out for my old Enduro and it was much better
The male connector has way too much meat on the connector. IT needs to be trimmed because making it fit within the rails is a hassle and a nightmare. They should cut it by about half an inch from the cable in terms of connector for better flexibility. I already know two trail riders local to me who have done this.
The superflux hs HAS SOME GAS
That thing flies like a bat out of hell
It's one hell of a motor, and it was worth every penny -
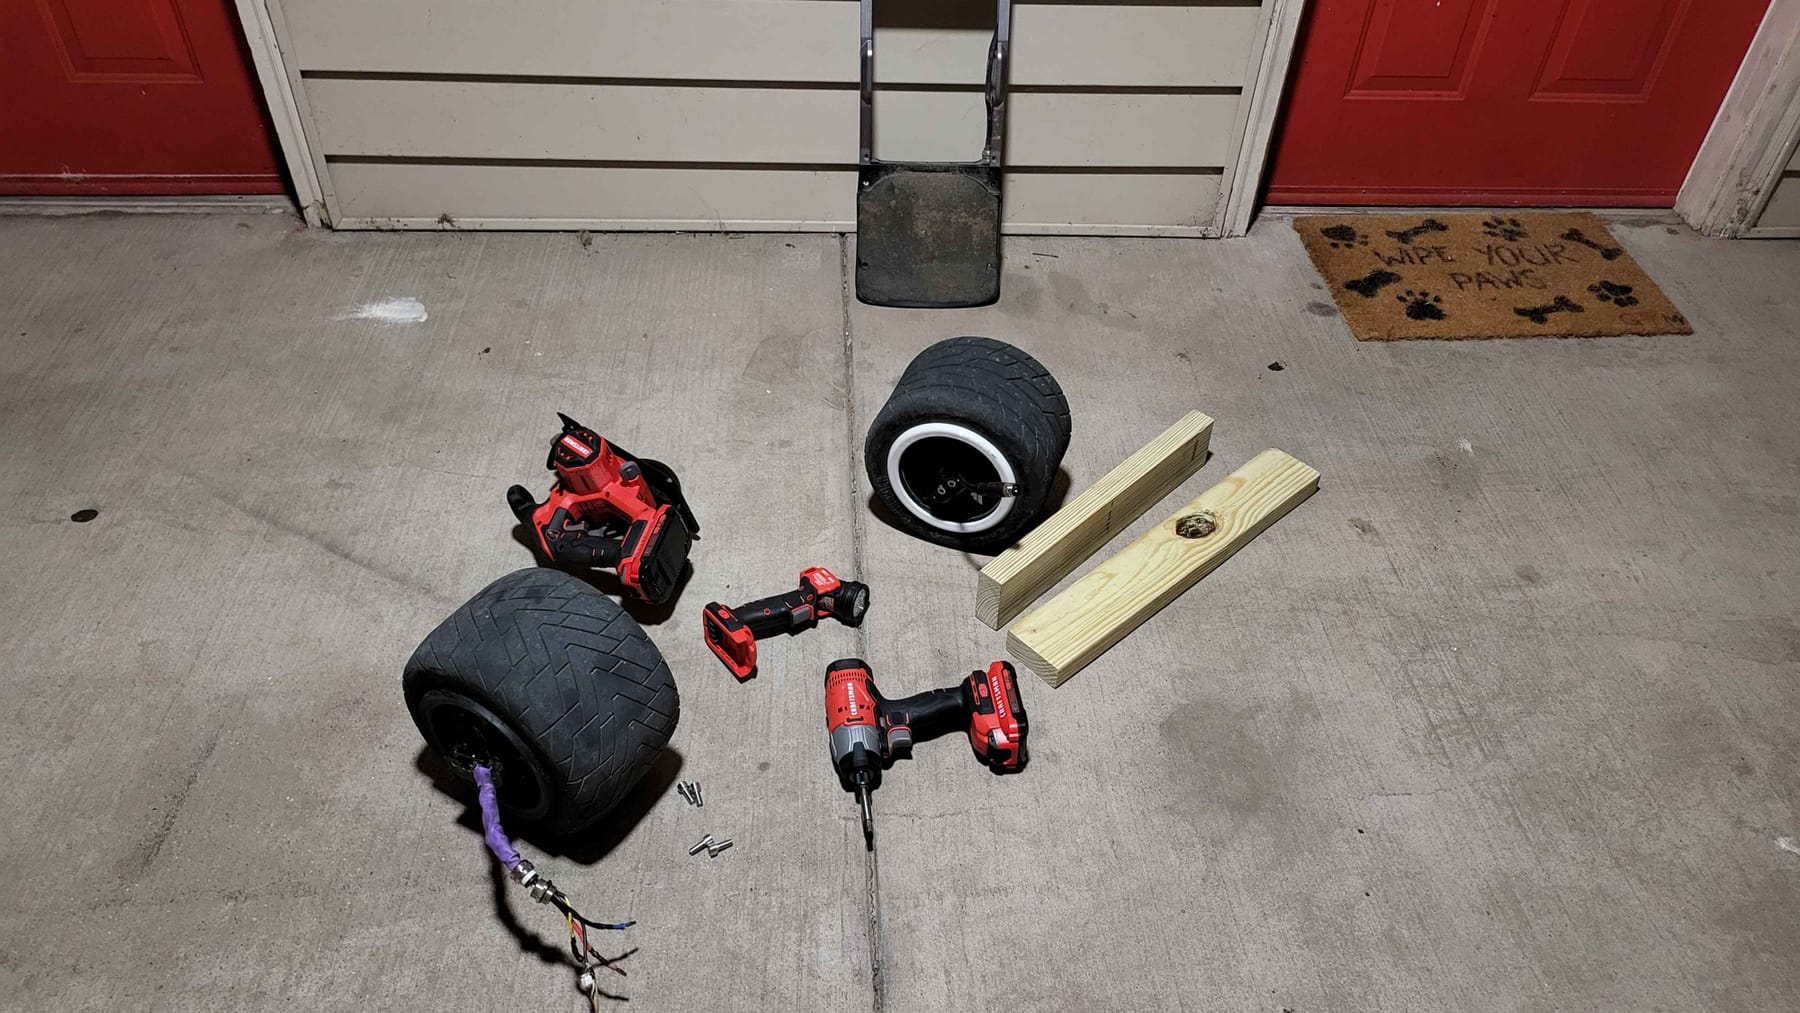
Here's a pic of the tire change. You can see how terrible the old motor was (the motor with the purple cable)
I'm not even going to sell the motor. It's got 6k miles, the cable is messed up and the bearings are the same ones from day one. I'm going to bring it to a lecture one day to take it apart for a lab then keep it as a trophy.The current goal now is to waterproof the board, finish my headlight project and then to give the board a visual overhaul
-
@loaffette I use to carry a solar charger, a 36v hoverboard battery, charging adapters, in a camera bag for group rides.
The solar charger converts the 36v to any higher voltage up to 90 v all programable with memory for different boards.
I've gone to 24s, so I can't use this anymore.![IMG_9512[1].JPG](/assets/uploads/files/1739293261386-img_9512-1-resized.jpg)
-
@lemur very interesting
I'll have to look into that option
I remember Wren for CD using a setup like that for his board -
Hey just wanted to say Ive read pretty much the whole thread due to somehow finding this page when searching for DIY solutions to VESC issues. It was a fun journey to see everything you've done to build a really decent board!
Im riding a totally self built VESC board and I love it. Think ill upgrade to WTF rails soon and some decent sensors and footpads as im still using tiny spintend sensors and homemade footpads from plywood and griptape.
But I ride every day and I love it. Cheers for sharing your journey!
its a big learning curve.. lots to work out and its a real sense of achievement once you get things really dialed in theres nothing like building your own board from scratch! -
Alright, I think ya'll need an update for the board.
As of writing this, I have switched to a metal controller box based off of the Pubbox design, which is amazing (outside of the thirty lid screws), went to the ennoid MK8, then back to the old ubox 100v. Added LEDs, 3d printed footpad with the first five milimeters being near-solid PETG with the rest being TPU and the stoked stock v4 sensor, and then the thundercat with WTF BTG rails.
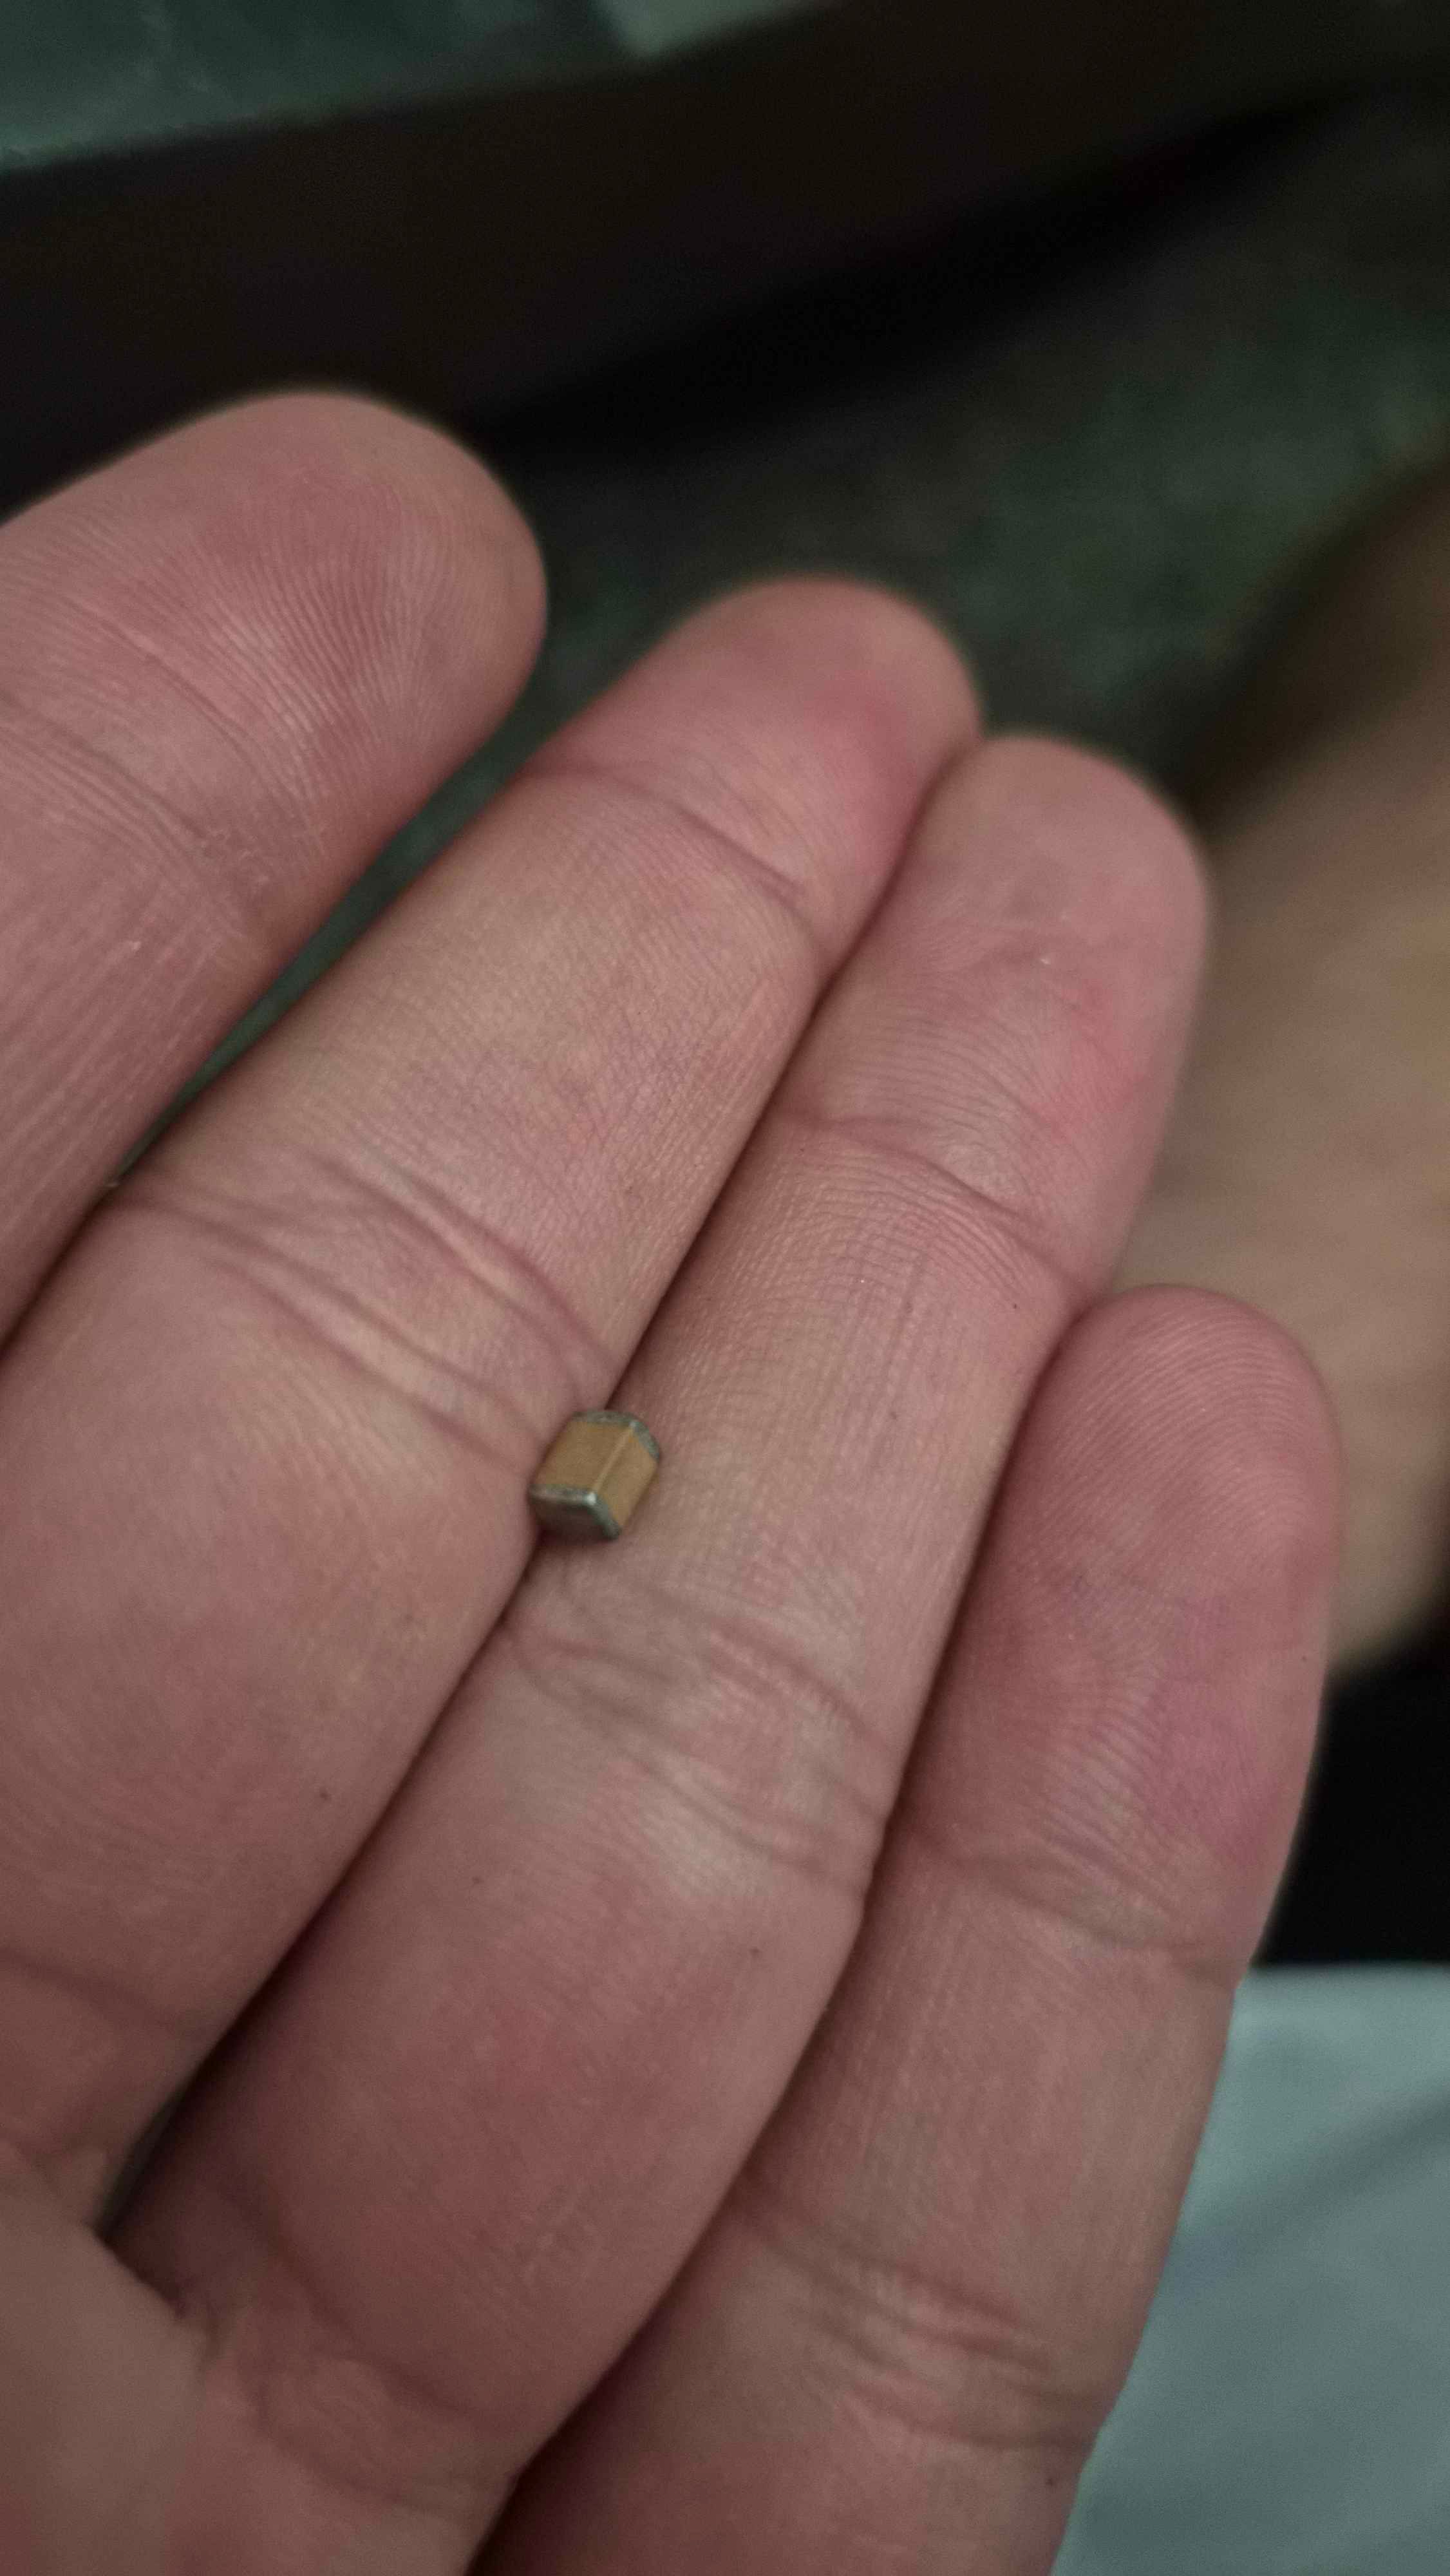
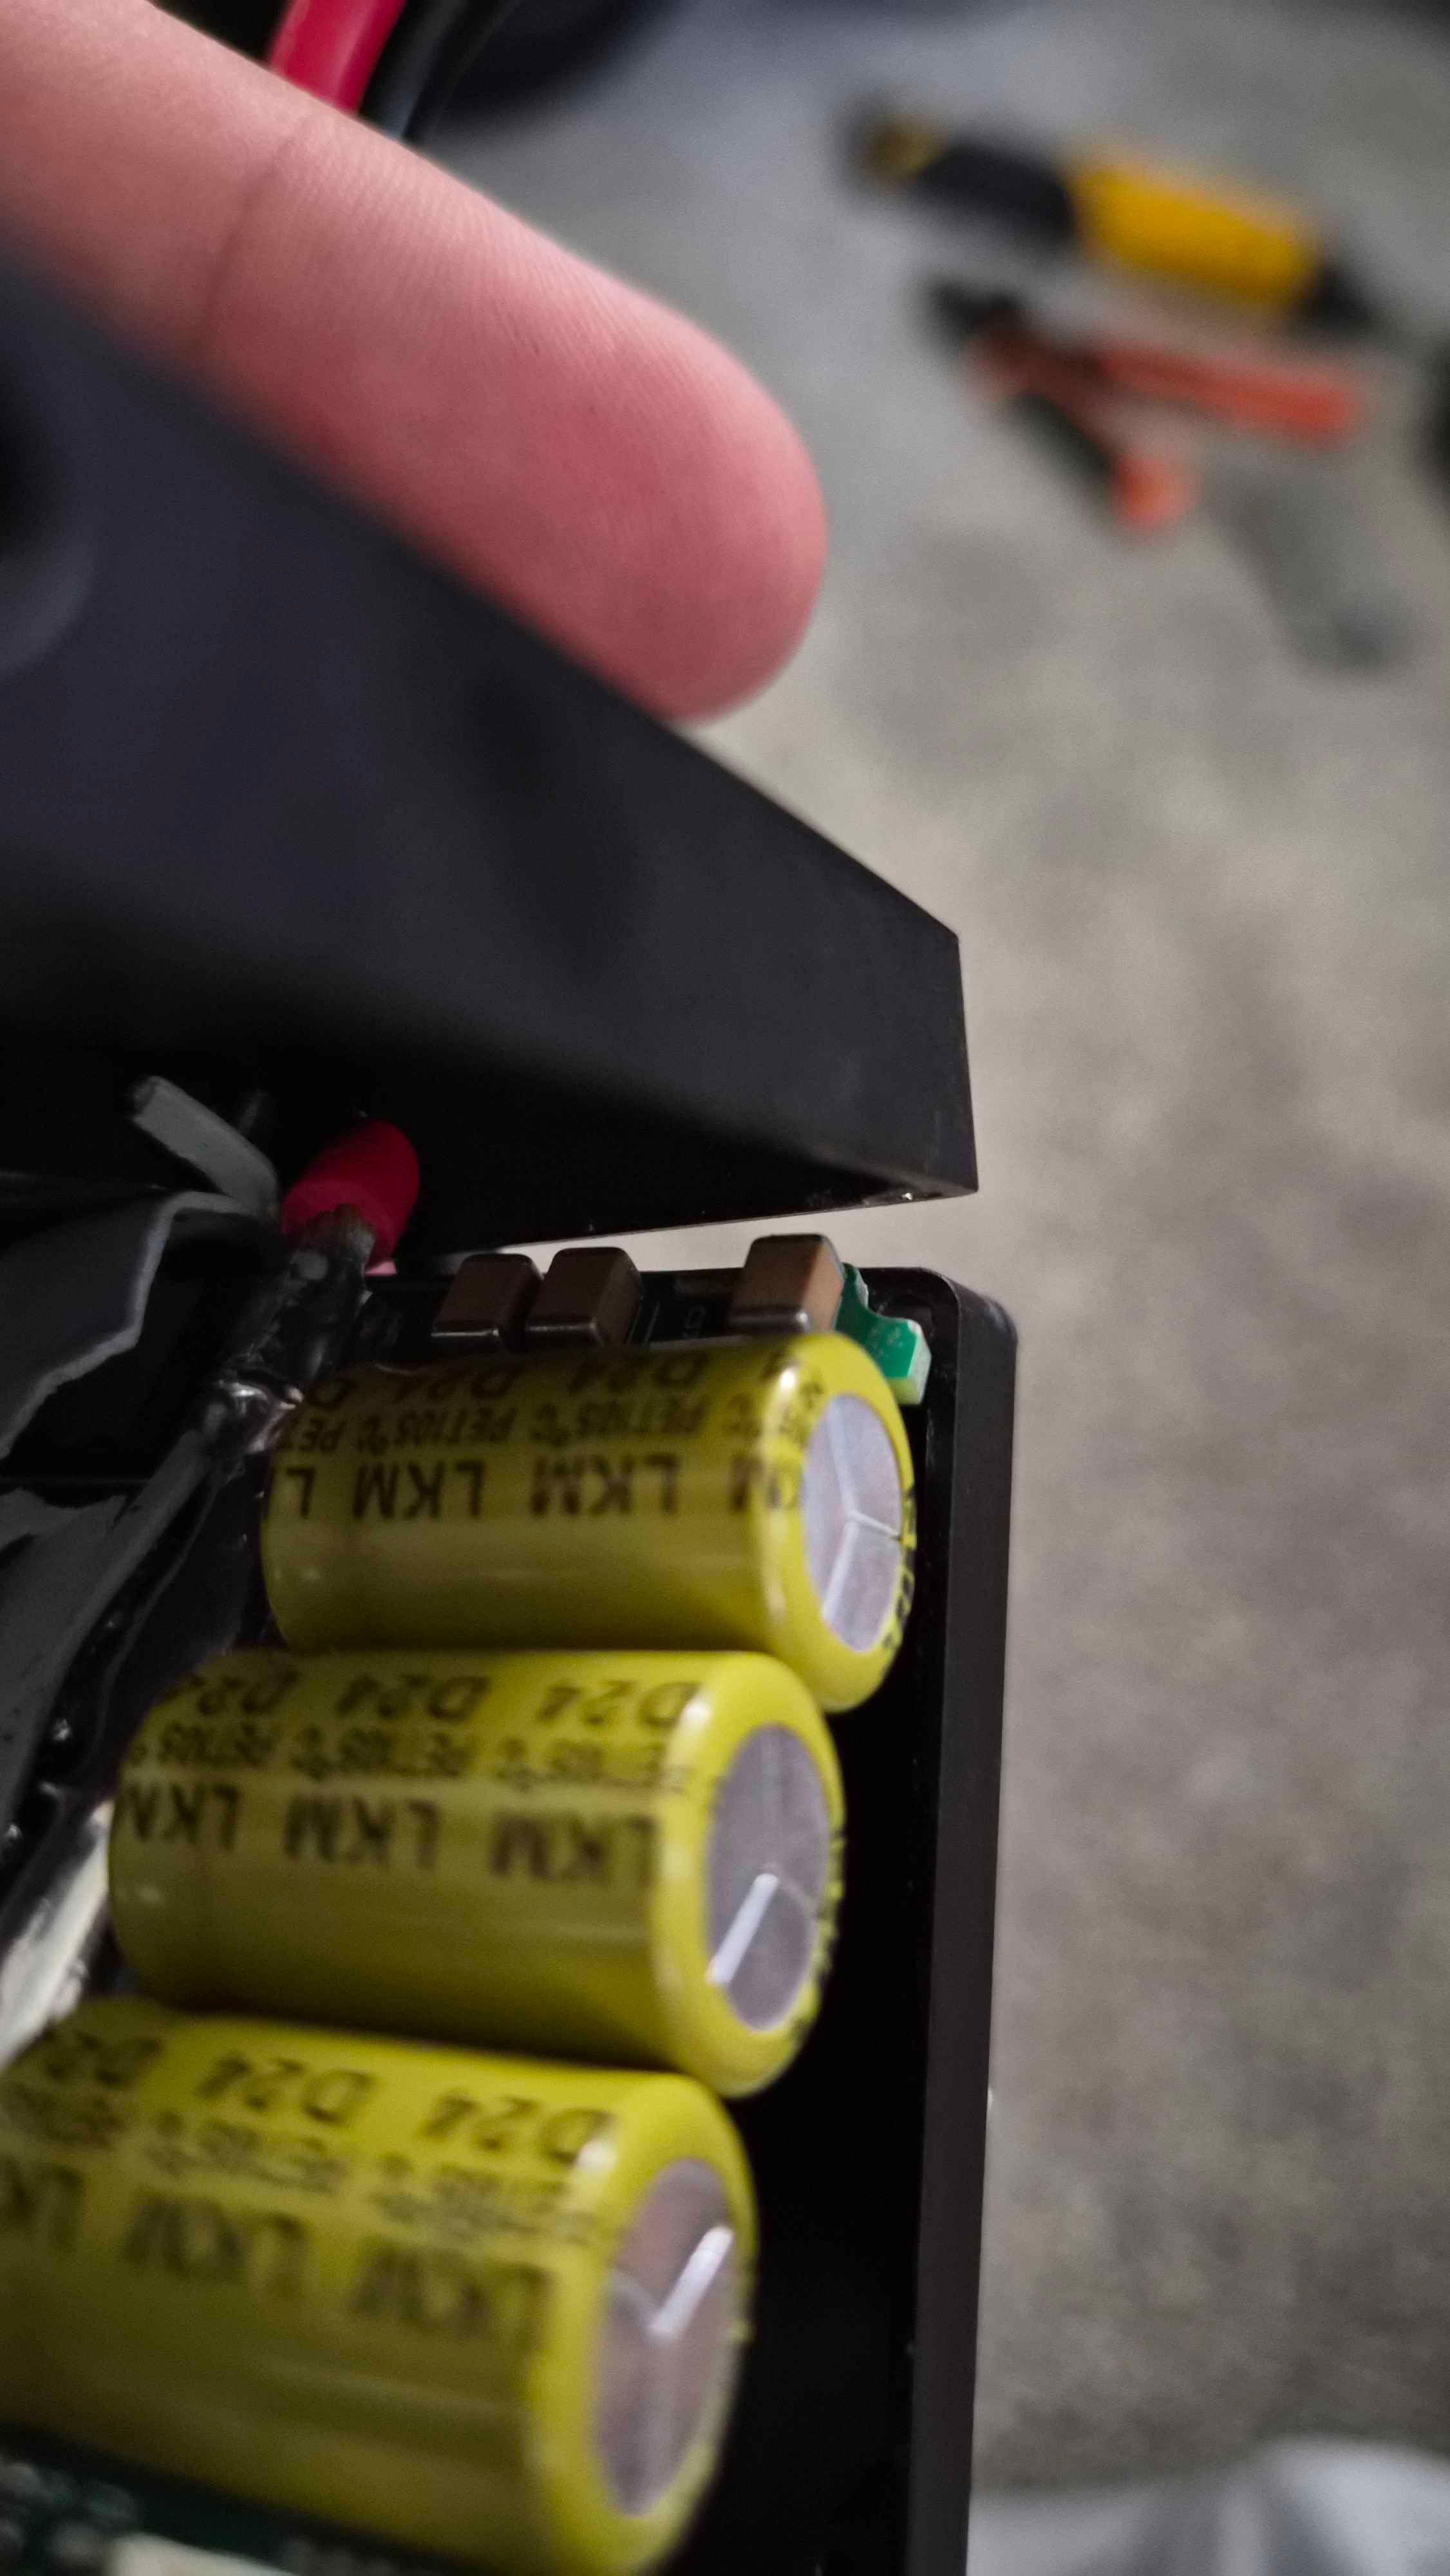
The board is currently in a weird state of un-death. I made some idiotic choices and browned out my MK8 enough times to do what I'd assume permanent damage to it, along with finding that somehow an SMD capacitor came off of the MK8 (wild). Spent the better part of a couple days then switching back to the ubox, only to find that the NRF data and ADC2 being dead. Greeaat
For the past month, I've been fighting the board to keep it running. It started with adding LEDs running directly off of the MK8. Bad choice, as that would cause the board to brown-out mid ride, and I'd get some very nice road-rash. Took out the LEDs, and it seemed like the problem went away, for two weeks. About two weeks ago, I switched to the metal controller box. The first ride with the board, I did a curb nudge after about twenty minutes of riding, and the board stated to make crunching noises intermittently, with no real pattern. Re-calibrating the motor caused this issue to go away, but after about twenty or so minutes later, the crunch came back. Double-checked settings, uploaded new firmware, reflashed the MK8, nothing fixed it.
I spent a solid week chasing everything that could possibly be the issue.
I can't tell you how many times I considered either tossing the board, parting it out or just straight up taking my mom's pint and doing unholy crap to that.
I think I've dialed it down.
VESC Tool has a command in the terminal called
hall_analyze, which lets you.. analyze the halls? Idk, it's VESC Tool. It's both the best and worst thing to exist. It's supposed to be used to troubleshoot your motor halls. You're supposed to get nice, clean square-wave output, with nothing weird or fishy about it.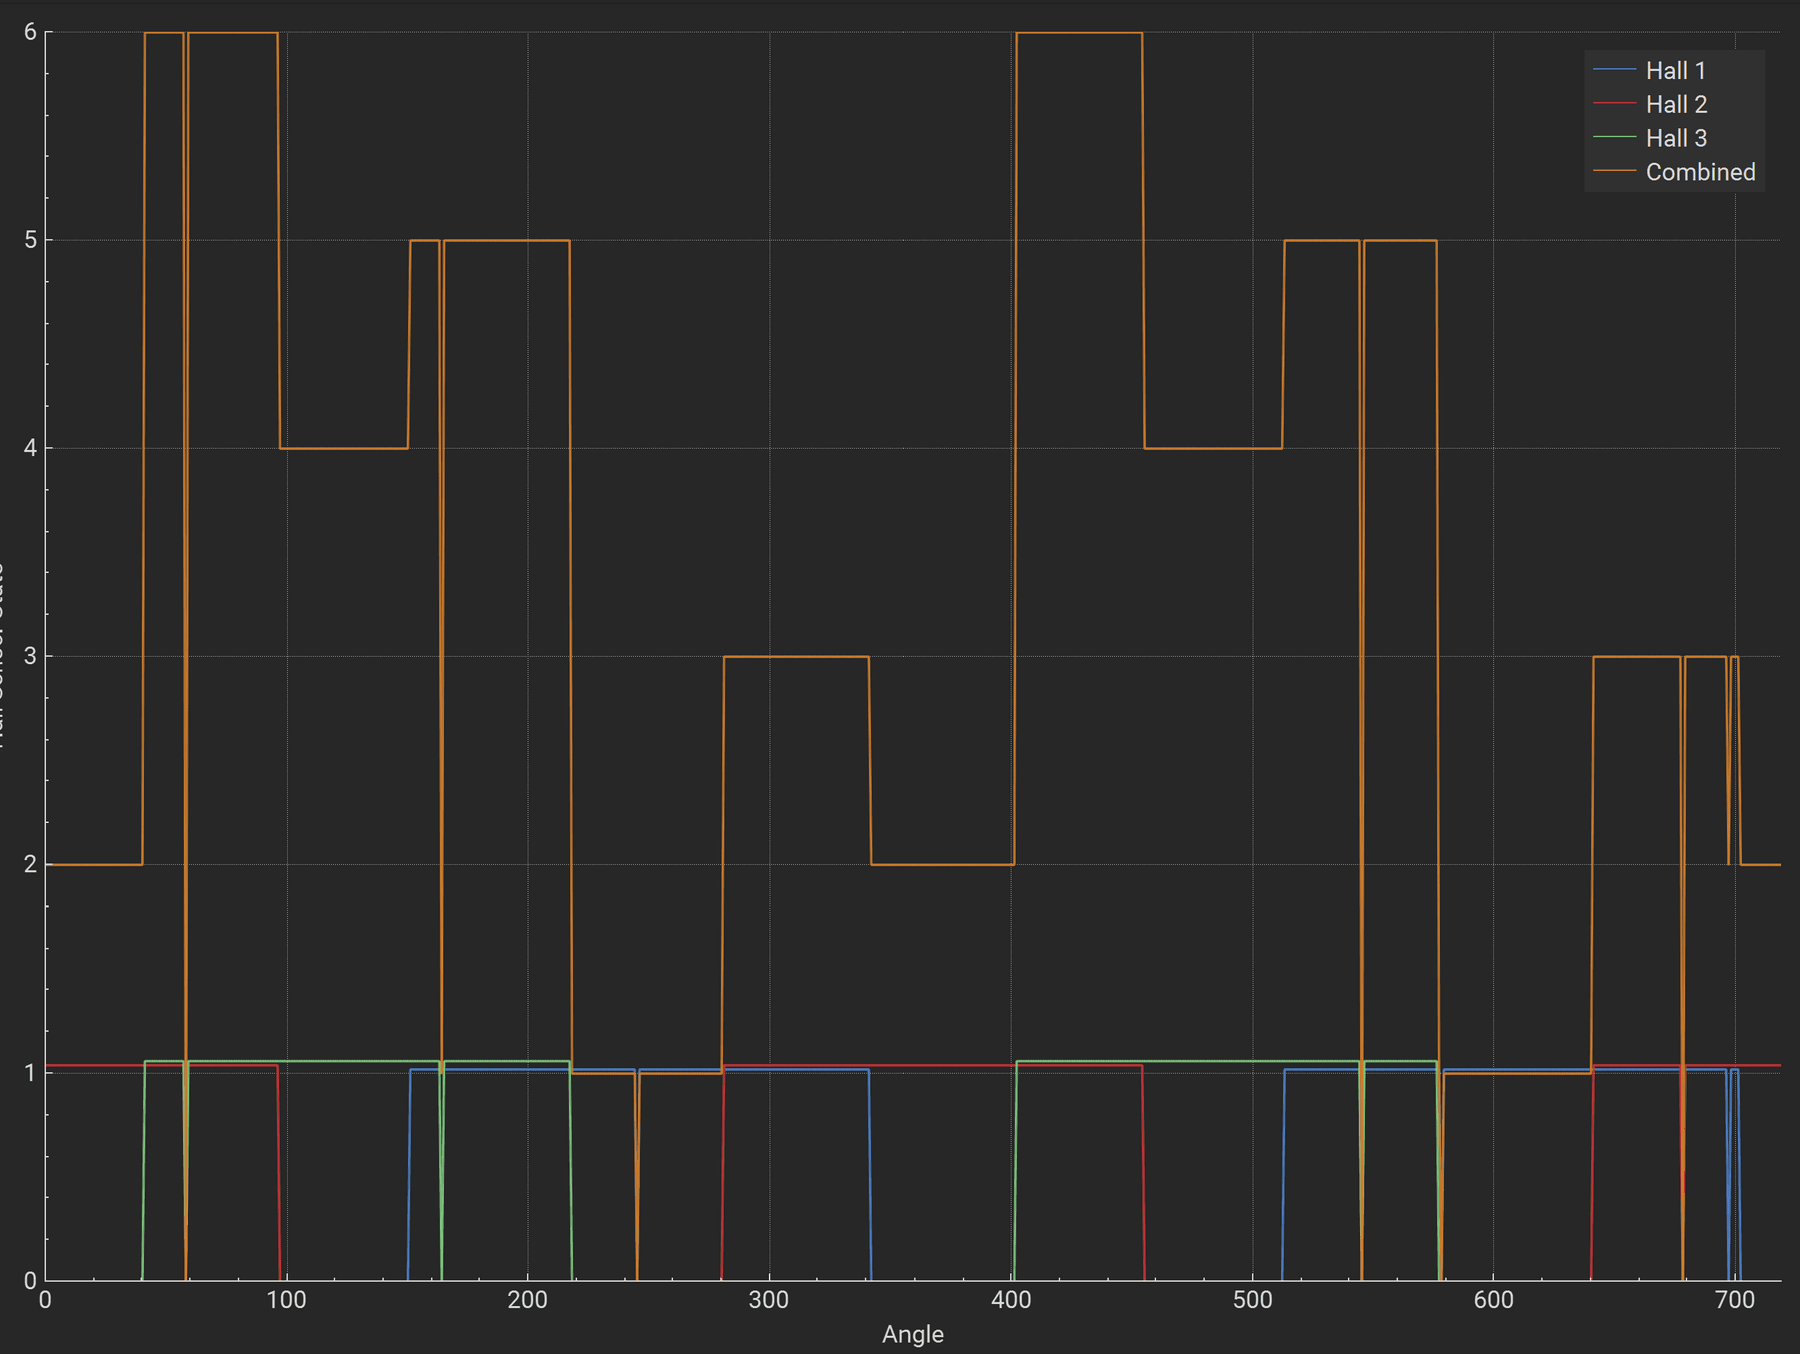
Above is my hall sensor. It's not clean, and it looks a little suspect. Those strange, sharp dips could be either Vesc tool absolutely crapping its brains out, my halls in the motor screwing up, or a mix of both. I already tried this with both my MK8 and Ubox, got similar results on both. Could be the motor, could be VESC tool.I hate this damn hobby-So, where are we at right now?
Well, I have four new hall sensors coming in, because one of the hall sensors DEFINITELY has damage to them, and it'd probably be a good idea. I've ordered a replacement MK8 with 120V MOSFETTS, and I'm currently trying not to go insane.
Also, this is all happening in between finishing up my last couple weeks at work, packing up for my transfer to Texas State, preparing for an event I'm going to called San Japan (Going with a group of friends against my willpleasesendhelp-) and having to juggle adulting stuff.
Hopefully I figure this out in time.
I'll keep ya'll updated.
I have no idea how ya'll do this crapFighting the pavement since I started this hobby!
-
One more thing-
GX-16 can be used in place of the switchcraft connector, it fits if the screw part of the connector is oval-shaped.
And I somehow managed to gaslight my Ubox 100v into making it think pitch was roll, vice-versa. I assume that I've either done something I shouldn't have, or I've messed up on IMU calibration.
Once I get this whole thing figured out, I'll post a more detailed write-up on my board as it currently stands.
-
@loaffette Hope you get the the Ubox set up, I had a sutdown problem with my MK8 150 with a shutdown while riding. Apparently, the long press firmware does not have a default auto shutdown while idle, and if you set a shutdown time on the LP firmware, it may shutdown while riding when the shutdown time expires, although it's supposed to reset to no shutdown time after rebooting.
I switched to the short press firmware just to be safe and had zero problems since and running any lights on the MK8 is risky, I removed light on my MK8. -
@lemur I talked with Ennoid a bit over email. He mentioned how if you use an external buck (which i use know) it can cause some weirdness with current rippling, and VOW needed to install a diode to prevent that.
I have seen people getting LEDs working on the MK8
I got the new hall sensors in and will be installing them, and will be finishing my conversion later today. Going to go pick up new grip tape later today for my new footpad. Considered pulling off my old grip tape but decided that I should stop with the jank and I should start doing this properly.
-
She's alive.
Board runs great, and I've already given it hell. The new campus I transfered too is very hilly and has some pretty steep inclines, so I've been pushing my board up the hills to try and stress it out.
I got the Ubox 100v installed, though I had to design my own mount for it and rip it out of the metal housing it came in. Found out the NRF data port and ADC 2 is dead, so that's fun. I have a new MK8 coming in with 120V FETS. Apparently running 150V FETs with a 75.6V battery makes the controller run HOT. Plus, switching to 120V means I can get insane amperage (About 198.6A for Soft max, over 230 abs. max!)
Motor feels great, and I did the hall sensor replacement on my own. Ended up doing all three, took pictures and then made a pev.dev post about how to do it. It's poorly written, but hopefully it's enough.
One of the riders at 1Wheelparts hooked me up with their quickies. I modified the pubpad to fit specifically the quickie, and I'm going to modify the foot hooks from VOW to fit the quickies specifically.
My new footpad runs a V4 Stoked Stock sensor with the first 5mm printed out of thick PETG, then rest out of TPU
Looking into adding PWM control for my COB LED lightbar, but that will come later if I learn PCB design.
-
Board is holding up well. Thought I would run through some things I've discovered and came up with while working on this board, and tinkering with it.
First- absolutely do not put off any maintenance or work on the board longer than needed. Will get back to this later.
I don't have any pictures, but I managed to get access to a makerspace at my new college, which is amazing. The parents aren't as happy that I've now got a place to go work on my projects that has A/C, access to 3D printers, CNC, waterjet and laser cutters. I've signed up to get training on the CNC, waterjet and laser cutters so I can gain some new skills and expand on what I can do next. I have a few projects I want to embark on once I get settled in and see how this semester goes. (Stepper-Motor powered guitar anyone?(Learned that Bambu A1 printers generate their boops and beeps via motor vibration, I'm now obsessed with playing music out of my printer. Roommates might hate me now))
I got the chance to put on some new heatshrink over the cable harness that runs from the battery to the controller. The hard part was running the new heat shrink over all of the cables. I started out with the largest wires, then pulled through the smaller ones using a length of string tied to the ends of a set of wires through the heat shrink. Also discovered that I had somehow lost length on the XT-60 even though I didn't cut it (black magic I guess). Gonna make a two inch extension using some length of wire and a female/male set of XT-60s so the main battery power leads aren't any tension. Remember to put the cable gland on before you put your XT-60 on or else it'll be trouble.
Did discover that if you leave neopixels powered but without data plugged into an ESP32, interference from the motor will cause the LEDs to flip out. Plugging in the data from the LEDs into the ESP32 negated this, and there is no reported issues so far. Will let the smart people figure this one out.
Old wiring harness heatshink wasn't made for the length of BTG, so I barely had any cable gland on the meat of the heat shrink, making for some very poor sealing. Waiting on the new MK8 Ennoid to come in, which has 120V FETs to allow for 20-22S shennanigans once I finally figure out how to properly route and manage wires. Thinking of using some zip-ties and hot glue to work this, and some pre-planning.
Ordered stainless steel m3 screws to replace the ones in my battery box which have finally stripped out. (I hate tiny torx for a reason. I hate tiny screws for a reason.)
Need to look at sealing the front and battery box, though I want to do this after I'm absolutely sure my board is 100 percent wroking. Found a couple trails near the college that have some trecherous terrain I could totally throw the board down to stress test it.Thinking back on the Hall sensor swap and VESC Tools Hall Analysis tool, I think I may have a reason as to why hall analysis was showing very wacky hall readings. It could be due to the fact that BLE isn't stable and may cause data to be intermitently dropped, leading to data being lost during trasmission. Could be the Vesc software itself on my iPad or computer being generally pretty jank and having some issues that cannot be diagnosed. It could be the VESC itself is old and is just showing it's age. Yes, I'm blaming my tools for a problem I can't solve, but it's the only thing I could think of outside of user error.
Off-topic time:
I went to San Japan over Labor Day Weekend. It's not my normal crowd, but it was fun. Sucked going alone, but it was genuine fun to see people and get to meet people who seemed to be important. Used my board to get to and from the convention between the convention center and my hotel. Got caught in the rain saturday night on the way back, and that soured my mood for a moment.Anyways, they had a car meetup thing in one of the halls where they had a bunch of crazy cars with anime/waifu wraps, similar to how Warstik was back in 2024, but better. It made me want to do it again, but Craft and Ride is dead and even if they weren't, I don't wanna drop the money on rail gaurds that wouldn't be removable or easy to protect. Came up with the idea there to have removable rail guards using the screw holes found in stock XR rails for those rail clips. BTG WTF rails don't have these, but they can be added with the help of a drill and tap set. Could have a set of screw holes, two on each half of the rail, one on top and one on bottom. You'd have a bit of the rail guard wrap over the rail and would be bolted in place to hold them on. Can't really prototype without proper training on a laser cutter or CNC, but it doesn't mean I can't make ideas. Now I just have to find a way to print on acrylic on the cheap.
Fighting the pavement since I started this hobby!