GT vesc components layout
-
Here my layout of components, but there are many ways to achieve a good result as there is lots of room in the GT controller box.
The ubox 100 has dual 12v 2 amp aux outputs
List of components used:
1-bluetooth module
2-buck converter 12v down to 5v to run tailights
3-Ardruin nano to run rgb lights
4- 5.7k pulldown resistors for acd1,2 on footpad
5- 12v to front stock GT bright light
6- 5 ohm resistor to limit current to the GT front bright lights.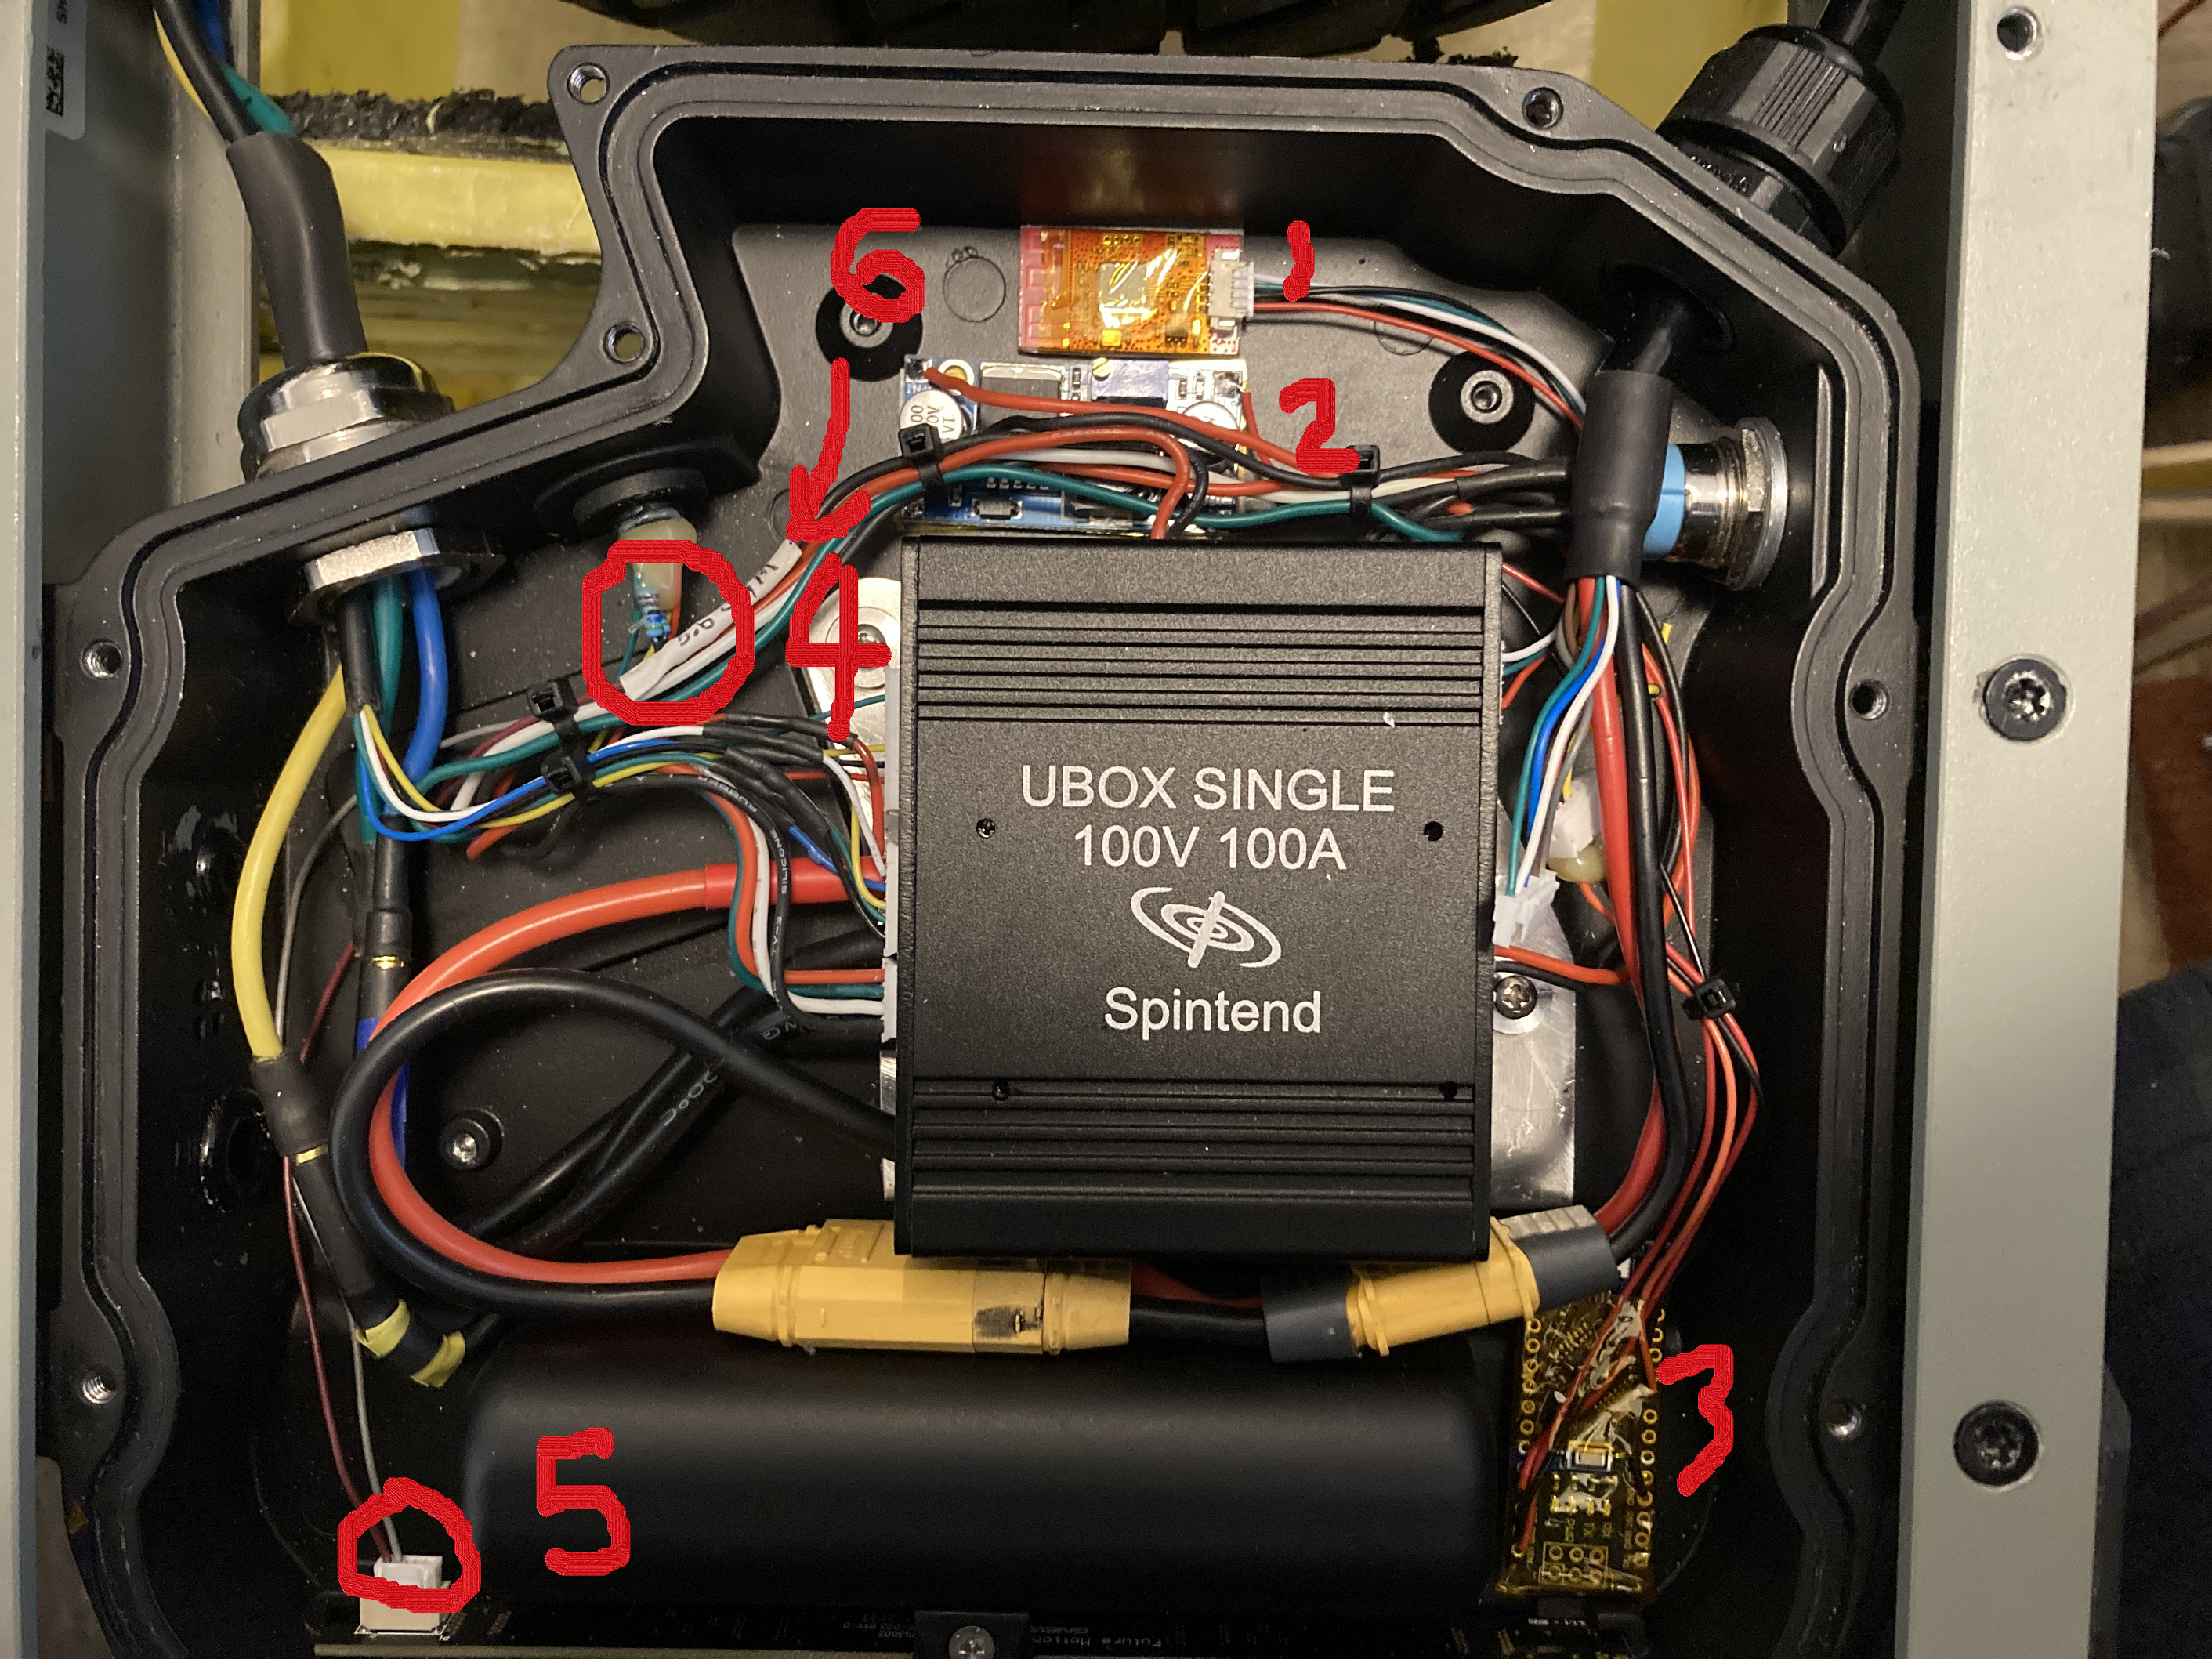
-
@lemur I updated the wiring a bit to add a fairly easy way to disconnect the battery as all vesc have a parasitic draw with a charge only bms.
I ruined a vesc Pint battery because I let the board sit for a few months.
This disconnect will be used if I intend to have the board sit for a while. I have too many boards to try to monitor every one.
You can see the XT90 antispark with the loop key and is wired on the negative leg, so no danger of shorting out the battery.![IMG_7958[1].JPG](/assets/uploads/files/1706647929676-img_7958-1.jpg)
-
@lemur said in GT vesc components layout:
I have too many boards to try to monitor every one.
I feel this 😅
The Gland looks clean on the motor port! -
@lia You don't even have to file a flat on the threaded part, screws in, won't tighten, but the nut secures it.
-
@lemur im very interested in this setup. Do you have a diy for the lights?