Vesc Conversion Status (Rose/Mika)
-
I'm back
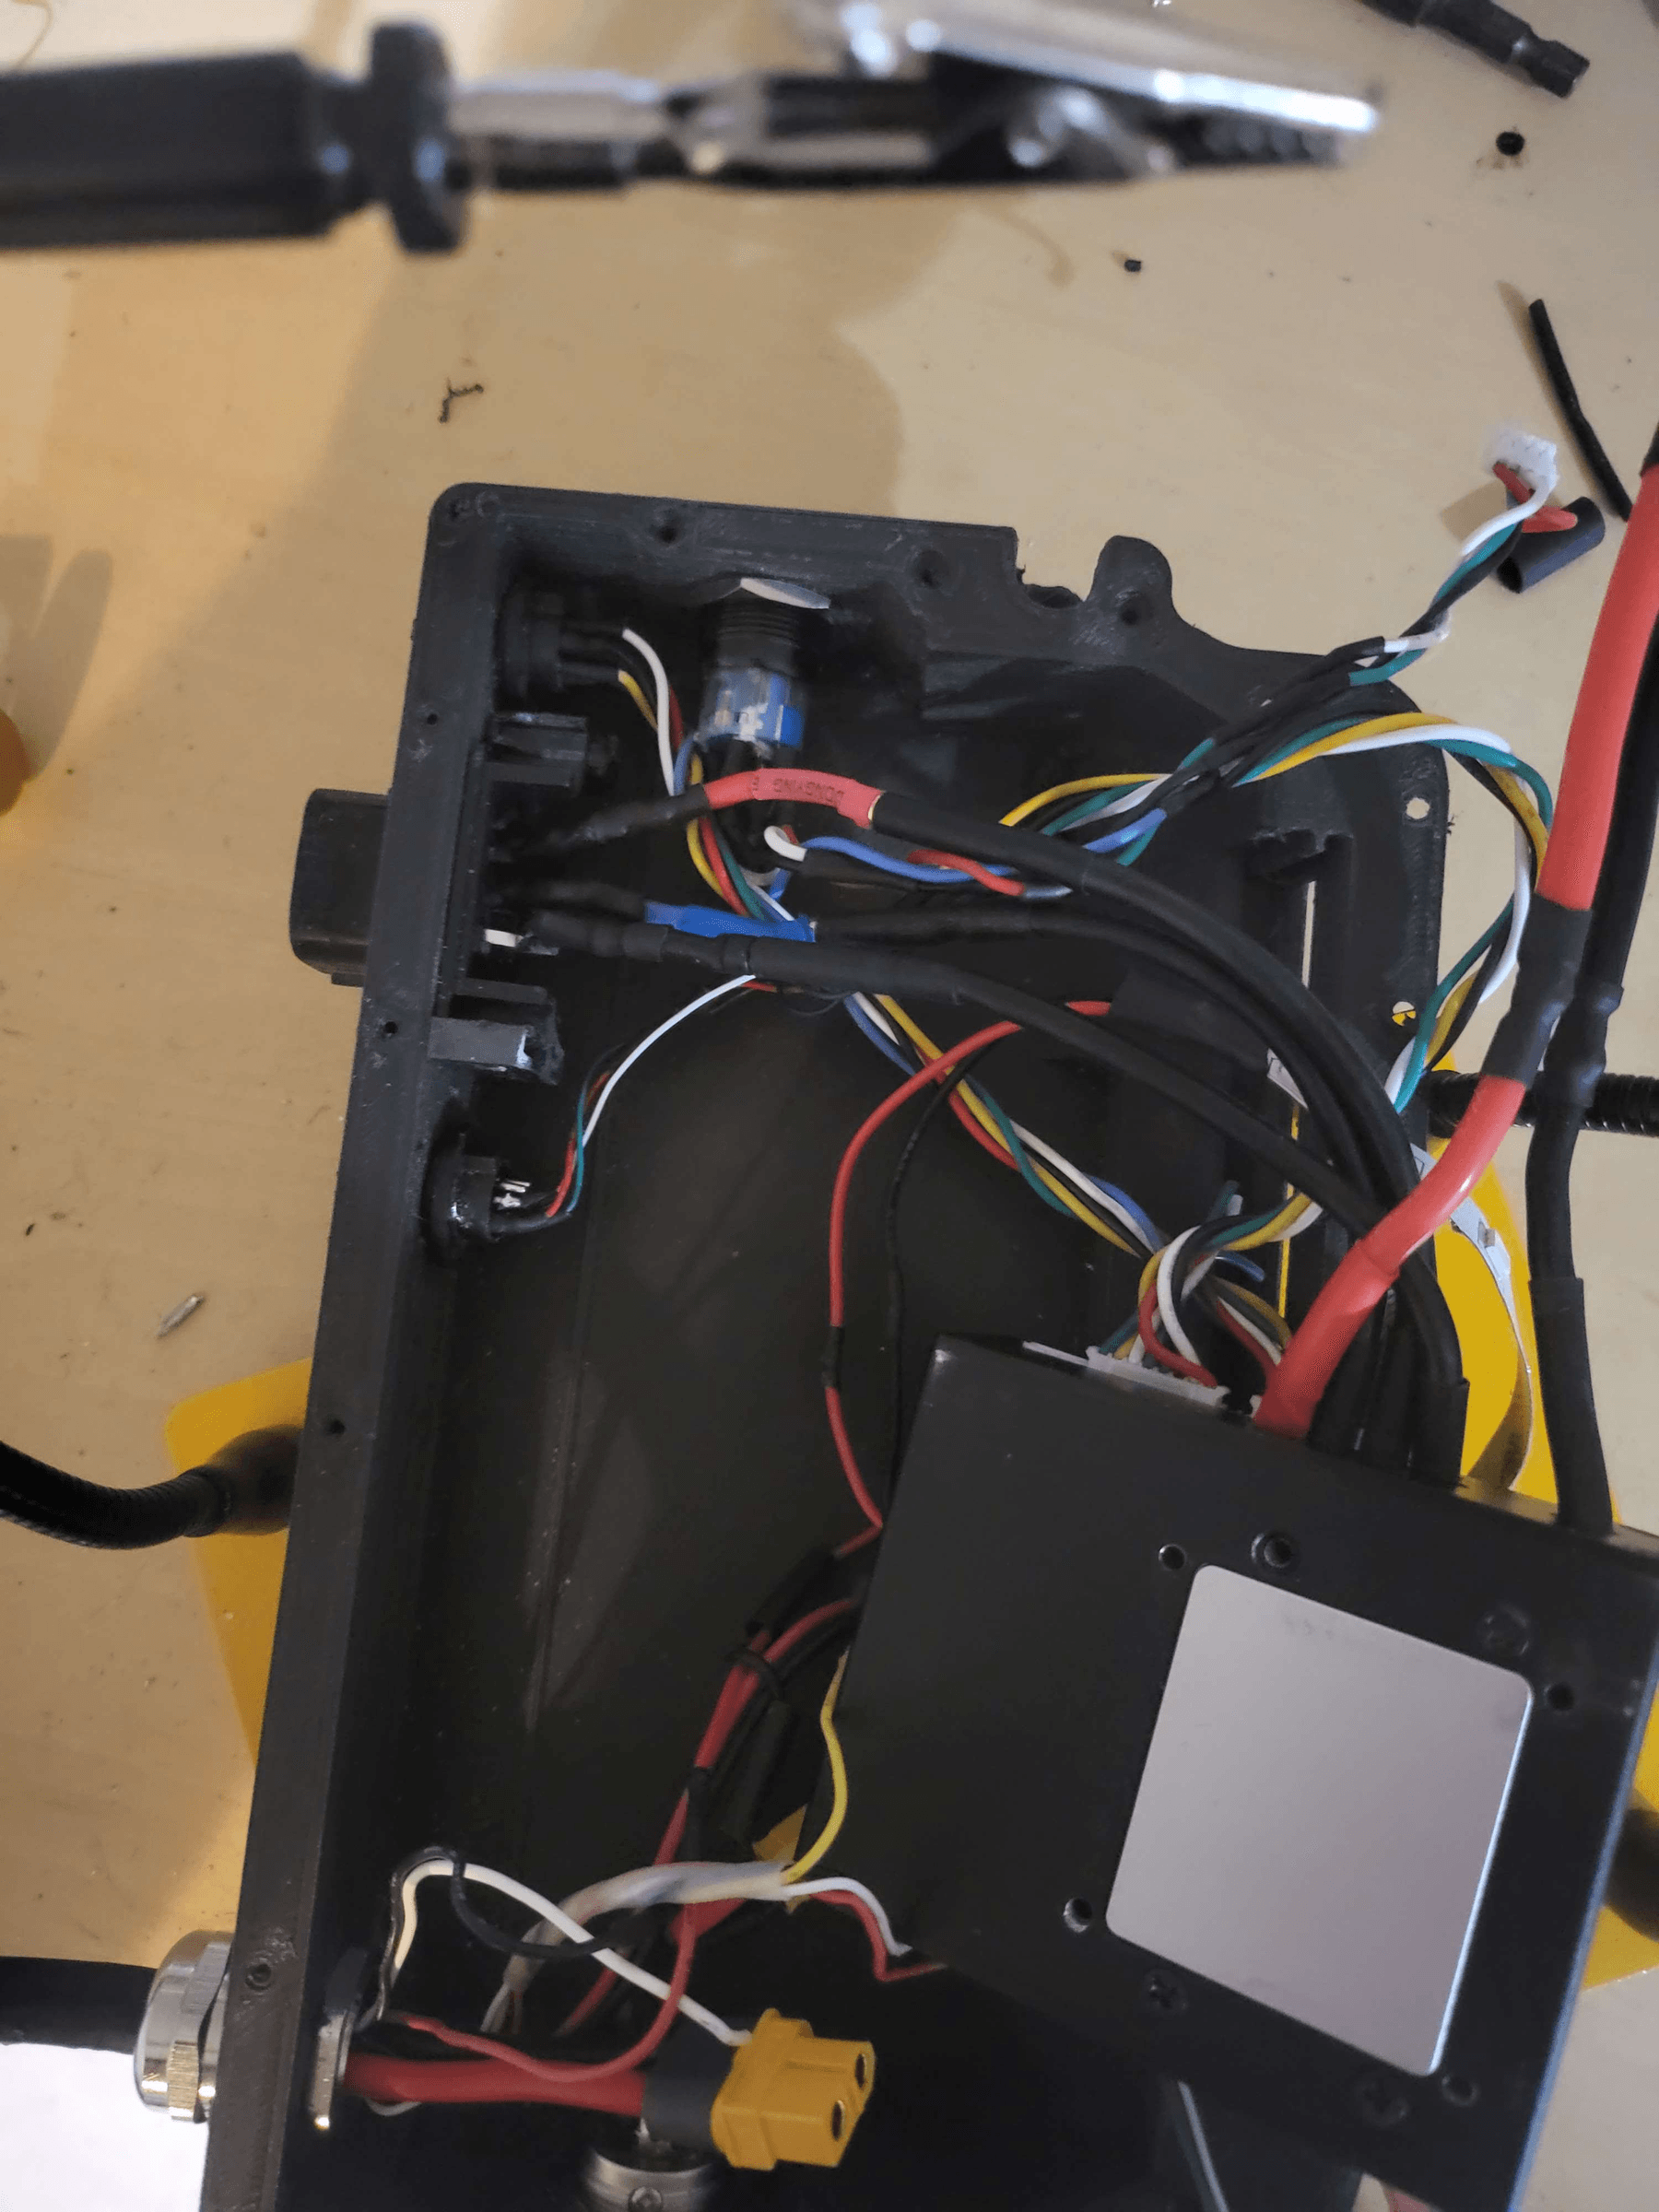
I'm fixing my vesc. It's 1 AM, my VESC has been in pieces for about four days.
I've had to rewire and shorten the wires within the battery box, redo the LED strips because they broke, rewire the entire controller-side, remove the footpad and hall connectors from the PCBs, re-solder the controller's XT90 and swap it for an XT60, drill new holes for the controller box because the lid I bought didn't line up with the existing holes, and I've had to do all other thingsslight rant but..
If VESC is ever going to get farther than it is, someone needs to make a few things obvious or make sure everything fits. The last two controller boxes I've printed have had misaligned screw holes for the lid..I'm tired, I'm going to bed
-
-
Back again
Avaspark sent me an STL link for a controller box that should have had everything I needed.
However, it had a bump sticking out that I should have looked at more closelyI can't get the bumper on fully, so I have to re-print the box
113 volts?! I could lick that!
-
@loaffette
Can't sand away the bump or is it like not an option?Also... actual bop

-
@lia I don't think I could. That bump goes pretty far into the bumper, and I'm worried if I sand too much of it, I'd be puncturing into the box's cavity
apologies for the venting and ranting, I'm just having one hell of a time with this board right now113 volts?! I could lick that!
-
@loaffette responding to this so people can be updated:
Turns out the Field-weakening setting was set to 45A. When I did a burnout on the ground, I think the field-weakening drew too many amps from the ESC and blew it.
So now I keep my field weakening current under or at 35 amps -
@loaffette No worries, feel free to get it off your chest.
Hopefully it all starts to just drop into place soon for you! -
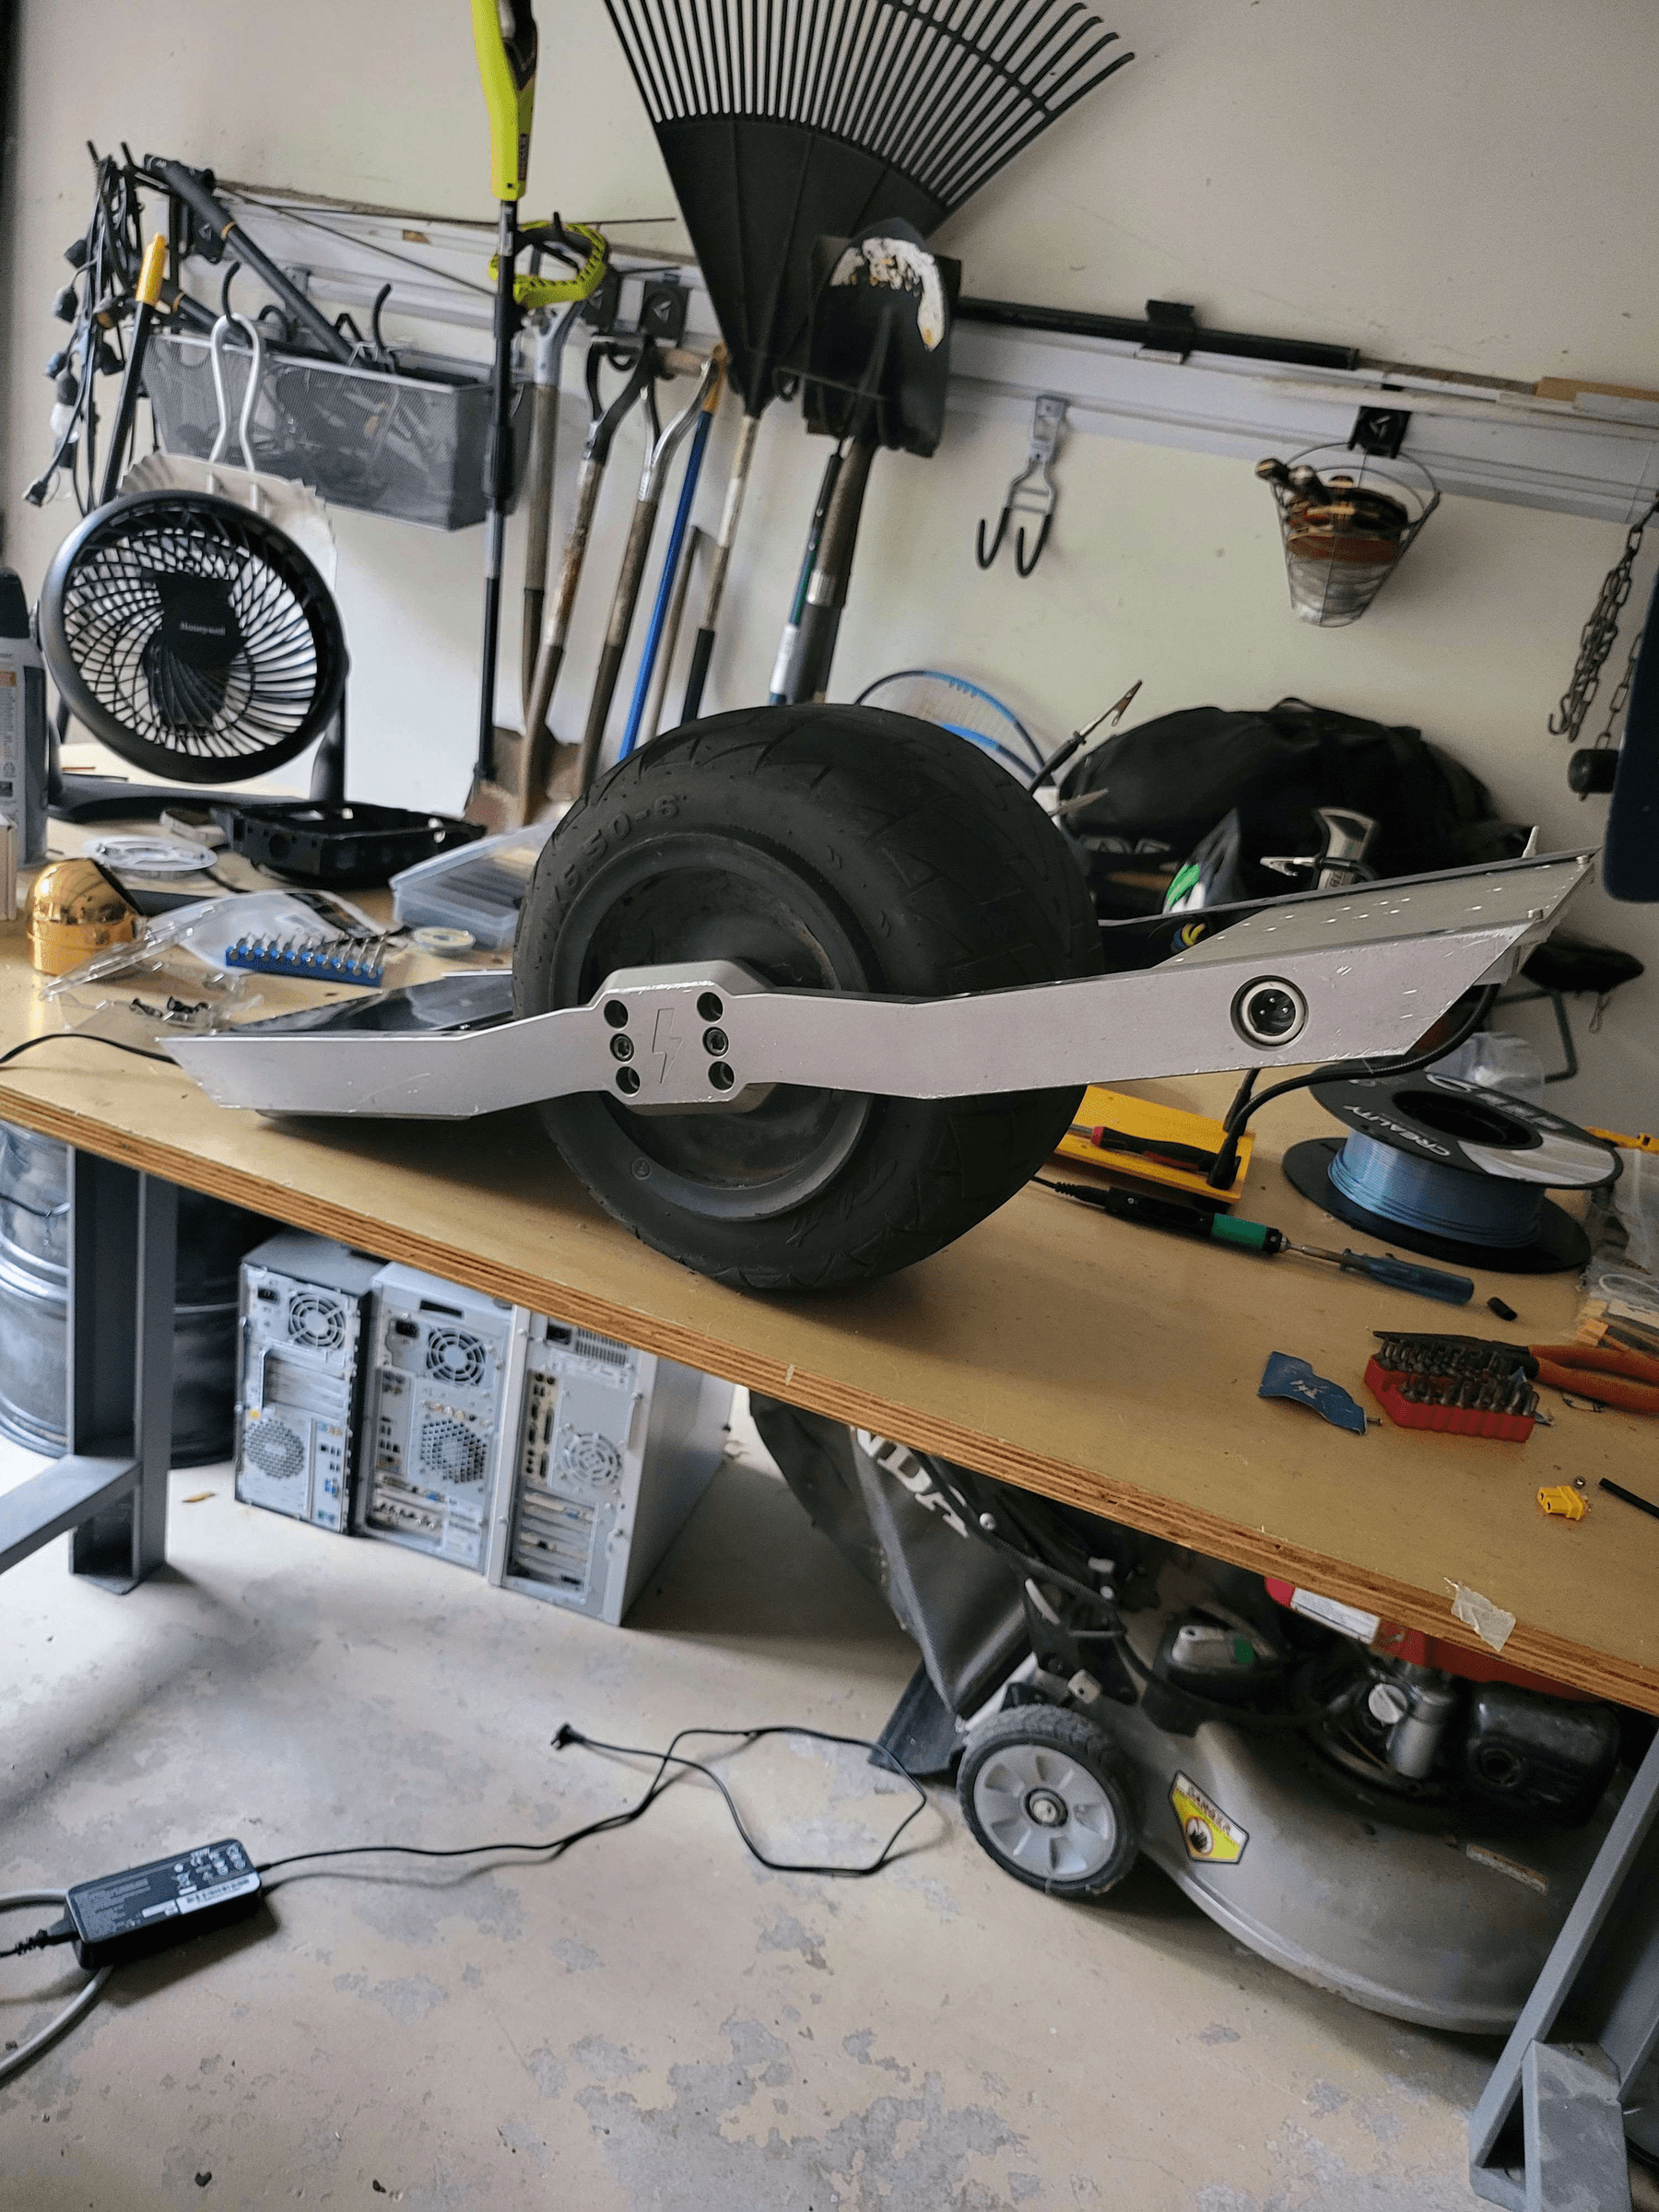
The board is back in one piece
However, there is a problem..
Here it is rebuilt, but in time-out
The board is acting weird. It's very sloggy, and I've made sure all of my settings are set correctly. I am having some weird issues with the yaw orientation, but I'm not sure if that is the problem or not. I'm gettgin 15-35 degree offset, not the usual 90 or -90 degrees
113 volts?! I could lick that!
-
@loaffette Regarding yaw do you mean it's just drifting?
I could be wrong but on the VESCs I've done with an external IMU the yaw is ignored as you really only care about pitch and sometimes roll. -
@lia figured it out
It was some pitch orientation problem. I redid the IMU calibration a few times until I got it working113 volts?! I could lick that!
-
@loaffette Congrats! ^-^
-
Here's some good news:
My board balances in freewheel mode freakishly well
and I am working on making fender deletes for the thunder rails
Currently basing the main design off of Rantharin's work on the fungineers discord, but his is for a pint tire. I'm adding an indents near the axel to make space forrim j-life savers, and a cutout to allow cables to run past unobstructed. I'm currently printing prototype 3
113 volts?! I could lick that!
-
Hello everyone
I'm still alive, just busy with summer internship and stuff.
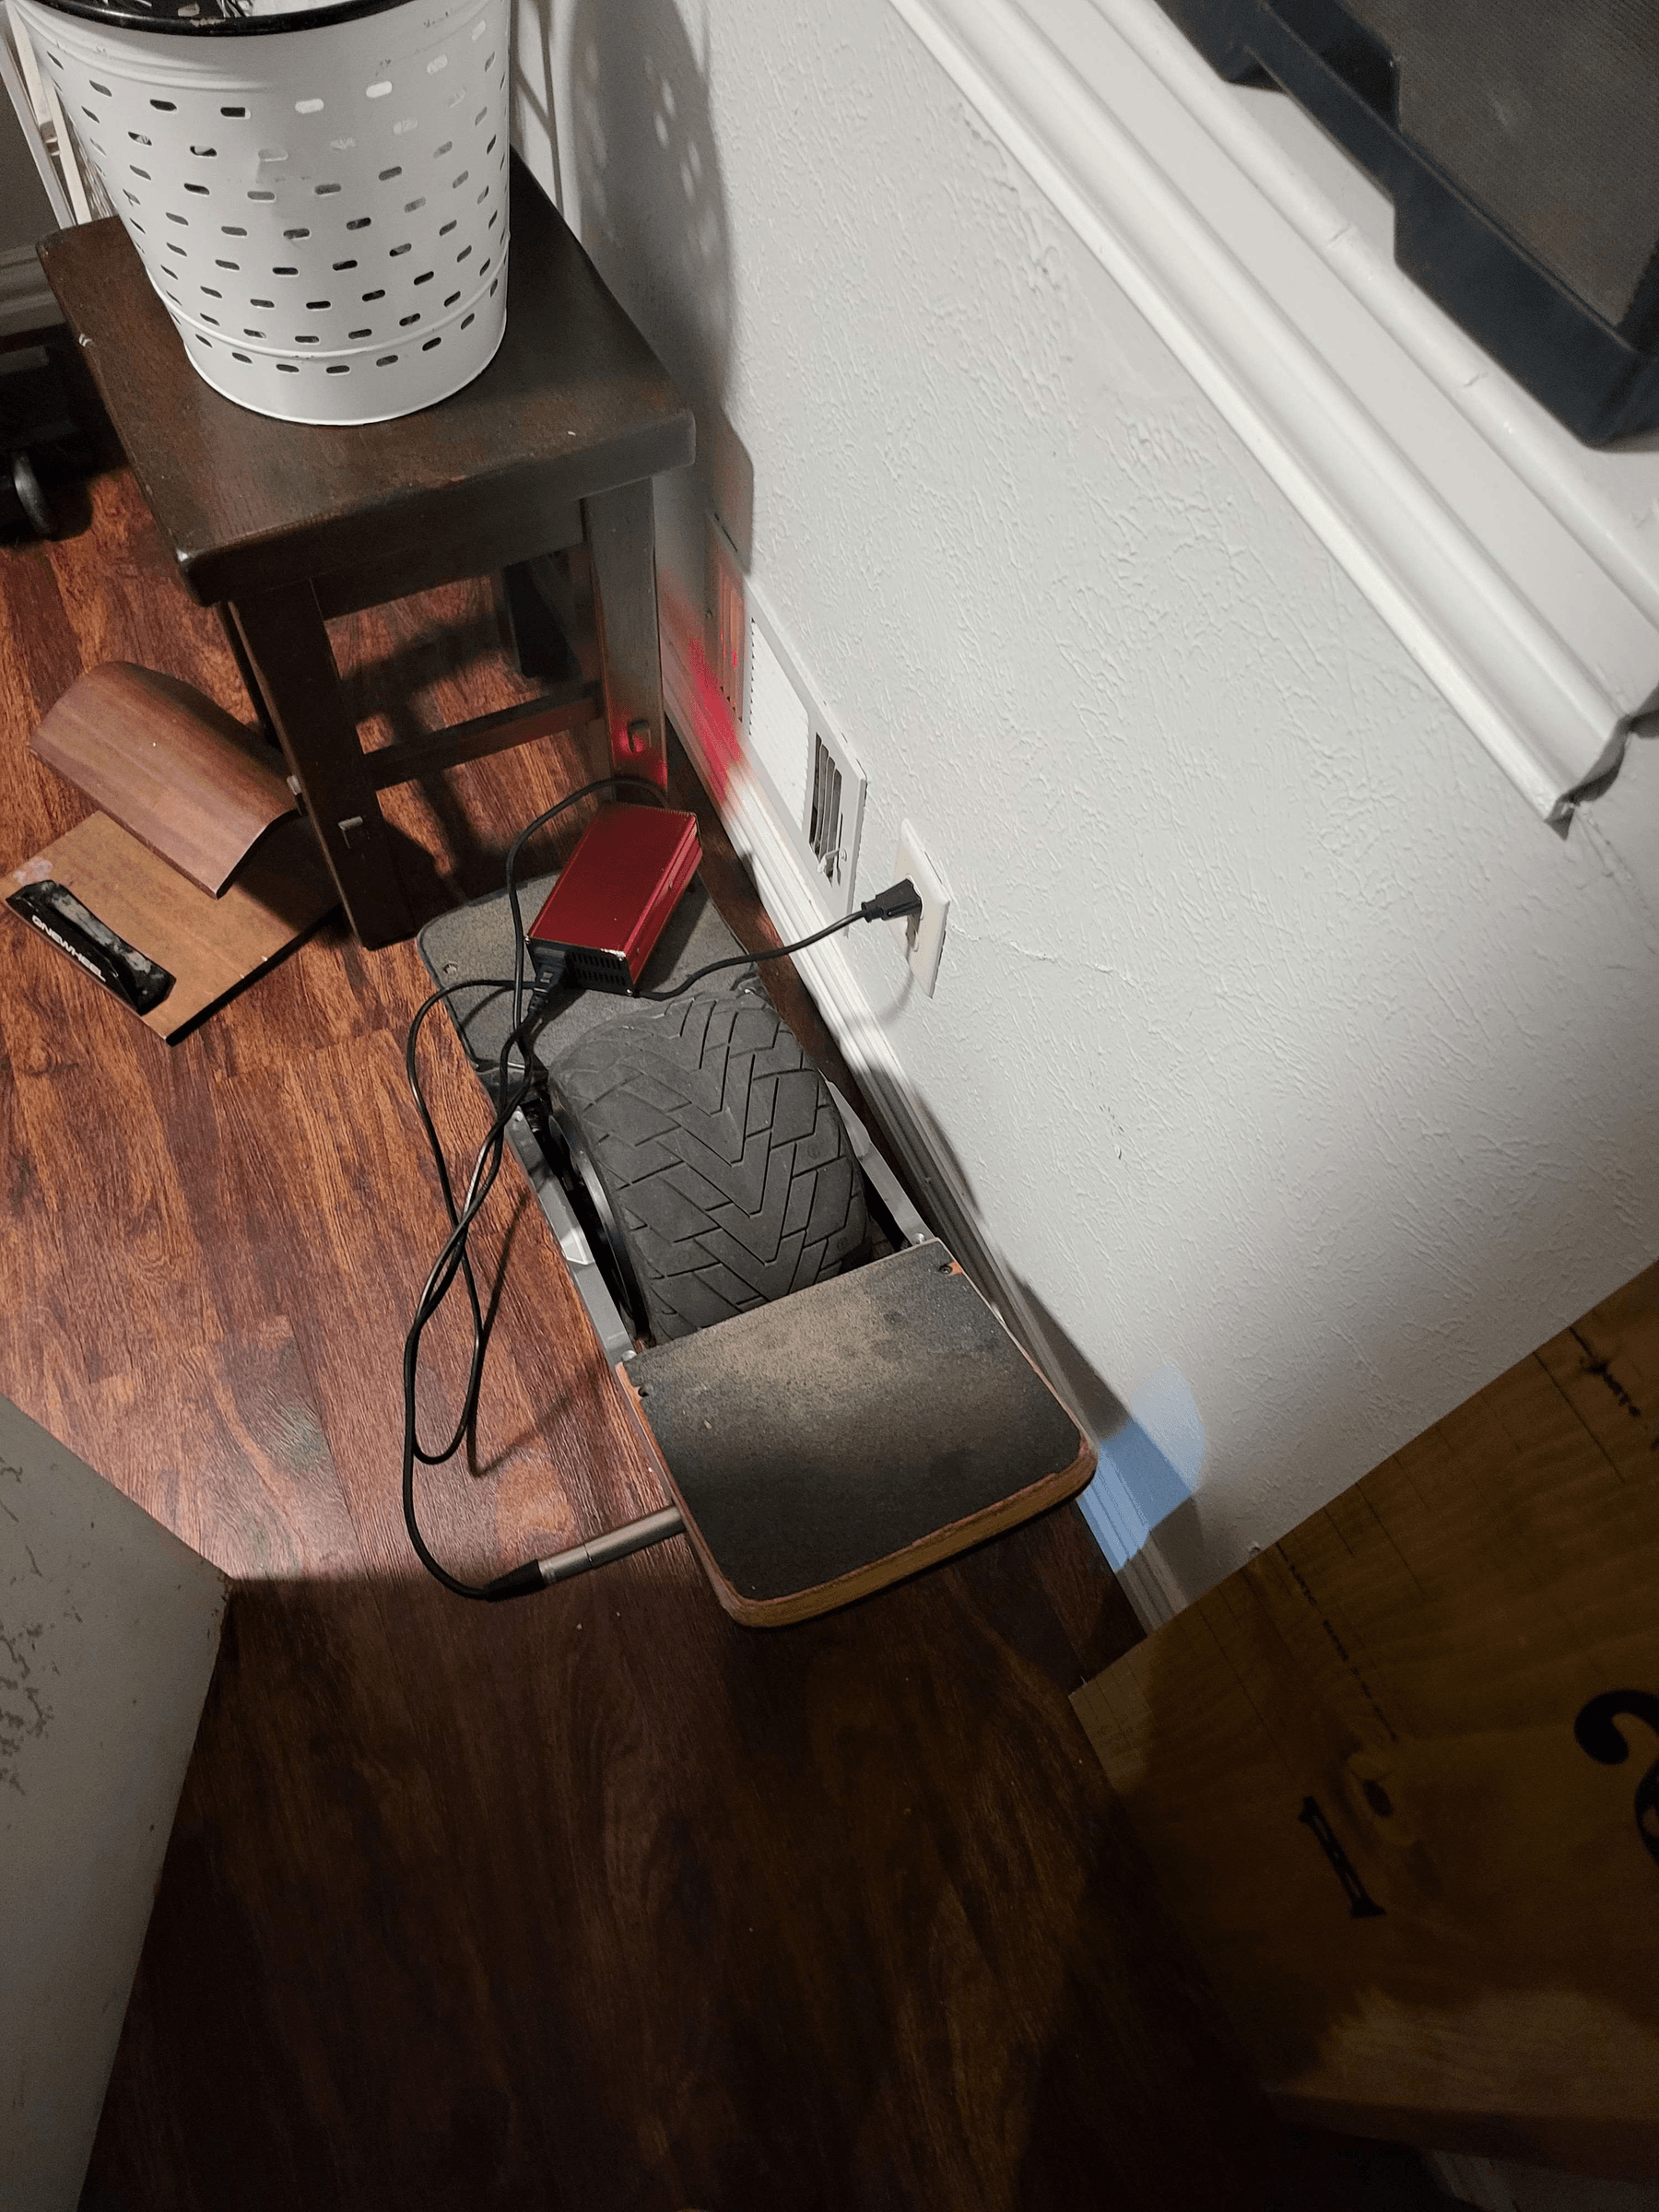
The board is fine, switched the controller box to an ASA Easy-Access modified to fit the stock XLR and power button.I will post a more detailed writeup later on, concerning what progress I have made with my board
In other news:
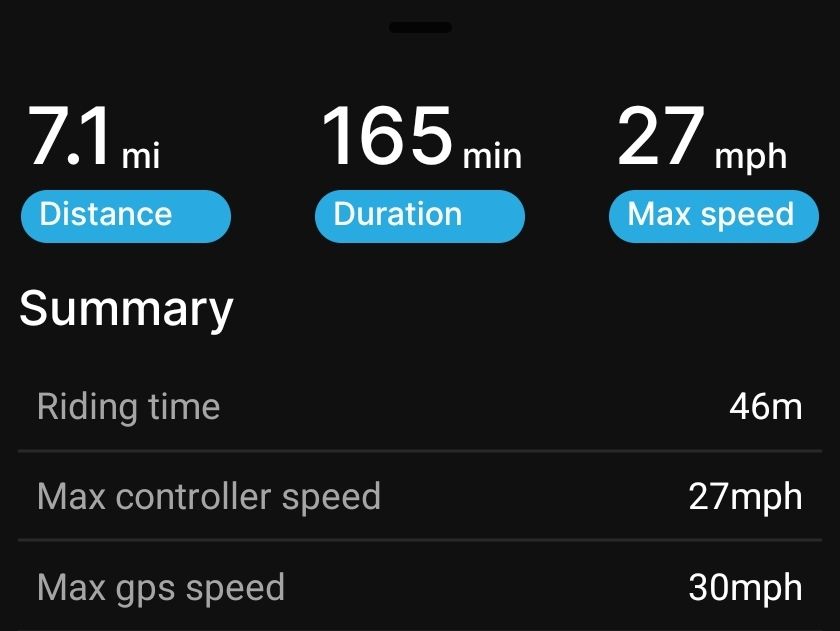
Pushed my board to 30MPH. Stock htpercore motor with 4000 mile old bearings, ubox 100v and the ME4T pack from TheBoardGarage
I may have a problem, and I think it concerns my sense of self-preservation
113 volts?! I could lick that!
-
@loaffette -- I suggest that you might want to wear some armor. A Fox Titan Pro Jacket (with some extra CE padding in the leading shoulder and elbow) has let me get back up and ride away from an handful of high speed crashes. That with a helmet, knee pads, and wrist guards. Also, on my hips, I wear knee/shin guards -- no more bruised thighs.
-
@s-leon I'm already working on that. Got a new full-face helmet, knee pads and wrist guards. Going to save up a little more and then buy something for the chest.
-
Alright, update time:
This time, properly.So, for the past year I've been dealing with a problem on my board. The threads on my rails keep going out. I've had press-fit inserts put in, but they keep falling out. I've JB-welded in some 10-32 nuts, but those don't hold. There isn't much metal left in the rails where the threads are to even do heilicoil.
So, what's man got to do to get his threads back?
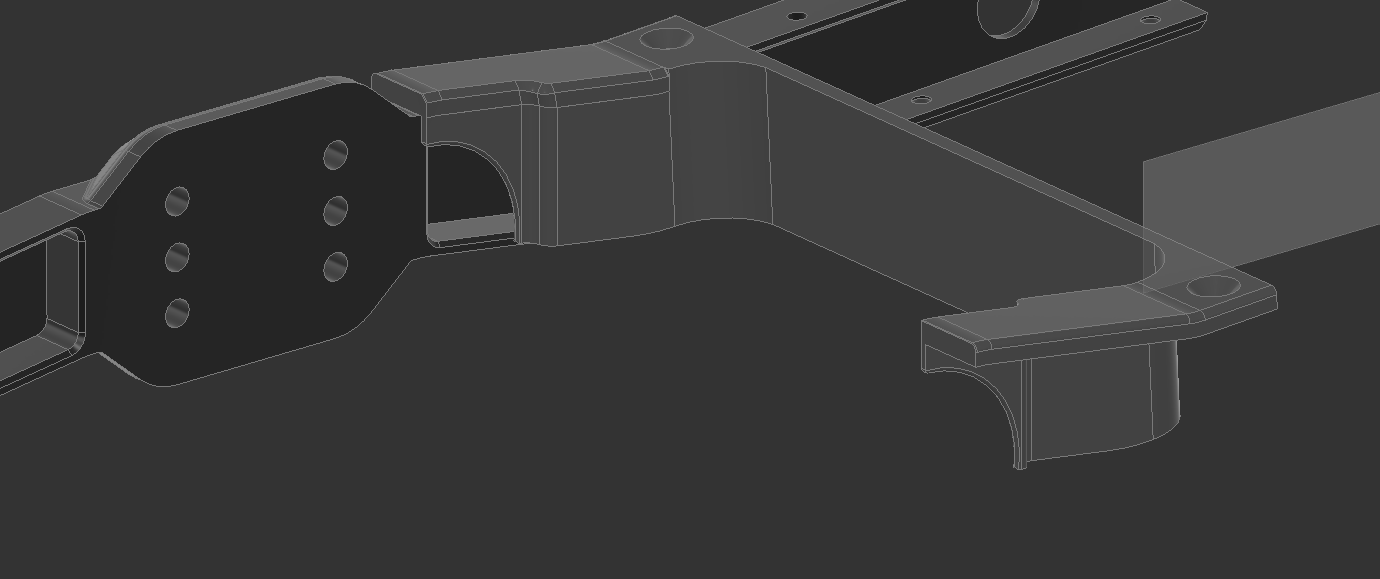
You make your own threads somewhere elseThe way I see how the onewheel is assembled is that everything attaches to everything. The bumpers attach to the rails, controller and the footpads all at the same time on the XR. The kush wide attaches similarly, and controller boxes are just bolted in with screws threading into the box itself.
So why not just cut the rails out of the picture if they are just a problem? The only screws holding my bumper on are attached to the footpad and controller anyways. So, why not just have the footpad and bumper attach directly to the controller itself?
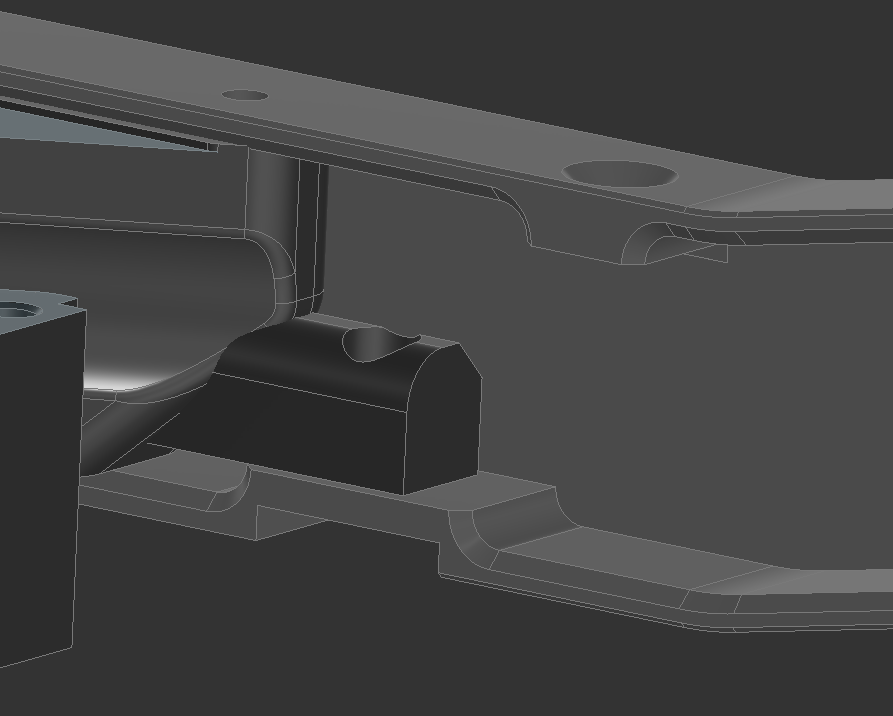
I took Fungineers Easy Access box and made the holes underneath the footpad screws small enough for heated inserts to fit snugly into. I extended out a small block for each bumper, and added a hole for a heated insert. I'm going to print this out on my new Bambu A1 (I got so fed up with my CR-10 Smart that it now permanently lives inside of its box in the garage). I'll print it using PETG, but I'm going to compensate by making the walls on this thing thick. I'm shooting for at least 5-6 walls thick, and I'm going to crank up the infill to 40 percent.
I'm also printing off a new footpad for the future. My old one has the sensor peeling up on one of the back corners, and it's ghosting on the left side of the board. Going to print off VOW's Mushies in PETG, but I'm going to make it pretty dense and add a couple mods of my own I'll show later.
Apart from that, I'm going to clean up the wiring in the board and make it a little prettier, add an Avaspark RGB Mini.
113 volts?! I could lick that!
-
picture of the box
I had to shrink the m3 heated insert holes around the top because they were way too large for the inserts I had on hand. Made little legs that stuck out, and made the screw holds small enough for heated inserts
I have a devious plan with his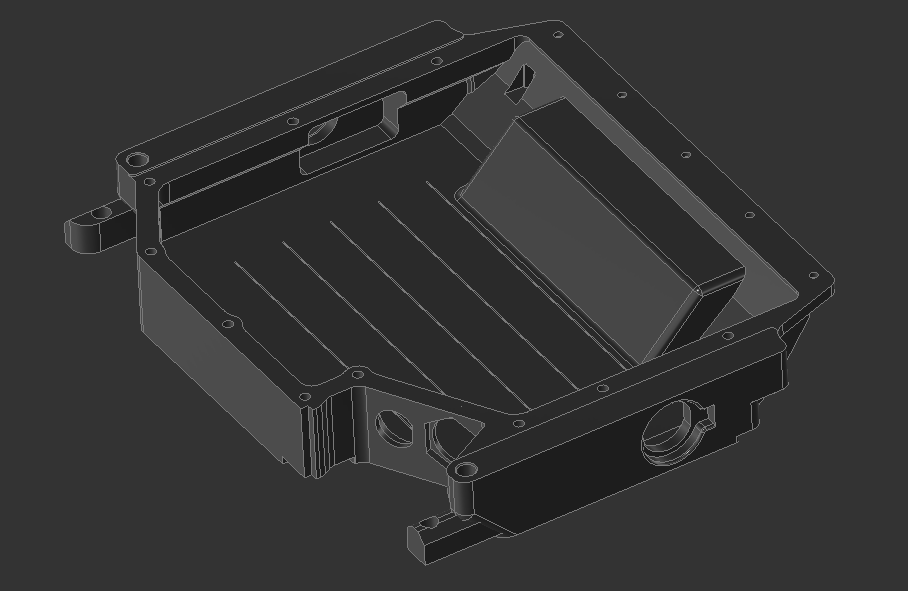
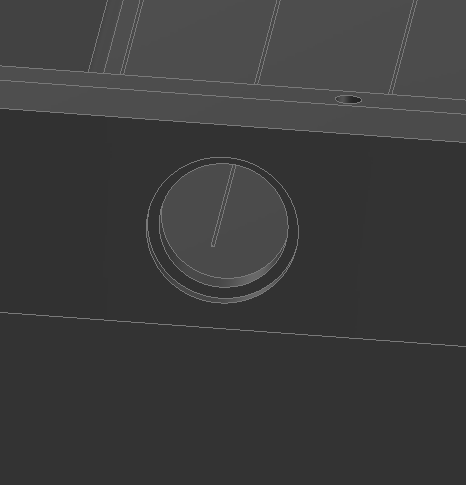
Expanded the holes for 19mm buttons, same for the plugalso, I found out today why my threads on my board got stripped.
apparently thunder rails are tapped for M5, not 10-32
XR uses 10-32 screws
Thunder rails are tapped for M5my reaction to this information:

113 volts?! I could lick that!
-
@loaffette Ouch :(
I think all the Fungineers stuff is metric. Mostly because we're all from predominantly metric based countries 😅 -
Ubox 100v stopped working after I shorted the 12v Power port on the controller itself. (the unmarked 2-pin PH 2.0 plug beside the SWD one on the side)
{
Emailed spintend to see if there's any fixing it, but this seriously puts a pause on my plans
I did get everything wired up for the LEDs, but it still sucks that the controller is busted.113 volts?! I could lick that!
-
@loaffette Hope they get back with a fix. Probably something replaceable has blown if you know someone with a reflow iron and steady hands.