Extra LEDs For the Onewheel (Because RGB adds a 15% preformance boost)
-
@loaffette ahh ok so you want 1 button each for a left turn and a right turn.
-
@cheppy44 yep!
And I don't know how to get that to work
-
@loaffette I am setting up the electronics to try and write the code for it. I might start from scratch with the code, but I can try to explain the code I end up writing! I dont exactly want to rob you of learning how to do this, but it sounds like a fun small project to work on for me.
-
@cheppy44 Thanks man!
I really owe you for this one! I'm pretty bad at programming and this really helps!
I'll probably get around to building a controller for this and designing a mount for the arduino and the LEDs. Found that under the fender is the only safe bet for now, and the footpad would be a pain.May look at doing on the fender itself (On top) could be an option.
-
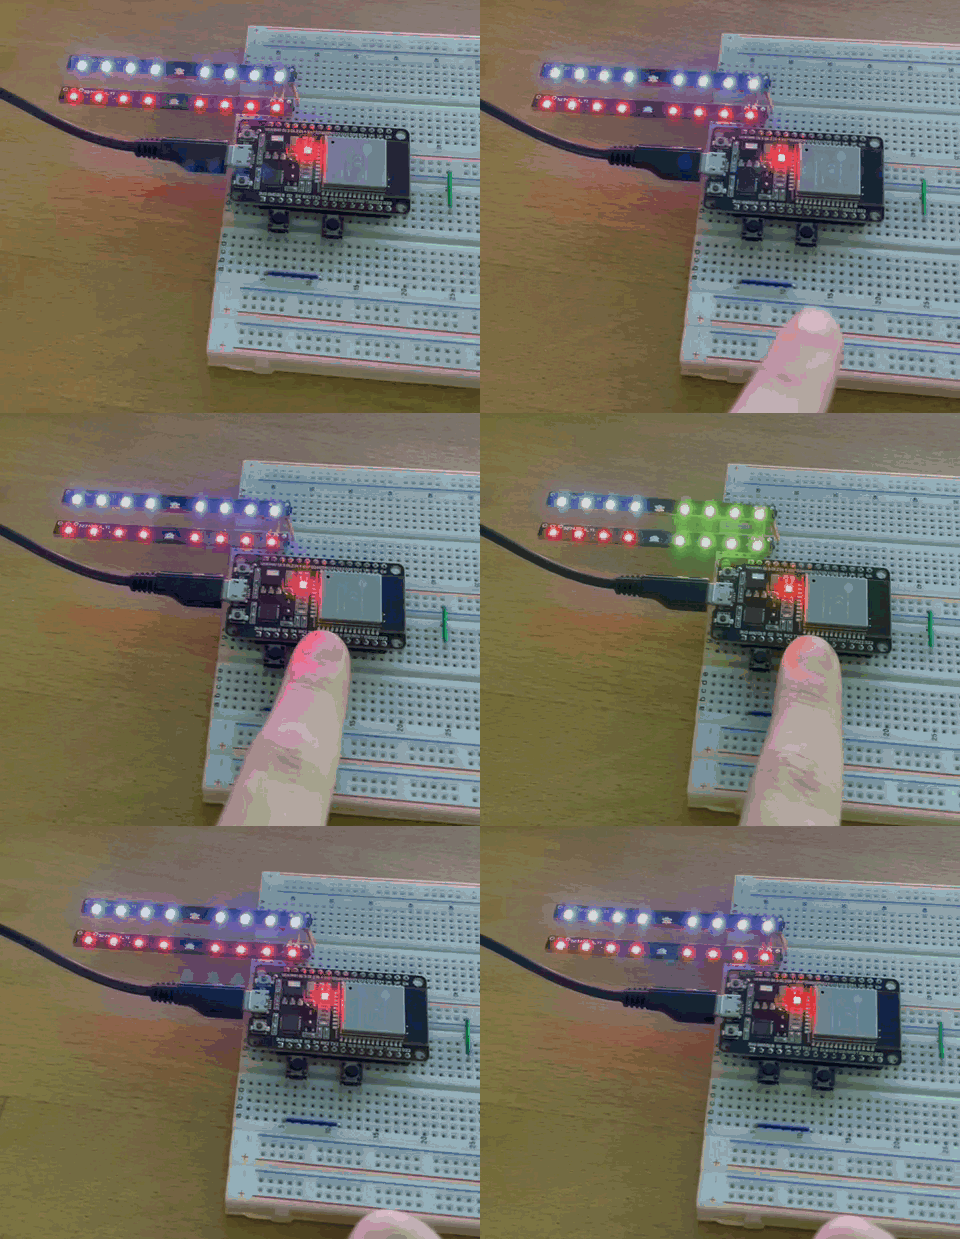
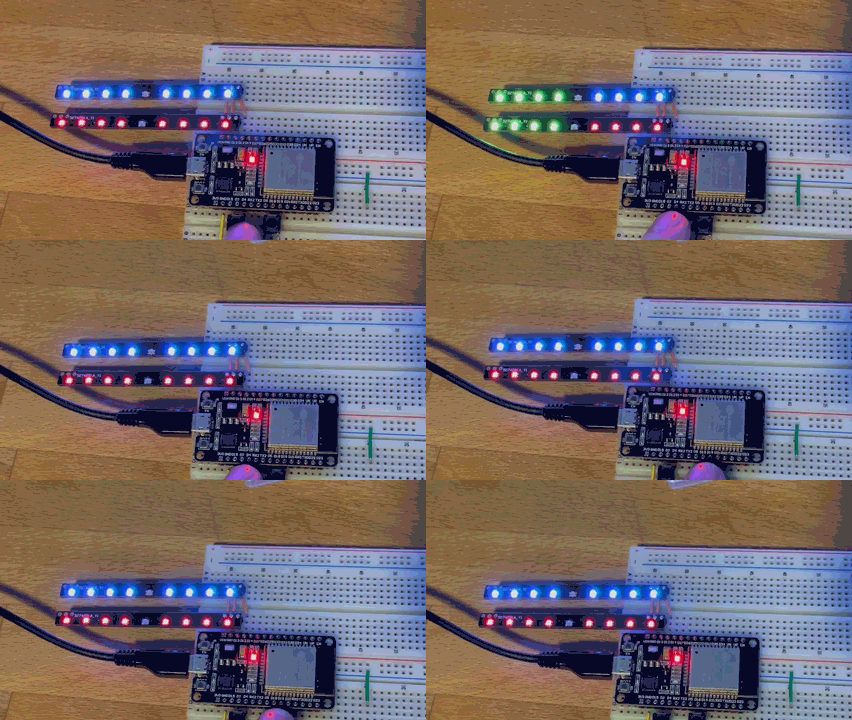
@loaffette here is a demo! still working out a few kinks

-
@loaffette
Here is the code I made! it uses 2 buttons and has 2 outputs for a front and a rear strip. Depending on what controller you use, you may have to set up the button inputs a bit differently. The ESP 32 I am using has Internal Pull up/down resistors for the inputs. I attempted to comment my code pretty good so you can attempt to learn a bit if you feel like it. If you've got any questions or want me to make some changes I am more than willing to help you out!
#include <Adafruit_NeoPixel.h> #define PIN1 12 // Pin for Front Strip #define PIN2 13 // Pin for Rear Strip #define BUTTON_PIN1 4 // Pin for Button 1 #define BUTTON_PIN2 19 // Pin for Button 2 #define NUMPIXELS 9 // Number of Neopixels in each strip Adafruit_NeoPixel strip1(NUMPIXELS, PIN1, NEO_GRB + NEO_KHZ800); //Setup for Strip1 Adafruit_NeoPixel strip2(NUMPIXELS, PIN2, NEO_GRB + NEO_KHZ800); //Setup for Strip1 int buttonState1 = 0; // variable for reading the pushbutton status int buttonState2 = 0; // variable for reading the pushbutton status uint32_t white = strip1.Color(255, 255, 255); //Defines a color later to be used in strip1.fill (r,g,b) uint32_t red = strip1.Color(255, 0, 0); uint32_t yellow = strip1.Color(255, 255, 0); void setup() { pinMode(BUTTON_PIN1, INPUT_PULLUP); // Pin for button 1 other side connected to ground pinMode(BUTTON_PIN2, INPUT_PULLUP); // Pin for button 2 other side connected to ground strip1.begin(); // INITIALIZE NeoPixel strip1 object (REQUIRED) strip1.setBrightness(4); // a value from 0 to 255 strip1.show(); // Initialize all pixels to 'off' strip2.begin(); // INITIALIZE NeoPixel strip2 object (REQUIRED) strip2.setBrightness(4); // a value from 0 to 255 strip2.show(); // Initialize all pixels to 'off' Serial.begin(9600); //start Serial console for debuging Serial.println("begin"); } void loop() { buttonState1 = digitalRead(BUTTON_PIN1); buttonState2 = digitalRead(BUTTON_PIN2); // check if the pushbutton is pressed. If it is, the buttonState is HIGH: if (buttonState1 == LOW) { // turn left turn signal on Serial.println("button one left"); strip1.fill(white, 0, 4); //strip.fill(color, first led index, number of leds to fill); strip1.fill(yellow, 5, 4); strip1.show(); strip2.fill(red, 0, 4); strip2.fill(yellow, 5, 4); strip2.show(); delay(500); //delay for 500 milliseconds or .5 seconds strip1.fill(white, 5, 4); strip1.show(); strip2.fill(red, 5, 4); strip2.show(); delay(500); } if (buttonState2 == LOW) { // turn right turn signal on Serial.println("button two right"); strip1.fill(yellow, 0, 4); strip1.fill(white, 5, 4); strip1.show(); strip2.fill(yellow, 0, 4); strip2.fill(red, 5, 4); strip2.show(); delay(500); strip1.fill(white, 0, 4); strip1.show(); strip2.fill(red, 0, 4); strip2.show(); delay(500); } else { // turn leds back to "normal" //Serial.println("normal"); strip1.fill(white, 0, 4); strip1.fill(white, 5, 4); strip1.show(); strip2.fill(red, 0, 4); strip2.fill(red, 5, 4); strip2.show(); } delay(50); } -
@cheppy44 thanks man!
This really helps me out with getting this going!
I'll give the code a spin in Tinkercad when I have time later tonight! -
Got the button code translated to work for the Arduino! Just had to change (INPUT_PULLUP) to (INPUT).
Tinkercad simulator is a bit broken though currently, and it's running slow. I'm gonna go and try to find a USB cable for the arduino and test it using real hardware instead.
Again, thank you so much for helping me out with the code!
-
No dice yet.
The arduino isn't recognizing the button press.Gonna try and see what I can chagne or what I can do
Changed the
} if (buttonState2 == HIGH) {
to LOW instead of high, and found that when I hold it down, it pauses the flashing -
@cheppy44 So I messed around a bit with the code to try and make it work
Added a fuction that would print to the console if button two wasn't pressed.
I don't have anything plugged into the pin for button 2 or 1 and it's reading that button one is pressed..Could my arduino be messed up?
what board are you using, I might try and buy the board you have instead.
Also, when I have the button plugged in and I hold it down, the LEDs stop flashing but are stuck on red -
@loaffette I am using an ESP 32 dev module, but I would not recommend it if you want to implement this on your board. I have a suspicion your issue has to do with pull up/down resistors. Could you post a picture of what your electronics looks like? The purpose of the resistors is to give the digital inputs a default state. If you leave them unconnected or “floating”, they are subjected to back ground electronic noise and are not reliable. Some micro controller have certain pins that have internal resisters that you can enable.
-
@cheppy44 I may have forgotten about the resistor...
-
@loaffette the controller you have may have internal pull up you can enable, that was why I was asking what your electronics situation looks like.
-
@cheppy44 I'm using an Arduino Uno, a button and two separate LEDs (4 leds per strip.)
Going to add the resistor.
Also, I had a cool idea to add on to it later on that would change the color of the LEDs depending on how fast I'm going, or how fast the motor is spinning
-
@loaffette that will be interesting! You would probably need an IMU to tell how fast you are moving.
-
@cheppy44 I actually have one lying around
So i tested it in tinkercad since I don't have any resistors IRL. It works with the pulldown, but only button 2 seems to be detected currently.
Also, I had to change the code up for the LED so that strip 1 is for the left, and strip 2 is for the right since I'm going to be placing them under the fender for now
Updated code:
#define PIN1        3 //Pin for Front Strip
#define PIN2        2  // Pin for Rear Strip
#define BUTTON_PIN1 4   // Pin for Button 1
#define BUTTON_PIN2 5  // Pin for Button 2
#define NUMPIXELS   4   // Number of Neopixels in each strip

Adafruit_NeoPixel strip1(NUMPIXELS, PIN1, NEO_GRB + NEO_KHZ800); //Setup for Strip1
Adafruit_NeoPixel strip2(NUMPIXELS, PIN2, NEO_GRB + NEO_KHZ800); //Setup for Strip1

int buttonState1 = 0;  // variable for reading the pushbutton status
int buttonState2 = 0;  // variable for reading the pushbutton status

uint32_t white = strip1.Color(255, 255, 255); //Defines a color later to be used in strip1.fill (r,g,b)
uint32_t red = strip1.Color(255, 0, 0);
uint32_t yellow = strip1.Color(255, 255, 0);

void setup() {

  pinMode(BUTTON_PIN1, INPUT_PULLUP);  // Pin for button 1 other side connected to ground
  pinMode(BUTTON_PIN2, INPUT_PULLUP); // Pin for button 2 other side connected to ground

  strip1.begin(); // INITIALIZE NeoPixel strip1 object (REQUIRED)
  strip1.setBrightness(4); // a value from 0 to 255
  strip1.show(); // Initialize all pixels to 'off'

  strip2.begin(); // INITIALIZE NeoPixel strip2 object (REQUIRED)
  strip2.setBrightness(4); // a value from 0 to 255
  strip2.show(); // Initialize all pixels to 'off'

  Serial.begin(9600); //start Serial console for debuging
  Serial.println("begin");
}

void loop() {
  buttonState1 = digitalRead(BUTTON_PIN1);
  buttonState2 = digitalRead(BUTTON_PIN2);

  // check if the pushbutton is pressed. If it is, the buttonState is HIGH:
  if (buttonState1 == LOW) {
    // turn left turn signal on
    Serial.println("button one left");
    strip1.fill(white, 0, 4); //strip.fill(color, first led index, number of leds to fill);
    strip1.fill(yellow, 5, 4);
    strip1.show();
    strip2.fill(red, 0, 4);
    strip2.show();
    delay(500); //delay for 500 milliseconds or .5 seconds

    strip1.fill(white, 0, 3);
    strip1.show();
    strip2.fill(red, 0, 3);
    strip2.show();
    delay(500);

  } if (buttonState2 == LOW) {
    // turn right turn signal on
    Serial.println("button two right");
    strip2.fill(yellow, 0, 4);
    //strip1.fill(white, 5, 4);
    strip2.show();
    //strip2.fill(yellow, 0, 4);
    strip1.fill(red, 0, 4);
    strip1.show();
    delay(500);

    strip2.fill(white, 0, 4);
    strip2.show();
    strip1.fill(red, 0, 4);
    strip1.show();
    delay(500);

  } else {
    // turn leds back to "normal"
    //Serial.println("normal");
    strip1.fill(white, 0, 4);
    strip1.fill(white, 5, 4);
    strip1.show();
    strip2.fill(red, 0, 4);
    strip2.fill(red, 5, 4);
    strip2.show();

  }
delay(50);
}
Update:
Checked the serial output and it does detect the button press, but nothing is changing with the LEDsupdate update:
Code works! :) Copied code from the rigth blinker and copied it into the if statement for the left blinker and changed strip1 to strip2 and vice-versaiam smort
-
@loaffette sweet! the strip.fill commands are pretty useful when you know how to use them.
-
@cheppy44 yep!
Tomorrow I'll order the arduinos, some resistors and I'll add them on later on this week.
Need to focus on studying for two exams this week, but also I'd like to do a lot of my Onewheel work when I get everything for the Onewheel in! (This, life savers and the Badgersense!) -
@loaffette did you decide which controller you are going to buy? For the application I do thing that any of the name brand arduinos may be a bit big.
-
@cheppy44 going for the Nano due to its compact size and okay price, though that's what I'm going to be using for now. Later i might switch it up to something else